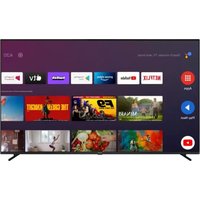
55QS8503UHD - TV AIWA - Free user manual and instructions
Find the device manual for free 55QS8503UHD AIWA in PDF.



User questions about 55QS8503UHD AIWA
0 question about this device. Answer the ones you know or ask your own.
Ask a new question about this device
Download the instructions for your TV in PDF format for free! Find your manual 55QS8503UHD - AIWA and take your electronic device back in hand. On this page are published all the documents necessary for the use of your device. 55QS8503UHD by AIWA.
USER MANUAL 55QS8503UHD AIWA
Detailed e/ User Manual can be easily accessed via "Favorite Apps" on the top line of the TV's main menu.
BG БЪЛГАРСКИ
1 Insert the batteries into the Remote Control
The remote may have a screw that secures the battery compartment cover onto the remote control (or this may be in a separate bag). Remove the screw, if the cover is screwed on previously. Then remove the battery compartment cover to reveal the battery compartment. Insert two 1.5V - size AAA batteries. Make sure the (+) and (-) signs match (observe correct polarity). Do not mix old and new batteries. Replace only with same or equivalent type. Place the cover back on. Secure the cover again with the screw, if any.
2 Connect the antenna to your TV
REAR SIDE OF THE TV
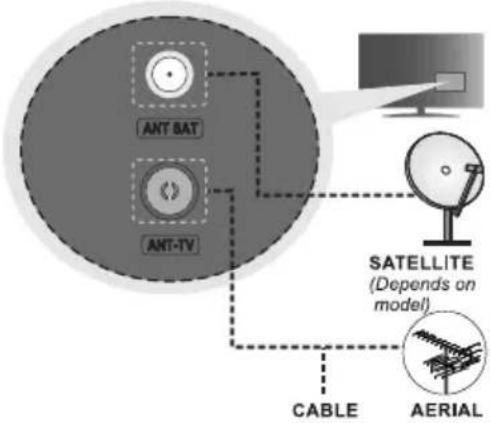
text_image
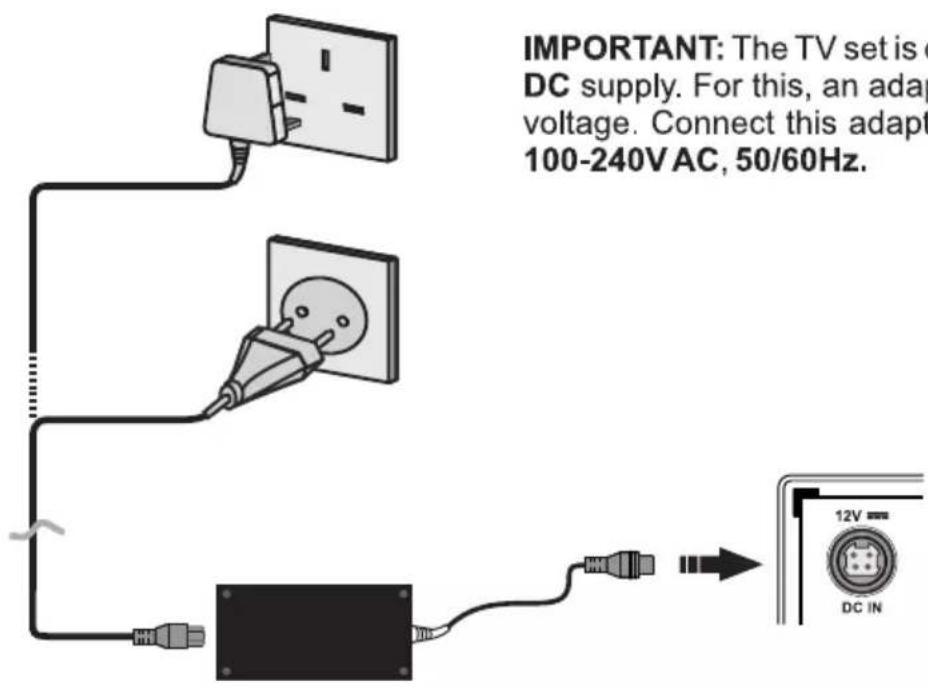
ANT BAT ANT-TV SATELLITE (Depends on model) CABLE AERIAL3 Connect the adaptor to the mains socket
text_image
IMPORTANT: The TV set is d DC supply. For this, an adap voltage. Connect this adapt 100-240V AC, 50/60Hz.IMPORTANT: The TV set is designed to operate on a 12V DC supply. For this, an adaptor is used which gives 12V voltage. Connect this adaptor to a system that supplies 100-240V AC, 50/60Hz.
4 Switch the TV on
After plugging the power cord to the mains socket outlet the TV will switch on automatically. If the TV is in standby mode the standby LED lights up.
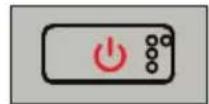
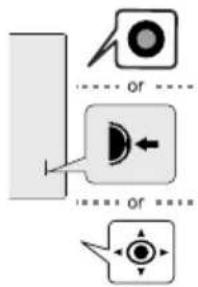
To switch on the TV from standby mode either;
- Press the Standby button on the remote control.
- Press the centre of the control switch on the TV in.
①
②
text_image
or or5 Initial Setup Wizard
When turned on for the first time, "Welcome" message will be displayed along with the language selection options listed on the screen. Select the desired language from the list and press OK to continue. Follow the on-screen instructions to complete the initial setup process. Use the directional buttons and the OK button on the remote to select, set, confirm and proceed.
Note: For detailed information and instructions on the initial setup process refer to the Instruction Book of this TV.
6 Change the Input Source
If you want to connect a device to the TV, make sure that both the TV and the device are turned off before making any connection. Use a suitable cable to connect two units together.
Once you have connected external systems to your TV, you can switch to different input sources. Press the Source button on your remote control consecutively or use the directional buttons and then press the OK button to switch to different sources when in Live TV mode. Besides this, you can switch to the desired input source by selecting the desired option from the Inputs menu on the Home Screen or TV options >Source menu in Live TV mode.
7 Connect your TV to the Internet
You can access the Internet via your TV, by connecting it to a broadband system. It is necessary to configure the network settings in order to enjoy a variety of streaming content and internet applications. These settings can be configured from the Network and Internet menu located under the TV Options>Settings menu in Live TV mode or under the Settings menu on the Home Screen. You can also highlight the Connected/Disconnected icon on the Home screen and press OK to access this menu.
Wireless Connection
A wireless LAN modem/router is required to connect the TV to the Internet via wireless LAN. Highlight Wi-Fi option in the Network and Internet menu and press OK to enable wireless connection. Available networks will be listed. Highlight your network from the list and press OK to connect. You may be asked to enter a password to connect to the selected network, in case the network is password protected.
Wireless Connection
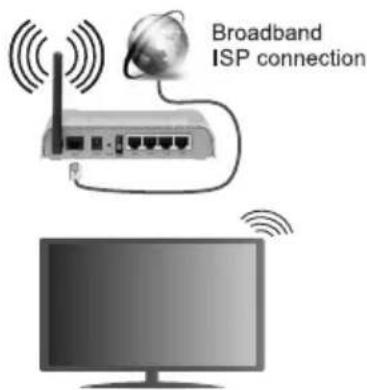
text_image
Broadband ISP connectionSafety Information

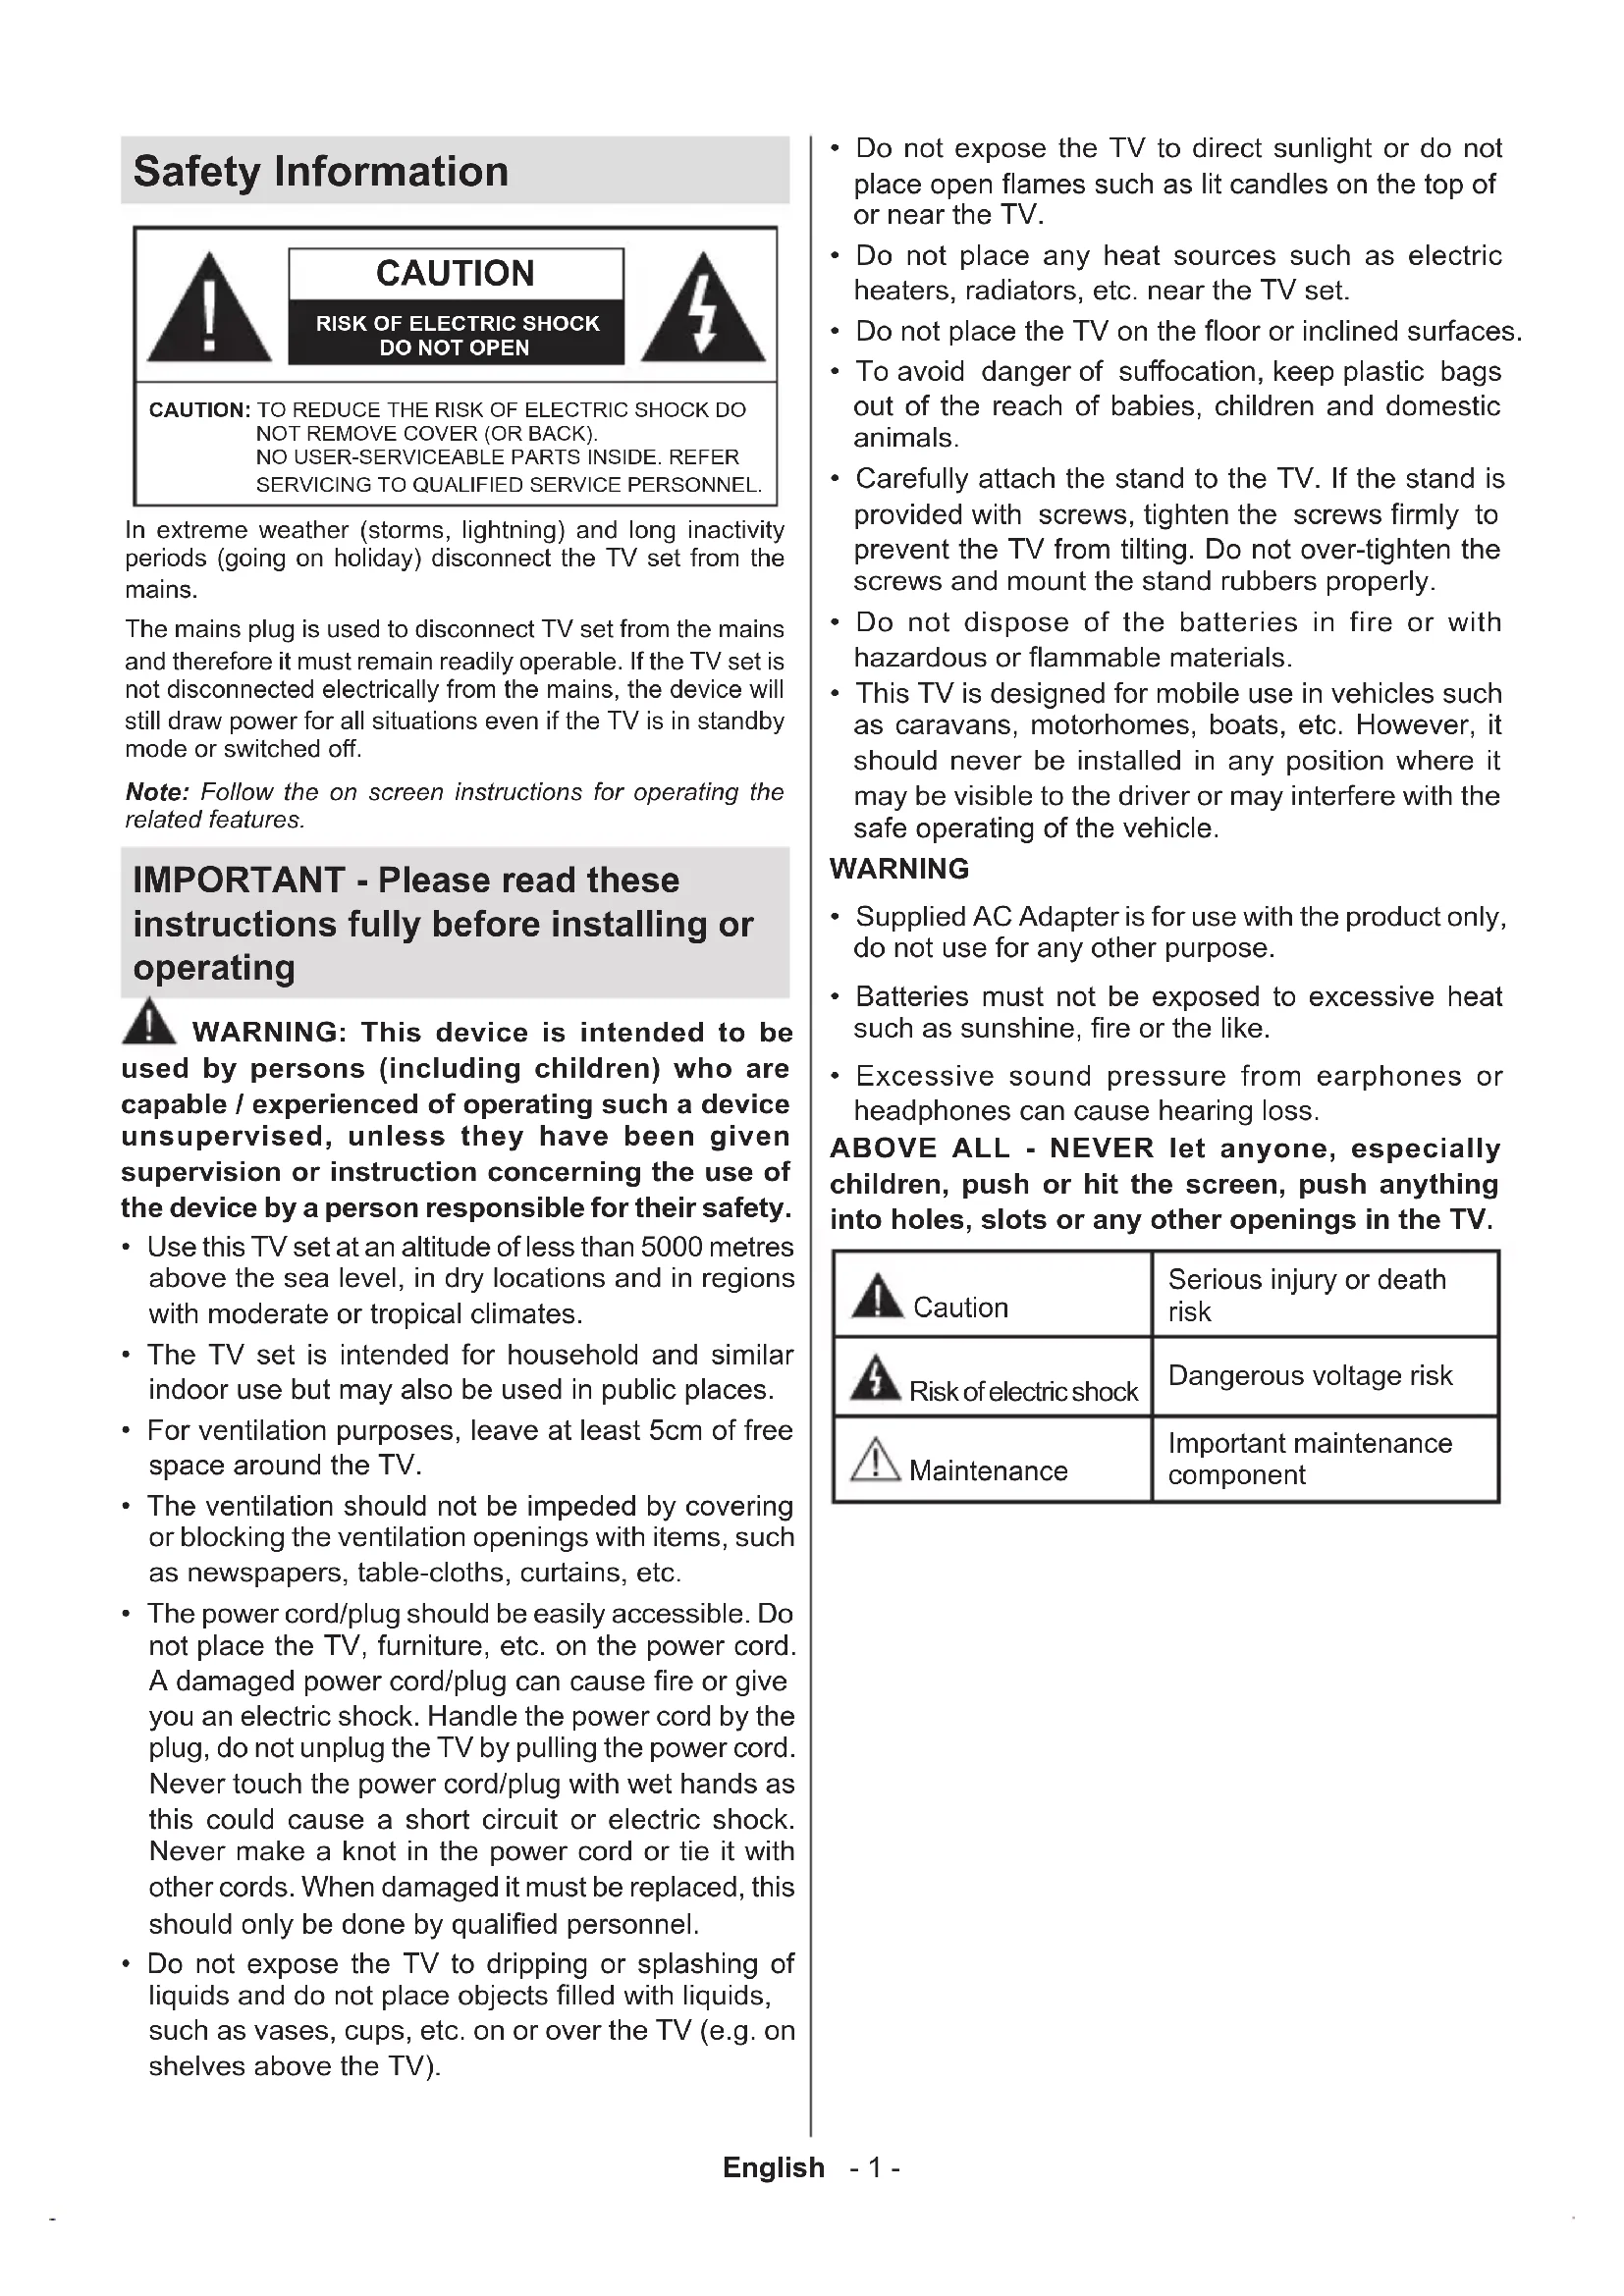
CAUTION
RISK OF ELECTRIC SHOCK DO NOT OPEN
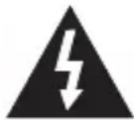
CAUTION: TO REDUCE THE RISK OF ELECTRIC SHOCK DO NOT REMOVE COVER (OR BACK). NO USER-SERVICEABLE PARTS INSIDE. REFER SERVICING TO QUALIFIED SERVICE PERSONNEL.
In extreme weather (storms, lightning) and long inactivity periods (going on holiday) disconnect the TV set from the mains.
The mains plug is used to disconnect TV set from the mains and therefore it must remain readily operable. If the TV set is not disconnected electrically from the mains, the device will still draw power for all situations even if the TV is in standby mode or switched off.
Note: Follow the on screen instructions for operating the related features.
IMPORTANT - Please read these instructions fully before installing or operating
WARNING: This device is intended to be used by persons (including children) who are capable / experienced of operating such a device unsupervised, unless they have been given supervision or instruction concerning the use of the device by a person responsible for their safety.
- Use this TV set at an altitude of less than 5000 metres above the sea level, in dry locations and in regions with moderate or tropical climates.
- The TV set is intended for household and similar indoor use but may also be used in public places.
- For ventilation purposes, leave at least 5cm of free space around the TV.
- The ventilation should not be impeded by covering or blocking the ventilation openings with items, such as newspapers, table-cloths, curtains, etc.
- The power cord/plug should be easily accessible. Do not place the TV, furniture, etc. on the power cord. A damaged power cord/plug can cause fire or give you an electric shock. Handle the power cord by the plug, do not unplug the TV by pulling the power cord. Never touch the power cord/plug with wet hands as this could cause a short circuit or electric shock. Never make a knot in the power cord or tie it with other cords. When damaged it must be replaced, this should only be done by qualified personnel.
-
Do not expose the TV to dripping or splashing of liquids and do not place objects filled with liquids, such as vases, cups, etc. on or over the TV (e.g. on shelves above the TV).
-
Do not expose the TV to direct sunlight or do not place open flames such as lit candles on the top of or near the TV.
- Do not place any heat sources such as electric heaters, radiators, etc. near the TV set.
- Do not place the TV on the floor or inclined surfaces.
- To avoid danger of suffocation, keep plastic bags out of the reach of babies, children and domestic animals.
- Carefully attach the stand to the TV. If the stand is provided with screws, tighten the screws firmly to prevent the TV from tilting. Do not over-tighten the screws and mount the stand rubbers properly.
- Do not dispose of the batteries in fire or with hazardous or flammable materials.
- This TV is designed for mobile use in vehicles such as caravans, motorhomes, boats, etc. However, it should never be installed in any position where it may be visible to the driver or may interfere with the safe operating of the vehicle.
WARNING
- Supplied AC Adapter is for use with the product only, do not use for any other purpose.
- Batteries must not be exposed to excessive heat such as sunshine, fire or the like.
- Excessive sound pressure from earphones or headphones can cause hearing loss.
ABOVE ALL - NEVER let anyone, especially children, push or hit the screen, push anything into holes, slots or any other openings in the TV.
| Caution | Serious injury or death risk |
| Risk of electric shock | Dangerous voltage risk |
| Maintenance | Important maintenance component |
Markings on the Product
The following symbols are used on the product as a marker for restrictions and precautions and safety instructions. Each explanation shall be considered where the product bears related marking only. Note such information for security reasons.

Class II Equipment: This appliance is designed in such a way that it does not require a safety connection to electrical earth.

Hazardous Live Terminal: The marked terminal(s) is/are hazardous live under normal operating conditions.

Caution, See Operating Instructions: The marked area(s) contain(s) user replaceable coin or button cell batteries.
text_image
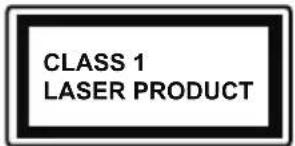
CLASS 1 LASER PRODUCTClass 1 Laser Product: This product contains Class 1 laser source that is safe under reasonably foreseeable conditions of operation.
WARNING
Do not ingest the battery, Chemical Burn Hazard This product or the accessories supplied with the product may contain a coin/button cell battery. If the coin/button cell battery is swallowed, it can cause severe internal burns in just 2 hours and can lead to death. Keep new and used batteries away from children. If the battery compartment does not close securely, stop using the product and keep it away from children. If you think batteries might have been swallowed or placed inside any part of the body, seek immediate medical attention.
A television may fall, causing serious personal injury or death. Many injuries, particularly to children, can be avoided by taking simple precautions such as:
- ALWAYS use cabinets or stands or mounting methods recommended by the manufacturer of the television set.
- ALWAYS use furniture that can safely support the television set.
- ALWAYS ensure the television set is not overhanging the edge of the supporting furniture.
- ALWAYS educate children about the dangers of climbing on furniture to reach the television set or its controls.
- ALWAYS route cords and cables connected to your television so they cannot be tripped over, pulled or grabbed.
- NEVER place a television set in an unstable location.
- NEVER place the television set on tall furniture (for example, cupboards or bookcases) without anchoring both the furniture and the television set to a suitable support.
- NEVER place the television set on cloth or other materials that may be located between the television set and supporting furniture.
- NEVER place items that might tempt children to climb, such as toys and remote controls, on the top of the television or furniture on which the television is placed.
- The equipment is only suitable for mounting at heights ≤ 2 m.
If the existing television set is going to be retained and relocated, the same considerations as above should be applied.
Apparatus connected to the protective earthing of the building installation through the MAINS connection or through other apparatus with a connection to protective earthing – and to a television distribution system using coaxial cable, may in some circumstances create a fire hazard. Connection to a television distribution system has therefore to be provided through a device providing electrical isolation below a certain frequency range (galvanic isolator).
WALL MOUNTING WARNINGS
- Read the instructions before mounting your TV on the wall.
- The wall mount kit is optional. You can obtain from your local dealer, if not supplied with your TV.
- Do not install the TV on a ceiling or on an inclined wall.
- Use the specified wall mounting screws and other accessories.
- Tighten the wall mounting screws firmly to prevent the TV from falling. Do not over-tighten the screws.
Figures and illustrations in these operating instructions are provided for reference only and may differ from the actual product appearance. Product design and specifications may be changed without notice.
Accessories Included(\*\*)
- Remote Control
- Batteries: 2 x AAA
- Quick Start Guide
• DC 12 V Input Power Adaptor - Car Plug
(**) Depends on model
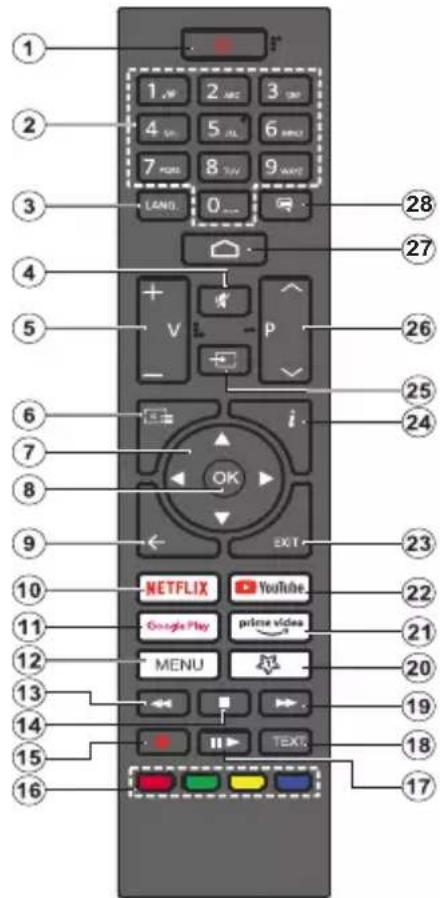
Remote Control(\*\*)
text_image
Diagram of a remote control with labeled keys and function buttons, including navigation controls and media icons.Inserting the Batteries into the Remote
The remote may have a screw that secures the battery compartment cover onto the remote control (or this may be in a separate bag). Remove the screw, if the cover is screwed on previously. Then remove the battery compartment cover to reveal the battery compartment. Insert two 1.5V - size AAA batteries. Make sure the (+) and (-) signs match (observing correct polarity). Do not mix old and new batteries. Replace only with same or equivalent type. Place the cover back on. Secure the cover again with the screw, if any.
Standby Button
Press and hold the Standby button on the remote control. Power off dialogue will appear on the screen. Highlight OK and press the OK button. The TV will switch into standby mode. Press briefly and release to switch the TV into quick standby mode or to switch on the TV when in quick standby or standby mode.
- Standby: Quick Standby / Standby / On
- Numeric buttons: Switches the channel in Live TV mode, enters a number in the text box on the screen
-
Language: Switches among sound modes (analogue TV), displays and changes audio language (digital TV, where available)
-
Mute: Completely turns off the volume of the TV
-
Volume +/-: Increases/decreases the volume level
-
Guide: Displays the electronic programme guide for Live TV channels
-
Directional buttons: Navigates menus, setting options, moves the focus or cursor, etc. and displays the subpages in Live TV-Teletext mode when pressed Right or Left. Follow the on-screen instructions
-
OK: Confirms selections, enters sub-menus, views channel list (in Live TV mode)
-
Back/Return: Returns to previous menu screen, goes one step back, closes open windows, closes teletext (in Live TV-Teletext mode)
-
Netflix: Launches the Netflix application
-
Google Play: Launches the Google Play Store application
-
Menu: Displays the main settings menu (on other sources than Android TV Home), displays available setting options such as sound and picture
-
Rewind: Moves frames backwards in media such as movies
-
Stop: Stops the media being played
-
Record: Records programmes in Live TV mode(**)
-
Coloured Buttons: Follow the on-screen instructions for coloured button functions
-
Pause: Pauses the media being played, starts timeshift recording in Live TV mode Play: Resumes playing the paused media
-
Text: Opens and closes teletext (where available in Live TV mode)
-
Fast forward: Moves frames forward in media such as movies
-
MyButton1: Opens the picture mode setting menu on available sources
-
Prime Video: Launches the Amazon Prime Video application
-
YouTube: Launches the YouTube application
-
Exit: Closes and exits from the main settings menus (on other sources than Android TV Home), closes the Home Screen and switches to last set source, exits from any running application or menu or OSD banner
-
Info: Displays information about on-screen content
-
Source: Shows all available broadcast and content sources, is also used in pairing process of the remote.
-
Programme +/-: Increases/decreases channel number in Live TV mode
-
Home: Opens the Home Screen
-
Subtitles: Turns subtitles on and off, opens the subtitle settings menu (where available)
(**) Depends on model
Remote Control(\*\*)
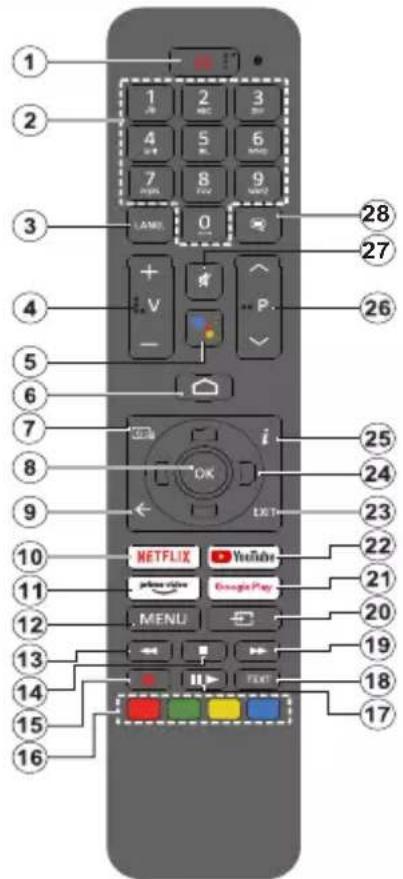
text_image
1 2 3 4 5 6 7 8 9 LAML 0 28 27 + - V P 26 5 6 7 i 25 24 OK LXT 23 10 NETFLIX YouTube 22 11 yellow video 21 12 Google Play 13 MENU 20 19 14 15 16 17 18 19 18 17Inserting the Batteries into the Remote
The remote may have a screw that secures the battery compartment cover onto the remote control (or this may be in a separate bag). Remove the screw, if the cover is screwed on previously. Then remove the battery compartment cover to reveal the battery compartment. Insert two 1.5V - size AAA batteries. Make sure the (+) and (-) signs match (observing correct polarity). Do not mix old and new batteries. Replace only with same or equivalent type. Place the cover back on. Secure the cover again with the screw, if any.
To pair remote with the TV
When the TV is turned on for the first time, a search for accessories will be performed after the initial setup starts. You will need to pair your remote control with your TV at this point.
Press and hold the Source button on the remote until the LED on the remote starts to blink, then release the Source button. That means the remote is in pairing mode.
Now you will wait for the TV to find your remote. Select the name of your remote and press OK when it appears on the TV screen.
When the pairing process is successful, the LED on the remote will go off. If the pairing process fails the remote will enter sleep mode after 30 seconds.
In order to pair your remote later on, you can go to Settings menu, highlight Remotes and Accessories option and press OK to start a search for accessories.
(**) Depends on model
- Standby: Quick Standby / Standby / On
- Numeric buttons: Switches the channel in Live TV mode, enters a number in the text box on the screen
-
Language: Switches among sound modes (analogue TV), displays and changes audio language (digital TV, where available)
-
Volume +/-: Increases/decreases the volume level
- Microphone: Activates the microphone on the remote if the remote is paired with the TV previously
-
Home: Opens the Home Screen
-
Guide: Displays the electronic programme guide for Live TV channels
-
OK: Confirms selections, enters sub-menus, views channel list (in Live TV mode)
-
Back/Return: Returns to previous menu screen, goes one step back, closes open windows, closes teletext (in Live TV-Teletext mode)
-
Netflix: Launches the Netflix application
- Prime Video: Launches the Amazon Prime Video application
-
Menu: Displays the main settings menu (on other sources than Android TV Home), displays available setting options such as sound and picture
-
Rewind: Moves frames backwards in media such as movies
-
Stop: Stops the media being played
-
Record: Records programmes in Live TV mode(**)
-
Coloured Buttons: Follow the on-screen instructions for coloured button functions
-
Pause: Pauses the media being played, starts timeshift recording in Live TV mode Play: Resumes playing the paused media
-
Text: Opens and closes teletext (where available in Live TV mode)
-
Fast forward: Moves frames forward in media such as movies
-
Source: Shows all available broadcast and content sources, is also used in pairing process of the remote.
-
Google Play: Launches the Google Play Store application
-
YouTube: Launches the YouTube application
-
Exit: Closes and exits from the main settings menus (on other sources than Android TV Home), closes the Home Screen and switches to last set source, exits from any running application or menu or OSD banner
-
Directional buttons: Navigates menus, setting options, moves the focus or cursor, etc. and displays the subpages in Live TV-Teletext mode when pressed Right or Left. Follow the on-screen instructions
-
Info: Displays information about on-screen content
-
Programme +/-: Increases/decreases channel number in Live TV mode
-
Mute: Completely turns off the volume of the TV
- Subtitles: Turns subtitles on and off, opens the subtitle settings menu (where available)
Standby Button
Press and hold the Standby button on the remote control. Power off dialogue will appear on the screen. Highlight OK and press the OK button. The TV will switch into standby mode. Press briefly and release to switch the TV into quick standby mode or to switch on the TV when in quick standby or standby mode.
Mobil TV Instructions
Switching On the TV Using Car Plug
- In order to supply the power via the cigarette lighter socket of your vehicle, plug one end of the cigarette lighter adaptor cable (car plug - can be purchased separately if not supplied with the TV) into the vehicle socket and plug the other end of the adaptor cable into the DC 12V terminal on the backside of the TV. Then the standby LED will light up.
- Press the Standby button on the remote control or press the control button on the TV. The TV will then switch on.
- Adjust the antenna position for better reception or reinstall TV channels if necessary.
Switching Off the TV
- The TV cannot be switched into standby mode via the control button. Press and hold the Standby button on the remote control. Power off dialogue will appear on the screen. Highlight OK and press the OK button. TV will switch into standby mode.
- Unplug cable connectors and power plugs.
ATTENTION: 12 V Input

AC Adaptor Specifications(**)
| Manufacturer Name MOSO POWER SUPPLY TECHNOLOGY CO., LTD | |
| Model Identifier MSA-Z4000IC12.0-48W-Q S7017-Q0 | |
| Input Voltage (V) 100-240 | |
| Input AC Frequency (Hz) 50-60 | |
| Output Voltage (V) 12,0 | |
| Output Current (A) 4,0 | |
| Output Power (W) 48,0 | |
| Average Active Efficiency % 87,8 | |
| Efficiency at Low Load (%10) % 79,0 | |
| No-load Power Consumption (W) 0,10 | |
| Manufacturer Name SHENZHEN HUNTKEY ELECTRIC CO., LTD | |
| Model Identifier HKA09012070-7U | |
| Input Voltage (V) 100-240 | |
| Input AC Frequency (Hz) | 50-60 |
| Output Voltage (V) | 12,0 |
| Output Current (A) | 7,0 |
| Output Power (W) 84,0 | |
| Average Active Efficiency | % 89,0 |
| Efficiency at Low Load (%10) | % 90,2 |
| No-load Power Consumption (W) | 0,15 |
(**) Depends on model
Licences
The terms HDMI, HDMI High-Definition Multimedia Interface, HDMI trade dress and the HDMI Logos are trademarks or registered trademarks of HDMI Licensing Administrator, Inc.

Manufactured under licence from Dolby Laboratories. Dolby, Dolby Audio, and the double-D symbol are trademarks of Dolby Laboratories Licensing Corporation.
Google, Android, Android TV, Chromecast, Google Play and YouTube are trademarks of Google LLC.
(**)For DTS patents, see http://patents.dts.com. Manufactured under licence from DTS Licensing Limited. DTS, DTS-HD, Virtual:X, and the DTS-HD logo are registered trademarks or trademarks of DTS, Inc. in the United States and other countries. © 2022 DTS, Inc. ALL RIGHTS RESERVED.

This product contains technology subject to certain intellectual property rights of Microsoft. Use or distribution of this technology outside of this product is prohibited without the appropriate licence(s) from Microsoft.
Content owners use Microsoft PlayReady™ content access technology to protect their intellectual property, including copyrighted content. This device uses PlayReady technology to access PlayReady-protected content and/or WMDRM-protected content. If the device fails to properly enforce restrictions on content usage, content owners may require Microsoft to revoke the device's ability to consume PlayReady-protected content. Revocation should not affect unprotected content or content protected by other content access technologies. Content owners may require you to upgrade PlayReady to access their content. If you decline an upgrade, you will not be able to access content that requires the upgrade.
The "CI Plus" Logo is a trademark of CI Plus LLP.
This product is protected by certain intellectual property rights of Microsoft Corporation. Use or distribution of such technology outside of this product is prohibited without a licence from Microsoft or an authorised Microsoft subsidiary.
Disposal Information
[European Union]
These symbols indicate that the electrical and electronic equipment and the battery with this symbol should not be disposed of as general household waste at its end-of-life. Instead, the products should be handed over to the applicable collection points for the recycling of electrical and electronic equipment as well as batteries for proper treatment, recovery and recycling in accordance with your national legislation and the Directive 2012/19/EU and 2013/56/EU.
By disposing of these products correctly, you will help to conserve natural resources and will help to prevent potential negative effects on the environment and human health which could otherwise be caused by inappropriate waste handling of these products.
For more information about collection points and recycling of these products, please contact your local municipal office, your household waste disposal service or the shop where you purchased the product.
Penalties may be applicable for incorrect disposal of this waste, in accordance with national legislation.
[Business users]
If you wish to dispose of this product, please contact your supplier and check the terms and conditions of the purchase contract.
[Other Countries outside the European Union]
These symbols are only valid in the European Union. Contact your local authority to learn about disposal and recycling.
The product and packaging should be taken to your local collection point for recycling.
Some collection points accept products free of charge.
Note: The sign Pb below the symbol for batteries indicates that this battery contains lead.
![AIWA 55QS8503UHD - [Other Countries outside the European Union] - 1](/content/2026/04/649135/images/e3442716a143428565f3801ebd4c5ac2258776638da915a4ff677432c81bcf3f.jpg)
text_image
① ②-
Products
-
Battery
(**) Depends on model
text_image
Diagram showing three labeled optical or signal processing components with directional arrows and symbols, likely illustrating a system or signal detection interface.text_image
CLASS 1 LASER PRODUCTtext_image
Diagram showing control panel with power button, display, and output ports labeled 'OU'5 Assistant d'Installation Initiale
text_image
CLASS 1 LASER PRODUCTtext_image
Diagram of a remote control with labeled keys and function buttons, showing various function keys and function icons.text_image
Diagram showing three labeled icons with arrows and symbols, possibly representing UI or control buttonstext_image
CLASS 1 LASER PRODUCTtext_image
Diagram of a remote control with labeled keys and function buttons, including keyboard, TV, and media controls.text_image
CLASS 1 LASER PRODUCTtext_image
Diagram of a remote control with labeled keys and function buttons, numbered from 1 to 28.text_image
CLASS 1 LASER PRODUCTtext_image
Diagram of a remote control with labeled keys and function buttons, numbered from 1 to 28.text_image
Diagram showing two identical mechanical or electrical component cross-sections labeled 1 and 2, with no text or symbols beyond labels.-
Produkte
-
Batterie
(**)Je nach modell
1 Voer de batterijen in de afstandsbediening
text_image
CLASS 1 LASER PRODUCTtext_image
Diagram of a remote control with labeled buttons and function keys in Chinesetext_image
CLASS 1 LASER PRODUCTtext_image
Diagram of a remote control with labeled keys and function buttons, including navigation controls and media icons.text_image
Diagram of a remote control with labeled keys and function buttons, showing various function icons and numbers.text_image
CLASS 1 LASER PRODUCTtext_image
Diagram of a remote control with labeled keys and function buttons, including navigation controls and media icons.text_image
Diagram of a remote control with labeled keys and function buttons, including Netflix, YouTube, Google Play, and other services.text_image
CLASS 1 LASER PRODUCTLaserski proizvod 1. klase:
text_image
Diagram of a remote control with labeled keys and function buttons, including navigation controls and media icons.text_image
Diagram of a remote control with labeled keys and function buttons, including keyboard, TV, and menu controls.text_image
CLASS 1 LASER PRODUCTtext_image
Diagram of a remote control with labeled keys and function buttons, including navigation controls and media icons.text_image
Diagram of a remote control with labeled buttons, navigation keys, and function keys in English and Spanishtext_image
Diagram showing two-step UI control interface with power, battery, and camera icons labeled ① and ②text_image
CLASS 1 LASER PRODUCTκες λειτουργίας.
text_image
Diagram of a remote control with labeled keys and function buttons, including navigation controls and media icons.text_image
Diagram of a remote control device with labeled buttons, function keys, and status LEDstext_image
CLASS 1 LASER PRODUCTtext_image
Diagram of a remote control with labeled keypad, function keys, and navigation buttons including Netflix, YouTube, Google Play, and other services.EN: Hereby, VESTEL Elektronik Sanayi ve Ticaret declares that the radio equipment type TFT ID in compliance with Directive 2014/53/EU. The full text of the EU declaration of conformity is available at the following internet address: doc.vosshub.com
text_image
Row of five social media platform icons: Facebook, Twitter, Instagram, Pinterest, and YouTubewww.eu-aiwa.com
AIWA CO., LTD.
Kita-Ku
All Rights Reserved.
Printed in Türkiye