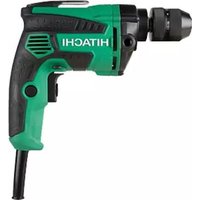
402976 - Drill HITACHI - Free user manual and instructions
Find the device manual for free 402976 HITACHI in PDF.
Download the instructions for your Drill in PDF format for free! Find your manual 402976 - HITACHI and take your electronic device back in hand. On this page are published all the documents necessary for the use of your device. 402976 by HITACHI.
USER MANUAL 402976 HITACHI
Designed for operating in USA & Canada only. When this product is used in areas other than the USA & Canada, we cannot guarantee the product quality and performance.
SAFETY INSTRUCTIONS AND INSTRUCTION MANUAL
000BookDustextractorsystemNA.indb2000BookDustextractorsystemNA.indb2 2017/12/0513:42:562017/12/0513:42:56IMPORTANT SAFETY INSTRUCTIONS Read all of the safety precautions, warnings and operating instructions in the Instruction Manual before operating or maintaining this power tool. Most accidents that result from power tool operation and maintenance are caused by the failure to observe basic safety rules or precautions. An accident can often be avoided by recognizing a potentially hazardous situation before it occurs, and by observing appropriate safety procedures. Basic safety precautions are outlined in the “SAFETY” section of this Instruction Manual and in the sections which contain the operation and maintenance instructions. Hazards that must be avoided to prevent bodily injury or machine damage are identifi ed by WARNINGS on the power tool and in this Instruction Manual. NEVER use this power tool in a manner that has not been specifi cally recommended by HITACHI.
MEANINGS OF SIGNAL WORDS
WARNING indicates a potentially hazardous situations which, if ignored, could result in death or serious injury. CAUTION indicates a potentially hazardous situations which, if not avoided, may result in minor or moderate injury, or may cause machine damage. NOTE emphasizes essential information. SAFETY
GENERAL POWER TOOL SAFETY WARNINGS
WARNING Read all safety warnings and all instructions. Failure to follow the warnings and instructions may result in electric shock, fi re and/or serious injury. Save all warnings and instructions for future reference. The term “power tool” in the warnings refers to your mains-operated (corded) power tool or battery-operated (cordless) power tool.
a) Keep work area clean and well lit. Cluttered or dark areas invite accidents. b) Do not operate power tools in explosive atmospheres, such as in the presence of fl ammable liquids, gases or dust. Power tools create sparks which may ignite the dust or fumes. c) Keep children and bystanders away while operating a power tool. Distractions can cause you to lose control.
2) Electrical safety
a) Power tool plugs must match the outlet. Never modify the plug in any way. Do not use any adapter plugs with earthed (grounded) power tools. Unmodifi ed plugs and matching outlets will reduce risk of electric shock. b) Avoid body contact with earthed or grounded surfaces such as pipes, radiators, ranges and refrigerators. There is an increased risk of electric shock if your body is earthed or grounded. c) Do not expose power tools to rain or wet conditions. Water entering a power tool will increase the risk of electric shock. d) Do not abuse the cord. Never use the cord for carrying, pulling or unplugging the power tool. Keep cord away from heat, oil, sharp edges or moving parts. Damaged or entangled cords increase the risk of electric shock. e) When operating a power tool outdoors, use an extension cord suitable for outdoor use. Use of a cord suitable for outdoor use reduces the risk of electric shock. f) If operating a power tool in a damp location is unavoidable, use a residual current device (RCD) protected supply. Use of an RCD reduces the risk of electric shock.
a) Stay alert, watch what you are doing and use common sense when operating a power tool. Do not use a power tool while you are tired or under the infl uence of drugs, alcohol or medication.
English 000BookDustextractorsystemNA.indb3000BookDustextractorsystemNA.indb3 2017/12/0513:42:562017/12/0513:42:56A moment of inattention while operating power tools may result in serious personal injury. b) Use personal protective equipment. Always wear eye protection. Protective equipment such as dust mask, non-skid safety shoes, hard hat, or hearing protection used for appropriate conditions will reduce personal injuries. c) Prevent unintentional starting. Ensure the switch is in the off -position before connecting to power source and/or battery pack, picking up or carrying the tool. Carrying power tools with your fi nger on the switch or energising power tools that have the switch on invites accidents. d) Remove any adjusting key or wrench before turning the power tool on. A wrench or a key left attached to a rotating part of the power tool may result in personal injury. e) Do not overreach. Keep proper footing and balance at all times. This enables better control of the power tool in unexpected situations. f) Dress properly. Do not wear loose clothing or jewellery. Keep your hair, clothing and gloves away from moving parts. Loose clothes, jewellery or long hair can be caught in moving parts. g) If devices are provided for the connection of dust extraction and collection facilities, ensure these are connected and properly used. Use of dust collection can reduce dust-related hazards.
4) Power tool use and care
a) Do not force the power tool. Use the correct power tool for your application. The correct power tool will do the job better and safer at the rate for which it was designed. b) Do not use the power tool if the switch does not turn it on and off . Any power tool that cannot be controlled with the switch is dangerous and must be repaired. c) Disconnect the plug from the power source and/or the battery pack from the power tool before making any adjustments, changing accessories, or storing power tools. Such preventive safety measures reduce the risk of starting the power tool accidentally. d) Store idle power tools out of the reach of children and do not allow persons unfamiliar with the power tool or these instructions to operate the power tool. Power tools are dangerous in the hands of untrained users. e) Maintain power tools. Check for misalignment or binding of moving parts, breakage of parts and any other condition that may aff ect the power tool’s operation. If damaged, have the power tool repaired before use. Many accidents are caused by poorly maintained power tools. f) Keep cutting tools sharp and clean. Properly maintained cutting tools with sharp cutting edges are less likely to bind and are easier to control. g) Use the power tool, accessories and tool bits etc. in accordance with these instructions, taking into account the working conditions and the work to be performed. Use of the power tool for operations diff erent from those intended could result in a hazardous situation.
5) Battery tool use and care
a) Recharge only with the charger specifi ed by the manufacturer. A charger that is suitable for one type of battery pack may create a risk of fi re when used with another battery pack. b) Use power tools only with specifi cally designated battery packs. Use of any other battery packs may create a risk of injury and fi re. c) When battery pack is not in use, keep it away from other metal objects, like paper clips, coins, keys, nails, screws or other small metal objects, that can make a connection from one terminal to another. Shorting the battery terminals together may cause burns or a fi re. d) Under abusive conditions, liquid may be ejected from the battery; avoid contact. If contact accidentally occurs, fl ush with water. If liquid contacts eyes, additionally seek medical help. Liquid ejected from the battery may cause irritation or burns.
a) Have your power tool serviced by a quali fi ed repair person using only identical replacement parts. This will ensure that the safety of the power tool is maintained. PRECAUTION Keep children and infi rm persons away. When not in use, tools should be stored out of reach of children and infi rm persons.
English 000BookDustextractorsystemNA.indb4000BookDustextractorsystemNA.indb4 2017/12/0513:42:562017/12/0513:42:56– WARNING – To reduce the risk of injury, user must read instruction manual. WARNING Some dust created by power sanding, sawing, grinding, drilling, and other construction activities contains chemicals known to the State of California to cause cancer, birth defects or other reproductive harm. Some examples of these chemicals are:
Lead from lead-based paints,
Crystalline silica from bricks and cement and other masonry products, and
Arsenic and chromium from chemically-treated lumber. Your risk from these exposures varies, depending on how often you do this type of work. To reduce your exposure to these chemicals: work in a well ventilated area, and work with approved safety equipment, such as those dust masks that are specially designed to fi lter out microscopic particles.
SAVE THESE INSTRUCTIONS
AND OWNERS OF THIS TOOL!
1. Before using the cordless rotary hammer, be sure to
read its instruction manual carefully.
2. Do not use the tool for any purposes other than those
3. Follow the instruction manual when attaching the dust
extractor system to the cordless rotary hammer, and when cleaning the dust extractor system, changing its fi lter, etc.
4. Use only the accessories and attachments that are
specifi ed. Use only the accessories and attachments that are specifi ed in this instruction manual and our company’s catalogs.
5. Substances such as silica and asbestos are harmful
to the human body. Perform anti-dust measures when working with materials that contain such substances.
6. Wear safety goggles and a dust mask.
7. If any tools or equipment are accidentally dropped or
bumped, carefully inspect them to make sure there is no damage, cracks, or deformation. Using tools or equipment with damage, cracks, or deformation may result in injury. SYMBOLS WARNING The following show symbols used for the machine. Be sure that you understand their meaning before use. Direct current
English 000BookDustextractorsystemNA.indb5000BookDustextractorsystemNA.indb5 2017/12/0513:42:562017/12/0513:42:56FUNCTIONAL DESCRIPTION NOTE The information contained in this Instruction Manual is designed to assist you in the safe operation and maintenance of the power tool. NEVER operate, or attempt any maintenance on the tool unless you have fi rst read and understood all safety instructions contained in this manual. Some illustrations in this Instruction Manual may show details or attachments that diff er from those on your own power tool.
Nozzle Dust box latch Dust box Terminal Latch (both sides) Depth adjustment button Motor (internal) Nozzle adjustment button Filter (internal) Fig. 1 OPTIONAL ACCESSORIES (sold separately)
Filter Replace the fi lter about once every 100 times the dust extractor system becomes full. Code No. 370520
Dust box set This product set includes a fi lter cover, fi lter, and dust box. Code No. 370518
Nozzle seal Replace this part if it becomes cracked or damaged, or if it loses its elasticity. Code No. 370494
Brush cap Replace this part if the bristles are falling out or becoming shorter from friction. Code No. 370496
Deltagon bit (SDS plus shank)
Drill bit (SDS plus shank) Optional accessories are subject to change without notice.
English 000BookDustextractorsystemNA.indb7000BookDustextractorsystemNA.indb7 2017/12/0513:42:572017/12/0513:42:57(1) Attaching the dust extractor system (Fig. 3) Terminal insertion port of tool body Rail section of tool body Protruding section of dust extractor system Latch (both sides) Fig. 3 CAUTION To prevent accident, make sure to turn the switch off , then disconnect the battery and the drilling tool. Place the dust extractor system on a stable platform, and line up and insert the rail section of the tool body into the protruding section of the dust extractor system. Fully insert the rail section of the tool body until the tool body and the dust extractor system come into full contact with each other, and ensure that the latches on both sides of the dust extractor system are properly and securely fastened. (2) Removing the dust extractor system (Fig. 4)
Latch (both sides) Fig. 4 CAUTION To prevent accident, make sure to turn the switch off , then disconnect the battery and the drilling tool. Press the latches on both sides of the dust extractor system, and remove the tool body from the dust extractor system.
1. Attaching and removing the dust extractor
When attaching, removing, or adjusting the dust extractor system, in order to prevent an unlikely accident, be sure to turn off the tool’s switch, and remove the tool’s battery and tool bit. (Fig. 2) Tool bit (drill bit) Battery Fig. 2
Make sure the dust extractor system is fully attached. If not fully attached, the dust extractor system could come loose and result in injury.
English 000BookDustextractorsystemNA.indb8000BookDustextractorsystemNA.indb8 2017/12/0513:42:572017/12/0513:42:572. Adjusting the nozzle position (Fig. 5, 6, 7) NOTE If the nozzle position adjustment button is pressed to release the lock while the nozzle is in any position other than fully extended, the nozzle may pop outward. (1) Press the nozzle position adjustment button and ensure that the nozzle is in the fully extended position. (Fig. 5) (2) While holding the tool in a way so that the switch does not get pressed, place the nozzle against the material to be drilled. (Fig. 5) Material Nozzle Fully extended position of nozzle Nozzle adjustment button Place against material
Fig. 5 (3) While pushing the nozzle adjustment button in the direction of the arrow, press the tool toward the material, allowing the nozzle position to shorten until it reaches the position where the drill bit comes into contact with the material.(Fig. 6)
Material While pressing button Push forward Drill bit Fig. 6 NOTE If the nozzle position is shortened before the nozzle adjustment button is pressed, the nozzle won’t be locked in position even if the nozzle adjustment button lock is released. (4) Release the nozzle adjustment button to lock the position of the nozzle. (Fig. 7)
Material When the nozzle adjustment button is released The nozzle becomes locked Fig. 7
The maximum drilling depth when using the dust extractor system is 85 mm.
The dust extractor system can be used with drill bits with diameters of 4.3 – 20 mm and eff ective lengths of 50 – 100 mm. If using a drill bit with a diameter of greater than 20 mm, remove the dust extractor system. Press the depth adjustment button in the direction of the arrow to release the lock, move the nozzle to set the stroke equal to the depth that you want to drill, and release the depth adjustment button to lock the position. (Fig. 8)
Release Material Depth adjustment button While pressing button Move to set depth of hole you want to drill Stroke (drilling depth) Fig. 8
English 000BookDustextractorsystemNA.indb9000BookDustextractorsystemNA.indb9 2017/12/0513:42:582017/12/0513:42:58When the end of the nozzle and the tip of the drill bit are aligned, the distance that the nozzle can move is drilling depth. (Fig. 9) A: Drilling depthA Fig. 9
The dust extractor system is only to be used when drilling concrete. Do not use it while drilling metal or wood.
Do not use the dust extractor system with wet concrete or in a wet environment. Doing so may result in a malfunction. (1) Grasp the nozzle with your hand and pull it back slightly, and align the tip of the drill bit with the spot to be drilled. (Fig. 10)
Spot to be drilled Nozzle Pull the nozzle back slightly and align the tip of the drill bit with the spot to be drilled. Fig. 10 (2) Release the nozzle and allow it to make fi rm contact with the surface of the concrete. (Fig. 11)
End of the nozzle in fi rm contact with the concrete surface Fig. 11 NOTE If the nozzle is raised off the surface, the dust extraction performance declines. (3) With the end of the nozzle still in fi rm contact with the surface of the concrete, proceed with drilling. (Fig. 12)
Firm contact with the concrete surface Drilling Raised off the concrete surface Fig. 12 Delayed stop function The dust extractor system’s internal motor stops after a delay of several seconds from when the tool’s switch is released. This allows dust to be extracted without leaving any dust behind.
5. Emptying the dust (Fig. 13, 14, 15)
If too much dust is collected in the dust box, the dust extraction performance declines. Additionally, if the dust box is full, dust may leak out of the dust extractor system. Inspect the dust extractor system regularly, and dispose of the dust before it becomes full. WARNING When emptying the dust, in order to prevent an unlikely accident, be sure to turn off the tool’s switch and remove the rechargeable battery from the tool body. CAUTION Wear a dust mask. NOTE Do not directly touch the fi lter with a hard brush or similar tool, or blast the backside of the fi lter with compressed air. Also, do not wash the fi lter with water. Doing so may scratch the fi lter and/or shorten its life.
6. Replacing the fi lter (Fig. 16, 17, 18)
If the fi lter inside the dust box becomes clogged, the dust extraction performance declines. As a guideline, replace the fi lter after every 100 times that the dust box becomes full. WARNING When replacing the fi lter, in order to prevent an unlikely accident, be sure to turn off the tool’s switch and remove the battery from the tool body. (1) Insert a fl at-head screwdriver into the groove on the side of the fi lter cover and remove the fi lter cover. (Fig. 16)
Dust box Filter cover Groove of dust box Fig. 16 (2) Remove the fi lter from inside, and replace it with a new one. (Fig. 17) Dust box Filter (internal) Seal packing Fig. 17 NOTE When removing the fi lter cover, be sure that the seal packing of the dust box does not peel off . (1) While keeping the dust extractor system level and upright, press and hold the dust box latches and pull the dust box out of the dust extractor system. Dispose of the dust inside. (Fig. 13, 14)
Dust box latch Dust box Fig. 13 Dust box Filter (internal) Fig. 14 CAUTION To prevent accident, make sure to turn the switch off , then disconnect the battery and the drilling tool. (2) When cleaning the fi lter, face the opening in the dust box downward and tap the dust box gently to knock the dust out. (Fig. 14) (3) If dust is adhered to the intake port (mesh covering) or the area around it, clean it off with a soft brush. (Fig. 15) Dust extractor system intake port (mesh covering) Fig. 15
Use pliers or a similar tool remove the C-ring, and replace the brush cap with a new one.
Align the groove of the new brush cap with the bump on the nozzle and fi t them together.
Reattach the C-ring in its original position, making sure that it is secure and won’t fall off . (3) Press the fi lter cover against the seal packing of the dust box. While pressing the latch, attach the fi lter cover so that it fi ts into the bumps of the dust box, making sure that the latch does not get in the way of the fi lter cover. (Fig. 18)
Bumps Seal packing Press fi lter cover against seal packing While pressing latch Attach Fig. 18
7. Replacing the nozzle seal and brush cap
(Fig. 19, 20) As the nozzle seal and brush cap wear out, the dust extracting performance declines. If the nozzle seal or brush cap is worn out, replace it with a new one. WARNING When replacing the nozzle seal or brush cap, in order to prevent an unlikely accident, be sure to turn off the tool’s switch and remove the battery from the tool body. Also, remove the tool bit. (a) Replacing the nozzle seal (Fig. 19) Nozzle Notch in nozzle seal Nozzle seal Fig. 19 CAUTION To prevent accident, make sure to turn the switch off , then disconnect the battery and the drilling tool.
Remove the nozzle seal as shown in the fi gure.
Attach a new nozzle seal. Align the nozzle seal so that its notch fi ts onto the outer shape of the nozzle.
English 000BookDustextractorsystemNA.indb12000BookDustextractorsystemNA.indb12 2017/12/0513:42:592017/12/0513:42:591. Inspecting the body of the dust extractor system Regularly inspect the places where the various parts of the dust extractor system fi t together to make sure there is no rattling or loose parts. If the dust extractor system is used while parts of it are loose, there is a risk of injury or other accidents. If there is anything abnormal with the dust extractor system, consult the Hitachi Authorized Service Center.
2. Cleaning on the outside
When the power tool is stained, wipe with a soft dry cloth or a cloth moistened with soapy water. Do not use chloric solvents, gasoline or paint thinner, for they melt plastics.
3. Handling the motor
Be careful not to allow oil, water, or other fl uids to get inside the internal motor. (Fig. 1 on page 6)
4. Cleaning the terminal (Fig. 21)
The terminal of the dust extractor system is an important component that supplies electrical current to the motor. After drilling concrete, if there is concrete dust adhered to the terminal, use a soft brush or a similar tool to clean off the adhered concrete dust before using the dust extractor system again. Additionally, clean the area around the terminal insertion port of the tool body. (Fig. 21) Terminal insertion port of tool body
MAINTENANCE AND INSPECTION
WARNING When performing inspections or maintenance, be sure to turn off the tool’s switch and remove the dust extractor system from the tool body. Terminal of dust extractor system Fig. 21 CAUTION To prevent accident, make sure to turn the switch off , then disconnect the battery and the drilling tool. NOTE Using the dust extractor system while there is concrete dust still adhered to it may result in a faulty terminal connection and may cause a malfunction.
Store the power tool in a place in which the temperature is less than 50°C and out of reach of children.
When storing the dust extractor system, press the nozzle adjustment button to put the nozzle in the fully extended position. Keeping the nozzle contracted inside the dust extractor system may result in its pressing force becoming weaker. (Fig. 22)
Nozzle adjustment button Nozzle Fig. 22 CAUTION To prevent accident, make sure to turn the switch off , then disconnect the battery and the drilling tool.
If the nozzle doesn’t return to the fully extended position, pull it outward with your hand. Repeatedly extending and contracting it will help it recover. CAUTION In the operation and maintenance of power tools, the safety regulations and standards prescribed in each country must be observed. Important notice on the batteries for the Hitachi cordless power tools Please always use one of our designated genuine batteries. We cannot guarantee the safety and performance of our cordless power tool when used with batteries other than these designated by us, or when the battery is disassembled and modifi ed (such as disassembly and replacement of cells or other internal parts). NOTE Due to HITACHI’s continuing program of research and development, the specifi cations herein are subject to change without prior notice.
English 000BookDustextractorsystemNA.indb14000BookDustextractorsystemNA.indb14 2017/12/0513:42:592017/12/0513:42:59TROUBLESHOOTING Use the inspections in the table below if the tool does not operate normally. If this does not remedy the problem, consult your dealer or the Hitachi Authorized Service Center. Symptom Possible cause Remedy Tool doesn’t run. There is dust adhered to the terminal, resulting in a faulty connection. Remove any dust from the terminal parts of the dust extractor system and the tool body. The dust extraction performance has declined, or dust is leaking out of the dust extractor system. The dust case is full. Empty the dust from the dust case and clean the dust case. The fi lter inside the dust case is clogged. Empty the dust from the dust case and clean the fi lter. Or, replace the fi lter with a new one. The fi lter, brush cap, or nozzle seal is cracked, damaged, or worn out. Replace it with a new one. The position of the nozzle won’t lock. The following incorrect steps were performed:
The nozzle was set to the desired position
The nozzle adjustment button was pressed Perform the following steps:
While pressing and holding the nozzle adjustment button...
Set the nozzle to the desired position
Release the nozzle adjustment button