ACW300C - Air Conditioning American Comfort - Free user manual and instructions
Find the device manual for free ACW300C American Comfort in PDF.


User questions about ACW300C American Comfort
0 question about this device. Answer the ones you know or ask your own.
Ask a new question about this device
Download the instructions for your Air Conditioning in PDF format for free! Find your manual ACW300C - American Comfort and take your electronic device back in hand. On this page are published all the documents necessary for the use of your device. ACW300C by American Comfort.
USER MANUAL ACW300C American Comfort
text_image
AMERICAN COMFORT WORLDWIDEAMERICAN COMFORT
WORLDWIDE
Owner's Manual
Portable Air Conditioner
ACW300
natural_image
Line drawing of a portable air purifier with ventilation grilles and control panel (no text or symbols)
It is important that you read these instructions before using your new purchase and we strongly recommend that you keep them in a safe place for future reference.
Innovative AutoDrain Technology
Table of Contents
Thank You ....I
Safety Instructions 1-2
Specifications 3
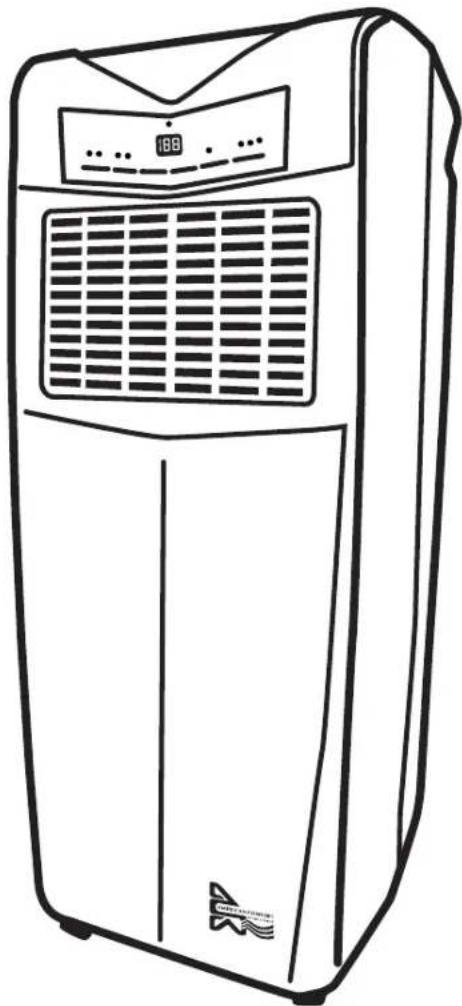
Parts 4
AutoDrain Technology Assembly 5
Positioning 6
Operation 7-8
Emptying the Water Container 9
Cleaning 10
Installation of the Filters ....10
Storage 11
Troubleshooting 12
Limited Warranty 14
Thank You!
Thank you for purchasing a ACW Portable Air Conditioner.
We would like you to enjoy the many benefits this unit offers, so please read this manual carefully and take full advantage of the many advanced features that your ACW Air Conditioner offers you.
In designing these advanced products, we have listened carefully to our customers and have passed their views on to our research and development laboratories.
We wish you many years of enjoyable use.
After reading this manual, please keep it in a safe place for future reference.
Read this entire instruction manual before use.
Please keep your receipt. Your receipt is your Proof of Purchase and is necessary for warranty service.
Safety Instructions
IMPORTANT!
- The unit is designed for indoor operation.
- Rating: This unit must be connected to a 115V/60Hz grounded outlet.
- The installation must be in accordance with regulations of the country where the unit is used.
If you are in any doubt about the electrical installation, have it checked and if necessary modified by a qualified electrician.
- The air conditioner is safe. However, as with other electrical appliances, use it with care.
- Keep out of the reach of children.
- Do not clean the unit by spraying it or immersing it in water.
- Do not insert any object into the openings of the unit.
- Disconnect the unit from the outlet before cleaning the unit or any of its components.
- Never connect the unit to an electrical outlet using an extension cord.
If an outlet is not available, one should be installed by a licensed electrician.
WARNING!
- Never operate this appliance if it has a damaged cord or plug. Do not lead the cord over sharp edges.
- A damaged supply cord should be replaced by the manufacturer, its service agent or a qualified person in order to avoid a hazard.
- Any service other than regular cleaning or filter replacement should be performed by an authorized service representative. Failure to do so could result in a loss of warranty.
Safety
Do not use your air conditioner:

natural_image
Abstract black-and-white graphic with diagonal lines and a stylized hand holding a gear (no text or symbols)If the power cable wires are frayed or cut
natural_image
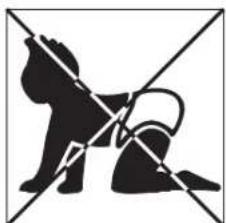
Silhouette of a dog holding a dog, crossed out by diagonal lines (no text or symbols)When small children may be left unattended
text_image
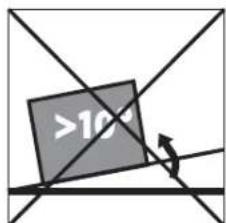
>10On a slope or uneven surface

natural_image
Simple line drawing of a campfire with no text or symbolsClose to a heat source

natural_image
Abstract geometric pattern with black and gray shapes intersected by diagonal lines (no text or symbols)This products is not made for DIY repair
natural_image
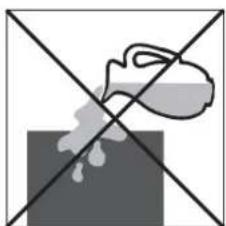
Simple line drawing of a container pouring liquid into a block, crossed by two diagonal lines (no text or symbols)If there is a risk of liquid falling on the unit
natural_image
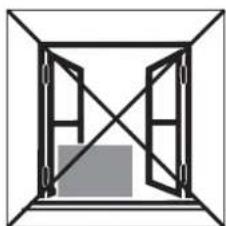
Simple line drawing of a double door frame with diagonal lines and a shaded bottom panel (no text or symbols)Inside unit exposed to the weather outdoors
natural_image
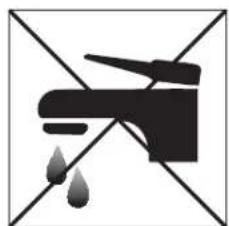
Black silhouette of a faucet with water droplets falling, crossed by diagonal lines (no text or symbols)In a permanent very humid environment

natural_image
Pure electrical circuit lines without any symbolsIf an extension lead may become overloaded
natural_image
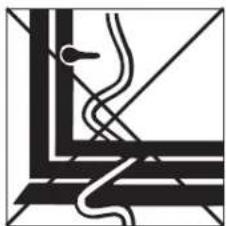
Abstract geometric line drawing with intersecting curves and a small figure (no text or symbols)Where the power cable may be damaged

text_image
OILWhere it may be damaged by chemicals
natural_image
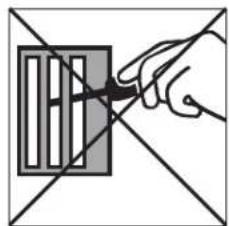
Hand holding a pen over a grid-patterned rectangular object (no text or symbols visible)Where there is a risk of interference by foreign objects
text_image
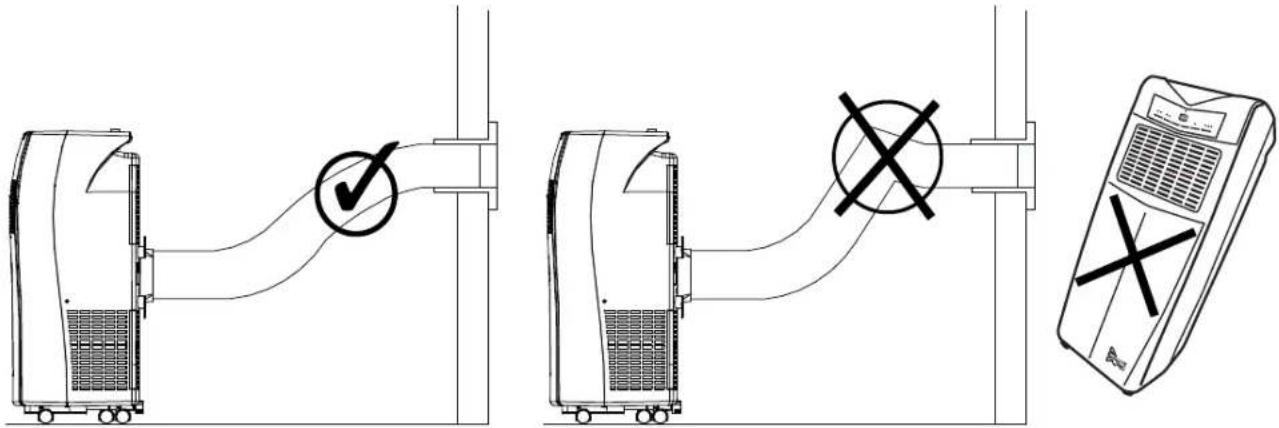
Diagram showing three different electrical or mechanical configurations with checkmark and cross symbols indicating failure or rejection states.
Reminder:
Waste electrical products must not be disposed of with household waste. This product should be taken to our local recycling center for safe treatment.
Specifications
| Model ACW300 | |
| Cooling Capacity 10,000 BTU/hr | |
| Power/Ampere Consumption 98 | 1W / 8.82A |
| Air Volume (Max. Speed) 177 CFM | |
| Humidity Removal Capacity 56.4 | pints / day |
| Power Supply 115V/60Hz/l phase | |
| Compressor Rotary | |
| Refrigerant R410A | |
| Fan Speed 2 | |
| Timer | 1~12 hours |
| Thermostat | Cooling: 64~90°F (18~32°C) |
| Operating Temperature | 41 ~ 110°F |
| Exhaust Pipe | 5" x 59" |
| Net Weight | 47.4 lbs. |
| Gross Weight | 55.12 lbs. |
| Unit Dimensions | 12.01"W x 14.96"D x 29.53"H |
| Package Dimensions | 13.58"W x 20.59"D x 30.51"H |
| Subject to modifications without prior notice.Please refer to the rating label for greater precision.The cooling capacity of the unit may be affected by the height of your ceiling, quality of your insulation, or number of windows in your room. There is no current testing statute for portable air conditioning products in the United States, yet we have made every effort to design engineer a superior quality portable air conditioning unit that effectively and efficiently cools select areas of the home or office.These portable air conditioning units are designed engineered to provide supplemental air conditioning.To gain a better understanding of the performance capabilities of your new American Comfort Worldwide portable AC unit, you can visit us online at: www.americancomfort.com/portableacdisclaimer | |
Parts
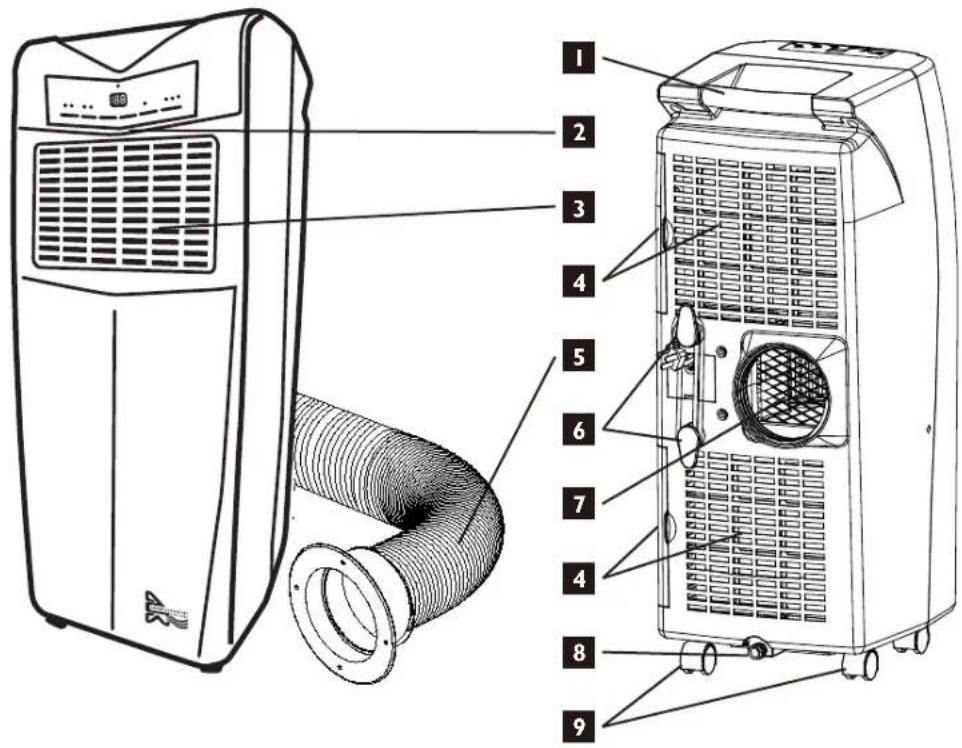
text_image
Technical diagram of a portable air conditioner unit with numbered parts labeled for identification.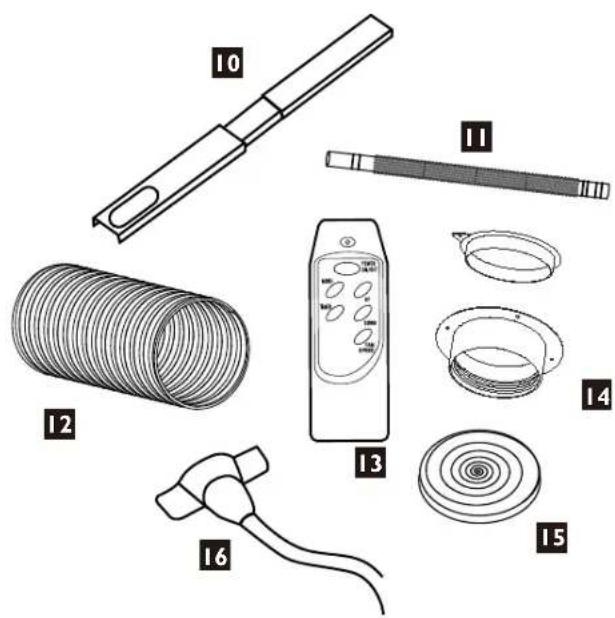
text_image
Diagram showing various types of household appliances and devices, including a coiled spring, remote control, and ring components with numbered labels.I. Handle
-
Control panel
-
Air outlet
-
Air inlet with filter
-
Exhaust hose with adapter
-
Power cord hanger
-
Exhaust air outlet
-
Water stopper (plug inside)
-
Casters
-
Adjustable Window Slide Bar
II. Flexible Drain Hose
-
Exhaust hose
-
IR Ergonomic Remote Control
-
Exhaust Hose Window Slide Bar Connector with cap-hole cover
-
Insulation tape
-
Spiral water pipe with connector
AutoDrain Technology Assembly
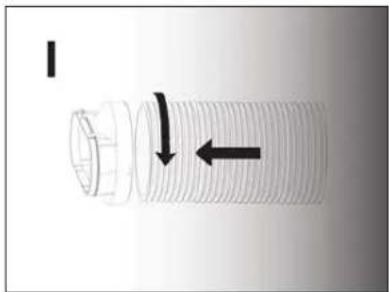
natural_image
Diagram of a pipe fitting with directional arrows indicating flow or movement (no text or symbols)Attach Window Slide Bar Connector to Exhaust Hose by twisting as shown.
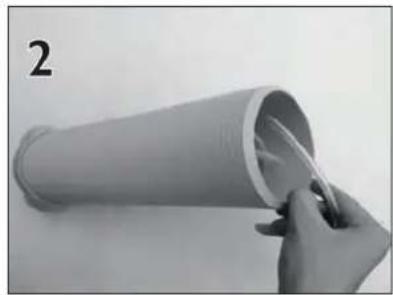
natural_image
Hand holding a cylindrical object with a white plastic tip, partially open (no text or symbols visible)Put spiral water pipe into hot air flexible hose.
natural_image
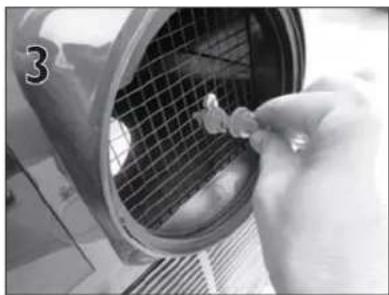
Close-up of a hand holding a small object inside a circular vent, no visible text or symbolsConnect the female half of the quick connector at the end of the spiral water pipe to the male part in the hot air outlet pipe.
natural_image
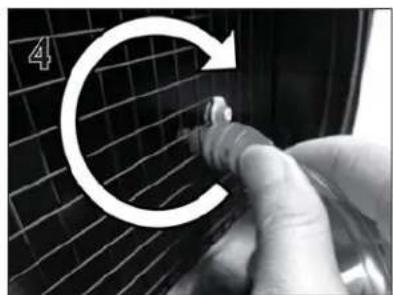
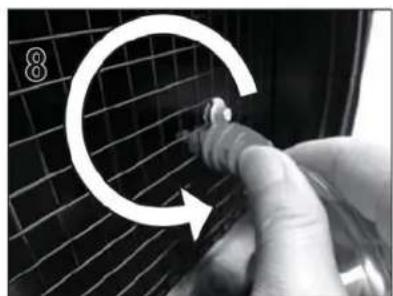
Close-up of a hand holding a tool near a grid-patterned surface, with a white circular arrow pointing to the edge (no text or symbols visible)Turn the connector 45° clockwise until it is locked in place.
natural_image
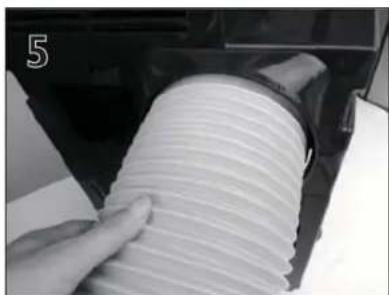
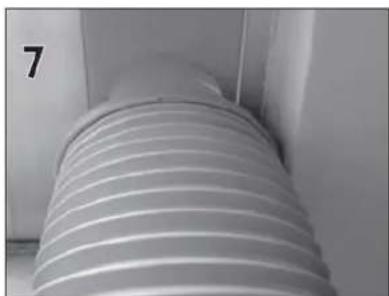
Close-up of a hand handling a white corrugated material inside a mechanical device (no visible text or symbols)Stretch end of the hose slightly. Assemble the hot air hose on the unit by screwing in clockwise.
natural_image
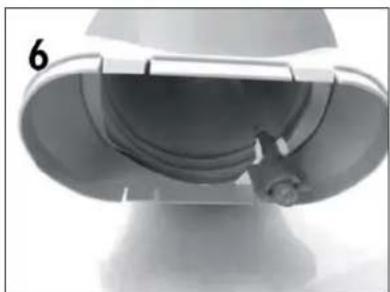
Close-up of a cylindrical device with a coiled cable and connector, labeled '6' in the corner (no text or symbols on the device itself)Clip on the water atomizer at the end of the spiral pipe to the holder.
natural_image
Close-up of a bed covered with striped insulation, no visible text or symbolsUnfold fl exible hose with attached hose adapter connector, and snap into Window Slide Bar.
natural_image
Close-up of a hand cleaning a car grille with a curved arrow indicating rotation (no text or symbols)Only Required For Disassembly.
In order to unlock the quick connector, push the tab and turn the connector counter-clockwise.
Positioning
This unit can easily be moved from one room to another. In doing, so keep this in mind:
- The air conditioner must stand upright on an even surface.
- Do not position near bath, sink, or other permanent, wet or damp area.
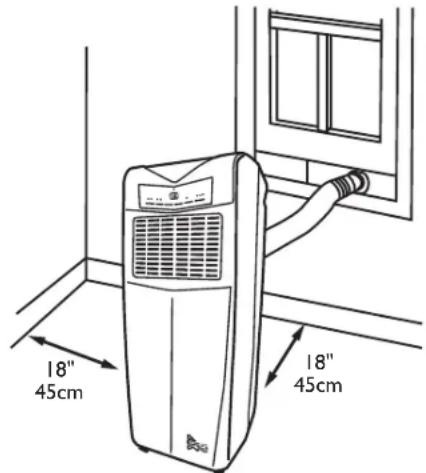
- Keep unit at least 18" from wall, curtains, draperies, or heat sources to insure adequate air circulation.
text_image
18" 45cm 18" 45cm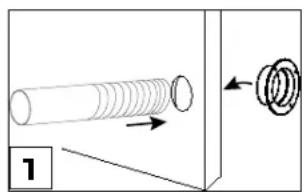
natural_image
Diagram showing a cylindrical object with arrows pointing to a separate spring-like component (no text or symbols)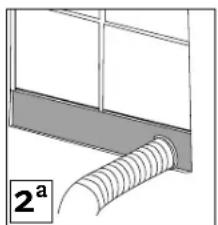
natural_image
Diagram of a mechanical assembly with a coiled spring and labeled section 2a (no text or symbols beyond label)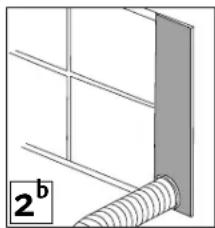
natural_image
Diagram of a wall corner with a coiled spring and labeled section '2b' (no text or symbols beyond label)Installing Exhaust Hose to Window Slide Bar
Note: The window kit is only designed to be installed with sliding windows or doors. The window kit is not designed or to be used with casement style windows. Measure your window kit according to the dimensions of your sliding window. If in case the unit is larger than your required dimensions, it can be cut using a saw or power tool of the sort. If the unit is too short for your opening, you can order an additional window kit from our online store to extend it.
After assembling Innovative AutoDrain Technology per instructions on page 5, make sure hose is rmly attached to oval connector that ts into window slide bar.
Snap hose connector into window slide bar opening. See Illustration I.
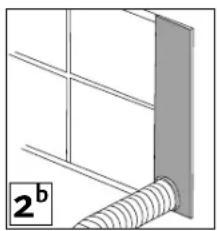
Extend window slide bar to t your window opening, either vertical or horizontal, depending on how the window opens. See Illustrations 2a - 2b.
Important
The exible exhaust hose can be extended from 12" to 60" for mounting. We recommend that you keep the hose as short as possible to minimize possible loss back in the room.
This length has been designed especially according to the specifications of the air conditioner.
Do not use an extension or exchange for a different hose as that may lead to malfunctioning.
The exhaust air must ow freely. Any blockage can lead to overheating of the air conditioner. Handle with care to prevent any kink or bend in the exhaust hose.
Operation
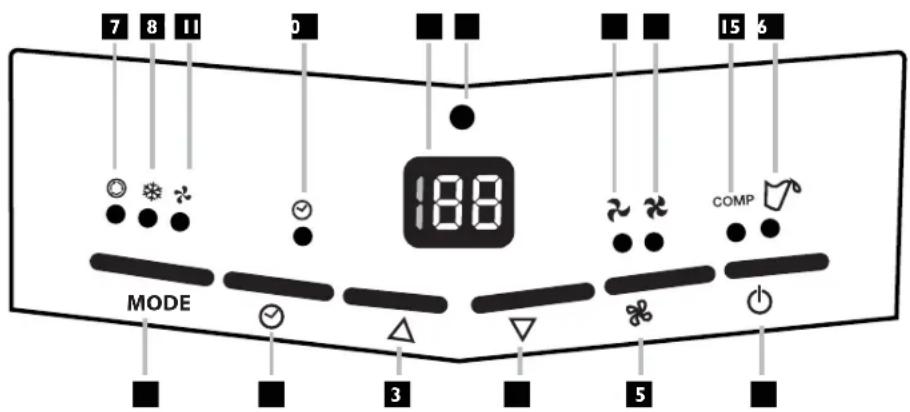
text_image
7 8 11 0 15 6 MODE 3 5I. Mode (function) option button
2. Timer button
3. 'Temperature up' button
4. 'Temperature down' button
5. Speed (ventilation) button
6. ON/OFF (power) button
- Automatic mode operation indicator
- Cooling mode operation indicator
- Fan mode operation indicator
-
Timer operation indicator
-
Display window
- Receiver for remote control
- Low ventilation indicator
- High ventilation indicator
- Compressor operation indicator
- "Water Full" indicator
Turning ON/OFF
I. Press ON/OFF button, the unit will start automatically. If the ambient temperature is
- Higher than 73.4^ (23^) , the unit will work in cooling model.
- Higher than 68^ (20°C) but below or equal to 73.4^ (23°C), the unit will work in ventilation model.
2. Indicators of the functions in progress come on at the same time.
*NOTE! The display window shows the ambient room temperature from 32°F (0°C) to 122°F (50°C)
3. To turn the unit off, press ON/OFF button again.
Setting Mode/Function
Press MODE button to select required working mode: automatic, cooling or fan.
The indicator of your selected mode comes on.
Setting Temperature
I. Press 'Temperature Up' or 'Temperature Down' button to regulate the temperature you desired.
2. The display window will show the temperature you set as you press 'Temperature Up' or 'Temperature Down' button. Otherwise, it will always show the ambient temperature.
3. The pre-setting temperature of this machine is: 75^ F ( 24^ C) for cooling
Setting Ventilation Speed
I. Press SPEED button to choose the ventilation speed you need, high or low.
The indicator of high or low ventilation will light on at the same time.
2. If the unit is in AUTO mode, it will choose the ventilation speed automatically according to the ambient temperature (the related indicators will light on), at this time, the speed switch is invalid.
Setting Timer
I. Press TIMER button to set the operating hours you desired (1 to 12 hours, the timer indicator will light on). When the set time has been reached, the machine will turn off automatically. The display window will show the hour(s) you set as you press TIMER button. If the timer button is not pressed, the unit will work continuously.
2. By pressing the timer but without turning on the other functions, you can PRE-SET the time for the machine to work. For example, if you press the timer to '2', the unit will work automatically after 2 hours.
Operation
Remote control
The air conditioner responds to all signals that are sent by the remote control. Two AAA-batteries are required to use the remote control. Point the remote control hand set towards the control panel of the unit and press the relevant button, the red LED on the hand set will flash whenever a button is pressed.
Note: the air flow direction can not be adjusted with the remote control.
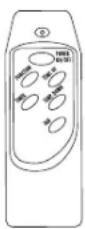
Air flow
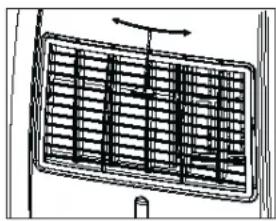
Adjust the left-right direction of the outflowing air by turning the roller on the front of the air outlet grill.
Adjust the up/down air flow by rotating the air outlet grill.
natural_image
Diagram of a vehicle's front grille with grid pattern and roof (no text or symbols)Important:
- The compressor will start approximately 3 minutes after the unit is turned on (this will help prolong the life of the compressor). After switching the unit off, please wait at least 3 minutes before turning the unit back on.
- The compressor will switch off when the room temperature is lower than the set temperature. The fan will however continue to work. When ambient temperature rises above the set temperature, the cooling will resume.
Emptying The Water Container
This air conditioning does not require emptying of the water container, except prior to season end storage.
This portable AC features the Innovative AutoDrain Technology
Very little excess water should accumulate. During the process of cooling, some of the water accumulated is actually used to cool the unit internally, making it run more efficiently. Both this evaporative technology and Innovative AutoDrain Technology are features not found in most portable air conditioners.
Switch off the unit and remove the plug from the outlet.
- Position a fl at container or dish on the floor under the drain hole. Do not allow the water to drip continuously into the container as it might easily overflow.
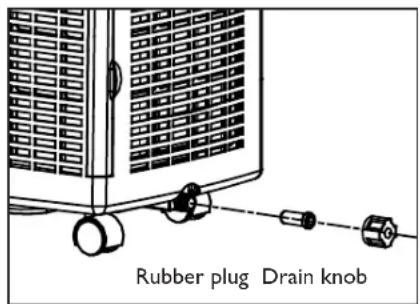
- Remove the drain knob.
- Remove the rubber plug, the water will flow in the container. When this is nearly full, replace the plug to stop the water flow and empty it. Repeat this process until all water has been removed.
- Replace the rubber plug into the drain hole firmly, the WATER FULL LED should not flash any longer.
- Replace the drain knob.
text_image
Rubber plug Drain knobCleaning
Always unplug the unit from the power supply (wall outlet) before beginning the cleaning.
Housing
Use a soft, damp cloth to wipe the body clean. Never use strong chemicals, oil-based products, detergents, chemically treated cloths or other cleaning solutions. These could possibly damage the housing.
Filter
Use a vacuum cleaner or tap the fi lter lightly to remove loose dust and dirt from the fi liters and then rinse them thoroughly under running water (not warmer than 104^ F).
Dry Thoroughly with a soft cloth before inserting them back into the unit.
Notice! Never operate the air conditioner without the fi Iters.
Installation of Carbon Filter

text_image
Diagram showing airflow or ventilation process from a grid-patterned panel to an air conditioner unit with fan and vent.It is recommended to replace the active carbon fi lter at the start of every season subsequent to the initial season of the unit or when dirty (3-6 months, depending on usage).
Always unplug the unit from the power supply (wall outlet) before installing the Carbon Filter.
- Remove the top fi lter frame from the unit by pulling it out.
- Separate the fi xer from the fi iter frame.
- Insert the active carbon fi lter into the fi lter frame, underneath the tabs.
- Insert the fi Iter frame inside the unit.
Troubleshooting
| Never try to repair or dismantle the air condition yourself. Incompetent repairs result in loss of warranty and can endanger the user and the property. | ||
| Problem Cause Solution | ||
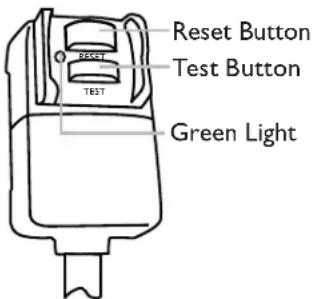
| The air conditioner does not function.* | No power supply. Make sure the green light on the plug is lit. | Connect to a functioning outlet and switch on. |
| Is the power light fl ashing? Is the water full LED lit? | Empty the drain pan. | |
| The air conditioner does not seem to perform. | The unit is in direct sunlight. Close curtains. | |
| Windows or doors open, many people or a heat source in the room. | Close doors and windows, place an extra air conditioner. | |
| The filter is dirty. Clean or replace the filter. | fi iter. | |
| Air inlet or air outlet blocked. Remove the blockage. | ||
| Room temperature lower than the selected value. | Change temperature selection. Set at the lowest possible setting: 62°F. | |
| The unit is noisy. Unit stands uneven. Place on an even, solid surface (less vibrations). | ||
| The compressor does not work. | The overheat protection may be activated. | Wait 30 minutes until the temperature has decreased, then turn on the unit again. |
| The remote control does not function. | Distance too great. | Make sure the remote control is correctly aimed at the control panel. |
| Remote control signal not detected by the control panel. | ||
| The batteries are drained. Replace the batteries. | batteries. | |
* If you plug in the Air Conditioner, and there is no green light on the plug, press the reset button on the LCDI plug. The green light should be lit, indicating that the air conditioner is getting power from the electrical outlet.
If the plug continues to trip (which is a USA national safety standard feature) and the green light goes off, the cord may be damaged preventing you from resetting the unit. For your safety, contact a licensed electrician.
text_image
Reset Button Test Button Green Light
text_image
AMERICAN COMFORT WORLDWIDEAMERICAN COMFORT
WORLDWIDE
One Year Limited Warranty
American Comfort Worldwide LLC (“ACW”) warrants this ACW portable air conditioner to the original retail purchaser (“Purchaser”) purchasing only in the 48 Contiguous States, for one year from the date of purchase, against defects in material and workmanship under normal use and service. Should your ACW Portable air conditioner prove defective within one year from the date of purchase, please follow our return procedure to return the defective unit. Within the first 30 days, ACW is responsible for the freight cost to and from our authorized service center for all units with an ACW authorized RMA. After 30 days and up to life of warranty (12 months), customer is responsible for freight costs to and from our authorized service center.
ACW's sole obligation under this warranty is to replace, or at ACW's discretion, to repair, free of charge, all defective parts, for a period of one (1) year from date of original purchase. All replacement parts and units will be new, remanufactured, or refurbished. ANY IMPLIED WARRANTY OF MERCHANTABILITY IS SIMILARLY LIMITED TO ONE (1) YEAR FROM DATE OF ORIGINAL PURCHASE AND NO ACTION BASED UPON ANY IMPLIED WARRANTY OF MERCHANTABILITY OR OTHERWISE MAY BE COMMENCED AFTER EXPIRATION OF ONE (1) YEAR FROM DATE OF ORIGINAL RETAIL PURCHASE. Some states do not allow limitations on how long an implied warranty lasts, so the above limitation may not apply to you.
The provisions of this warranty shall not apply to any product which in ACW's judgment has been (1) subject to misuse or neglect. (2) damaged in an accident. (3) used for a purpose for which it was not designed, or (4) repaired or altered in any way that adversely affected its performance or reliability. Do not attempt to "open unit", except for filter replacement. Opening unit will void manufacturer's warranty.
THIS WARRANTY DOES NOT COVER:
- Damage, accidental or otherwise, to the unit while in the possession of the consumer not caused by a defect in material or workmanship.
- Damage caused by consumer misuse, tampering, or failure to follow the care and special handling provisions in the instructions.
- Damage to the finish of the case, or other appearance parts caused by the wear.
- Damage caused by repairs or alterations of the unit by anyone other than those authorized by American Comfort Worldwide.
- Freight and Insurance cost for the warranty service beyond 30 days from date of purchase up to life of warranty (12 months).
This warranty covers only new products purchased from our authorized dealers or retailers. It does not cover used, salvaged, or refurbished products.
To obtain warranty service, the defective product or part must be shipped or delivered to: American Comfort Worldwide, the Manufacturer. If warranty applies under ACW's approved terms, all Shipping charges and insurance are covered by purchaser. Proof of Purchase (i.e. Copy of Original Receipt) must be sent in with the unit.
AMERICAN COMFORT WORLDWIDE NEITHER ASSUMES NOR AUTHORIZES ANY PERSON TO ASSUME FOR IT ANY OTHER (LIABILITY IN CONNECTION WITH ITS PRODUCTS, THERE ARE NO WARRANTIES WHICH EXTEND BEYOND THE DESCRIPTION ON THE FACE HEREOF. NO RESPONSIBILITY IS ASSUMED FOR INCIDENTAL OR CONSEQUENTIAL DAMAGES THAT MAY RESULT FROM THE USE OF AN ACW PRODUCT, NOR FOR THE DAMAGES DUE TO ACCIDENT, ABUSE, LACK OF RESPONSIBLE CARE, THE AFFIXING OF ANY UNAUTHORIZED ATTACHMENT, LOSS OF PARTS, OR USE AT A VOLTAGE OTHER THAN SPECIFIED. Some states do not allow the exclusion of limitation of incidental or consequential damages, so these limitations may not apply to you. ACW disclaims all liabilities for defects or damages caused by use of replacement parts obtained from or by service at any service center other than American Comfort Worldwide, the Manufacturer.
This warranty gives you specific legal rights, and you may also have other rights which vary from state to state.
QUESTIONS? Call 1-877-645-0299 · www.americancomfort.com
Dear Customer: Please keep this warranty for your records along with a copy of original receipt.
DO NOT return it.

text_image
AMERICAN COMFORT WORLDWIDEAMERICAN COMFORT
WORLDWIDE
natural_image
Line drawing of a portable air purifier with ventilation grilles and control panel (no text or symbols)natural_image
Abstract black-and-white geometric pattern with intersecting diagonal lines and a central emblem (no text or symbols)natural_image
Silhouette of a dog and a cat crossed by diagonal lines, no text or symbols presentnatural_image
Simple line drawing of a campfire with no text or symbolsnatural_image
Abstract geometric pattern with intersecting diagonal lines and shaded shapes (no text or symbols)natural_image
Simple line drawing of a container with liquid and bubbles, crossed by two diagonal lines (no text or symbols)natural_image
Simple line drawing of a double-framed window with diagonal lines and a shaded bottom area (no text or symbols)natural_image
Black silhouette of a faucet with water droplets falling, crossed by diagonal lines (no text or symbols)natural_image
Pure electrical circuit lines without any symbolsnatural_image
Abstract geometric line drawing with intersecting curves and a central symbol (no text or labels)natural_image
Hand holding a pen over a grid of rectangular blocks (no text or symbols visible)text_image
Technical diagram showing three different installation or piping system configurations with checkmark and cross symbols indicating inspection or failure points.
Un Rappel :
text_image
Technical diagram of a portable air conditioner unit with numbered parts labeled for identification.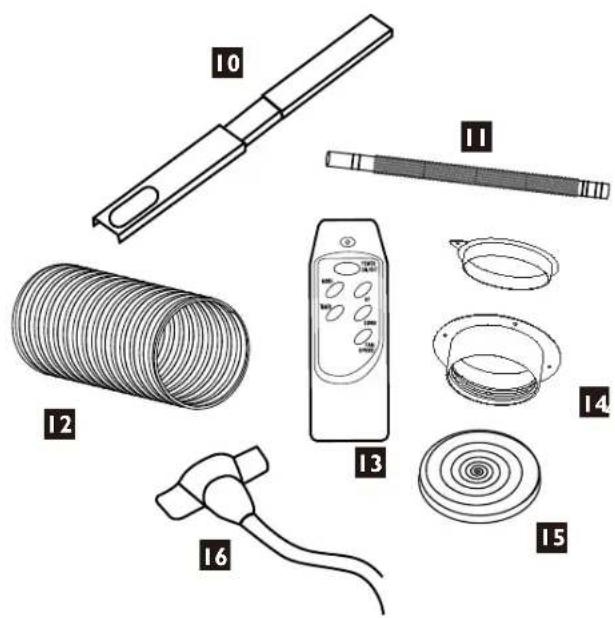
text_image
Diagram showing various types of electrical connectors and components with numbered labelsnatural_image
Diagram of a pipe fitting with directional arrows indicating flow or movement (no text or symbols)natural_image
Hand holding a cylindrical object with a white plastic tip, partially open (no text or symbols visible)natural_image
Close-up of a hand holding a small object inside a circular vent, no visible text or symbolsnatural_image
Close-up of a hand holding a tool near a grid-patterned surface, with a white circular arrow pointing to the edge (no text or symbols visible)natural_image
Close-up of a hand handling a white corrugated material inside a mechanical device (no visible text or symbols)natural_image
Close-up of a cylindrical device with a coiled cable and connector, labeled '6' in the corner (no text or symbols on the device itself)natural_image
Close-up of a bed covered with striped insulation, no visible text or symbolsnatural_image
Close-up of a hand holding a tool near a car grille with a curved arrow indicating rotation (no text or symbols)natural_image
Diagram showing a cylindrical object inserted into a housing with a separate circular component, labeled '1' (no text or symbols on the diagram itself)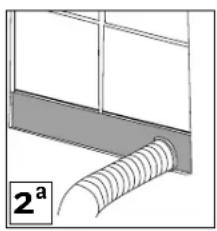
natural_image
Diagram of a mechanical assembly with a coiled spring and labeled section '2a' (no text or symbols beyond label)