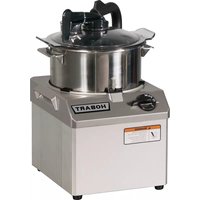
HCM61 - Food Processor Hobart - Free user manual and instructions
Find the device manual for free HCM61 Hobart in PDF.


| Brand | Hobart |
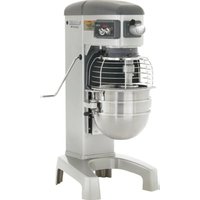
| Model | HCM61 |
| Product type | Professional food processor |
| Usage | Chopping meat, fish, vegetables, fruits, nuts, dry bread; mixing sauces, mayonnaise, soups; pureeing thick sauces or desserts |
| Motor power | 1.5 HP (1,119 W) |
| Rotation speed | 1,700 rpm (single speed, pulse) |
| Power supply | 120 V, 60 Hz, 1 phase, 20 A, NEMA 5-20R plug |
| Protection device | Circuit breaker 20 A max |
| Main functions | Chop, mix, puree, pulse |
| Controls | OFF, ON, PULSE |
| Safety | Automatic stop within 4 seconds after opening the arm; lock preventing start without bowl/lid; mandatory grounding |
| Maintenance and cleaning | Full disassembly; hand wash parts; do not use steel wool or abrasive sponges; air dry; wipe exterior with damp cloth |
| Available spare parts | Bowl, lid, scraper, blade shaft, blades, wipers, lid gasket, plug, handle |
| Repairability | Contact your local authorized Hobart service (phone 1 800 333-7447) |
| General information | Food processor designed for professional use; inspect upon receipt for shipping damage; check power supply before installation; keep packaging for claims |
Frequently Asked Questions - HCM61 Hobart
User questions about HCM61 Hobart
0 question about this device. Answer the ones you know or ask your own.
Ask a new question about this device
Download the instructions for your Food Processor in PDF format for free! Find your manual HCM61 - Hobart and take your electronic device back in hand. On this page are published all the documents necessary for the use of your device. HCM61 by Hobart.
USER MANUAL HCM61 Hobart
HCM61 & HCM62 FOOD PROCESSORS
MODELS
HCM61 ML-134017
HCM62 ML-134018
HOBART
701 S. RIDGE AVENUE
TROY, OHIO 45373
937 332-3000
www.hobartcorp.com

natural_image
Industrial food processing machine with a large lid and control panel (no visible text or symbols)FORM 34468 Rev. A (December 2023)
Installation, Operation and Care of HCM61 & HCM62 FOOD PROCESSORS
SAVE THESE INSTRUCTIONS
GENERAL
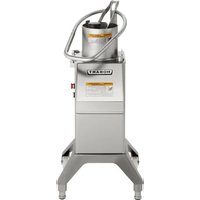
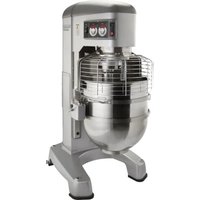
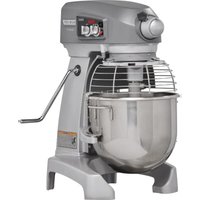
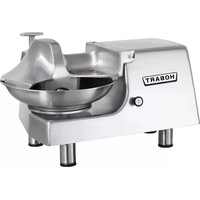
The model HCM61 and HCM62 Food Processors are used for chopping meat, fish, fruits, vegetables, nuts, or dry bread, for mixing various sauces, mayonnaise, or soups, or for blending or pureeing various products, such as thickening or desserts. Refer to Capacity Recommendations, page 6.
The HCM61 has a 1.5 HP motor, is provided with 120 Volt cord and plug, and requires a 20 Amp. electrical service and receptacle. The machine operates at 1700 rpm with single speed or pulse control.
The HCM62 has a 2.0 HP motor, is provided with 208 - 240 Volt three phase cord and plug, and requires a 20 Amp. electrical service and receptacle. The machine operates at 1700 or 3400 rpm with two speed or pulse control.
natural_image
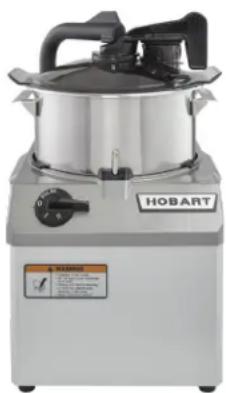
Exterior view of a stainless steel HOBART kitchen appliance (no visible text or symbols on the device itself)Model HCM62
INSTALLATION
UNPACKING
The food processor was inspected before leaving the factory. The carrier assumes full responsibility for safe delivery upon acceptance of the shipment. Check for possible shipping damage immediately after receipt.
If the food processor is found to be damaged, complete the following steps:
- Carrier must be notified within five business days of receipt.
- All original packing materials must be kept for inspection purposes.
- The food processor cannot have been moved, installed, or modified.
-
Notify Hobart customer care at (800) 333-7447.
-
Carrier's local terminal must be notified immediately upon discovery (note the time, date, and who was spoken to), and follow up and confirm with written or electronic communication.
Prior to installing the food processor, verify that the electrical service agrees with the specifications on the machine data plate, which is located on the back of the machine.
Check that the cutting tools are in good condition and are sharp.
LOCATION
Place the food processor on a suitable sturdy worktop or table. There should be adequate space around the machine for the user to operate the controls and install and remove the bowl and knife.
ELECTRICAL CONNECTIONS (CORD CONNECTED MACHINES)
⚠ WARNING The electrical cord on this machine is equipped with a grounding type plug which must be connected to a properly grounded receptacle. If the receptacle is not the proper grounding type, contact an electrician. Do not remove the grounding prong from the plug.
Refer to the machine data plate and Electrical Data, below.
ELECTRICAL DATA
| Model Volts / Hertz / Phase | Minimum Circuit Ampacity Maximum Protective Device AMPS | Receptacle Plug | |
| HCM61 120 / 60 / 1 20 |  5-20R 5-20R | Plug: 5-20P | |
| HCM62 208-240 / 60 / 3 20 |  L15-20R L15-20R | Plug: L15-20P |
Compiled in accordance with the National Electrical Code, NFPA70, latest edition.
CHECK MOTOR ROTATION (THREE-PHASE MACHINES ONLY)
On model HCM62, check the rotation. With all parts in their normal operating positions (pages 4 – 5), turn the switch to the Pulse position for two seconds and release. The direction of rotation of the knife should be counterclockwise as viewed from the top.
If the knife rotates clockwise, correct the rotation using the following procedure:
DISCONNECT THE ELECTRICAL POWER SUPPLY. Interchange any two of the incoming power supply leads in the plug. Reconnect the power supply and turn the switch to the Pulse position to verify that the knife rotates counterclockwise as viewed from the top.
PRESTART CHECK
With the machine fully assembled (pages 4 – 5), make sure the cutting blades stop within 4 seconds after the arm is swung back away from the center of the bowl cover.
Make sure the machine cannot be started with the bowl and cover removed but with the arm swung into position above the center of the drive shaft.
If the machine fails to work properly, contact Service; do not allow the machine to be operated.
BOWL AND KNIFE ASSEMBLY
Install the Bowl so the center post of the Bowl fits over the motor shaft, one of the Bowl Pins fits in the slot at the front of the machine, and the bowl handles are positioned on left and right (Fig. 1). Install Knife Shaft over center bowl post so the slots on the Knife Shaft fit the grooves on the motor shaft (Fig. 1).

Fig. 1
The four Bowl Scraper Wipers must be properly installed in the grooves of the Bowl Scraper. The upper tips of the wipers point straight up and slightly toward the center (Fig. 2); the ends of the wipers are vertical so they do not interfere with the lip of the Bowl Cover. Do not install the wipers backwards.
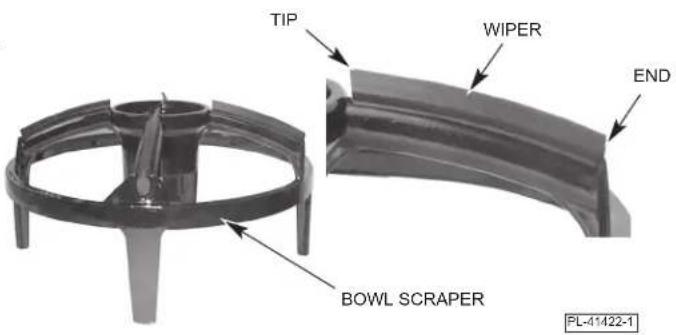
Fig. 2
After installing the Lid Plug, turn it so the underneath side of the plug is flat with the underneath side of the Bowl Cover (Fig. 3). The Bowl Cover Gasket must be properly installed in the groove around the lip of the Bowl Cover (Fig. 3).
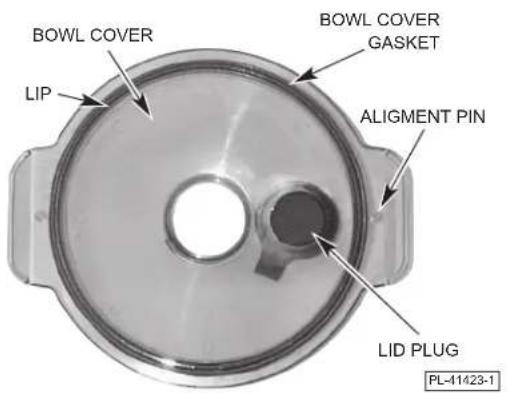
Fig. 3
Fit the Bowl Cover over the Bowl Scraper so the center holes align. Fit the Scraper Handle Shaft through the center hole in the Bowl Cover into the Slots of the Bowl Scraper. The Bowl Cover Tab must fit around the 180° Cam on the Scraper Handle. The Tabs on the Scraper Handle Shaft must fit through the Slots in the center hole of the Bowl Scraper.
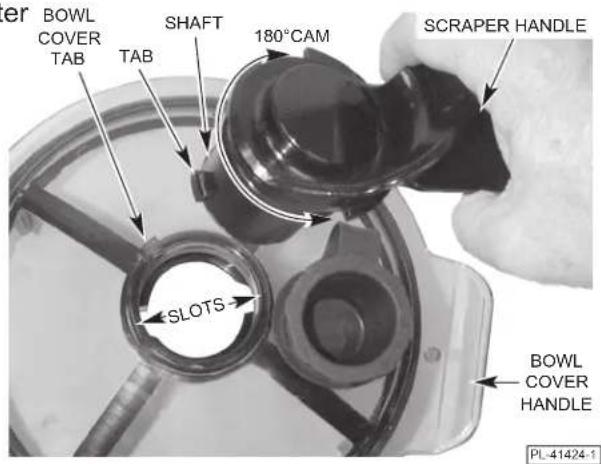
Fig. 4
Place the assembled Bowl Cover / Bowl Scraper/Scraper Handle on a flat surface. Press down on the Scraper Handle (Fig. 5) and turn it clockwise 1/8 turn so the Tabs engage with the bottom of the Slots. The Bowl Cover / Bowl Scraper / Scraper Handle are now joined as one piece. Move the Scraper Handle until it is positioned over the Lid Plug.
Place the assembled Bowl Cover / Bowl Scraper/Scraper Handle in the Bowl. The Bowl Scraper Legs touch the sides of the Bowl. The Bowl Cover Handles set directly above the Bowl Handles (Fig. 6). The Alignment Pins under the Bowl Cover Handles fit the holes in the Bowl Handles (Fig. 6).
Swing the Arm forward so the end of the Arm fits over the center of the Bowl above the Scraper Handle (Fig. 7). The Arm must be properly positioned over the center of the Bowl and all parts must be properly assembled before the machine will operate.

Fig. 5
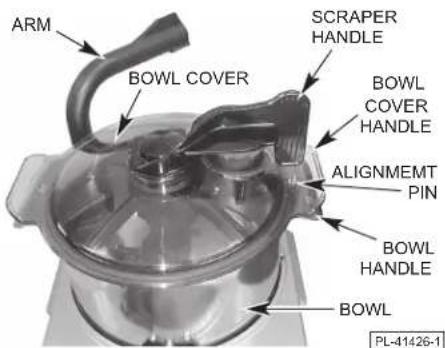
Fig. 6

Fig. 7
OPERATION
⚠ WARNING Rotating knives inside. Do not open cover until knife shaft stops. Unplug cord before inserting or removing attachments, cleaning or servicing.
CONTROLS
Model HCM61

OFF — Machine is OFF. Switch machine OFF before unpluging.
ON — Runs motor and knife at 1700 rpm until switch is turned to OFF.
PULSE — Runs motor and knife at 1700 rpm while switch is held. When switch is released, machine returns to OFF.
Model HCM61
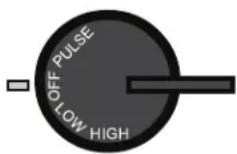
OFF — Machine is OFF. Switch machine OFF before unpluging.
LOW — Runs motor and knife at 1700 rpm until switch is turned OFF.
HIGH — Runs motor and knife at 3400 rpm until switch is turned OFF.
PULSE — Runs motor and knife at 1700 rpm while switch is held. When switch is released, machine returns to OFF.
When processing is done, turn Arm to rear. Wait for Knife to stop. Unplug machine power cord. Lift the Bowl Cover, Scraper Handle, and Bowl Scraper straight up. Remove the Knife Shaft. The Bowl can be removed to empty contents.
CAPACITY RECOMMENDATIONS
The maximum quantity that can be processed at one time and the length of time required for processing are dependent on the product and kind of result desired. Shorter processing times give a coarser result; longer processing yields a finer consistency. The Capacity Chart shows the maximum quantity of various products that can be processed in one batch and the approximate processing time.
| Product QUANTITY TIME | ||
| Mince, ChopOnions 3 pounds 20 SecondsCarrots 3 pounds 20 SecondsMozzarella Cheese | 3 pounds 20 Seconds | |
| MeatsFreshCookedSalmon MousseSteak Tatar | 3 pounds 30 Seconds 4^-1/2 pounds 3^-1/2 pounds3 pounds 30 Seconds | 30 Seconds30 Seconds |
| MiscellaneousBread CrumbsParmesan Cheese (fine)ButterMayonnaiseTomato SauceLiquid | 1^-1/2 pounds 1^-1/2 pounds4 pounds 30 Seconds 4^-1/2 quarts 4^-1/2 quarts 4^-1/2 quarts | 10 Seconds1 Minute35 Seconds20 Secondsas required |
PREPARING THE PRODUCT FOR PROCESSING
Cut products such as meat and cheese into equal pieces of approximately 1" cubes for easy processing.
For bread crumbs or other dry products, place product into the bowl first, turn the machine on, then add liquid ingredients.
For pureeing products, be sure to move the Scraper Handle back and forth to reintroduce partially cut product into the cutting zone.
USING THE BOWL SCRAPER DURING PROCESSING
During processing, move the Scraper Handle back and forth to reintroduce partially cut product that is clinging to the sides of the bowl back into the cutting area. The Bowl Scraper can also be used during processing to stir or mix liquid products. The Bowl Scraper has four legs and four lid wipers — this allows a 90° motion to fully wipe the entire Bowl and lid.
USE OF THE FEED TUBE
The Bowl Cover is equipped with a Lid Plug which can be pulled open for adding ingredients. When replacing the Lid Plug, be sure to turn the Lid Plug so the underneath side of the plug is flat with the underneath side of the Bowl Cover. With the Lid Plug in closed position, the Scraper Handle should move back and forth over it.
CLEANING
⚠ WARNING Switch off and unplug machine power cord before beginning any cleaning procedure.
The food processor should be thoroughly cleaned after use. Never use steel wool, abrasive cleaning sponges, or high pressure hose for cleaning. Do not leave the knife shaft wet or setting on a stainless steel worktop when not in use.
Swing the Arm to the rear as far as it will go. Remove the Bowl Cover / Bowl Scraper / Scraper Handle by lifting straight up, out of the Bowl. Set the assembly on a table or countertop (Fig. 8). Press the Scraper Handle down (Fig. 8), freeing the tabs of the Scraper Handle Shaft from the slot restrictions in the Bowl Scraper. While pressing down, turn the Scraper Handle counterclockwise 1/8 turn. Remove the Scraper Handle. Separate the Bowl Cover and Bowl Scraper. Remove the Bowl Scraper Wipers from the grooves of the Bowl Scraper.
Remove the Knife Shaft by lifting it straight up. Remove the Bowl.
Remove the Bowl Cover Gasket from the Bowl Cover by grasping the gasket with your finger and thumb at the Indentation where the Gasket Groove is not present (Fig. 9).
Wash, rinse, and sanitize all parts in a sink as you would any food utensil and allow to air dry. Wipe the exterior of the machine with a damp cloth. Reassemble all parts when dry following the Bowl and Knife Assembly instructions on pages 4 – 5.

Fig. 8
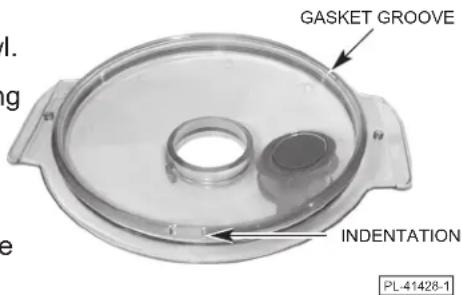
Fig. 9
TROUBLESHOOTING
| SYMPTOM POSSIBLE CAUSE SUGGESTED ACTION | ||
| Machine will not start. Fuse or circuit breaker interrupting power. | Have electrician check circuit. | |
| Bowl not in place. Make sure bowl is in proper position. | ||
| Arm not in position over center of Bowl Cover. | ||
| Machine not plugged in. Plug into proper mating electrical receptacle. | ||
| Machine stops while operating and will not restart. | Motor overloaded. Allow motor to cool; motor will restart when it is cool. It may take 10 to 30 minutes for the motor to cool. | |
| Fuse or circuit breaker interrupting power. | Have electrician check circuit. | |
SERVICE
Contact your local Hobart-authorized service office for any repairs or adjustments needed on this equipment.
PROCESADORES DE ALIMENTOS HCM61 Y HCM62
MODELOS
HCM61 ML-134017
HCM62 ML-134018
HOBART
701 S. RIDGE AVENUE
TROY, OHIO 45373
937 332-3000
www.hobartcorp.com

natural_image
Industrial food processing machine with a large lid and control panel (no visible text or symbols)natural_image
Exterior view of a stainless steel HOBART kitchen appliance (no visible text or symbols on the device itself)Modelo HCM62
INSTALACIÓN
DESEMBALAJE
natural_image
Industrial food processing machine with a large lid and control panel (no visible text or symbols)natural_image
Exterior view of a stainless steel HOBART kitchen appliance (no visible text or symbols on the device itself)Modèle HCM62
INSTALLATION
DÉBALLAGE
- HCM61 & HCM62 FOOD PROCESSORS
- Installation, Operation and Care of HCM61 & HCM62 FOOD PROCESSORS
- GENERAL
- INSTALLATION
- UNPACKING
- LOCATION
- ELECTRICAL CONNECTIONS (CORD CONNECTED MACHINES)
- CHECK MOTOR ROTATION (THREE-PHASE MACHINES ONLY)
- PRESTART CHECK
- BOWL AND KNIFE ASSEMBLY
- OPERATION
- CONTROLS
- CAPACITY RECOMMENDATIONS
- PREPARING THE PRODUCT FOR PROCESSING
- USING THE BOWL SCRAPER DURING PROCESSING
- USE OF THE FEED TUBE
- CLEANING
- ⚠ WARNING Switch off and unplug machine power cord before beginning any cleaning procedure.
- TROUBLESHOOTING
- SERVICE
- PROCESADORES DE ALIMENTOS HCM61 Y HCM62
- INSTALACIÓN
- DESEMBALAJE
- DÉBALLAGE
Brand : Hobart
Model : HCM61
Category : Food Processor