
MB250 - Heating MILL - Free user manual and instructions
Find the device manual for free MB250 MILL in PDF.

| Product type | Electric wall heater |
| Brand | Mill |
| Model | MB250 |
| Power | 250 W |
| Power supply | 220-240 V ~, 50-60 Hz |
| Dimensions (H x W) | 30.0 cm x 36.5 cm |
| Protection rating | IPX4 (splash resistant) |
| Thermostat type | Electronic Day/Night |
| Color | White |
| Installation | Wall-mounted mandatory, horizontal mounting |
| Main functions | Day/night programming, open window function, temperature calibration, settings memory |
| Maintenance and cleaning | Clean with a damp cloth, do not immerse, do not use detergents |
| Safety | Do not cover, respect minimum distances, cut power before maintenance |
| Warranty | 2 years |
| General information | Household use only, suitable for damp rooms (volume 2) |
Frequently Asked Questions - MB250 MILL
User questions about MB250 MILL
0 question about this device. Answer the ones you know or ask your own.
Ask a new question about this device
Download the instructions for your Heating in PDF format for free! Find your manual MB250 - MILL and take your electronic device back in hand. On this page are published all the documents necessary for the use of your device. MB250 by MILL.
USER MANUAL MB250 MILL
Invisible & Glass panel heater
Please read the instructions carefully before use. Take good care of this manual for later use.
Scandinavian home comfort
Mill is a Norwegian brand that develops heating and indoor air quality products tailored for your modern home. Inspired by Scandinavian nature, our products are designed to sustain the toughest of climates to ensure safe, efficient and comfortable temperatures, as well as good air quality.
Mill products are praised for their minimalistic and elegant features as they blend in naturally with any modern interior. Our advanced and user-friendly technology will support a relaxing and healthy home space with reliable temperatures and air quality. Mill's vision is to develop products that create an enjoyable and harmonic household atmosphere, enhancing both comfort and style; the ultimate Scandinavian home comfort.
We hope you enjoy your Mill product.
Content
2-4 | Important safety information
4 Specifications
5 | Before first use
5 | First use
5 | Minimum distances
5 | Description of heater
6 | Assembly
6 | Temperature calibration
6 Resetting the heater
6 | Memory function
6 | "Open window" function
7 Instructions electronic thermostat
7 | Power indicator for electronic thermostat
7 Set desired temperature for electronic thermostat
7 Instructions day/night thermostat
8 | Power indicator day/night thermostat
8 Set desired temperature for day/night thermostat
8 | Day- and nighttime setback
9 How to activate daytime setback
9 How to activate nighttime setback
11 | Change setback temperature — daytime
11 | Change setback temperature — nighttime
11 | Change number of hours — daytime
11 | Change number of hours — nighttime
11 Cancel (skip) setback period
11 Delete setback program
2 Maintenance
2 Warranty
2 | Waste disposal
Please read the instructions carefully before use. Take good care of this manual for later use.
natural_image
Illustration of a person standing with a diagonal line crossing through the airline, no text or symbols present
natural_image
Simple line drawing of a car with a diagonal cross mark (no text or symbols)STORE THIS INSTRUCTION MANUAL FOR FUTURE USE!
NEVER TOUCH YOUR HEATER OR ITS CASING WITH WET HANDS!
IN ORDER TO AVOID OVERHEATING, DO NOT COVER THE HEATER.
Important safety information
You must obey common safety guidelines when using electrical products, especially in the presence of children.

WARNING! To avoid electric shock or damage due to the heat, always make sure the plug is pulled out before the heater is moved or cleaned.
READ THE INSTRUCTIONS CAREFULLY
- The product is intended for home use only.
- Make sure the heater is connected to the house’s regular mains as indicated on the heater.
- New heaters will produce a specific odor when used the first time. This will stop after a short time and is completely harmless.
- Check for any pieces of packing foam or cardboard that may have fallen into the heating elements of the heater. These pieces must be removed to avoid unpleasant odors.
- Prevent the heater from overheating -do not cover.
- Always turn off the heater and unplug it when not used for a long period of time.
- Pay special attention if the heater is used in rooms where children, the handicapped or elderly reside.
- The heater should not be set up directly beneath an electrical socket outlet.
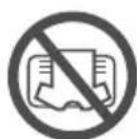
- The cord must not be laid under any kind of carpet. Make sure the cord is laid in such a way that nobody can trip on it.
- The heater must not be used if either the cord or plug is damaged. The heater must not be used if it has been
dropped on the floor is damaged in any other way causing it to malfunction.
- The cord must be repaired by the manufacturer or by an expert if it has been damaged, to avoid dangerous situations.
- Avoid using extension cords, which may overheat and could possibly start a fire.
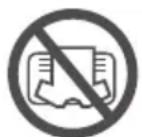
- Never cover the air vents on the heater. Avoid potential fire hazards by making sure the air intakes are not blocked or covered. The heater should be used in rooms with normal flat floors.
- The heater should not be installed in close proximity to flammable materials of any kind because there can always be a risk of fire. The heater must never be used in rooms where gasoline, paint or other flammable liquids are stored, such as in a garage.
- Never touch an electric heater with wet hands. The heater should be installed so a person showering or taking a bath cannot come into direct contact with it.
- Some parts of this product can become very hot and cause burns. Particular attention has to be given where children and vulnerable people are present.
- The heater must be switched off, the plug removed and the heater must cool down before it is moved.
- Avoid overloading the mains (the circuit) where the heater is connected. The heater may overload the electrical circuit if other electrical devices are plugged into the same socket outlet.
-
Do not use this heater in small rooms when they are occupied by persons not capable to leaving the room on their own, unless constant supervision is provided.
-
The product cannot be used by children under 8 years of age and persons with reduced physical or mental abilities or lack of experience and knowledge unless they have been given supervision or instruction in the safe use of the product and understand the hazards involved.
- Children should not play with the product. Cleaning and maintenance should not be done by unsupervised children.
- Children under the age of 3 should be kept away from the product, unless they are under constant supervision.
- Children aged 3 to 8 years are only permitted to turn the product ON/OFF, assuming the heater is mounted according to the assembly instructions and the children have received instruction or supervision in the safe use of the product and understand the hazards involved.
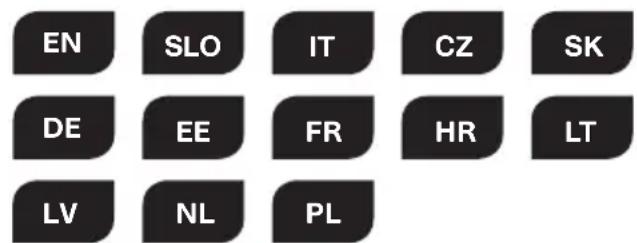
- Do not use this heater in the immediate surroundings of a bath, a shower or a swimming pool.
WARNING! The heater must not be used if the glass panels are damaged (this applies to the products with model names starting with MB).
Specifications
Model Thermostat Color Height Width Amperage Power (W) IP rating
| IB250 | Electronic | White | 30.0 cm | 35.0 cm | 220-240V~, 50-60Hz | 250 | IPx4 |
| IB600DN | Day/Night | White | 40.0 cm | 65.0 cm | 220-240V~, 50-60Hz | 600 | IPx4 |
| IB900DN | Day/Night | White | 40.0 cm | 85.0 cm | 220-240V~, 50-60Hz | 900 | IPx4 |
| IB1200DN | Day/Night | White | 40.0 cm | 105.0 cm | 220-240V~, 50-60Hz | 1200 | IPx4 |
| IB800L DN | Day/Night | White | 25.0 cm | 105.0 cm | 220-240V~, 50-60Hz | 800 | IPx4 |
| IB1000L DN | Day/Night | White | 25.0 cm | 121.5 cm | 220-240V~, 50-60Hz | 1000 | IPx4 |
| MB250 | Electronic | White | 30.0 cm | 36.5 cm | 220-240V~, 50-60Hz | 250 | IPx4 |
| MB600DN | Day/Night | White | 40.0 cm | 66.5 cm | 220-240V~, 50-60Hz | 600 | IPx4 |
| MB900DN | Day/Night | White | 40.0 cm | 86.5 cm | 220-240V~, 50-60Hz | 900 | IPx4 |
| MB1200DN | Day/Night | White | 40.0 cm | 106.5 cm | 220-240V~, 50-60Hz | 1200 | IPx4 |
| MB800L DN | Day/Night | White | 25.0 cm | 106.5 cm | 220-240V~, 50-60Hz | 800 | IPx4 |
| MB1000L DN | Den /noc | White | 25.0 cm | 123.0 cm | 220-240V~, 50-60Hz | 1000 | IPx4 |
The heater is approved for use in bathrooms zone 2 (IPX4 approved)
Before first use
After unpacking the heater, check to make sure the product was not damaged during transport. Contact the retailer or importer if you discover any visible damages to the product.
Keep the outer packaging to transport the heater in the future. If you want to dispose the packaging, make sure it is done properly. Keep plastic bags away from children.
First use
After turning on the heater for the first time or after an extends the heater can produce a burnt odor for a short time. This is normal. Please read all the instructions carefully before use. Save the instruction manual for future use.
It is also normal for the heater to make “sounds” when it warms up or cools down.
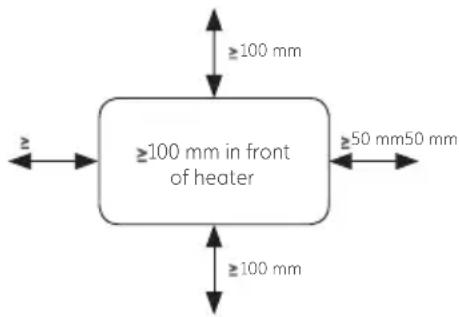
Minimum distances
Description of heater
See figure 1 on separate illustration sheet
A MILL INVISIBLE
- On/Off
- Wall bracket
- Temperature sensor
- Heat emission
- Thermostat
- Steel front
B MILL GLASS
- On/Off
- Wall bracket
- Temperature sensor
- Heat emission
- Thermostat
- Glass front
Assembly
See figure 2 on separate illustration sheet
A. Drill holes in the wall for holes 1 & 2. Then drill holes in the wall for the topmost holes (holes 3 & 4 by using 6).
B. Insert the wall plugs into the drilled holes and attach the bracket with 4 screws.
C. Place the heater on the lower lugs on the bracket, then hang the heater on the upper lugs (lift the heater slightly to align the heater with for the upper lugs). Screw in the locking screws on the top of the bracket (clockwise).
ATTENTION! HORIZONTAL PLACEMENT ONLY
Temperature calibration
See figure 3 on separate illustration sheet
It may occur deviation between the temperature registered by the heater and the actual temperature in the room. This can be caused by several reasons, however, the most common is that the heater is placed in a fair distance from where you usually reside. When you set the temperature to for example 22 degrees, it is only natural that you expect the same temperature where your sofa is placed for instance. However, the temperature sensor is placed on the product itself, and therefore a deviation in temperature may occur. To adjust this, all Mill heaters are equipped with a calibration function, which enables you to adjust the temperature registered by the heater. N.B! The room must have achieved a stable temperature before any calibration.
Press ⏻ 2 times and use + or - to set the actual temperature observed in the room. Confirm with ⏻ or wait 15 seconds for automatic confirmation.
Resetting the heater
See figure 4 on separate illustration sheet
Turn off the heater's main switch. Press and hold (9 while you turn on the heater's main switch.
Memory function
The heater remembers all the temperature settings and will automatically return to the desired temperature after a power cut. Your day- and nighttime setbacks will however be deleted after a power cut, and you will need to register the programs again.
"Open window" function
The heater has an “open window” function that is activated instantly when it registers a sudden drop in temperature with more than 2 degrees Celsius in 2 minutes. The heater will automatically stop heating and FO will be visible in the display of the heater.
The heater will automatically start heating again after 10 minutes (the display switch from FO to desired room temperature).
Instructions electronic thermostat
Please see table on page 4 for which models that have electronic thermostats
Control panel
See figure 5 on separate illustration sheet
- Display (shows the desired room temperature by default)
- Power indicator - shows whether the heater is using power or not
- Control button (+) (increase temperature)
- Control button (-) (reduce temperature)
- Function button
ATTENTION! After a power cut the thermostat will return to the last registered temperature
WARNING! BEFORE THE HEATER IS TURNED ON, IT MUST BE ATTACHED TO A WALL. IF THE HEATER IS NOT INSTALLED CORRECTLY OR IS INSTALLED ASKEW, THIS MAY CAUSE THE HEATER TO MALFUNCTION OR IN THE WORST CASE, BE DAMAGED.

If the temperature sensor is not functioning properly, you will see this symbol on the display. Please contact the dealer or importer.
Power indicator for electronic thermostat
See figure 6 on separate illustration sheet
When the panel heater is using power (i.e. when it is heating), the power indicator is lit

Set desired temperature for electronic thermostat
See figure 7 on separate illustration sheet
Press the arrow buttons to set the desired temperature.
Instructions day/night thermostat
Please see table on page 4 for which models that have day- and night thermostats.
TIP! The thermostat can be used as a regular electronic thermostat (i.e. the heater will maintain a constant temperature 24 hours a day). Please see the section instructions electronic thermostat for further information.
Control panel
See figure 8 on separate illustration sheet
- Display (shows the desired room temperature by default)
- Control light — night function
- Control light — day function
- Power indicator — Shows whether the heater is using power or not
- Control button (+) (Increase temperature)
- Control button (-) (Reduce temperature)
- Night function
- Day function
- Function button
ATTENTION! After a power cut the thermostat will return to the last registered temperature.
WARNING! BEFORE THE HEATER IS TURNED ON, IT MUST BE ATTACHED TO A WALL. IF THE HEATER IS NOT INSTALLED CORRECTLY OR IS INSTALLED ASKEW, THIS MAY CAUSE THE HEATER TO MALFUNCTION OR IN THE WORST CASE, BE DAMAGED.

If the temperature sensor is not functioning properly, you will see this symbol on the display. Please contact the dealer or importer.
Power indicator for day/night thermostat
See figure 9 on separate illustration sheet
When the panel heater is using power (i.e. when it is heating), the power indicator is lit

Set desired temperature for day/night thermostat
See figure 7 on separate illustration sheet
Press the arrow buttons to set the desired temperature.
Day- and nighttime setback
When programming the heater for either day- or nighttime setback, the setback period will be active from the time you register the program. Which means; if you want to start your daytime setback at 7.30 am, you need to register the program at 7.30 am.
You only need to program the heater 1 time for daytime setback and 1 time for nighttime setback. If you have programmed the heater, the setback programs will be active on all 7 days (or 7 nights).
EXAMPLE:
Let us say you want to program the heater for both daytime- and nighttime setback (normally the heater is set to 23 degrees). , bu want the heater to do the following:
- Daytime setback activated from 7.30 am to 2.30 pm. Desired temperature: 17 degrees.
- Nighttime setback activated from 10.00 pm to 6.00 am. Desired temperature: 18 degrees.
How to activate daytime setback
See figure 10 on separate illustration sheet
- Tuesday 7.30 am you go to the heater and press ⚙️ on the heater's control panel.
- "d" will be visible in the display. Use the + and - buttons to set what day it is today when you are programming the heater (1= Monday, 2 = Tuesday etc.), bu are not programming the heater for the various days. This is simply to tell the heater what day it is when you are programming the heater. Select 2 for Tuesday. Confirm by pressing
- "C" will flash in the display. Use the + and - buttons to set 17 as the desired temperature for daytime setback. Confirm by pressing 📋
- "H" will flash in the display. Use the + and - buttons to set 7 hours as desired setback period (meaning it will be active from 7.30 am to 2:30 pm). Confirm by pressing
- The daytime setback will now be active from 7.30 am to 2:30 pm every day. Setback temperature is 17 degrees.
*Control light is green when the heater is in an active setback period. The control light is red when the setback period is inactive but programmed.
How to activate nighttime setback
See figure 11 on separate illustration sheet
- Tuesday 10.00 pm you go to the heater and press ★ on the heater's control panel.
- "d" will be visible in the display. Use the + and - buttons to set what day it is today when you are programming the heater (l=Monday), 2 = Tuesday etc.). You are not programming the heater for various days. This is simply to tell the heater what day it is when you are programming the heater. Select 2 for Tuesday. Confirm by pressing
- "C" will flash in the display. Use the + and - buttons to set 18 as the desirectfemperatu-re for nighttime setback. Confirm by pressing 🏠
- "H" will flash in the display. Use the + and - buttons to set 8 hours as desired setback period (meaning it will be active from 22.00 pm to 6.00 am). Confirm by pressing
- The nighttime setback will now be active from 10.00 pm to 6.00 am every day. The setback temperature is 18 degrees.
*Control light(! is green when the heater is in an active setback period. The control light is red when the setback period is inactive but programmed.
N.B! If a power cut occurs/you turn off the heater, the programming will be lost and you will have to do this over again.
Advanced mode
If you want to have different temperature settings each day, you may use advanced mode. To activate advanced mode you need to activate day and night setback first.
See figure 18 on separate illustration sheet.
How to activate advanced mode for daytime setback:
-
Press and hold ⚙, then press+ one time.
-
"dl" (day one) will be visible W he display, and you may now choose the temperature you want for Monday. Confirm by pressing
-
"0 C" will flash in the display. Use the + and - buttons to set the temperature for daytime setback. Confirm by pressing 📋
-
"H" will flash in the display. Use the + and - buttons to set the number of hours as desired setback period. Confirm by pressing 📋
-
"SR" will be visible in the display. Now you have the option to set the time of day that you want the setback time to start. You may choose from -4 hours to +4 from the time your daytime setback normally starts. Meaning, if your daytime setback normally starts at 10:30, but you want the setback time to be activated 08:30 every Monday, you may use the - button to set "-2" (hours). Confirm by pressing 📋
-
"d2" (day 2) which is Tuesday, will now be visible in the display and you may do the same procedure to set the desired temperature for Tuesday. Keep repeating the same procedure for all 7 days.
How to activate advanced mode for nighttime setback:
-
Press and hold ⭐, then press + one time.
-
"dl" (day one) will be visible in the.JJLsplay, and you may now choose the temperature you want for Monday night. Confirm by pressing 📋
-
"0 C" will flash in the display. Use the + and - buttons to set the temperature for nighttime setback. Confirm by pressing 🌐
-
"H" will flash in the display. Use the plus and minus buttons to set the number of hours as desired setback period. Confirm by pressing 🏠
-
"SR" will be visible in the display. Now you have the option to set the time of night that you want the setback time to start. You may choose from -4 hours to +4 hours from the time your nighttime setback normally starts. Meaning, if your nighttime set-back normally starts at 22:00, but you want the setback time to be activated 21:00 every Monday, you may use the - button to set "-1" (hour). Confirm by pressing.
-
"d2" (day 2) will now be visible in the display and you may do the same procedure to set the desired temperature for Tuesday. Keep repeating the same procedure for all 7 days.
Change setback temperature — daytime
See figure 12 on separate illustration sheet
Press and hold ⏱ and press ⚡ 3 times.
Enter the desired temperature for daytime setback. Save by pressing 🏠 or wait for 15 seconds for automatic confirmation.
Change setback temperature — nighttime
See figure 13 on separate illustration sheet
Press and hold ⏱ and press ⚙ 3 times.
Enter the desired temperature for nighttime setback. Save by pressing 📋 or wait for 15 seconds for automatic confirmation.
Change number of hours — daytime
See figure 14 on separate illustration sheet
Press and hold ⏱ and press ⚡ 2 times.
Enter the desired number of hours for daytime setback. Save by pressing 📍 or wait for 15 seconds for automatic confirmation.
Change number of hours — nighttime
See figure 15 on separate illustration sheet
Press and hold ⚡️ and press ⭐ 2 times.
Enter the desired number of hours for nighttime setback. Save by pressing 🏠 or wait for 15 seconds for automatic confirmation.
Cancel (skip) setback period
See figure 16 on separate illustration sheet
Press and hold ⚙️ and press ⚙️ or ⚙ once (depending on which setback period you want to cancel).
*The heater will skip an active setback period or the next setback period.
*During the next setback period, the heater will automatically resume the programmed temperature reduction.
Delete a setback program
See figure 17 on separate illustration sheet
Press and hold 🙏 or ⭐ (depending on which setback period you want to cancel) for 3 seconds.
Maintenance
- For cleaning, always unplug the heater and leave it to cool.
- Wipe the heater regularly with a damp cloth and dry the surface before turning on the heater again.
- The heater must be cleaned at least once a month during the he
CAUTION! The heater should never be immersed in water.
Avoid using detergents to clean the heater.
Never let any water get inside the heater; this can be hazardous.
- Dust etc. should be removed with a soft cloth.
- The heater can be stored in a dry and clean place.
- If the heater stops working, do not attempt to repair it yourself because it can cause a fire hazard and/or electric shock.
Warranty
The warranty is valid for 2 years. The heater will be repaired or replaced during this time should any malfunction occur. The warranty applies if the heater is used according to these instructions and the customer can present the heater malfunctions in any way, please contact the store where it was purchased or the importer.
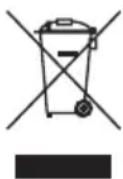
Waste disposal
The symbol 📋 indicates that this product is not to be disposed of together with household waste. This product must be delivered to a recycling service or container for electrical appliances and electronic equipment. This is do and prevent harm to the environment. Local businesses (or the environmental station in your neighborhood) are required by law to accept and recycle such products, as a means of environmentally sound disposal.
mill
Mill International B.V.
De Giesel 5
6081 PG Haelen
The Netherlands
www.millnorway.com
Vsebina
natural_image
Illustration of a person standing with a diagonal line crossing through the airline, no text or symbols present
natural_image
Simple line drawing of a car with a diagonal cross mark (no text or symbols)TA NAVODILA ZA UPORABO SHRANITE ZA KASNEJŠE PREVERJANJE!
NIKOLI SE NE DOTIKAJTE GRELNIKA ALI OHIŠ-JA Z MOKRIMI ROKAMI!
NE POKRIVAJTE GRELNIKA, DA NE PRIDE DO PREGREVANJA.
natural_image
Simple line drawing of a person standing with a diagonal line crossing over, no text or symbols present
natural_image
Simple line drawing of a vehicle with a diagonal cross mark (no text or symbols)CONSERVARE QUESTO MANUALE D'ISTRUZIONE PER USO FUTURO! MANUALE PER USO FUTURO! NON TOCCARE MAI IL TUO RISCALDATORE O I SUOI RIVESTIMENTI CON MANI BAGNATE!
PER EVITARE IL SURRISCALDAMENTO, NON COPRIRE IL RISCALDATORE.
natural_image
Illustration of a person standing with a diagonal line crossing through the airline, no text or symbols present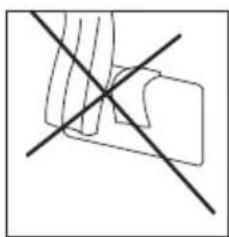
natural_image
Simple line drawing of a vehicle with a diagonal cross mark (no text or symbols)ULOŽTE TENTO NÁVOD K POUŽITÍ PRO BU- DOUCÍ POUŽITÍ!
NIKDY SE NEDOTÝKEJTE SVÉHO OHŘÍVAČE NEBO JEHO OBAL S VLHKOU RUKOU!

ABY NEDOŠLO K PŘHERÁTÍ, NEZAKRÝVEJTE OHŘÍVAČ.
Set desired temperature for day/night thermostat
natural_image
Illustration of a person standing with a diagonal line crossing over a wall, no text or symbols present
natural_image
Simple line drawing of a car with a diagonal line crossing through it (no text or symbols)ULOŽTE SI TENTO NÁVOD NA POUŽITIE PRE BUDÚCE POUŽITIE!NEKAD NEPIESKARIETIES NIKDY SA NEDOTÝKAJTE OHRIEVAČA ALEBO JEHO OBALU VLHKOU RUKOU!

ABY STE PREDIŠLI PREHRIATIU, OHRIEVAČ NEZAKRÝVAJTE.
natural_image
Illustration of a person standing under a diagonal line with raindrops, no text or symbols present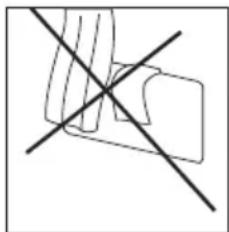
natural_image
Simple line drawing of a vehicle with a diagonal cross mark (no text or symbols)FASSEN SIE NIE HEIZKÖRPER ODER DESSEN HÜLLE MIT NASSEN HÄNDEN AN!

natural_image
Illustration of a person standing with a diagonal line crossing through the airline, no text or symbols present
natural_image
Simple line drawing of a car with a diagonal cross mark (no text or symbols)SÄILITAGE KASUTUSJUHEND HILISEMAKS KASUTAMISEKS!
ÄRGE PUUDUTAGE SEADET JA SELLE KORPUST MÄRGADE KÄTEGA!

ÜLEKUUMENEMISE VÄL TIMISEKS ÄRGE KATKE KÜTTESEADET KINNI.
Oluline ohutusteave
natural_image
Illustration of a person standing with a diagonal line crossing through the airline, no text or symbols present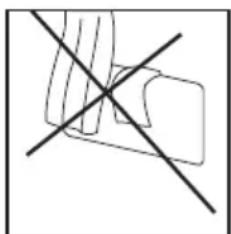
natural_image
Simple line drawing of a car with a diagonal cross mark (no text or symbols)CONSERVEZ CE MANUEL POUR UNE FUTURE UTILIZATION!
NE TOUCHES JAMAIS VOTRE CHAUFFAGE AVEC DES MAINS MOUILLÈES!

AFIN D'ÉVITER TOUTE SURCHAUFFE, NE COUVREZ PAS LE RADIATEUR.
natural_image
Illustration of a person standing under a diagonal line with raindrops, no text or symbols present
natural_image
Simple line drawing of a mechanical component with a diagonal cross mark (no text or symbols)SAČUVAJTE OVA UPUTSTVA ZA NAKNADNO KORIŠTENJE!
NIKAD NE DODIRUJTE GRIJALICU ILI NJENO KUĆIŠTE S MOKRIM RUKAMA!
KAKO BI SE IZBJEGLO PREGRIJAVANJE, GRIJALICA SE NE SMIJE PREKRIVATI.
Opis panela
Vidi prikaz 1 na zasebnom ilustracijskom listu
A
MILL INVISIBLE
- Off/On
- Zidni držać
- Senzor temperature
- Emisija topline
- Termostat WiFi
- Čelična fronta
B
MILL GLASS
- Off/On
- Zidni držač
- Senzor temperature
- Emisija topline
- Termostat WiFi
- Staklena fronta
Sastavljanje
Vidi prikaz 2 na zasebnom ilustracijskom listu
A. Izbušite rupe u zidu za otvore 1 i 2. Potom izbušite rupe u zidu za gornje otvore (3 i 4 koristeći 6).
B. Umetnite tiple u rupe i pričvrste nosač s četri vijka.
C. Postavite panel s nižim ušicama na nosač, a zatim ga spustite na gornje ušice (lagano podignite panel za namještanje na gornju ušicu). Pričvrstite vijak na vrhu nosača (u smjeru kazaljke na satu).
natural_image
Illustration of a person standing with a diagonal line crossing through the airline, no text or symbols present
natural_image
Simple line drawing of a vehicle with a diagonal cross mark (no text or symbols)SAUGOKITE ŠIA INSTRUKCIJA VÈLESNIAM NAUDOJIMUI!
NIEKADA NELIESKITE ŠILDYTUVO AR JO KOR- PUSO DRĖGNOMIS RANKOMIS!
KAD IŠVENGTUMĚTE PERKAITIMO, ŠILDYTUVO NEUŽDENKITE.
Svarbi saugumo informacija
Šildytuvo aprašymas
natural_image
Simple line drawing of a person standing under a diagonal line with raindrops, no text or symbols present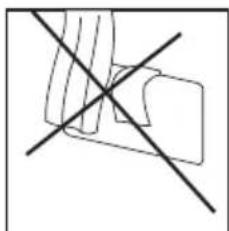
natural_image
Simple line drawing of a vehicle with a diagonal cross mark (no text or symbols)SAGLABÄJIET ISNTRUKCIJU TURPMÄKAI LIETOSANAI!
NEKAD NEPIESKARIETIES SILDITAJAM VAI TÄ DETALÄM AR MITRÄM ROKÄM!

LAI IZVAIRITOS NO PÄRKARŠANAS, NEAPKLÄJIET SILDITAJU!
Sildītāja apraksts
natural_image
Illustration of a person standing with a diagonal line crossing through the airline, no text or symbols present
natural_image
Simple line drawing of a vehicle with a diagonal cross mark (no text or symbols)natural_image
Illustration of a person standing with a diagonal line crossing against a tiled floor (no text or symbols)
natural_image
Simple line drawing of a vehicle with a diagonal cross mark (no text or symbols)ZACHOWAJ INSTRUKCJĘ OBSŁUGI!
NIE DOTYKAJ PANELU LUB OBUDOWY URZĄDZENIA MOKRYMI RĘKAMI!
Opis grzejnika
Seasonal energy efficiency
Information requirement for the electric local space heaters
Model identifier(s): MB250, IB250
Item Symbol Value Unit Item Unit
| Head Output | Type of heat input, for electric storage local space heaters only (select one) | ||||
| Nominal heat output Pnom 0,25 kW | manual heat charge control, with integrated thermostat | No | |||
| Minimum heat output (indicative) | Pmin 0,25 kW | manual heat charge control with room and/or outdoor temperature feedback | No | ||
| Maximum continuous heat output | Pmax,c 0,25 kW | electronic heat charge control with room and/or outdoor temperature feedback | No | ||
| Auxiliary electricity consumption | fan assisted heat output No | ||||
| At nominal heat output e max N/A kW | Type of heat output/room temperature control (select one) | ||||
| At minimum heat output | elmin N/A kW | single stage heat output and no room temperature control | No | ||
| In standby mode | eISB 0,0 kW | two or more manual stages, no room temperature control | No | ||
| with mechanic thermostat room temperature control | No | ||||
| Seasonal space heating energy efficiency | ηs | 34 % | with electronic room temperature control | Yes | |
| electronic room temperature control plus day timer | No | ||||
| electronic room temperature control plus week timer | No | ||||
| Other control options (multiple selections possible) | |||||
| room temperature control, with presence detection | No | ||||
| room temperature control, with open window detection | Yes | ||||
| with distance control option No | |||||
| with adaptive start control | No | ||||
| with working time limitation | No | ||||
| with black bulb sensor | No | ||||
| Contact details | Mill International AS Grini Næringspark 10, 1361 ∅sterås, Norway | ||||
Seasonal energy efficiency
Information requirement for the electric local space heaters
Model identifier(s): MB600DN, IB600DN
Item Symbol Value Unit Item Unit
| Head Output | Type of heat input, for electric storage local space heaters only (select one) | ||||
| Nominal heat output Pnom 0,60 kW | manual heat charge control, with integrated thermostat | No | |||
| Minimum heat output (indicative) | Pmin 0,60 kW | manual heat charge control with room and/or outdoor temperature feedback | No | ||
| Maximum continuous heat output | Pmax,c 0,60 kW | electronic heat charge control with room and/or outdoor temperature feedback | No | ||
| Auxiliary electricity consumption | fan assisted heat output No | ||||
| At nominal heat output | elmax | N/A | kW | Type of heat output/room temperature control (select one) | |
| At minimum heat output | elmin N/A | kW | single stage heat output and no room temperature control | No | |
| In standby mode | eISB 0,0 | kW | two or more manual stages, no room temperature control | No | |
| with mechanic thermostat room temperature control | No | ||||
| Seasonal space heating energy efficiency | ηs | 38 % | with electronic room temperature control | Yes | |
| electronic room temperature control plus day timer | No | ||||
| electronic room temperature control plus week timer | Yes | ||||
| Other control options (multiple selections possible) | |||||
| room temperature control, with presence detection | No | ||||
| room temperature control, with open window detection | Yes | ||||
| with distance control option | No | ||||
| with adaptive start control | No | ||||
| with working time limitation | No | ||||
| with black bulb sensor | No | ||||
| Contact details | Mill International AS Grini Næringspark 10, 1361 ∅sterås, Norway | ||||
Seasonal energy efficiency
Information requirement for the electric local space heaters
Model identifier(s): MB800DL, IB800L DN
Item Symbol Value Unit Item Unit
| Head Output | Type of heat input, for electric storage local space heaters only (select one) | ||||
| Nominal heat output Pnom 0,80 kW | manual heat charge control, with integrated thermostat | No | |||
| Minimum heat output (indicative) | Pmin 0,80 kW | manual heat charge control with room and/or outdoor temperature feedback | No | ||
| Maximum continuous heat output | Pmax,c 0,80 kW | electronic heat charge control with room and/or outdoor temperature feedback | No | ||
| Auxiliary electricity consumption | fan assisted heat output No | ||||
| At nominal heat output e max N/A kW | Type of heat output/room temperature control (select one) | ||||
| At minimum heat output | elmin N/A kW | single stage heat output and no room temperature control | No | ||
| In standby mode | eISB | 0,0 | kW | two or more manual stages, no room temperature control | No |
| with mechanic thermostat room temperature control | No | ||||
| Seasonal space heating energy efficiency | ηs | 38 % | with electronic room temperature control | Yes | |
| electronic room temperature control plus day timer | No | ||||
| electronic room temperature control plus week timer | Yes | ||||
| Other control options (multiple selections possible) | |||||
| room temperature control, with presence detection | No | ||||
| room temperature control, with open window detection | Yes | ||||
| with distance control option | No | ||||
| with adaptive start control | No | ||||
| with working time limitation | No | ||||
| with black bulb sensor | No | ||||
| Contact details | Mill International AS Grini Næringspark 10, 1361 ∅sterås, Norway | ||||
Seasonal energy efficiency
Information requirement for the electric local space heaters
Model identifier(s): MB900DN, IB900DN
Item Symbol Value Unit Item Unit
| Head Output | Type of heat input, for electric storage local space heaters only (select one) | ||||
| Nominal heat output Pnom 0,90 kW | manual heat charge control, with integrated thermostat | No | |||
| Minimum heat output (indicative) | Pmin 0,90 kW | manual heat charge control with room and/or outdoor temperature feedback | No | ||
| Maximum continuous heat output | Pmax,c 0,90 kW | electronic heat charge control with room and/or outdoor temperature feedback | No | ||
| Auxiliary electricity consumption | fan assisted heat output No | ||||
| At nominal heat output | elmax | N/A | kW | Type of heat output/room temperature control (select one) | |
| At minimum heat output | elmin N/A | kW | single stage heat output and no room temperature control | No | |
| In standby mode | eISB | 0,0 | kW | two or more manual stages, no room temperature control | No |
| with mechanic thermostat room temperature control | No | ||||
| Seasonal space heating energy efficiency | ηs | 38 % | with electronic room temperature control | Yes | |
| electronic room temperature control plus day timer | No | ||||
| electronic room temperature control plus week timer | Yes | ||||
| Other control options (multiple selections possible) | |||||
| room temperature control, with presence detection | No | ||||
| room temperature control, with open window detection | Yes | ||||
| with distance control option | No | ||||
| with adaptive start control | No | ||||
| with working time limitation | No | ||||
| with black bulb sensor | No | ||||
| Contact details | Mill International AS Grini Næringspark 10, 1361 ∅sterås, Norway | ||||
Seasonal energy efficiency
Information requirement for the electric local space heaters
Model identifier(s): MB1000L DN, IB1000L DN
Item Symbol Value Unit Item Unit
| Head Output | Type of heat input, for electric storage local space heaters only (select one) | ||||
| Nominal heat output Pnom 1,00 kW | manual heat charge control, with integrated thermostat | No | |||
| Minimum heat output (indicative) | Pmin 1,00 kW | manual heat charge control with room and/or outdoor temperature feedback | No | ||
| Maximum continuous heat output | Pmax,c 1,00 kW | electronic heat charge control with room and/or outdoor temperature feedback | No | ||
| Auxiliary electricity consumption | fan assisted heat output No | ||||
| At nominal heat output e max N/A kW | Type of heat output/room temperature control (select one) | ||||
| At minimum heat output | e min N/A kW | single stage heat output and no room temperature control | No | ||
| In standby mode | e ISB | 0,0 | kW | two or more manual stages, no room temperature control | No |
| with mechanic thermostat room temperature control | No | ||||
| Seasonal space heating energy efficiency | ηs | 38 % | with electronic room temperature control | Yes | |
| electronic room temperature control plus day timer | No | ||||
| electronic room temperature control plus week timer | Yes | ||||
| Other control options (multiple selections possible) | |||||
| room temperature control, with presence detection | No | ||||
| room temperature control, with open window detection | Yes | ||||
| with distance control option | No | ||||
| with adaptive start control | No | ||||
| with working time limitation | No | ||||
| with black bulb sensor | No | ||||
| Contact details | Mill International AS Grini Næringspark 10, 1361 ∅sterås, Norway | ||||
Seasonal energy efficiency
Information requirement for the electric local space heaters
Model identifier(s): MB1200DN, IB1200DN
Item Symbol Value Unit Item Unit
| Head Output | Type of heat input, for electric storage local space heaters only (select one) | ||||
| Nominal heat output Pnom 1,20 kW | manual heat charge control, with integrated thermostat | No | |||
| Minimum heat output (indicative) | Pmin 1,20 kW | manual heat charge control with room and/or outdoor temperature feedback | No | ||
| Maximum continuous heat output | Pmax,c 120 kW | electronic heat charge control with room and/or outdoor temperature feedback | No | ||
| Auxiliary electricity consumption | fan assisted heat output No | ||||
| At nominal heat output e max N/A kW | Type of heat output/room temperature control (select one) | ||||
| At minimum heat output | elmin N/A kW | single stage heat output and no room temperature control | No | ||
| In standby mode | eISB | 0,0 | kW | two or more manual stages, no room temperature control | No |
| with mechanic thermostat room temperature control | No | ||||
| Seasonal space heating energy efficiency | ηs | 38 % | with electronic room temperature control | Yes | |
| electronic room temperature control plus day timer | No | ||||
| electronic room temperature control plus week timer | Yes | ||||
| Other control options (multiple selections possible) | |||||
| room temperature control, with presence detection | No | ||||
| room temperature control, with open window detection | Yes | ||||
| with distance control option | No | ||||
| with adaptive start control | No | ||||
| with working time limitation | No | ||||
| with black bulb sensor | No | ||||
| Contact details | Mill International AS Grini Næringspark 10, 1361 ∅sterås, Norway | ||||