
Deuba - Garden furniture Casaria - Free user manual and instructions
Find the device manual for free Deuba Casaria in PDF.
| Product type | Garden furniture (garden lounge set) |
| Brand | Casaria |
| Model | Deuba |
| Main material | Synthetic rattan weave on steel structure |
| Color | Brown / Beige (depending on model) |
| Use | Indoor and outdoor, domestic use only |
| Package contents | Table, 4 chairs, seat cushions (depending on variant) |
| Table dimensions (L x W x H) | Approx. 120 x 70 x 74 cm |
| Chair dimensions (L x D x H) | Approx. 58 x 54 x 86 cm |
| Total weight | Approx. 25 kg |
| Maximum load capacity (table) | 50 kg |
| Maximum load capacity (chair) | 110 kg |
| Number of persons | 4 persons |
| Assembly level | Easy assembly, 2 persons recommended |
| Tools required | Hex key provided, power drill not recommended |
| Weather resistance | Treated against UV and water, protected by cushions |
| Maintenance | Clean with lukewarm soapy water, no harsh detergents |
| Winter storage | Store in a dry, sheltered place, use a protective cover |
| Safety | Keep small parts away from children, choking hazard |
| Warranty | 2 years (subject to terms) |
| Spare parts | Available from the manufacturer subject to availability |
| Recycling | Dispose of packaging according to local regulations, recycle at end of life |
Frequently Asked Questions - Deuba Casaria
User questions about Deuba Casaria
0 question about this device. Answer the ones you know or ask your own.
Ask a new question about this device
Download the instructions for your Garden furniture in PDF format for free! Find your manual Deuba - Casaria and take your electronic device back in hand. On this page are published all the documents necessary for the use of your device. Deuba by Casaria.
USER MANUAL Deuba Casaria
natural_image
Technical line drawing of a circular mechanical component with curved internal structure (no text or symbols)Artikelnummer 992852/992853/993326
natural_image
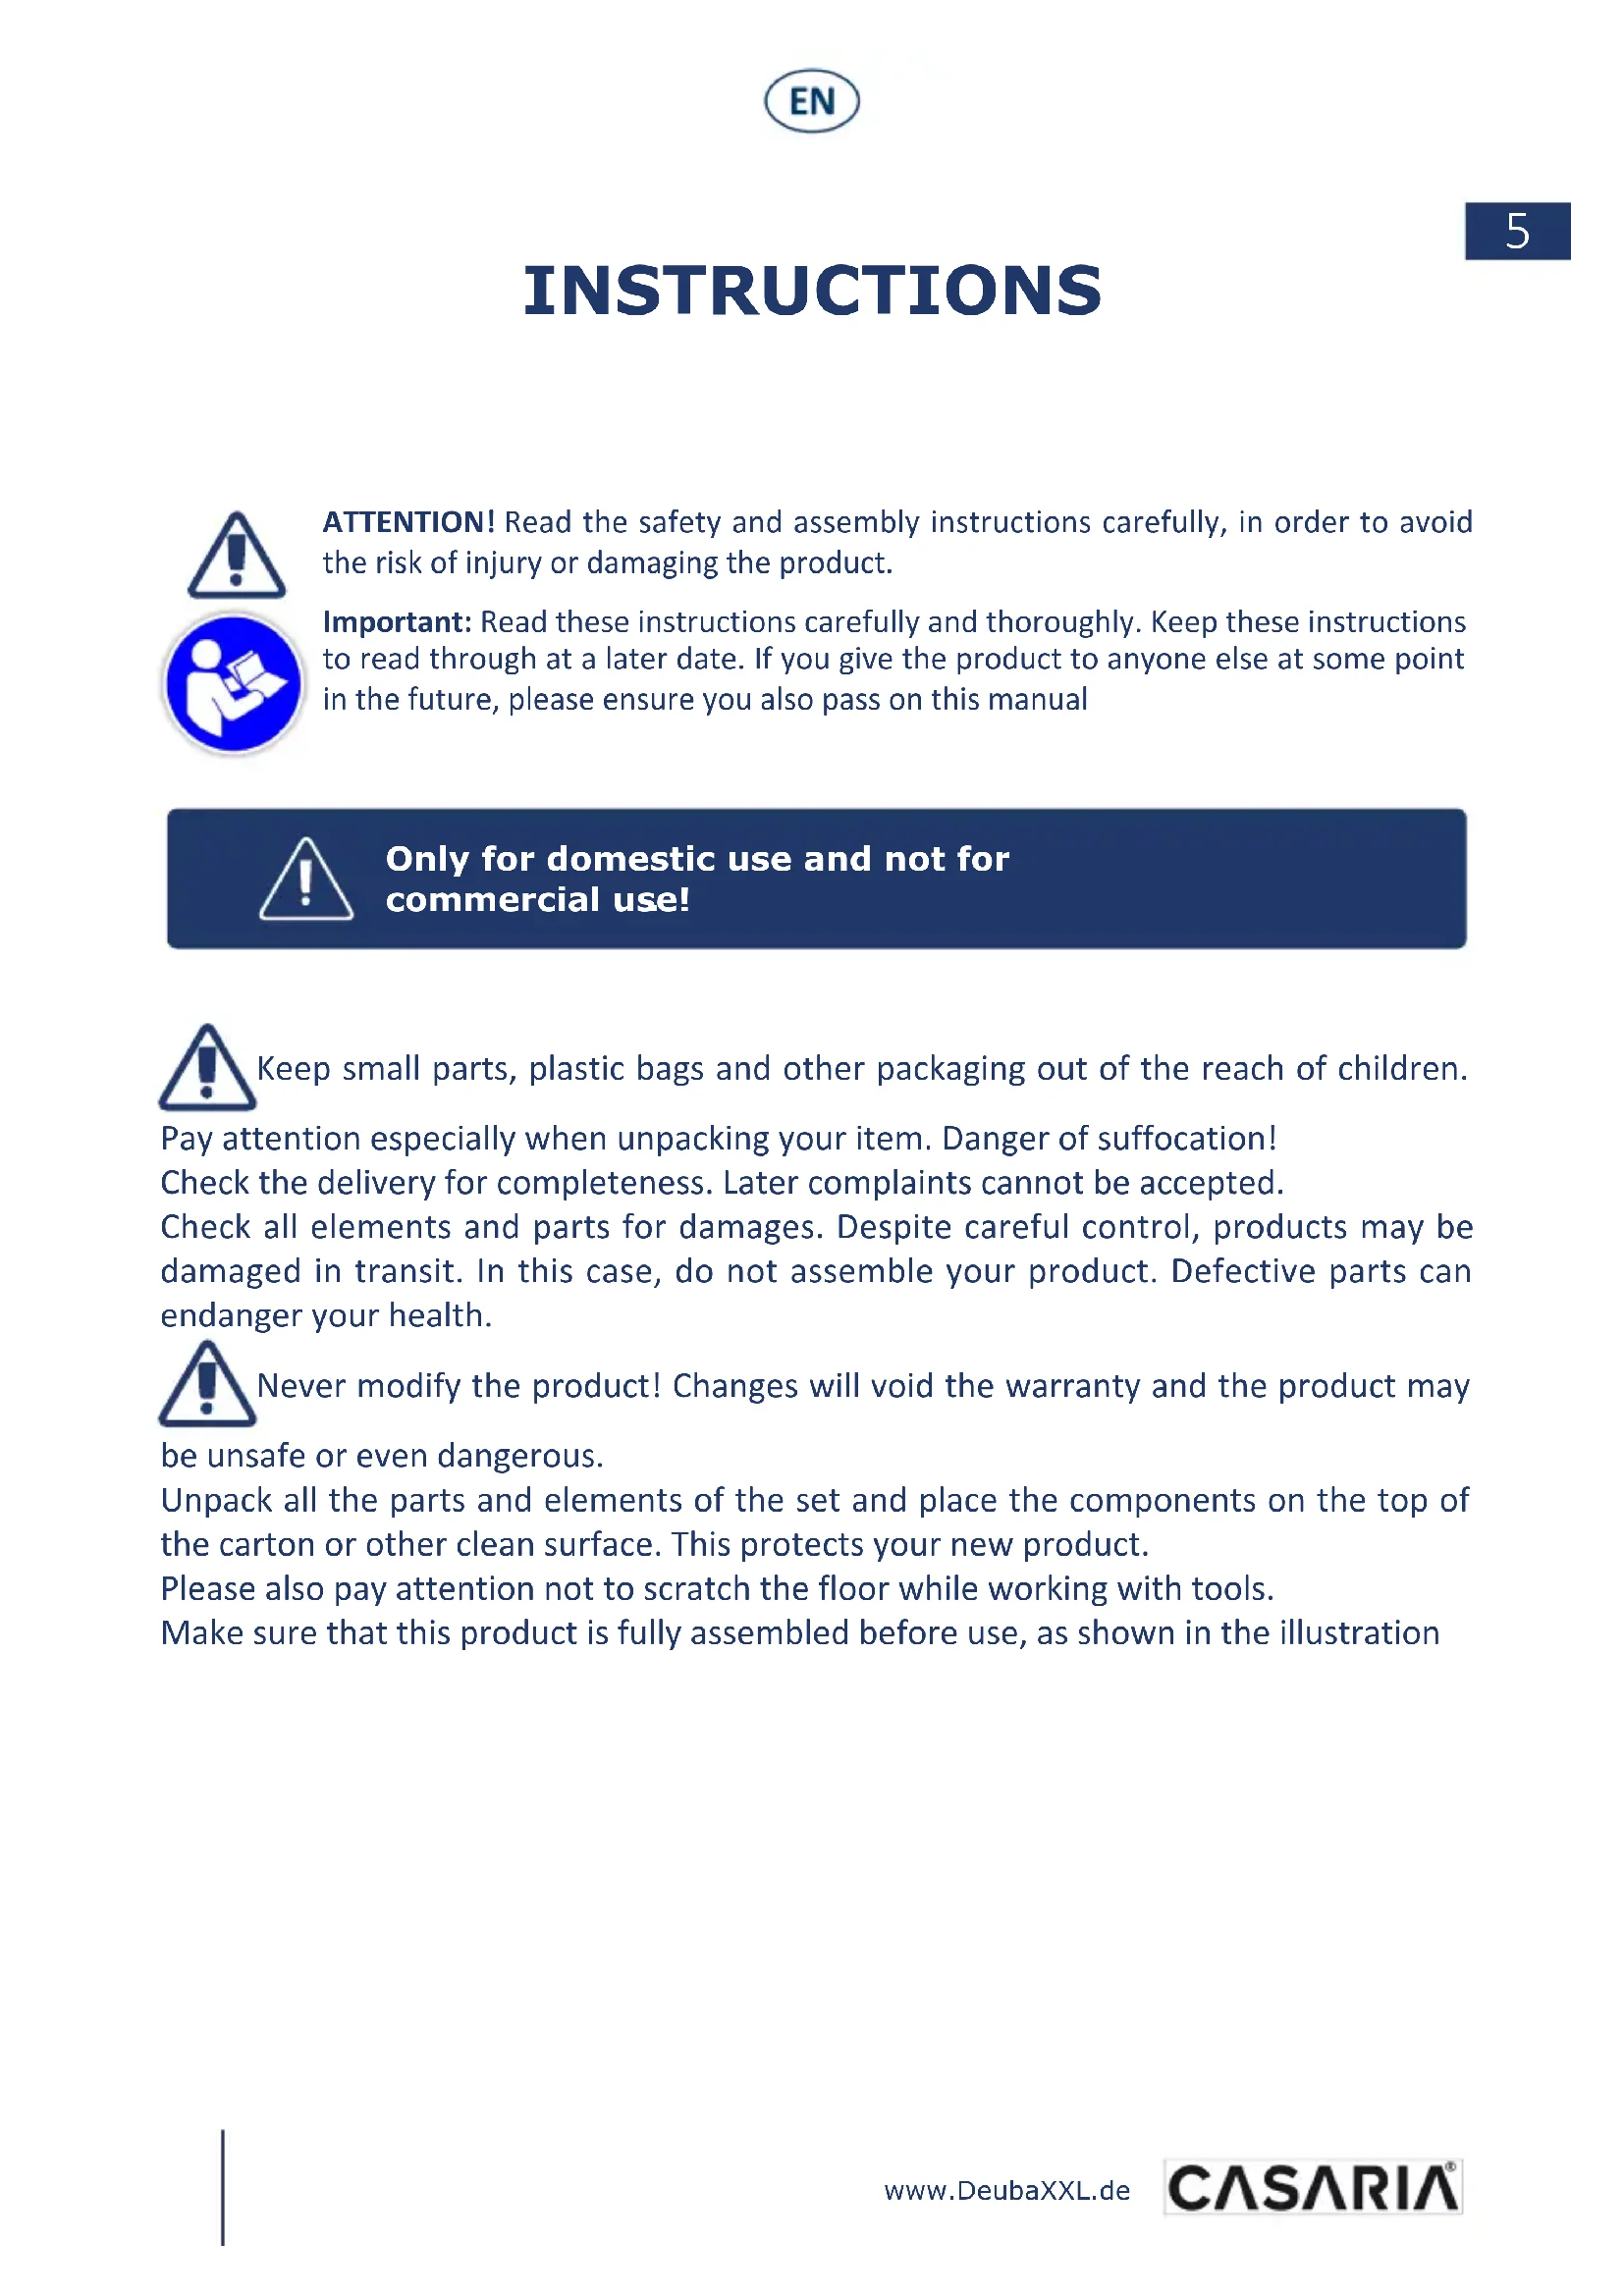
Two mechanical components with a cross mark, one circular and one threaded, against a horizontal line (no text or symbols)natural_image
Technical illustration of two mechanical components with no visible text or symbolsATTENTION! Read the safety and assembly instructions carefully, in order to avoid the risk of injury or damaging the product.
Important: Read these instructions carefully and thoroughly. Keep these instructions to read through at a later date. If you give the product to anyone else at some point in the future, please ensure you also pass on this manual

Only for domestic use and not for commercial use!

Keep small parts, plastic bags and other packaging out of the reach of children.
Pay attention especially when unpacking your item. Danger of suffocation!
Check the delivery for completeness. Later complaints cannot be accepted.
Check all elements and parts for damages. Despite careful control, products may be damaged in transit. In this case, do not assemble your product. Defective parts can endanger your health.

Never modify the product! Changes will void the warranty and the product may
be unsafe or even dangerous.
Unpack all the parts and elements of the set and place the components on the top of the carton or other clean surface. This protects your new product.
Please also pay attention not to scratch the floor while working with tools.
Make sure that this product is fully assembled before use, as shown in the illustration
General information
We recommend a minimum of 2 persons for the assembly of larger garden furniture.
Dispose of the packaging material in accordance with local regulations. Recycling is important!
If you have purchased seat cushions or cushions with this item, please note that the water-repellent coating is washed out of the fabric during washing. Your local laundry can advise you on the possibilities of waterproofing.
Important: Do not stand or sit on tables. Keep small parts out of the reach of children. When unpacking, be sure to keep plastic bags and other packaging materials away from children! Danger of suffocation!
Tip for stain removal: Avoid machine washing! First, try to wash out the stain with lukewarm soapy water. Do not use hard brushes or aggressive cleaning agents that can damage the water-repellent protective layer of the cushion or support.
Assembly Instructions
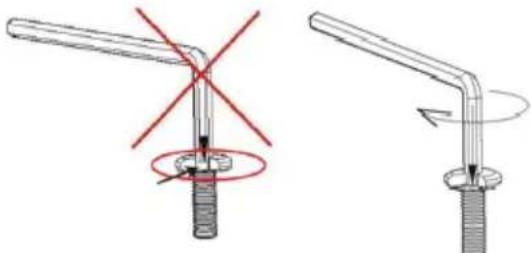
Please note that the screws must first be inserted by hand, and then slightly tightened so that the screw is held in place and the components are firmly fastened.
natural_image
Two mechanical components with a cross mark, one circular and one threaded, both aligned with a horizontal line (no text or symbols)Screws must not be tightened until all parts are connected in this way. By subsequently tightening the screws, small deviations in the drill holes or welding points that can occur with hand-made products can be compensated for.
Do not use any power tools to assemble this product. The excessive force of a power tool can cause screws to be overtightened and thus no longer hold.
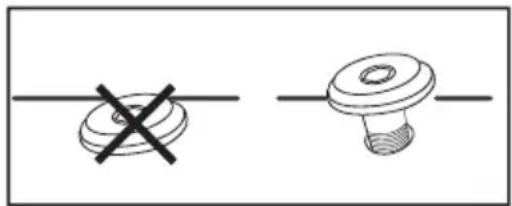
Always insert the hexagonal wrench completely into the recess provided in the screws
natural_image
Technical illustration of two mechanical components with no visible text or symbolsMake sure this product is fully assembled before usage, as shown in the illustration. Ensure that all legs are in contact with the floor and that your product is securely placed on the floor. Check that all screws and bolts are tight and inspect them regularly.
Do not overtighten the screws, overtightened screws can damage the material and cause cracking.
Keep away from small children, risk of injury!
Rattan
Your new rattan braid product has a pre-treated steel/aluminum body. The frame is pre-treated and powder-coated for maximum durability. Unpack all parts and elements of the set and place the components on a clean surface. Be careful not to scratch the floor. This product should only be used on a firm and level surface. We recommend mounting the product where it will be used later. Rattan products are designed to be used with appropriate cushions or pads. Use without seat cushions or pads may result in damage.
Protect your product from rain and weather effects. Store your product in a dry and protected place during periods of frost and winter. We recommend using a suitable protective cover! You can find it in our Online Shop.
If you do not carry out regular care and maintenance, the service life of your product will be considerably reduced. We cannot accept any liability for consequential damage resulting from lack of maintenance and care.
ORIENTATION


natural_image
Two mechanical components with a cross mark, one circular and one threaded, against a plain background (no text or symbols)natural_image
Diagram showing two mechanical components with a red crosshair and rotation arrow, no text or symbols presentnatural_image
Two mechanical components with a cross mark, one circular and one threaded, against a horizontal line (no text or symbols)natural_image
Technical illustration of two mechanical components with no visible text or symbolsnatural_image
Two mechanical components with a cross mark, one circular and one threaded, against a horizontal line (no text or symbols)natural_image
Technical illustration of two mechanical components with no visible text or symbolsnatural_image
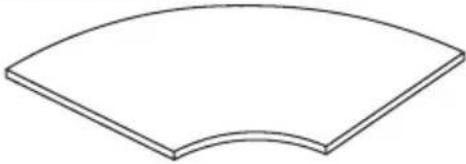
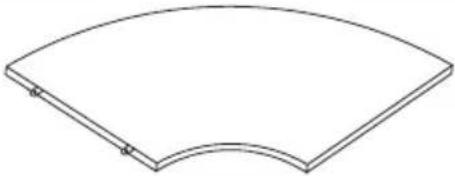
Isometric line drawing of a rectangular panel with two corner holes (no text or symbols)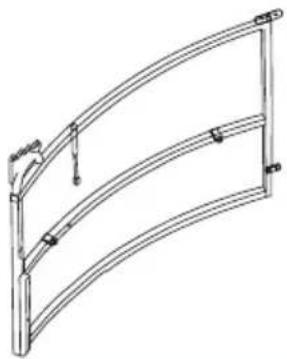
natural_image
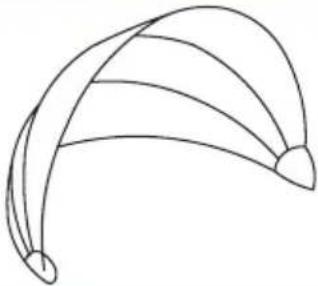
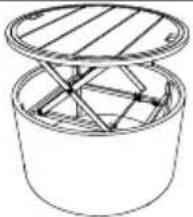
Line drawing of a curved metal frame structure with mounting feet (no text or symbols)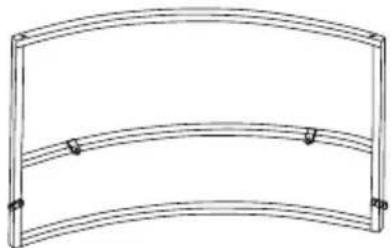
natural_image
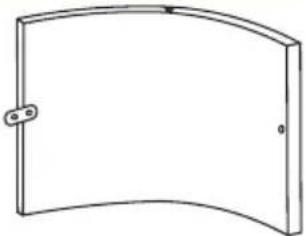
Simple line drawing of a curved rectangular frame with three small circular cutouts at the bottom (no text or symbols)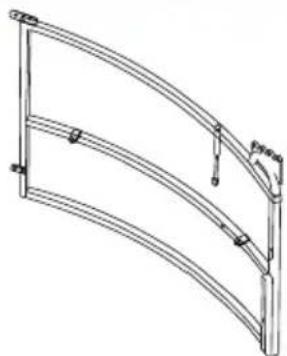
natural_image
Pure technical line drawing of a curved metal frame structure without any text, numbers, or symbols
natural_image
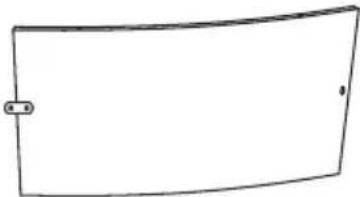
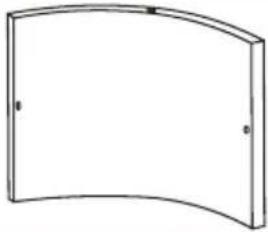
Simple line drawing of a rectangular frame with rounded corners and a horizontal line at the top (no text or symbols)
| TEIL NR. STK. | ||
 | KO 3 | |
 | KQ | 2 |
 | KU | 1 |
 | KV 1 | |
 | KW | 1 |
 | KX | 3 |

| TEIL NR. STK. | |||
 | KY | 3 | |
 | KZ | 1 | |
 | KT | 1 | |
text_image
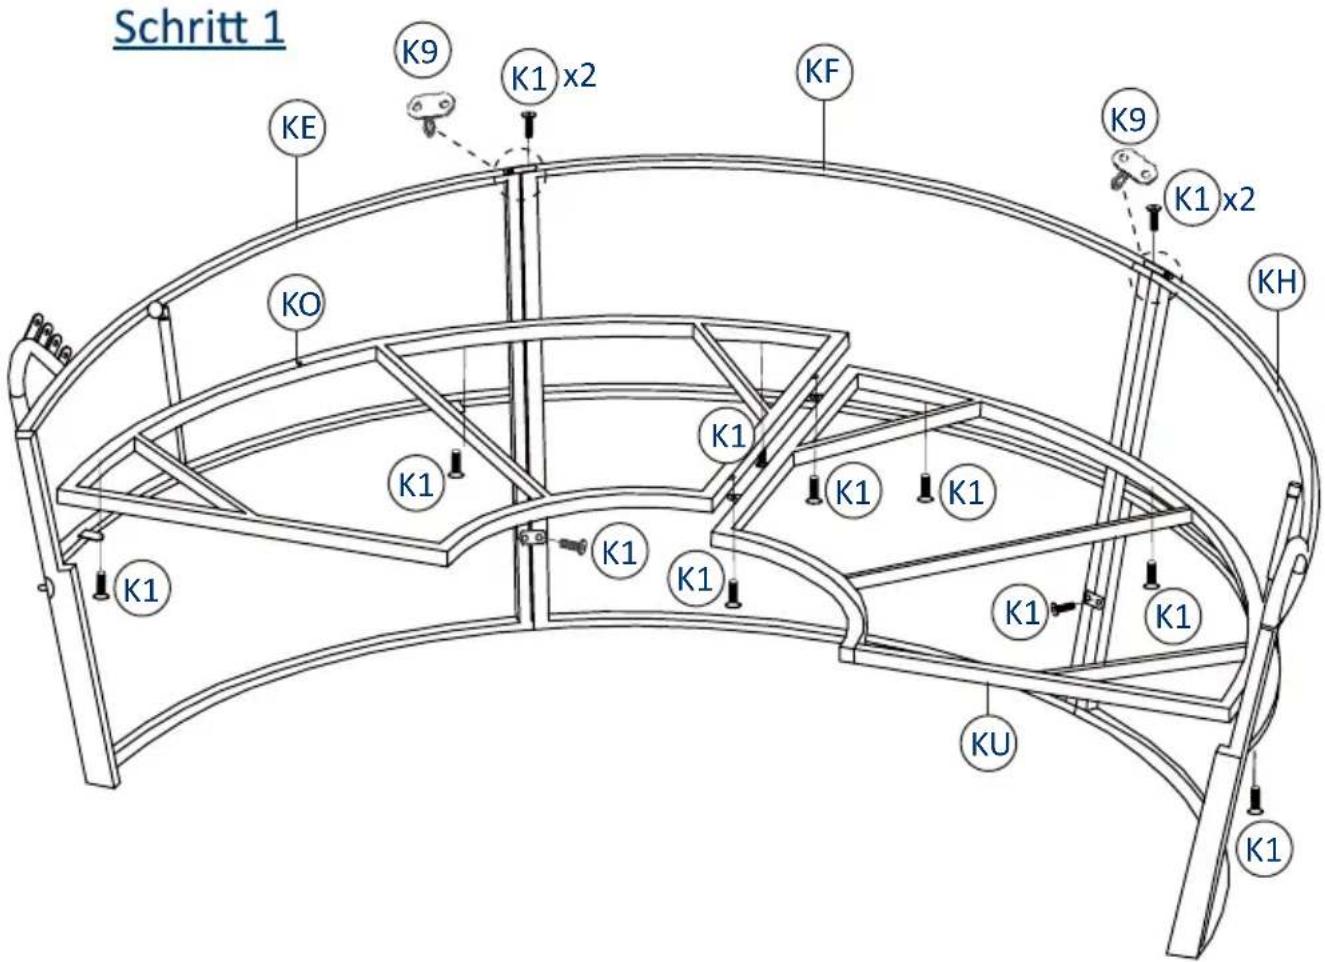
Schritt 1 KE K9 K1 x2 KF K9 K1 x2 KH KO K1 K1 K1 K1 K1 K1 K1 K1 KU K1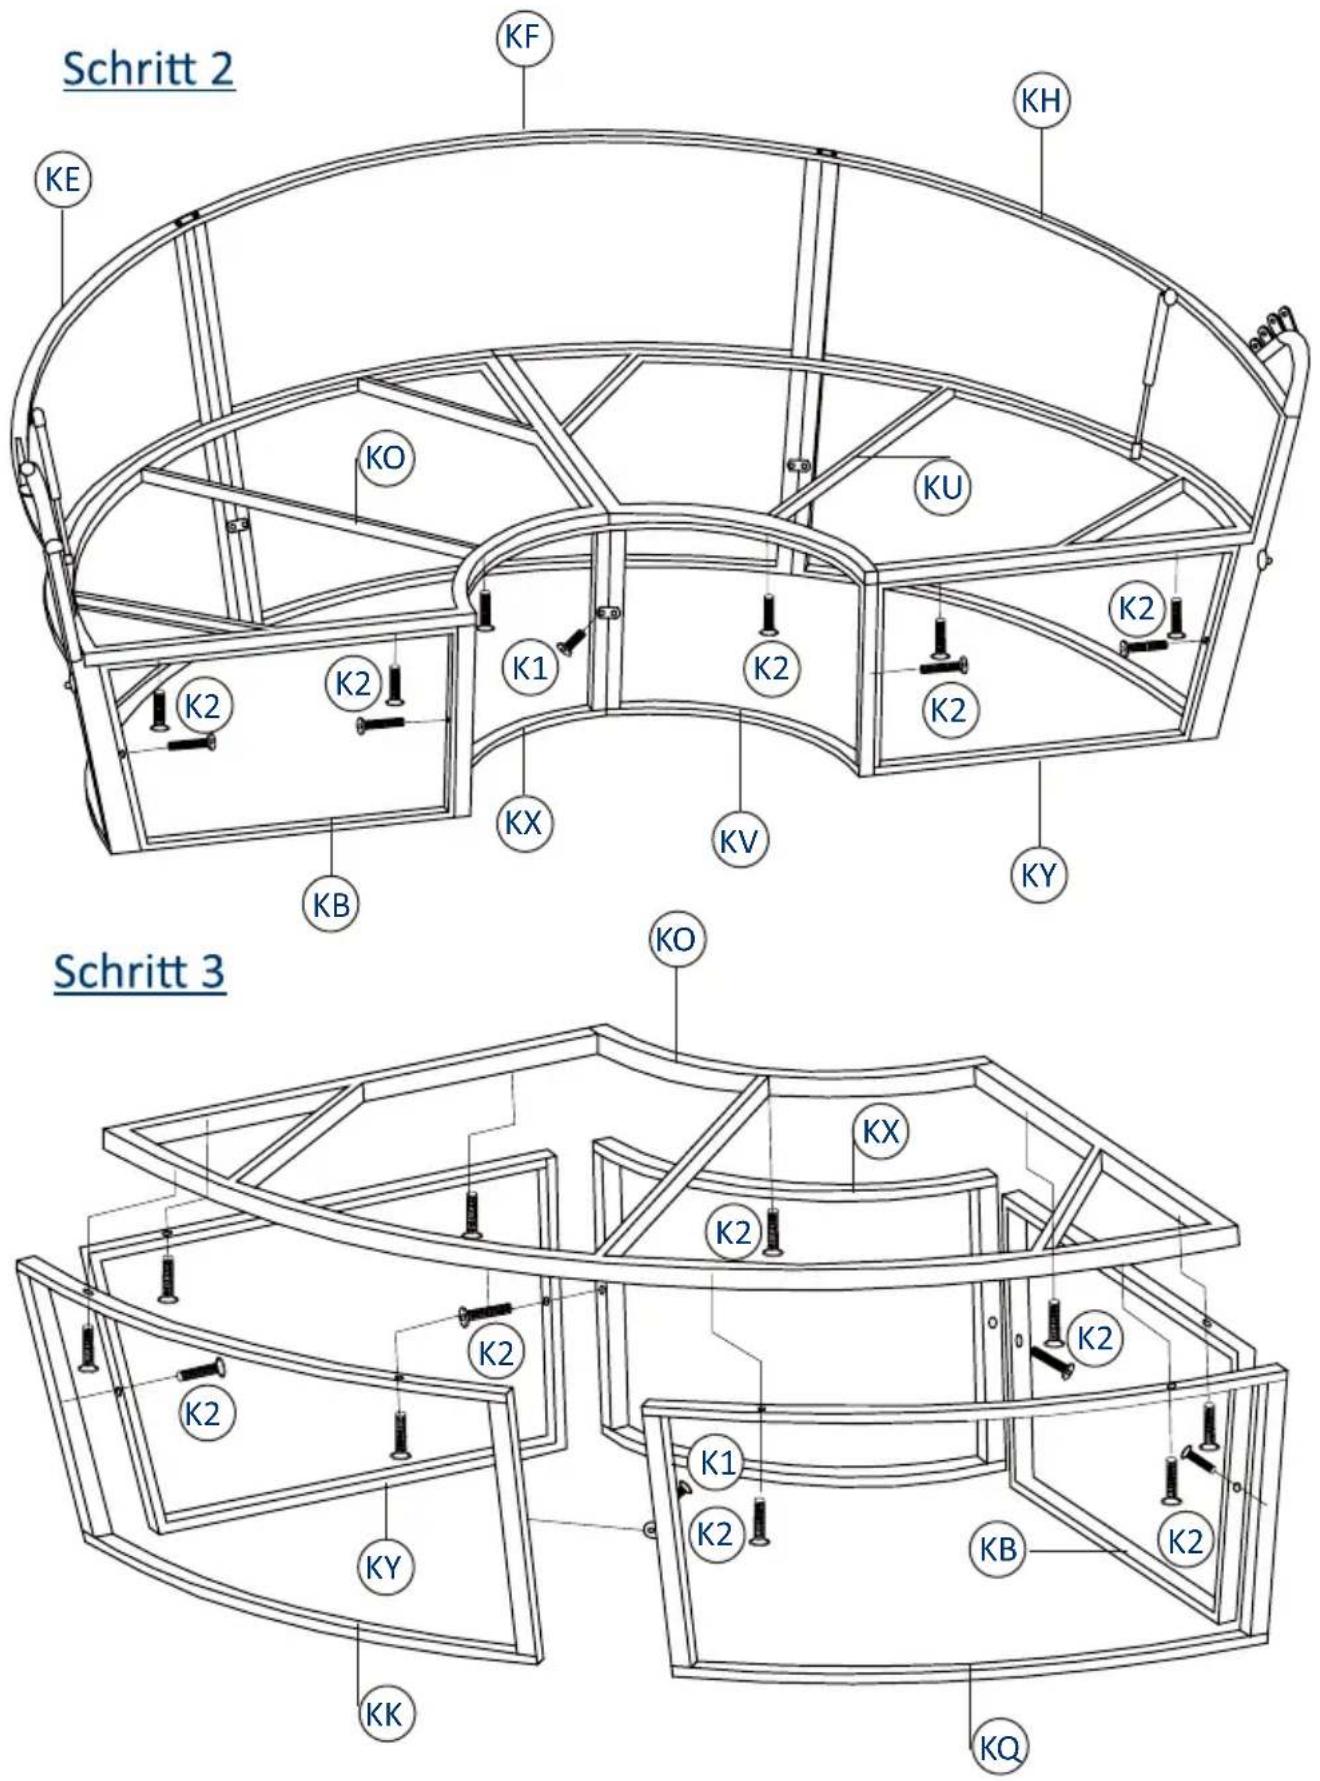
text_image
Schritt 2 KF KE KO KU K2 K2 K1 K2 K2 K2 KB KV KY Schritt 3 KO KX K2 K2 K1 K2 K2 KQ KK KK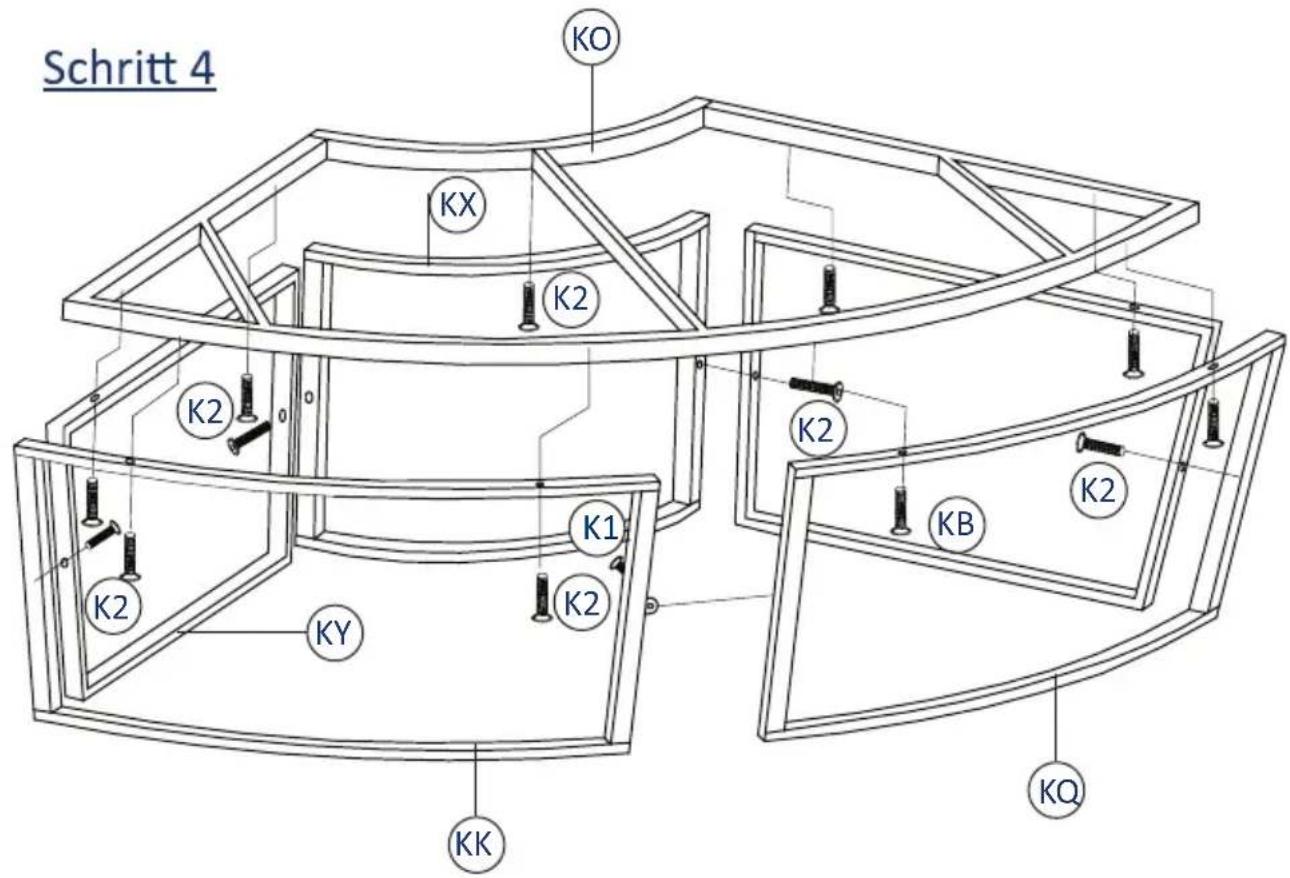
text_image
Schritt 4 KO KX K2 K2 K2 K1 K2 KY KK KB K2 KQ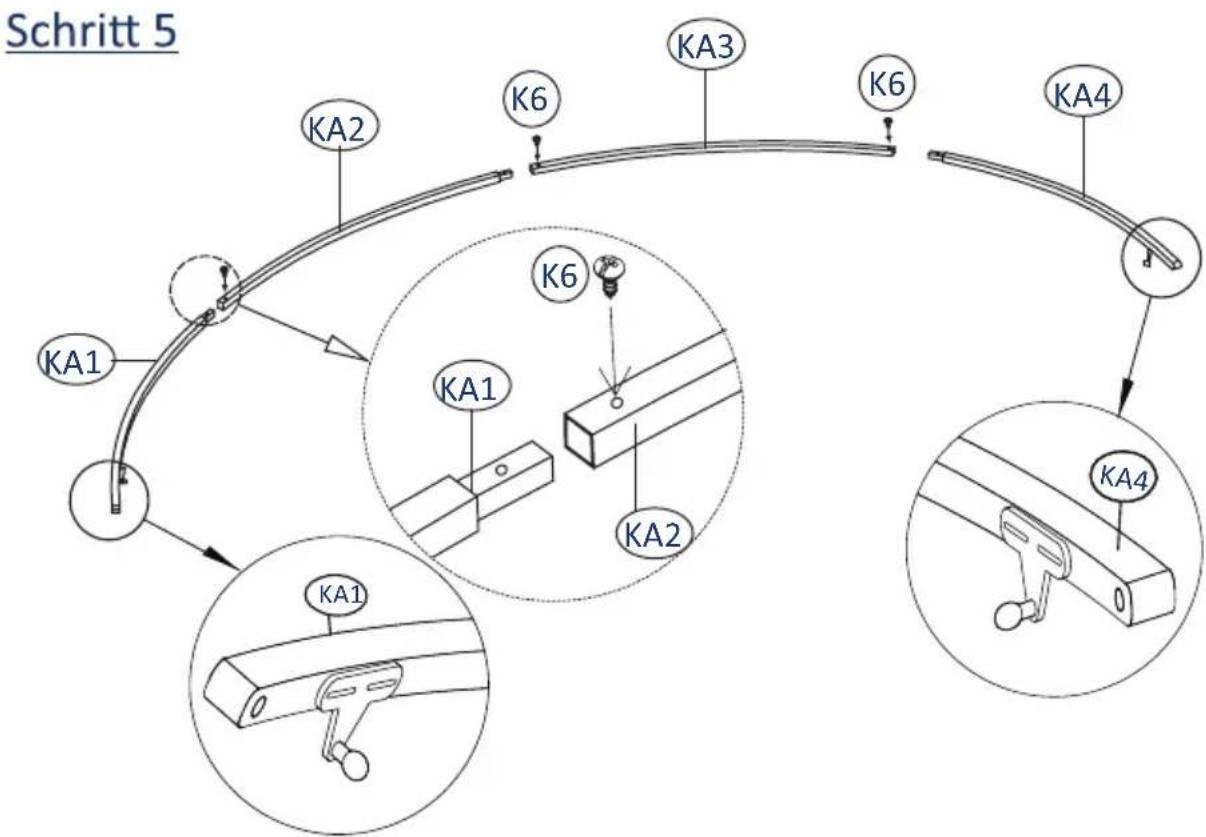
text_image
Schritt 5 KA2 K6 KA3 K6 KA4 KA1 K6 KA1 KA2 KA4 KA1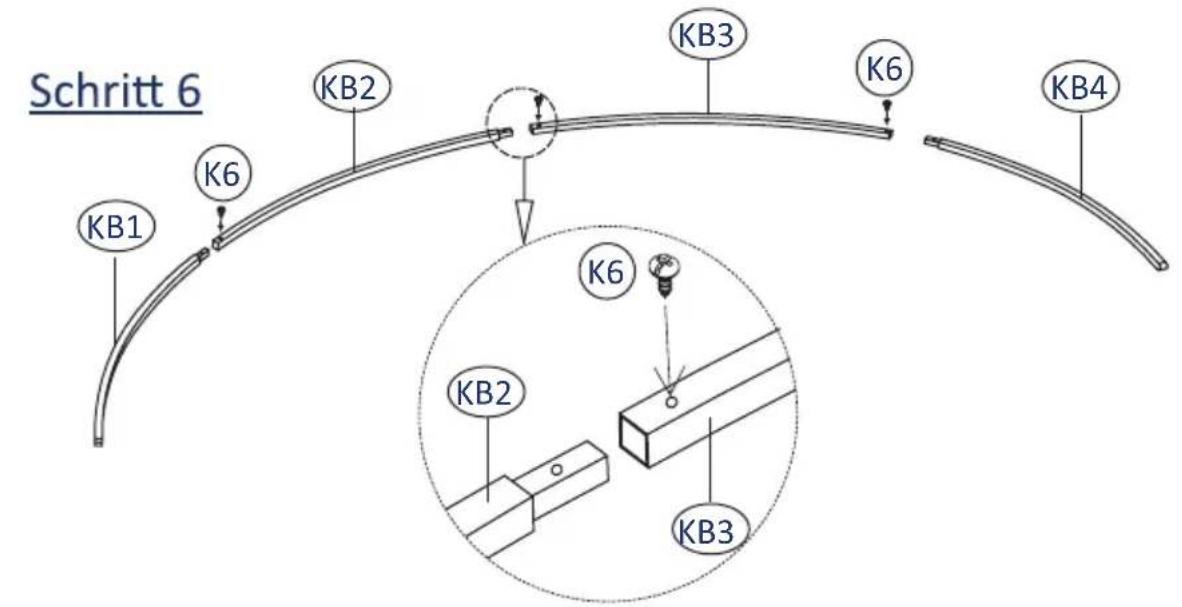
text_image
Schritt 6 KB1 K6 KB2 KB3 K6 KB4 KB2 K6 KB3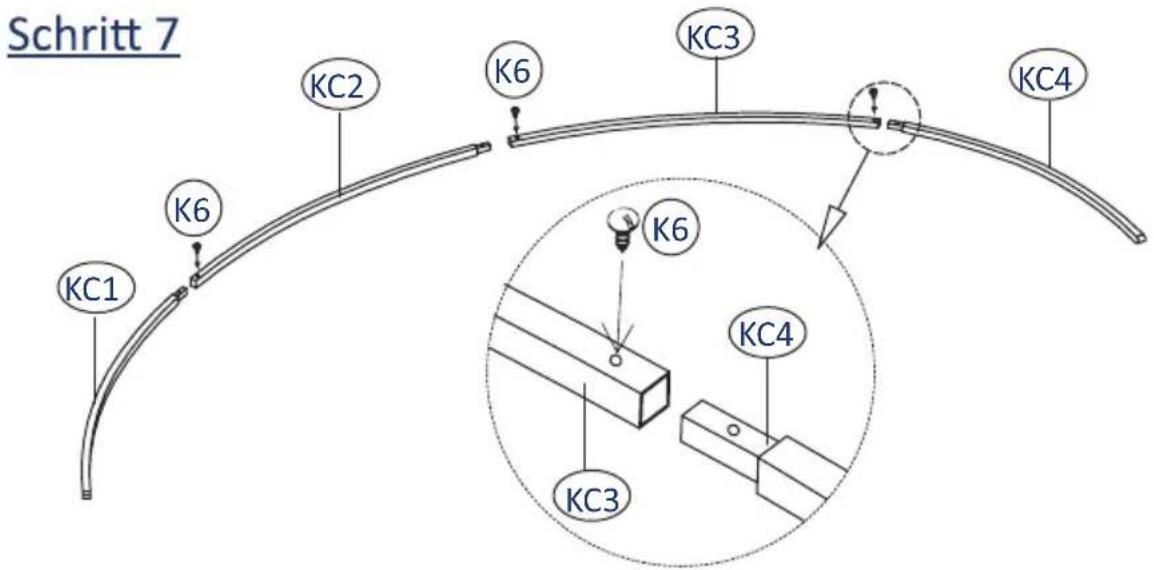
text_image
Schritt 7 KC1 K6 KC2 K6 KC3 KC4 K6 KC4 KC3
text_image
Schritt 8 KD1 K6 KD2 K6 KD3 KD4 K6 KD4 KD3Schritt 9
text_image
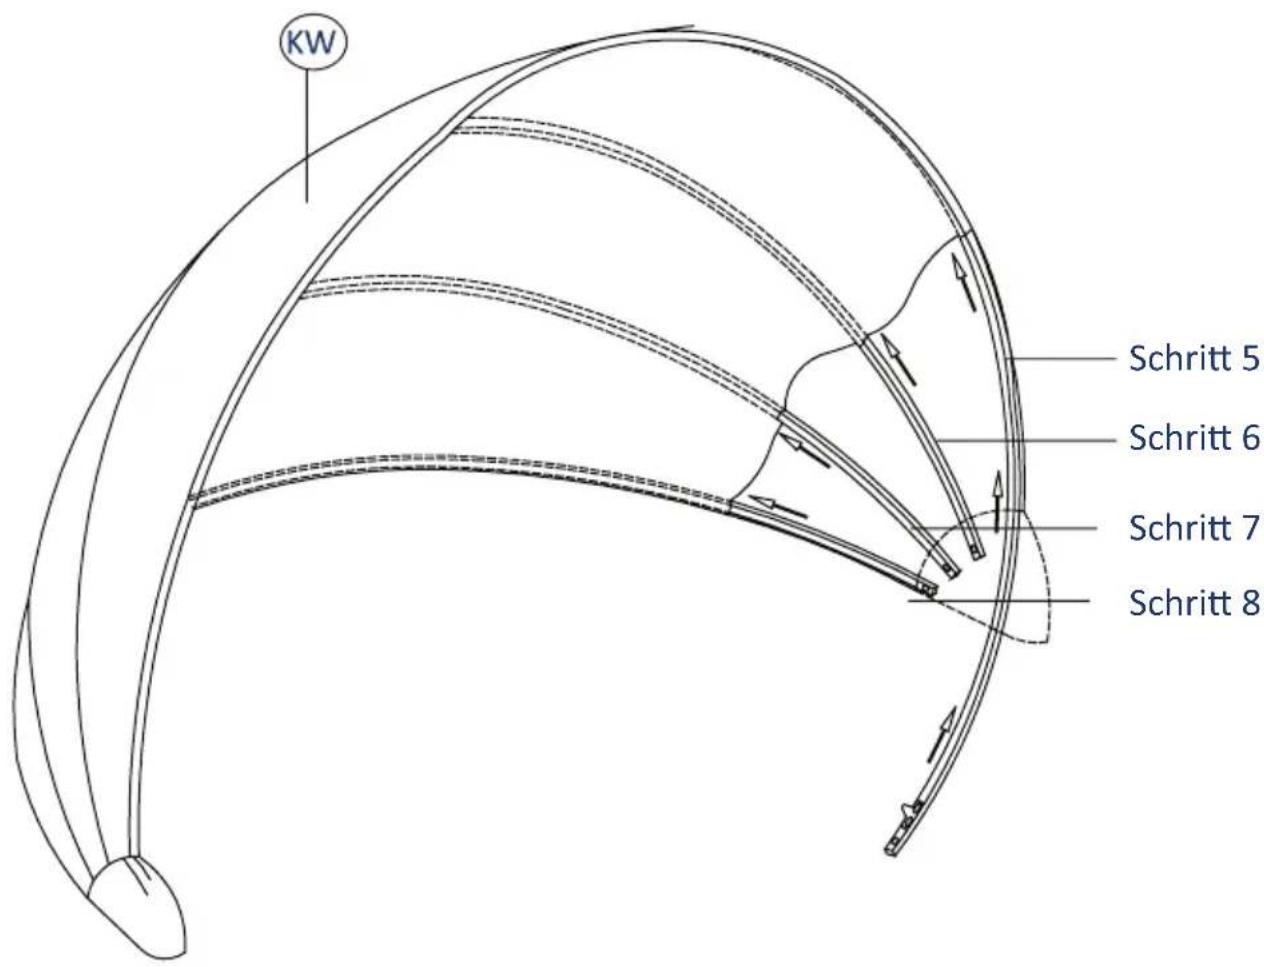
KW Schritt 5 Schritt 6 Schritt 7 Schritt 8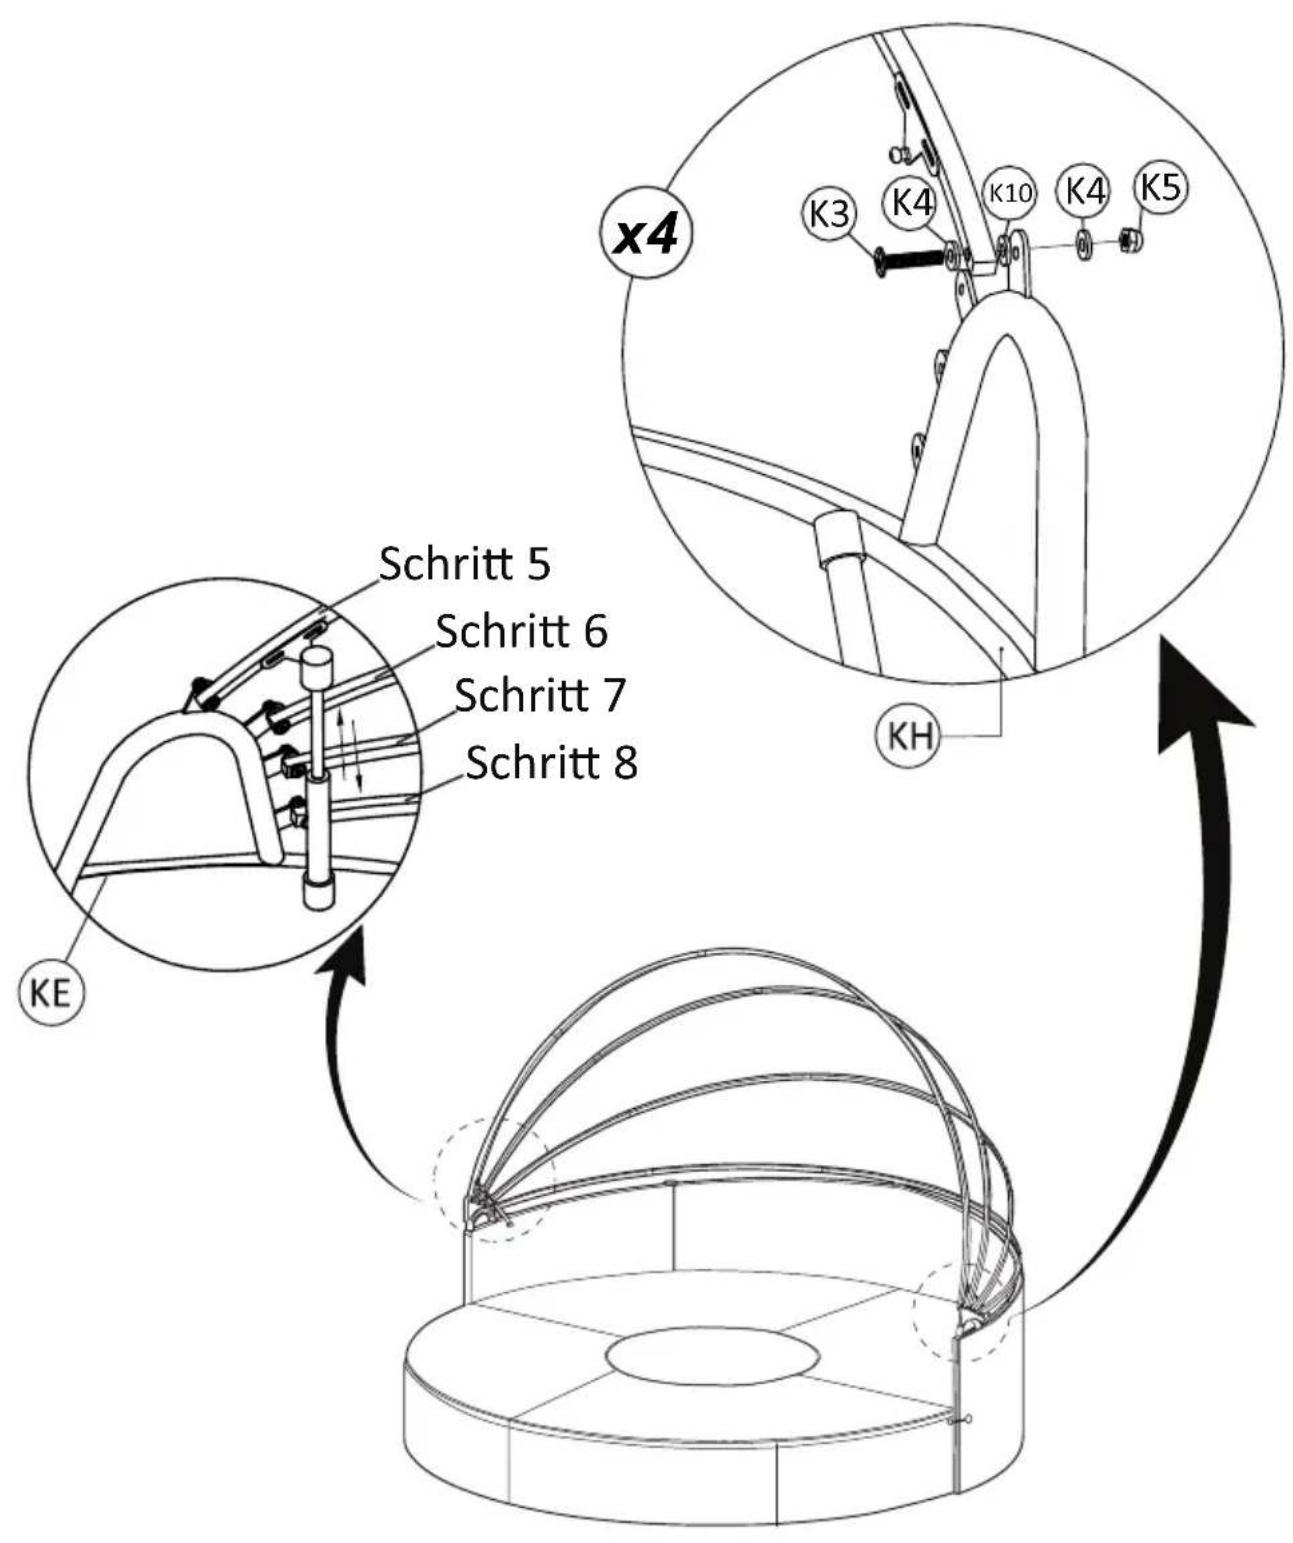
text_image
Schritt 5 Schritt 6 Schritt 7 Schritt 8 KE x4 K3 K4 K10 K4 K5 KH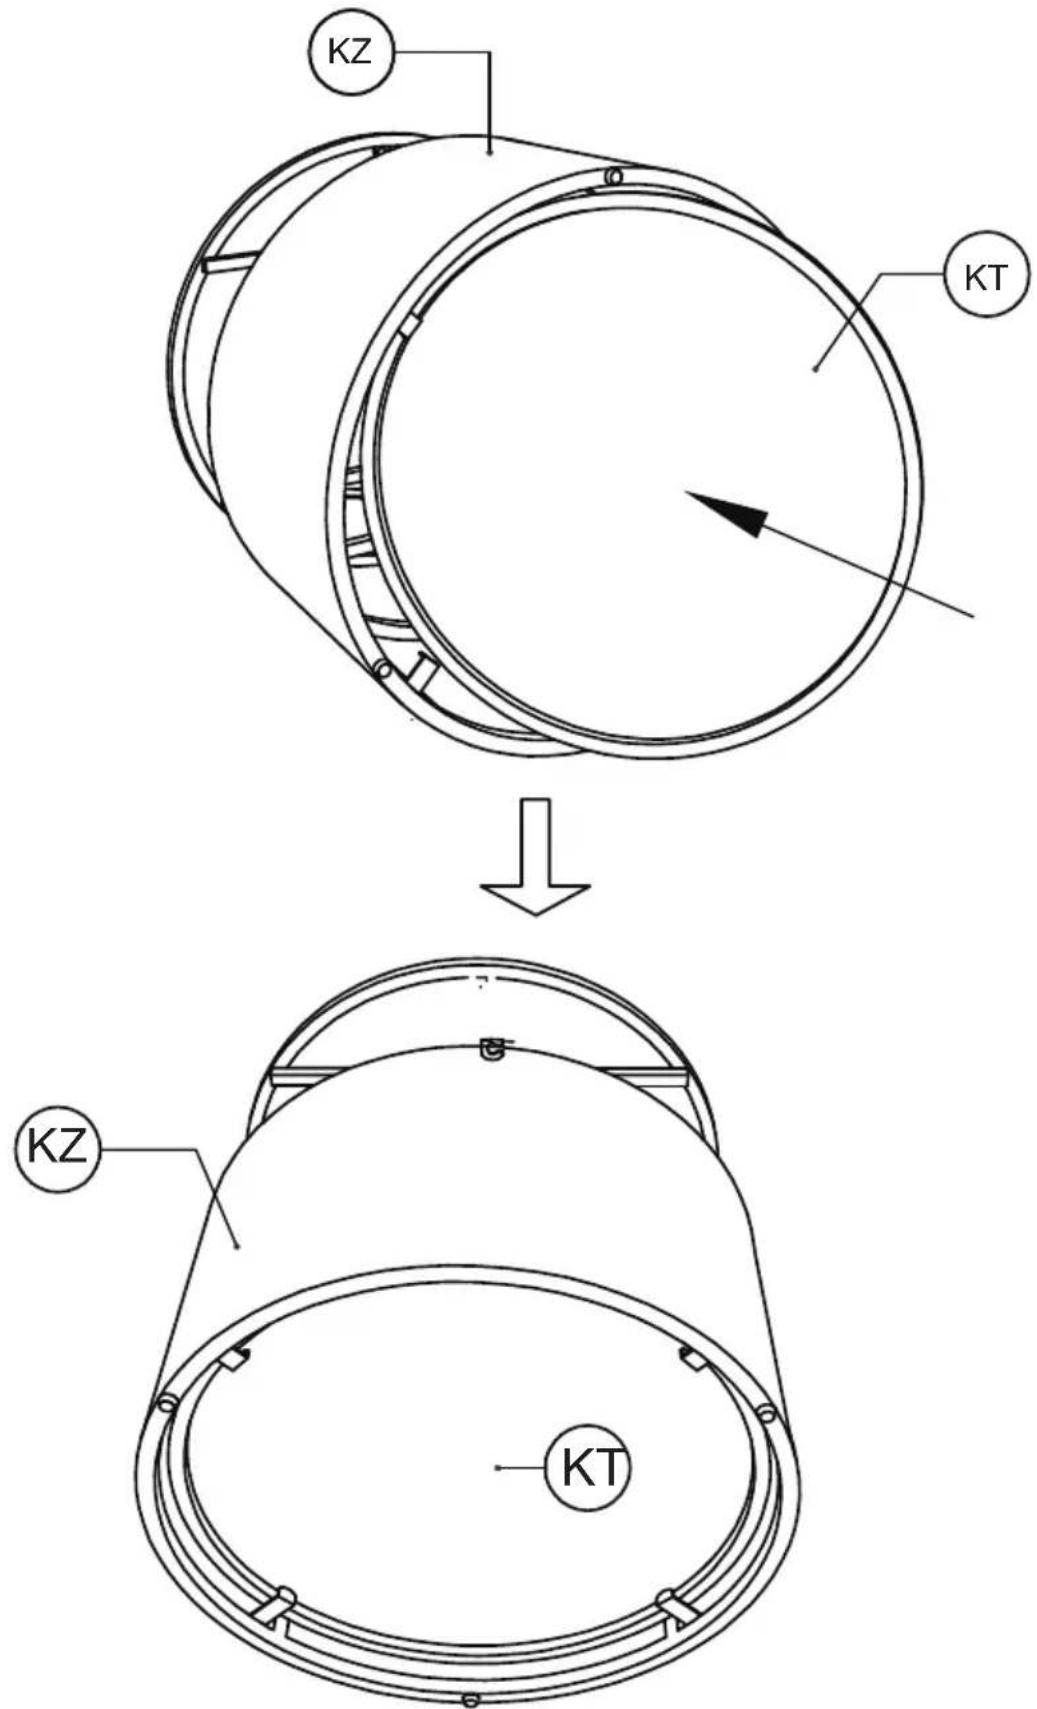
text_image
KZ KT KZ KT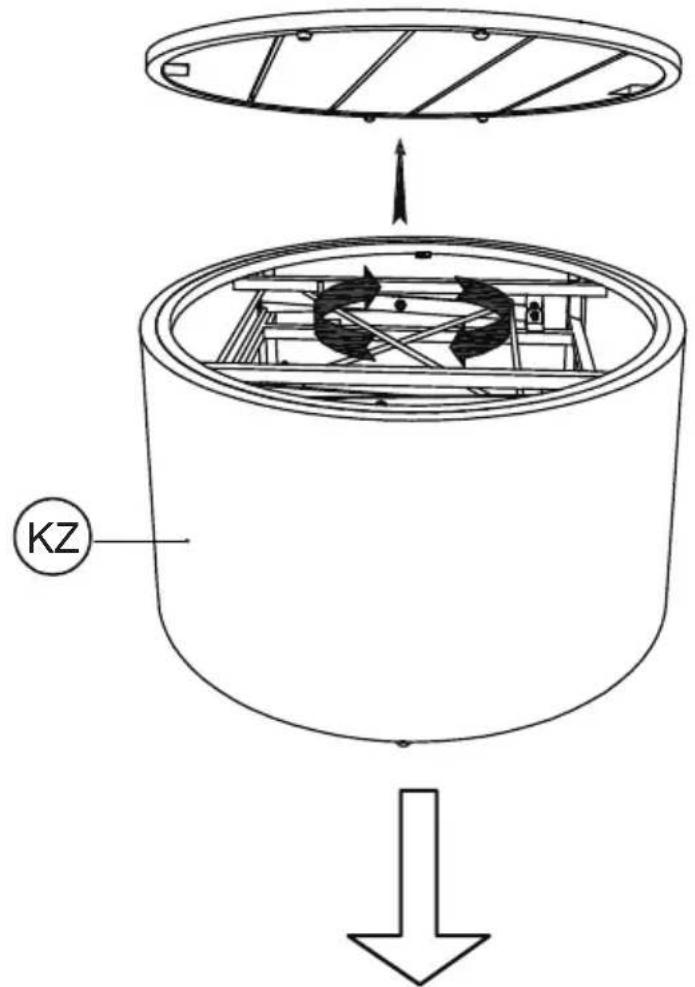
text_image
KZ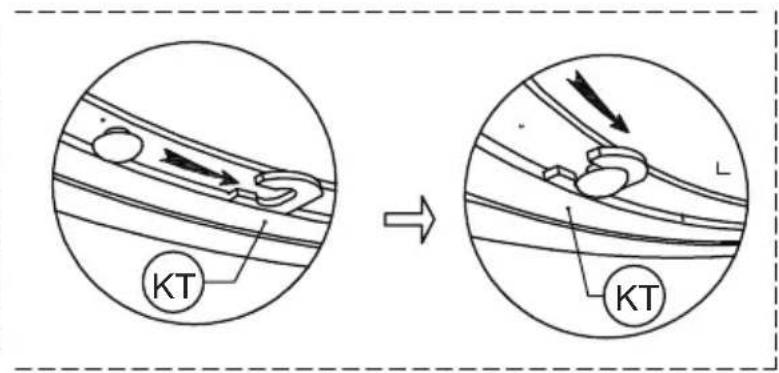
text_image
KT KT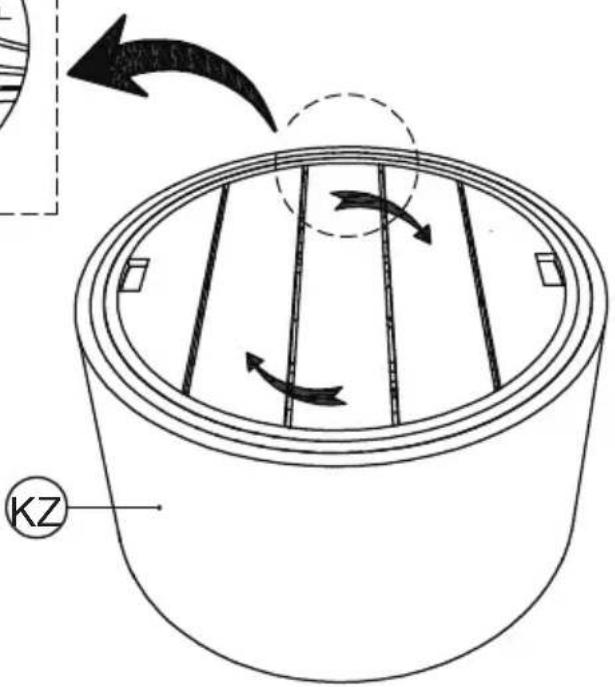
text_image
KZ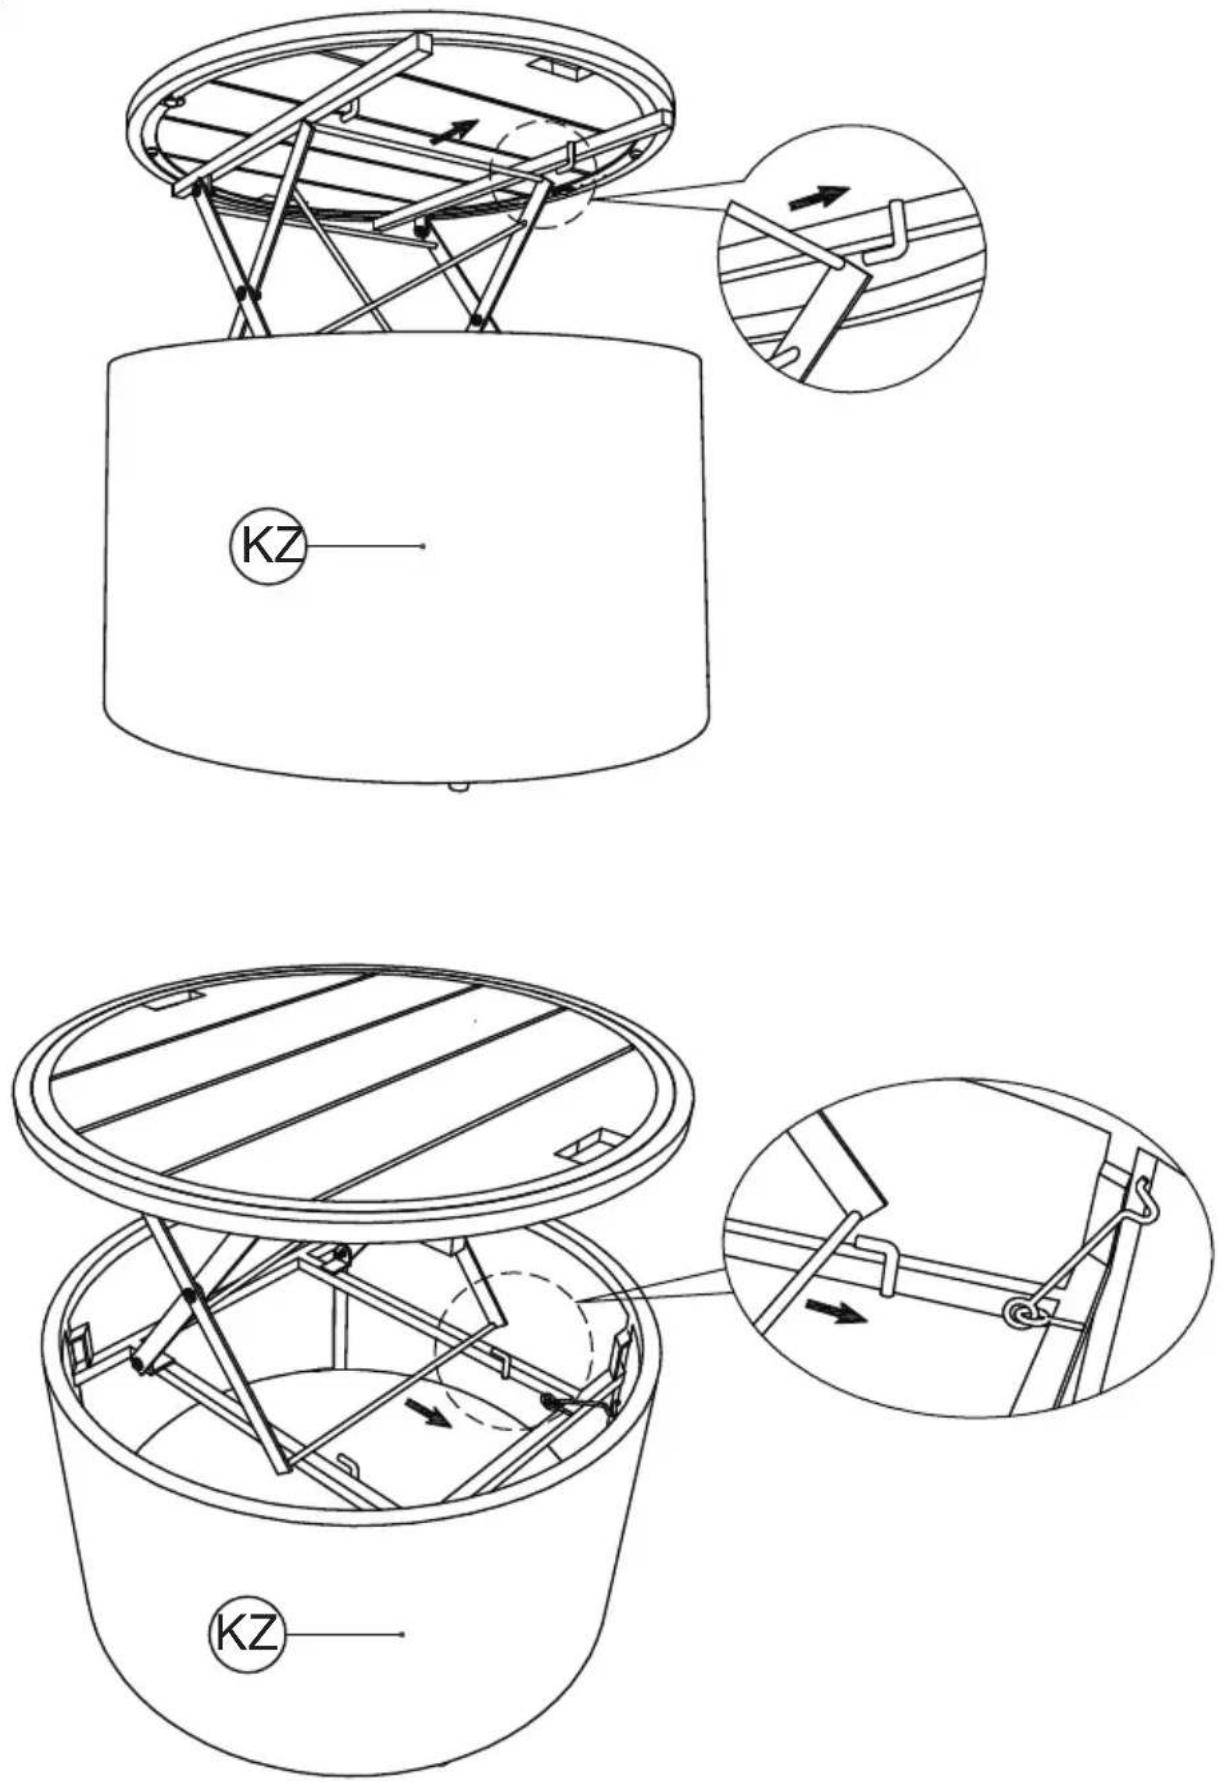
text_image
KZ KZ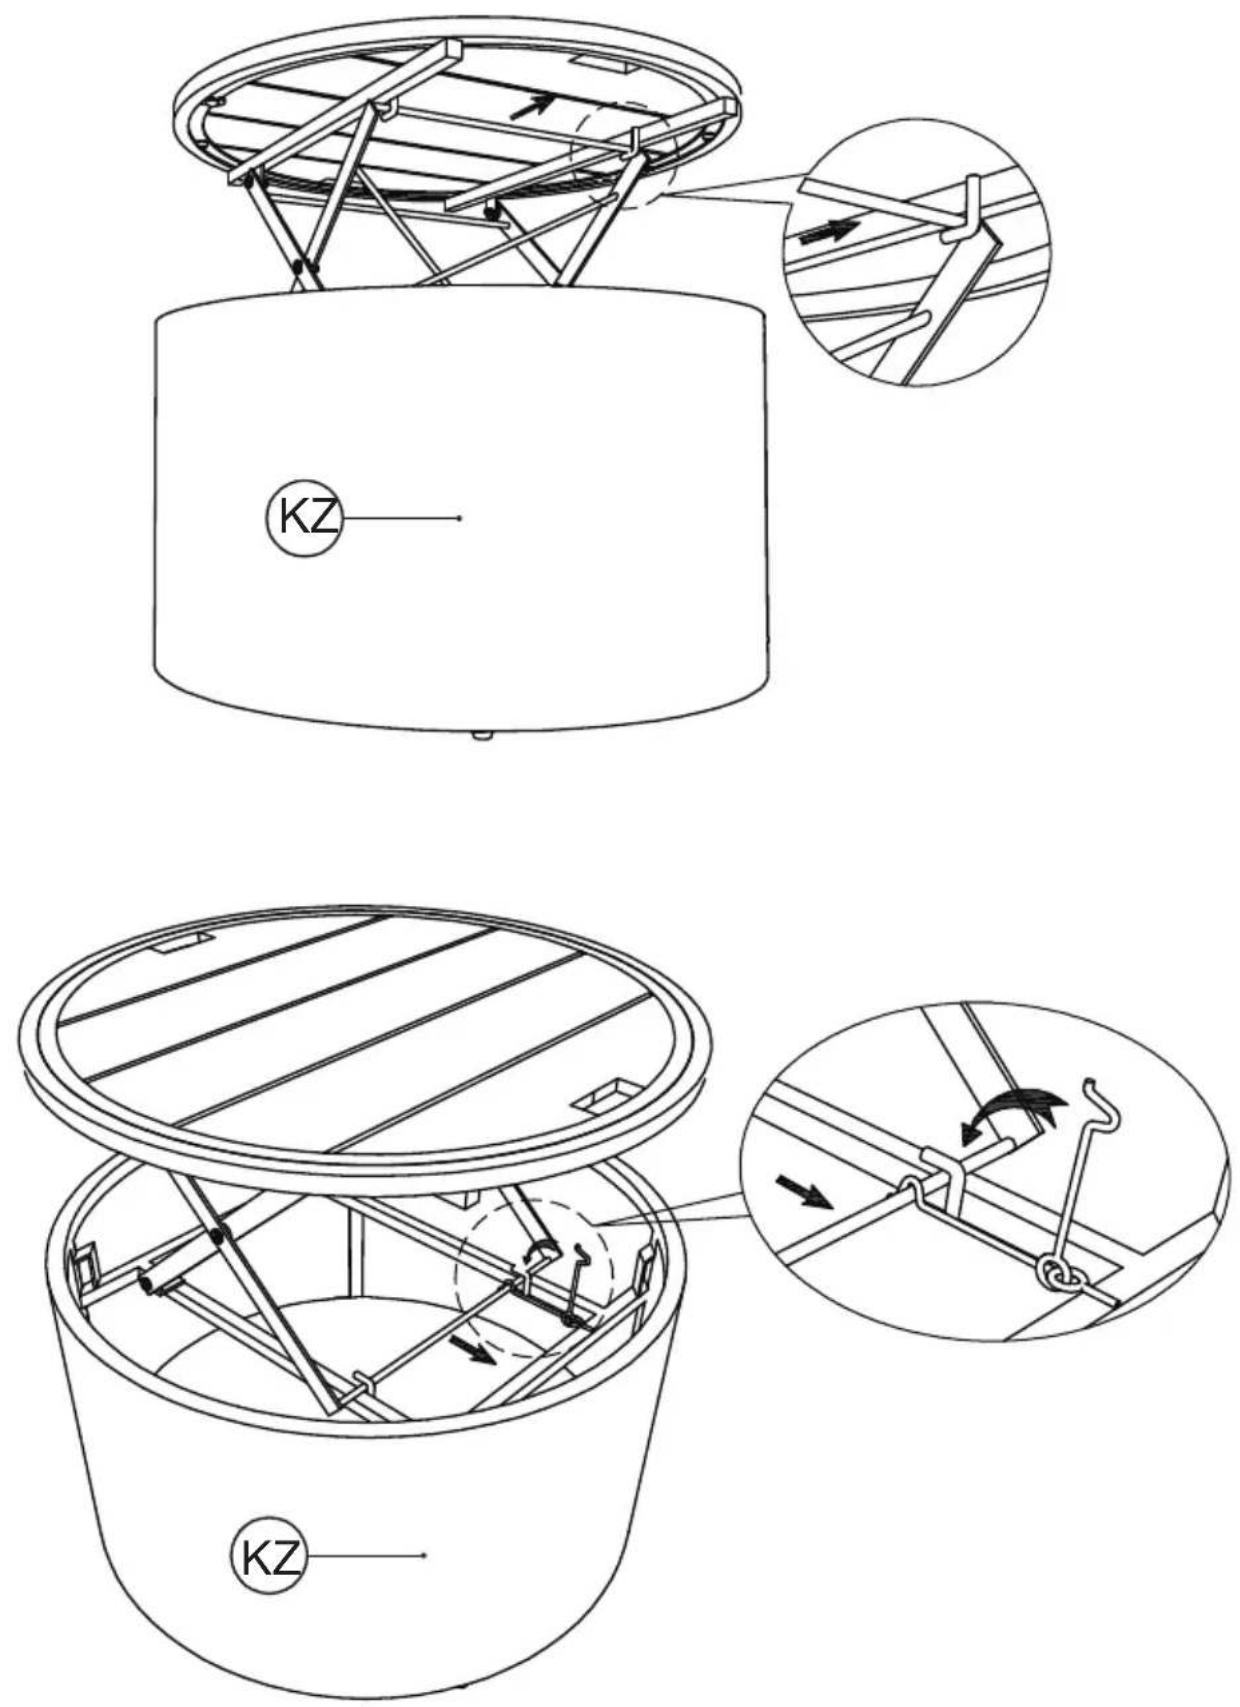
text_image
KZ KZ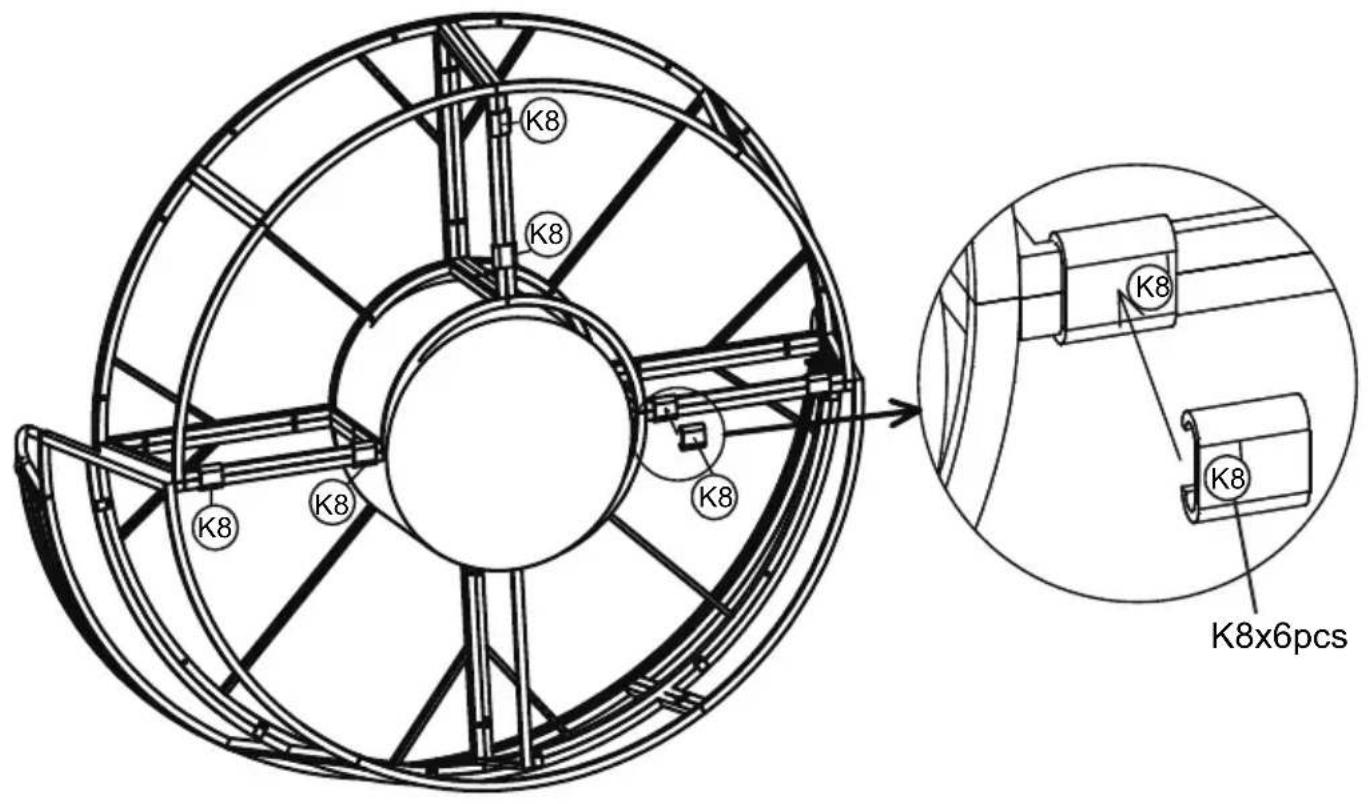
text_image
K8 K8 K8 K8 K8x6pcsEntsorgung:
Once item end-of-life, please dispose valuable raw materials for a proper recycling. If you are not sure how to handle it in a correct way please contact your local disposal or recycling centers for advice.