
LT-65VA8035 - Television JVC - Free user manual and instructions
Find the device manual for free LT-65VA8035 JVC in PDF.
| Product type | 4K Ultra HD LED TV |
| Brand | JVC |
| Model | LT-65VA8035 |
| Screen size | 65 inches (165 cm) |
| Resolution | 3840 x 2160 (4K Ultra HD) |
| HDR technology | HDR10, HLG, Dolby Vision |
| Power supply | 220-240 V AC, 50 Hz |
| Typical power consumption | 180 W |
| Standby power consumption | < 0.5 W |
| Dimensions with stand (W x H x D) | 1462 x 905 x 280 mm |
| Dimensions without stand (W x H x D) | 1462 x 854 x 74 mm |
| Weight with stand | 22.5 kg |
| Weight without stand | 22.0 kg |
| Operating system | Android TV |
| Wireless connectivity | Wi-Fi (2.4 & 5 GHz), Bluetooth 4.2 |
| HDMI connectors | 3 x HDMI 2.0a |
| USB connectors | 2 x USB 2.0 |
| Network connector | 1 x Ethernet RJ45 |
| Smart functions | Google Cast, Netflix, YouTube, HbbTV, CI+, USB recording |
| Voice assistant | Google Assistant (via remote control) |
| Remote control batteries | 2 x AAA (1.5 V) |
| Operating temperature | 5 °C to 35 °C |
| Operating humidity | 20 % to 80 % (non-condensing) |
Frequently Asked Questions - LT-65VA8035 JVC
User questions about LT-65VA8035 JVC
0 question about this device. Answer the ones you know or ask your own.
Ask a new question about this device
Download the instructions for your Television in PDF format for free! Find your manual LT-65VA8035 - JVC and take your electronic device back in hand. On this page are published all the documents necessary for the use of your device. LT-65VA8035 by JVC.
USER MANUAL LT-65VA8035 JVC
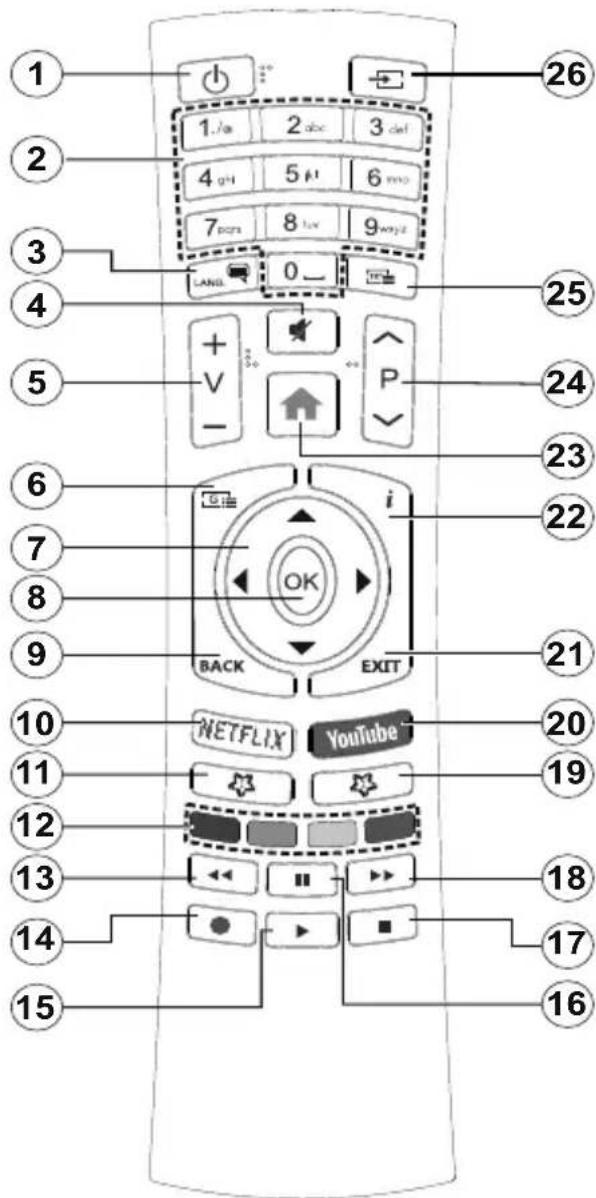
① Inserting the batteries into the remote
The remote may have a screw that secures the battery compartment cover onto the remote control (or this may be in a separate bag). Then remove the battery compartment cover to reveal the battery compartment. Insert two 1.5V size AAA batteries. Make sure the (+) and (-) signs match (observing correct polarity). Do not mix old and new batteries. Replace only with same or equivalent type. Place the cover back on and refit the screw.
-or-
Remove the screw that secure the battery compartment cover on the back side of the remote control first. Lift the cover gently. Insert two 1.5V - size AAA batteries. Make sure the (+) and (-) signs match (observe correct polarity). Do not mix old and new batteries. Replace only with same or equivalent type. Place the cover back on. Then screw the cover back on again.
-or-
Remove the back cover to reveal the battery compartment. You need to do the followings in order to do that:
- Place the tip of a pen or some other pointed object in the hole above the cover and press it down.
- Then press firmly on the cover and slide in the direction of the arrow.
Insert two 1.5V - size AAA batteries. Make sure the (+) and (-) signs match (observe correct polarity). Do not mix old and new batteries. Replace only with same or equivalent type. Place the cover back on.
② Connections
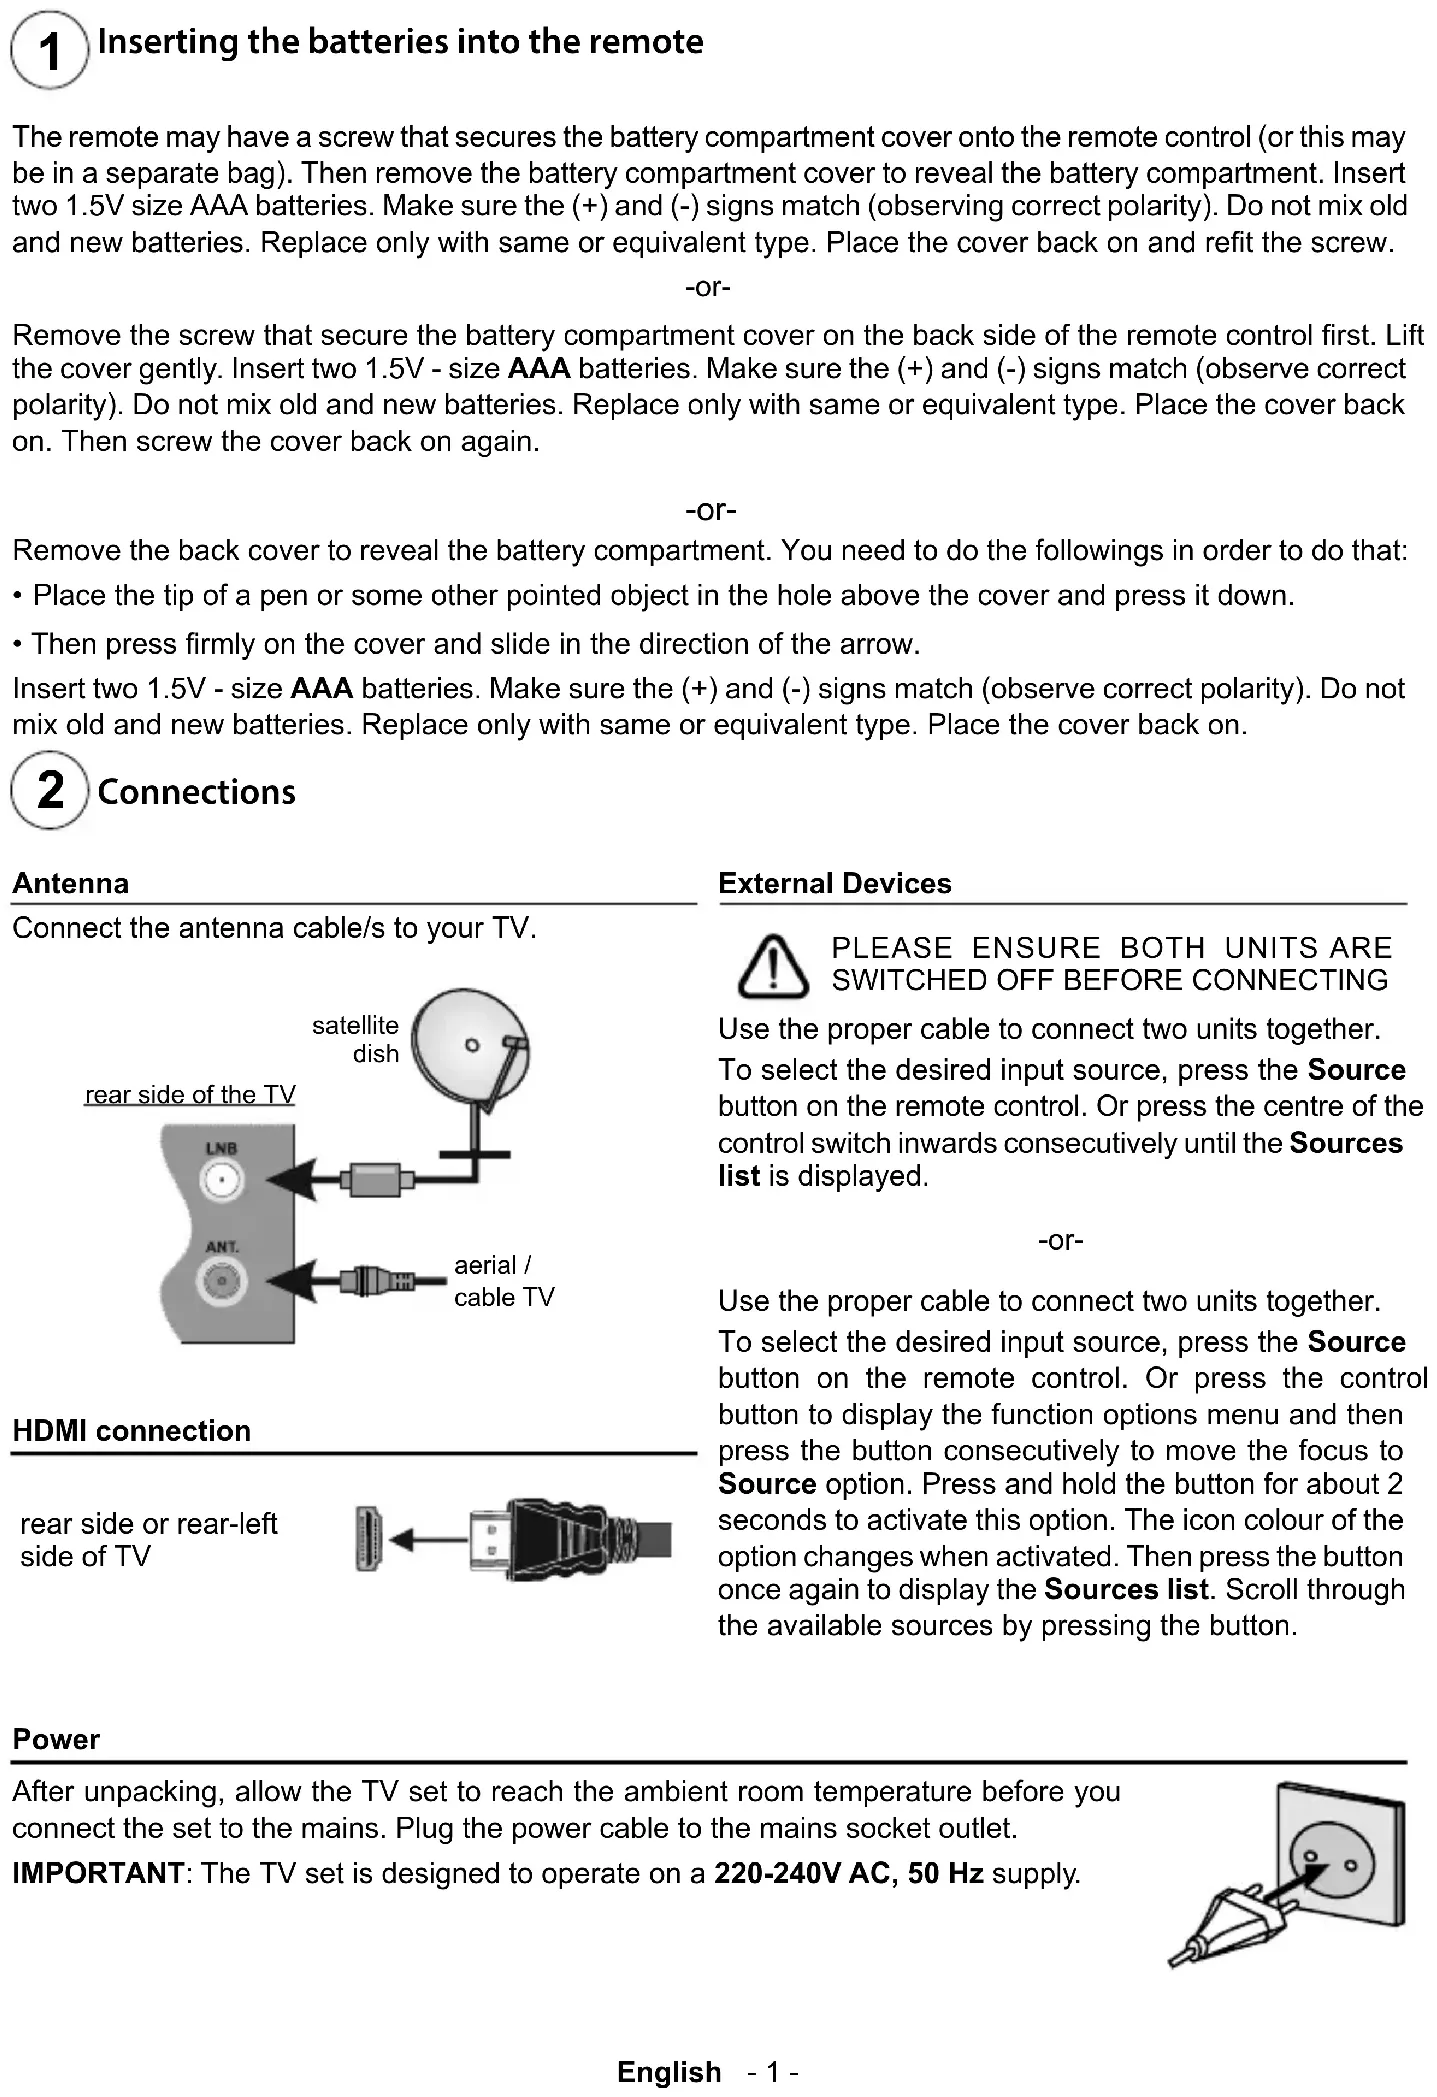
Antenna
Connect the antenna cable/s to your TV.
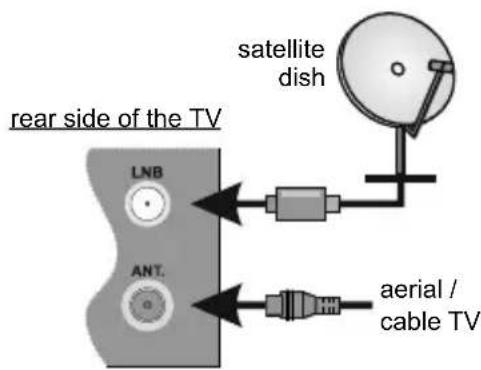
HDMI connection
rear side or rear-left side of TV
External Devices
PLEASE ENSURE BOTH UNITS ARE SWITCHED OFF BEFORE CONNECTING
Use the proper cable to connect two units together. To select the desired input source, press the Source button on the remote control. Or press the centre of the control switch inwards consecutively until the Sources list is displayed.
-or-
Use the proper cable to connect two units together. To select the desired input source, press the Source button on the remote control. Or press the control button to display the function options menu and then press the button consecutively to move the focus to Source option. Press and hold the button for about 2 seconds to activate this option. The icon colour of the option changes when activated. Then press the button once again to display the Sources list. Scroll through the available sources by pressing the button.
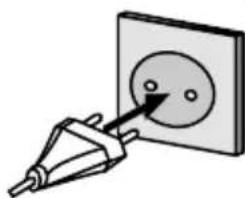
Power
After unpacking, allow the TV set to reach the ambient room temperature before you connect the set to the mains. Plug the power cable to the mains socket outlet.
IMPORTANT: The TV set is designed to operate on a 220-240V AC, 50 Hz supply.
natural_image
Illustration of a power plug inserted into a square socket with a circular component (no text or symbols)
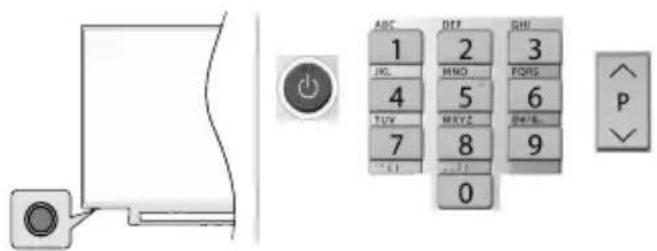
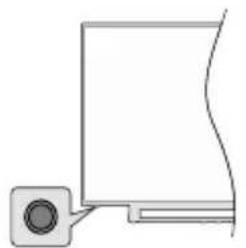
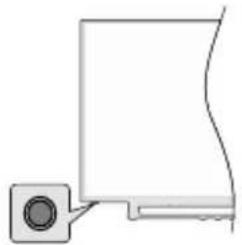
Switching on the TV
In order to turn the TV on from standby mode:
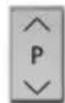
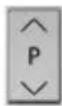
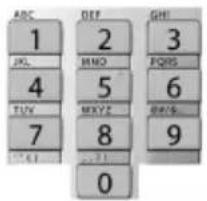
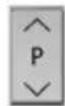
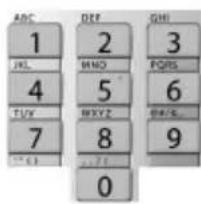
- Press the Standby button, a numeric button or Programme +/- button on the remote control
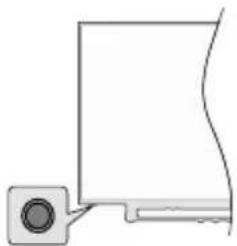
- Press the centre of the control switch inwards, located at the rear left hand side of the TV
-or-

In order to turn the TV on from standby mode:
- Press the Standby button, a numeric button or Programme +/- button on the remote control
- Press the control button on the TV

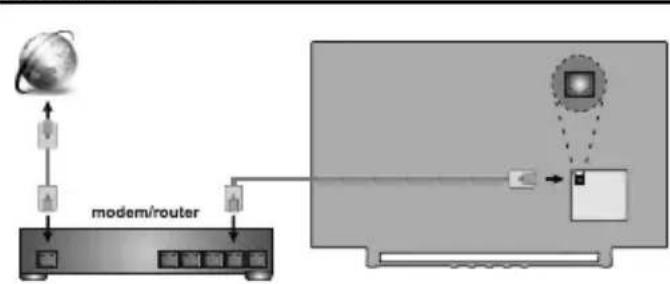
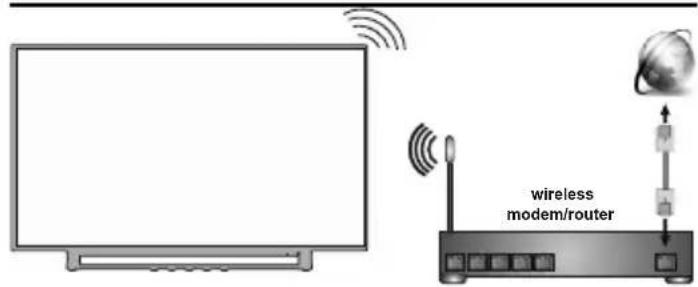
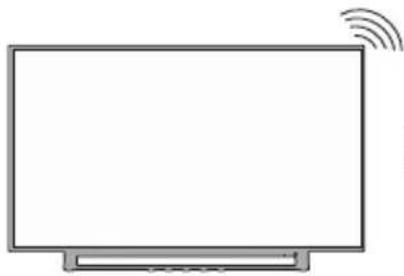
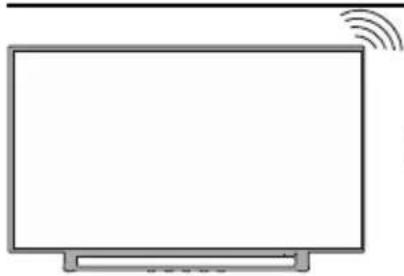
Internet connection
You can set up your TV so that it can access the Internet through your local area network (LAN) using a wired or wireless connection. Refer to full user manual for detailed instructions.
Wired Wireless
flowchart
graph TD
    A["global"] --> B["modem/router"]
    B --> C["monitor with icons"]
    C --> D["Monitor with icon"]
    D --> E["User Interface"]
    style A fill:#f9f,stroke:#333
    style B fill:#ccf,stroke:#333
    style C fill:#cfc,stroke:#333
    style D fill:#fcc,stroke:#333
    style E fill:#ffc,stroke:#333
Note: The figures are for representation only
5
Remote control RC43160
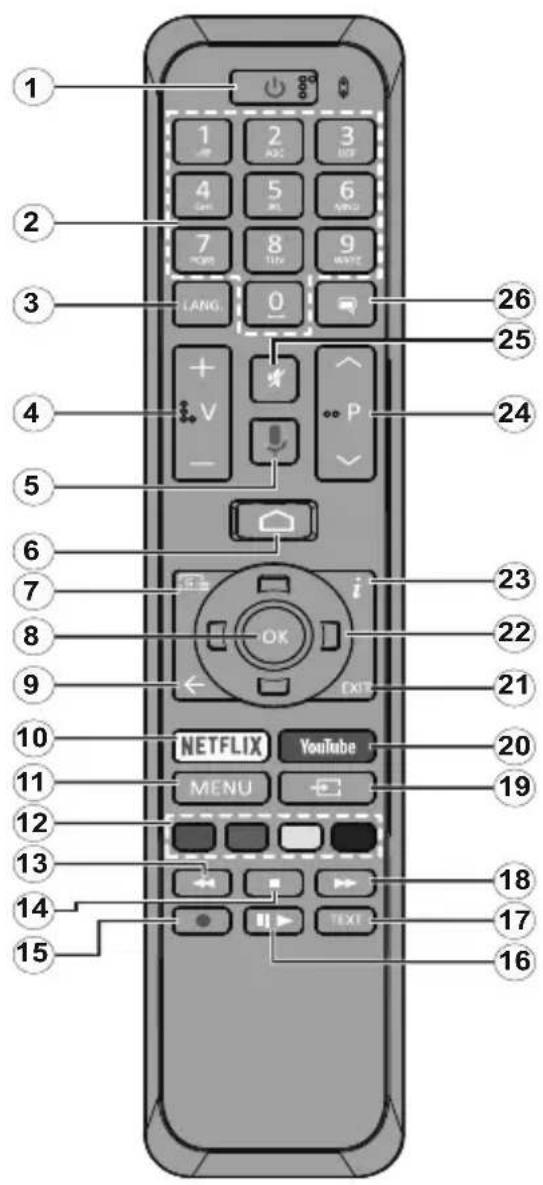
- Standby: Quick Standby / Stanby / On
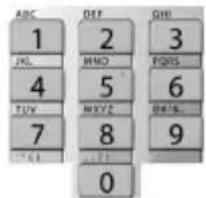
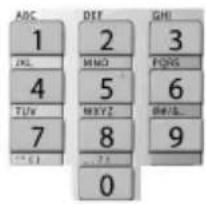
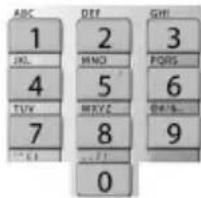
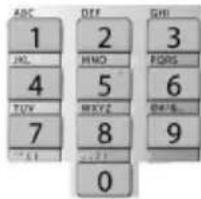
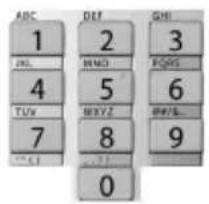
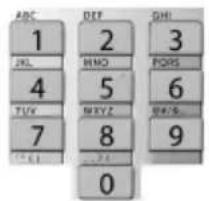
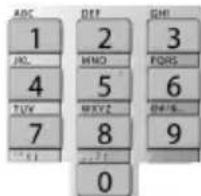
- Numeric buttons: Switches the channel in Live TV mode, enters a number or a letter in the text box on the screen
- Language: Switches among sound modes (analogue TV), displays and changes audio language (digital TV, where available)
- Volume +/-
- Microphone: Activates the microphone on the remote
- Home: Opens the Home Screen
- Guide: Displays the electronic programme guide in Live TV mode
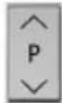
- OK: Confirms selections, enters to sub-menus, views channel list (in Live TV mode)
- Back/Return: Returns to previous menu screen, goes one step back, closes open windows, closes teletext (in Live TV-Teletext mode)
- Netflix: Launches the Netflix application
- Menu: Displays Live TV Settings menu in Live TV mode
- Coloured Buttons: Follow the on-screen instructions for coloured button functions
- Rewind: Moves frames backwards in media such as movies
- Stop: Stops the media being played
- Record: Records programmes in Live TV mode(**)
- Pause: Pauses the media being played, starts timeshift recording in Live TV mode(**) Play: Starts to play selected media
- Text: Opens and closes teletext (where available in Live TV mode)
- Fast forward: Moves frames forward in media such as movies
- Source: Shows all available broadcast and content sources in Live TV mode
- YouTube: Launches the YouTube application
- Exit: Closes and exits from displayed Live TV Settings menus, closes the Home Screen
- Directional buttons: Navigates menus, setting options, moves the focus or cursor etc., sets record time and displays the subpages in Live TV-Teletext mode when pressed Right or Left. Follow the on-screen instructions.
- Info: Displays information about on-screen content
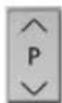
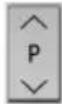
- Programme +/-: Increases/Decreases channel number in Live TV mode
- Mute: Completely turns off the volume of the TV
- Subtitles: Turns subtitles on and off (where available)
(**) If this feature is supported by your TV.

- Standby: Quick Standby / Standby / On
- Numeric buttons: Switches the channel in Live TV mode, enters a number or a letter in the text box on the screen
- Language: Switches among sound modes (analogue TV), displays and changes audio language (digital TV, where available)
- Home: Opens the Home Screen
- Mute: Completely turns off the volume of the TV
- Volume +/-
- Guide: Displays the electronic programme guide in Live TV mode
- Directional buttons: Navigates menus, setting options, moves the focus or cursor etc., sets record time and displays the subpages in Live TV-Teletext mode when pressed Right or Left. Follow the on-screen instructions.
- OK: Confirms selections, enters sub-menus, views channel list (in Live TV mode)
- Back/Return: Returns to previous menu screen, goes one step back, closes open windows, closes teletext (in Live TV-Teletext mode)
- Netflix: Launches the Netflix application
- Menu: Displays Live TV Settings menu in Live TV mode, displays available setting options such as sound and picture
- Stop: Stops the media being played
- Rewind: Moves frames backwards in media such as movies
- Record: Records programmes in Live TV mode(**)
- Coloured Buttons: Follow the on-screen instructions for coloured button functions
- Text: Opens and closes teletext (where available in Live TV mode)
- Pause: Pauses the media being played, starts timeshift recording in Live TV mode(**) Play: Starts to play selected media
- Fast forward: Moves frames forward in media such as movies
- MyButton1: Opens the picture mode setting menu on available sources
- YouTube: Launches the YouTube application
- Exit: Closes and exits from displayed Live TV Settings menus, closes running applications and/or the Home Screen and switches to last set source
- Info: Displays information about on-screen content
- Source: Shows all available broadcast and content sources, closes the Home Screen and switches to last set source
- Programme +/-: Increases/Decreases channel number in Live TV mode
- Subtitles: Turns subtitles on and off (where available)
(**) If this feature is supported by your TV.
5
Remote control RC4390
- Standby: Quick Standby / Standby / On
- Numeric buttons: Switches the channel in Live TV mode, enters a number or a letter in the text box on the screen
- Language: Switches among sound modes (analogue TV), displays and changes audio language (digital TV, where available)
- Mute: Completely turns off the volume of the TV
- Volume +/-
- Menu: Displays Live TV Settings menu in Live TV mode, displays available setting options such as sound and picture
- Directional buttons: Navigates menus, setting options, moves the focus or cursor etc., sets record time and displays the subpages in Live TV-Teletext mode when pressed Right or Left. Follow the on-screen instructions.
- OK: Confirms selections, enters sub-menus, views channel list (in Live TV mode)
- Back/Return: Returns to previous menu screen, goes one step back, closes open windows, closes teletext (in Live TV-Teletext mode)
- Netflix: Launches the Netflix application
- MyButton1: Opens the picture mode setting menu on available sources
- Coloured Buttons: Follow the on-screen instructions for coloured button functions
- Rewind: Moves frames backwards in media such as movies
- Record: Records programmes in Live TV mode(**)
- Play/Pause button (*)
- Play/Pause button (*)
- Stop: Stops the media being played
- Fast forward: Moves frames forward in media such as movies
- Guide: Displays the electronic programme guide in Live TV mode
- YouTube: Launches the YouTube application
- Exit: Closes and exits from displayed Live TV Settings menus, closes running applications and/or the Home Screen and switches to last set source
- Info: Displays information about on-screen content
- Home: Opens the Home Screen
- Programme +/-: Increases/Decreases channel number in Live TV mode
- Text: Opens and closes teletext (where available in Live TV mode)
- Source: Shows all available broadcast and content sources, closes the Home Screen and switches to last set source
(*) Play - Starts to play selected media
Pause - Pauses the media being played, starts timeshift recording in Live TV mode(**)
(**) If this feature is supported by your TV.
When turned on for the first time, a search for accessories will be performed before the initial setup starts. Follow the on-screen informations to pair your remote control and other wireless accessories with your TV. To pair your remote press and hold the Source button for about 5 seconds. Press Exit to end adding accessories and start the setup. After that welcome screen will be displayed. Select your language and press OK. Follow the on screen instructions to set your TV and install channels. The installation wizard will guide you through the setup process. You can perform initial setup anytime using the Reset option in the Settings>Device Preferences menu. You can access the Settings menu from the Home Screen or from the TV options menu in Live TV mode.
Accessories Included
- Remote Control
- Batteries: 2 x AAA
- Quick Start Guide
- Product Fiche
Feature Overview
Multi Media Player
Browse the media content stored on USB devices that are connected to your TV or on mobile devices that are connected to the same network as your TV using the MMP app
Common Interface
Decode encrypted digital TV channels with a Conditional Access Module(CAM) and a card provided by a digital TV service operator
USB Recording(\*\*)
Record your favourite TV programmes
Electronic Programme Guide
Display the scheduled digital TV programmes
CEC
Control basic functions of the connected HDMI-CEC compatible audio/video devices with the remote control of the TV
HbbTV
Access to HbbTV services (services are dependant on broadcast)
Apps
Access the applications installed on your TV, add more from the market
Google Cast
With the built-in Google Cast technology you can cast the content from your mobile device straight to your TV.
Voice Search(\*\*)
You can start a voice search using your remote's built-in microphone
Bluetooth ^® (\*\*)
Connect audio devices or remote controller wirelessly to your TV.
(**) Limited Models Only
High Dynamic Range (HDR) / Hybrid Log-Gamma (HLG)
Using this feature the TV can reproduce greater dynamic range of luminosity by capturing and then combining several different exposures. HDR/HLG promises better picture quality thanks to brighter, more realistic highlights, more realistic colour and other improvements. It delivers the look that filmmakers intended to achieve, showing the hidden areas of dark shadows and sunlight with full clarity, colour and detail. HDR/HLG contents are supported via native and market applications, HDMI, USB inputs and over DVB-S broadcasts. Set the related HDMI source input as EDID 2.0 or Auto EDID from the HDMI EDID Version option in the Settings>Device Preferences>Inputs menu in order to watch HDR/HLG content, if the HDR/HLG content is received through an HDMI input. The source device should also be at least HDMI 2.0a compatible in this case.
Dolby Vision
Dolby Vision™ delivers a dramatic visual experience, astonishing brightness, exceptional contrast, and vivid colour, that brings entertainment to life. It achieves this stunning image quality by combining HDR and wide colour gamut imaging technologies. By increasing the brightness of the original signal and using a higher dynamic colour and contrast range, Dolby Vision presents amazing true-to-life images with stunning detail that other post-processing technologies in the TV aren't able to produce. Dolby Vision is supported via native and market applications, HDMI and USB inputs. Set the related HDMI source input as EDID 2.0 or Auto EDID from the HDMI EDID Version option in the Settings>Device Preferences>Inputs menu in order to watch Dolby Vision content, if the Dolby Vision content is received through an HDMI input. The source device should also be at least HDMI 2.0a compatible in this case. In the Settings>Device Preferences>Picture>Picture Mode menu two predefined picture modes will be available if Dolby Vision content is detected: Dolby Vision Bright and Dolby Vision Dark. Both allow the user to experience the content in the way the creator originally intended with different ambient lighting conditions. While watching Dolby
Vision Content via an internet streaming application you will not be able to access the Picture menu and set the Picture Mode.
Safety Information
In extreme weather (storms, lightning) and long inactivity periods (going on holiday) disconnect the TV set from the mains.
The mains plug is used to disconnect TV set from the mains and therefore it must remain readily operable. If the TV set is not disconnected electrically from the mains, the device will still draw power for all situations even if the TV is in standby mode or switched off.
Note: Follow the on screen instructions for operating the related features.
IMPORTANT - Please read these instructions fully before installing or operating
WARNING: This device is intended to be used by persons (including children) who are capable / experienced of operating such a device unsupervised, unless they have been given supervision or instruction concerning the use of the device by a person responsible for their safety.
- Use this TV set at an altitude of less than 2000 meters above the sea level, in dry locations and in regions with moderate or tropical climates.
- The TV set is intended for household and similar general use but may also be used in public places.
- For ventilation purposes, leave at least 5cm of free space around the TV.
- The ventilation should not be impeded by covering or blocking the ventilation openings with items, such as newspapers, table-cloths, curtains, etc.
- The power cord plug should be easily accessible. Do not place the TV, furniture, etc. on the power cord. A damaged power cord/plug can cause fire or give you an electric shock. Handle the power cord by the plug, do not unplug the TV by pulling the power cord. Never touch the power cord/plug with wet hands as this could cause a short circuit or electric shock. Never make a knot in the power cord or tie it with other cords. When damaged it must be replaced, this should only be done by qualified personnel.
-
Do not expose the TV to dripping or splashing of liquids and do not place objects filled with liquids, such as vases, cups, etc. on or over the TV (e.g., on shelves above the unit).
-
Do not expose the TV to direct sunlight or do not place open flames such as lit candles on the top of or near the TV.
- Do not place any heat sources such as electric heaters, radiators, etc. near the TV set.
- Do not place the TV on the floor and inclined surfaces.
- To avoid danger of suffocation, keep plastic bags out of the reach of the babies, children and domestic animals.
- Carefully attach the stand to the TV. If the stand is provided with screws, tighten the screws firmly to prevent the TV from tilting. Do not over-tighten the screws and mount the stand rubbers properly.
- Do not dispose of the batteries in fire or with hazardous or flammable materials.

WARNING
- Batteries must not be exposed to excessive heat such as sunshine, fire or the like.
- Excessive sound pressure from earphones or headphones can cause hearing loss.
ABOVE ALL - NEVER let anyone, especially children, push or hit the screen, push anything into holes, slots or any other openings in the case.
 | Caution | Serious injury or death risk |
 | Risk of electric shock | Dangerous voltage risk |
 | Maintenance | Important maintenance component |
Markings on the Product
^0 The following symbols are used on the product as a marker for restrictions and precautions and safety instructions. Each explanation shall be considered where the product bears related marking only. Note such information for security reasons.

Class II Equipment: This appliance is designed in such a way that it does not require a safety connection to electrical earth.

Hazardous Live Terminal: The marked terminal(s) is/are hazardous live under normal operating conditions.

Caution, See Operating Instructions: The marked area(s) contain(s) user replaceable coin or button cell batteries.
Class 1 Laser Product: This product contains Class 1 laser source that is safe under reasonably foreseeable conditions of operation.
WARNING
Do not ingest the battery, Chemical Burn Hazard This product or the accessories supplied with the product may contain a coin/button cell battery. If the coin/button cell battery is swallowed, it can cause severe internal burns in just 2 hours and can lead to death.
Keep new and used batteries away from children. If the battery compartment does not close securely, stop using the product and keep it away from children.
If you think batteries might have been swallowed or placed inside any part of the body, seek immediate medical attention.
A television may fall, causing serious personal injury or death. Many injuries, particularly to children, can be avoided by taking simple precautions such as:
- ALWAYS use cabinets or stands or mounting methods recommended by the manufacturer of the television set.
- ALWAYS use furniture that can safely support the television set.
- ALWAYS ensure the television set is not overhanging the edge of the supporting furniture.
- ALWAYS educate children about the dangers of climbing on furniture to reach the television set or its controls.
- ALWAYS route cords and cables connected to your television so they cannot be tripped over, pulled or grabbed.
- NEVER place a television set in an unstable location.
- NEVER place the television set on tall furniture (for example, cupboards or bookcases) without anchoring both the furniture and the television set to a suitable support.
- NEVER place the television set on cloth or other materials that may be located between the television set and supporting furniture.
- NEVER place items that might tempt children to climb, such as toys and remote controls, on the top of the television or furniture on which the television is placed.
- The equipment is only suitable for mounting at heights ≤ 2 m.
If the existing television set is going to be retained and relocated, the same considerations as above should be applied.
Apparatus connected to the protective earthing of the building installation through the MAINS connection or through other apparatus with a connection to protective earthing – and to a television distribution system using coaxial cable, may in some circumstances create a fire hazard. Connection to a television distribution system has therefore to be provided through a device providing electrical isolation below a certain frequency range (galvanic isolator)
Using the special functions to change the size of the displayed image (i.e. changing the height/width ratio) for the purposes of public display or commercial gain may infringe on copyright laws.
The LCD display panels are manufactured using an extremely high level of precision technology; however, sometimes some parts of the screen may be missing picture elements or have luminous spots. This is not a sign of a malfunction.
The set should be operated only from a 220-240 V AC 50 Hz outlet. Ensure that the television is not standing on the mains lead. Do not cut off the mains plug from this equipment, this incorporates a special Radio Interference Filter, the removal of which will impair its performance. It should only be replaced by a correctly rated and approved type. IF IN DOUBT PLEASE CONSULT A COMPETENT ELECTRICIAN.
WALL MOUNTING WARNINGS
- Read the instructions before mounting your TV on the wall.
- The wall mount kit is optional. You can obtain from your local dealer, if not supplied with your TV.
- Do not install the TV on a ceiling or on an inclined wall.
- Use the specified wall mounting screws and other accessories.
- Tighten the wall mounting screws firmly to prevent the TV from fall. Do not over-tighten the screws.
Figures and illustrations in this user manual are provided for reference only and may differ from the actual product appearance. Product design and specifications may be changed without notice.
Licenses
The terms HDMI and HDMI High-Definition Multimedia Interface, and the HDMI Logo are trademarks or registered trademarks of HDMI Licensing Administrator, Inc. in the United States and other countries.

Dolby, Dolby Vision, Dolby Audio, and the double-D symbol are trademarks of Dolby Laboratories Licensing Corporation. Manufactured under license from Dolby Laboratories. Confidential unpublished works. Copyright © 1992-2020 Dolby Laboratories. All rights reserved.
Dolby Vision
Dolby Audio
Google, Android, Android TV, Chromecast, Google Play and YouTube are trademarks of Google LLC.
For DTS patents, see http://patents.dts.com. Manufactured under license from DTS Licensing Limited. DTS, the Symbol, DTS and the Symbo together, DTS-HD, and the DTS-HD logo are registered trademarks or trademarks of DTS, Inc. in the United States and/or other countries. © DTS, Inc. All Rights Reserved.

dts-HD®
The Bluetooth ^® word mark and logos are registered trademarks owned by the Bluetooth SIG, Inc. and any use of such marks by Vestel Elektronik Sanayi ve Ticaret A.S. is under license. Other trademarks and trade names are those of their respective owners.
DVB is a registered trademark of the DVB Project.
[1] EIA/CEA-861-D compliance covers the transmission of uncompressed digital video with high-bandwidth digital content protection, which is being standardized for reception of high-definition video signals. Because this is an evolving technology, it is possible that some devices may not operate properly with the television.
This product contains technology subject to certain intellectual property rights of Microsoft. Use or distribution of this technology outside of this product is prohibited without the appropriate license(s) from Microsoft.
Content owners use Microsoft PlayReady™ content access technology to protect their intellectual property, including copyrighted content. This device uses PlayReady technology to access PlayReady-protected content and/or WMDRM-protected content.
If the device fails to properly enforce restrictions on content usage, content owners may require Microsoft to revoke the device's ability to consume PlayReady-protected content. Revocation should not affect unprotected content or content protected by other content access technologies. Content owners may require you to upgrade PlayReady to access their content. If you decline an upgrade, you will not be able to access content that requires the upgrade.
The "CI Plus" Logo is a trademark of CI Plus LLP.
This product is protected by certain intellectual property rights of Microsoft Corporation. Use or distribution of such technology outside of this product is prohibited without a license from Microsoft or an authorized Microsoft subsidiary.
Wireless LAN Transmitter Specifications
| Frequency Ranges | Max Output Power |
| 2400 - 2483,5 MHz (CH1-CH13) < 100 | mW |
| 5150 - 5250 MHz (CH36 - CH48) < 200 | mW |
| 5250 - 5350 MHz (CH52 - CH64) < 200 | mW |
| 5470 - 5725 MHz (CH100 - CH140) < 200 | mW |
Country Restrictions
This device is intended for home and office use in all EU countries (and other countries following the relevant EU directive) without any limitation except for the countries mentioned below.
| Country Restriction | |
| Bulgaria | General authorization required for outdoor use and public service |
| Italy | If used outside of own premises, general authorization is required |
| Greece | In-door use only for 5470 MHz to 5725 MHz band |
| Luxembourg | General authorization required for network and service supply(not for spectrum) |
| Norway | Radio transmission is prohibited for the geographical area within a radius of 20 km from the centre of Ny-Ålesund |
| Russian Federation | In-door use only |
| Israel | 5 GHz band only for 5180 MHz - 5320 MHz range |
The requirements for any country may change at any time. It's recommended that user checks with local authorities for the current status of their national regulations for 5 GHz wireless LAN's.
Disposal Information
[European Union]
These symbols indicate that the electrical and electronic equipment and the battery with this symbol should not be disposed of as general household waste at its end-of-life. Instead, the products should be handed over to the applicable collection points for the recycling of electrical and electronic equipment as well as batteries for proper treatment, recovery and recycling in accordance with your national legislation and the Directive 2012/19/EU and 2013/56/EU.
By disposing of these products correctly, you will help to conserve natural resources and will help to prevent potential negative effects on the environment and human health which could otherwise be caused by inappropriate waste handling of these products.
For more information about collection points and recycling of these products, please contact your local municipal office, your household waste disposal service or the shop where you purchased the product.
Penalties may be applicable for incorrect disposal of this waste, in accordance with national legislation.
[Business users]
If you wish to dispose of this product, please contact your supplier and check the terms and conditions of the purchase contract.
[Other Countries outside the European Union]
These symbols are only valid in the European Union.
Contact your local authority to learn about disposal and recycling.
The product and packaging should be taken to your local collection point for recycling.
Some collection points accept products free of charge.
Note: The sign Pb below the symbol for batteries indicates that this battery contains lead.
- Products
- Battery
natural_image
Simple line drawing of a plug inserted into a socket (no text or symbols)![JVC LT-65VA8035 - [Other Countries outside the European Union] - 2](/content/2026/04/635858/images/64e5f8462559b30af54bbeebece5a2e0c111ead56203bdca7a5a02e7a48d81ac.jpg)
natural_image
Pure diagram of a mechanical component with no text, numbers, or symbols visible![JVC LT-65VA8035 - [Other Countries outside the European Union] - 3](/content/2026/04/635858/images/26d3f2b0c23d4b800dc56c1fc6c4eaf55773b74b7bc5ef823846a555123e66eb.jpg)
![JVC LT-65VA8035 - [Other Countries outside the European Union] - 5](/content/2026/04/635858/images/1bf95668cd9651760450f407c4c5fb22a1b4d8f5fc17b5532482f6d3f148e282.jpg)
![JVC LT-65VA8035 - [Other Countries outside the European Union] - 6](/content/2026/04/635858/images/aade27858aefcca898cc78ef77621d476d05da0fdb0f03327022ad1f1ebfb660.jpg)
natural_image
Pure technical line drawing of a mechanical component or bracket (no text or symbols)![JVC LT-65VA8035 - [Other Countries outside the European Union] - 7](/content/2026/04/635858/images/717fde7c7049dfd9211aab138f86f441c1c7b67ff36b69ae601d615246849560.jpg)

![JVC LT-65VA8035 - [Other Countries outside the European Union] - 9](/content/2026/04/635858/images/1f426001c1f71c771ebdbaf12f5351965b682cb9093b73681cbb054a9f90596c.jpg)
![JVC LT-65VA8035 - [Other Countries outside the European Union] - 10](/content/2026/04/635858/images/a36ce22f2cda13a4ea16017d0115bf15aad634ee84cfc66a39b4072508cc670b.jpg)
Conexión a Internet
- Productos
- Pila
natural_image
Simple line drawing of a plug inserted into a socket (no text or symbols)③ Ligar a TV.
natural_image
Pure diagram of a mechanical component with a close-up view of a pin (no text or symbols)
natural_image
Pure technical line drawing of a mechanical part with no text or symbols

4 Ligação Internet
natural_image
Simple line drawing of a plug inserted into a socket (no text or symbols)

Internetverbindung
natural_image
Simple line drawing of a plug inserted into a socket (no text or symbols)3 Zapnutí televizoru
-nebo-
natural_image
Simple line drawing of a plug inserted into a square socket with a circular component (no text or symbols)
Zapnutie televízora
natural_image
Pure diagram of a mechanical component with a close-up view of a circular feature (no text or symbols)


-alebo-
natural_image
Pure technical line drawing of a mechanical component without any text, numbers, or symbols


Internetové pripojenie
- Produkty
- Batéria
natural_image
Simple line drawing of a plug inserted into a socket (no text or symbols)
natural_image
Pure diagram of a mechanical component with a close-up view of a pin (no text or symbols)

-vagy-
natural_image
Pure technical line drawing of a mechanical component or bracket (no text or symbols)

flowchart
graph TD
    A["global"] --> B["modem/router"]
    B --> C["monitor"]
    C --> D[" screen icon with dashed arrow"]
    D --> E[" interface icon with square"]
natural_image
Simple line drawing of a flat-screen monitor with wireless signal icons on top (no text or symbols)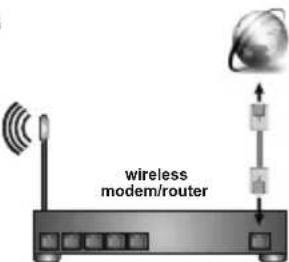
natural_image
Simple line drawing of a plug inserted into a socket (no text or symbols)
-ose-
natural_image
Simple line drawing of a plug inserted into a socket (no text or symbols)
Включете телевизор,
natural_image
Pure diagram of a mechanical component with a close-up view of a circular feature (no text or symbols)
natural_image
Pure technical line drawing of a mechanical component without any text, numbers, or symbols


Интернет връзка
natural_image
Simple line drawing of a flat-screen monitor with wireless signal icons on top (no text or symbols)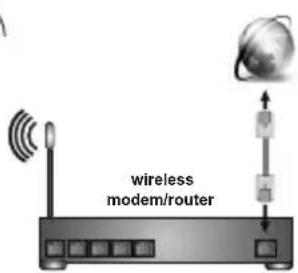
natural_image
Simple line drawing of a plug inserted into a square socket with a circular component (no text or symbols)
Uključivanje televizora
natural_image
Pure diagram of a mechanical component with a close-up view of a circular feature (no text or symbols)
natural_image
Pure technical line drawing of a mechanical part with no text or symbols


natural_image
Simple line drawing of a flat-screen monitor with wireless signal icons on top (no text or symbols)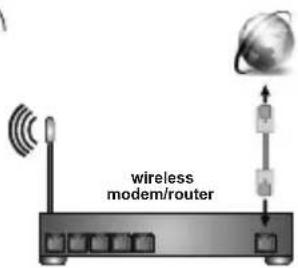
-
Standby (Pripravnost): Brza pripravnost / Pripravnosti / Uključeno
-
Numeric buttons (Numerički taster): Mijenja kanal na režim TV uživo (Live TV), unosi broj ili slovo u okvir za tekst na ekranu
-
Language (Jezik): Prebacuje se među režimima zvuka (analogni TV), prikazuje i mijenja jezik zvuka (digitalni TV, ako je dostupan)
-
Home (Početak): Otvara Početni ekran
-
Mute (Utišaj): Potpuno isključuje zvuk televizora
-
Glasnoća +/-
-
Guide (Vodič): Prikazuje elektronski vodič programa u Live TV modu
-
Directional buttons (Navigacijske tipke): Prelazi po menijima, opcijama za postavke, pomiče fokus ili kursor itd., postavlja vrijeme snimanja i prikazuje podstranice u režimu TV uživo-teletekst kada pritisnete Desno ili Lijevo. Slijedite uputstva na ekranu.
-
OK (U redu): Potvrđuje odabire, ulazi u podizbornike, prikazuje listu kanala (u režimu TV uživo)
-
Back/Return(Povratak/Nazad): Vraća se na prethodni ekran menija, vraća se korak unazad, zatvara otvorene prozore, zatvara teletekst (u režimu TV uživo-Teletekst)
-
Netflix: Aktivira aplikaciju Netflix.
-
Meni: Prikazuje meni postavki režima TV uživo u režimu TV uživo, prikazuje dostupne opcije postavki kao što su zvuk i slika
-
Stop (Zaustavi): Zaustavlja pušteni medijum
-
Premotavanje: Vraća okvire unatrag u medijima, kao što su filmovi
-
Snimak: Snima programe u režimu TV uživo(**)
-
Tasteri u boji: Slijediti instrukcije na ekranu za funkcije obojenih tastera
-
Text (Tekst): Otvara i zatvara teletekst (ako je dostupan u režimu TV uživo)
-
Pauza: Pauzira medijum koji se reprodukuje, započinje snimanje u zadato vrijeme u režimu TV uživo(**) Izvedi: Pokreće reprodukciju izabranog medijuma
-
Ubrzaj naprijed: Pomjera slike naprijed u medijima kao što su filmovi
-
MyButton1: Otvara meni za podešavanje režima slike na dostupnim izvorima
-
YouTube: Aktivira aplikaciju YouTube
-
Exit (Izlaz): Zatvara i izlazi iz prikazanih menija Postavki režima TV uživo, zatvara pokrenute aplikacije i/ili Početni ekran i prebaca na poslednji podešeni izvor
-
Info (Informacije): Prikazuje informaciju oko sadržaja na erkanu
-
Source (Izvor): Prikazuje sve dostupne izvore i sadržaje, zatvara Početni ekran i prebaca na poslednji postavljeni izvor
-
Program +/-: Povećava manjuje broj kanala u režimu TV uživo
-
Titl: Uključuje ili isključuje titlove (gdje su dostupni)
natural_image
Simple line drawing of a plug inserted into a socket (no text or symbols)
natural_image
Pure diagram of a mechanical component with no text, numbers, or symbols visible
natural_image
Pure technical line drawing of a mechanical part with no text or symbols


Connexion Internet
flowchart
graph TD
    A["global"] --> B["modem/router"]
    B --> C["monitor with icons"]
    C --> D["Monitor with icon"]
    D --> E["User Interface"]
    style A fill:#f9f,stroke:#333
    style E fill:#ccf,stroke:#333
natural_image
Simple line drawing of a flat-screen monitor with wireless signal icons above (no text or symbols)
natural_image
Simple line drawing of a plug inserted into a socket with a circular outlet (no text or symbols)3 Accendere la TV.
natural_image
Pure diagram of a mechanical component with a close-up view of a pin (no text or symbols)

natural_image
Pure technical line drawing of a mechanical component or bracket (no text or symbols)

natural_image
Simple line drawing of a flat-screen monitor with wireless signal icons on top (no text or symbols)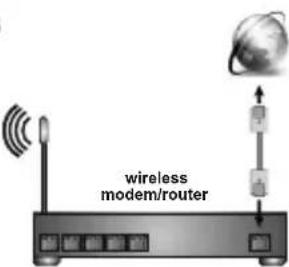
- Prodotti
- Batteria
- ① Inserting the batteries into the remote
- ② Connections
- Antenna
- HDMI connection
- External Devices
- PLEASE ENSURE BOTH UNITS ARE SWITCHED OFF BEFORE CONNECTING
- Power
- Switching on the TV
- Internet connection
- 5
- Remote control RC43160
- Remote control RC4390
- Accessories Included
- Feature Overview
- Multi Media Player
- Common Interface
- USB Recording(\*\*)
- Electronic Programme Guide
- CEC
- HbbTV
- Apps
- Google Cast
- Voice Search(\*\*)
- Bluetooth ® (\*\*)
- High Dynamic Range (HDR) / Hybrid Log-Gamma (HLG)
- Dolby Vision
- Safety Information
- IMPORTANT - Please read these instructions fully before installing or operating
- WARNING
- Markings on the Product
- WALL MOUNTING WARNINGS
- Licenses
- Country Restrictions
- Disposal Information
- [European Union]
- [Business users]
- [Other Countries outside the European Union]
- Conexión a Internet
- ③ Ligar a TV.
- Ligação Internet
- Internetverbindung
- Zapnutí televizoru
- Zapnutie televízora
- Internetové pripojenie
- Включете телевизор,
- Интернет връзка
- Uključivanje televizora
- Connexion Internet
- Accendere la TV.
Brand : JVC
Model : LT-65VA8035
Category : Television