BHCA62422BBH - Basket BEKO - Free user manual and instructions
Find the device manual for free BHCA62422BBH BEKO in PDF.
User questions about BHCA62422BBH BEKO
0 question about this device. Answer the ones you know or ask your own.
Ask a new question about this device
Download the instructions for your Basket in PDF format for free! Find your manual BHCA62422BBH - BEKO and take your electronic device back in hand. On this page are published all the documents necessary for the use of your device. BHCA62422BBH by BEKO.
USER MANUAL BHCA62422BBH BEKO
natural_image
Simple line drawing of a chimney emitting steam (no text or symbols)BHCA62422BBH
185732395_1/ EN/ DE/ FR/ ES/ R.AC/ 04.03.24 16:16
7704331232
Welcome!
Dear Customer,
Thank you for choosing the Beko product. We want your product, manufactured with high quality and technology, to offer you the best efficiency. Therefore, carefully read this manual and any other documentation provided before using the product.
Keep in mind all the information and warnings stated in the user's manual. This way, you will protect yourself and your product against the dangers that may occur.
Keep the user's manual. If you give the product to someone else, give the manual with it. The warranty conditions, usage and troubleshooting methods for your product are provided in this manual.
The symbols and their descriptions in the user's manual:
Hazard that may result in death or injury.
Important information or useful usage tips.

Read the user's manual.
Hot surface warning.
NOTICE Hazard that may result in material damage to the product or its environment.
Arçelik A.Ş.
Karaağaç caddesi No:2-6 34445 Sütlüce/Istanbul/TURKEY
Made in TURKEY
Table of Contents
1 Safety Instructions...... 4
1.1 Intended Use.... 4
1.2 Child, Vulnerable Person and Pet Safety 4
1.3 Electrical Safety.... 5
1.4 Transportation Safety 6
1.5 Installation Safety...... 7
1.6 Safety of Use 8
1.7 Maintenance and Cleaning Safety 9
2 Environmental Instructions...... 9
2.1 Waste Directive....9
2.1.1 Compliance with the WEEE Directive and Disposing of the Waste Product ....9
2.2 Package Information.... 10
3 Your product ...... 10
3.1 Product Introduction ...... 10
3.2 Product Accessories.... 10
3.3 Technical Specifications.... 12
4 First Use.... 13
4.1 Initial Cleaning 13
5 Using the Hood 13
6 Maintenance and Cleaning ...... 13
6.1 General Cleaning Information...... 13
6.2 Cleaning the inside surface of the 14 hood ....
6.3 Cleaning the Control Panel 14
6.4 Aluminium Filter 15
6.5 Carbon Filter (Usage without a flue) 15
6.6 Hood Lamp 16
7 Troubleshooting...... 16

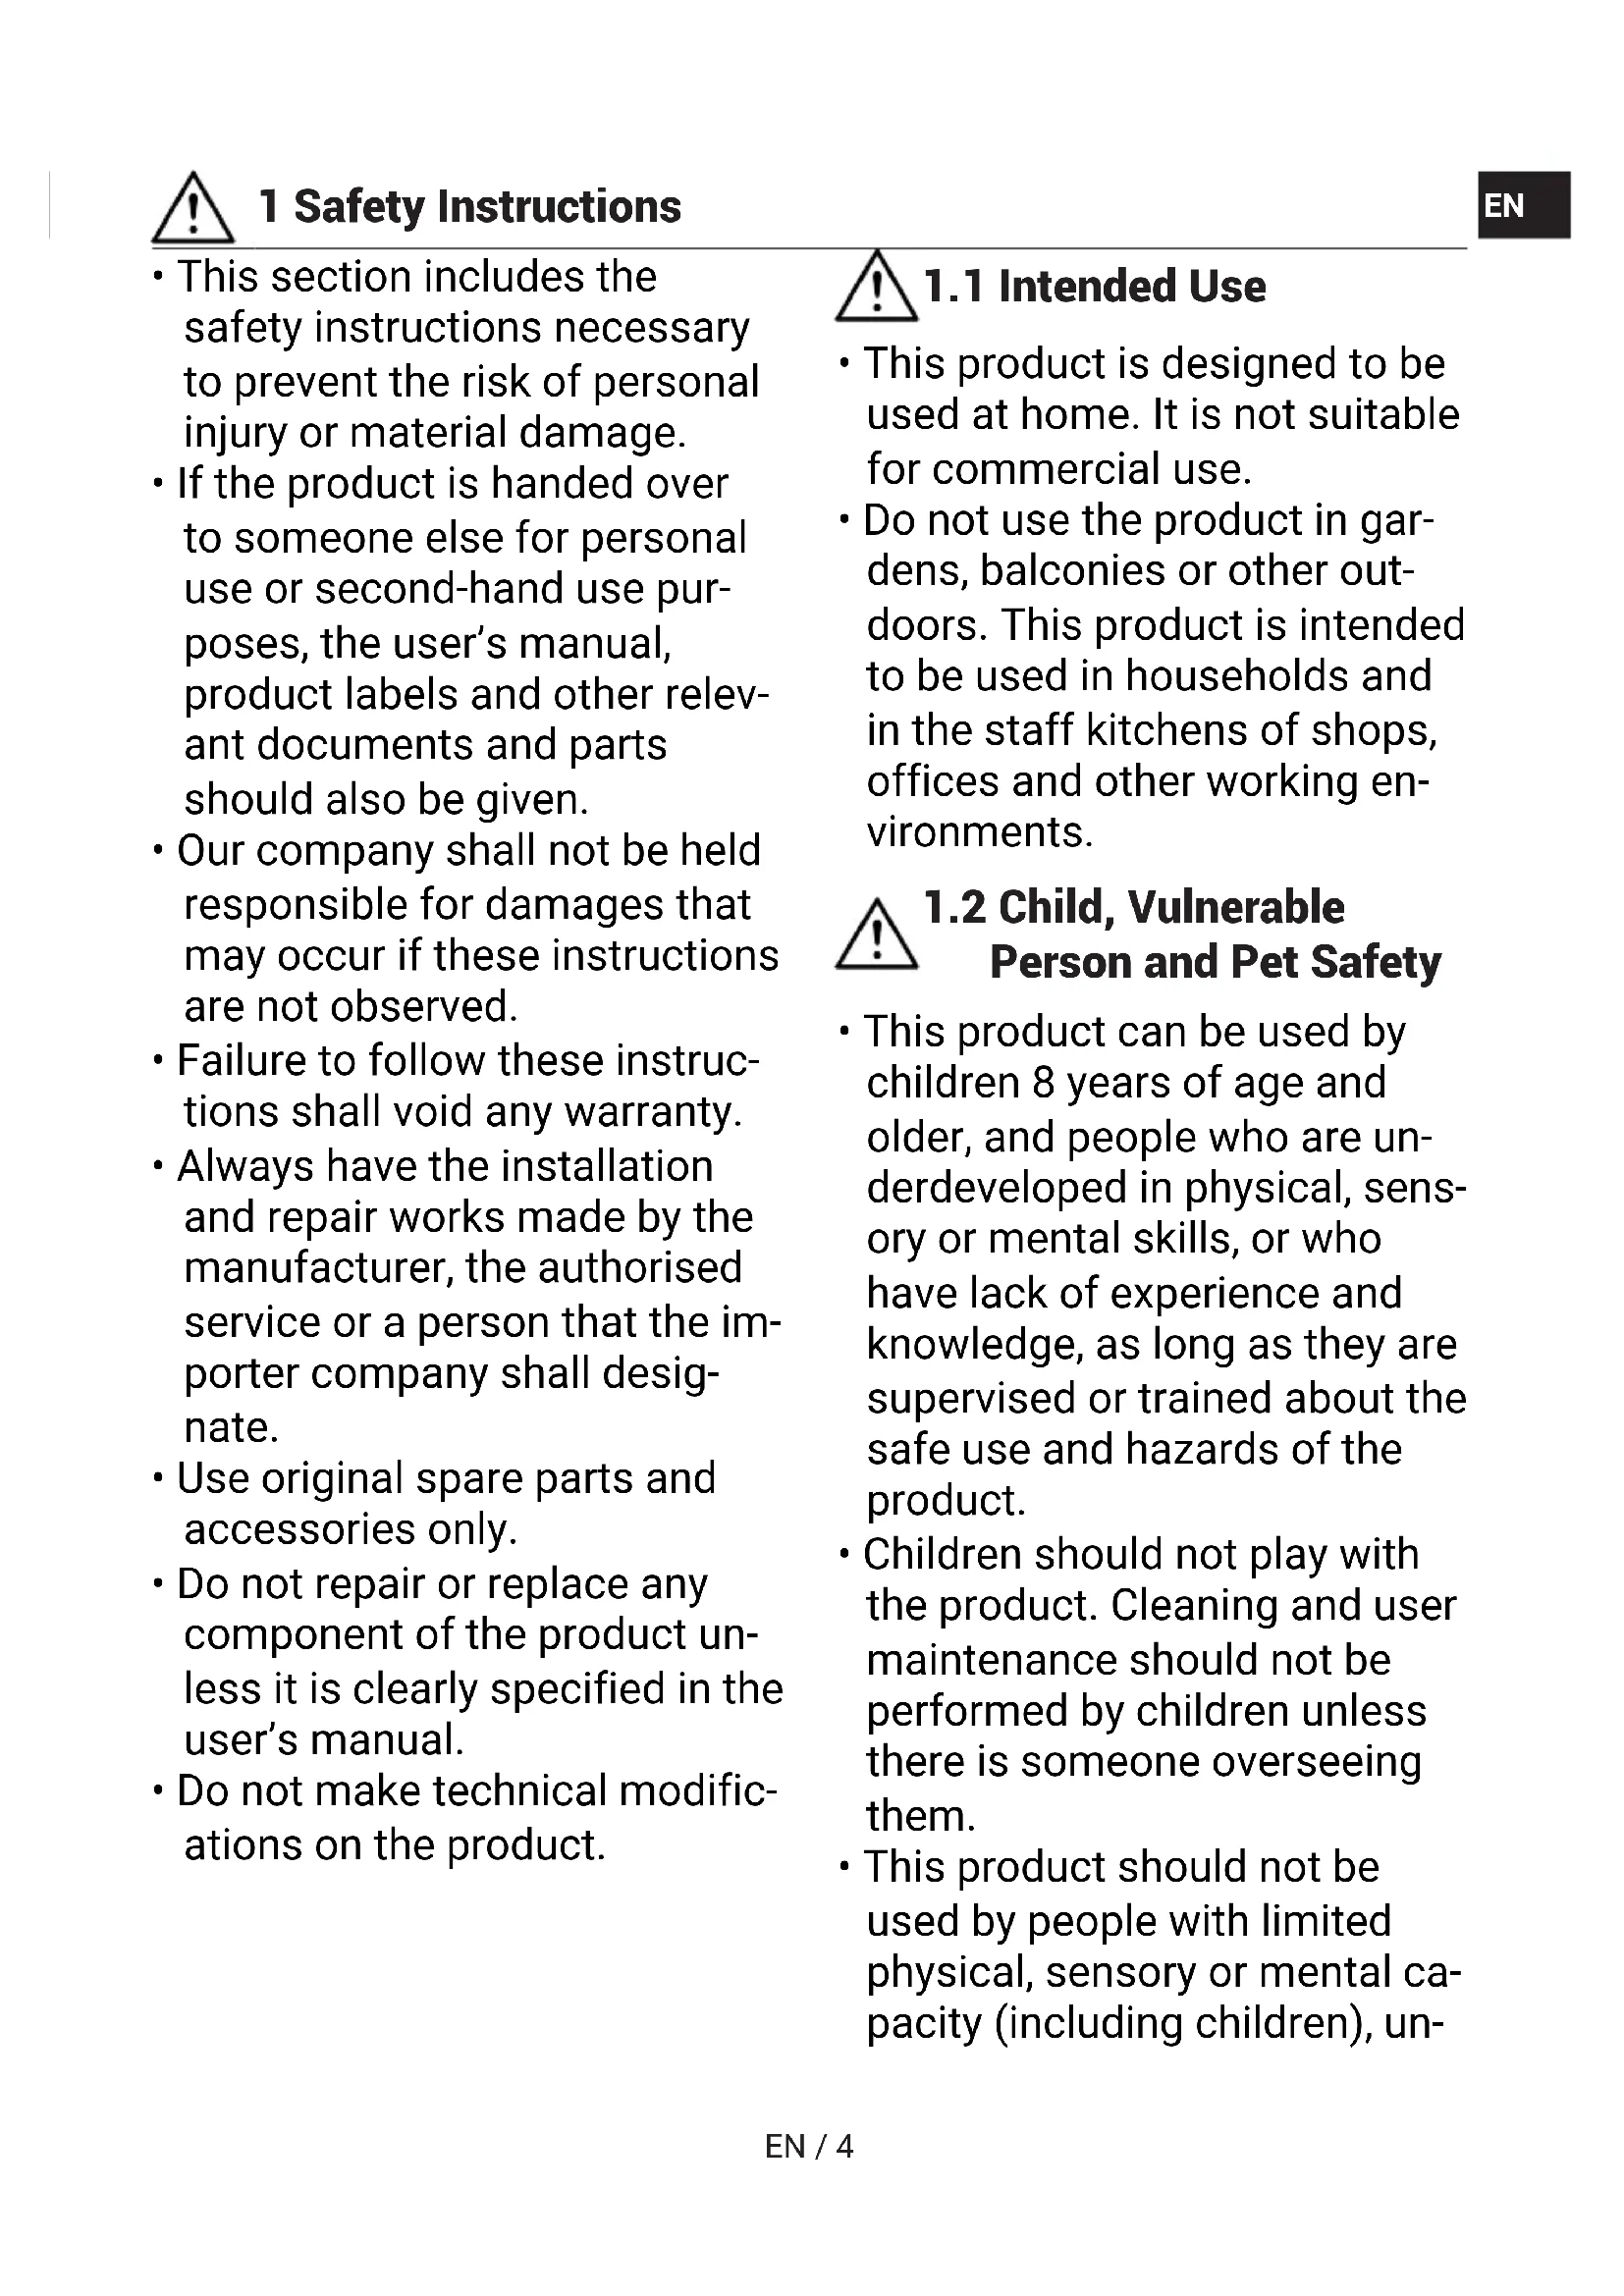
1 Safety Instructions
EN
• This section includes the safety instructions necessary to prevent the risk of personal injury or material damage.
- If the product is handed over to someone else for personal use or second-hand use purposes, the user's manual, product labels and other relevant documents and parts should also be given.
- Our company shall not be held responsible for damages that may occur if these instructions are not observed.
- Failure to follow these instructions shall void any warranty.
• Always have the installation and repair works made by the manufacturer, the authorised service or a person that the importer company shall designate.
- Use original spare parts and accessories only.
- Do not repair or replace any component of the product unless it is clearly specified in the user's manual.
- Do not make technical modifications on the product.

1.1 Intended Use
• This product is designed to be used at home. It is not suitable for commercial use.
- Do not use the product in gardens, balconies or other outdoors. This product is intended to be used in households and in the staff kitchens of shops, offices and other working environments.

1.2 Child, Vulnerable Person and Pet Safety
- This product can be used by children 8 years of age and older, and people who are underdeveloped in physical, sensory or mental skills, or who have lack of experience and knowledge, as long as they are supervised or trained about the safe use and hazards of the product.
• Children should not play with the product. Cleaning and user maintenance should not be performed by children unless there is someone overseeing them. - This product should not be used by people with limited physical, sensory or mental capacity (including children), un-
less they are kept under supervision or receive the necessary instructions.
• Children should be supervised to ensure that they do not play with the product.
• Electrical products are dangerous for children and pets. Children and pets should not play with the product.
- Keep the packaging materials out of the reach of children. There is a hazard of injury and suffocation.
- Before discarding worn out and useless products:
- Unplug and disconnect the power plug (if the product is plugged in).
- Cut off the power cable and disconnect it with the plug from the product.
- Do not allow children to play with product when it is in idle mode.

1.3 Electrical Safety
- Plug the product into a grounded outlet protected by a fuse that matches the current ratings indicated on the type label. Have the grounding installation made by a qualified electrician. Do not use the product without grounding in accordance with local / national regulations.
- The plug or the electrical connection of the appliance shall be in an easily accessible place. If this is not possible, there should be a mechanism (fuse, switch, key switch, etc.) on the electrical installation to which the product is connected, in compliance with the electrical regulations and separating all poles from the network.
- Unplug the product or switch off the fuse before repair, maintenance and cleaning.
- Plug the product into an outlet that meets the voltage and frequency values specified on the type label.
- (If your product does not have a mains cable) only use the connecting cable described in the "Technical specifications" section.
- Do not plug your hood in until it is mounted.
- Do not jam the power cable under and behind the product. Do not put a heavy object on the power cable. The power cable should not be bent, crushed, and come into contact with any heat source.
-
Do not install the electricity cord near the heaters. The cable might melt, causing a fire.
-
Make sure that the power cable is not jammed while putting the product to its place after assembly or cleaning.
- Do not plug your hood in until it is mounted.
- Use original cable only. Do not use cut or damaged cables.
- Do not use an extension cord or multi-plug to operate your product.
- Contact the authorized service centre or importer to use the approved adapter in cases where the use of a converter adapter (for plug type) is necessary.
- Contact the importer or the authorized service centre if the length of the power line is inadequate.
- Portable power sources or multiple plugs may overheat and catch fire. Keep multiple plugs and portable power sources away from the product.
- If the power cable is damaged, it must be replaced by the manufacturer, an authorized service or a person to be specified by the importer company in order to prevent possible dangers.
- If your product has plug, do not make electrical connections by disconnecting the plug during
installation. Connections made by cutting off render the product warranty void and pose a danger to user safety.
If your product has a power cable and plug:
- Never put the product plug into a broken, loose, or out-of-socket plug. Make sure the plug is fully inserted into the socket. Otherwise the connections may overheat and cause a fire.
- Avoid inserting the device into plugs that are greasy, unclean, or potentially exposed to water (such as those near a worktop where water may escape). Otherwise there is a risk of short circuit and electrocution.
- Never touch the plug with wet hands!
- Pull the plug out of the socket using the plug's body rather than the cord itself.

1.4 Transportation Safety
- Disconnect the product from the mains before transporting the product.
- The product is heavy, carry the product with at least two people.
-
Do not place items on the appliance. Carry the appliance vertically.
-
When you need to transport the product, wrap it with bubble wrap packaging material or thick cardboard and tape it tightly. Secure the moving parts of the product firmly to prevent damage.
- Before the product is installed, check the product for any damage after transport. Contact the importer or the authorized service centre if damaged.

1.5 Installation Safety
- To have your product ready for use, first provide the place of installation and have the electrical installation made. Always have the installation made by the manufacturer, the authorised service or a person that the importer company shall designate.
- To have your product ready for use, first provide the place of installation and have the electrical installation made. Then, call the Authorised Service to have the installation performed. After installation by the authorized service, the warranty period begins.
- Before beginning the installation, de-energize the power line to which the product will be connected by turning off the fuse.
• Always wear protective gloves during transport and installation. Otherwise there is a risk of injury from sharp edges!
- Before the product is installed, check the product for any damage. Do not have it installed if the product is damaged.
- Avoid using any heat-insulating materials to cover the interior of the furniture that will be installed.
- Direct sunlight and heat sources, such as electric or gas heaters, must not be present in the area where the product is installed.
- If there is a socket behind the place where the product will be installed, it must be ensured that the product does not come into contact with the socket nor with the plug plugged into the socket.
- For usage with chimney connections, have qualified individuals assess the suitability of the chimney to which the product will be connected.
- Height between the bottom surface of your hood and the top surface of the oven should be no less than 650 mm for gas ovens and 500 mm for electrical ovens. Otherwise,
your product will be affected by the heat or flame of the hob and pose a safety hazard.
- Never attach the hood to flues used as a flame heater or flame-emitting heaters. Comply with local regulations on purging the outflow.
- Use pipes with a diameter of 120 mm when connecting a flue to your product. The pipe connection should be as short as possible and with few bends.

1.6 Safety of Use
- Poisoning Danger! While the appliance is operating, air is drawn from the whole house. If adequate ventilation is not provided, air flow occurs and the waste and toxic gases released as a result of combustion in the house are reabsorbed. Do not operate the product together with products that provide air circulation and may emit toxic gas (wood, gas, oil and coal stoves, boilers, water heaters, etc.).
- Ensure that the appliance is switched off after every use.
- Don't use the product if it breaks down or gets damaged while being used. Disconnect
the product from the electricity. Contact the importer or the authorized service centre.
- Do not touch the lamps of your hood after operating the hood for a long time. Hot lamps may burn your hand.
- Do not operate the appliance without an oil filter. Do not remove the filters while the appliance is operating. Otherwise the product and electrical connections may be adversely affected by the oil.
- Do not create a high flame under the product. Otherwise, the oil in the oil filter may ignite, causing a fire.
- Turn off the oven before taking the cooking pots, pans, etc. from the ovens. Otherwise, your product could be harmed by flame and growing heat.
- Never set anything combustible or items prone to falling on your hood. Otherwise, it could fall on the hop and risk burning them or fall into the food and hurt the user,
- Do not keep easily flammable materials under your hood.
- (Except for goods that return exhaust air to the room) The room needs to be well ventilated if the hood is utilized in the same area as gas or liquid fuel burning equipment.
- The chimney of appliances like room heaters that run on gas or liquid fuel must be entirely insulated in the environment where the hood is utilized, or the appliance must be hermetic.
- If there is another appliance operating with energy other than electrical energy in the same environment with the hood, the negative pressure in the room should be at most 0.04 mbar so that the exhaust of the other appliance is not drawn back into the room by the hood.
- Easily flammable and combustible materials should not be hung on the hood handles (if any).
- There should not be open fire under the hood. (for example: flambe)
2 Environmental Instructions
2.1 Waste Directive
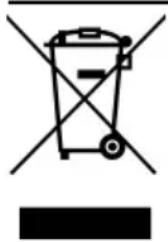
2.1.1 Compliance with the WEEE Directive and Disposing of the Waste Product
This product complies with EU WEEE Directive (2012/19/EU). This product bears a classification symbol for waste electrical and electronic equipment (WEEE).
- Caution: Accessible parts can heat up when used with a cooker.

1.7 Maintenance and Cleaning Safety
- The grease accumulated on the hood and grease filter must be cleaned at the specified intervals. Otherwise, there is a risk of fire!
- It is recommended to clean the filter once a month under normal usage. If not, the build-up of oil in the filter could catch fire and pose a hazard.
- Never wash the product by spraying or pouring water on it! There is the risk of electric shock!
- Do not use steam cleaners to clean the product as this may cause an electric shock.
natural_image
Symbol of a trash bin crossed with no text or labels, accompanied by a black rectangular block below (no readable text or symbols)This product has been manufactured with high quality parts and materials which can be reused and are suitable for recycling. Therefore, do not dispose of the waste product with normal domestic and other wastes at the end of its service life. Take it to a collection point for the recycling of electrical and electronic equipment. You can ask your local administration about these collection points. Disposing of the appliance properly helps prevent negative consequences for the environment and human health.
Compliance with RoHS Directive:
The product you have purchased complies with EU RoHS Directive (2011/65/EU). It does not contain harmful and prohibited materials specified in the Directive.
2.2 Package Information
Packaging materials of the product are manufactured from recyclable materials in accordance with our National Environment Regulations. Do not dispose of the packaging waste with the household or other wastes, take it to the packaging material collection points designated by the local authorities.
3 Your product
3.1 Product Introduction
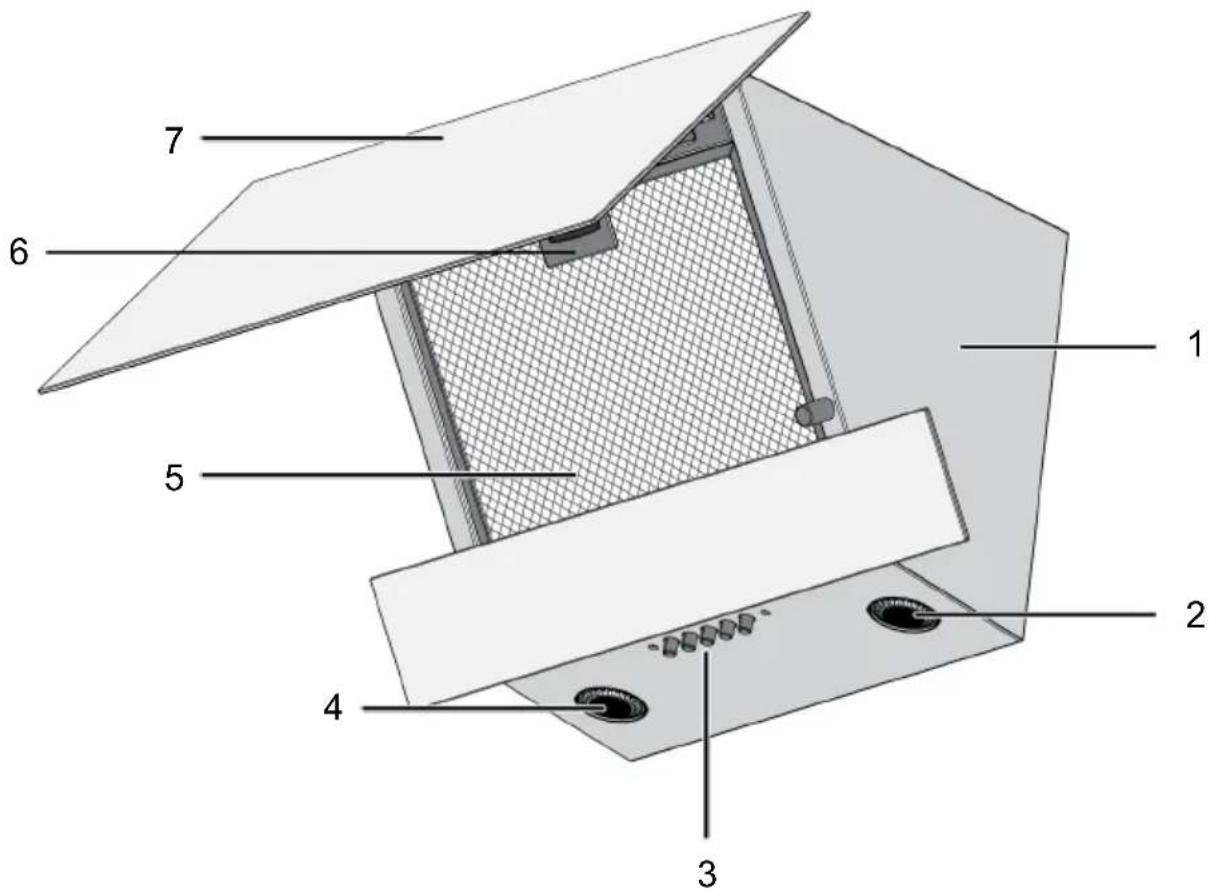
text_image
Technical diagram of a mechanical assembly with numbered components for identification1 Hood body 2 Lamp
3 Control panel 4 Lamp
5 Aluminium filter 6 Aluminium filter lock
7 Hood glass lid
3.2 Product Accessories
Depending on the product model, the supplied accessory varies. All accessories described in the user's manual may not be available in your product.
Some parts will be used during installation. If you do not have the product and it is necessary, you can obtain it from authorized services.
Filters should be changed at certain intervals. You can obtain filters from authorized services. Detailed information is explained in the "Maintenance and Cleaning" section.
Wall mounting part
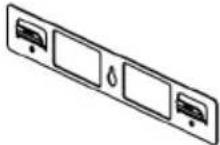
Air router
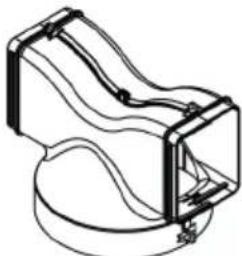
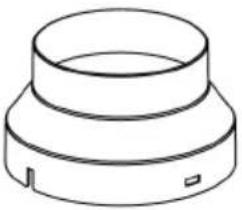
natural_image
Technical line drawing of a mechanical component with no visible text or symbolsFlue connection adapter
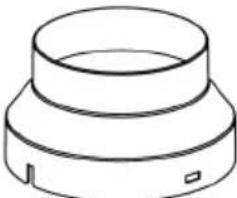
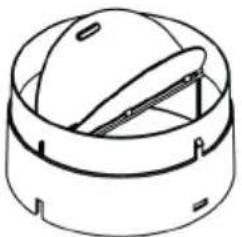
natural_image
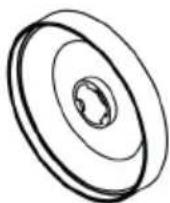
Simple line drawing of a cylindrical mechanical component with a flanged base and mounting holes (no text or symbols)Covers to prevent reverse airflow
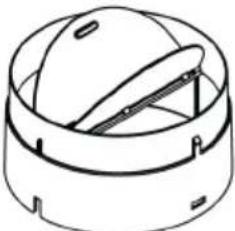
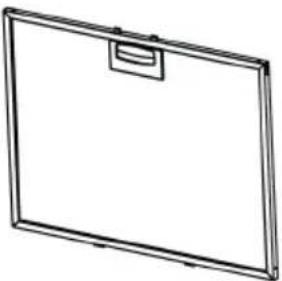
natural_image
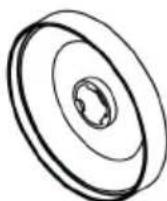
Technical line drawing of a dome-shaped mechanical component with internal ribs and mounting holes (no text or symbols)Aluminium filter
natural_image
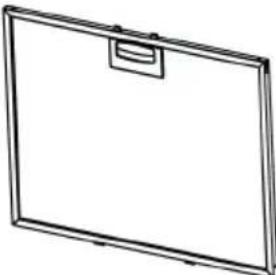
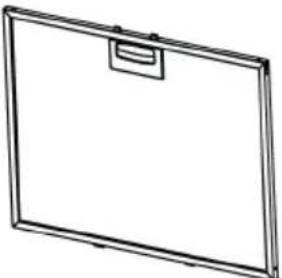
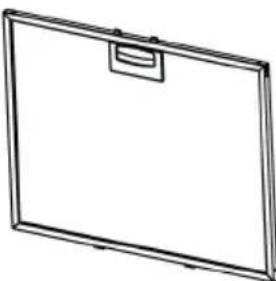
Simple line drawing of a blank rectangular frame with a small square top on the side (no text or symbols)Carbon filter
3.3 Technical Specifications
| Product external dimensions (height/width/depth) (mm) min. 910 - max. 1138 /595 /396 |
| Voltage/Frequency 220-240 V ~1N; 50 Hz |
| Total power consumption max. 155 W |
| Suction power 400 m3/h |
| Diameter of air outlet pipe 120-150 mm |
Technical specifications may be changed without prior notice to improve the quality of the product.
Figures in this manual are schematic and may not exactly match your product.
Values stated on the product labels or in the documentation accompanying it are obtained in laboratory conditions in accordance with relevant standards. Depending on operational and environmental conditions of the product, these values may vary.
4 First Use
Before you start using your product, it is recommended to do the following stated in the following sections respectively.
4.1 Initial Cleaning
- Remove all packaging materials.
5 Using the Hood
The hood has an engine with various speeds. For a good performance, we recommend using low speeds under normal conditions and high speeds in case of strong odour and vapour condensation.
MODEL A
6 Maintenance and Cleaning
6.1 General Cleaning Information
General warnings
- Wait for the product to cool before cleaning the product. Hot surfaces may cause burns!
- Do not apply the detergents directly on the hot surfaces. This may cause permanent stains.
-
The product should be thoroughly cleaned and dried after each operation. Thus, food residues shall be easily cleaned and these residues shall be prevented from burning when the product is used again later. Thus, the service life of the appliance extends and frequently faced problems are decreased.
-
Wipe the surfaces of the product with a wet cloth or sponge and dry with a cloth.
NOTICE: Some detergents or cleaning agents may cause damage to the surface. Do not use abrasive detergents, cleaning powders, cleaning creams or sharp objects during cleaning.
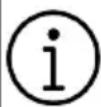
Operating the hood
-
Press the speed level button you have selected to operate the hood.
⇒ The hood starts to operate in the adjusted speed level. -
You can press the other speed level buttons to change the speed level.
Turning off the hood
- When your hood is operated at any level, press the off button.
Operating the lamp
- Press the button to operate the lamp.
→ Hood lamp lights.
Turning off the lamp
-
You can turn off the hood lamp by pressing the button again.
-
Do not use steam cleaning products for cleaning.
-
Some detergents or cleaning agents cause damage to the surface. Unsuitable cleaning agents are: bleach, cleaning products containing ammonia, acid or chloride, steam cleaning products, de-scaling agents, stain and rust removers, abrasive cleaning products (cream cleaners, scouring powder, scouring cream, abrasive and scratching scrubber, wire, sponges, cleaning cloths containing dirt and detergent residues).
-
No special cleaning material is needed in the cleaning made after each use. Clean the appliance using dishwashing detergent, warm water and a soft cloth or sponge and dry it with a dry cloth.
- Be sure to completely wipe off any remaining liquid after cleaning and immediately clean any food splashing around during cooking.
- Do not wash any component of your appliance in a dishwasher unless otherwise stated in the user's manual.
Inox - stainless surfaces
- Do not use acid or chlorine-containing cleaning agents to clean stainless-inox surfaces and handles.
- Stainless-inox surface may change colour in time. This is normal. After each operation, clean with a detergent suitable for the stainless or inox surface.
- Clean with a soft soapy cloth and liquid (non-scratching) detergent suitable for inox surfaces, taking care to wipe in one direction.
- Remove lime, oil, starch, milk and protein stains on the glass and inox surfaces immediately without waiting. Stains may rust under long periods of time.
- Cleaners sprayed/applied to the surface should be cleaned immediately. Abrasive cleaners left on the surface cause the surface to turn white.
Glass surfaces
- When cleaning glass surfaces, do not use hard metal scrapers and abrasive cleaning materials. They can damage the glass surface.
- Clean the appliance using dishwashing detergent, warm water and a microfiber cloth specific for glass surfaces and dry it with a dry microfiber cloth.
-
If there is residual detergent after cleaning, wipe it with cold water and dry with a clean and dry microfiber cloth. Residual detergent may damage the glass surface next time.
-
Under no circumstances should the dried-up residue on the glass surface be cleaned off with serrated knives, wire wool or similar scratching tools.
- You can remove the calcium stains (yellow stains) on the glass surface with the commercially available descaling agent, with a descaling agent such as vinegar or lemon juice.
- If the surface is heavily soiled, apply the cleaning agent on the stain with a sponge and wait a long time for it to work properly. Then clean the glass surface with a wet cloth.
• Discolorations and stains on the glass surface are normal and not defects.
Plastic parts and painted surfaces
- Clean plastic parts and painted surfaces using dishwashing detergent, warm water and a soft cloth or sponge and dry them with a dry cloth.
- Do not use hard metal scrapers and abrasive cleaners. They may damage the surfaces.
- Ensure that the joints of the components of the product are not left damp and with detergent. Otherwise, corrosion may occur on these joints.
6.2 Cleaning the inside surface of the hood
Follow the cleaning steps described in the "General Cleaning Information" section according to the surface types in your product.
The inner surface of the product and the parts inside may have sharp surfaces. Be careful while cleaning.
6.3 Cleaning the Control Panel
- When cleaning the panels with knob-control, wipe the panel and knobs with a damp soft cloth and dry with a dry cloth. Do not remove the knobs and gaskets underneath to clean the panel. The control panel and knobs may be damaged.
- While cleaning the inox panels with knob control, do not use inox cleaning agents around the knob. The indicators around the knob can be erased.
- Clean the touch control panels with a damp soft cloth and dry with a dry cloth. If your product has a key lock feature, set the key lock before performing control panel cleaning. Otherwise, incorrect detection may occur on the keys.
6.4 Aluminium Filter
This filter serves to retain oil particles in the air. It is recommended to clean the filter once a month under normal usage. To achieve this:
- Remove the aluminium filters.
- Wash the filters in water using liquid detergent and reinstall after drying.
Aluminium filters may change colour as they are washed; this is normal and does not require replacing your filters.
You can also wash the aluminium filter in the dishwasher. (max. 70°C)
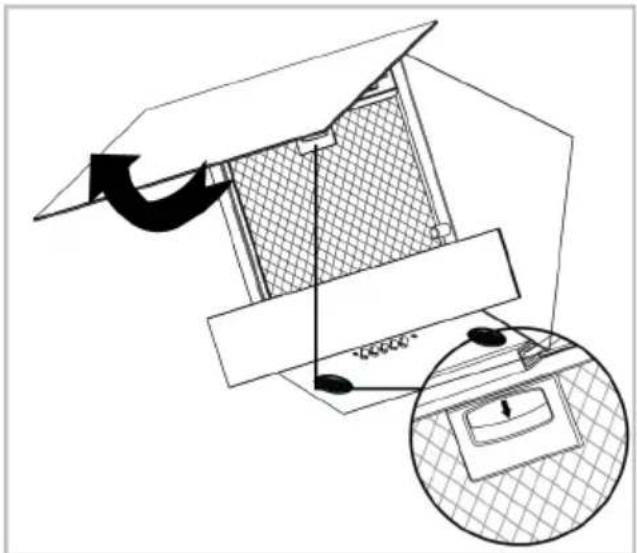
Removing aluminium filters
- Open hood cover upwards and pull aluminium filter lock downwards as shown in the figure.
natural_image
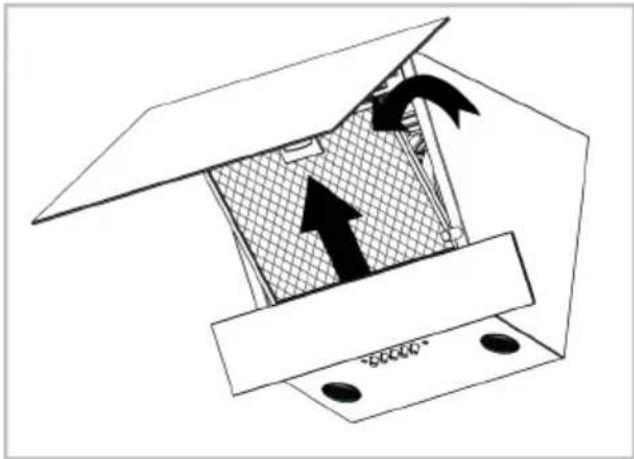
Diagram of a roof structure with ventilation duct and mesh pattern, showing airflow direction (no text or symbols)- Gently pull the filter towards you first and pull it upwards to remove it from its slot.
natural_image
Diagram of a mechanical or architectural component with internal grid pattern and directional arrows (no text or symbols)- Reinstall the aluminium filter in its slot after flushing by following the above steps in reverse.
6.5 Carbon Filter (Usage without a flue)
General warnings
- If you have installed your product without a flue, you should replace your carbon filters every 4 months in normal use. You can obtain the carbon filter from Authorized Services.
• The carbon filter should never be washed. - If you do not follow the rules for cleaning and replacing the filters of your hood, you may cause a fire.
In carbon-filtered usage, the sound level increases and the flow rate performance decreases.
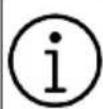
Removing carbon filters
- Open the glass cover of the hood and remove the aluminium filter.
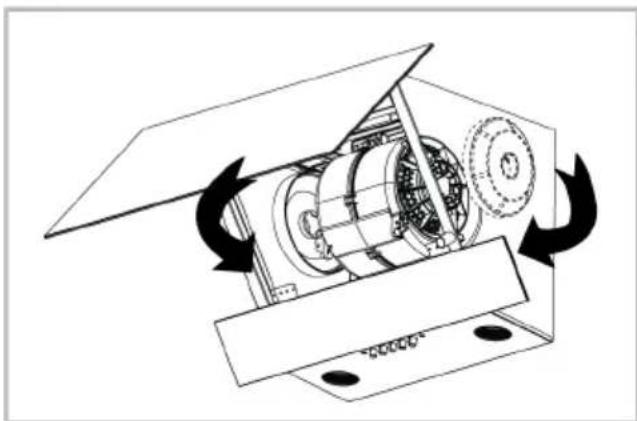
- Unscrew the carbon filters on the right and left of the motor holder.
natural_image
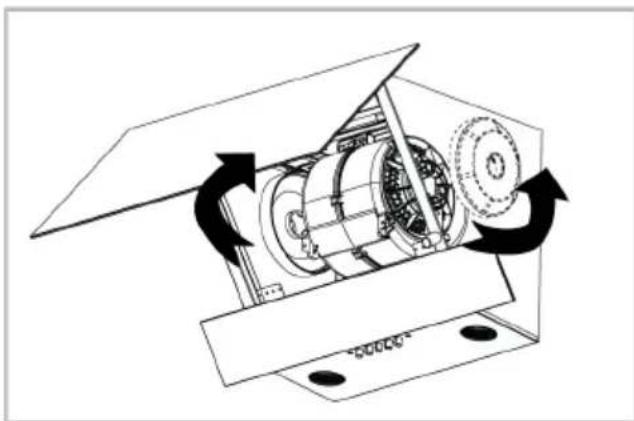
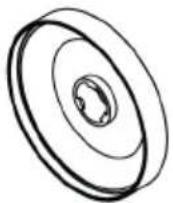
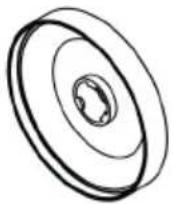
Mechanical assembly diagram showing a rotating device with gears and housing (no text or symbols)- Place the lug slots of your new carbon filters into the lugs on the motor holder and turn them clockwise to snap them into place.
natural_image
Technical diagram of a mechanical device with rotating components and directional arrows indicating motion (no text or symbols)- Close the hood glass cover after installing the aluminium filter.
6.6 Hood Lamp
In the event of a lamp malfunction in the hood, contact your local dealer or the Customer Service, and ensure that the lamp is replaced.
7 Troubleshooting
If the problem persists after following the instructions in this section, contact your vendor or an Authorized Service. Never try to repair your product yourself.
Product is not working.
- Fuse may be faulty or blown. >>> Check the fuses in the fuse box. Change them if necessary or reactivate them.
- The product may not be plugged in. >>> Check if the product is plugged in to the outlet or not.
- The speed button may not be set. >>> Press/touch the desired speed button.
- There may be no electricity. >>> Ensure the mains is operational and check the fuses in the fuse box. Change the fuses if necessary or reactivate them.
Hood light is not on.
- Hood lamp may be faulty. >>> Contact your local dealer where you purchased your product or the Customer Service, and ensure that the lamp is replaced.
- There may be no electricity. >>> Ensure the mains is operational and check the fuses in the fuse box. Change the fuses if necessary or reactivate them.
Wilkommen!
text_image
Technical diagram of a mechanical assembly with numbered components for identificationnatural_image
Technical line drawing of a mechanical component with no visible text or symbolsAnschlussadapter
natural_image
Simple line drawing of a cylindrical mechanical component with a flanged base and mounting holes (no text or symbols)Rückstauklappe
natural_image
Line drawing of a dome-shaped container with internal structure (no text or symbols)Metallfettfilter
natural_image
Simple line drawing of a blank rectangular frame with a small rectangular clip on top (no text or symbols)Aktivkohlefilter
DE
natural_image
Diagram of a roof structure with ventilation duct and mesh pattern, showing internal components and a magnified inset (no text or symbols)natural_image
Diagram of a mechanical or electrical component with arrows indicating motion, no readable text or symbols present.natural_image
Technical line drawing of a mechanical device with rotating components and directional arrows indicating motion (no text or symbols)natural_image
Technical diagram of a mechanical device with rotating components and directional arrows indicating motion (no text or symbols)Cher client, chère cliente
natural_image
Symbol of a trash bin with crossed lines indicating no waste or restriction, and a solid black rectangle below (no text or labels)text_image
Technical diagram of a mechanical assembly with numbered components for identificationnatural_image
Technical line drawing of a mechanical component with no visible text or symbolsnatural_image
Simple line drawing of a cylindrical mechanical component with a flanged top and base (no text or symbols)natural_image
Technical line drawing of a cylindrical mechanical component with internal structure (no text or symbols)Filtre en aluminium
natural_image
Simple line drawing of a blank rectangular frame with a small rectangular clip on top (no text or symbols)Filtre à charbon
FR
natural_image
Architectural diagram of a roof structure with ventilation duct and mesh pattern, showing no text or symbolsnatural_image
Diagram of a mechanical or electrical component with arrows indicating motion, no text or symbols presentnatural_image
Technical line drawing of a mechanical device with rotating components and directional arrows indicating motion (no text or symbols)natural_image
Technical diagram of a mechanical device with rotating components and directional arrows indicating motion (no text or symbols)natural_image
Symbol of a trash bin with crossed lines indicating no waste or restriction, and a solid black rectangle below (no text or labels)text_image
Technical diagram of a mechanical assembly with numbered components for identificationnatural_image
Technical line drawing of a mechanical component with no visible text or symbolsnatural_image
Simple line drawing of a cylindrical mechanical component with a flanged base and mounting holes (no text or symbols)natural_image
Line drawing of a circular mechanical component with internal structure (no text or symbols)Filtro de Aluminio
natural_image
Simple line drawing of a blank rectangular frame with a small rectangular clip on top (no text or symbols)Filtro de carbón