
DFC8 - Kitchen appliance MOULINEX - Free user manual and instructions
Find the device manual for free DFC8 MOULINEX in PDF.

| Brand | Moulinex |
| Model | DFC8 |
| Product type | Multifunction food processor with digital assistance |
| Power supply | 220-240 V ~ 50/60 Hz |
| Operating modes | Recipes, Auto, Manual |
| Display | Graphic display with contrast adjustment |
| Main functions | Blending, chopping, kneading, mixing, grating, slicing, beating, whisking, citrus juicing, centrifugal juicing, grinding (with accessories) |
| Capacity of chopper bowl | Up to 1.2 kg of heavy dough, 1 liter of soup, 600 g of chopping |
| Capacity of blender bowl | 1.5 liters |
| Capacity of mini-chopper | 80 g of dried fruits, 120 g of baby purée |
| Capacity of centrifugal juicer | 250 g per operation |
| Capacity of citrus juicer | Up to 1 liter of juice without emptying |
| Capacity of Maxipress | Up to 1 kg of cooked vegetables (large holes), 500 g of fruit (small holes) |
| Motor speed | Variable with Turbo and Pulse mode |
| Included accessories | Chopper bowl, blender bowl, metal blade, kneading blade, vegetable cutter with inserts, whisk, citrus juicer, centrifugal juicer, mini-chopper, grinder, Maxipress, spatula, storage basket |
| Care and cleaning | Accessories dishwasher safe except whisk drive housing. Wipe motor unit with a damp sponge. |
| Safety | Automatic shut-off, lid locking, safety system preventing operation if incorrectly assembled |
| Spare parts and repairability | Accessories sold separately (references listed). Repair exclusively by an authorized Moulinex service center. |
| General information | Household use only. Integrated recipe booklet. Warranty void if incorrectly connected. |
| Weight | Approximately 8 kg (estimate) |
Frequently Asked Questions - DFC8 MOULINEX
User questions about DFC8 MOULINEX
0 question about this device. Answer the ones you know or ask your own.
Ask a new question about this device
Download the instructions for your Kitchen appliance in PDF format for free! Find your manual DFC8 - MOULINEX and take your electronic device back in hand. On this page are published all the documents necessary for the use of your device. DFC8 by MOULINEX.
USER MANUAL DFC8 MOULINEX
natural_image
Line drawing of a kitchen blender with handle, blade, and side panel (no text or symbols)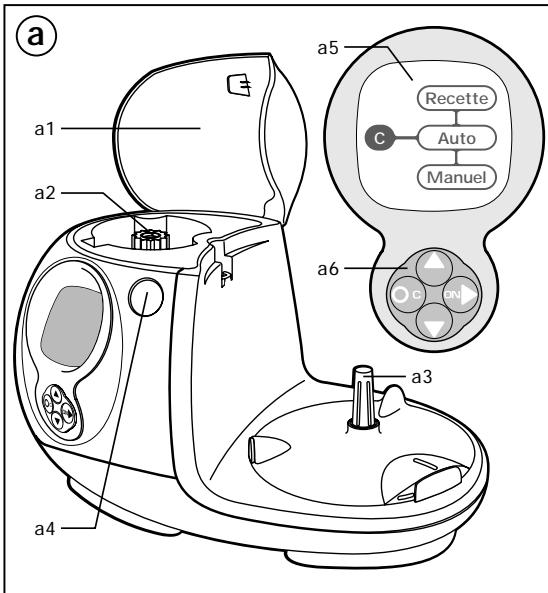


Français p. 6
English p. 17
Deutsch S. 27
Nederlands p. 39
Italiano p. 50
Русский с. 61
Moulinex
b Ensemble bol hachoir
b1 poussoir doseur
natural_image
Simple line drawing of a coffee cup with control buttons and play button icons (no text or symbols)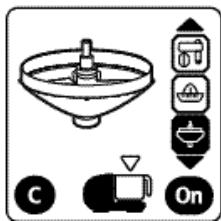
natural_image
Simple line drawing of a funnel with a handle and central shaft, labeled 'Off' (no text or symbols on the diagram itself)flowchart
graph TD
    A["3"] --> B["Off"]
    A --> C["Turbo"]
natural_image
Simple line drawing of a coffee maker with control panel and buttons (no text or symbols)natural_image
Simple line drawing of a blender with control knob and buttons (no text or symbols)natural_image
Simple line drawing of a camera with no text or symbolsThank you for choosing an appliance from the Moulinex range, which is intended exclusively for food preparation.
Description
a Motor unit
a1 Top power outlet cover
a2 Top power outlet
a3 Bottom power outlet
a4 Release button for cover (a1) and for accessory fitted on upper power outlet
a5 Graphic display, showing operating modes, recipes, etc.
a6 Keypad with multi-function keys for navigating the various modes
b Chopping bowl assembly
b1 Pusher / measure
b2 Cover with feed tube
b3 Bowl
b3-1 Driver
b3-2 Rubber ring
b3-3 Nut
b4 Detachable handle
b4-1 Handle release button
c Drive shaft
ACCESSORIES ACCORDING TO MODEL
d Blades
d1 Metal blade
d2 Plastic kneader
e Grating/slicing discs
e1 Sector holder disc
e2 Choice of 6 sectors:
. Fine grater (A)
. Thin slicer (D)
. Coarse grater (C)
. Thick slicer (H)
. Special reibekuchen grater
(parmesan, coconut) (G)
. Chip cutter (E)
f Whisk
f1 Drive box
f2 Whisk
g Citrus press
g1 Cone
g2 Strainer
g3 Driver
h Liquidiser
h1 Measuring stopper
h2 Cover
h3 Jug
h4 Detachable handle
h4-1 Handle release button
i Juice Extractor
i1 Pusher
i2 Cover
i3 Collar
i4 Filter strip
i5 Filter holder
j Small mincer
j1 Cover
j2 Bowl
j3 Blade
k "Maxipress"
k1 Blade unit
k2 Blade unit clip
k3 2 grids (small holes / large holes)
I Grinder
I1 Cover
12 Bowl
13 Blade
m Spatula
n Storage basket for the grating/slicing discs (e), the sectors (e2), the metal blade (d1) and the drive shaft (c).
Safety instructions
- Read the instructions carefully before using your appliance for the first time; any use that does not conform to the instructions for use will absolve Moulinex from any liability.
- Do not leave the appliance unattended within the reach of children. The use of this appliance by children or by disabled persons must be supervised at all times.
- Check that the power rating of the appliance does in fact match that of your electrical system.
- Check that the voltage rating of your appliance corresponds to that of your household electrical wiring system.
This appliance is manufactured to conform to the Low Voltage Electrical Equipment (Safety) Regulations 1989 and is designed to comply with BS 3456. It complies with the requirements of the EEC Directive (89/336/EEC).
Any connection fault invalidates the guarantee.
- Your appliance is intended only for indoor, domestic use, for culinary purposes only.
- Your appliance must not be left running un-attended.
- Unplug your appliance as soon as you have finished using it, when you are cleaning it or in the event of a power cut.
- Do not use your appliance if it is not working correctly or if it has been damaged. If this is the case, contact a Moulinex approved service centre (see list in service booklet).
- Any intervention, apart from cleaning and normal maintenance by the customer, must be carried out by an approved Moulinex service centre (see list in the service booklet).
- Do not immerse the appliance, the supply cable or the plug in water or in any other liquid.
- Do not allow the power cord to hang down within reach of children.
- The supply cable must never be close to or in contact with the hot parts of your appliance or any other source of heat and should be kept away from sharp edges.
- If the supply cable or the plug is damaged, do not use the appliance. To avoid any risk, these must be replaced by an approved Moulinex service centre (see list in the service booklet).
- Do not use the appliance if the filter holder of the juice extractor is damaged.
- For your own safety, use only the appropriate Moulinex accessories and spare parts for your appliance.
- Always use the pushers to feed food items down the feed tubes; never use the fingers or cutlery or any other implement.
- Never insert utensils (spoon, spatula etc.) through the feed tube of the cover.
- Never remove accessories unless the appliance is completely stopped.
- Never introduce a utensil containing metal into a microwave oven.
- Only use one accessory at a time.
- Handle the cutter and blades with care - they are extremely sharp.
- You must remove the blades (d) and the drive shaft (c) before emptying the bowl.
- Empty the chopping bowl or liquidiser before detaching the handle.
- Never touch the moving parts.
- Do not operate your appliance when empty.
- Do not allow long hair, scarves, ties, etc. to dangle over accessories during operation.
Using your appliance for the first time
- Before using your appliance for the first time, wash all the accessory parts in hot, soapy water (NOTE: the drive box for the whisk (f1) is not dishwasher-proof). Rinse and dry.
- Place the motor unit on a flat, clean and dry surface.
- Plug in your appliance. The display will light up. You can follow the guidance given by the Digital Assistant.
Using the navigation keys (a6):


or


: Vertical arrows to select the desired option
: Right arrow to confirm your selection
: Starting the motor
: Press "C" briefly to go back to the previous page
Hold “C” down for longer (2 s) to go back to the start of the menu
: Stopping the motor
Digital Assistant:
When the processor is switched on, the start screen appears:

When you first use the appliance, this will be followed by a screen asking you to choose the language that you wish to use:
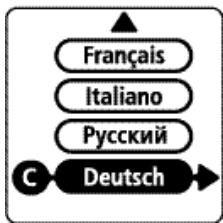
flowchart
graph TD
    A["Français"] --> B["C"]
    C["Italiano"] --> B
    D["Русский"] --> B
    E["Deutsch"] --> B
Select your language by means of the vertical arrows, then confirm your selection by pressing
Your language choice will remain in the memory, even once the appliance is switched off.
If, however, you wish to change your language choice, refer to the section “Adjusting display contrast and changing language selection”.
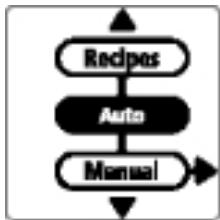
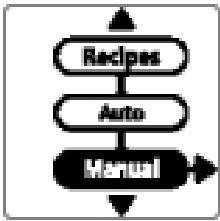
When this operation is completed, the main menu appears:
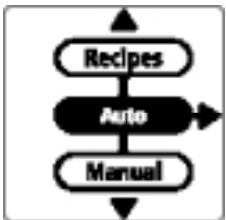
flowchart
graph TD
    A["Recipes"] --> B["Auto"]
    B --> C["Manual"]
Your food processor has 3 operation modes:
- Recipe mode:
step-by-step display of recipes for perfect success in preparing your starters, main courses, desserts etc.
- Auto mode:
use of accessories with pre-programmed functions (sequences and speeds adjusted for optimum results).
- Manual mode:
completely free use of your appliance with adjustment of speeds and timing to suit you.
Recipe Mode:
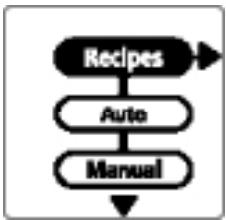
flowchart
graph TD
    A["Recipes"] --> B["Auto"]
    B --> C["Manual"]
In the main menu, select Recipe mode using the vertical arrows
-, then confirm your selection by pressing

flowchart
graph TD
    A["Basic rops"] --> B["Starters"]
    B --> C["Main crises"]
    C --> D["Desserts"]
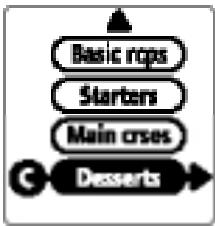
Select the required recipe category (Basic recipes, Starters, Main courses, Desserts, Drinks) using the verti-
cal arrows ♦, then confirm your choice by pressing ➤.
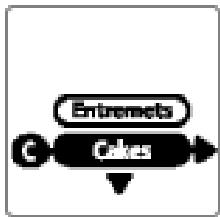
Select the recipe using the vertical arrows ◆, then confirm your choice by pressing ▶.
flowchart
graph TD
    A["Entremets"] --> B["Cakes"]
    B --> C["End"]
flowchart
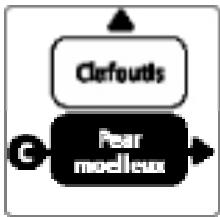
graph TD
    A["Cerfoutts"] --> B["Pear moelieux"]
    B --> C["→"]

For some recipes, you have the choice of 2/4 persons or 6/8 persons. Select the number of servings using the vertical arrows, then confirm your choice by pressing.
You will then be given information regarding the recipe: number served, preparation time, cooking time, etc.
Press ▶ to continue.

flowchart
graph TD
    A["C"] --> B["Cooking"]
    B --> C["Looking"]
You have the choice of: step by step, or
- going straight on to prepare the recipe
- reading through the recipe to ascertain the ingredients and method.
Select your choice using the vertical arrows, then confirm your choice by pressing.
flowchart
graph TD
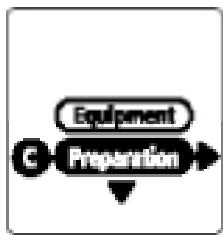
C["C"] -->|Equipment| Preparation
Preparation -->|Down Arrow| End
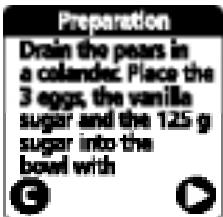
Each recipe is displayed step by step to make its preparation as easy as possible.
Make your selection using the vertical arrows ♦, then confirm your choice by pressing ➤.
The equipment required for the recipe is listed in this section.
If you have everything ready, continue by pressing ▶ to start viewing the preparation instructions.


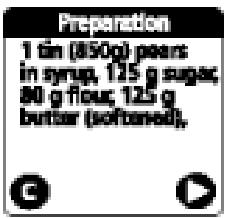
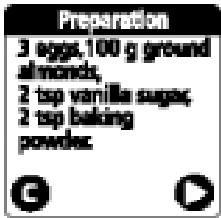
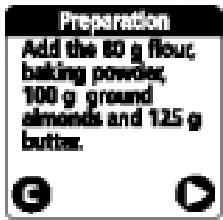
The preparation instructions begin with the list of ingredients required.
Prepare the ingredients and continue bypassing ▶.
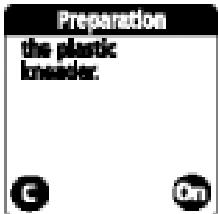
Follow the instructions, taking care to use the accessories and quantities specified.
Press On to start the processor.
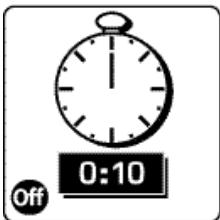
The motor will start. The speed and time are pre-programmed. A countdown of the time appears on the display.
The motor stops automatically at the end of the preset time.
If you press off while the machine is running, the motor will stop and the display will offer the following options:
- continue at the point where you left off,
- go back to the previous screen.
The button Ⓐ can be used to go back to the previous screen and run the machine for longer if necessary.
Follow the instructions until you reach the end of the recipe.
AUTO Mode:
flowchart
graph TD
    A["Recipes"] --> B["Auto"]
    B --> C["Manual"]
In the main menu, select Auto mode using the vertical arrows ◆, then confirm your choice by pressing ➤.
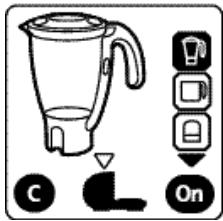
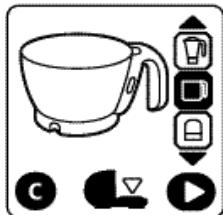
Select the desired accessory using the vertical arrows ♦.
The selected accessory will be shown on the display. Press On to start the processor (the motor speed is pre-adjusted for optimum results).
The flashing arrow towards the bottom of the display shows the power outlet (upper or lower) to be used.
The button Ⓐ can be used to go back to the previous screen.
For the accessories operating from the lower power outlet, select the chopping bowl (b3), followed by the desired accessory, using the vertical arrows ♦.
Press On to start the processor.
Hold the button ⓒ down for 2 seconds to go back to the main menu.
natural_image
Simple line drawing of a coffee cup with control buttons and play button icons (no text or symbols)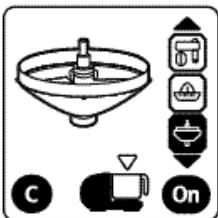

natural_image
Simple line drawing of a funnel with a handle and internal structure, labeled 'Off' (no text or symbols on the diagram itself)You can adjust the speed of the accessory using the vertical arrows ◆ on the keypad (a6).
The motor can be stopped by pressing off.
Manual Mode:
flowchart
graph TD
    A["Recipes"] --> B["Auto"]
    B --> C["Manual"]
In the main menu, select Manual mode using the vertical arrows, then confirm your choice by pressing.
flowchart
graph TD
    A["On"] --> B["Pulse"]
    C["C"] --> B
    B --> D["3"]
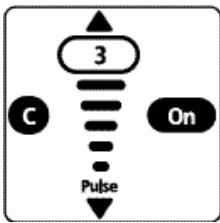
Select the desired speed using the vertical arrows. Press Ⓞ to start the processor. The button Ⓐ can be used to go back to the previous screen.
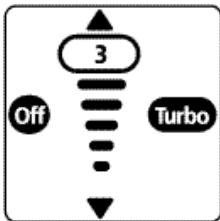
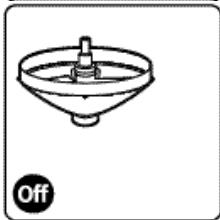
flowchart
graph TD
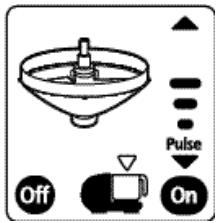
A["3"] --> B["Off"]
A --> C["Turbo"]
The Turbo mode can be accessed when the motor is running by continuously holding down the button on the right; this allows the machine to run at maximum power. The motor can be stopped by pressing off.
While the motor is stopped, Pulse mode (intermittent operation to give your preparation a better finish) becomes available when
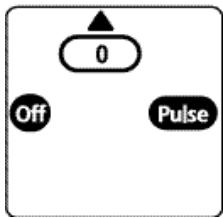
the 📋 button is used to select the lowest speed. Pulse mode operation is obtained by pressing the right arrowon your keypad (a6).
Adjusting display contrast and changing language selection.
On switching on the processor, when the start screen appears, press simultaneously on the bottom button.
The following screen will appear:

flowchart
graph TD
    A["Language"] --> B["Contrast"]
    B --> C["C"]
Select the mode that you wish to modify and proceed with the change.
Functional faults
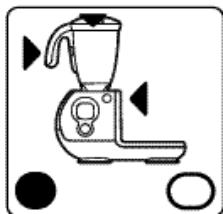
If your appliance fails to work, the Digital Assistant indicates the points to be checked with flashing arrows:
natural_image
Simple line drawing of a coffee maker with control panel and buttons (no text or symbols)Your processor is not working with the chopping bowl: check the positioning of bowl, cover and handle; otherwise, check that the cover of the upper power outlet (a1) is properly closed.
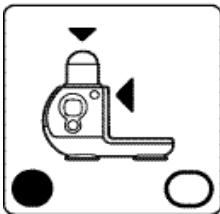
natural_image
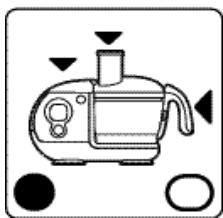
Simple line drawing of a blender with control knob and buttons (no text or symbols)Your processor is not working with the liquidiser: check the positioning of bowl and handle and that the cover is properly latched.
natural_image
Simple line drawing of a camera with no text or symbolsYour processor is not working with the small mincer:
check the position of the bowl and the latching of the cover.
After 16 minutes of inactivity, the display goes into standby. Pressing one of the keys on the keypad (a6) will restore the display.
You now know all the functions of the DIGITAL ASSISTANT.
You can prepare all the recipes programmed into your food processor.
These recipes are classified in a number of categories, as follows:
BASIC RECIPES:
DOUGHS
White bread dough
Short-crust pastry
Pancake batter
Brioche dough
Rich short-crust pastry
Pizza dough
Choux pastry
SAUCES
Avocado sauce
Mayonnaise
Aïoli
Tomato coulis
Guacamole
STARTERS
FLANS
Quiche lorraine
Mushroom cake
Provençale Tart
Fondante flan
SOUFFLES
Salmon soufflé
Asparagus flan
Fish terrine
Cheese soufflé
SOUPS
Cream of mushroom
Farmhouse soup
Gaspacho
Creamed asparagus
Creamed leek
MAIN COURSES
MEATS DISHES
Filet mignon pork curry
Moussaka
Stuffed tomatoes
Lincolnshire pie
Steak tartare
Osso Bucco
FISH DISHES
Salmon tart
Salmon tartare
Prawns with baby vegetables
Cod brandade
Scallops with Noilly-Prat
VEGETABLES
Gratin dauphinois
Courgette gratin
Carrot purée
Potato soufflé
Lentil purée
DESSERTS
ENTREMETS
Raspberry ice
Chocolate mousse
Tiramisu
Chantilly cream
CAKES
Yoghurt gateau
Clafoutis
Pear moelleux
Pound cake
Apple tarte Tatin
DRINKS
Refreshing cocktail
Iced coffee
Energy cocktail
Fruit cocktail
Fruit shake
The functions of your food processor
① FITTING DETACHABLE PARTS
. FITTING / DETACHING THE BOWL (B3)
The bowl is used with the following accessories:
- blades (d), grating/slicing discs (e), whisk (f); citrus press (g), juice extractor (i), "Maxipress" (k).
- Fit the rubber ring (b3-2) at the bottom of the bowl. The lip of the ring should point upwards.
- Fit the driver (b3-1).
- Fit the nut (b3-3) and tighten it to lock the assembly.
- Dismantle the assembly for cleaning after each use.
. FITTING/DETACHING THE CHOPPING BOWL HANDLE (b4) AND THE LIQUIDISER HANDLE (h4)
For ease of cleaning and storage, the chopping bowl handle (b4) and liquidiser handle (h4) are detachable.
- To fit the handle, position it against the lugs of the bowl/jug.
- Slide the handle upwards. The handle is correctly fitted when you hear a click.
- To detach the handle, press the release button (b4-1 or h4-1) and slide the handle downwards.
(Note: the lid of the liquidiser must be unlocked in order to be able to detach the handle (h4)).
NOTE: the handle (b4) must be fitted to the chopping bowl in order to be able to lock the upper power outlet cover (a1).
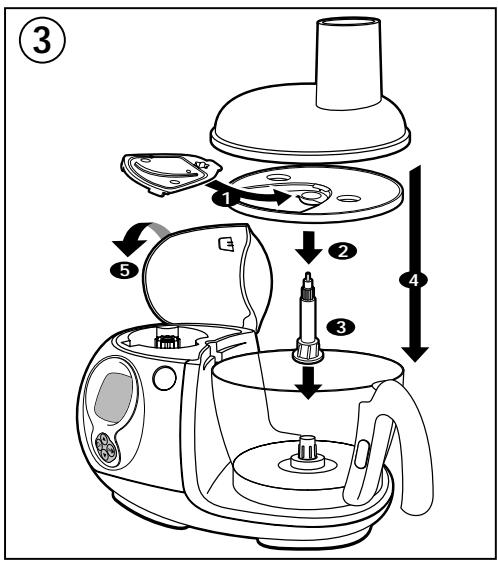
②MIXING/LIQUIDISING/CHOPPING/KNEADING
ACCESSORIES USED
- Bowl assembly (b), drive spindle (c) and blades (d):
. metal blade (d1) for liquidising and chopping,
. plastic kneader (d2) for kneading or mixing.
FITTING ACCESSORIES
Press the release button (a4) to open the upper power outlet cover (a1).
- Fit the bowl (b3) on the lower power outlet (a3).
- Fit the drive spindle (c) on the bowl driver (b3-1).
- Slide the metal blade (d1) or the plastic kneader (d2) onto the drive shaft (c) down to the bottom of the bowl.
- Place the ingredients in the bowl.
- Fit the lid (b2) on the bowl.
- Close the top outlet cover (a1). You should hear a click.
To release the blades (d) from the drive shaft (c):
- Place the assembly on a stable surface.
- Turn the drive shaft (c) clockwise while holding the upper part of the blade (d).
USAGE AND PRACTICAL TIPS
Liquidising
- In manual mode: set the speed between 3 and 5 and press On to start the appliance.
- In Auto mode: select the accessory ☐ then 📄 and press ⓕ.
You can liquidise up to 1 litre of soup or compote in 20 s.
Chopping
- In manual mode: set the speed to 5 and press On to start the appliance.
- In Auto mode: select the accessory ☐ then ☑ and press On.
In 15 to 30 s, you can chop up to 600 g of food:
. hard produce: cheese, dried fruit, certain vegetables (carrots, celery, etc.).
. soft produce: certain vegetables (onions, spinach, etc.).
. raw or cooked meats (boned, trimmed of gristle and diced).
. raw or cooked fish.
Kneading/mixing
- In manual mode: set the speed to 5 and press On to start the appliance.
- In Auto mode: select the accessory ☐ then ☑ and press On.
When kneading, stop the appliance as soon as you see the dough form a ball.
You can:
. knead up to 1.2 kg of heavy dough (short-bread, short-crust, bread) in about 60 s.
. mix up to 1 litre of batter for pancakes, waffles etc. in 1 min to 1 min 30 s.
. mix 1.5 kg of light dough (sponge cake, pound cake) in 1 min 30 s to 3 min 30 s.
③GRATING/SLICING
ACCESSORIES USED
- Chopping bowl assembly (b), drive spindle (c) and grating/slicing discs (e).
FITTING ACCESSORIES
Press the release button (a4) to open the upper power outlet cover (a1).
- Fit the bowl (b3) on the lower power outlet (a3).
- Fit the desired sector (e2) in the holder disc (e1).
- Push the holder disc (e1) fully home on the drive shaft (c).
- Place the assembly on the bowl driver (b3-1).
- Fit the lid (b2) on the bowl.
- Close the upper outlet cover (a1). You should hear a click.
USAGE AND PRACTICAL TIPS
- Insert the food in the feed tube and feed it into the mechanism by means of the pusher (b1).
To grate:
- In manual mode: set the speed to 5 and press On to start the appliance.
- In Auto mode: select the accessory ☐ then ☑ and press ☑.
To slice:
- In manual mode: set the speed to 2 and press On to start the appliance.
- In Auto mode: select the accessory ☐ then ☑ and press On.
. thick slicing (H) / thin slicing (D): potatoes, onions, cucumbers, beetroot, apples, carrots, cabbage, etc.
. coarse grating (C) / fine grating (A): celeriac, potatoes, carrots, cheese, etc.
. Special reibekuchen grater (G): parmesan, coconut, chocolate.
④ BEATING/EMULSIFYING/WHIPPING
ACCESSORIES USED
- Chopping bowl assembly (b) and whisk (f).
FITTING ACCESSORIES
Press the release button (a4) to open the upper power outlet cover (a1).
- Fit the bowl (b3) on the lower power outlet (a3).
With the whisk (f):
- place it on the bowl driver (b3-1), then:
- Place the ingredients in the bowl.
- Fit the lid (b2) on the bowl.
- Close the top outlet cover (a1). You should hear a click.
- In manual mode: set the speed between 1 and 5, according to the preparation in hand, and press on to start the appliance.
- In Auto mode: select the accessory ☐ then 📋 and press On (the speed is programmed to increase in steps).
- Never use these accessories to knead heavy dough or to mix light dough.
You can prepare: mayonnaise, aioli, sauces, whipped egg whites (1 to 7), whipped cream, chantilly (up to 0.5 litres).
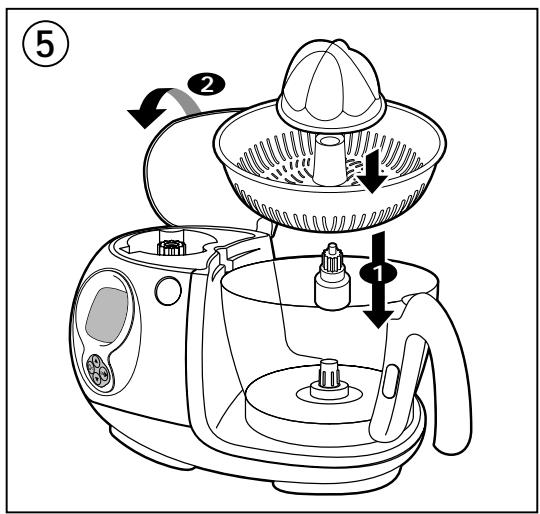
⑤ PRESSING CITRUS FRUIT
ACCESSORIES USED
- Bowl (b3) and citrus press (g)
FITTING ACCESSORIES
Press the release button (a4) to open the upper power outlet cover (a1).
- Fit the bowl on the lower power outlet (a3).
- Fit the drive spindle (g3) for the citrus press on the bowl driver.
- Fit the strainer (g2) on the bowl.
- Fit the cone (g1) through the hole in the strainer.
- Close the upper outlet cover (a1). You should hear a click.
USAGE AND PRACTICAL TIPS
- Hold one half of the fruit on the cone (g1).
- In manual mode: set the speed to 1 and press On to start the appliance.
- In Auto mode: select the accessory ☐ then 📋 and press On.
You can squeeze up to a litre of juice without emptying the bowl.
Press the release button (a4) to open the upper power outlet cover (a1).
- Place the ingredients in the liquidiser (h3) then lock the cover (h2) on the jug.
- Fit the liquidiser (h) on the upper power outlet (a2) (audible click). You can also fill the liquidiser after it is fitted on the upper power outlet (a2).
If the cover is not correctly fitted on the jug, the appliance will not start.
USAGE AND PRACTICAL TIPS
- In manual mode: set the speed between 1 and 5 and press On to start the appliance.
- In Auto mode: select the accessory 📁 and press On.
During preparation, you can add ingredients through the measuring stopper (h1) hole.
- Never fill the liquidiser with boiling liquid.
- Never use the liquidiser with dry produce (hazelnuts, almonds, peanuts, etc.).
You can:
- prepare up to 1.5 litres of finely chopped soup, crème soup, cream, compote, milkshake or cocktail,
- mix all kinds of batter (pancake, doughnut, clafoutis, custard cake),
- crush ice at speed 5.
To remove the liquidiser from the appliance, grasp it by the handle and press the release button (a4).
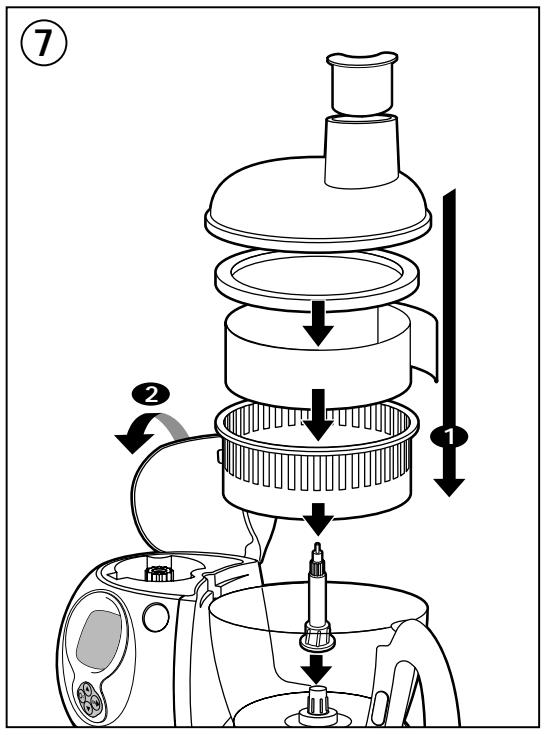
⑦ SQUEEZING FRUIT AND VEGETABLES
ACCESSORIES USED
- Bowl (b3), drive shaft (c) and juice extractor (i).
FITTING ACCESSORIES
Press the release button (a4) to open the upper power outlet cover (a1).
- Fit the bowl (b3) on the lower power outlet (a3).
- Fit the drive spindle (c) on the bowl driver.
- Slide the assembled filter holder (i3+i4+i5) onto the drive shaft (c).
- Fit the lid (i2) on the bowl.
- Close the top outlet cover (a1). You should hear a click.
USAGE AND PRACTICAL TIPS
- In manual mode: set the speed to 5 and press On to start the appliance.
- In Auto mode: select the accessory ☐ then and press On.
- Insert the food in the feed tube and feed it into the mechanism by means of the pusher (i1).
- You should empty residues from the filter holder and clean the filter strip at frequent intervals.
- Do not exceed 250 g of ingredients for each operation.
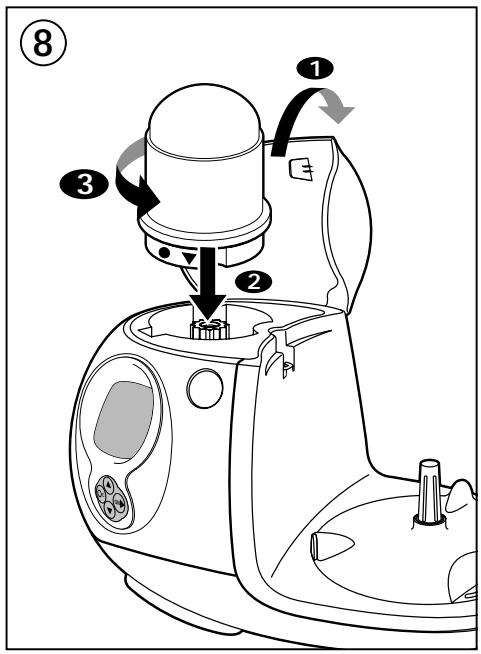
⑧CHOPPING SMALL QUANTITIES VERY FINELY
ACCESSORY USED
- Small-mincer (j) or grinder (l).
FITTING THE ACCESSORY
Press the release button (a4) to open the upper power outlet cover (a1).
- Place the ingredients in the bowl (j2 or l2) then lock the cover (j1 or l1) on the bowl.
- Fit the accessory on the upper power outlet (a2) (audible click).
If the cover is not correctly fitted, the appliance will not start.
USAGE AND PRACTICAL TIPS
- In manual mode: set the speed to 5 and press On to start the appliance.
- In Auto mode: select the accessory 🔒 and press On.
With the small mincer, you can:
. chop cloves of garlic, mixed herbs, parsley, dried fruit, bread, rusk for breadcrumbs, ham etc. in a few seconds.
. prepare baby-food purées: 120 g.
Maximum quantity of dried fruit/nuts (hazelnuts, almonds etc.): 80 g.
This small mincer is not intended for hard produce, such as coffee.
With the grinder, you can:
. chop coriander, pepper, cayenne pepper, dried apricots etc. in a few seconds.
. Maximum quantity/time, dried apricots: 140 g / 10 s. In manual mode: set the speed to 5.
To remove the accessory from the appliance, press the release button (a4).
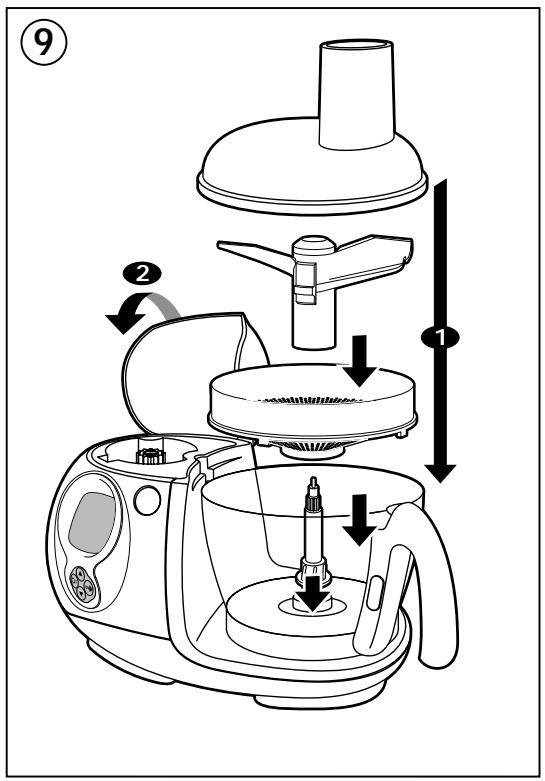
⑨ MILLING/PRESSING/CRUSHING (depending on model)
ACCESSORIES USED
- Chopping bowl assembly (b), drive spindle (c) and "Maxipress" (k).
FITTING THE ACCESSORY
Press the release button (a4) to open the upper power outlet cover (a1).
- Fit the bowl (b3) on the lower power outlet (a3).
- Fit the drive spindle (c) on the bowl driver (b3-1).
- Fit the blade unit (k1) in the central hole in the grid (k2) and press down until it clicks.
- Slide this assembly onto the drive spindle (c), turning slightly so that the notches of the grid come up against the ridges on the inside of the bowl (b3).
- Fit the lid (b2) on the bowl.
- Close the upper outlet cover (a1). You should hear a click.
USAGE AND PRACTICAL TIPS
- Chop the food into chunks before processing.
- In manual mode: set the speed to 1 and press On to start the appliance.
- In Auto mode: select the accessory ☐ then and press On.
Selecting the grid:
. Large holes: for purées (up to 1 kg of cooked vegetables or fruit) - potatoes, carrots, cauliflower.
. Small holes: for coulis or compotes of stoned fruit (up to 500 g) - tomatoes, grapes, strawberries, raspberries, redcurrants, apricots, peaches.
Note: if the blade unit fails to crush the food, check that it is properly clipped into the grid.
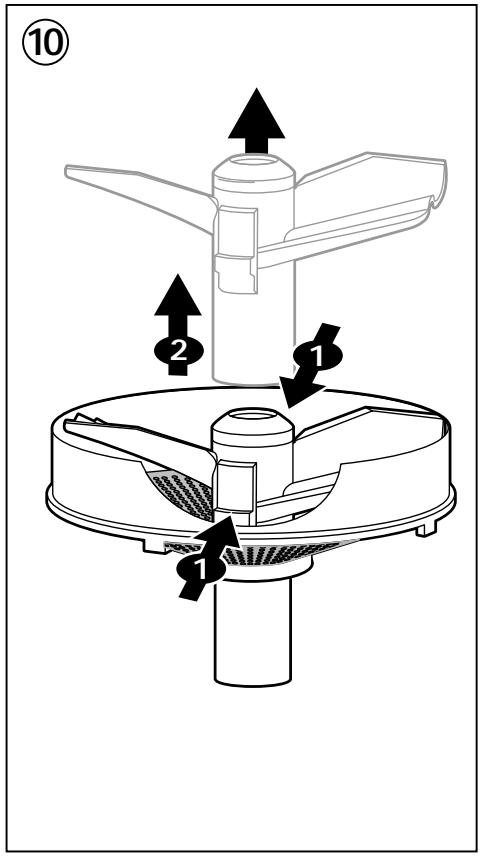
⑩DISMANTLING AND CLEANING THE "MAXIPRESS"
- Lift out the assembly of drive spindle / blade unit (k1) / grid (k2) by grasping the drive spindle (c).
- Remove the grid / blade unit assembly from the drive spindle (c).
- Press on the clips on either side of the blade unit to release it from the grid.
Cleaning
- Disconnect your appliance.
- For ease of cleaning, quickly rinse the accessories immediately after use.
- Wash and wipe the accessories (except for the drive box for the whisk (f1), they can be put in the dishwasher).
- Pour hot water with a few drops of washing up liquid into the liquidiser. Close the cover. Press the pulse button to give it a few pulses. Disconnect your appliance. Rinse the jug under running water and leave it to dry.
- The bowl (b3) is fitted with a rubber ring. To clean it, you can put the bowl through the dishwasher or wash it in hot water. When refitting the rubber ring to the bowl, ensure that the lip of the ring points upwards.
- For ease of cleaning and storage, the chopping bowl handle (b4) and the liquidiser handle (h4) are detachable and dishwasher proof.
- If your accessories are discoloured by the food (carrots, oranges etc.), rub them immediately after use with a cloth to which you have applied some cooking oil and then clean in the usual way.
- Never immerse the motor unit (a) or the whisk drive box (f1) in water or put them under running water. Wipe them with a damp sponge.
- The accessory blades are very sharp. Handle them with caution.
Storage
Your Odacio food processor is equipped with:
- a storage basket (n), which fits inside the chopping bowl (b). You can store the grating/slicing sectors (e2), the holder disc (e1), the metal blade (d1) and the drive shaft (c) in it.
- a cable tidy, built into in the motor unit - store the supply flex and adjust it to the required length by pushing it into or pulling it out of the base.
What to do if your appliance does not work
- Check:
. that the appliance is properly connected,
. that the accessories are correctly fitted on the motor unit,
. that the covers are correctly fitted, . when using the chopping bowl (b), that the top power outlet cover (a1) is properly closed.
Your appliance still does not work? If this is the case, contact a Moulinex approved service centre (see list in the “Moulinex Service” booklet).
Accessories
To equip your appliance as you require, you can obtain the following accessories from your usual dealer or from a Moulinex approved service centre:
| Accessories (Moulinex approved service centre) | |
| Chip cutter sector (E) | 5980678 |
| Special reibekuchen grater sector (parmesan, coconut) (G) | 5980679 |
| Coarse grater sector (C) | 5966358 |
| Thick slicer sector (H) | 5966356 |
| Fine grater sector (A) | 5980676 |
| Thin slicer sector (D) | 5980677 |
| Grinder | 5909800 |
| Small mincer | 5909801 |
| Whisk | 5980652 |
| Plastic kneader | 5980640 |
| Citrus press | 5909802 |
| Liquidiser | 5909803 |
| Metal blade | A11D09 |
| Juice extractor | 0697254 |
| Spatula | 4909610 |
| Storage basket | 5909804 |
| Maxipress | 5980671 |
| Chopping bowl | 5909808 |
| Chopping bowl handle | 0697271 |
| Liquidiser handle | 0697272 |

Environnement protection first !
①Your appliance contains valuable materials which can be recovered or recycled.
Leave it at a collection point.

- b Ensemble bol hachoir
- Description
- a Motor unit
- b Chopping bowl assembly
- c Drive shaft
- ACCESSORIES ACCORDING TO MODEL
- d Blades
- e Grating/slicing discs
- f Whisk
- g Citrus press
- h Liquidiser
- i Juice Extractor
- j Small mincer
- k "Maxipress"
- I Grinder
- m Spatula
- Safety instructions
- Any connection fault invalidates the guarantee.
- Using your appliance for the first time
- Using the navigation keys (a6):
- Digital Assistant:
- Your food processor has 3 operation modes:
- Adjusting display contrast and changing language selection.
- Functional faults
- You now know all the functions of the DIGITAL ASSISTANT.
- BASIC RECIPES:
- DOUGHS
- SAUCES
- STARTERS
- FLANS
- SOUFFLES
- SOUPS
- MAIN COURSES
- MEATS DISHES
- FISH DISHES
- VEGETABLES
- DESSERTS
- ENTREMETS
- CAKES
- DRINKS
- The functions of your food processor
- ① FITTING DETACHABLE PARTS
- FITTING / DETACHING THE BOWL (B3)
- FITTING/DETACHING THE CHOPPING BOWL HANDLE (b4) AND THE LIQUIDISER HANDLE (h4)
- ②MIXING/LIQUIDISING/CHOPPING/KNEADING
- ACCESSORIES USED
- FITTING ACCESSORIES
- USAGE AND PRACTICAL TIPS
- Liquidising
- Chopping
- Kneading/mixing
- ③GRATING/SLICING
- ④ BEATING/EMULSIFYING/WHIPPING
- ⑤ PRESSING CITRUS FRUIT
- ⑦ SQUEEZING FRUIT AND VEGETABLES
- ⑧CHOPPING SMALL QUANTITIES VERY FINELY
- ACCESSORY USED
- FITTING THE ACCESSORY
- This small mincer is not intended for hard produce, such as coffee.
- ⑨ MILLING/PRESSING/CRUSHING (depending on model)
- ⑩DISMANTLING AND CLEANING THE "MAXIPRESS"
- Cleaning
- Storage
- What to do if your appliance does not work
- Accessories
- Environnement protection first !
Brand : MOULINEX
Model : DFC8
Category : Kitchen appliance