WK 341 901 S - Wine cellar AMICA - Free user manual and instructions
Find the device manual for free WK 341 901 S AMICA in PDF.
Document temporarily unavailable
The manual is currently being transferred to our new server. It will be accessible again in a few hours. Thank you for your patience.
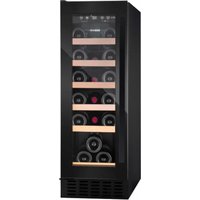
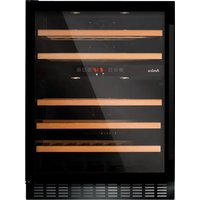
| Product type | Wine cellar |
| Brand | Amica |
| Model | WK 341 901 S |
| Climate class | SN (10-32°C), N (16-32°C), ST (16-38°C), T (16-43°C) |
| Temperature range | 5-20°C |
| Capacity | Number of standard bottles (0.75 L) per product sheet |
| Electrical supply | 220-240 V, 50 Hz, 10 A |
| Digital display | Temperature in °C or °F |
| Child lock | Panel lock/unlock (long press 5 s) |
| Interior lighting | LED, touch control |
| Door opening direction reversal | Reversible, procedure described |
| Anti-tip system | On some models, mounting as per diagram |
| External handle | To be attached on some models, without power tools |
| Cleaning | Warm water and baking soda, do not use abrasive products |
| Shelf maintenance | Removable, do not wash in dishwasher |
| Repairability | Intervention by authorized service only |
| Spare parts | Available 7 to 10 years depending on part |
| Warranty | According to warranty card |
| Compliance | Directives 2014/35/EU, 2014/30/EU, 2009/125/EC, 2011/65/EU |
Frequently Asked Questions - WK 341 901 S AMICA
User questions about WK 341 901 S AMICA
0 question about this device. Answer the ones you know or ask your own.
Ask a new question about this device
Download the instructions for your Wine cellar in PDF format for free! Find your manual WK 341 901 S - AMICA and take your electronic device back in hand. On this page are published all the documents necessary for the use of your device. WK 341 901 S by AMICA.