Series 7 730s 4 - Shaver BRAUN - Free user manual and instructions
Find the device manual for free Series 7 730s 4 BRAUN in PDF.

| Product Type | Electric Shaver |
| Brand | Braun |
| Model | Series 7 730s 4 |
| Power Supply | Rechargeable battery with power cord (low-voltage transformer plug) |
| Charging Time | 1 hour for full charge |
| Run Time | Up to 50 minutes of cordless shaving |
| Battery Indicator | Green light flashes during charging/use, solid when charged; red indicator flashes below 20% (2-3 shaves remaining) |
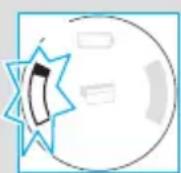
| Shaving Head | Removable shaving cassette, pivoting head with lock |
| Trimmer | Retractable trimmer for long hairs (sideburns, mustache, beard) |
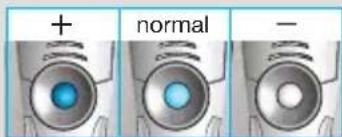
| Settings | Sensitive (−) and Intensive (+) buttons; settings indicated by light (dark blue, light blue, white) |
| Shaving | Can be used on dry skin or under running water (wet) |
| Cleaning | Washable under running water; dry cleaning possible with brush (brush included) |
| Maintenance | Oil the shaving cassette once a week after water cleaning (sewing machine oil) |
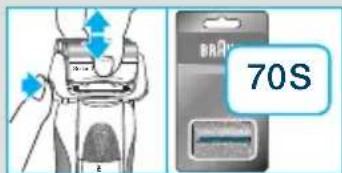
| Cassette Replacement | 70S shaving cassette recommended every 18 months; reset with reset button |
| Safety | Unplug before washing with water; do not modify cord; keep out of reach of children |
| Warranty | 2 years, covers manufacturing defects; does not cover normal wear or unauthorized repairs |
| Included Accessories | Power cord, travel case, cleaning brush, oil bottle |
| Charging Temperature | 5°C to 35°C |
| Material | Flexible foils, pivoting head |
Frequently Asked Questions - Series 7 730s 4 BRAUN
User questions about Series 7 730s 4 BRAUN
0 question about this device. Answer the ones you know or ask your own.
Ask a new question about this device
Download the instructions for your Shaver in PDF format for free! Find your manual Series 7 730s 4 - BRAUN and take your electronic device back in hand. On this page are published all the documents necessary for the use of your device. Series 7 730s 4 by BRAUN.
USER MANUAL Series 7 730s 4 BRAUN
natural_image
Illustration of a Series 7-branded hairbrush with a blue circular head and 'BRAUN' branding (no text or symbols on the device itself)Type 5694
Type 5695
www.braun.com
730s-4
720s-4
Deutsch 4,7
English 8,
Français 13, 17
Español 18, 22
Português 23, 27
Italiano 28, 32
Nederlands 33, 37
Dansk 38, 42
Norsk 43, 47
Svenska 48, 52
Suomi 53, 57
Türkçe 58
Ελληνικά 63, 67
D A 00 800 27 28 64 63
00 800 BRAUNINFOLINE
12
CH 08 44 - 88 40 10
GB 0800 783 70 10
IRL 1 800 509 448
CH 08 44 - 88 40 10
F 0 800 944 802
B 0 800 14 592
E 901 11 61 84
P 808 20 00 33
① (02) 6 67 86 23
NL 0 800-445 53 88
DK 70 15 00 13
N 22 63 00 93
S 020 - 21 33 21
FIN 020 377 877
TR 0 800 261 63 65
HK 852-25249377
(Audio Supplies Company Ltd.)
www.service.braun.com
Deutsch
natural_image
Illustration of a soldering iron plug and its wire with a base, alongside a small mechanical component (no text or symbols)
natural_image
Illustration of a hairdryer tip connecting a cable to an electrical outlet plug (no text or symbols visible)natural_image
Two circular diagrams with internal black and white shapes, no text or symbols present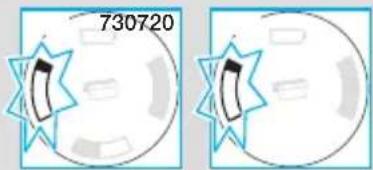
natural_image
Illustration of a soldering iron plug and its terminal connector with a compass needle (no text or symbols)Our products are designed to meet the highest standards of quality, functionality and design. We hope you enjoy your new Braun Shaver.
Warning
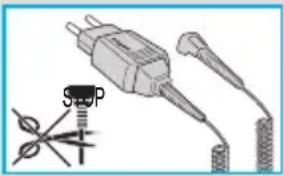
Your shaver is provided with a special cord set, which has an integrated Safety Extra Low Voltage power supply. Do not exchange or tamper with any part of it, otherwise there is risk of electric shock.
This appliance is not intended for use by children or persons with reduced physical or mental capabilities, unless they are supervised by a person responsible for their safety. In general, we recommend that you keep the appliance out of reach of children. Children should be supervised to ensure that they do not play with the appliance.
Oil bottle
Keep out of reach of children.
Do not swallow.
Dispose of properly when empty.
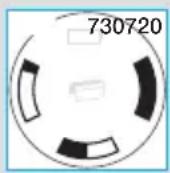
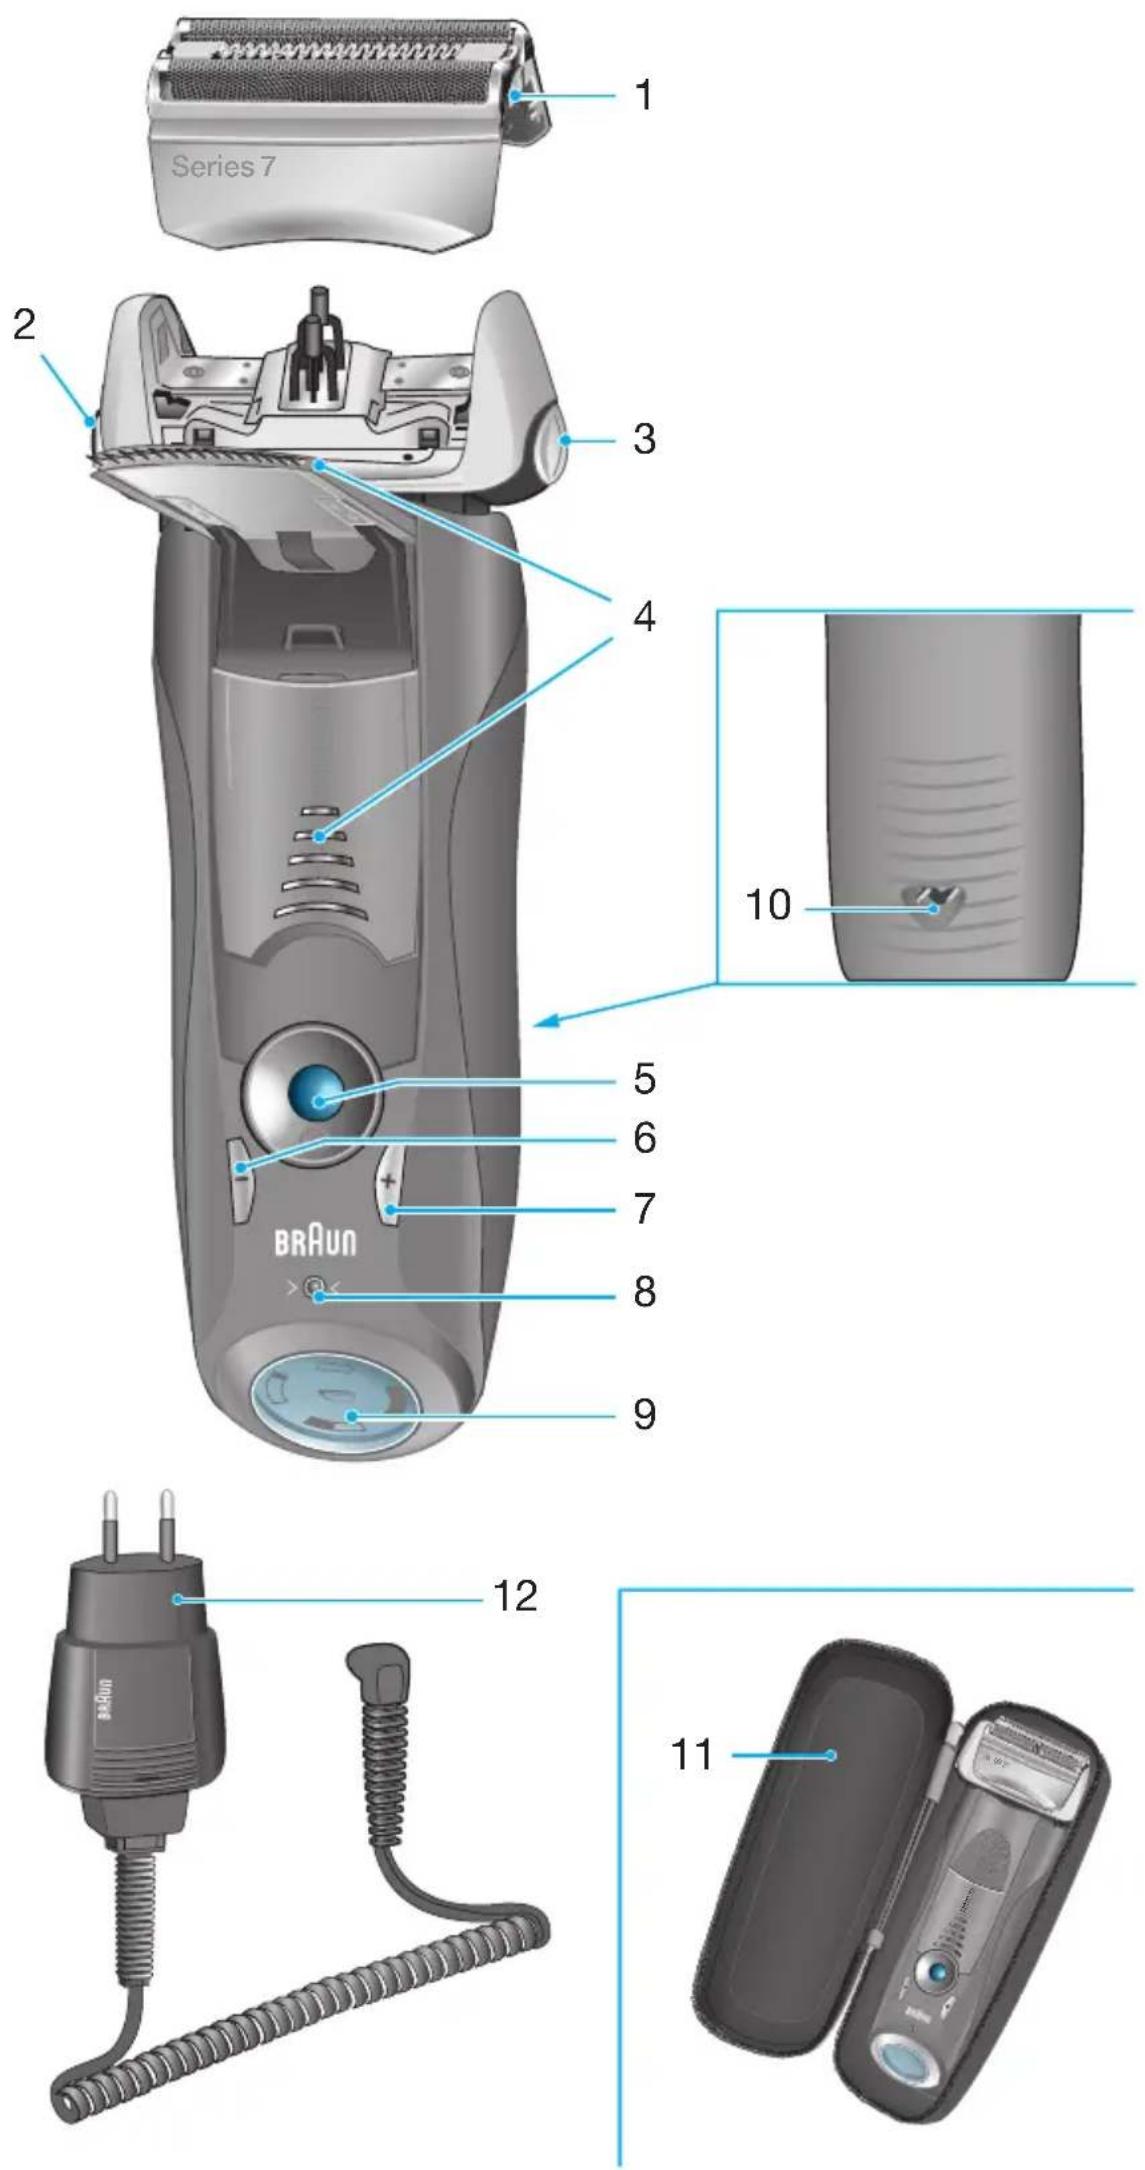
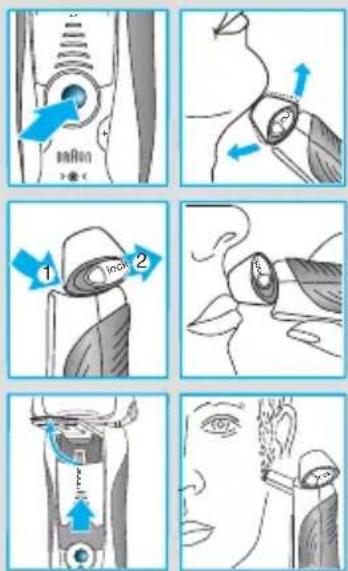
Description
① Foil & Cutter cassette
② Cassette release button
③ Shaver head «lock» switch
④ Pop-out long hair trimmer
⑤ On/off switch
⑥ (−) setting button (sensitive)
⑦ (+) setting button (intensive)
⑧ Reset button
⑨ Shaver display
⑩ Shaver power socket
⑪ Travel case
⑫ Special cord set
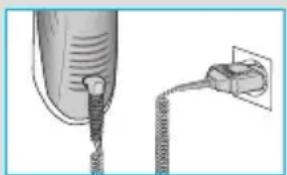
Charging
The best environmental temperature for charging is between 5 °C and 35 °C.
- Using the special cord set ⑫, connect the shaver to an electrical outlet with the motor switched off and charge it for at least one hour.
- A full charge provides up to 50 minutes of cordless shaving time. This may vary according to your beard growth.
natural_image
Illustration of a hairdryer tip connecting a cable to a plug (no text or symbols visible)- If the rechargeable battery has run out of power (discharged), you may also shave by connecting the shaver to an electrical outlet via the special cord set.
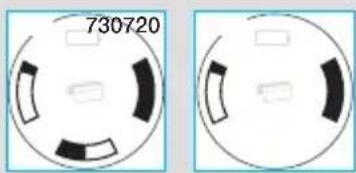
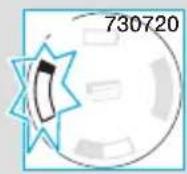
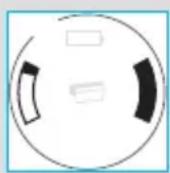
Shaver display ⑨
The green indicator fl ashes when the shaver is being charged or when in use.
When the battery is fully charged, the charge segment «1» (720) / «1» ««» (730) will light up continuously provided that the shaver is switched on or connected to an electrical outlet.
Stand-by mode
(shaver is switched off but connected to the mains)
Some minutes after completing the charging, the shaver switches to the stand-by-mode: The display turns off.
The red «¶» indicator fl ashes when the battery capacity has dropped below 20%, provided the shaver is switched on. The remaining capacity will then be suffi cient for 2 to 3 shaves.
natural_image
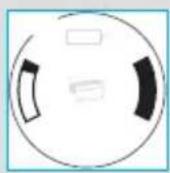
Two circular diagrams with black rectangular cutouts, no text or symbols present
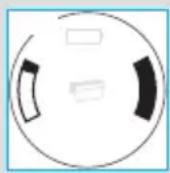
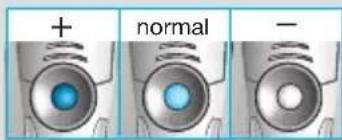
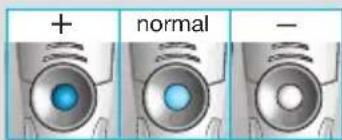
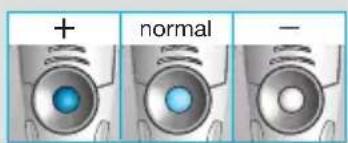
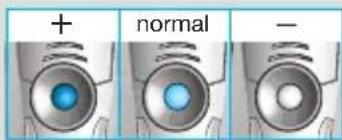
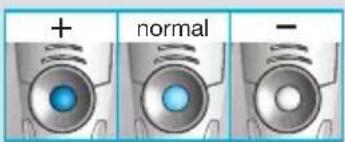
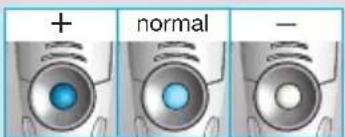
Personalizing your shaver
Personalizing your shaver
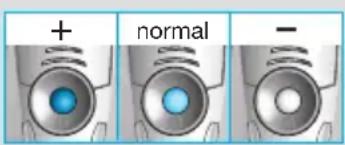
With the (-) ⑥ and (+) ⑦ buttons you can choose the best setting for shaving different areas of your face and as per your specific needs. The different settings are indicated by the pilot light incorporated in the on/off switch ⑤:
• dark blue (powerful shave)
• light blue (normal)
- white (for a thorough comfortable shave in sensitive areas of your face such as neck)
For a thorough and fast shave we recommend the (+) setting.
When switching on next time, the last used setting will be activated.

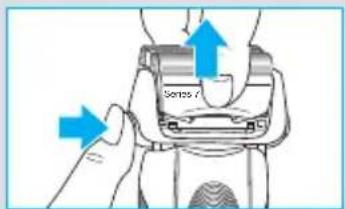
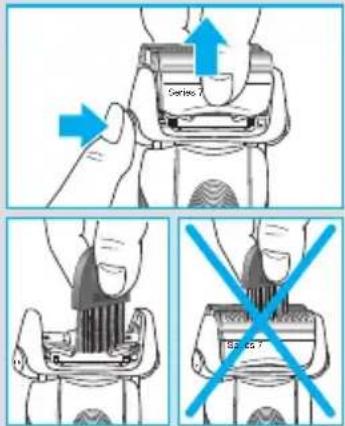
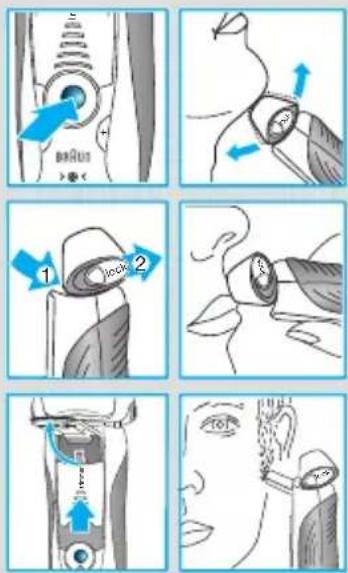
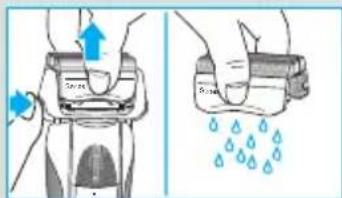
How to use
Press the on/off switch ⑤ to operate the shaver:
- The pivoting shaver head and fl oating foils automatically adjust to every contour of your face.
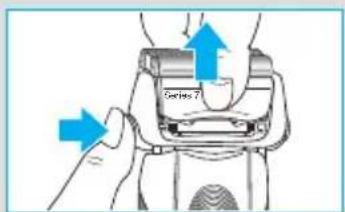
- To shave hard to reach areas (e.g. under the nose) slide the shaver head «lock» switch ③ to the back position to lock the pivoting head at an angle.
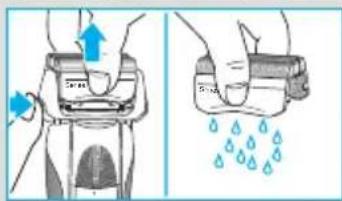
- To trim sideburns, moustache or beard, slide the pop-out long hair trimmer ④ upwards.
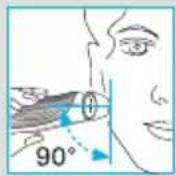
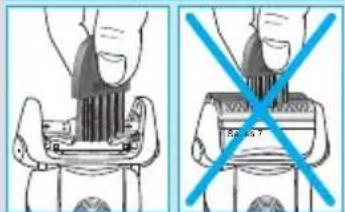
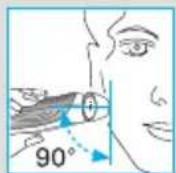
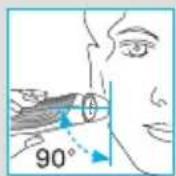
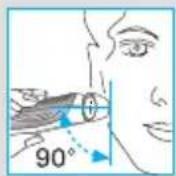
Tips for the perfect shave
For best shaving results, Braun recommends you to follow 3 simple steps:
- Always shave before washing your face.
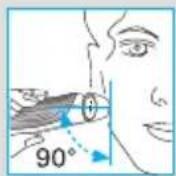
- At all times, hold the shaver at right angles (90°) to your skin.
- Stretch your skin and shave against the direction of your beard growth.
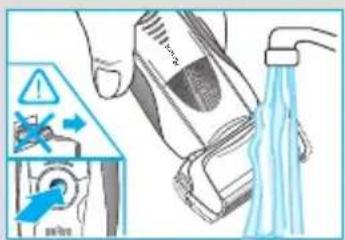
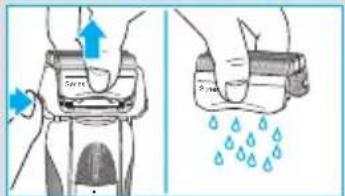
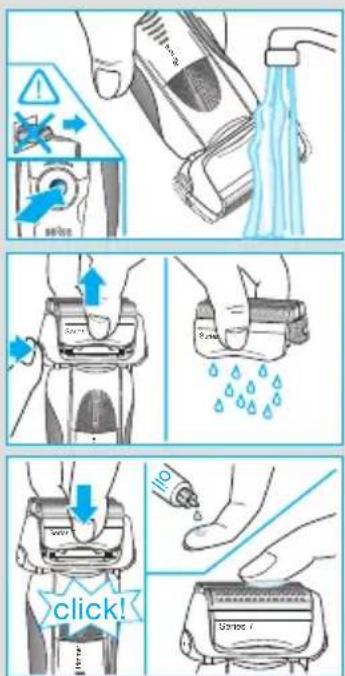
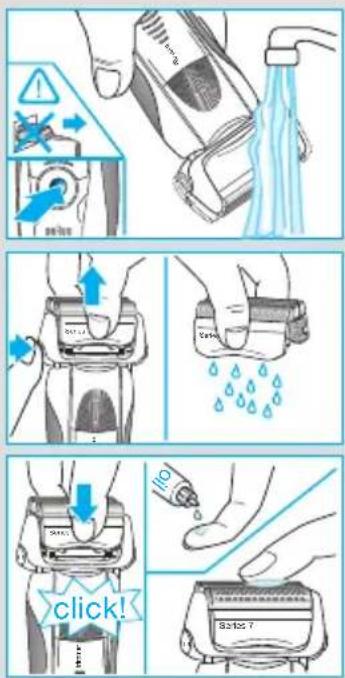
Cleaning

The shaver head is suitable for cleaning under running tap water.
Warning: Detach the shaver from the power supply before cleaning the shaver head in water.
Regular cleaning ensures better shaving performance. Rinsing the shaving head under running water after each shave is an easy and fast way to keep it clean:
- Switch the shaver on (cordless) and rinse the shaving head under hot running water. You may use liquid soap without abrasive substances. Rinse off all foam and let the shaver run for a few more seconds.
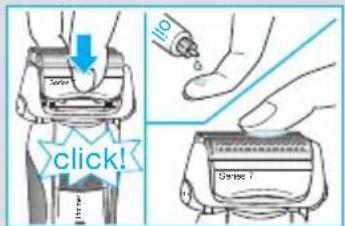
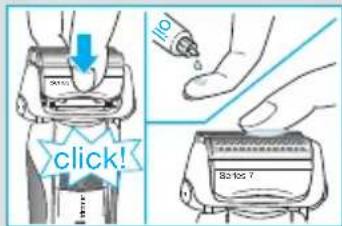
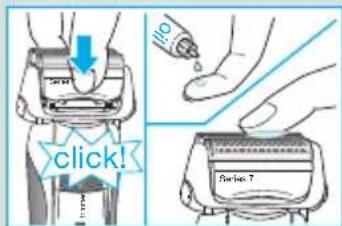
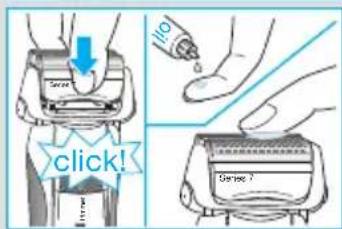
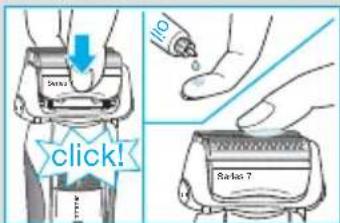
- Next, switch off the shaver, press the release button ② to remove the Foil & Cutter cassette ① and let it dry.
- If you regularly clean the shaver under water, then once a week apply a drop of light machine oil on top of the Foil & Cutter cassette.
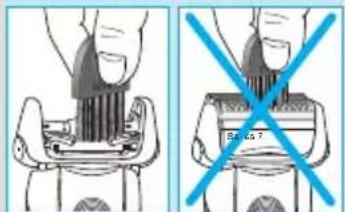
Alternatively, you may clean the shaver using the brush provided:
- Switch off the shaver. Remove the Foil & Cutter cassette ① and tap it out on a fl at surface. Using the brush, clean the inner area of the pivoting head. However, do not clean the foil and cutter cassette with the brush as this may damage it.
Keeping your shaver in top shape
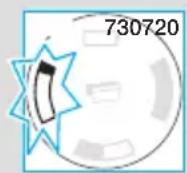
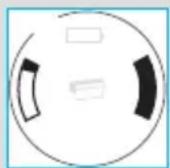
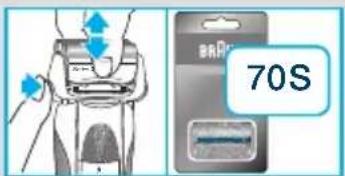
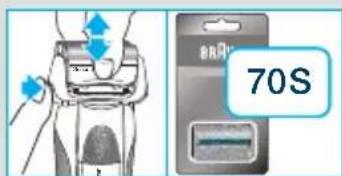
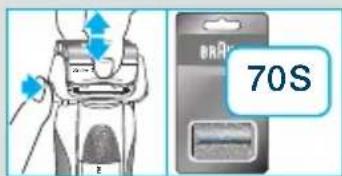
Replacing the Foil & Cutter cassette / reset
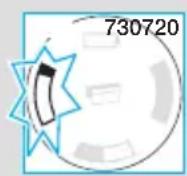
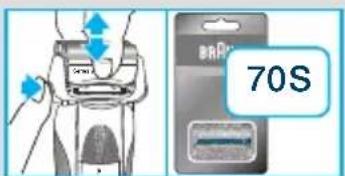
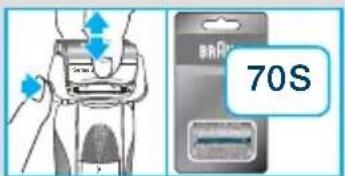
To maintain 100% shaving performance, replace the Foil & Cutter cassette ①, when the replacement symbol lights up on the shaver display ⑨ (after about 18 months) or when cassette is worn.
The replacement symbol will remind you during the next 7 shaves to replace the Foil & Cutter cassette. Then the shaver will automatically reset the display.
After you have replaced the Foil & Cutter cassette, use a ball-pen to push the reset button ⑧ for at least 3 seconds to reset the counter. While doing so, the replacement light blinks and goes off when the reset is complete. The manual reset can be done at any time.
Accessories
Available at your dealer or Braun Service Centres:
- Foil & Cutter cassette 70S
Environmental notice
This product contains rechargeable batteries. In the interest of protecting the environment, please do not dispose of the product in household waste at the end of its useful life. Disposal can take place at a Braun Service Centre or at appropriate collection points provided in your country.
Subject to change without notice.
For electric specifications, see printing on the special cord set.


Guarantee
We grant a 2 year guarantee on the product commencing on the date of purchase. Within the guarantee period we will eliminate any defects in the appliance resulting from faults in materials or workmanship, free of charge either by repairing or replacing the complete appliance at our discretion.
This guarantee extends to every country where this appliance is supplied by Braun or its appointed distributor.
This guarantee does not cover: damage due to improper use, normal wear and tear (e.g. shaver foil or cutter block) as well as defects that have a negligible effect on the value or operation of the appliance. The guarantee becomes void if repairs are undertaken by unauthorised persons and if original Braun parts are not used.
To obtain service within the guarantee period, hand in or send the complete appliance with your sales receipt to an authorised Braun Customer Service Centre (address information available online at www.service.braun.com).
For UK only:
This guarantee in no way affects your rights under statutory law.
natural_image
Illustration of a soldering iron plug and its wiring with a screwdriver (no text or symbols)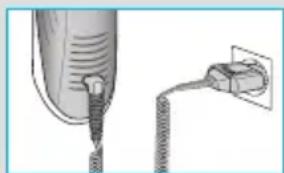
natural_image
Close-up of a hairdryer tip connecting a cable to a plug (no text or symbols visible)

natural_image
Illustration of a soldering iron plug and its wire with a screwdriver, no text or symbols present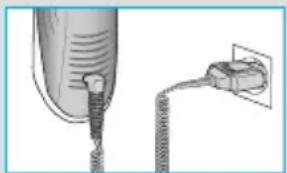
natural_image
Illustration of a hairdryer tip connecting a cable to a plug outlet (no text or symbols visible)natural_image
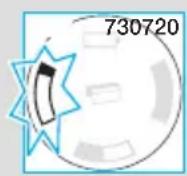
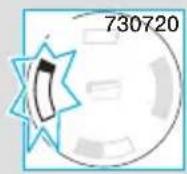
Two circular diagrams with internal black shapes, one labeled '730720' (no other text or symbols)


Modo de empleo
natural_image
Diagram of a soldering iron plug and its wire with a compass needle (no text or symbols)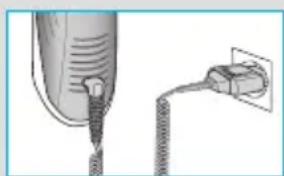
natural_image
Illustration of a hairdryer tip connecting a cable to a plug (no text or symbols visible)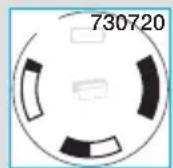


natural_image
Illustration of a soldering iron plug and its wire with a screwdriver, alongside a small mechanical component (no text or symbols)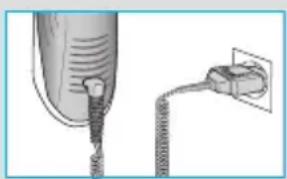
natural_image
Illustration of a hairdryer tip connecting a wire to a plug outlet (no text or symbols)natural_image
Two circular diagrams with internal black and white shapes, no text or symbols present


natural_image
Illustration of a soldering iron plug and its wiring with a compass (no text or symbols)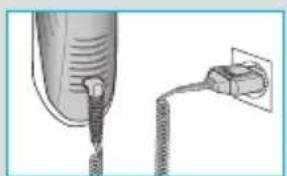
natural_image
Illustration of a hairdryer tip connecting a cable to a plug outlet (no text or symbols)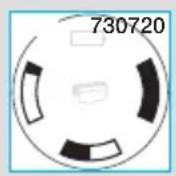

natural_image
Illustration of a soldering iron plug and its wire with a screwdriver, no text or symbols presentnatural_image
Illustration of a hairdryer with a cable inserted, connected to an electrical outlet plug (no text or symbols visible)Opladning af shaver
natural_image
Two circular diagrams with internal black and white shapes, no text or symbols present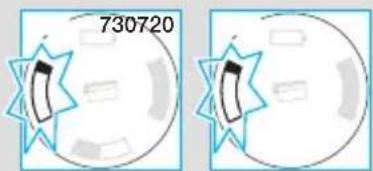

Brugsanvisning
natural_image
Illustration of a soldering iron plug and its wiring with a compass (no text or symbols)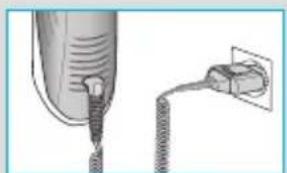
natural_image
Illustration of a hairdryer tip and plug connection (no text or symbols)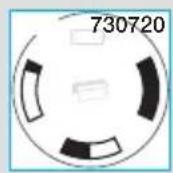
- Hvis det oppladbare batteriet er utladet, kan du barbere deg ved å koble barbermaskinen til en stikkontakt med spesialledningen.
Barbermaskinens display

natural_image
Two circular diagrams with internal geometric shapes, no text or symbols present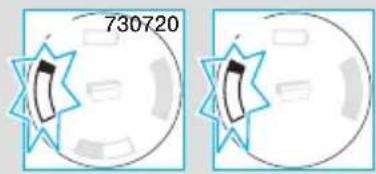

natural_image
Illustration of a soldering iron plug and its electrical terminal with a screwdriver (no text or symbols)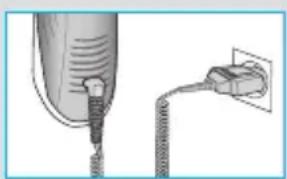
natural_image
Close-up of a hairdryer tip connecting a cable to a plug outlet (no text or symbols visible)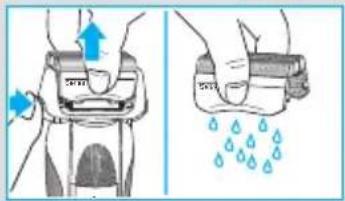
trconsumers@custhelp.com
natural_image
Illustration of a soldering iron plug and its electrical terminal with a screwdriver (no text or symbols)
natural_image
Illustration of a hairdryer tip connecting a plug into a socket (no text or symbols visible)