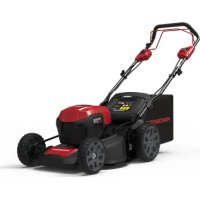
PD48LM46SP - Lawn mower Powerworks - Free user manual and instructions
Find the device manual for free PD48LM46SP Powerworks in PDF.


| Product Type | Cordless Lawn Mower |
| Brand | Powerworks |
| Model | PD48LM46SP |
| Rated Voltage | 48 V |
| Cutting Width | 460 mm |
| Adjustable Cutting Height | 25 - 80 mm |
| Grass Catcher Capacity | 55 L |
| Weight (without battery) | 28.5 kg |
| Self-Propelled Forward Speed | 0.7 - 1.35 m/s |
| Battery Type | Lithium-ion |
| Compatible Battery Model | BAM701 and other BAM series |
| Charger Type | Charger model CAM80 and other CAM series |
| Sound Pressure Level | 70.57 dB(A) |
| Guaranteed Sound Power Level | 94 dB(A) |
| Vibration | < 5 m/s², K = 1.5 |
| Self-Propulsion System | Yes, with lever and speed adjustment |
| Mulching Function | Yes, with mulching insert included |
| Side Discharge | Yes, with side discharge chute |
| Blade Height Adjustment | Central, by lever |
| Maintenance and Cleaning | Clean after each use with a dry cloth, do not use water. Lubricate bearings if necessary. |
| Safety | Wear eye protection. Remove safety key and battery before any intervention. Do not mow on slopes >15°. |
| Spare Parts and Repairability | Approved replacement blades, battery pack and charger available. |
| Product Warranty | 3 years (domestic use) |
| Battery Warranty | 2 years (domestic use) |
| Manufacturer | Changzhou Globe Co., Ltd. |
Frequently Asked Questions - PD48LM46SP Powerworks
User questions about PD48LM46SP Powerworks
0 question about this device. Answer the ones you know or ask your own.
Ask a new question about this device
Download the instructions for your Lawn mower in PDF format for free! Find your manual PD48LM46SP - Powerworks and take your electronic device back in hand. On this page are published all the documents necessary for the use of your device. PD48LM46SP by Powerworks.
USER MANUAL PD48LM46SP Powerworks
LME462
CE
Original Instructions / Übersetzung der Originalanweisungen / Traducción de las instrucciones originales / Traduzione delle istruzioni originali / Traduction des instructions d'origine / Vertaling van de originele gebruiksaanwijzing / Alkuperäisten ohjeiden käännös / Översättning av original instruktionerna / Produsentens instruksjoner / Oversættelse af de originale vejledninger / Překlad originálního návodu / Preklad originálneho návodu / Prevod originalnih navodil / Prijevod izvornih uputa / Az eredeti utasítás fordítása / Превод на оригинаналните инструкции / Orijinal Talimatlann Tercümesi / Originaalkasutusjuhendi tõlge
English
EN
1 Description.... 2
1.1 Purpose......2
1.2 Overview.... 2
2 Safety.... 2
3 Installation.... 2
3.1 Unpack the machine....2
3.2 Unfold the lower handle.....2
3.3 Install the upper handle ....2
3.4 Install the grass catcher.... 3
3.5 Install the mulch plug....3
3.6 Install the side discharge chute.... 3
3.7 Set the blade height.... 3
3.8 Install the battery pack.... 3
3.9 Remove the battery pack.... 3
4 Operation....3
4.1 Start the machine.... 3
4.2 Stop the machine.... 4
4.3 Operate the self-propel system 4
4.4 Empty the grass catcher....4
4.5 Operate on slopes....4
4.6 Operation tips....4
5 Maintenance....4
5.1 General maintenance....5
5.2 Lubrication....5
5.3 Replace the blade.... 5
5.4 Store the machine.... 5
6 Troubleshooting......5
7 Technical data.... 6
8 Warranty....6
9 EC Declaration of conformity......6
1 DESCRIPTION
1.1 PURPOSE
This machine is used for domestic lawn mowing. The cutting blade must be approximately parallel to the ground. All four wheels must touch the ground while you mow.
1.2 OVERVIEW
Figure 1-11.
| 1 | Handle knob |
| 2 | Lower handle |
| 3 | Bracket |
| 4 | Upper handle |
| 5 | Bolt |
| 6 | Knob |
| 7 | Grass catcher |
| 8 | Mulch plug |
| 9 | Side discharge chute |
| 10 | Rear discharge door |
| 11 | Grass catcher handle |
| 12 | Hook |
| 13 | Door rod |
| 14 | Mulch plug handle |
| 15 | Discharge chute |
| 16 | Side discharge door |
| 17 | Recesses |
| 18 | Pivot |
| 19 | Height adjustment lever |
| 20 | Battery door |
| 21 | Battery compartment |
| 22 | Safety key |
| 23 | Battery release button |
| 24 | Start button |
| 25 | Handle bar |
| 26 | Bail switch |
| 27 | Self-propel lever |
| 28 | Speed control button |
| 29 | Blade |
| 30 | Wood |
| 31 | Mounting screw |
| 32 | Arrows |
2 SAFETY
WARNING
Make sure that you do/obey all safety instructions.
Refer to Safety Manual.
3 INSTALLATION
WARNING
Do not change or make accessories that are not recommended by the manufacturer.
WARNING
Do not put in the safety key or the battery pack until you assemble all the parts.
3.1 UNPACK THE MACHINE
WARNING
Make sure that you correctly assemble the machine before use.
WARNING
- If the parts have damage, do not use the machine.
- If you do not have all the parts, do not operate the machine.
-
If the parts are damaged or missing, speak to the service center.
-
Open the package.
- Read the documentation in the box.
- Remove all the unassembled parts from the box.
- Remove the machine from the box.
- Discard the box and package in compliance with local regulations.
3.2 UNFOLD THE LOWER HANDLE
Figure 2.
- Pull and turn the handle knobs 90°.
- Unfold the lower handle.
- Line up the handle knobs in one of the three positions on the brackets.
- Turn the handle knobs 90° until they engage the holes in the brackets.
i NOTE
Make sure that the two handle knobs are in the same position.
WARNING
Do not make damage to the cables when you fold or unfold the handle.
3.3 INSTALL THE UPPER HANDLE
Figure 3.
- Align the holes in the upper handle and the lower handle.
- Put the bolts through the holes.
- Tighten the knobs onto the bolts.
- Do the same operation on the other side.
3.4 INSTALL THE GRASS CATCHER
Figure 4.
- Remove the mulch plug.
- Remove the side discharge chute.
- Open the rear discharge door and hold it.
- Hold the the grass catcher by its handle and engage the hooks on the door rod.
- Close the rear discharge door.
3.5 INSTALL THE MULCH PLUG
Figure 5.
- Remove the grass catcher.
- Open the rear discharge door and hold it.
- Hold the mulch plug by its handle and fit it in the discharge chute.
- Close the rear discharge door.
3.6 INSTALL THE SIDE DISCHARGE CHUTE
Figure 6.
CAUTION
When you use the side discharge chute,
• do not install the grass catcher.
- keep the mulch plug installed.
- Open the side discharge door and hold it.
- Line up the recesses of the side discharge chute below the pivot.
- Close the side discharge door.
3.7 SET THE BLADE HEIGHT
The machine can be set to different blade heights.
Figure 7.
- Pull the height adjustment lever rearward to increase the blade height.
- Pull the height adjustment lever forward to decrease the blade height.
3.8 INSTALL THE BATTERY PACK
Figure 8.
WARNING
- If the battery pack or charger is damaged, replace the battery pack or the charger.
- Stop the machine and wait until the engine stops before you install or remove the battery pack.
- Read, know, and do the instructions in the battery and charger manual.
i NOTE
The machine has an automatic switch function that lets the other battery work when the first cannot operate.
- Open the battery door.
- Align the lift ribs on the battery pack with the grooves in the battery compartment.
- Push the battery pack into the battery compartment until the battery pack locks into place.
- When you hear a click, the battery pack is installed.
- Close the battery door.
i NOTE
The engine starts only when you put in the safety key.
3.9 REMOVE THE BATTERY PACK
Figure 8.
- Open the battery door.
- Remove the safety key.
- Push and hold the battery release button.
- Remove the battery pack from the machine.
4 OPERATION
WARNING
Wear eye protection during operation.
4.1 START THE MACHINE
Figure 9.
- Put in the safety key.
- Push and hold the start button.
- While you hold the start button, pull the bail switch in the direction of the handle bar.
- Release the start button to start the machine.
Soft-Start
This Li-ion machine has a "soft-start" feature.
When you start the machine, it goes to full speed after approximately 3 seconds.
i NOTE
If the machine does not start, remove the battery pack and examine the mower deck to make sure that:
- no grass catches on the blade.
• the blade can turn freely by hand.
4.2 STOP THE MACHINE
Figure 9.
- Release the bail switch to stop the machine.
WARNING
Wait until the blades fully stop before you start the machine again. Do not quickly turn the machine off and on.
WARNING
Always remove the safety key and battery pack after you complete the work.
4.3 OPERATE THE SELF-PROPEL SYSTEM
Figure 9.
- Start the machine.
- While you hold the bail switch, push the self-propel lever in the direction of the handle bar.
- Hold the bail switch and the self-propel lever at the same time with your right hand.
-
Adjust the speed control button with your left hand.
-
Push the speed control button in the direction of the Cougar Symbol to increase the speed.
-
Pull the speed control button in the direction of the Turtle Symbol to decrease the speed.
-
Release the self-propel lever to close the self-propel system.
4.4 EMPTY THE GRASS CATCHER
Figure 10.
- Stop the machine.
- Remove the safety key.
- Remove the battery pack.
- Open the rear discharge door and hold it.
- Hold the grass catcher by its handle and unhook it from the door rod.
- Close the rear discharge door.
- Empty the grass catcher.
4.5 OPERATE ON SLOPES
WARNING
Do not mow on the slopes with decline more than 15° . If you are not comfortable, do not mow on a slope.
WARNING
Please keep a low self-propelled speed when you mow on a slope.
- Do not go up and down on a slope when you mow across the face of the slope. Be careful when you change the direction on a slope.
- Monitor the holes, ruts, rocks, and other hidden objects that can cause you to fall. Remove all obstacles such as rocks and tree limbs.
- Make sure that your footing is stable. If you are out of balance, release the bail switch immediately.
- Do not mow near drop-offs, ditches, or embankments.
4.6 OPERATION TIPS
- Do not tilt the machine when you start it.
- Do not put hands or feet near or below the turning parts.
- Keep the discharge chute clean.
- Do not cut wet grass.
- Higher blade height is necessary for new or thick grass.
- Clean the bottom of the mower deck after each use. Remove grass clippings, leaves, dirt, and other debris.
5 MAINTENANCE
WARNING
Remove the safety key and battery pack from the machine before maintenance.
WARNING
Keep the engine and battery pack free from grass, leaves or too much grease.
CAUTION
Use only approved replacement parts.
CAUTION
Do not let brake fluids, gasoline, petroleum-based materials touch the plastic parts. Chemicals can cause damage to the plastic, and make the plastic unserviceable.
CAUTION
Do not use strong solvents or detergents on the plastic housing or components.
5.1 GENERAL MAINTENANCE
- Before each use, examine the machine for damaged, missing, or loose parts such as screws, nuts, bolts and caps.
- Tighten correctly all the fasteners and caps.
- Clean the machine with a dry cloth. Do not use water.
5.2 LUBRICATION
Apply sufficient quantity of high grade lubricant to all bearings. No more bearing lubrication is necessary in usual operation conditions.
WARNING
Do not lubricate the wheel components. Lubrication can cause damage to the wheel components during operation.
5.3 REPLACE THE BLADE
Figure 11.
| ▲ WARNING |
| Use only approved replacement blades. |
WARNING
Wear heavy gloves or wind cloth around the blade when you touch the blade.
- Stop the machine.
- Make sure that the blades fully stop.
- Remove the safety key and battery pack.
- Turn the machine to its side.
- Use a piece of wood to prevent the movement of the blade.
- Remove the mounting screw with a wrench or socket.
- Remove the blade.
- Install the new blade. Make sure that the arrows engage the holes in the blade.
- Put in the mounting screw and tighten it.
5.4 STORE THE MACHINE
- Clean the machine before storage.
• Make sure the engine is not hot when you store the machine.
- Make sure that the machine does not have loose or damaged parts. If it is necessary, do these steps/instructions:
- Replace the damaged parts.
- Tighten the bolts.
- Speak to a person of an approved service center.
- Store the machine in a dry area.
- Make sure that children cannot come near the machine.
* If you cannot find the solution to these problems, go to the service center.
6 TROUBLESHOOTING
| Problem Possible | cause Solution | |
| The handle is not in position. | The bolts are not engaged correctly. | Adjust the height of the handle and make sure that the knobs and bolts are aligned correctly. |
| The machine does not start. | The battery capacity is low. | Charge the battery pack. |
| The bail switch is defective. | Replace the bail switch. | |
| The battery key is not put in. | Put in the battery key. | |
| The machine cuts grass unevenly. | The lawn is rough. | Examine the mowing area. |
| The blade height is not set correctly. | Move the wheels to a higher position. | |
| The machine does not mulch correctly. | Wet grass clippings attach to the deck. | Wait until the grass dries before mowing. |
| The mulch plug is missing. | Install the mulch plug. | |
| The machine is hard to push. | The grass is too tall, or the blade height is too low. | Increase the blade height. |
| The grass catcher and the blade drags in thick grass. | Empty the grass clippings from the grass catcher. | |
| There is a high vibration in the machine. | The blade is un-balanced and worn. | Replace the blade. |
| The engine shaft is bent. | 1. Stop the engine.2. Remove the safety key and battery pack.3. Disconnect the power source.4. Inspect for damage.5. Repair the machine before you start it again. | |
| The machine stops during mowing. | The blade height is too low. | Increase the blade height. |
| The battery pack is out of power. | Charge the battery pack. | |
| The grass clippings attach to the deck or the blade. | Remove the battery pack and check the deck. | |
| Operation temperature of the machine is too high. | Cool the machine. |
7 TECHNICAL DATA
| Voltage 48 V | |
| No load speed 2800 / min | |
| Cut width 460 mm | |
| Cut height 25 - 80 mm | |
| Self-propelled speed 0.7-1.35 m/s | |
| Grass catcher capacity 55 L | |
| Weight (without battery pack) | 28.5 kg |
| Measured sound pressure level | LpA = 70.57 dB(A) |
| Measured sound power level | LwA = 90.57 dB(A) |
| Guaranteed sound power level | LwA.d = 94 dB(A) |
| Vibration < 5 m/s | 2, K = 1.5 |
| Battery model BAM701 and | other BAM series |
| Charger model CAM805 and | other CAM series |
8 WARRANTY
(The full warranty terms and conditions can be found on Powerworks webpage)
The Powerworks warranty is 3 years on the product, and 2 years on batteries (consumer/private usage) from the date of purchase. This warranty covers manufacturing faults. A faulty product under warranty might be either repaired or replaced. A unit that has been misused or used in other ways then described in the owner's manual might be rejected for warranty. Normal wear, and wear parts are not considered as warranty. The original manufacturer warranty is not affected by any additional warranty offered by a dealer or retailer.
A faulty product must be returned to the point of purchase in order to claim for warranty, together with the proof of purchase (receipt).
9 EC DECLARATION OF CONFORMITY
Name and address of the manufacturer:
Name: Changzhou Globe Co., Ltd.
Address: No. 65 (3-4) Xinggang Rd., Zhonglou Zone, Changzhou 213101 China.
Name and address of the person authorised to compile the technical file:
Name: Peter Söderström
Address: Propellergatan 1, 211 15 Malmö, Sweden
Herewith we declare that the product
Category: Lawn mower
Model: LME462
Serial number: See product rating label
Year of Construction: See product rating label
- is in conformity with the relevant provisions of the Machinery Directive 2006/42/EC.
- is in conformity with the provisions of the following other EC-Directives:
• 2014/30/EU (EMC-Directive)
• 2000/14/EC (Noise Directive) incl. modifications(2005/88/EC)
Furthermore, we declare that the following (parts/clauses of) European harmonised standards have been used:
• EN 60335-1, EN60335-2-77; EN 62233, EN ISO 3744; EN 55014-1; EN 55014-2, ISO 11094
Measured sound power level: 90.57 dB(A)
Guaranteed sound power level: 94 dB(A)
Conformity assessment method to Annex VI Directive 2000/14/EC.
EC type approval to 2000/14/EC: Intertek Testing & Certification Co., Ltd. (NB0359)
Place, date: Changzhou, 20171207
Signature: Ted Qu, Quality Director
Ted Gu
Deutsch
DE
3.3 OBEREN GRIFF MONTIEREN
Abbildung 3.
Adresse: No. 65 (3-4) Xinggang Rd., Zhonglou Zone, Changzhou 213101 China.
9 DÉCLARATION DE CONFORMITÉ CE
Adresse : No. 65 (3-4) Xinggang Rd., Zhonglou Zone, Changzhou 213101 Chine.
• 2000/14/CE (Directive Bruit) modifications includes (2005/88/CE)
Adres: No. 65 (3-4) Xinggang Rd., Zhonglou Zone, Changzhou 213101 China.
4.4 TÖMMA GRÄSUPPSAMLAREN
Figur 10.
Adress: No. 65 (3-4) Xinggang Rd., Zhonglou Zone, Changzhou 213101, Kina.
5.1 GENERELT VEDLIKEHOLD
Adresse: No. 65 (3-4) Xinggang Rd., Zhonglou Zone, Changzhou 213101, Kina.
5.3 CSERÉLJE KI A KÉST
- ábra
FIGYELMEZTETÉS
4.4 ÇİM TOPLAYICIYI BOŞALTIN
Şekil 10.
Adres: No. 65 (3-4) Xinggang Rd., Zhonglou Zone, Changzhou 213101 Çin.
Aadress: No. 65 (3-4) Xinggang Rd., Zhonglou Zone, Changzhou 213101, Hiina.


- ENGLISH
- 1 DESCRIPTION
- 1.1 PURPOSE
- 1.2 OVERVIEW
- 2 SAFETY
- WARNING
- 3 INSTALLATION
- 3.1 UNPACK THE MACHINE
- 3.2 UNFOLD THE LOWER HANDLE
- FIGURE 2
- I NOTE
- 3.3 INSTALL THE UPPER HANDLE
- FIGURE 3
- 3.4 INSTALL THE GRASS CATCHER
- FIGURE 4
- 3.5 INSTALL THE MULCH PLUG
- FIGURE 5
- 3.6 INSTALL THE SIDE DISCHARGE CHUTE
- FIGURE 6
- CAUTION
- 3.7 SET THE BLADE HEIGHT
- FIGURE 7
- 3.8 INSTALL THE BATTERY PACK
- FIGURE 8
- 3.9 REMOVE THE BATTERY PACK
- 4 OPERATION
- 4.1 START THE MACHINE
- FIGURE 9
- SOFT-START
- 4.2 STOP THE MACHINE
- 4.3 OPERATE THE SELF-PROPEL SYSTEM
- 4.4 EMPTY THE GRASS CATCHER
- FIGURE 10
- 4.5 OPERATE ON SLOPES
- 4.6 OPERATION TIPS
- 5 MAINTENANCE
- 5.1 GENERAL MAINTENANCE
- 5.2 LUBRICATION
- 5.3 REPLACE THE BLADE
- 5.4 STORE THE MACHINE
- 8 WARRANTY
- 9 EC DECLARATION OF CONFORMITY
- DEUTSCH
- 3.3 OBEREN GRIFF MONTIEREN
- ABBILDUNG 3
- 9 DÉCLARATION DE CONFORMITÉ CE
- 4.4 TÖMMA GRÄSUPPSAMLAREN
- FIGUR 10
- 5.1 GENERELT VEDLIKEHOLD
- 5.3 CSERÉLJE KI A KÉST
- FIGYELMEZTETÉS
- 4.4 ÇİM TOPLAYICIYI BOŞALTIN
- ŞEKIL 10
Brand : Powerworks
Model : PD48LM46SP
Category : Lawn mower