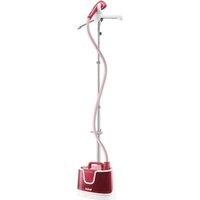
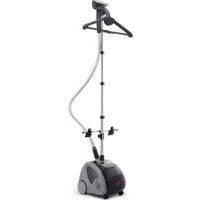
Pro Style One IT2461 - Steam cleaner TEFAL - Free user manual and instructions
Find the device manual for free Pro Style One IT2461 TEFAL in PDF.
| Product type | Steam cleaner |
| Brand | Tefal |
| Model | Pro Style One IT2461 |
| Water tank capacity | 1.3 L |
| Heat-up time | 45 seconds |
| Steam levels | 2 levels (high and low) |
| Accessories included | Fabric brush head, trouser clip, glove, foldable hanger |
| Hanger type | Adjustable telescopic hanger with hook |
| Switch | On/Off with integrated steam control |
| Indicator lights | Red (high steam), blue (low steam), off (stop) |
| Descaling | Every 6 months or if performance decreases |
| Cleaning | Sponge or damp cloth, no detergent |
| Safety | Do not use on thick carpet, do not iron worn clothing |
| Power supply | Mains (not specified) |
| Spare parts | Water tank, steam head, brush, clip, glove |
Frequently Asked Questions - Pro Style One IT2461 TEFAL
User questions about Pro Style One IT2461 TEFAL
0 question about this device. Answer the ones you know or ask your own.
Ask a new question about this device
Download the instructions for your Steam cleaner in PDF format for free! Find your manual Pro Style One IT2461 - TEFAL and take your electronic device back in hand. On this page are published all the documents necessary for the use of your device. Pro Style One IT2461 by TEFAL.
USER MANUAL Pro Style One IT2461 TEFAL
natural_image
3D rendering of a portable steam purifier with adjustable arm and base (no text or symbols visible)PRO STYLE ONE - IT24****
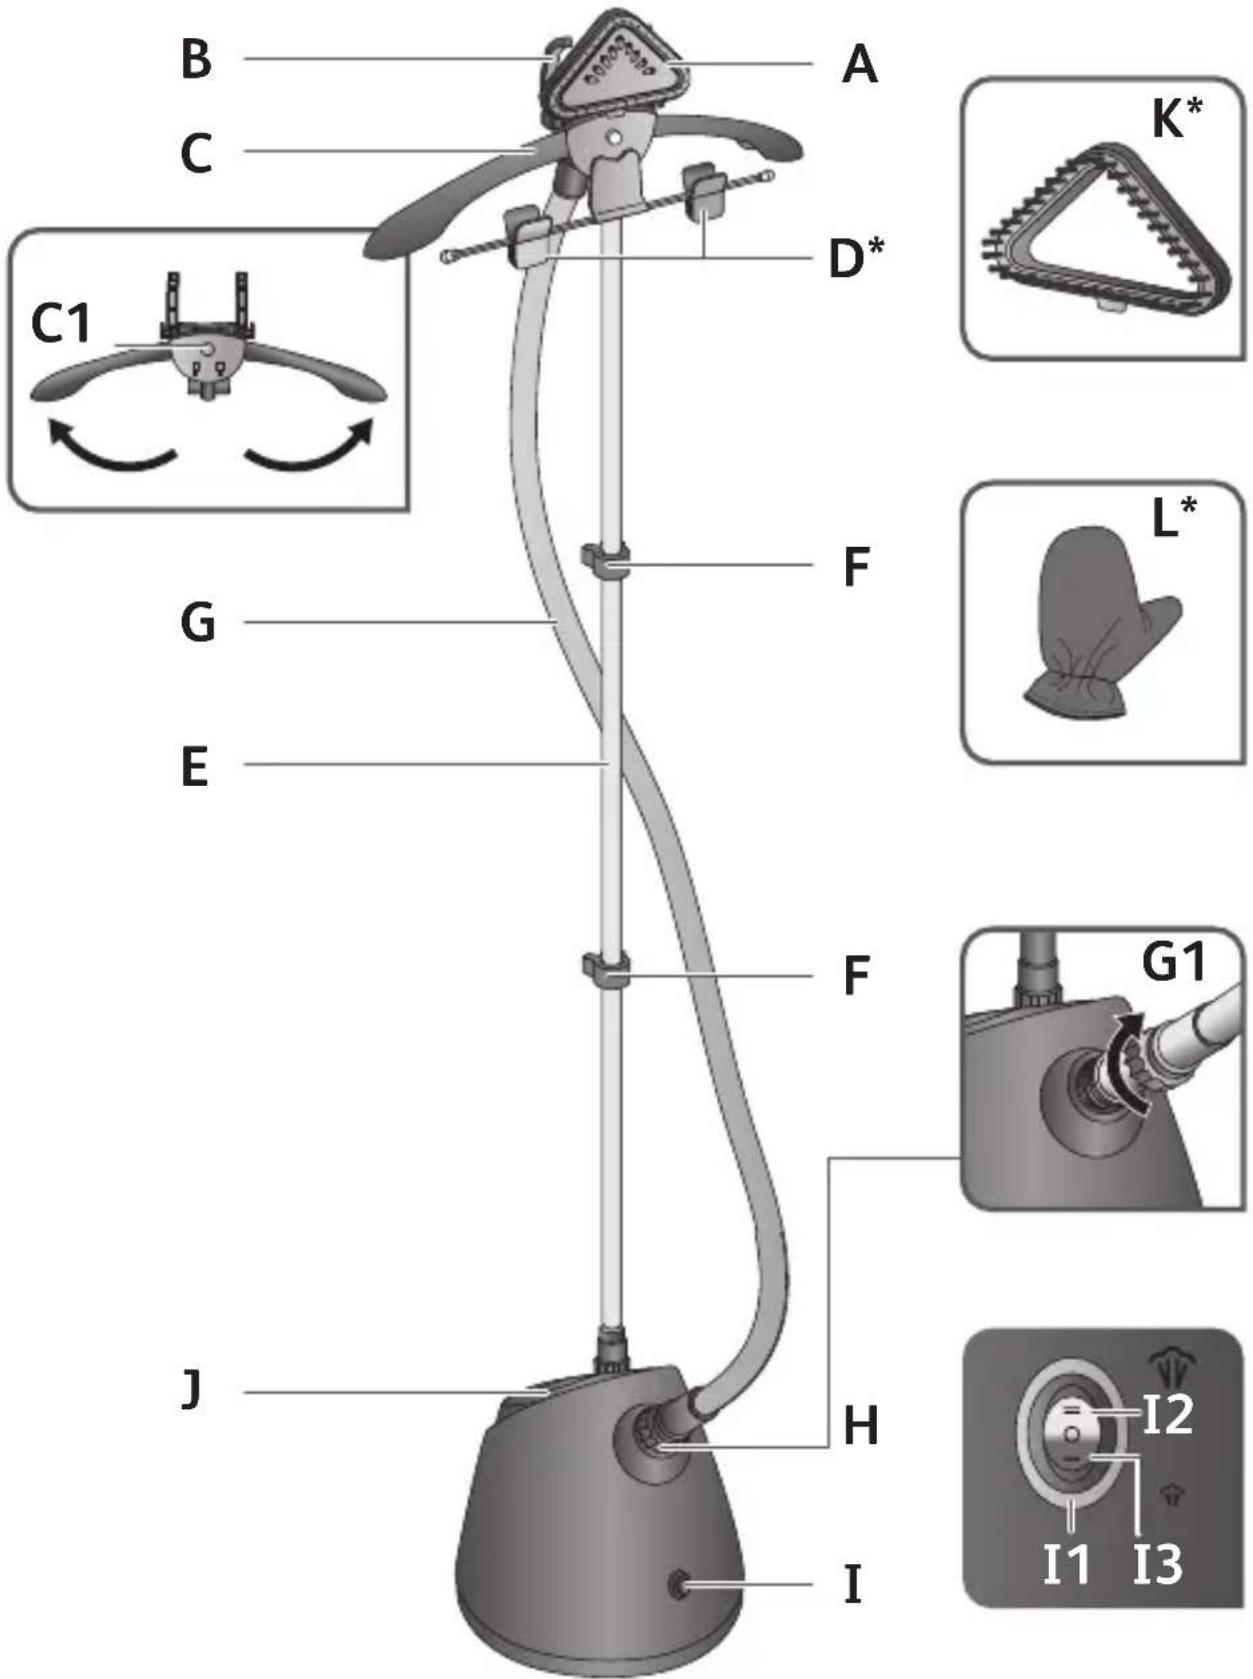
text_image
B A C D* K* C1 F G L* E F G1 J H I2 I1 I3* FR Selon le modèle / NL Afhankelijk van het model / DE Abhängig vom Modell / EN depending on model / EL Aváloya με το μοντέλο / TR Modele bağlı olarak / SV Beroende på modell / DA Afhængig af model / NO Avhengig av modell / FI Mallista riippuen / RU B зависимости от модели / UK Залежно від моделі / PL W zależności od modelu / CS V závislosti na modelu / BG B зависимост от модела / HU Modelltől függően / RO În funcție de model / SR Zavisno od modela / SK V závislosti od modelu / BS Ovisno o modelu / ET Oleneb mudelist / LV Atkaribā no modela / LT Priklausomai nuo modelio / SL Odvisno od modela / HR Ovisno o modelu / TH ขึ้นอยู่กับรุ่น / AR حسب الموديل
2
BEFORE USE
text_image
Safety warning illustration showing no protection symbols for electrical outlets and a hand holding a device, with an upward arrow indicating improvement.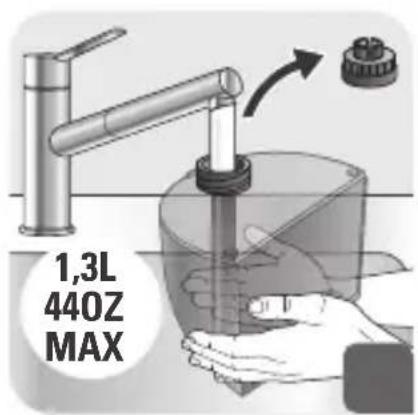
text_image
1,3L 440Z MAX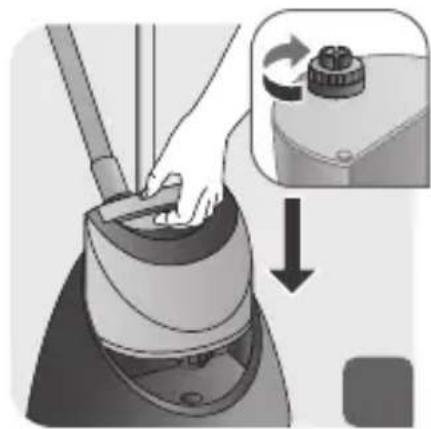
natural_image
Illustration of a hand using a tool to press down a small mechanical component, with an inset showing the rotary knob (no text or symbols present)
natural_image
Line drawing of a men's blouse with collar and button (no text or symbols)3
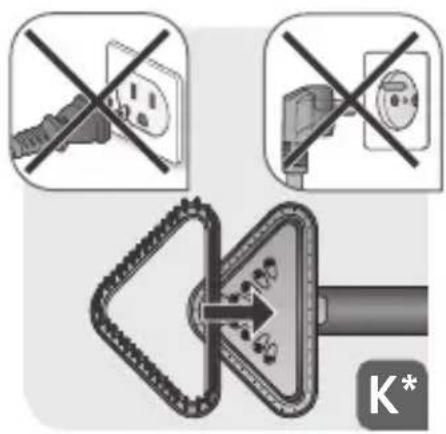
ACCESSORIES (\*IN SOME MODELS ONLY)
text_image
Safety warning illustration showing no protection symbols for electrical outlets and a hazard warning symbol with 'K*' label
natural_image
Illustration of a mechanical device with a triangular component and lever mechanism (no text or symbols)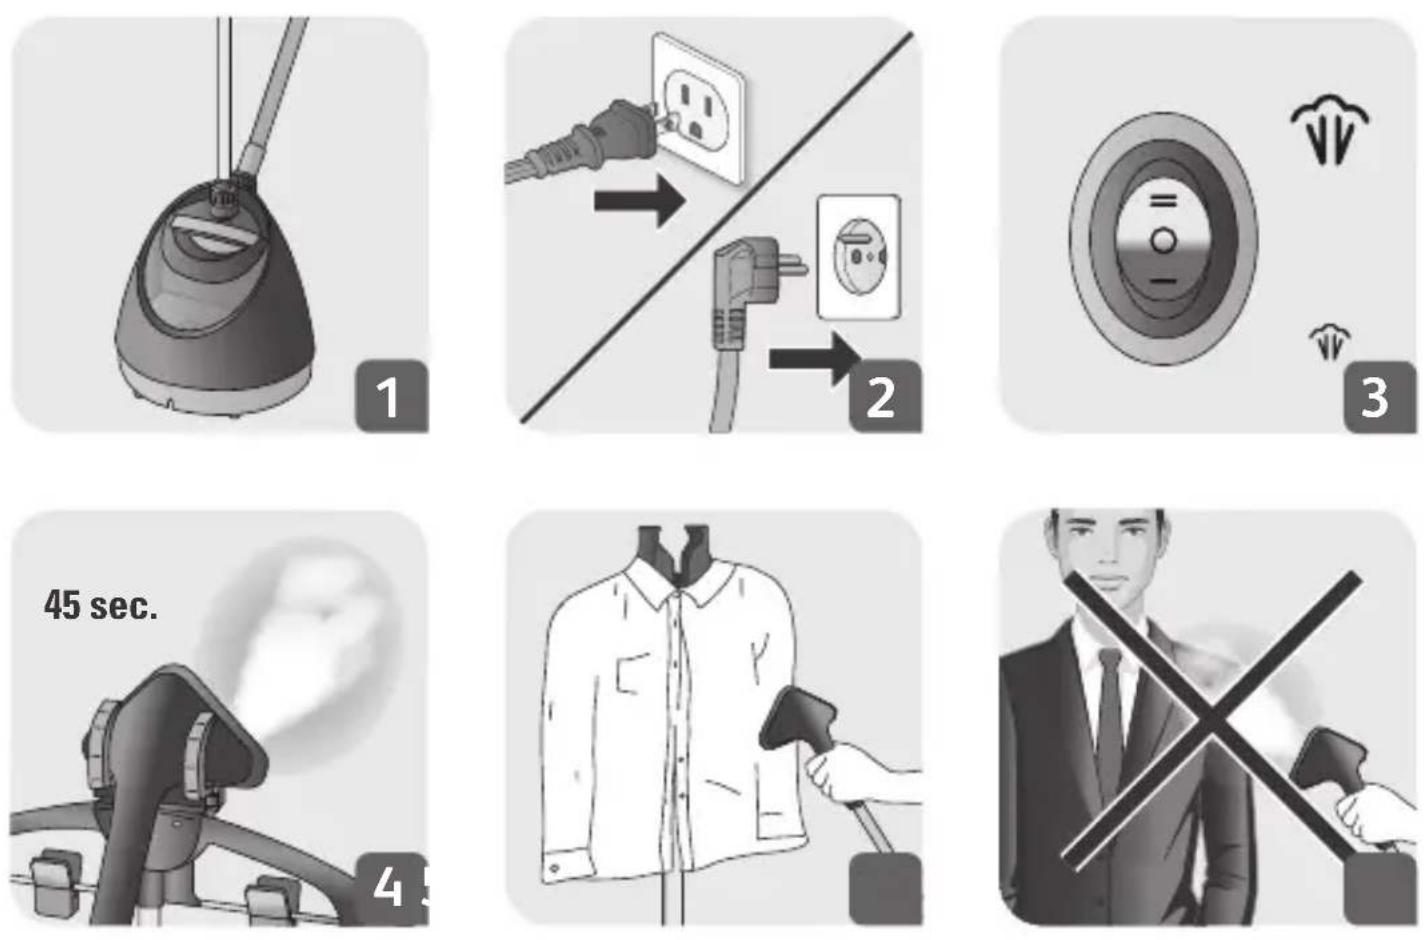
AFTER USE
natural_image
Illustration of hands using a tool to lift a water pump, showing mechanical components and a downward arrow (no text or symbols)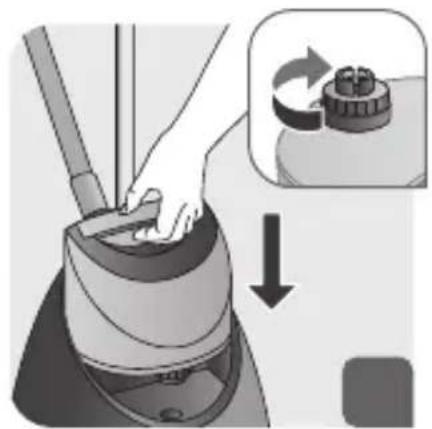
natural_image
Illustration of a hand using a brush to clean or adjust a small mechanical component, with an inset showing the process (no text or symbols)
text_image
1h7 DESCALING PROCEDURE
text_image
Diagram illustrating a mechanical device with labeled parts and directional arrows, showing components like a valve or clamp.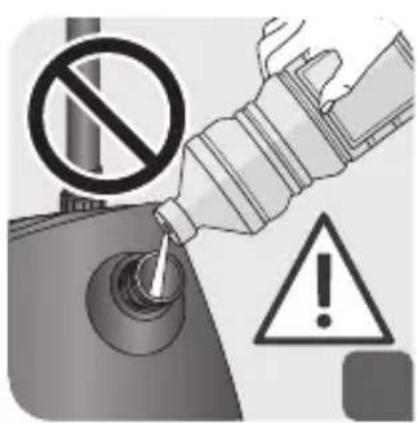
text_image
Warning symbol for a vehicle battery, showing no prohibition sign, warning sign, and warning triangle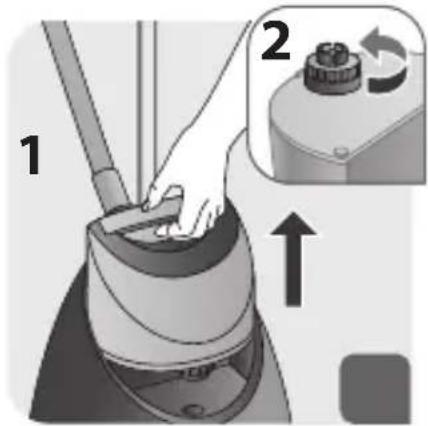
text_image
1 2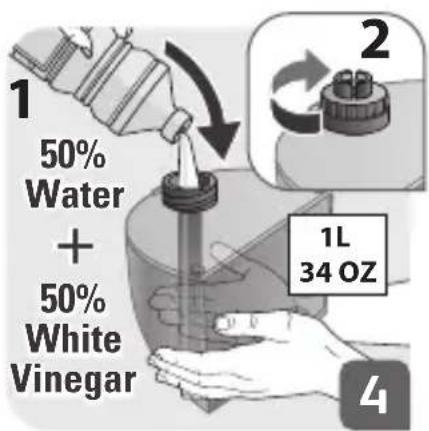
text_image
1 50% Water + 50% White Vinegar 2 1L 34 OZ 4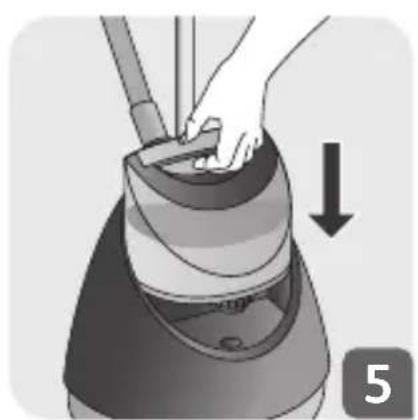
natural_image
Illustration of a hand using a tool to clean or adjust a garment with a downward arrow (no text or symbols)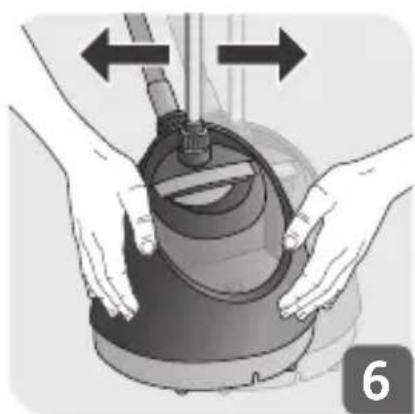
natural_image
Illustration of hands operating a vacuum cleaner with directional arrows indicating movement (no text or symbols)7 DESCALING PROCEDURE

text_image
5 MINS. 7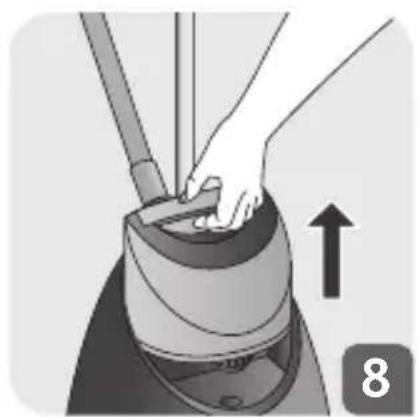
natural_image
Illustration of a hand using a tool to press down a device component, with an upward arrow indicating motion (no text or symbols)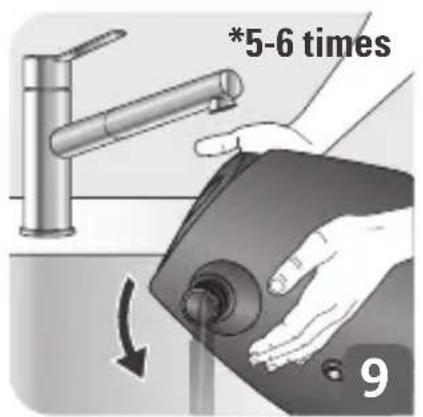
text_image
*5-6 times 9
text_image
step 1 to 9 * 5-6 times 10
text_image
1,3L 440Z MAX 11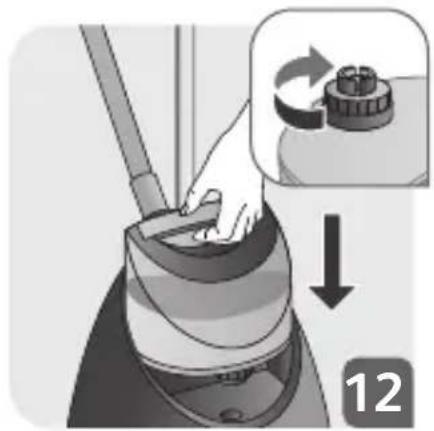
natural_image
Illustration of a hand using a brush to press down a cloth or towel, with an inset showing a rotary knob (no text or symbols)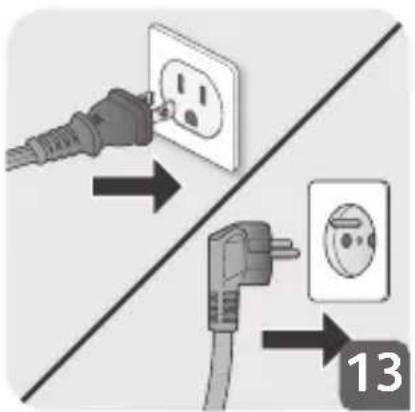
text_image
Diagram showing two electrical plug connections with labels and a numbered label '13'
natural_image
Illustration of a mechanical device with an hourglass symbol above it, no text or symbols present.DESCRIPTION
FR
A Tête vapeur
C1 Lock button for hanger foldability
D Trouser clips *
E Adjustable pole
F Pole locking clips
G Woven fabric steam hose G1 Hose Lock
H Hose Connector
* Depending on model
I ON/OFF switch + 2 steam setting button
I1 ON/OFF Light indicator
I2 High steam level position
I3 Low steam level position
J Removable Water tank
K Steam head brush *
L Glove *
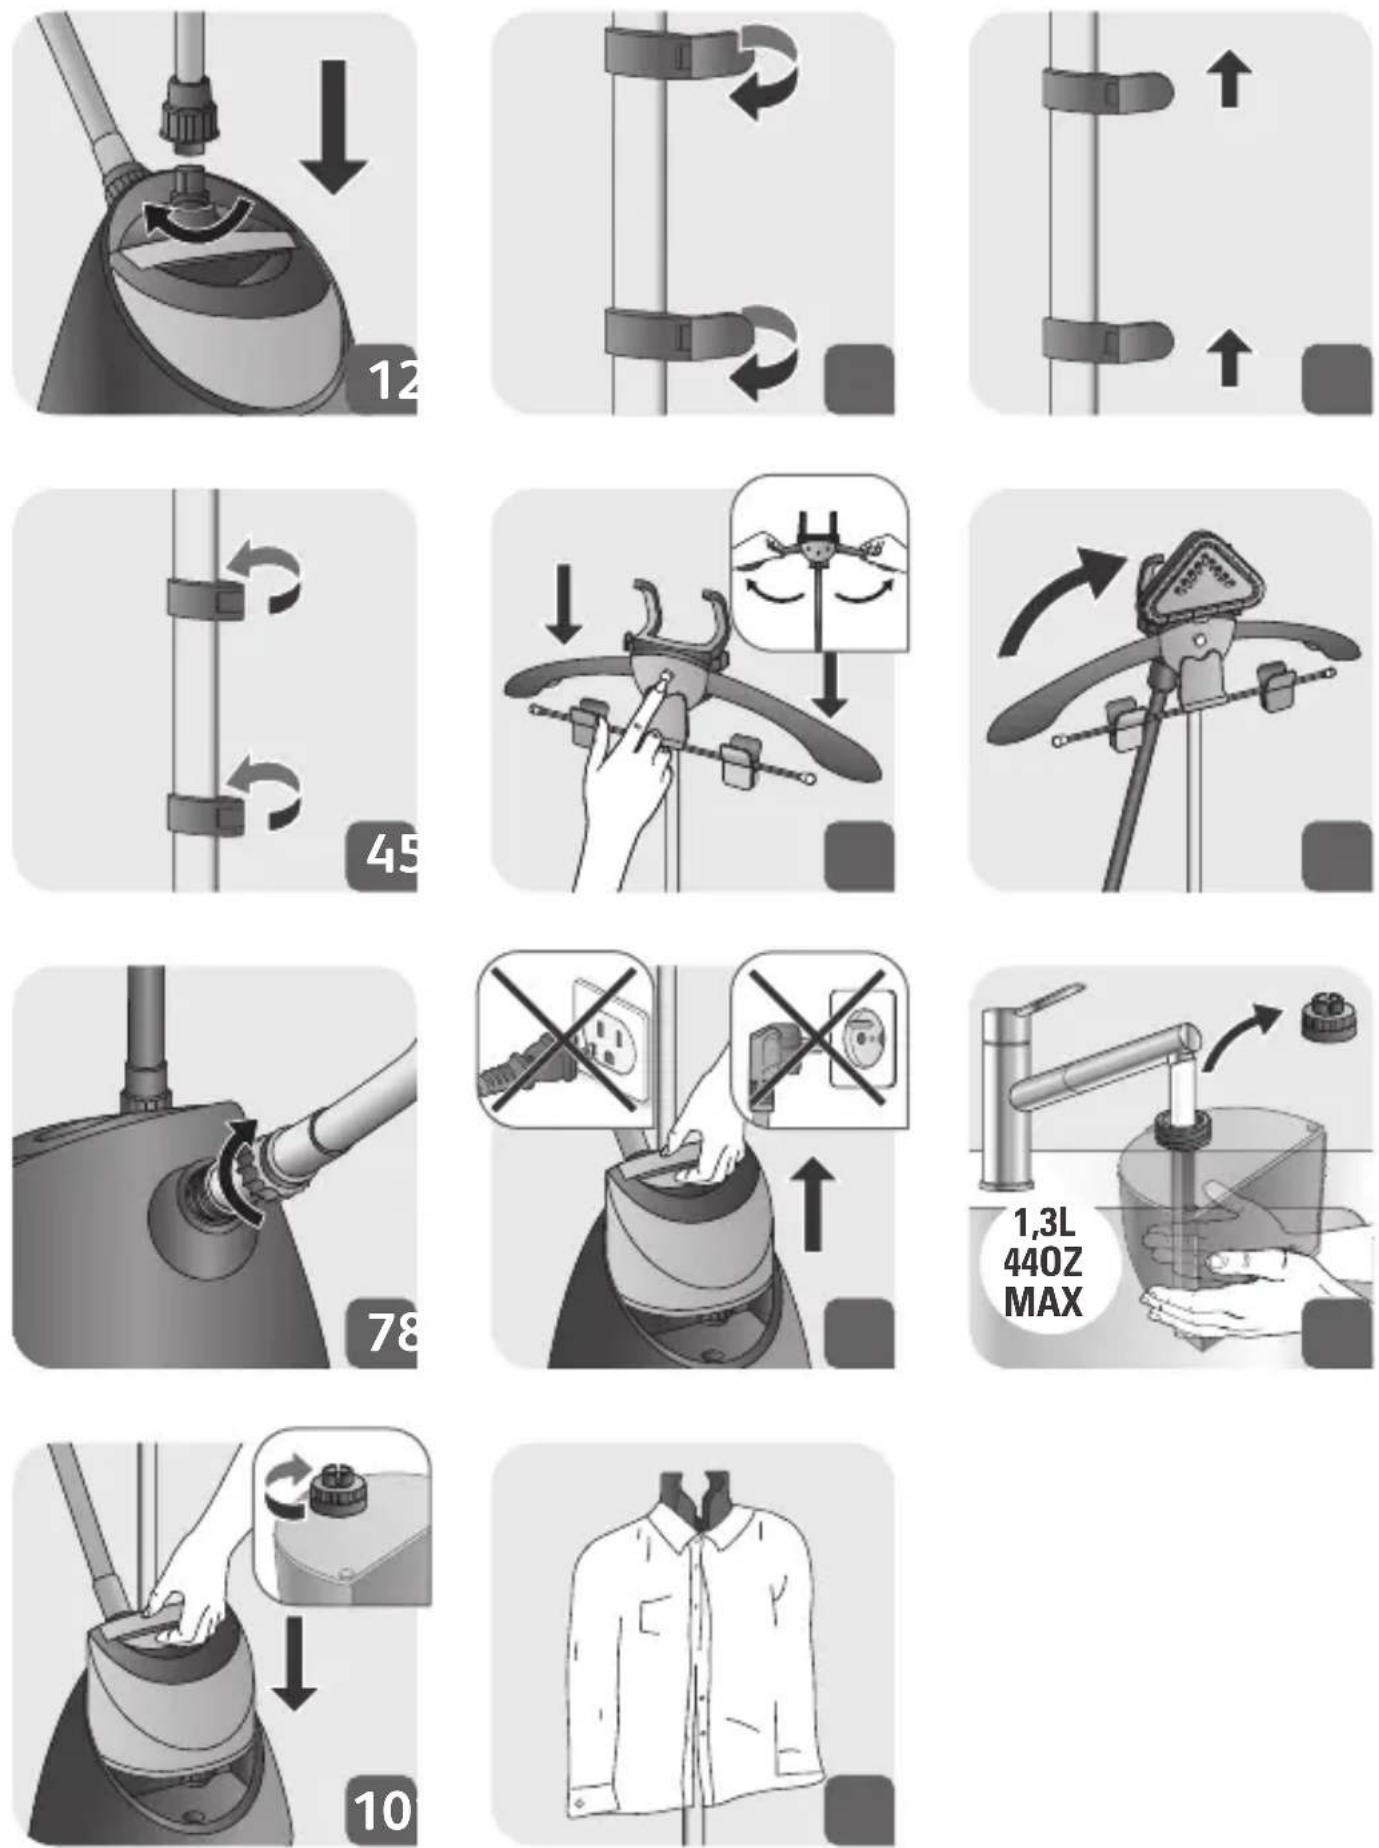
1. ASSEMBLY
-
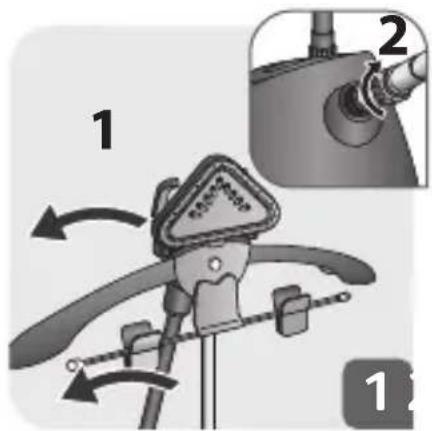
Insert the pole in the housing & then lock.
-
Open the 2 pole locks.
-
Extend the pole fully.
-
Close the 2 locks.
-
Fully insert the hanger vertically on top of the pole.
-
Position the steam head on the holder of the hanger.
-
Lock the extremity of the steam hose (G1) to the connector(H) located on the product base.
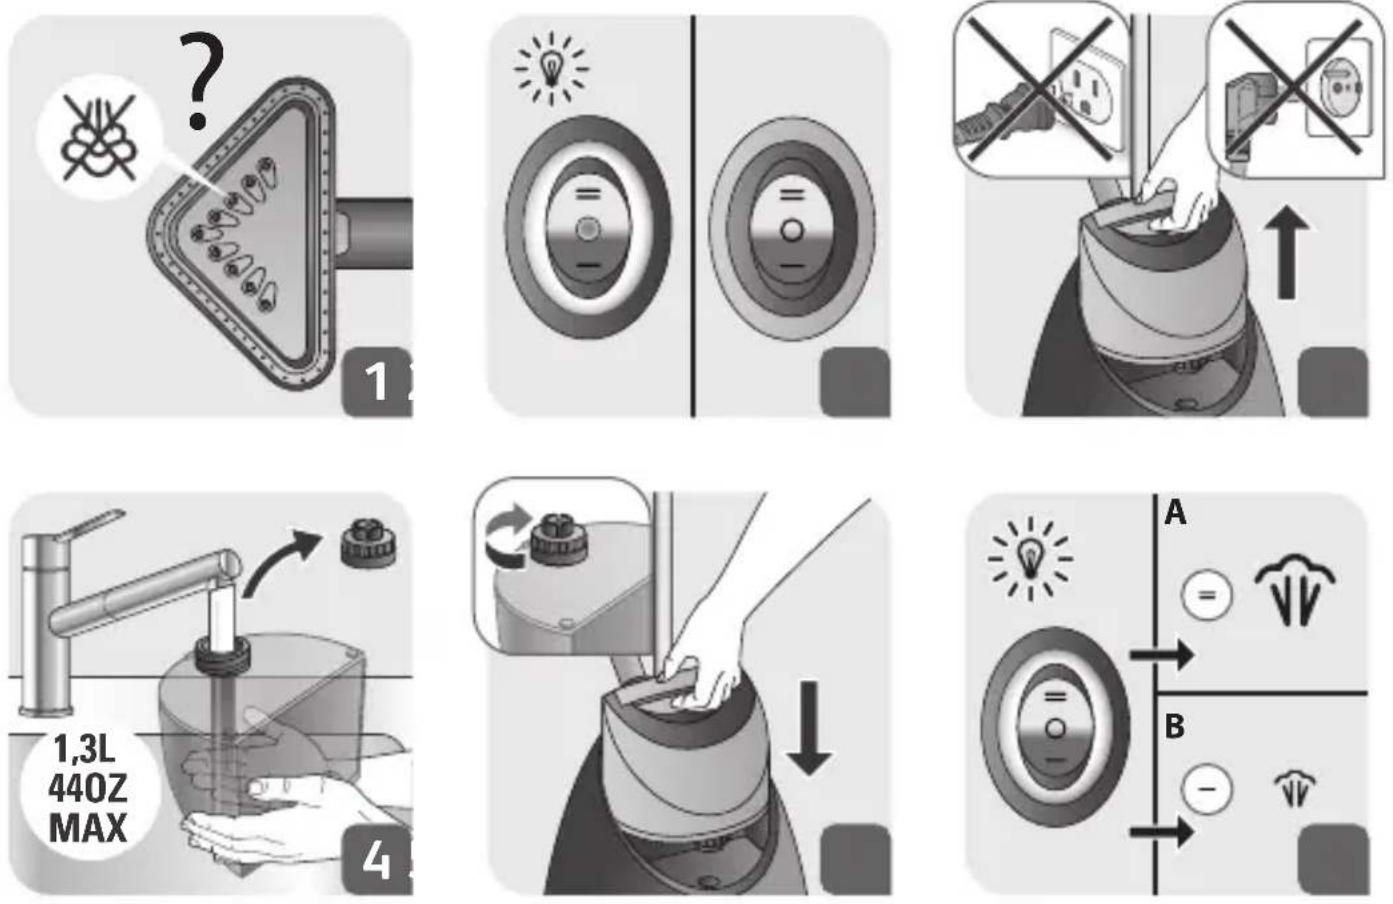
2. BEFORE USE
-
Remove the water tank.
-
Remove the cap then fill the water tank.
-
Fully screw the water tank cap and insert tank back into the appliance.
-
Place the garment on the hanger.
3. ACCESSORIES (\* IN SOME MODELS ONLY)

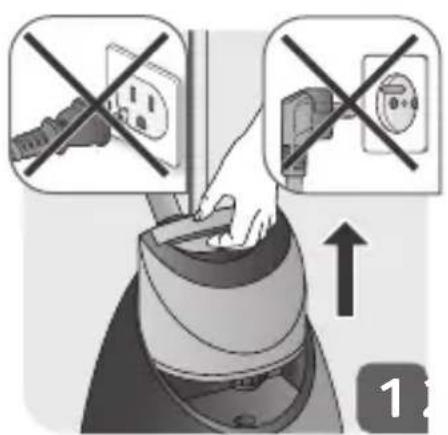
Make sure the appliance is unplugged and completely cool before attaching or removing accessories.
EN
K. The fabric brush opens the weaves of the fabrics for better steam penetration.
Attach the fabric brush to the steam head when appliance is unplugged and has cooled down.
D. The trouser clip should be clipped on the hanger. It helps to hold trousers, skirts and other clothes during steaming.
4. SCENARIO OF USE
- Only operate the appliance on a floor clear of any materials which may obstruct the base of the steamer (flat and horizontal surface). Do not obstruct the openings on the lower part of the appliance. This appliance should not be used on very thick carpets or rugs.
- Plug in the appliance.
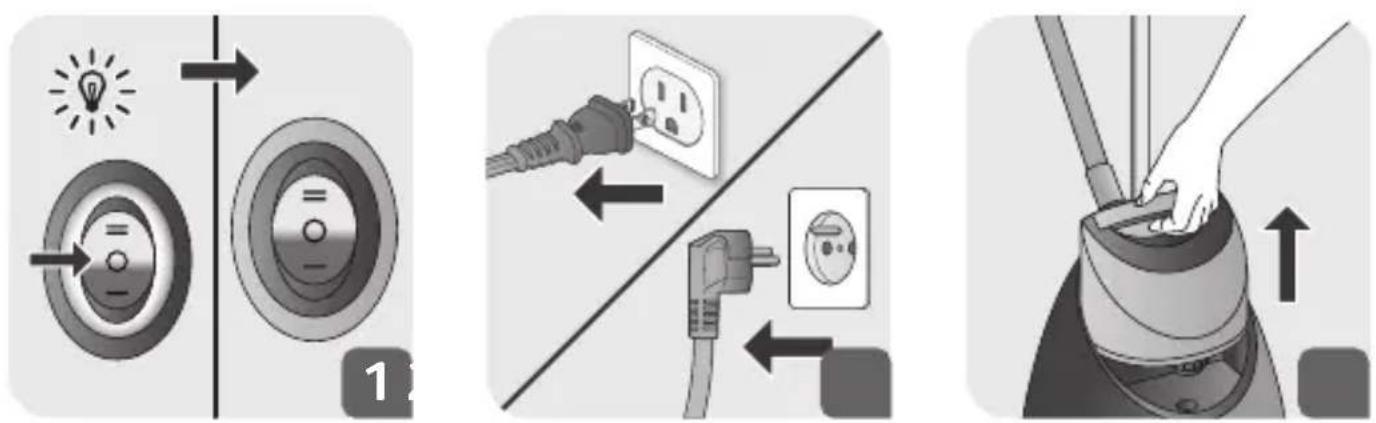
- Press on the ON/OFF switch to turn the appliance ON or OFF.
Press on the highest position for higher steam concentration. A red light will turn on.
Press on the lowest position for a lower steam concentration. A blue light will turn on.
Wait for 45 seconds before steaming.
If you want to turn OFF the appliance, press on the middle position ⚙ The light indicator will turn off.
- After 45 seconds approximately, steam will come out.
- For optimal use, pass the steam jets on your garment from top to bottom.

Warning: Never steam a garment while it is being worn.
5. DURING USE
- If steam is not coming out anymore, this can be due to low water level in tank.
- Press the ON/OFF switch to the middle position and check that light is switched OFF.
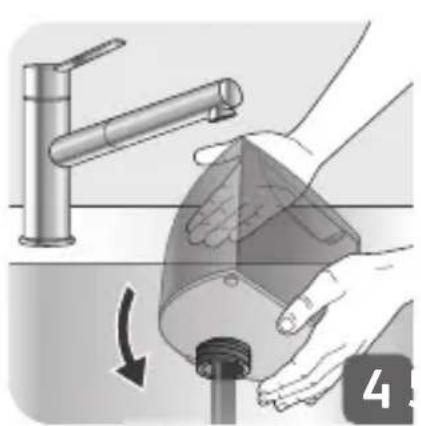
- Remove the water tank.
- Remove the cap then fill the water tank.
- Fully screw the water tank cap and insert tank back in appliance.
- Press the ON/OFF switch and select your desired steam concentration. Check that light is switching on. Wait for 45 seconds before steaming.
6. AFTER USE
- Press the ON/OFF switch to the middle position and check that light is switched OFF.
- Unplug the appliance.
- Remove the water tank.
- Unscrew the cap and then empty the water tank completely in a sink.
- Screw back the cap and place the water tank back onto the appliance.
- Wait for an hour for your appliance to cool before storing.
7. DESCALING PROCEDURE

This process should be made every 6 months or as soon as you feel that the performance of the appliance (steam output) is decreasing.
EN


WARNING! Wait an hour so that the appliance has completely cooled down.
- Remove the steam head from the hanger, unlock the locker and pull out the pole.
- Never fill inside the pole connection (G1 / H).
- Remove the water tank and open its cap.
- Fill the water tank with a mixed preparation of 500ml of vinegar and 500ml of water. Close the cap.
- Descale the appliance by placing the water tank with the preparation of vinegar / water (cold appliance), back into the base.
- Gently shake the appliance.
- Leave to soak for at least 5 minutes.
- Remove the water tank from the base.
- Vertically tilt the appliance to empty the water into the sink.
- Repeat the procedure until there is no more water in the water tank (5-6 times).
- Once completed, re-assemble the product (Step 1 to 7).
- Remove the cap then fill the water tank with 1.3L of water.
- Re-assemble the water tank cap by screwing it in completely to ensure that it is watertight but do not over tighten it and insert the water tank back into the appliance.
- Plug in the appliance.
- Let the appliance run until the water tank has completely emptied.
8. CLEANING
- Wait an hour so that the appliance has completely cooled down.
- Only use a damp sponge/cloth with water to clean the base.
- Only use a damp sponge/cloth with water to clean the steam head.
- Never use detergents when cleaning your appliance.
- Never wash or rinse appliance directly over a sink.