AC1308 - Controller IFM - Free user manual and instructions
Find the device manual for free AC1308 IFM in PDF.



| Product Type | AS-i Controller |
| Brand | IFM |
| Model | AC1308 |
| Power Supply | 24 V DC (20...30 V DC) |
| Protection | IP20 |
| Mounting | DIN rail 35 mm |
| Programming Interface | RS232C, baud rate 4800 to 115200 baud, max distance 20 m |
| Fieldbus Interface | DeviceNet, baud rates 125, 250, 500 kbit/s |
| Number of AS-i Masters | 1 (AC1308) / 2 (AC1314) |
| Display | Screen with contrast adjustment |
| LED Indicators | PWR/COM, PROJ, CONF/PF, DeviceNet network and module status |
| Programming | Via specific software and cable E70320 |
| Main Functions | AS-i control, signal preprocessing, gateway mode, optional integrated PLC |
| Compliance | cULus with class 2 power supply |
| Operating Temperature | Not specified |
| Maintenance | Clean with a dry cloth, avoid moisture |
| Safety | Mount in a protected environment, avoid condensation and dust |
Frequently Asked Questions - AC1308 IFM
User questions about AC1308 IFM
0 question about this device. Answer the ones you know or ask your own.
Ask a new question about this device
Download the instructions for your Controller in PDF format for free! Find your manual AC1308 - IFM and take your electronic device back in hand. On this page are published all the documents necessary for the use of your device. AC1308 by IFM.
USER MANUAL AC1308 IFM
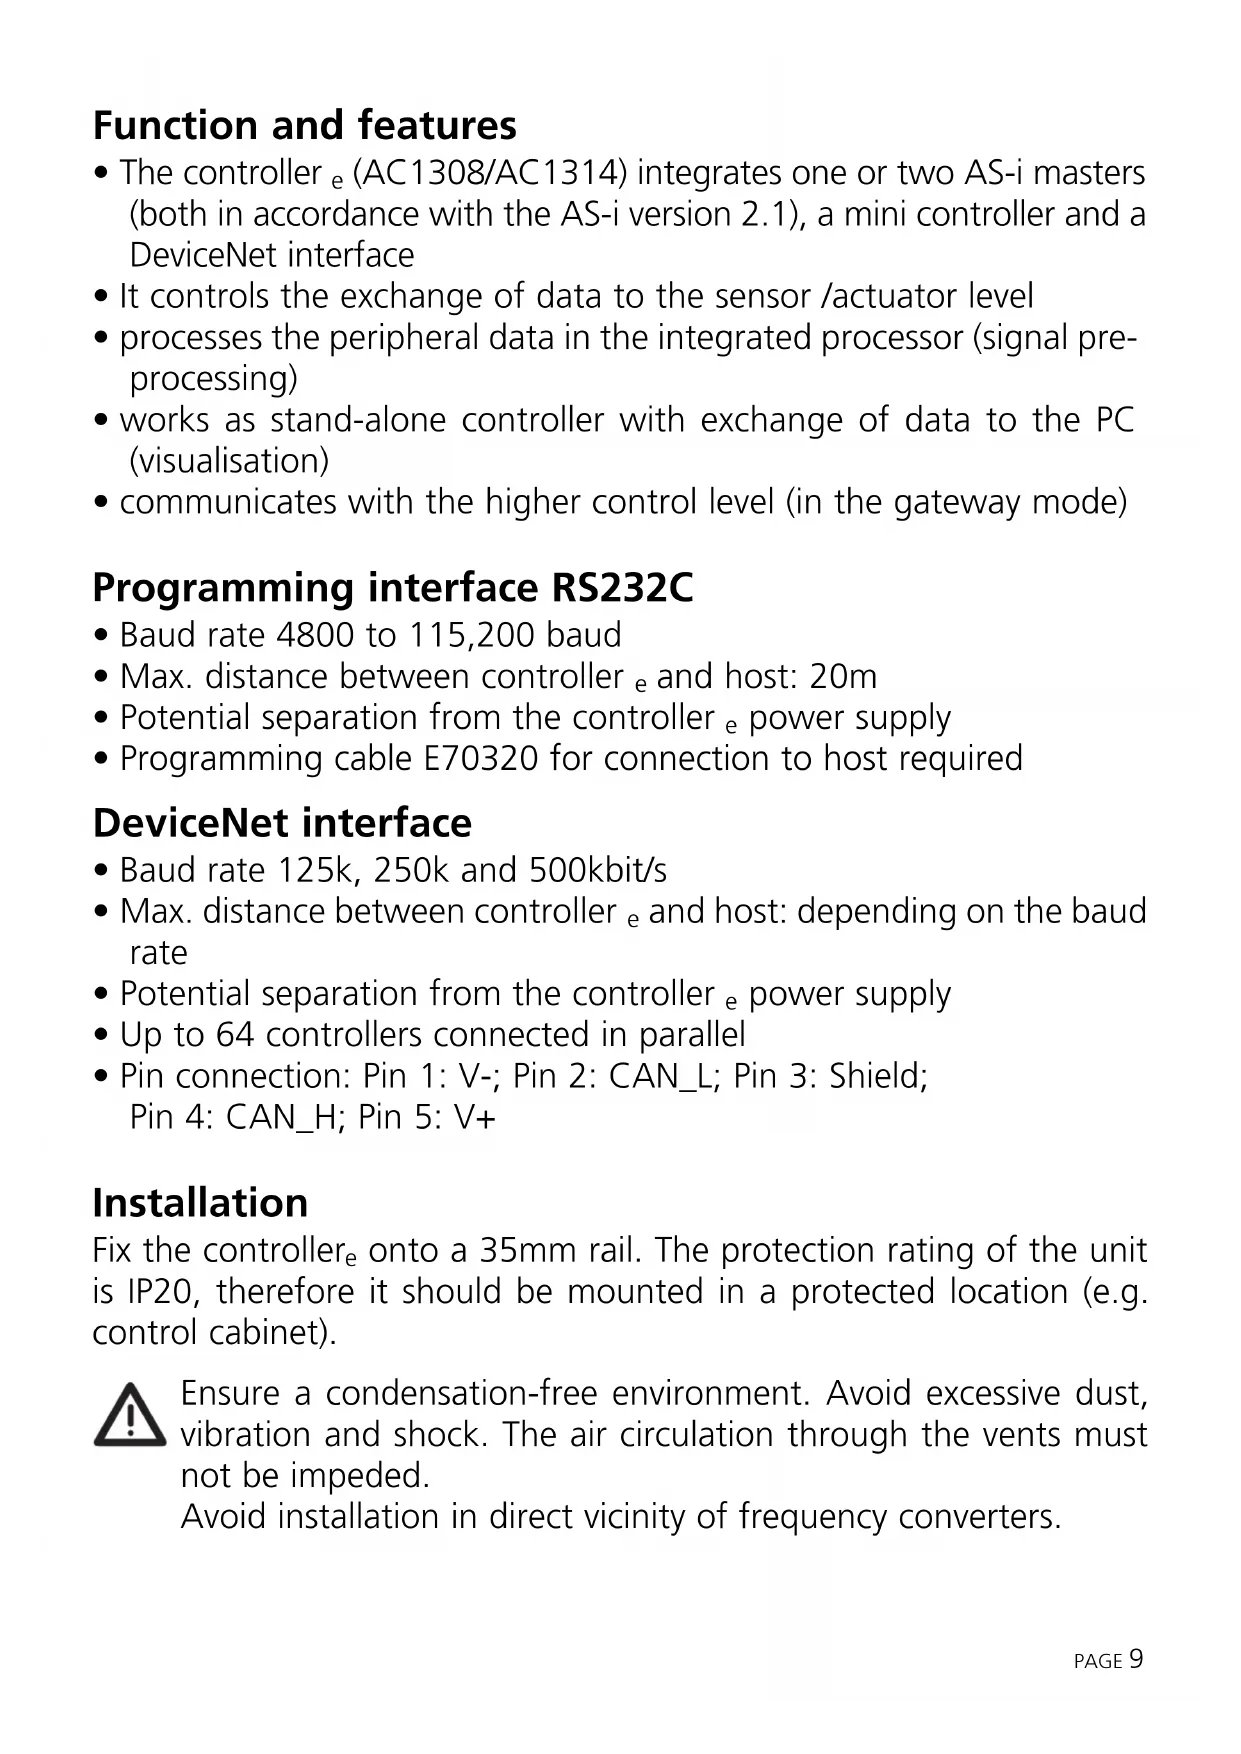
natural_image
Line drawing of an electrical control panel with buttons and a grid, no text or symbols presentDeviceNet Status LEDs (Network Status)
Function and features
- The controller e (AC1308/AC1314) integrates one or two AS-i masters (both in accordance with the AS-i version 2.1), a mini controller and a DeviceNet interface
- It controls the exchange of data to the sensor /actuator level
- processes the peripheral data in the integrated processor (signal preprocessing)
- works as stand-alone controller with exchange of data to the PC (visualisation)
- communicates with the higher control level (in the gateway mode)
Programming interface RS232C
• Baud rate 4800 to 115,200 baud
- Max. distance between controller e and host: 20m
- Potential separation from the controller e power supply
- Programming cable E70320 for connection to host required
DeviceNet interface
- Baud rate 125k, 250k and 500kbit/s
- Max. distance between controller e and host: depending on the baud rate
- Potential separation from the controller e power supply
- Up to 64 controllers connected in parallel
- Pin connection: Pin 1: V-; Pin 2: CAN_L; Pin 3: Shield; Pin 4: CAN_H; Pin 5: V+
Installation
Fix the controller e onto a 35mm rail. The protection rating of the unit is IP20, therefore it should be mounted in a protected location (e.g. control cabinet).

Ensure a condensation-free environment. Avoid excessive dust, vibration and shock. The air circulation through the vents must not be impeded.
Avoid installation in direct vicinity of frequency converters.
Electrical connection

Disconnect the installation from power. Connect the unit as indicated on the terminals. Never connect the minus potentials to each other or the minus potentials to the FE connection. Ensure an electrically safe ground connection between AS-i controller e (terminal FE) and ground of the unit.
Supply the DeviceNet controller e with a 24V DC voltage (20...30V DC).
Connection is made to the terminals +24V and 0V.

The DeviceNet controller e has the cULus approval when supplied by a certified class 2 source.
Examples of the power supplies available from ifm electronic gmbh:
Power supply DN2112 for applications that require the cULus approval.
Power supply DN2011 for applications that require no cULus approval.
Operating and indicating elements
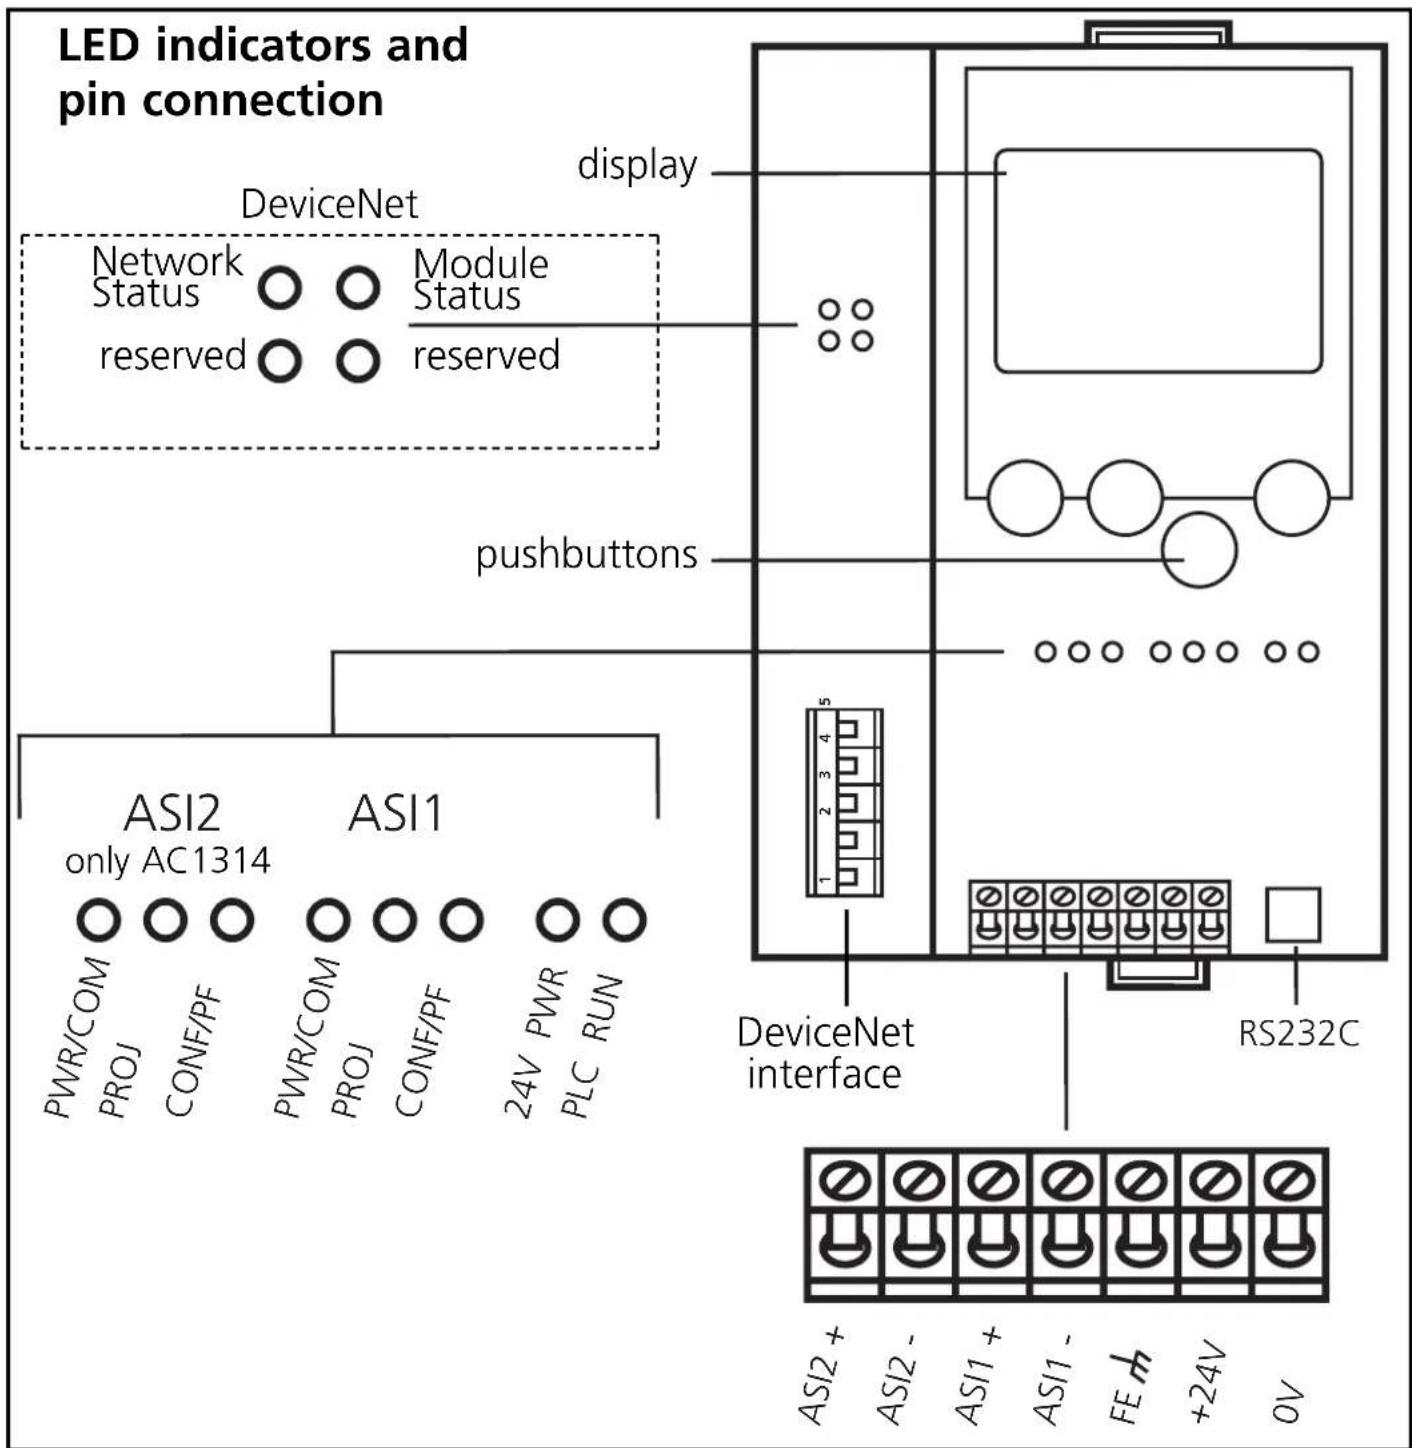
Information concerning the state of the master (AC1308) / master AC1314) and the connected system is given via three diagnostic LEDs on the controller e .
- LED PWR/COM lights: AS-i voltage present, at least one slave was detected
- LED PWR/COM flashes: AS-i voltage present, but no slave was detected correctly
- LED PROJ lights: Projection mode active, the configuration monitoring is deactivated
- LED PROJ flashes: Projection mode active, changeover to protected mode not possible as a slave with the address 0 is connected
- LED CONF/PF lights: Projected and current configuration do not match
- LED CONF/PF flashes: Periphery fault on at least one connected slave
DeviceNet status LEDs (Network Status)
• LEDs off: DeviceNet voltage not ok
• LED green lights: online, connected
- LEDs off: DeviceNet voltage not ok - LED green lights: online, connected
• LED green flashes: online, not connected
- LED red lights: BUS OFF
• LED red flashes: timeout error during data transmission
DeviceNet status LEDs (module status)
• LEDs off: no supply voltage
- LED green lights: controller e online
• LED red lights: unrecoverable system error
• LED red flashes: system error
flowchart
graph TD
    A["LED indicators and pin connection"] --> B["DeviceNet"]
    B --> C["Network Status: PWR/COM, PROJ, CONF/PF, PWR/COM, PROJ, CONF/PF, 24V, PWR, PLC, RUN"]
    B --> D["Module Status: reserved"]
    B --> E["display"]
    B --> F["pushbuttons"]
    B --> G["DeviceNet interface"]
    G --> H["RS232C"]
    G --> I["ASI2+"]
    G --> J["ASI2-"]
    G --> K["ASI1+"]
    G --> L["ASI1-"]
    G --> M["FE×"]
    G --> N["+24V"]
    G --> O["OV"]
Contrast setting
The contrast can be directly changed by simultaneously pressing the right button and the Δ -button (too bright) or the -button (too dark).
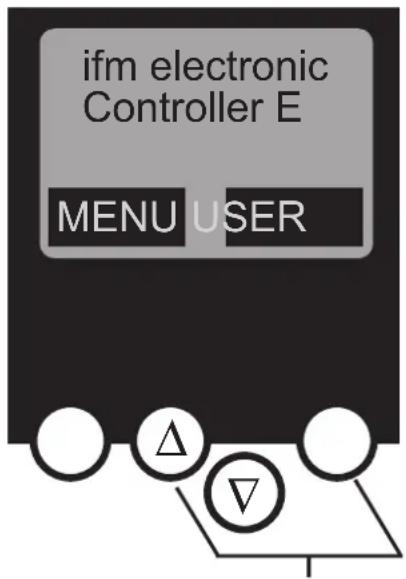
increase contrast
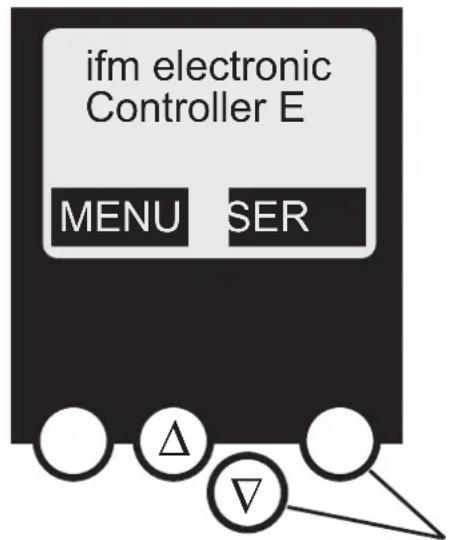
decrease contrast
Operation
To operate an AS-i system a special AS-i power supply is required. Connection is made to the terminals AS-i + and AS-i -.

The DeviceNet controller e has the cULus approval when supplied by a certified class 2 source.
Examples of the power supplies available from ifm electronic gmbh: Power supply AC1216 for applications that require the cULus approval. Power supply AC1218 for applications that require no cULus approval.

Disconnect the power supply before connecting the controller e .

The AS-i system is operated ungrounded. AS-i + and AS-i - are to be symmetrical to the ground potential of the installation. Ensure a low resistance connection of the symmetry point of the AS-i power supply (terminal shield) to the ground of the installation.
Menu overview
Open the main menu by pressing the left button "MENU" in the start display.
To navigate within a menu point press the button Δ or .
Press the buttons simultaneously to switch between the German and English menu.
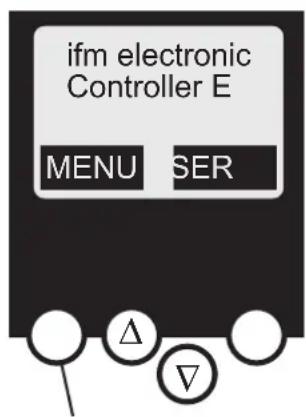
Menu button
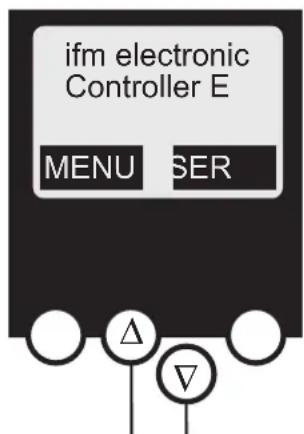
navigation buttons
Menu navigation
O Slave lists (Checking of the addresses of the connected AS-i slaves)
∇List of the detected AS-i slaves (LDS)
∇List of the projected AS-i slaves (LPS)
∇List of the activated AS-i slaves (LAS)
∇List of the AS-i slaves with periphery fault (LPF)
O Address slave (Programming of the correct addresses in the connected AS-i slaves)
∇Readdressing of an AS-i slave connected to the controller e
∇Automatic addressing of new AS-i slaves to the next free address (easy startup)
O Quick setup (Summary of the menu points required for a basic configuration)
∇Reading of the current AS-i configuration (config all)
∇Setting of the fieldbus connection (optional)
O System setup (Setting of the controller e device)
∇Baud rate of the serial programming interface
∇IP address of the Ethernet programming interface (optional)
∇Input of the password to enable changes in the system configuration
Update of the controller e firmware (special programming software required)
O System info (Device information)
∇Hardware and firmware version numbers of this controller e
∇Serial number of this controller e
∇Current /maximum PLC cycle time
O PLC setup (Using the integrated PLC is optional)
∇Activation or deactivation of the gateway mode (no PLC used)
∇Start or stop of the PLC in the controller e (if used)
O PLC info (Display of the user program name, author, date)
O Master setup (AS-i master flags)
∇Reading of the current AS-i configuration (config all)
∇Changeover to the projection mode: configuration of the AS-i system
∇Changeover to the protected mode: standard mode (the master monitors the configuration)
∇Deactivation of the automatic AS-i slave addressing in the protected mode
∇Deactivation of the AS-i reset when exiting the projection mode
∇Display of the config.error counter of the connected AS-i system
∇Reset of the config.error counter
∇Display of the percentage fault rate of the connected AS-i system
O Slave setup (Details about the connected AS-i slaves)
∇Digital or analogue inputs/outputs of the connected AS-i slaves
∇Current and projected parameters of the connected AS-i slaves
∇Current and projected I/O and ID codes of the connected AS-i slaves
∇Message faults in the communication to the connected AS-i slaves
O Fieldbus setup
Input of the DeviceNet Node Address of controller
∇Input of the baud rate of the controller
∇Input of the module length
| Modul 1 =digital inputs master1A |
| Modul 2 = digital outputs master1A |
| Modul 3 =digital inputs master2A |
| Modul 4 = digital outputs master2A |
| Modul 5 =digital inputs master1B |
| Modul 6 = digital outputs master1B |
| Modul 7 =digital inputs master2B |
| Modul 8 =digital outputs master2B |
| Modul 9 =analogue multiplexed input |
| Modul 10 = analog. multiplexed output |
| Modul 11 = command channel |
| Modul 12 = PLC inputs |
| Modul 13 = PLC outputs |
| Modul 14 = analogue input master 1 |
| Modul 15 = analogue output master 1 |
| Modul 16 = analogue input master 2 |
| Modul 17 = analogue output master 2 |
| Modul 18 = diagnosis |
O Fieldbus data (optional)
∇Display of the data cyclically transmitted via the fieldbus


- Function and features
- Programming interface RS232C
- DeviceNet interface
- Installation
- Electrical connection
- Operating and indicating elements
- DeviceNet status LEDs (module status)
- Contrast setting
- Operation
- Menu overview
- Menu navigation
- O Slave setup (Details about the connected AS-i slaves)
- O Fieldbus setup
- O Fieldbus data (optional)
Brand : IFM
Model : AC1308
Category : Controller