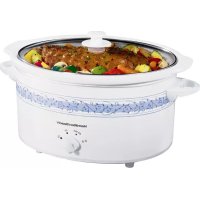
Meal Maker 33675 - Other kitchen appliances HAMILTON BEACH - Free user manual and instructions
Find the device manual for free Meal Maker 33675 HAMILTON BEACH in PDF.


| Product Type | Slow cooker |
| Brand | Hamilton Beach |
| Model | Meal Maker 33675 |
| Capacity | 8 liters (max) |
| Pot material | Removable ceramic |
| Lid material | Glass |
| Power supply | 120 V, 60 Hz |
| Cooking functions | High intensity (HIGH), low intensity (LOW), keep warm (WARM) |
| Indicator light | "ON" light |
| Included accessories | Pot, lid, base with handles |
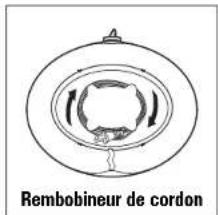
| Optional features | Lid rest, cord rewinder, Lid Latch™ lid lock |
| Care and cleaning | Wash pot and lid in warm soapy water; do not immerse base, cord or plug |
| Safety | Polarized plug, hot surfaces, do not use outdoors, unplug before cleaning |
| Replacement parts | Ceramic pot, glass lid, base (available via customer service) |
| Repairability | Limited 1-year warranty; customer service at 1-800-267-2826 (Canada) |
| General information | For household use only; visit hamiltonbeach.ca for recipes |
Frequently Asked Questions - Meal Maker 33675 HAMILTON BEACH
User questions about Meal Maker 33675 HAMILTON BEACH
0 question about this device. Answer the ones you know or ask your own.
Ask a new question about this device
Download the instructions for your Other kitchen appliances in PDF format for free! Find your manual Meal Maker 33675 - HAMILTON BEACH and take your electronic device back in hand. On this page are published all the documents necessary for the use of your device. Meal Maker 33675 by HAMILTON BEACH.
USER MANUAL Meal Maker 33675 HAMILTON BEACH
delicious recipes, tips, and to register your product online!
Please call us – our friendly associates are ready to help.
USA: 1.800.851.8900
Questions?
natural_image
Line drawing of two rice cookware containers, one with lid and one with side handles (no text or symbols)Hamilton Beach®
Slow Cooker Mijoteuse
Olla de cocción
English 2
Français ...... 11
Español 20
IMPORTANT SAFEGUARDS
When using electrical appliances, basic safety precautions should always be followed to reduce the risk of fire, electric shock, and/or injury to persons, including the following:
- Read all instructions.
- Do not touch hot surfaces. Use handles or knobs.
- To protect against electrical shock do not immerse cord, plug, or base in water or other liquid.
- Close supervision is necessary when any appliance is used by or near children.
- Unplug from outlet when not in use and before cleaning. Allow to cool before putting on or taking off parts.
- Do not operate any appliance with a damaged cord or plug, or after the appliance malfunctions or is dropped or damaged in any manner. Call our toll-free customer service number for information on examination, repair, or adjustment.
-
The use of accessory attachments not recommended by the appliance manufacturer may cause injuries.
-
Do not use outdoors.
- Do not let cord hang over edge of table or counter, or touch hot surfaces, including stove.
- Do not place on or near hot gas or an electric burner, or in a heated oven.
- Extreme caution must be used when moving an appliance containing hot oil or other hot liquids.
- To disconnect slow cooker, turn control knob to OFF then remove plug from wall outlet.
- Caution: To prevent damage or shock hazard do not cook in base. Cook only in removable crock.
- Avoid sudden temperature changes, such as adding refrigerated foods into a heated crock.
- Do not use appliance for other than intended use.
SAVE THESE INSTRUCTIONS!
OTHER CONSUMER SAFETY INFORMATION
This product is intended for household use only.
This product is only intended for the preparation, cooking, and serving of foods. This product is not intended for use with any non-food materials or products.
WARNING! Shock Hazard: This appliance has a polarized plug (one wide blade) that reduces the risk of electric shock. The plug fits only one way into a polarized outlet. Do not defeat the safety purpose of the plug by modifying the plug in any way or using an adaptor. If the plug does not fit, reverse the plug. If it still does not fit, have an electrician replace the outlet.
2
The length of the cord used on this appliance was selected to reduce the hazards of becoming tangled in, or tripping over a longer cord. If a longer cord is necessary an approved extension cord may be used. The electrical rating of the extension cord must be equal to or greater than the rating of the appliance. Care must be taken to arrange the extension cord so that it will not drape over the counter-top or tabletop where it can be pulled on by children or accidentally tripped over.
CROCK AND LID: PRECAUTIONS AND INFORMATION
- Please handle crock and lid carefully to ensure long life.
- Avoid sudden, extreme temperature changes. For example, do not place a hot lid or crock into cold water, or onto a wet surface.
- Avoid hitting crock or lid against faucet or other hard surfaces.
- Do not use crock or lid if chipped, cracked, or severely scratched.
-
Do not use abrasive cleansers or metal scouring pads.
-
The bottom of crock is very rough and can damage countertop. Use caution.
- The crock and lid can become very hot. Use caution. Do not place directly on any unprotected surface or countertop.
- The crock is microwave safe and oven proof, but never heat crock when empty. Never place lid on a burner or stove top. Do not place lid in a microwave oven, conventional oven, or on stove top.
REMOVING LID AND CROCK
When removing lid, tilt so that opening faces away from you to avoid being burned by steam.
The sides of the slow cooker's base get very warm because the heating elements are located here. Use handles on base if necessary. Use hot mitts to remove crock.
Parts and Features
Crock Capacity
For best results, fill the crock at least half-full but no more than one inch from the rim. If only half-filled, check for doneness 1 to 2 hours earlier than recipe.

Optional features on select models

natural_image
Line drawing of a lid holder with handle and lid (no text or symbols)
natural_image
Line drawing of a lid holder with cord wrap (no text or symbols on the diagram itself)
natural_image
Line drawing of a lid latch with a lid and handle (no text or symbols on the object itself)
natural_image
Line drawing of a cooking pot with a lid and handle, labeled 'Carrying Case' below (no other text or symbols)
natural_image
Diagram of a circular cord wrap with internal curved lines and a central hub (no text or symbols)
How to Use Your Slow Cooker
Before First Use: Wash lid and crock in hot, soapy water. Rinse and dry.
⚠ WARNING Food Safety Hazard. Food must be hot enough to prevent bacterial growth before using Keep Warm setting. The Keep Warm setting should only be used after a recipe has been thoroughly cooked. Do not reheat food on Keep Warm setting. If food has been cooked and then refrigerated, reheat it on Low or High, then switch to Keep Warm. Visit foodsafety.gov for more information.
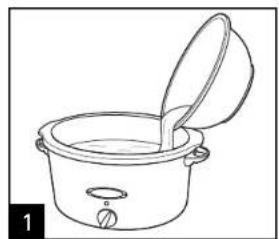
natural_image
Line drawing of a cooking pot with lid and side pan (no text or symbols)
natural_image
Line drawing of a cooking pot with a lid and downward arrow indicating cooling (no text or symbols)
natural_image
Simple line drawing of a pipe connecting a pot to an electrical outlet (no text or symbols)
natural_image
Line drawing of a cooking pot with a lid and side handles, showing a small fish inside (no text or symbols)
natural_image
Line drawing of a cooking pot with a lid and side handles, showing a single pan with a handle (no text or symbols)When cooking is finished, turn OFF.
5
Cleaning and Care
WARNING
Electrical Shock Hazard
Disconnect power before cleaning. Do not immerse cord, plug, or base in any liquid.

natural_image
Simple line drawing of a cooking pot connected to an electrical outlet (no text or symbols)
natural_image
Line drawing of hands holding a pot and a measuring cup (no text or symbols)
natural_image
Line drawing of a hand holding a cooking pot with a handle (no text or symbols)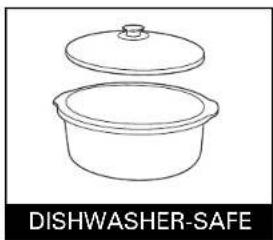
natural_image
Line drawing of a two-tiered dishwasher with lid and side bowl (no text or symbols)Remove crock and let cool.
How to Use Lid Latch™ (optional feature on some models)

natural_image
Line drawing of a cooking pot with lid and side handles (no text or symbols)
natural_image
Line drawing of a cooking pot with lid and side handles (no text or symbols)The Lid Latch™ helps secure lid while moving, transporting, or storing slow cooker.
Place latch into groove under one handle. Stretch to other side and secure in groove under other handle. 6
Once attached, latch can also be crossed over knob to further secure lid.
Tips for Slow Cooking
• The crock should be at least half-filled for best results. If only half-filled, check for doneness 1 to 2 hours earlier than recipe.
- Stirring is not necessary when slow cooking and removing glass lid results in major heat loss and the cooking time may need to be extended. However, if cooking on High, you may want to stir occasionally.
- If cooking soups or stews, leave a 2-inch (5 cm) space between the top of the crock and the food so that the recipe can come to a simmer.
- Many recipes call for cooking all day. If your morning schedule doesn't allow time to prepare a recipe, do it the night before. Place all ingredients in crock, cover with lid and refrigerate overnight. In the morning, simply place crock in slow cooker.
- Do not use frozen, uncooked meat in slow cooker. Thaw any meat or poultry before slow cooking.
- Some foods are not suited for extended cooking in a slow cooker. Pasta, seafood, milk, cream, or sour cream should be added 2 hours before serving. Evaporated milk or condensed soups are perfect for slow cooking.
• The higher the fat content of meat, the less liquid is needed. If cooking meat with a high fat content, place thick onion slices underneath so meat will not sit on (and cook in) fat. - Slow cookers allow for very little evaporation. If making your favorite soup, stew, or sauce, reduce liquid called for in original recipe. If too thick, liquid can be added later.
- If cooking a vegetable-type casserole, there will need to be liquid in the recipe to prevent scorching on the sides of crock.
Cooking Chart
Visit hamiltonbeach.com for more delicious recipes, tips, and to register your product online!
For best results, fill the crock at least half-full but no more than one inch from rim. Always follow package directions.
RECIPE 3-5 QT/L 6-7 QT/L 8 QT/L INSTRUCTIONS
Beef Pot 2 lb. (907 g) beef pot roast 3-5 lb. (1.3-2.2 kg) beef pot roast 4-6 lb. (1.8-2.7 kg) beef pot roast
Roast 1 teaspoon (5 ml) salt 1-1/2 teaspoons (7.5 ml) salt 2 teaspoons (10 ml) salt
1/2 teaspoon (2.5 ml) pepper 1 teaspoon (5 ml) pepper 1 teaspoon (5 ml) pepper
1/4 (60 ml) cup beef broth/water 1/2 cup (125 ml) beef broth/water 3/4 cup (175 ml) beef broth/water
1/2 to 1 envelope dry onion mix 1 envelope dry onion mix
1 onion, quartered
2 potatoes, quartered
2 carrots, cut in 1"
(2.5 cm) pieces
2 onions, quartered
3-4 potatoes, quartered
3-4 carrots, cut in 1"
(2.5 cm) pieces
1 envelope dry onion mix
3 onions, quartered
5-6 potatoes, quartered
5-6 carrots, cut in 1"
(2.5 cm) pieces
Chili
1 lb. (450 g) ground beef
1 1.5 oz (40 g) envelope
chili seasoning
1 14.5 oz. (411 g)
can diced tomatoes
1 16 oz. (453 g) can kidney
beans, (drained and rinsed)
2 lb. (907 g) ground beef
2 1.5 oz (40 g) envelopes
chili seasoning
2 14.5 oz. (411 g)
can diced tomatoes
2 16 oz. (453 g) can kidney
beans, (drained and rinsed)
4 lb. (1.8 kg) ground beef
4 1.5 oz (40 g) envelopes
chili seasoning
4 14.5 oz. (411 g)
can diced tomatoes
4 16 oz. (453 g) can kidney
beans, (drained and rinsed)
Whole
Chicken
3 lb. (1.3 kg) whole chicken
2 garlic cloves, peeled
1/2 lemon
1 bay leaf
1 teaspoon (5 ml) salt 2 bay leaves
1/2 teaspoon (2.5 ml) pepper 2 teaspoons (10 ml) salt
1 teaspoon (5 ml) paprika
4-6 lb (1.8-2.7 kg) whole chicken
(or two 3 lb. [1.3 kg] chickens)
3 garlic cloves, peeled
1/2 lemon
7-8 lb (3.2-3.6 kg) whole chicken
4 garlic cloves, peeled
1 lemon, halved
3 bay leaves
1 tablespoon (10 ml) salt
1-1/2 teaspoons (7.5 ml) pepper
1 teaspoon (5 ml) pepper
1-2 teaspoons (5-10 ml) paprika
-
Season roast with salt and pepper.
-
Over medium-high heat, brown roast on all sides.
-
Place vegetables in crock.
-
Place roast on top of vegetables.
-
Sprinkle with onion soup mix.
-
Drizzle beef broth over meat and vegetables.
-
Cover and cook on HIGH for 5 hours, LOW for 10 hours or until internal temperature measures at least 160°F (71°C) for medium. Cooking on the LOW setting will result in more tender meat.
-
Combine beef, chili seasoning, diced tomatoes and kidney beans in crock.
-
Cover and cook on HIGH for 4 hours, LOW for 8 hours or until temperature is at least 160°F (71°C).
-
Remove giblets/neck from cavity of chicken(s).
-
Place garlic, lemon and bay leaf in chicken cavity.
-
Season chicken(s) with salt and pepper.
-
Place chicken(s) in crock and sprinkle with paprika.
-
Cover and cook on HIGH for 4 hours, LOW for 8 hours or until internal temperature measures at least 165°F (74°C).
Visit www.foodsafety.gov for more information on safe internal cooking temperatures.
Troubleshooting
POTENTIAL PROBLEM
Food is undercooked.
PROBABLE CAUSE
- Was food cooked on the Keep Warm setting? Do not cook on Keep Warm; always cook on Low or High heat settings.
• Was power interrupted? - Did you select the Low heat setting, but use a cooking time based on the High heat setting?
• Did you have the lid placed correctly on the slow cooker?
The food isn't done after cooking the amount of time recommended in my recipe.
- This can be due to voltage variations (which are commonplace everywhere) or altitude. The slight fluctuations in power do not have a noticeable effect on most appliances. However, it can alter the cooking times in the slow cooker by extending the cooking times. Allow sufficient time and select the appropriate heat setting. You will learn through experience if a shorter or longer time is needed.
My meal was overcooked. Why?
- Was the crock at least half-full? The slow cooker has been designed to thoroughly cook food in a filled crock. If the crock is only half-filled, check for doneness 1 to 2 hours earlier than recipe time.
- Did you select correct number of hours based on cooking temperature (Low or High)?
- Foods will continue to increase in temperature after desired temperature has been reached.
Lid gasket collapsed.
- This can be caused by sudden temperature change, like running cold water over a warm lid. Allow lid to sit at room temperature. It will return to the original shape within 24 hours.
- To help maintain the shape of the gasket, do not cook with clips latched and do not store empty unit with clips latched.
Limited Warranty
This warranty applies to products purchased in the U.S. and Canada. This is the only express warranty for this product and is in lieu of any other warranty or condition.
This product is warranted to be free from defects in material and workmanship for a period of one (1) year from the date of original purchase. During this period, your exclusive remedy is repair or replacement of this product or any component found to be defective, at our option; however, you are responsible for all costs associated with returning the product to us and our returning a product or component under this warranty to you. If the product or component is no longer available, we will replace with a similar one of equal or greater value.
This warranty does not cover glass, filters, wear from normal use, use not in conformity with the printed directions, or damage to the product resulting from accident, alteration, abuse, or misuse. This warranty extends only to the original consumer purchaser or gift recipient. Keep the original sales receipt, as proof of purchase is required to make a warranty claim. This warranty is void if the product is used for other than single-family household use.
We exclude all claims for special, incidental, and consequential damages caused by breach of express or implied warranty.
All liability is limited to the amount of the purchase price. Every implied warranty, including any statutory warranty or condition of merchantability or fitness for a particular purpose, is disclaimed except to the extent prohibited by law, in which case such warranty or condition is limited to the duration of this written warranty. This warranty gives you specific legal rights. You may have other legal rights that vary depending on where you live. Some states or provinces do not allow limitations on implied warranties or special, incidental, or consequential damages, so the foregoing limitations may not apply to you.
To make a warranty claim, do not return this appliance to the store. Please call 1.800.851.8900 in the U.S. or 1.800.267.2826 in Canada or visit hamiltonbeach.com in the U.S. or hamiltonbeach.ca in Canada. For faster service, locate the model, type, and series numbers on your appliance.
DIRECTIVES IMPORTANTES DE SÉCURITÉ
natural_image
Line drawing of a repose-couvercle cooking pot (no text or symbols on the diagram itself)
natural_image
Line drawing of a cooking pot with label 'Verrouillage de couvercle' (no other text or symbols)

natural_image
Line drawing of a cooking pot with lid and side outlets (no text or symbols)
natural_image
Line drawing of a cooking pot with a lid and downward arrow indicating cooling (no text or symbols)
natural_image
Line drawing of a cooking pot connected to an electrical outlet (no text or symbols)
natural_image
Line drawing of a cooking pot with a handle and arrow indicating rotation (no text or symbols)
natural_image
Line drawing of a cooking pot with a lid and side handles, showing a black arrow indicating a direction (no text or symbols)natural_image
Simple line drawing of a cooking pot connected to an electrical outlet (no text or symbols)
natural_image
Line drawing of a cooking pot with two kitchen utensils (no text or symbols)
natural_image
Line drawing of a hand holding a cooking pot with a handle (no text or symbols)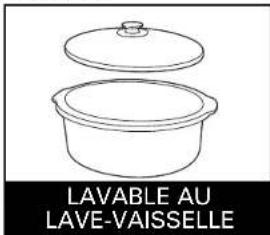
natural_image
Line drawing of a cooking pot with lid and side handles (no text or symbols)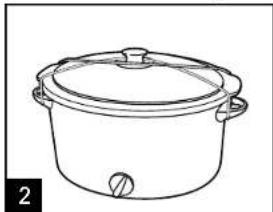
natural_image
Line drawing of a cooking pot with lid and side handles (no text or symbols)natural_image
Line drawing of a cooking pot with lid and handle, labeled 'Descanso de Tapa' below (no other text or symbols)

natural_image
Line drawing of a lid latch with a lid and handle (no text or symbols on the object itself)
natural_image
Line drawing of a cooking pot with lid and side handles, labeled 'Estuche' below (no other text or symbols)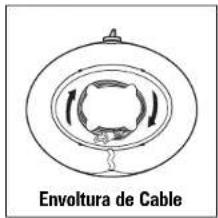

natural_image
Line drawing of a cooking pot with lid and side handles (no text or symbols)
natural_image
Line drawing of a cooking pot with a lid and downward arrow indicating cooling (no text or symbols)
natural_image
Line drawing of a cooking pot connected to an electrical outlet (no text or symbols)
natural_image
Line drawing of a cooking pot with a handle and arrow indicator (no text or symbols)
natural_image
Line drawing of a cooking pot with a lid and side handles, showing a black arrow indicating direction (no text or symbols)natural_image
Simple line drawing of a cooking pot connected to an electrical outlet (no text or symbols)
natural_image
Line drawing of hands holding a pot with a griddle and a wok (no text or symbols)
natural_image
Line drawing of a hand holding a cooking pot with a handle (no text or symbols)
natural_image
Line drawing of a cooking pot with lid and side handles (no text or symbols)
natural_image
Line drawing of a cooking pot with lid and side handles (no text or symbols)RECETA 3-5 CTS/L 6-7 CTS/L 8 CTS/L INSTRUCTIONS
Col. Palmitas Polanco
Mixcoac MEXICO 03910 D.F.
Tel: 01 55 5563 8723 • Fax: 01 55 5615 1856
Nuevo Leon
natural_image
Empty rectangular frame with corner markers and a central number 31, no text or symbols present.840174801 SPnv01.qxd:Layout 1 7/10/09 9:40 AM Page 32

- Hamilton Beach®
- IMPORTANT SAFEGUARDS
- SAVE THESE INSTRUCTIONS!
- OTHER CONSUMER SAFETY INFORMATION
- CROCK AND LID: PRECAUTIONS AND INFORMATION
- REMOVING LID AND CROCK
- Parts and Features
- Crock Capacity
- How to Use Your Slow Cooker
- Cleaning and Care
- How to Use Lid Latch™ (optional feature on some models)
- Tips for Slow Cooking
- Cooking Chart
- RECIPE 3-5 QT/L 6-7 QT/L 8 QT/L INSTRUCTIONS
- Chili
- Whole
- Chicken
- Troubleshooting
- POTENTIAL PROBLEM
- PROBABLE CAUSE
- Limited Warranty
- DIRECTIVES IMPORTANTES DE SÉCURITÉ
- Nuevo Leon
Brand : HAMILTON BEACH
Model : Meal Maker 33675
Category : Other kitchen appliances