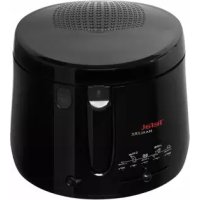
Maxi Fry FF1055 - Deep fryer TEFAL - Free user manual and instructions
Find the device manual for free Maxi Fry FF1055 TEFAL in PDF.



User questions about Maxi Fry FF1055 TEFAL
0 question about this device. Answer the ones you know or ask your own.
Ask a new question about this device
Download the instructions for your Deep fryer in PDF format for free! Find your manual Maxi Fry FF1055 - TEFAL and take your electronic device back in hand. On this page are published all the documents necessary for the use of your device. Maxi Fry FF1055 by TEFAL.
USER MANUAL Maxi Fry FF1055 TEFAL
natural_image
White TEFA air fryer with food arrangement on a plate (no visible text or symbols)Mode d'emploi • Instructions for use • Gebruiksaanwijzing • Gebrauchsanweisung
www.groupeseb.com
Francais 2
Description 2
Protection of the environment .....9
Helpline 9
Safety instructions .....9
Before using for the first time .....10
Filling the bowl 10
Preheating .....11
Loading the basket .....11
Lowering the basket .....12
Setting the timer .....12
At the end of cooking time .....12
Table of cooking times .....13
Switching off the deep fryer .....14
Filtering the oil .....14
Cleaning the lid and the basket .....14
Cleaning the fryer 14
Problem and possible causes .....15
Nederlands 16
natural_image
Line drawing of a rice cooker with a hand adjusting its lid and handle, showing no text or symbols.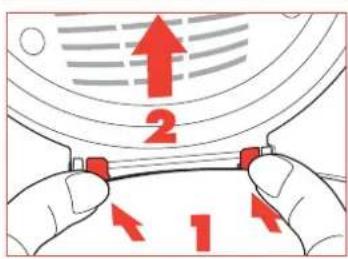
text_image
Diagram showing two hands holding a device with red arrows labeled 1 and 2 indicating directional movement or force vectors.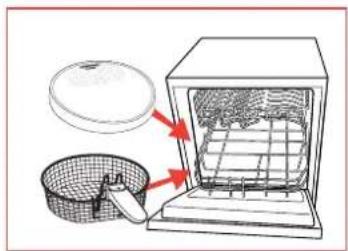
text_image
Diagram showing a kitchen appliance with a lid, basket, and mouse, annotated with red arrows indicating parts of the lid.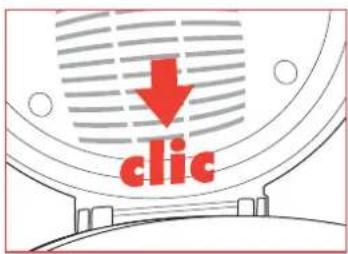
text_image
clicnatural_image
Line drawing of a hand pouring liquid into a container with a lid (no text or symbols)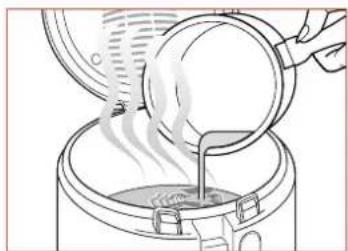
natural_image
Line drawing of a cooking step showing a pan pouring liquid into a steaming pot (no text or symbols)natural_image
Line drawing of a cooking pot with a red arrow indicating upward motion (no text or symbols)text_image
Diagram illustrating temperature measurement with thermometer and hand gesture, showing upward temperature rise and contact pointtext_image
Diagram showing a cooking pot with water being heated, labeled with 'MAX' and red arrows indicating heating direction.natural_image
Line drawing of a hand placing a wooden block structure into a grid-patterned surface (no text or symbols)natural_image
Illustration of a basket filled with wooden sticks and a small airplane, crossed by a red diagonal line (no text or symbols)natural_image
Illustration of hands using a kitchen grater to remove ingredients from a net (no text or symbols)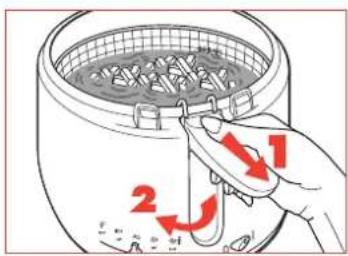
text_image
Diagram showing a hand placing a component into a steamer with labeled parts 1 and 2, indicating a step in the process.natural_image
Illustration of a hand using a spatula to lift a steamer basket containing food (no text or symbols)natural_image
Line drawing of an air fryer with internal components (no text or symbols)natural_image
Simple line drawing of a hand holding a device with a red indicator '0' and a vertical line (no text or symbols on the diagram itself)natural_image
Line drawing of a hand holding a cable with a small connector (no text or symbols)- Rangez le cordon.
natural_image
Line drawing of a mug with handle and mesh pattern (no text or symbols)natural_image
Line drawing of a cooking step showing a hand stirring a dish into a steamer with a lid (no text or symbols)text_image
Diagram showing a kitchen oven with a lid and a basket, annotated with red arrows indicating parts of the oven.natural_image
Line drawing of a hand pouring a textured substance into a cooking pot (no text or symbols)- Permanent metal filter
- Viewing window (depending on model)
- Removable lid
- Basket
- Basket handle unlocking button
- Basket hanging hooks
- Fold-away handle
- Frying bowl (with non-stick coating depending on model)
Protection of the environment
- Mini and Maxi oil level markers
- Carrying handles
- Lid opening button
- Adjustable thermostat
- Digital timer (depending on model)
- On/Off switch with temperature indicator light
- Cord
- Plug storage
Your appliance has been designed to work for many years. However, when you finally decide to replace it, do not forget to think of what you can do to help to protect the environment by disposing of it at your local waste disposal centre..
Helpline
For any problems or queries please telephone : 0845 602 14 54 - UK (calls charged at local rates)
(01) 4751947 - Ireland
or consult our web site : www.tefal.co.uk
Safety instructions
- This appliance complies with current safety regulations and requirements as well as directives:
- 89/336/CEE modified by 93/68/CEE
- 73/23/CEE modified by 93/68/CEE
- This electrical appliance operates at high temperatures which may cause burns. Despite the high heat protection of the deep fryer, do not touch the apparent metal parts or the window.
- Do not leave the appliance switched on while unattended.
- The basket handle may become hot after prolonged use.
- Use and store it out of children's reach.
- Never insert any object between the removable bowl and the bottom of the equipment.
- A lways plug in the appliance at an earthed power socket.
- Do not use an extension lead. If you accept liability for doing so, only use an extension lead which is in good condition, has an earthed plug, and is suited to the power of the equipment.
- Check that the mains voltage corresponds with that shown on the appliance (alternating current only).
- If the appliance is used in a country other than that of purchase, have it checked by an approved Service Centre.
- Never use or plug in your appliance if:
- its power cord is faulty or damaged,
- the appliance has been dropped,
- it has visible damage or operating faults. In such cases, to avoid any danger contact your nearest approved Service Centre to have the appliance repaired, as special tools are needed.
Never dismantle the appliance yourself. This will negate the guarantee.
- If the power cord is damaged, it must be replaced by an authorised service centre, in order to avoid any danger.
- The lid's seal should be replaced if damaged. Contact an approved Service Centre or call our Helpline (see page 9).
- In the event of fire, never try to extinguish the flames with water. Close the lid. Smother the flames with a damp cloth.
- Do not switch on the appliance near to inflammable materials (blinds, curtains, etc.) or close to an external heat source (gas stove, hotplate, etc.)
- This appliance has been designed for domestic use only. Any professional use, inappropriate use or failure to comply with the instructions, the manufacturer accepts no responsibility and the guarantee does not apply.
Voltage
- This appliance is designed to work on 230-240 volts AC only. Check that the mains supply corresponds to that shown on the rating plate of the appliance. If the appliance is to be used in any country other than that of purchase, it should be checked by an approved Service Dealer. Standards can vary from country to country.
Important:
if the electrical cord of this appliance is damaged, it must only be replaced by an authorised Service Dealer. The safety of this appliance complies with the technical regulations and standards in force.
Before using for the first time

natural_image
Illustration of a hand pressing down on a rice cooker with a red arrow indicating the handle (no text or symbols present)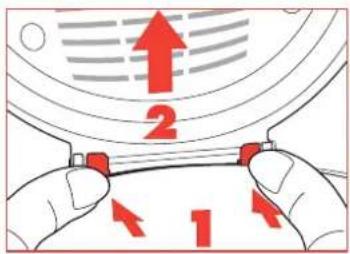
text_image
Diagram showing two hands holding a flexible object with red arrows labeled 1 and 2 indicating direction or movement.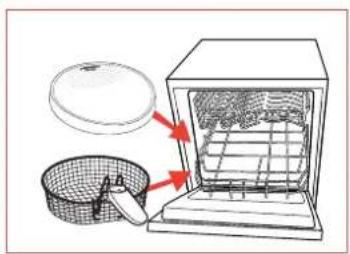
natural_image
Diagram showing a kitchen appliance with a lid and basket, no text or symbols present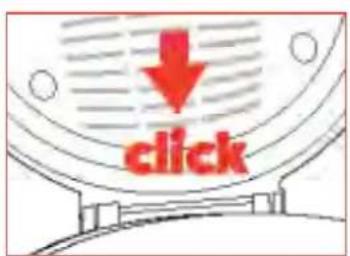
text_image
clickFilling the bowl
text_image
Diagram showing a hand pouring liquid into a container with labeled components and text.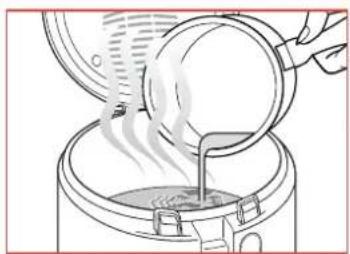
natural_image
Illustration of a cooking step showing a pan pouring liquid into a steaming pot (no text or symbols)- Press on the lid opening button.
- Press on the two tabs that lock the lid in place and lift upwards to remove the lid.
- P lace the lid and the basket in the dishwasher or wash by hand with warm water and washing up liquid.
- C lean the body by wiping it with a sponge and soapy water.
You should never immerse the appliance body in water.
- When the lid is thoroughly dry, place it back on the fryer.
- Use an oil recommended for frying: sunflower, blended vegetable, etc. If using sunflower oil ensure the oil is changed after every 5 uses.
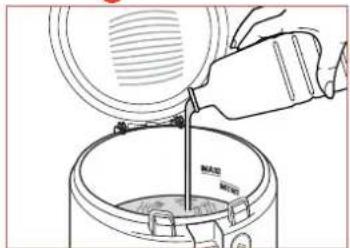
The oil/fat level must always be between the mini and maxi markers, stamped inside the bowl. Check this each time prior to cooking and add some of the same type of oil if necessary.
- If you use solid vegetable fat: Cut it into pieces and melt it in a separate pan then pour it inside the fryer (do not let it melt in the basket, nor in the bowl).
Do not mix different types of oil or fat. Oil which should not be used under any circumstances and may cause overflowing/smoking/risk of fire are: ground nut oil, soya oil, olive oil, lard or dripping.
| Oil Solid vegetable fat |
| Min. 1.8 | 1660 g |
| Max. 2.1 | 1910g |
Preheating
natural_image
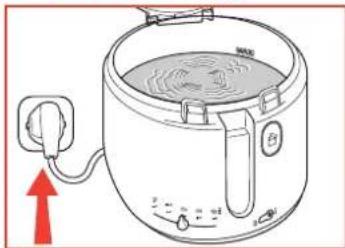
Line drawing of a kitchen air fryer with a red upward arrow indicating heating (no text or symbols)• C lose the lid and plug in the deep fryer.
Never operate your fryer without any oil or fat in the bowl.
text_image
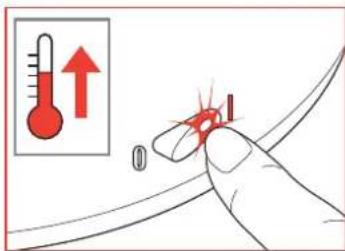
Diagram illustrating temperature measurement with thermometer and hand gesture, showing upward temperature trend- Turn the fryer on by pressing the on/off switch. The indicator light will switch on.
text_image
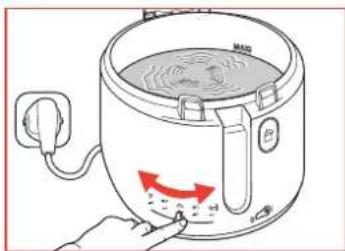
Diagram showing a cooking pot with red arrows indicating heating process, labeled 'MAG' and 'B', and a hand pressing down.- Adjust the thermostat according to the type of food to fry (see the table of cooking times, p. 13).
Loading the basket
natural_image
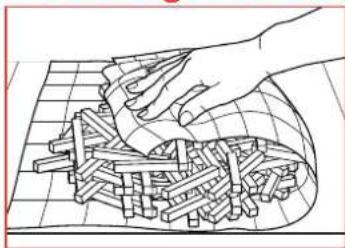
Hand placing a cube into a grid, no text or symbols visible- Remove excess moisture (water and ice) from the food. Fill the basket, away from the fryer, as per the chart below.
- Reduce food quantity for frozen foods (see table below and table of cooking times p. 13).
natural_image
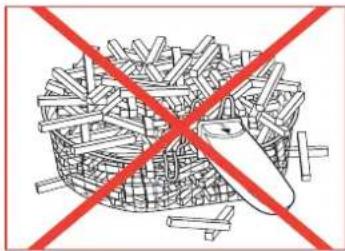
Diagram of a basket filled with wooden sticks and an airplane, crossed by red diagonal lines (no text or symbols)Never exceed the maximum capacity. For a good and fast cooking, limit the quantity of chips to 1/2 basket per frying.
| Fresh potato chips Frozen potato chips | ||
| Maximum capacity 1200 g 900 g | ||
| Quantity for best results | 600 g | 450 g |
Lowering the basket
text_image
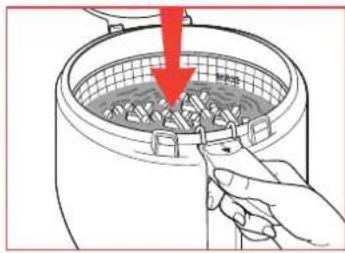
Diagram showing a hand using a tool to remove or remove granular material in a container, with a red arrow indicating the process.- After the temperature indicator light goes out place the basket in the oil.
- C lose the lid.
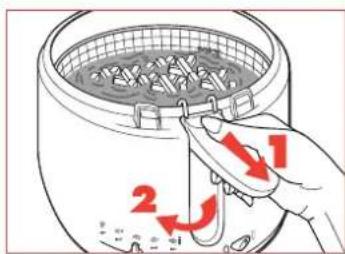
- The handle can be folded back fully into its housing on the outside of the fryer.
text_image
Diagram showing a hand placing a component into a steamer with labeled parts 1 and 2, indicating a process or step in a cooking or processing context.- Keeping the lid closed during frying is recommended to help alleviate odours and reduce splattering.
Warning: do not place your hand above the filter or on the window. The steam and glass are very hot. The steam coming from the filter is extremely hot, so are the window and metallic parts
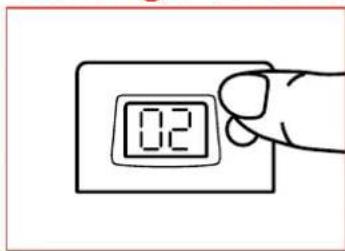
Setting the timer (depending on model)
text_image
0.2- Press the button to set the time, minute by minute. Release the button. The time displayed is selected and the countdown begins.
- If you make a mistake, or want to cancel the time selected, press the button for 2 seconds. To stop the timer alarm, press the button.
The timer signals that the cooking time is complete, but does not switch off the fryer.
At the end of cooking time

natural_image
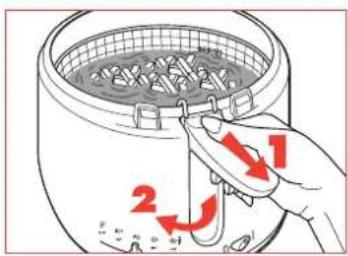
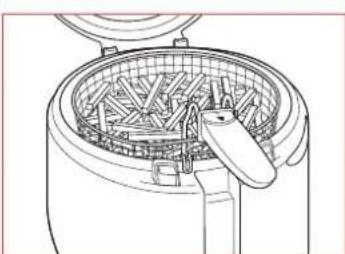
Illustration of a hand using a tool to press food into a steamer basket (no text or symbols visible)- Press the handle unlocking button. Lift the handle horizontally, until you hear a click as it locks.
- Open the lid.
- P lace the basket on the edge of the bowl with basket hanging clips. Let the food drain.
natural_image
Line drawing of an air fryer with a lid and handle (no text or symbols)- Remove the basket.
- Serve the food.
- Close the lid when the fryer is not in use.
- To use a second time wait for the temperature indicator light to go out before frying.

We recommend you to:
- Control the cooking: do not eat very brown or burnt food, but golden food.
- Clean your oil after each use to avoid burnt crumbs and change it regularly.
- Eat a balanced and varied diet which includes plenty of fruits and vegetables.
- Control the cooking: do not eat very brown or burnt food, but golden food. - Clean your oil after each use to avoid burnt crumbs and change it regularly. - Eat a balanced and varied diet which includes plenty of fruits and vegetables.
For a good and fast cooking, limit the quantity of chips to 1/2 basket per frying.
Table of cooking times
The times given are only a guide and may vary depending on quantities and personal taste. Thicker foods may require turning halfway through frying to ensure even cooking on both sides.
FRESH FOOD
No.


| Chips 1000g 190°C 11-16 min. | |||||
| Chips (maximum quantity) | 1200g* | 1 170°C 11-13 min.2 190°C 8-10 min. | |||
| Chips (quantity recommended for best results) |  | 600g | 190°C 11-16 min. | ||
| Battered cod fillet 8-11 190°C 9-10 min. | |||||
| Fried Chicken (leg portion) 1-2 180°C 14-16 min. | |||||
| Breaded plaice fillet 1-2 170°C | 6-8 min. | ||||
| Fried whole mushrooms | 8 | mini | 5-7 min. | ||
| Fried onion rings | 6-8 170°C | 3-4 min. | |||
| Apple fritters | 4 | 180°C | 5-6 min. | ||
| Ring doughnuts | 4 | 180°C | 6-8 min. | ||
| Breaded camembert wedge | 6 | 190°C | 2-3 min. | ||

* Always fry freshly made chips twice: a first fry at 170°C and a second fry at 190°C. Cooks tip: When cooking battered foods or doughnuts, remove the wire basket to prevent food sticking to it. Take great care when handling the food and use tongs. Gradually place the food in the hot oil, submerging it an inch at a time to prevent it from sinking straight away.
FROZEN FOOD
No.


| Chips (maximum quantity) | 900g | 190°C 12-14 min. | ||
| Chips (quantity recommended for best results) |  | 450g | 170°C | 9 - 13 min. |
| American style thin cut chips | 500g | 190°C 8-10 min. | ||
| Fish fingers | 8 | 190°C | 5-7 min. | |
| Chicken nuggets | 12 | 190°C | 4-5 min. | |
| Fried Chicken (leg portion) 1-2 190°C 14-15 min. | ||||
| Breaded scampi | 12 | 170°C | 4-5 min. | |
| Fried onion rings | 6-8 | 180g | 190°C | 3-4 min. |
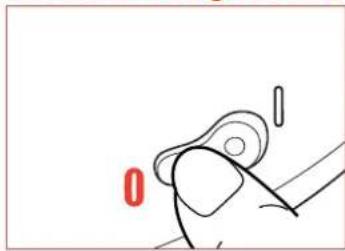
Switching off the fryer
natural_image
Simple line drawing of a hand holding a small object with a red '0' mark and a vertical line above it (no text or symbols)- When you have finished frying, press the switch to the 0 position.
- Unplug the fryer.
- Leave the fryer (and the oil inside) to cool completely (approx. 4 hours).
natural_image
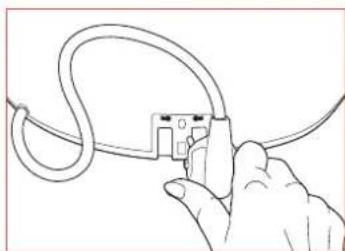
Line drawing of a hand holding a cable with a small connector (no text or symbols)- Store the plug. - Move the fryer using the carrying handles.
Never move the fryer while the oil or fat is still hot. Never move the fryer with the lid open.
Filtering the oil
natural_image
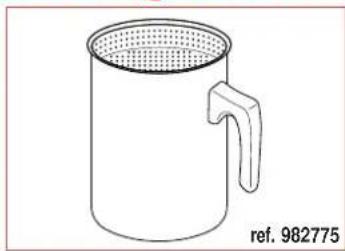
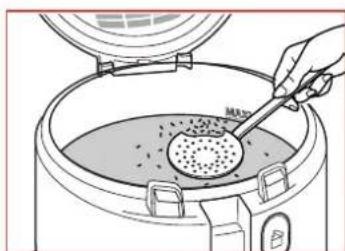
Line drawing of a mug with handle and perforated interior (no text or symbols)- Remove small pieces of food with a non-metallic skimmer. You may store the oil or fat in the fryer, or in separate airtight container.
Filter the oil after each use with filter paper (available from approved Service Centres) or a filter pot. Crumbs that break away from food tend to burn and alter the quality of the oil more rapidly. Over time, this increases the risk of catching fire. For this reason, filter the oil regularly.
natural_image
Line drawing of a cooking process showing a steamer with a lid and a hand using a tool (no text or symbols)- We recommend changing the oil after a maximum of 8 to 12 uses. If using sunflower oil, change after every 5 uses.
Do not pour used oil into the sink. Leave it to cool, and throw it away with the household waste - according to the local community regulations-.
Cleaning the lid and the basket
text_image
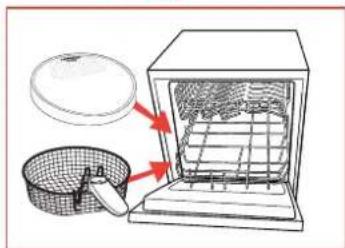
Diagram showing a kitchen oven with a lid and a basket, illustrating the process of adding a lid to the interior.Never clean the fryer unless it has been unplugged and left to cool completely beforehand (approx. 4 hours).
- Remove the lid from the fryer.
- C lean the lid and the basket after each use in a dishwasher or by wiping it with a damp sponge and washing-up liquid.
- Dry the lid before replacing it. The lid is fitted with a permanent metallic filter, you don't need to change it.
Cleaning the fryer
natural_image
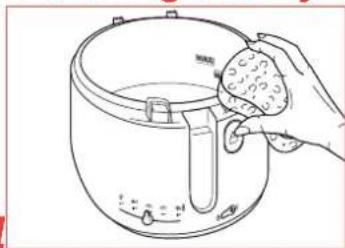
Line drawing of a hand pouring liquid into a cooking pot (no text or symbols)- C lean the bowl and the body using a damp sponge with some washing-up liquid. Dry carefully.
Never immerse the appliance in water, or put it under the tap.
| Problems and possible causes Solutions | |
| The deep fryer does not work | |
| · The fryer is not plugged in.· The on-off switch is not set to 1.· The temperature indicator light does not come on.. | · Plug in the fryer.· Set the light switch to 1.· Set the thermostat to the required temperature and check that the temperature indicator light comes on. |
| Unpleasant odours | |
| · The anti-odour filter is saturated.· The oil has deteriorated.· U nsuitable oil has been used. | · Replace it.· Renew the oil after 8 to 12 uses.· Use a good quality blended vegetable oil. |
| Vision through the viewing window is not clear | |
| · N ot cleaning the window often enough or using an inappropriate cloth. | · T o ensure good visibility, clean the viewing window by wiping it with a sponge and lemon juice.· Allow the window to dry at room temperature or dry with a clean cotton cloth. |
| Steam escapes from around the lid | |
| · The lid is not closed properly.· The seal is defective. | · Check that the lid is properly locked closed.· Contact your nearest approved Service Centre. |
| The frying oil overflows | |
| · The Max. marker for filling the bowl has been exceeded.· Overfilling the basket with food.· The basket is misshapen.· Mixture of different oils and fats.· Food is wet or contains too much water (frozen food).· N ot changing the oil often enough. Using the wrong oil.· Frying 1,2 kg of fresh chips in one fry. | · Check the oil level (Max.), and remove the excess.· Check that the basket is not too full.· Change your basket.· Empty and clean the bowl. Refill the bowl with one type of oil.· Remove the ice and dry the food thoroughly. Lower the basket very slowly.· O n l y use vegetable oil / fats.· A lways cook them in 2 fries : 1st fry 13 min. at 170°, 2nd fry 10 min. at 190°. |
| The food does not become golden and remains soggy | |
| · They are too thick and contain a lot of water.· Too much food is being cooked at the same time and the cooking oil is no longer at the right temperature.· The frying oil temperature may not be high enough; the thermostat is set incorrectly. | · As a test, try a longer cooking time.· Fry the food in small quantities (particularly frozen food).· Set the thermostat to the recommended temperature. |
| The timer no longer works (depending on model) | |
| · The battery is spent. | · H ave it replaced at an approved Service Centre. |
Any repairs must only be carried out by an approved Servicing Centre with the manufacturer's own replacement parts.
If the problem remains, please call our Customer Relations team first for expert help and advice on:
HELPLINE : 0845 602 14 54 - UK (calls charged at local rates) (01) 4751947 - Ireland
natural_image
Illustration of a hand pressing a button on a rice cooker (no text or symbols visible)text_image
Diagram showing a kitchen appliance with a lid, basket, and red arrows indicating parts of the lid and window.natural_image
Line drawing of a hand pouring liquid into a container with a lid (no text or symbols)natural_image
Line drawing of a cooking step showing a pan pouring liquid into a steaming pot (no text or symbols)natural_image
Line drawing of a cooking pot with a red upward arrow indicating heating (no text or symbols)text_image
Diagram illustrating temperature measurement with thermometer and flame, showing upward pressure indicatortext_image
Diagram showing a hand pressing down on a cooking pot with red arrows indicating cooling process and text labels like 'MAX' and 'A'natural_image
Line drawing of a hand placing a ball into a grid-patterned container (no text or symbols)text_image
Diagram showing a basket filled with birds and an airplane, crossed out by red prohibition linesnatural_image
Illustration of hands using a kitchen grater to remove ingredients from a basket (no text or symbols)