
PCO865 - Battery charger Pyle - Free user manual and instructions
Find the device manual for free PCO865 Pyle in PDF.
| Product type | Remote control car (RC Truck) with battery charger |
| Brand | Pyle |
| Car model | RC TRUCK T1 |
| Charger model | PCO865 (included) |
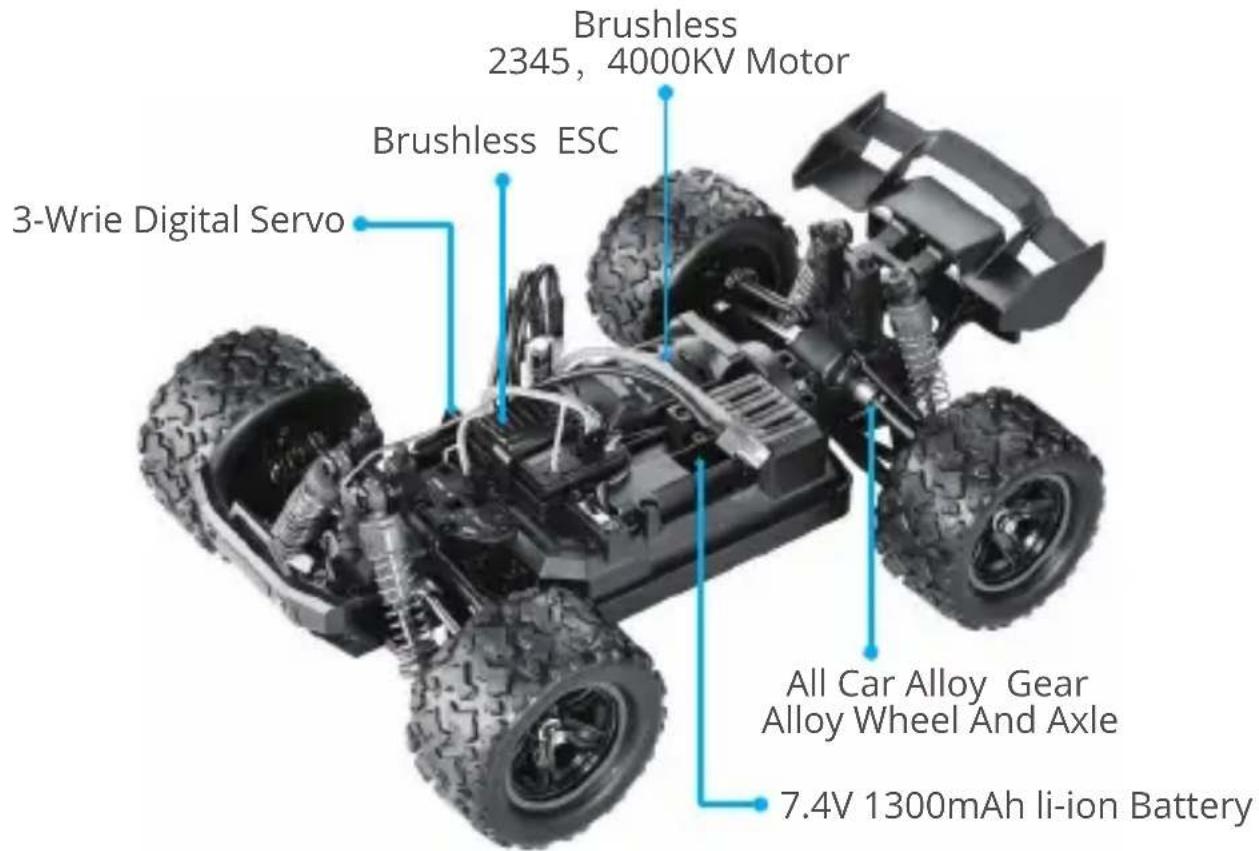
| Car power supply | Li-ion battery 7.4V 1300 mAh |
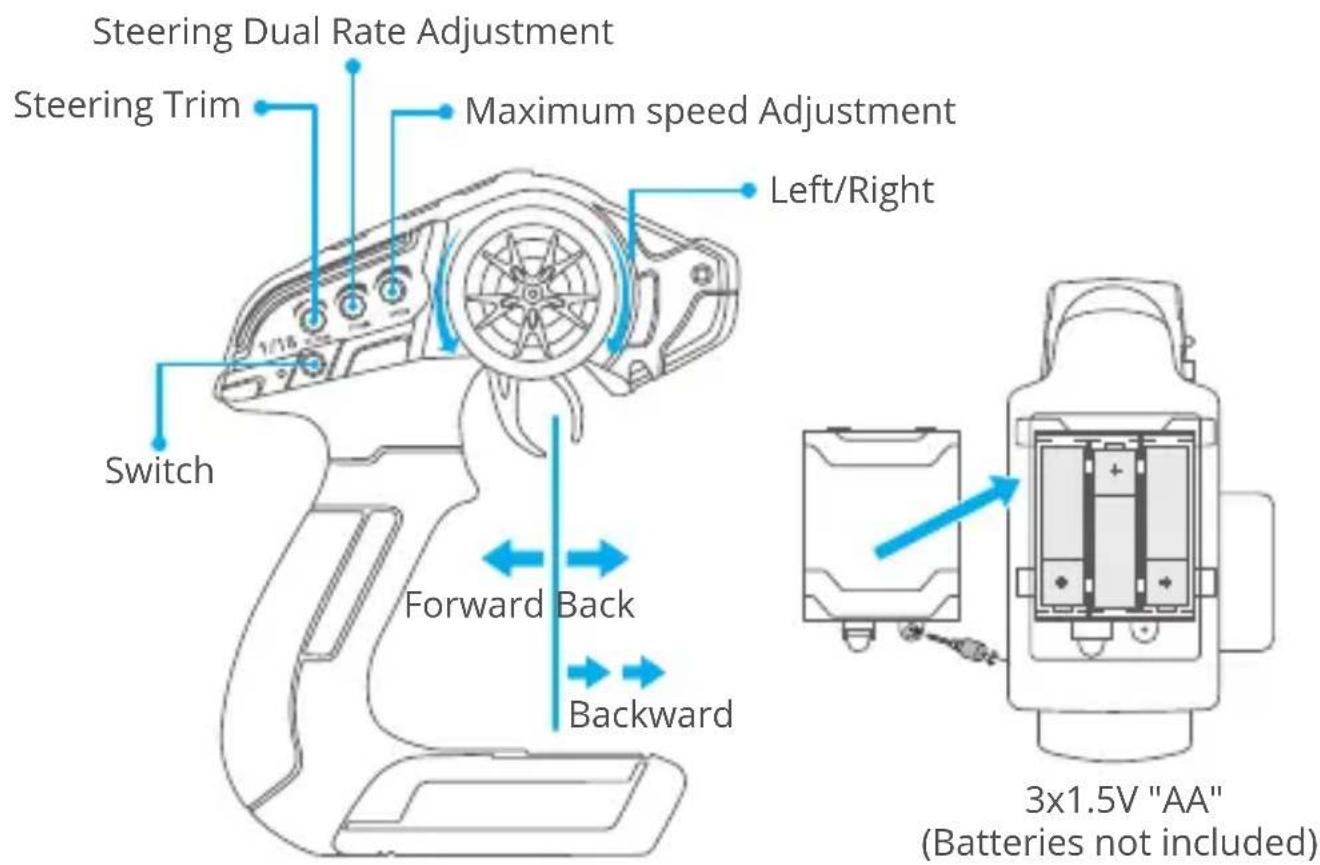
| Transmitter power supply | 3 AA 1.5V batteries (not included) |
| Motor type | Brushless motor 2345, 4000 KV |
| ESC type | Brushless ESC |
| Servo | 3-wire digital servo |
| Wheel and axle material | Alloy |
| Driving functions | Forward, brake, reverse, left/right steering |
| USB charger | USB charger with LED indicators (solid red in standby, blinking green charging, solid red+green = charged) |
| Recommended age | 14 years and up |
| Regular maintenance | Inspect for damage, gears, wheels, screws, wiring, servo; clean chassis and body |
| Safety precautions | Turn off after use, remove battery from car for charging, use original charger, do not operate trigger/wheel when turning on |
| Customer support | support@kidomo.net | www.kidomo.net |
Frequently Asked Questions - PCO865 Pyle
User questions about PCO865 Pyle
0 question about this device. Answer the ones you know or ask your own.
Ask a new question about this device
Download the instructions for your Battery charger in PDF format for free! Find your manual PCO865 - Pyle and take your electronic device back in hand. On this page are published all the documents necessary for the use of your device. PCO865 by Pyle.
USER MANUAL PCO865 Pyle
Thank you for choosing our product: RC TRUCK T1
To ensure proper use, please read the QSG below and have a good understanding of the product before using
WARNING
- Please turn off the switch after using this product, remove the battery power cord, and properly replace the battery after charging, so as to avoid excessive battery discharge caused by the battery being installed in the car for a long time.
- Do not flip the trigger or the steering wheel as you switch on the radio controller.
- This product has a brake function. The first time you push the trigger it brakes; you need to release it to neutral. Push the trigger again, to reverse.
- This product is not suitable for minors under 14.
- Please use the original charger.
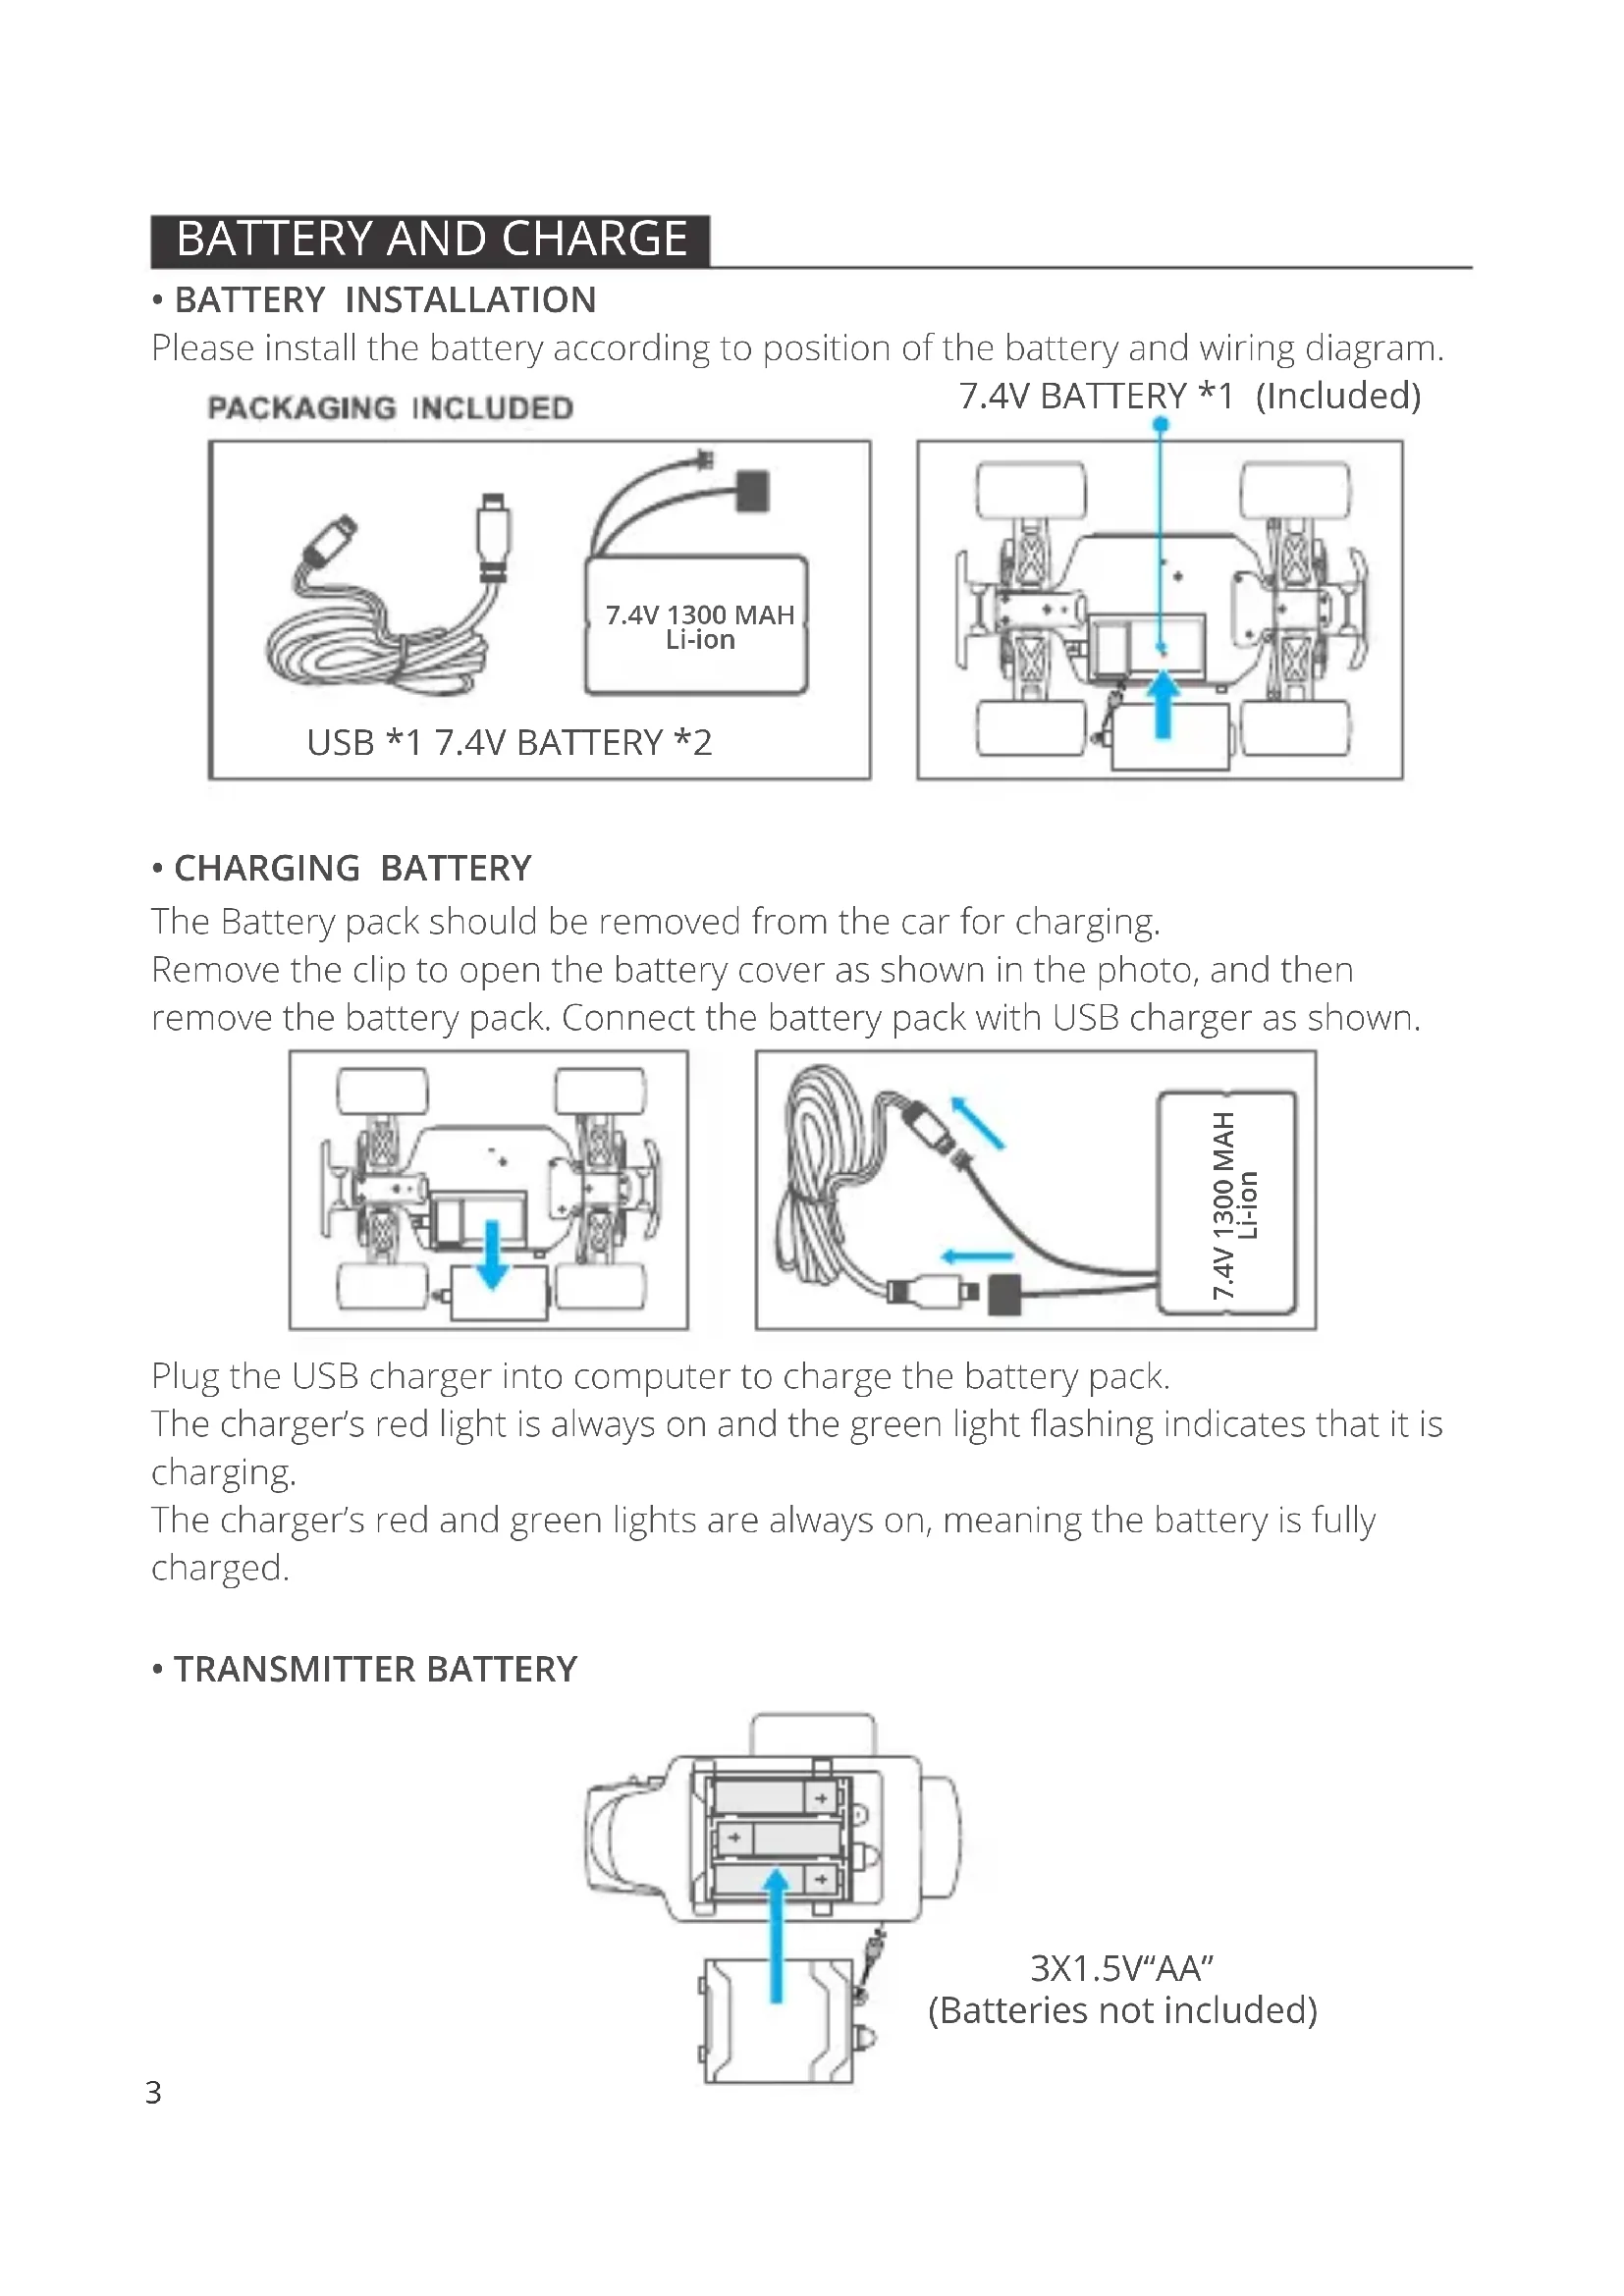
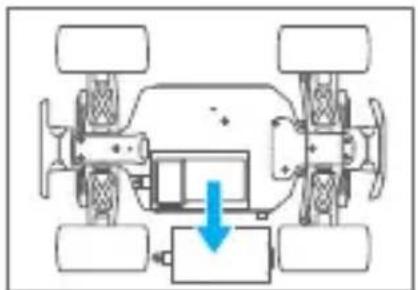
• BATTERY INSTALLATION
Please install the battery according to position of the battery and wiring diagram.
PACKAGING INCLUDED
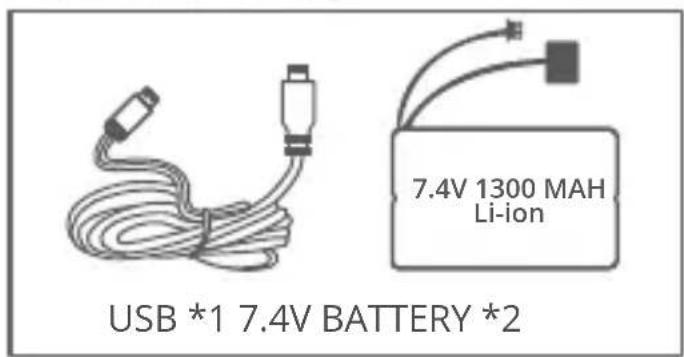
7.4V BATTERY *1 (Included)

natural_image
Top-down diagram of a vehicle chassis with four wheels and a central monitor, showing no text or symbols.- CHARGING BATTERY
The Battery pack should be removed from the car for charging.
Remove the clip to open the battery cover as shown in the photo, and then remove the battery pack. Connect the battery pack with USB charger as shown.
natural_image
Top-down schematic of a vehicle chassis with four wheels and a blue arrow indicating a component (no text or symbols)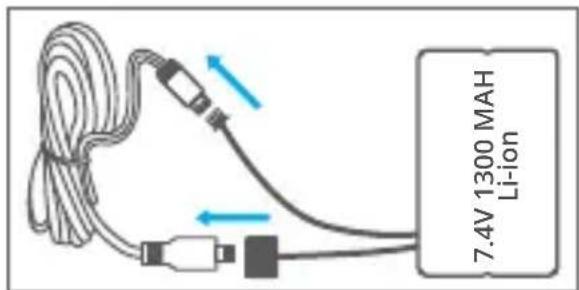
Plug the USB charger into computer to charge the battery pack.
The charger's red light is always on and the green light flashing indicates that it is charging.
The charger's red and green lights are always on, meaning the battery is fully charged.
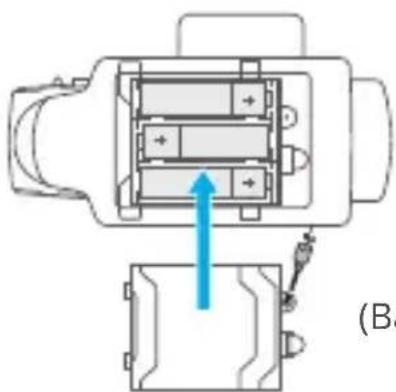
• TRANSMITTER BATTERY
natural_image
Technical diagram of a mechanical assembly with no visible text or symbols3X1.5V"AA" (Batteries not included)
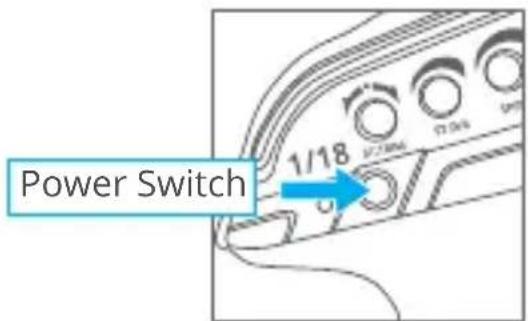
1. TURN ON THE RATIO CONTROLLER AND YOUR CAR
Always turn on the radio controller and then the car receiver.
The binding process is automatically fulfilled in system.
natural_image
Close-up of a mechanical assembly with visible gears and a blue arrow pointing to a component (no text or symbols)IMPORTANT INFORMATION:
① Switch on the radio controller, and then the ESC/Receiver on the truck.
② The binding process is automatically performed in system.
③ Never flip the Trigger or the Steering Wheel at the moment you switch the radio
④ Controller on. Failure to do so will cause the radio system to record the incorrect signals.
⑤ You are ONLY permitted to spin the Trigger and the Steering Wheel after your truck is bound with the radio controller.
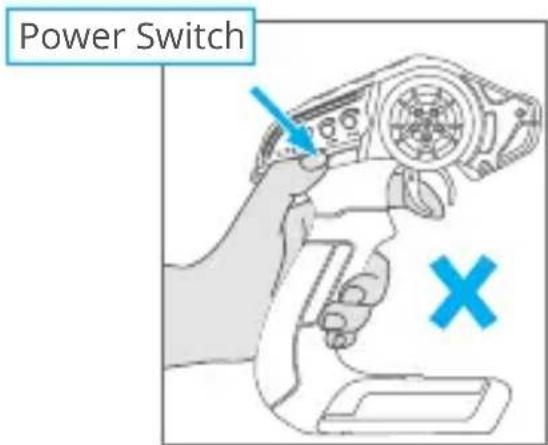
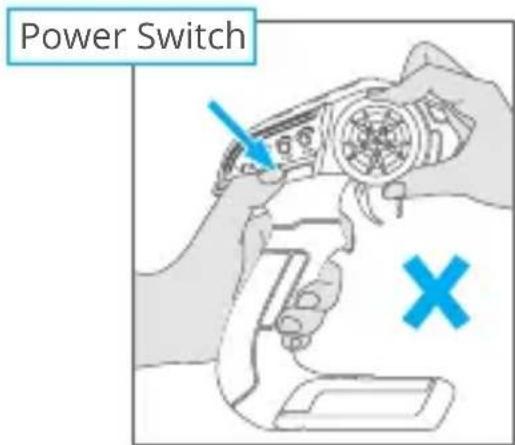
Do not flip the trigger or the steering wheel when you switch on the radio controller.
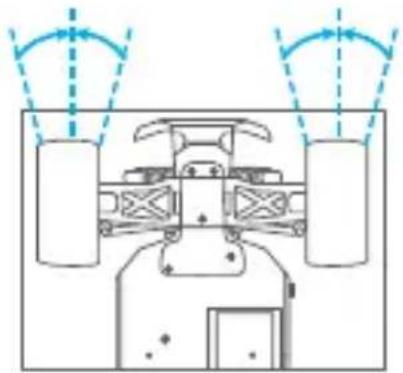
3. TO TUNE THE STEERING TRIM

natural_image
Diagram of a vehicle under load with two cylindrical components and directional arrows indicating motion (no text or labels)Gently pull the trigger to allow the car to run slowly. In the meantime, adjust the steering trim until the front wheels are aligned.
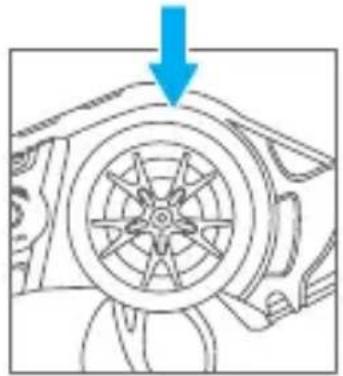
4. CHECK STEERING PERFORMANCE
① To keep the car running in a straight line, do not move the control wheel. (Keep it at center)
② Turn it left to allow your vehicle to turn to left.
③ Turn it right to allow your vehicle to turn to right.
CENTER TURN LEFT TURN RIGHT
natural_image
Diagram of a car wheel with a blue arrow pointing to the wheel rim (no text or symbols)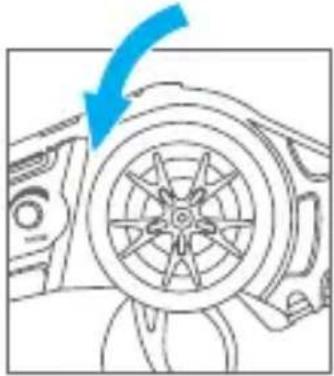
natural_image
Diagram of a car wheel assembly with a blue arrow indicating direction (no text or symbols)
natural_image
Diagram of a car wheel assembly with a blue arrow indicating direction (no text or symbols)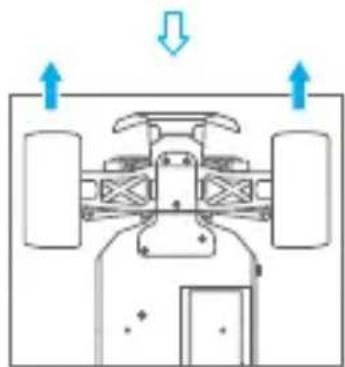
natural_image
Top-down schematic of a vehicle showing front, rear, and side views with directional arrows (no text or symbols)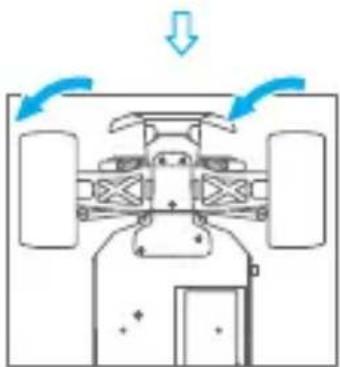
natural_image
Top-down diagram of a vehicle showing airflow direction with arrows and no text or symbols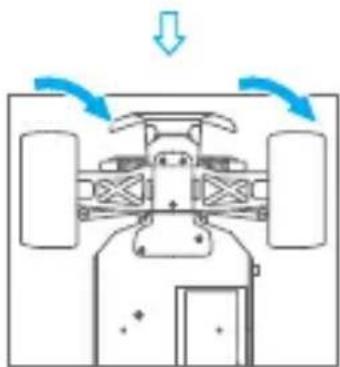
natural_image
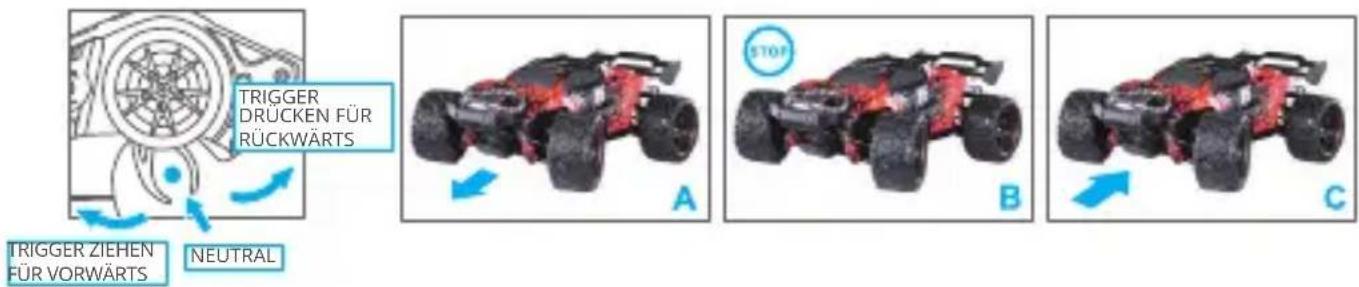
Top-down diagram of a vehicle showing airflow or movement with arrows indicating direction (no text or symbols)5. CHECK TRIGGER RESPONSE
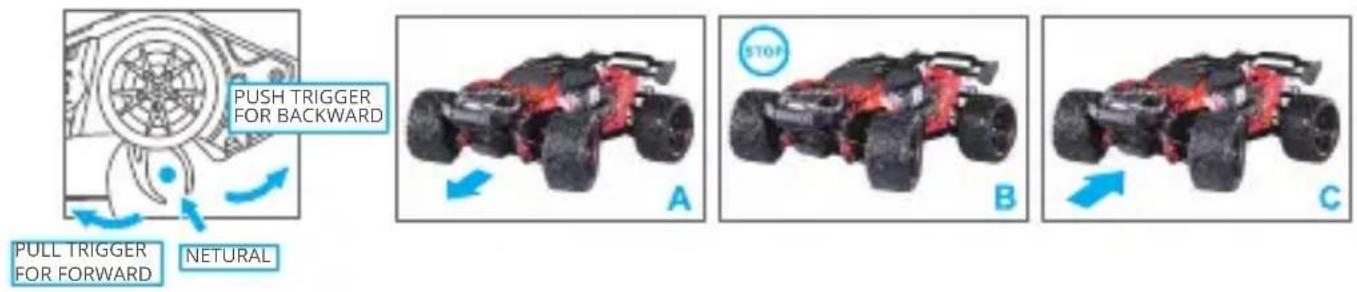
A: Pull the trigger back to accelerate, release it to decelerate and push it to brake.
B. To stop your car, release the trigger to Neutral
C. Pushing the trigger a second time activates the reverse feature.
MAINTENANCE
After running your car, the following procedures should be performed regularly to help you maintain your car's performance.
- Inspect your car for any obvious damage
- Check the gears for wear, debris or broken/slipping teeth
- Check the wheels and tighten the wheel screws properly.
- Check for loose screws in the chassis.
- Check the wiring for frayed or damaged wires or connectors.
- Check the steering servo which will wear out over time and require replacement.
- Check all batteries
- Keep the chassis clean and free of sand, dust, and moisture
- Remove and clean the motor if necessary. (Never attempt to re-assemble the motor, you will damage it and void the warranty.)
- Clean the car body with a soft lint-free cloth.
- Remove all batteries when not in use.
CONTACT US
For any inquiries about KIDOMO products, please feel free to contact us.
We will respond within 24 hours.
Email: support@kidomo.net
Tel: 301-670-7335 (US)
Official website: www.kidomo.net
natural_image
Top-down schematic of a vehicle chassis with four wheels and a central body, showing no text or symbols.• BATTERIE LADEN
natural_image
Top-down diagram of a vehicle chassis with four wheels and a blue arrow indicating a specific component (no text or symbols present)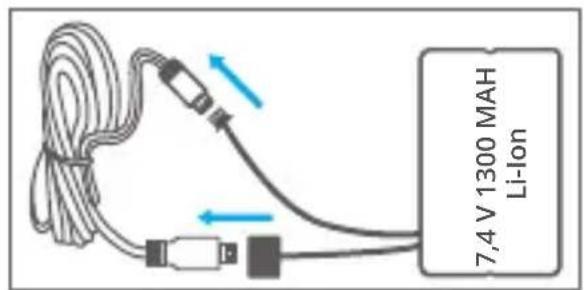
natural_image
Technical diagram of a mechanical assembly with internal components and a blue arrow indicating direction (no text or symbols)natural_image
Close-up of a mechanical assembly with visible gears and a blue arrow indicating a component (no text or symbols)natural_image
Diagram of a vehicle interior with two cylindrical tanks and directional arrows indicating flow or movement (no text or symbols)natural_image
Mechanical component diagram showing a wheel with spokes and a blue arrow pointing to it (no text or symbols)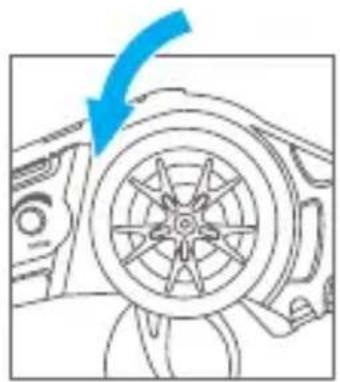
natural_image
Diagram of a car wheel assembly with a blue arrow indicating direction (no text or symbols)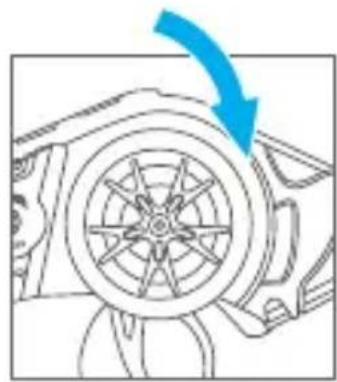
natural_image
Diagram of a car wheel assembly with a blue arrow indicating direction (no text or symbols)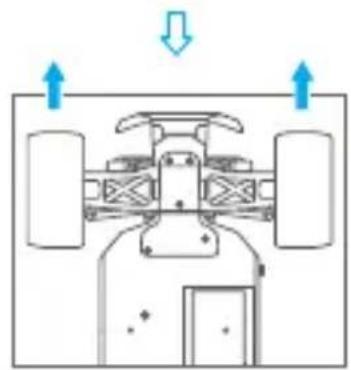
natural_image
Top-down diagram of a vehicle showing front, rear, and side views with directional arrows (no text or symbols)
natural_image
Top-down diagram of a vehicle showing airflow or movement with arrows indicating direction (no text or symbols)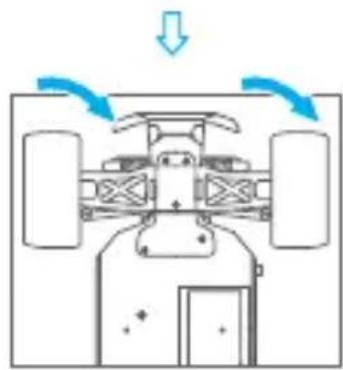
natural_image
Top-down diagram of a vehicle showing airflow or movement with arrows indicating direction (no text or symbols)5. TRIGGERVERHALTEN PRÜFEN
natural_image
Top-down diagram of a vehicle chassis with four wheels and a highlighted component (no text or symbols)• CHARGEMENT DE LA BATTERIE
natural_image
Top-down schematic of a vehicle chassis with four wheels and a blue arrow indicating a specific component (no text or symbols present)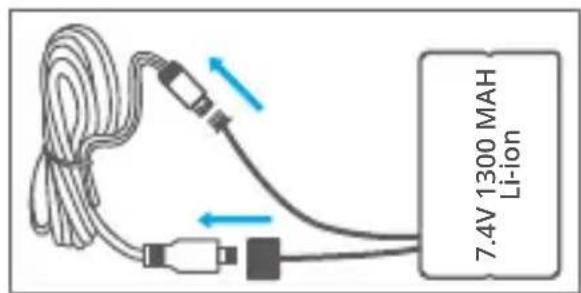
natural_image
Technical diagram of a mechanical assembly with no visible text or symbolsnatural_image
Close-up of a mechanical assembly with visible gears and springs, no text or symbols presentALLUMEZ LE RÉCEPTEUR DE VOTRE VOITURE
2. PRÉCAUTIONS POUR LE CONTROLEUR RADIO 2.4GHz
INFORMATIONS IMPORTANTES :
natural_image
Diagram of a vehicle under load with two cylindrical components and directional arrows indicating motion (no text or symbols)natural_image
Diagram of a car wheel with a blue arrow pointing to the wheel rim (no text or symbols)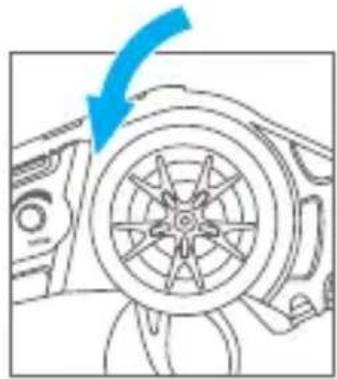
natural_image
Diagram of a car wheel with a blue arrow indicating direction (no text or symbols)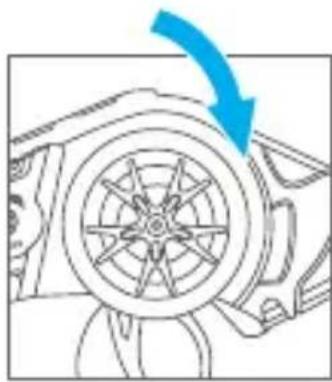
natural_image
Diagram of a car wheel with a blue arrow indicating direction (no text or symbols)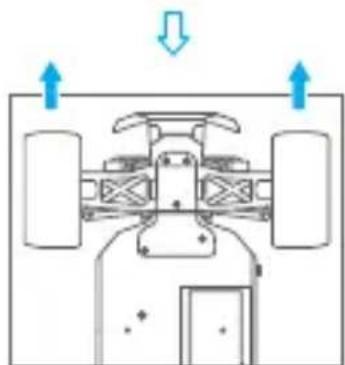
natural_image
Top-down schematic of a vehicle showing front, rear, and side views with directional arrows (no text or labels)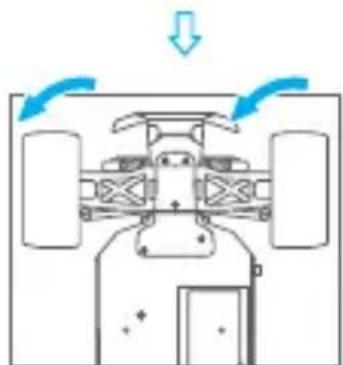
natural_image
Diagram of a vehicle interior with directional arrows indicating movement or flow (no text or symbols)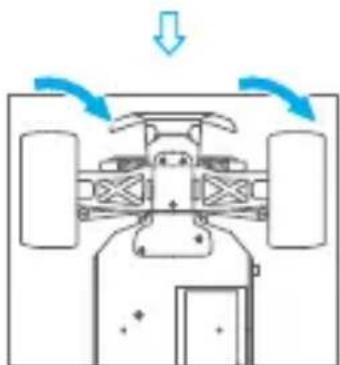
natural_image
Diagram of a vehicle interior with directional arrows indicating motion or airflow (no text or symbols)5. VÉRIFIER LA RÉACTION DE LA GACHETTE

- WARNING
- • BATTERY INSTALLATION
- - CHARGING BATTERY
- • TRANSMITTER BATTERY
- TURN ON THE RATIO CONTROLLER AND YOUR CAR
- IMPORTANT INFORMATION:
- TO TUNE THE STEERING TRIM
- CHECK STEERING PERFORMANCE
- CHECK TRIGGER RESPONSE
- MAINTENANCE
- CONTACT US
- • BATTERIE LADEN
- TRIGGERVERHALTEN PRÜFEN
- • CHARGEMENT DE LA BATTERIE
- PRÉCAUTIONS POUR LE CONTROLEUR RADIO 2.4GHz
- INFORMATIONS IMPORTANTES :
- VÉRIFIER LA RÉACTION DE LA GACHETTE
Brand : Pyle
Model : PCO865
Category : Battery charger