PA36WTKG - Cooker THERMADOR - Free user manual and instructions
Find the device manual for free PA36WTKG THERMADOR in PDF.
Download the instructions for your Cooker in PDF format for free! Find your manual PA36WTKG - THERMADOR and take your electronic device back in hand. On this page are published all the documents necessary for the use of your device. PA36WTKG by THERMADOR.
USER MANUAL PA36WTKG THERMADOR
Range Low Backguard and Toe Kick Accessory2 Safety DEFINITIONS 9 WARNING This indicates that death or serious injuries may occur as a result of non-observance of this warning. 9 CAUTION This indicates that minor or moderate injuries may occur as a result of non-observance of this warning. NOTICE: This indicates that damage to the appliance or property may occur as a result of non-compliance with this advisory. Note: This alerts you to important information and/or tips. Rear clearance REQUIREMENTS
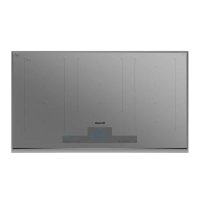
- To avoid staining on the back wall, high temperature, non-porous construction materials suitable for use in a cooking environment are recommended.
- Models PRD606xx are suitable for 0'' rear clearance to combustible surfaces.
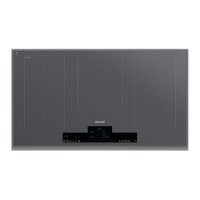
- When using the included island trim a minimum 6" (152 mm)* rear clearance is required to a combustible surface*.
- When installing against a combustible surface, a Thermador low backguard is required for a 0'' rear clearance to the combustible surface. A Thermador low backguard must be purchased separately.
- A rear clearance to a surface covered in a non- combustible material (metal, ceramic tile, brick, marble, or stone)* is 0'' when using the included Island Trim. *Clearances of less than 6'' (152 mm) should be approved by the local codes and/or by the local authority having jurisdiction. Clearances from non-combustible materials are not part of the ANSI Z21.1 scope and are not certified by CSA. Installation INSTRUCTIONS For use with the following models: 9 WARNING Fingers or hands could get pinched when installing the backguard. Severe injury could result. Use extreme caution and wear thick protective gloves to avoid potential laceration to finger or hand while sliding the backguard down onto the range. 9 WARNING To avoid possible burn or fire hazard, a backguard designed specifically for this appliance must be installed whenever the appliance is used. Proposition 65 Warning This product may contain a chemical known to the State of California, which can cause cancer or reproductive harm. Therefore, the packaging of your product may bear the following label as required by California: PRD364WDGx PRD48WCSGx PRG364WDG PRD364WIGx PRD48WDSGx PRG364WLG PRD364WLGx PRD48WISGx PRG366WG PRD366WGx PRD48WLSGx PRG486WDG PRD484WCGx PRD606WCG PRG486WLG PRD486WDGx PRD606WCSG PRD486WIGx PRD606WEG
PRD486WLGU PRD606WESG
State of California Proposition 65 Warning: : WARNING Cancer and Reproductive Harm - www.P65Warnings.ca.gov3 Low backguard installation Tools needed
- T-20 star head screwdriver or drill
- Protective work gloves Attach the backguard before sliding the appliance into the final installed position. To remove the island trim
1. With a T-20 torx head screwdriver, remove the screws
in the front face of the island trim.
2. Remove the T-20 torx screws securing the trim to the
side panels and the back panel. Lift up to fully remove. To install the low backguard
1. Align the low backguard with the range side panel’s
right and left rear corners. The backguard is inserted inside the guide channels on the back of the range.
2. The backguard’s front face is outside the flange on the
front side of the range.
3. Re-install the screws.4
Toe kick panel installation Tools needed
- Protective work gloves Installing the toe kick panel on units with clips
1. Pull the door trim off the plastic mounting clips. No
2. Secure the accessory back plate to the range with the
two provided screws.
3. Remove the protective plastic covering from the toe
4. Place the toe kick panel onto the back plate tabs
located on both ends and into the slots at the bottom. Installing the toe kick panel on units without clips
1. Slide the door trim up and off the mounting screws.
No tools are required.