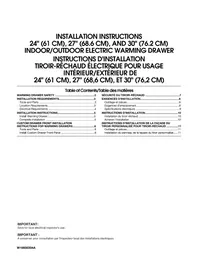
KEWS105SSS - Warming drawers and cabinets KITCHENAID - Free user manual and instructions
Find the device manual for free KEWS105SSS KITCHENAID in PDF.


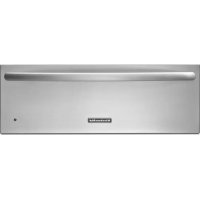
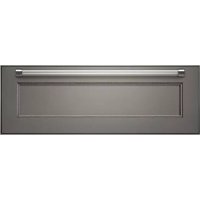
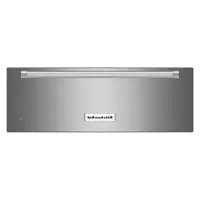
| Product Type | Warming Drawer |
| Brand | KitchenAid |
| Model | KEWS105SSS |
| Overall Width (24" model) | 60.3 cm |
| Cutout Width (24" model) | 56.5 cm |
| Cutout Height | 22.9 cm |
| Depth | 57.8 cm |
| Approximate Weight | 16 kg |
| Power Supply | 120 V, 60 Hz, 15 A, AC only |
| Required Outlet | 3-prong grounded outlet |
| Functions | Warming with adjustable thermostat (Low to High settings) |
| Indicator Light | Yes, "ON" indicator visible through the lens cap |
| Material | Brushed stainless steel |
| Installation | Built-in, requires two people, sturdy and level support surface |
| Use | Indoor only (for oil-rubbed bronze, black/white glass finishes) |
| Safety | Do not use an adapter or extension cord; separate circuit recommended |
| Maintenance | Clean with a soft cloth and mild detergent; refer to the use and care guide |
| Included Parts | 4 screws No. 8-18 x 5/8", lens cap for indicator light |
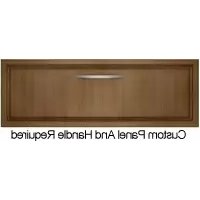
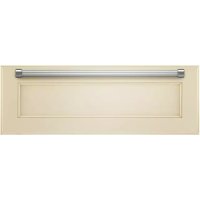
| Optional Accessories | Custom wood front panel, custom handle |
| Warranty | Refer to the use and care guide or contact the dealer |
Frequently Asked Questions - KEWS105SSS KITCHENAID
User questions about KEWS105SSS KITCHENAID
0 question about this device. Answer the ones you know or ask your own.
Ask a new question about this device
Download the instructions for your Warming drawers and cabinets in PDF format for free! Find your manual KEWS105SSS - KITCHENAID and take your electronic device back in hand. On this page are published all the documents necessary for the use of your device. KEWS105SSS by KITCHENAID.
USER MANUAL KEWS105SSS KITCHENAID
INSTALLATION INSTRUCTIONS 24" (61 CM), 27" (68.6 CM), AND 30" (76.2 CM) INDOOR/OUTDOOR ELECTRIC WARMING DRAWER
INSTRUCTIONS D'INSTALLATION TIROIR-RÉCHAUD ÉLECTRIQUE POUR USAGE INTÉRIEUR/EXTÉRIEUR DE 24" (61 CM), 27" (68,6 CM), ET 30" (76,2 CM)
Table of Contents/Table des matières
WARMING DRAWER SAFETY 2
INSTALLATION REQUIREMENTS....3
Tools and Parts ....3
Location Requirements....3
Electrical Requirements 4
INSTALLATION INSTRUCTIONS....5
Install Warming Drawer....5
Complete Installation ....5
CUSTOM DRAWER FRONT INSTALLATION
INSTRUCTIONS FOR WARMING DRAWERS....6
Tools and Parts 6
Install Custom Drawer Front Panel 6
SÉCURITÉ DU TIROIR-RÉCHAUD ....7
EXIGENCES D'INSTALLATION....8
WARMING DRAWER SAFETY
Your safety and the safety of others are very important.
We have provided many important safety messages in this manual and on your appliance. Always read and obey all safety messages.

This is the safety alert symbol.
This symbol alerts you to potential hazards that can kill or hurt you and others.
All safety messages will follow the safety alert symbol and either the word "DANGER" or "WARNING."
These words mean:
DANGER
You can be killed or seriously injured if you don't immediately follow instructions.
WARNING
You can be killed or seriously injured if you don't follow instructions.
All safety messages will tell you what the potential hazard is, tell you how to reduce the chance of injury, and tell you what can happen if the instructions are not followed.
INSTALLATION REQUIREMENTS
Tools and Parts
Gather the required tools and parts before starting installation. Read and follow the instructions provided with any tools listed here.
Tools needed
■ Phillips screwdriver
Drill
■ 1 ^3/8 " (3.5 cm) hole saw
Parts supplied
■ 4 - #8-18 x ^5/8 " screws
■ Lens (for panel ready models)
Check local codes. Check existing electrical supply. See "Electrical Requirements."
It is recommended that all electrical connections be made by a licensed, qualified electrical installer.
Location Requirements
IMPORTANT: Observe all governing codes and ordinances.
■ Cutout dimensions that are shown must be used. Given dimensions provide minimum clearance with warming drawer.
■ Recessed installation area must provide complete enclosure around the recessed portion of the warming drawer.
■ Grounded electrical supply is required. See “Electrical Requirements” section.
■ Electrical supply outlet should be located in the rear wall on the upper right-hand side of the cutout or in an adjacent cabinet. The outlet must be recessed. If the electrical outlet is located in an adjacent cabinet, a 1 ^3/8 " (3.5 cm) minimum diameter hole should have been drilled in the back of the cutout or support surface to pass the power supply cord through to the outlet.
■ Warming drawer support surface must be solid, level and flush with bottom of cabinet cutout.
■ Warming drawers with oiled bronze, black glass, and white glass panels are approved for indoor use only.
For best performance results, make sure the warming drawer is leveled before completing installation. There is no way to level the warming drawer after it has been installed. If the installation is not level, the door may slide open or not seal tightly, allowing heat to escape.
NOTE: If installing the warming drawer below another product, refer to that product's literature for any installation requirements.
Product Dimensions

| WARMING DRAWER SIZE | OVERALL WIDTH (A) | RECESSED WIDTH (B) | RECESSED HEIGHT (C) |
| 24"(61 cm) | 23 34 "(60.3 cm) | 22 14 "(56.5 cm) | 9"(22.9 cm) |
| 27"(68.6 cm) | 26 34 "(67.9 cm) | 25 14 "(64.1 cm) | 9"(22.9 cm) |
| 30"(76.2 cm) | 29 34 "(75.6 cm) | 28 14 "(71.8 cm) | 9"(22.9 cm) |
Cabinet Dimensions
Cabinet Side View

Cabinet Front View

| WARMING DRAWER SIZE | CUTOUT WIDTH (A) | MIN. CABINET WIDTH (B) |
| 24" (61 cm) 22 12 " (57.1 cm) 24" (61 cm) | ||
| 27" (68.6 cm) | 25 12 " (64.8 cm) | 27" (68.6 cm) |
| 30" (76.2 cm) | 28 12 " (72.4 cm) | 30" (76.2 cm) |
Warming drawer can be installed as an indoor single or double installation or installed under a single oven. Two warming drawers under a single oven are shown.
NOTE: The warming drawer cannot be leveled after being installed.
For outdoor installation, follow the cutout dimensions above. Install the outdoor warming drawer in a permanent fixture.
Custom Wood Drawer Front
If you plan to install a custom wood panel to match your cabinets, we recommend consulting a qualified cabinetmaker or carpenter. The back of the wood panel must be sealed to avoid moisture damage.
Electrical Requirements
WARNING

Electrical Shock Hazard
Plug into a grounded 3 prong outlet.
Do not remove ground prong.
Do not use an adapter.
Do not use an extension cord.
Failure to follow these instructions can result in death, fire, or electrical shock.
IMPORTANT: The warming drawer must be electrically grounded in accordance with local codes and ordinances, or in the absence of local codes, with the National Electrical Code, ANSI/NFPA 70 or Canadian Electrical Code, CSA C22.1.
If codes permit and a separate ground wire is used, it is recommended that a qualified electrical installer determine that the ground path is adequate.
A copy of the above code standards can be obtained from:
National Fire Protection Association
1 Batterymarch Park
Quincy, MA 02169-7471
CSA International
8501 East Pleasant Valley Road
Cleveland, OH 44131-5575
■ A 120 volt, 60 Hz., AC only, 15-amp fused, electrical circuit is required. A time-delay fuse or circuit breaker is also recommended. It is recommended that a separate circuit serving only this warming drawer be provided.
■ The model/serial rating plate is located above the left-hand side receiving slide. The warming drawer must be removed to view the model/serial rating plate. See the following illustration.

natural_image
Technical line drawing of a structural frame with labeled component A (no text or symbols beyond label)A. Model/serial number plate
INSTALLATION INSTRUCTIONS
Install Warming Drawer
WARNING
Excessive Weight Hazard
Use two or more people to move and install warming drawer.
Failure to do so can result in back or other injury.
- Turn off power supply. Using 2 or more people, move warming drawer close to its final location. Remove and discard shipping materials, tape, and film from the warming drawer. Remove and set aside racks and other parts from inside warming drawer.
- Check that the warming drawer Temperature control knob is set to the OFF position.
- Support the warming drawer on a sturdy surface level with the cutout opening.
WARNING

Electrical Shock Hazard
Plug into a grounded 3 prong outlet.
Do not remove ground prong.
Do not use an adapter.
Do not use an extension cord.
Failure to follow these instructions can result in death, fire, or electrical shock.
- Plug the power supply cord into the grounded 3 prong outlet.
-
Slide the warming drawer over halfway into the cutout opening.
-
Open warming drawer and slowly push against the front panel to slide the drawer completely into the cabinet until the flanges on the front panel meet the cabinet face.
- Use the two #8-18 x 5/8" screws provided to secure the warming drawer frame to the cabinet.

natural_image
Pure technical line drawing of a structural frame with no text or symbolsA. Two #8-18 x 58 " screws
Complete Installation
- Check that all parts are now installed. If there is an extra part, go back through the steps to see which step was skipped.
- Check that you have all of your tools.
- Dispose of/recycle all packaging materials.
- For warming drawer use and cleaning, read the Use and Care Guide.
- Turn the Temperature control knob to HI. The light should illuminate.
If warming drawer(s) does not operate, check the following:
■ Household fuse is intact and tight; or circuit breaker has not tripped.
■ Warming drawer is plugged in, and electrical supply is connected.
If you need Assistance or Service:
Please reference the "Assistance or Service" section of the Use and Care Guide or contact the dealer from whom you purchased your warming drawer.
CUSTOM DRAWER FRONT INSTALLATION INSTRUCTIONS FOR WARMING DRAWERS
Tools and Parts
Gather the required tools and parts before starting installation. Read and follow the instructions provided with any tools listed here.
Tools Needed
■ Phillips screwdriver
■ Drill and appropriate bits
Parts Supplied
■ 6 - #8-18 x 12 " screws
■ Indicator light lens
Parts Needed
■ Custom drawer front
■ Custom handle (optional)
■ Adhesive recommended for plastic to wood
Install Custom Drawer Front Panel
The warming drawer has an interface that will allow a modest range of panel sizes. The actual panel size should be selected by the customer and the contractor to suit the desired effect. It is recommended that a qualified carpenter make and install the custom drawer front and handle(s) to match surrounding cabinetry.
- Install warming drawer unit as instructed by the installation instructions provided with the warming drawer.
- Create the custom drawer front. Below are the minimum and maximum dimensions for the custom drawer front. The size of the custom drawer front for the warming drawer will vary according to the specific installation. The depth of the panel will vary in order to have the custom warming drawer flush with the surrounding cabinets.

Model A - MAX B - MAX A - MIN B - MIN
| 24" (61 cm)Warming Drawer | 23 34 "(60.3 cm) | 10 516 "(26.2 cm) | 23"(58.4 cm) | 9 116 "(23.0 cm) |
| 27" (68.6 cm)Warming Drawer | 26 34 "(67.9 cm) | 10 516 "(26.2 cm) | 26"(66.1cm) | 9 116 "(23.0 cm) |
| 30" (76.2 cm)Warming Drawer | 29 34 "(75.6 cm) | 10 516 "(26.2 cm) | 29"(73.7cm) | 9 116 "(23.0 cm) |
- It is recommended that if a wood or porous custom drawer front is installed, a high quality spray polyurethane finish be applied to the inner wood surface.
- For the lens, drill a 516 " (7.9 mm) diameter hole through the appearance side of the custom drawer front. This hole will allow the indicator "ON" light to be visible through the custom drawer front. To secure the lens, use an adhesive specified for plastic to wood application.
- Install custom handle (not supplied) through custom drawer front.
- The custom drawer front is fastened to the stainless steel drawer by driving 6 screws through clearance holes in the drawer front into the wooden or other custom made panel.

A. Optional handle
B. Custom door panel
C. Warming drawer front
D. 6 - #8-18 x 34 " screws
E. Lens
SÉCURITÉ DU TIROIR-RÉCHAUD
National Fire Protection Association
1 Batterymarch Park
Quincy, MA 02169-7471
CSA International
8501 East Pleasant Valley Road
Cleveland, OH 44131-5575
natural_image
Technical line drawing of a structural frame with labeled component A (no text or symbols beyond label)natural_image
Pure technical line drawing of a structural frame with no text or symbolsA. Deux vis n° 8-18 x 5/8"
Achever l'installation
- INSTALLATION INSTRUCTIONS 24" (61 CM), 27" (68.6 CM), AND 30" (76.2 CM) INDOOR/OUTDOOR ELECTRIC WARMING DRAWER
- INSTRUCTIONS D'INSTALLATION TIROIR-RÉCHAUD ÉLECTRIQUE POUR USAGE INTÉRIEUR/EXTÉRIEUR DE 24" (61 CM), 27" (68,6 CM), ET 30" (76,2 CM)
- Table of Contents/Table des matières
- WARMING DRAWER SAFETY
- Your safety and the safety of others are very important.
- DANGER
- WARNING
- INSTALLATION REQUIREMENTS
- Tools and Parts
- Tools needed
- Parts supplied
- Location Requirements
- Cabinet Dimensions
- Custom Wood Drawer Front
- Electrical Requirements
- Electrical Shock Hazard
- INSTALLATION INSTRUCTIONS
- Install Warming Drawer
- Complete Installation
- If warming drawer(s) does not operate, check the following:
- If you need Assistance or Service:
- CUSTOM DRAWER FRONT INSTALLATION INSTRUCTIONS FOR WARMING DRAWERS
- Parts Needed
- Install Custom Drawer Front Panel
- SÉCURITÉ DU TIROIR-RÉCHAUD
- Achever l'installation
Brand : KITCHENAID
Model : KEWS105SSS
Category : Warming drawers and cabinets