HS20 - Steam cleaner DELONGHI - Free user manual and instructions
Find the device manual for free HS20 DELONGHI in PDF.

| Brand | DELONGHI |
| Model | HS20 |
| Product type | Electric convector (thermoconvector) |
| Power supply | Mains, voltage adapted to the plug (see rating plate) |
| Main function | Convection heating, thermostatic control |
| Anti-freeze function | Yes (models with thermostat): maintains 5°C |
| Built-in fan | Yes (on some models) for rapid distribution |
| Maximum power | Not specified (two switches for selection) |
| Mounting | On feet (included) or wall-mounted (optional kit) |
| Maintenance | Clean with a soft, dry cloth, appliance cold |
| Do not use | Near bathtubs, showers, swimming pools; under a fixed socket |
| Precautions | Do not obstruct grilles, do not cover, do not use in rooms < 4 m² |
| Cable replacement | By the manufacturer or authorized service only |
| Compliance | Directive 89/336/EEC (electromagnetic compatibility) |
| Disposal | Do not dispose with household waste, selective collection (WEEE) |
Frequently Asked Questions - HS20 DELONGHI
User questions about HS20 DELONGHI
0 question about this device. Answer the ones you know or ask your own.
Ask a new question about this device
Download the instructions for your Steam cleaner in PDF format for free! Find your manual HS20 - DELONGHI and take your electronic device back in hand. On this page are published all the documents necessary for the use of your device. HS20 by DELONGHI.
USER MANUAL HS20 DELONGHI
ELECTRIC CONVECTOR HEATER
CONVECTEUR ELECTRIQUE
TERMOCONVETTORE ELETTRICO
ELETRISCHER HEIZKONVEKTOR
ELEKTRISCHE CONVECTORKACHEL
TERMOCONVECTOR ELECTRICO
TERMOCONVECTOR ELECTRICO
HAEKTIKO KONBEKTOP
ELEKTRISK VARMLUFTOVN
ELEKTRISK TERMOOVN
ELEKTRISK KONVEKTIONSVÄRMARE
SAHKÖKAYTOJEN VIRTAUSLÄMMITIN
NAVOD K POUIITI
GRZEJNIK ELEKTRYCZNY
ELEKTROMOS KONVEKTOR
Instructions
Mode d'emploi
A) If your appliance comes fitted with a plug, it will incorporate a 13 Amp fuse. If it does not fit your socket, the plug should be cut off from the mains lead, and on appropriate plug fitted, as below. WARNING: Very carefully dispose of the cut off plug after removing the fuse: do not insert in a 13 Amp socket elsewhere in the house as this could cause a shock hazard. With alternative plugs not incorporating a fuse, the circuit must be protected by a 15 Amp fuse. If the plug is a moulded-on type, the fuse cover must be re-fitted when changing the fuse using a 13 Amp Asta approved fuse to BS 1362. In the event of losing the fuse cover, the plug must NOT be used until a replacement fuse cover can be obtained from your nearest electrical dealer. The colour of the correct replacement fuse cover is that as marked on the base of the plug.
B) If your appliance is not fitted with a plug, please follow the instructins provided below:
IMPORTANT
The wires in the mains lead are coloured in accordance with the following code:
Blue
Neutral
Brown
Live
As the colours of the wires in the mains lead may not correspond with the coloured markings identifying the terminals in your plug, proceed as follows:
The blue wire must be connected to the terminal marked with the letter N or coloured black.
The brown wire must be connected to the terminal marked with the letter L or coloured red.
If you have a 3-pins plug, do not connect any wire to the "earth" terminal.
ASSEMBLING THE FEET
- Fit the feet ti the appliance as follows:
- Insert the anchor pins into the slots and turn the foot until it clicks into position (fig. 1).
- Fasten the feet in position using the screws (fig. 2).
WALL-MOUNTING
If you want to fix the appliance to the wall, please contact your nearest Service Centre asking for the wall-mounting kit.
electrical connection
- Before inserting the plug in an electrical outlet, check carefully to be certain that the voltage in your home's electrical system matches the voltage indicated on the appliance and that the socket and main feed are of a size sufficient to power this appliance.
- This appliance complies with EEC Directive 89/336 regarding electromagnetic compatibility.
OPERATION AND USE
Turning the appliance on
Models with only one switch
- This appliance is turned on when you can see the red area on the switch (or, in those models so equipped, when the warning light on the switch comes on).
Models with only a thermostat
This appliance can be turned on by rotating its knob clockwise until it stops at the last possible setting.
To turn this appliance off, rotate the knob to its lowest position and remove its plug from the electrical outlet.
Models with a thermostat and two switches
Turn the thermostat knob clockwise until it reaches its last possible setting, then press one switch (minimum power) or both switches (maximum power) so the red area becomes visible (or the warning light comes on in those models so provided).
Adjusting the thermostat
When the room has reached the desired temperature, turn the thermostat knob slowly in an anti-clockwise direction until you get to the setting — and not beyond it — where you hear a click (or, for models with warning lights, until those lights turn off). The thermostat will then adjust that set temperature automatically and keep it constant.
If your appliance is the type with 2 switches, you could utilize only one of them during mild seasons and on days not particularly cold. You will thus use but little electrical power and obtain even greater savings in energy consumption.
Anti-freeze function (only for models with a thermostat)
Turn the switch (or switches) to make the red area show, then turn the thermostat knob to the " " setting. When so regulated, this appliance will keep a room at a temperature of 5^ . while consuming but a minimum of energy.
Model with a fan
This version makes it possible to heat a room even more quickly, thanks to a built-in fan that speeds up the spread of heat and keeps the temperature uniform.
To turn this unit on, proceed as follows:
- Turn the thermostat knob clockwise to the last possible setting.
-
To operate the appliance at minimum with the fan, push the I button (the red area will become visible or, in models having a switch with a warning light, the light will come on).
-
To operate the appliance at minimum without the fan, press the ll button (the red area will become visible or, in models having a switch with a warning light, the light will come on).
- Push both switches in order to get the highest power
In this model, the thermostat can be adjusted just as it is for models without a fan.
MAINTENANCE
Always pull the plug out of its electrical outlet before beginning any cleaning.
This electric convector requires no special maintenance. All you have to do is dust it off with a soft, dry cloth — but do so only when the appliance is cold. Never use abrasive powders or solvents.
HELPFUL ADVICE
- Do not make use of this heating convector in the immediate proximity of bathtubs, showers, washbasins, pools, etc. In addition, this appliance must never be placed directly under a permanent electrical outlet.
- Do not place the power cable atop this appliance when it is hot.
- Always use this heating convector only in an upright position.
- Do not block the hot-air outlet grilles or the intake grille located on the bottom of the applian
- If the supply cord is damaged, it must be replaced by the manufacturer, its service agent in order to avoid a hazard.
- Never use this appliance in a room whose base area is less than 4m^2 . We likewise recommend that you not place this equipment in a draft, because blasts of air may adversely affect the equipment's operational efficiency.

WARNING: In order to avoid overheating, never under any circumstances cover the appliances during operation.
IMPORTANT INFORMATION FOR CORRECT DISPOSAL OF THE PRODUCT IN ACCORDANCE WITH EC DIRECTIVE 2002/96/EC.
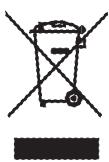
At the end of its working life, the product must not be disposed of as urban waste.
It must be taken to a special local authority differentiated waste collection centre or to a dealer providing this service.
Disposing of a household appliance separately avoids possible negative consequences for the environment and health deriving from inappropriate disposal and enables the constituent materials to be recovered to obtain significant savings in energy and resources. As a reminder of the need to dispose of household appliances separately, the product is marked with a crossed-out wheeled dustbin.