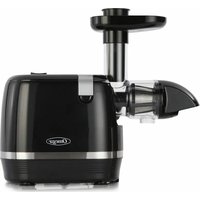
OMG500 - Juicer OMEGA - Free user manual and instructions
Find the device manual for free OMG500 OMEGA in PDF.
| Product Type | Centrifugal Juicer |
| Brand | Omega |
| Model | OMG500 |
| Dimensions (W x D x H) | 180 x 330 x 410 mm |
| Weight | 3.4 kg |
| Power Supply | 120 V, 60 Hz, 350 W |
| Rotation Speed | 11,000 rpm |
| Motor Type | Universal 1/2 HP |
| Cord Length | 1.5 m |
| Basket Material | Stainless Steel |
| Feed Chute | Mega Mouth (large opening) |
| Pulp Container Capacity | Approx. 1.5 L |
| Main Functions | Juicing fruits and vegetables |
| Safety Features | Arm locks, automatic shut-off, polarized plug |
| Maintenance and Cleaning | Dishwasher safe removable parts (top rack), hand washing recommended |
| Spare Parts and Repairability | Replacement parts available on request from Omega customer service |
| Warranty | Not specified in the manual |
| Usage | Household use only |
Frequently Asked Questions - OMG500 OMEGA
User questions about OMG500 OMEGA
0 question about this device. Answer the ones you know or ask your own.
Ask a new question about this device
Download the instructions for your Juicer in PDF format for free! Find your manual OMG500 - OMEGA and take your electronic device back in hand. On this page are published all the documents necessary for the use of your device. OMG500 by OMEGA.
USER MANUAL OMG500 OMEGA
natural_image
Exterior view of a modern Omega juice brush unit (no text or symbols visible on the device body)OMG500S USER MANUAL
OMG500S MANUEL DE L'UTILISATEUR
OMG500S MANUAL DEL USUARIO
Omega®
Congratulations!
CONGRATULATIONS on the purchase of your new Omega product.
At Omega, we strive to develop technologically advanced machines that help deliver nutrition and flavor of the highest kind and closest to nature's purest form. We are driven by you, our brand supporters. Your enthusiasm helps us continue to reinvent and renew our line of juicers, high speed blenders and beverage equipment. Our team at Omega thanks you for supporting us for over 50 years!
Join us on Twitter @OmegaAppliances &/or on Facebook @OmegaJuicers
PRODUCT WARRANTY & REGISTRATION, VISIT:
www.omegajuicers.com/omega-warranty-registration
RECIPES, VISIT: www.omegajuicers.com/recipes
CUSTOMER SERVICE: Visit: www.omegajuicers.com/contact-omega-juicers
After using your Omega, we kindly ask you to rate the machine on
www.OmegaJuicers.com
TABLE OF CONTENTS
02 - 03 Important Safeguards
04 - 05 Know Your Omega
06 - 07 Quick Start Assembly
08 - 09 How to Assemble
10 - 11 How to Disassemble
12 - 13 Operating Instructions
14 - 15 Sterilization & Easy Cleaning
16 - 19 Precautions for Safe Use
20 - 21 If Your Juicer Isn't Working
22 - 23 Hints & Tips
24 - 25 Troubleshooting
26 - 27 Product Specifications
28 - 29 Recipes
30 - 59 French Manual
60 - 89 Spanish Manual

IMPORTANT SAFEGUARDS
IMPORTANT SAFEGUARDS
When using electrical appliances, basic safety precautions should always be followed including the following.
- Read all instructions.
- To protect against risk of electrical shock, do not immerse cord, plugs or the appliance in water or other liquid.
- Close supervision is necessary when any appliance is used by or near children.
- Unplug your juicer from the outlet when not in use, before putting on or taking off parts, and before cleaning.
-
Avoid contacting moving parts.
-
DO NOT operate this or any appliance with a damaged cord or plug, or after the appliance malfunctions or is dropped or damaged in any manner. Return appliance to the nearest authorized service facility for examination, repair or electrical or mechanical adjustment.
-
The use of attachments not recommended or sold by the manufacturer may cause fire, electrical shock or injury.
-
DO NOT use outdoors.
-
DO NOT let cord hang over edge of table or counter, or touch hot surfaces.
-
DO NOT place near a hot gas or electric burner or in a heated oven.
-
DO NOT use appliance for other than intended use.
-
Always make sure juicer cover is clamped securely in place before motor is turned on.
-
DO NOT unfasten latch arms while juicer is in operation.
-
Be sure to turn the switch to the off position after each use. Make sure the motor stops completely before disassembling.
-
DO NOT put your fingers or other objects into the feed chute while the juicer is in operation. If food becomes lodged in the feed chute, use pusher or another piece of fruit or vegetable to push it down. When this method is not possible, turn the motor off and disassemble the juicer to remove the remaining food.
-
DO NOT use the appliance if the rotating sieve is damaged.
-
Do not operate without the pulp container in place.
-
Make sure appliance is OFF when not in use, before putting on or taking off parts, and before cleaning.
-
Do not let cord contact hot surface, including the stove.
-
Household use only.
SAVE THESE INSTRUCTIONS

natural_image
Glass of orange juice with fresh green and carrot slices in the background (no text or symbols)
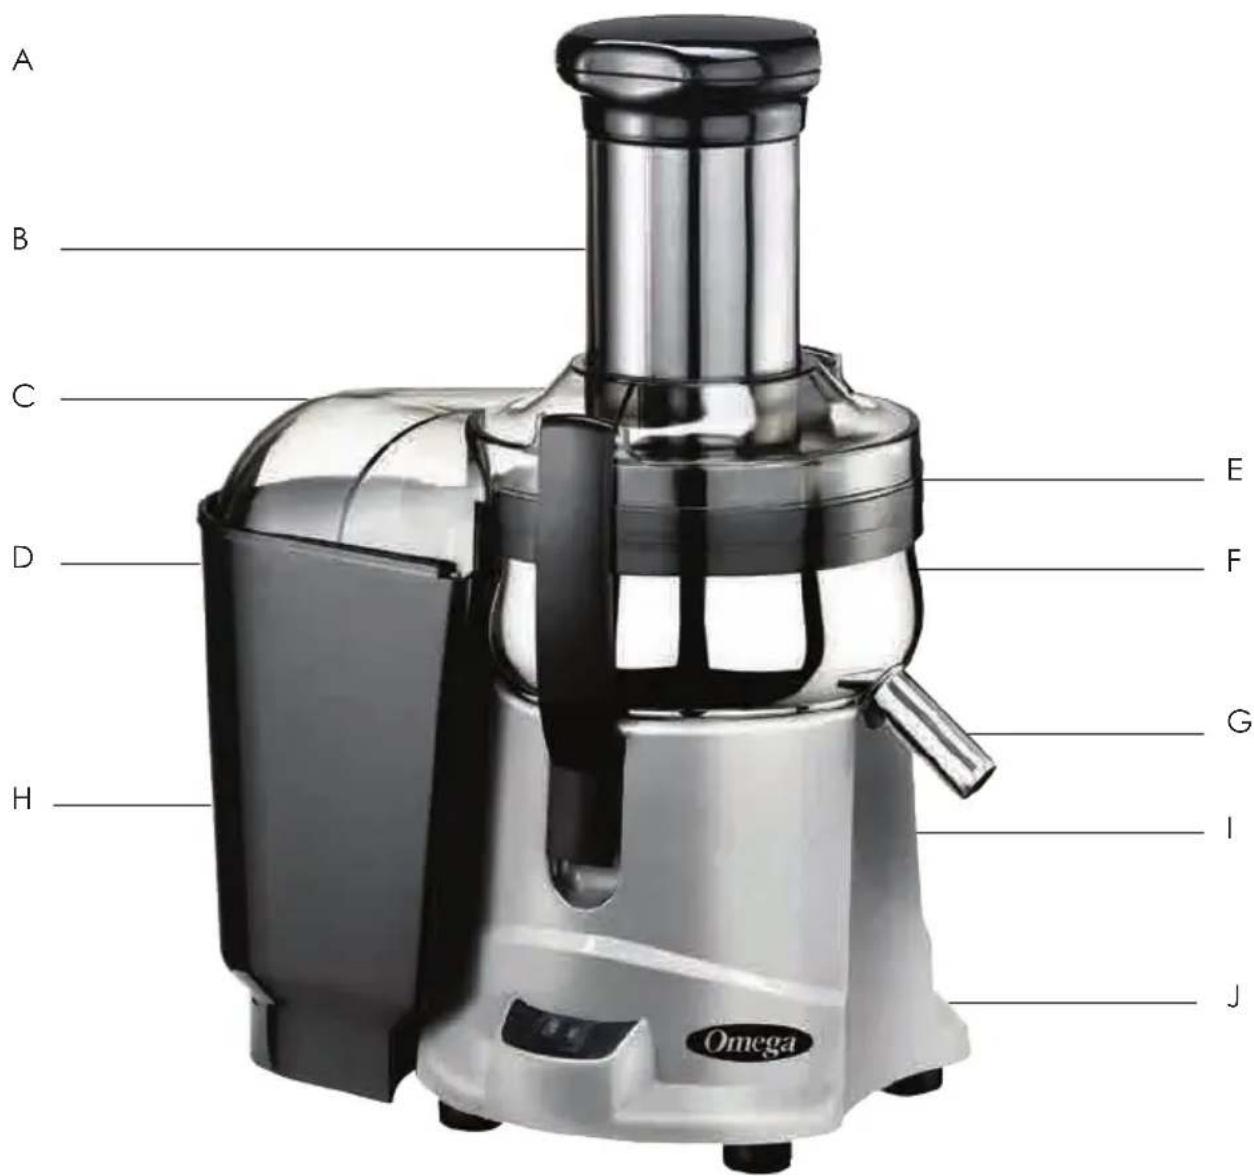
KNOW YOUR OMEGA
KNOW YOUR OMEGA
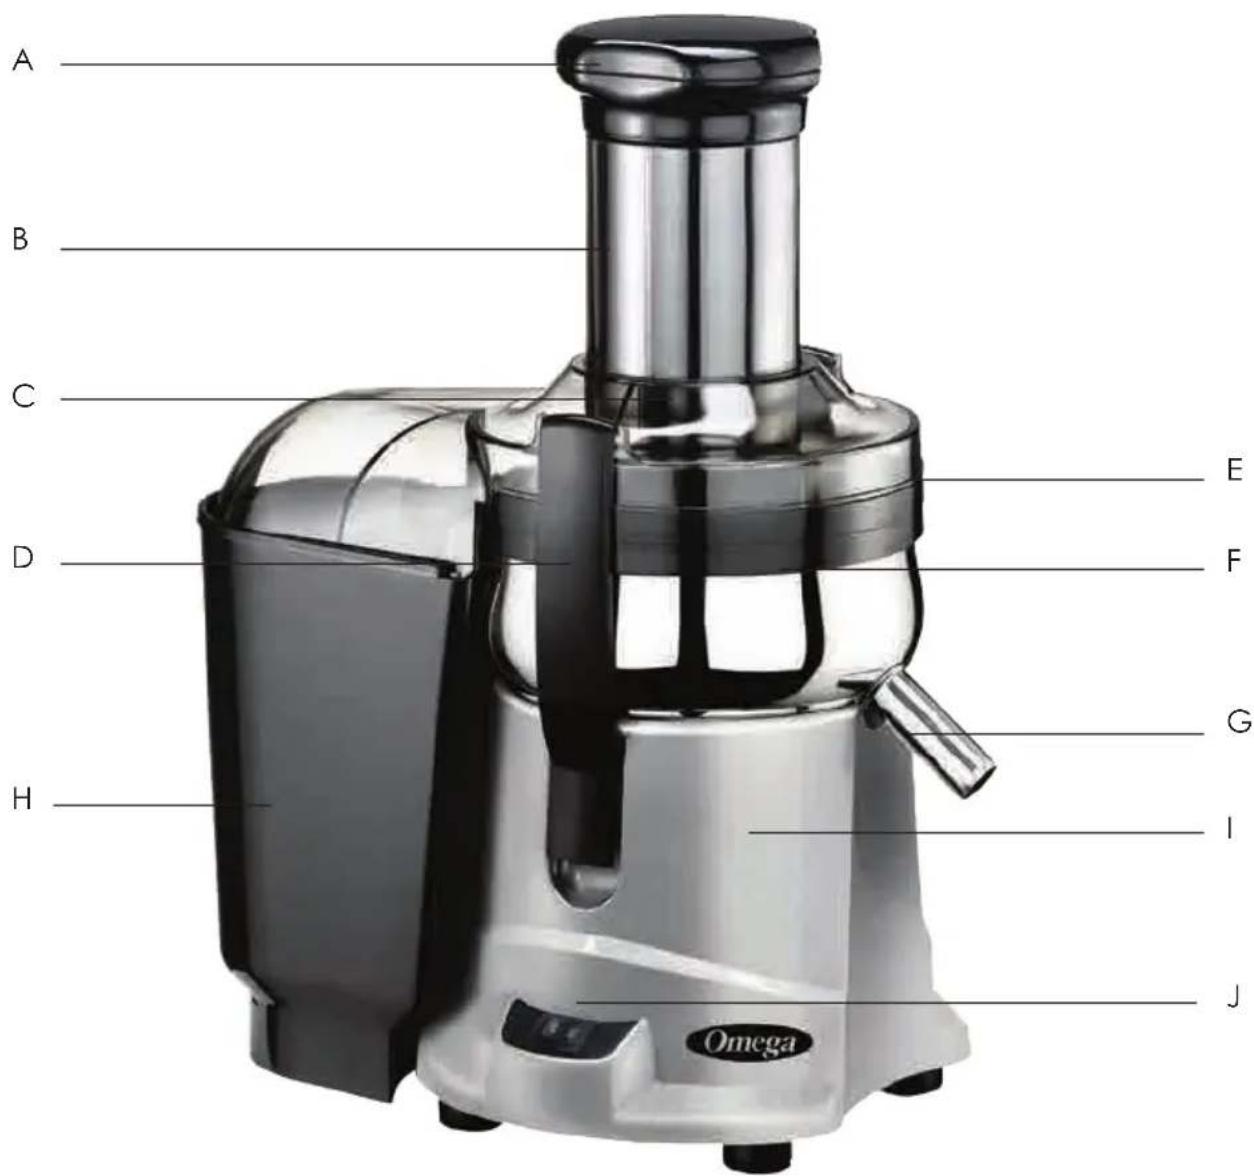
text_image
A B C D E F G H I J OmegaA Pusher
B Mega Mouth Feed Chute
C Cover
D Latch Arm
E Bowl Ring
F Bowl
G Juice Spout
H Pulp Receptacle Bin
I Base with High
Performance Motor
J Power Switch

QUICK START ASSEMBLY
QUICK START ASSEMBLY
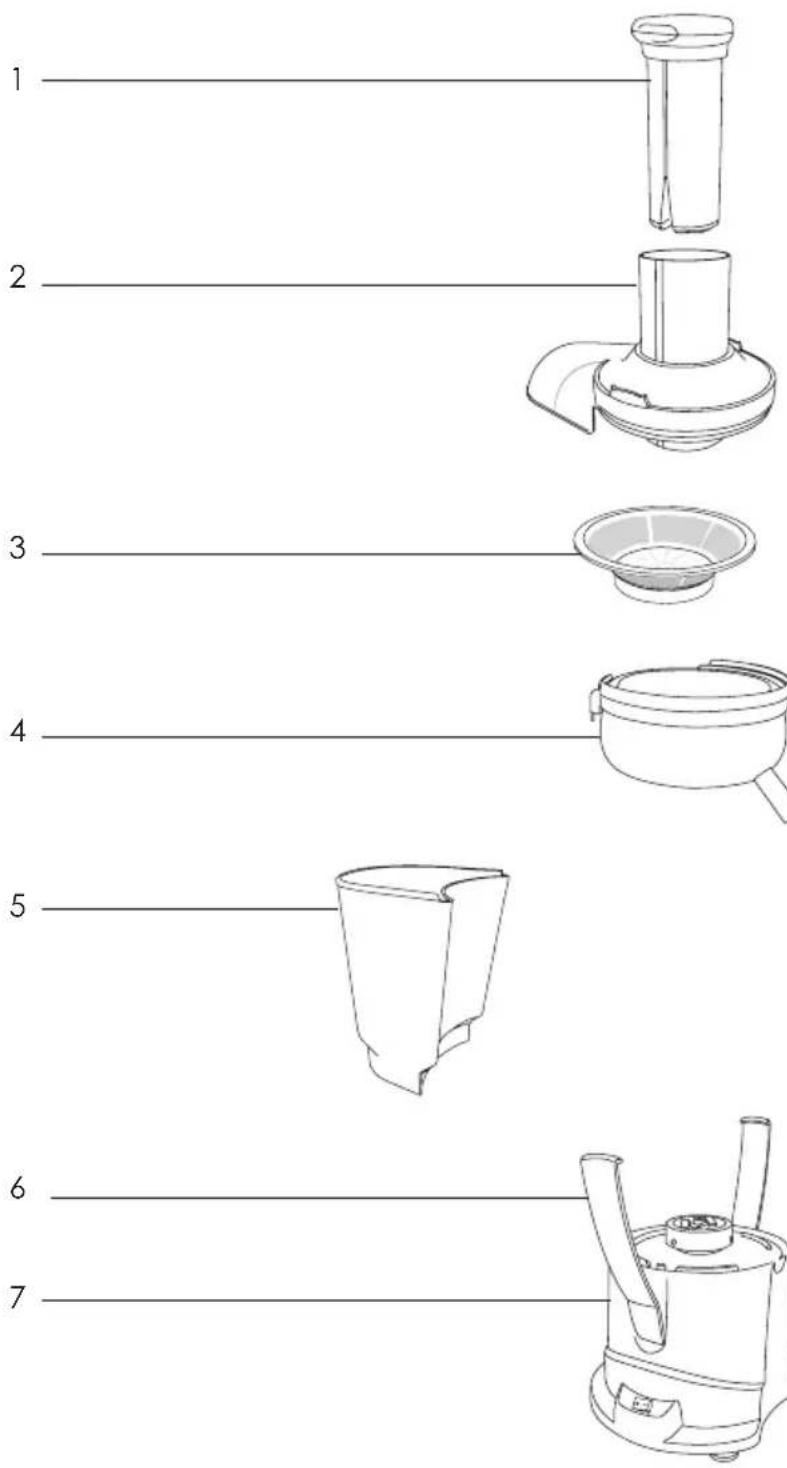
1 Pusher
2 Cover
3 Juicing Screen Blade Assembly
4 Bowl
5 Pulp Receptacle Bin
6Latch Arm
7 Base Housing

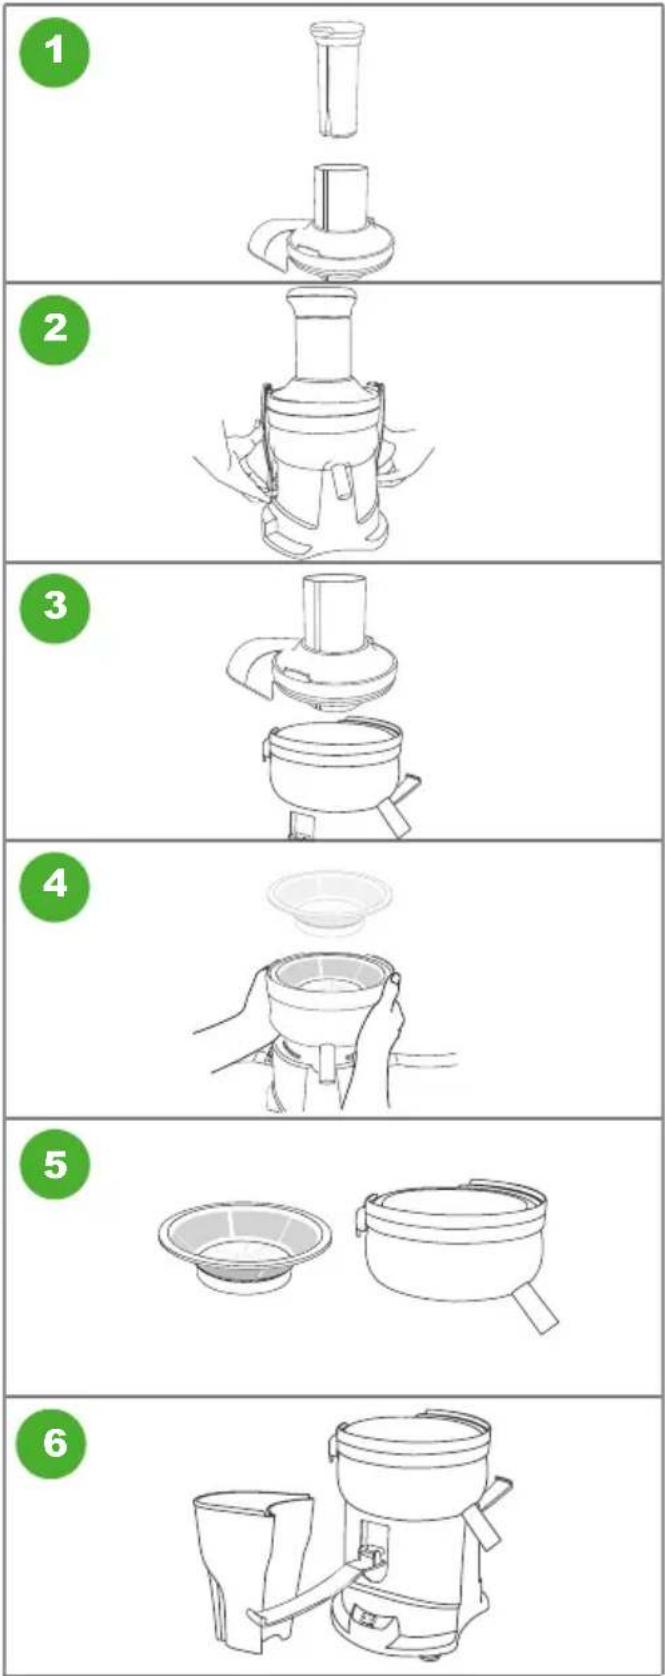
HOW TO ASSEMBLE
INSTRUCTIONS: How to Assemble
Place the pulp receptacle bin behind the motor base housing.
Place the bowl on the base housing with the spout facing the front of the unit.
Place bowl ring on top of the bowl with the groove facing upwards. Align the chute over the pulp receptacle bin.
Place the juicing screen/blade assembly inside the bowl, making certain it rests flat.
Place cover on bowl with ejection chute opening to the rear. The tab on the front of the cover should rest in the groove on the pulp chute. The pulp chute should rest inside of the pulp receptacle bin.
Place tabs of latch arms over cover and secure by pressing down on the bottom of each latch arm.
Insert pusher into the feed chute.

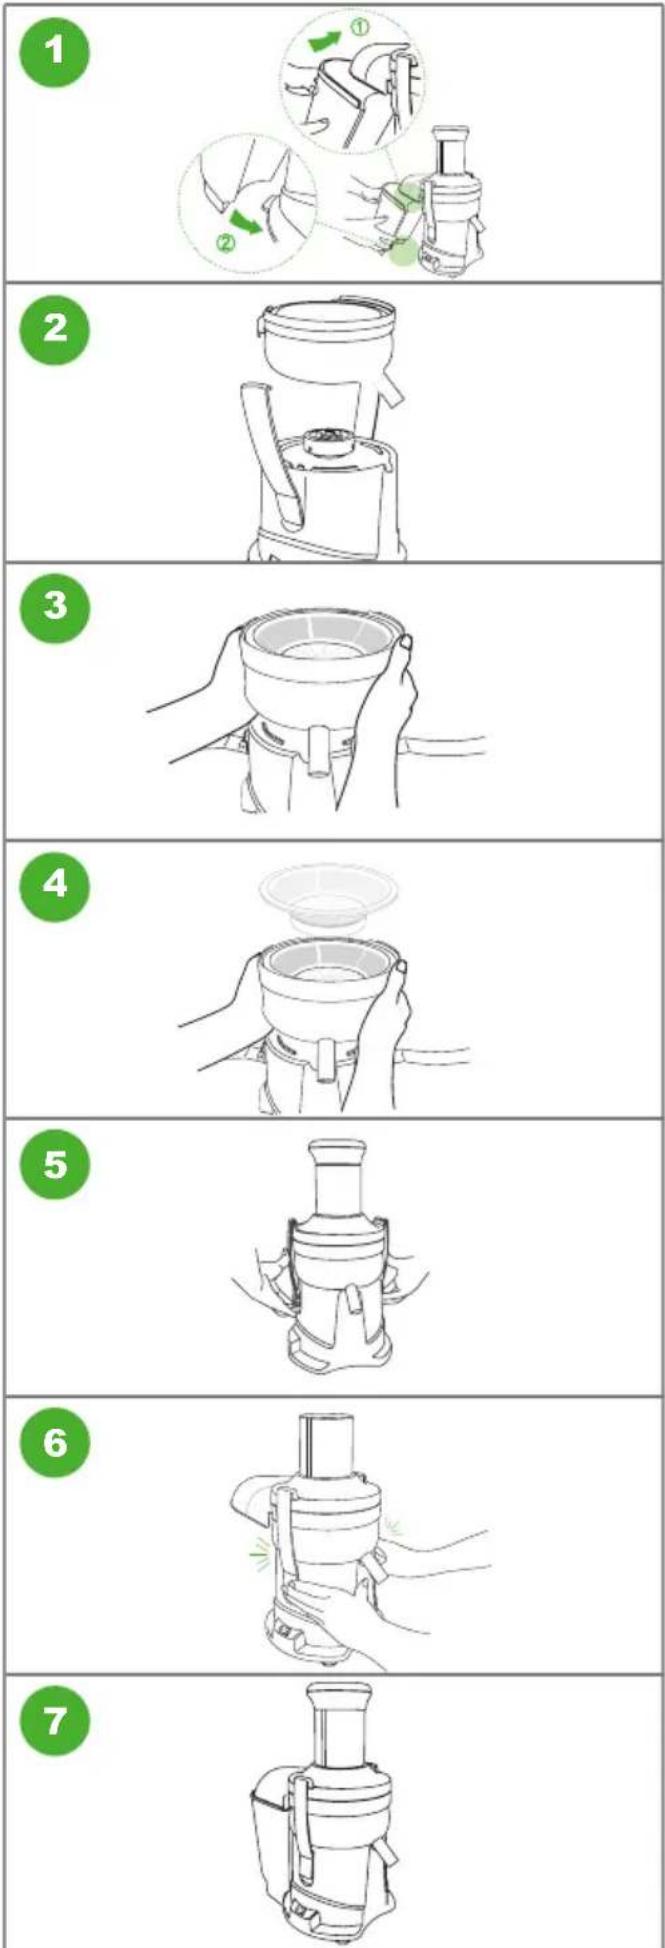
HOW TO DISASSEMBLE
INSTRUCTIONS: How to Disassemble
text_image
1 2 3 4 5 6Remove pusher from feed chute.
Release both side latch arms by inserting fingers into the two side openings at the bottom of the motor base housing and by pulling outward.
Remove cover.
Lifting from the bowl. Simultaneously lift out bowl, coupling, and strainer basket/blade assembly. Do not attempt to remove the strainer basket/blade assembly by itself.
Separate the pulp chute, strainer basket/blade assembly and coupling from bowl.
Remove the Pulp Reception Bin.
SPECIAL NOTE: The stainless steel basket is a precision-engineered item that should be handled carefully. This will help the juicer run efficiently and smoothly while increasing its operating life.

OPERATING INSTRUCTIONS
OPERATING INSTRUCTIONS
CONTROL BUTTONS
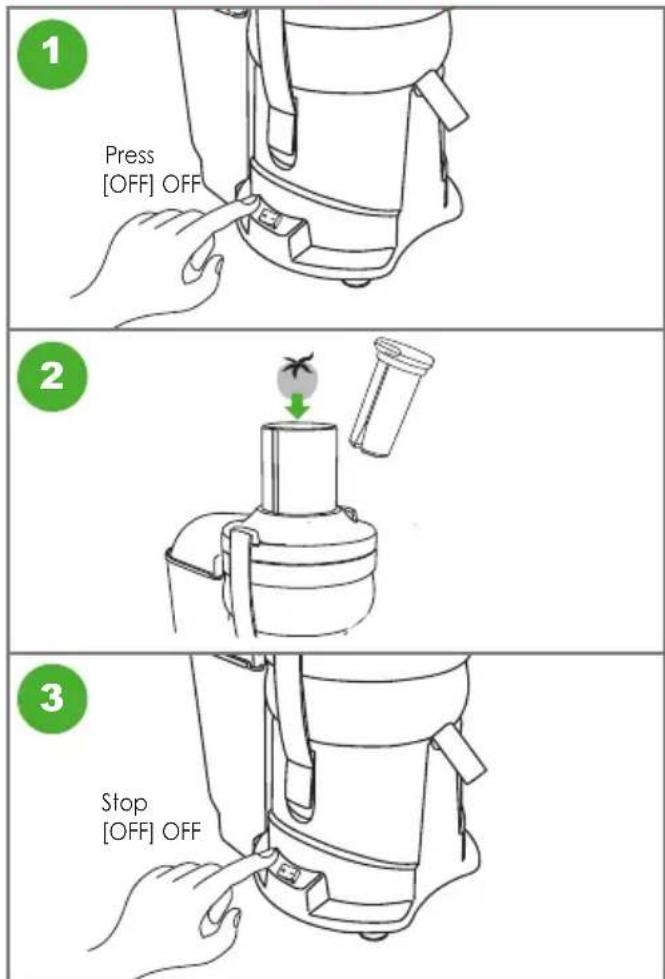
Press ON button to make natural juice with soft fruits like watermelon, peeled oranges, etc.
Press ON button to make natural juice with hard fruits and vegetables like apples, carrots, celery, etc.
Wait 3-5 seconds after turning the unit on before inserting produce. Gradually put the ingredients into the chute and press down with the pusher.
After the extraction is complete, press the [OFF] button to stop.

WARNING When turning off, make sure that the motor stops completely.
TIPS
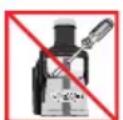
- For safety, always make sure the unit is unplugged before assembly or disassembly.
- When assembling the juicer, the parts must be in alignment or the arms will not lock.
- Check that the parts are aligned before locking the arms. If the parts are not aligned as shown in the manual, forcing the arms shut may cause damage!
- For best results slowly feed large or hard ingredients with the pusher in 2-3 stages, alternating between pushing and pausing. This technique ensures the maximum amount of juice extraction and also prevents malfunction.

STERILIZATION
&
EASY CLEANING
STERILIZATION & EASY CLEANING
STEP 1 Follow the disassembling instructions as explained previously in this manual.
STEP 2 Thoroughly wash parts in hot water. No detergent is required, but a mild detergent may be used if desired. Pulp chute, plunger, and cover require only light rinsing.
STEP 3 Wash strainer basket/blade assembly and bowl under running water. A stiff brush may be used to loosen any food residue.
STEP 4 If desired, removable parts may be cleaned in the dishwasher on the top rack. Do not attempt to clean motor base housing in the dishwasher.
STEP 5 To remove pulp debris from the strainer basket/blade assembly, scrape out using a non-abrasive brush. Place the strainer basket/blade assembly under running water to aid in the cleaning process.
STEP 6 Towel dry all parts before reassembling.
STEP 7 After repeated use, mineral stains may begin to appear on parts that come in contact with juice. Immerse all removable parts and completely submerge in water overnight with a solution of eight tablespoons of dishwasher detergent per gallon of water. (Do Not immerse the motor base housing).
STEP 8 If juicing daily, it is recommended to soak parts overnight as mentioned above on a weekly basis. If this precaution is not taken the openings in the mesh screen of the basket will start to fill in, making the juicer less efficient.
STEP 9 Your Omega Juicer never needs lubrication of any kind.
DISHWASHER USE: The stainless steel parts of the Mega Mouth Juicer can be placed in the dishwasher. The plastic parts may be placed in the dishwasher on the top rack only if the water is not extremely hot. If the water is too hot, the items should be hand washed. Plastic parts that become warped due to high heat will not be covered under the warranty.

PRECAUTIONS
FOR SAFE USE
PRECAUTIONS FOR SAFE USE
All users of this appliance must read and understand these safety precautions before operating.
SIGN SAMPLES

This sign indicates contents that may cause risk of a fire or an electrical shock. Specific warning is written in the sign.

This sign indicates prohibited acts. Specific prohibitions are written around or in the sign.

This sign indicates contents of regulating or directing actions. Specific prohibitions are written around or in the sign.
PRECAUTIONS

CAUTION Hazards or unsafe practices which could result in minor personal injury or appliance damage.

DO NOT PLUG IN OR UNPLUG WITH WET HANDS. It may cause an electric shock or an injury.
DO NOT USE WITH OTHER THAN RATED VOLTAGE. It may cause an electric shock, a fire or abnormal performance. If the voltage is different, it may shorten the life of the motor or cause a failure.

PLUG THE POWER CORD CORRECTLY AND PUSH IT TIGHT IN A WALL SOCKET. It may cause electric shock or a fire.

IF THE SUPPLY CORD IS DAMAGED, IT MUST BE REPLACED BY THE MANUFACTURER, ITS SERVICE OR SIMILARLY QUALIFIED PERSONS IN ORDER TO AVOID A HAZARD. If the power cord is damaged, it may cause electric shock or a fire.
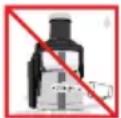
NEVER ALTER THE APPLIANCE. ALSO, DO NOT DISASSEMBLE OR REPAIR BY YOURSELF. DO NOT INSERT FINGERS, FOREIGN SUBSTANCES OR OBJECTS SUCH AS PINS INTO GAPS OR HOLES IN THE BASE.
It may cause a fire, an electric shock or a failure. For any technical support, contact the authorized local Customer Care Center.
PRECAUTIONS FOR SAFE USE
DO NOT MOISTEN THE BASE OR SPLASH WATER ON THE BASE.
Be careful not to let any liquids or other substances get into the buttons on the appliance. DO NOT OPERATE THE BUTTONS WITH WET HANDS. It may cause electric shock or a fire.

WHEN THE POWER CORD, WIRE IS BROKEN OR DAMAGED OR THE PLUG-IN PART BECOMES LOOSE, DO NOT OPERATE IT.
It may cause an electric shock, a fire or an injury.
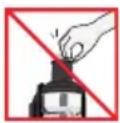
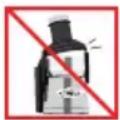
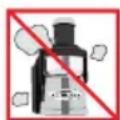
NEVER DISASSEMBLE BOWL SET DURING OPERATION OR INSERT FINGERS, FOREIGN OBJECTS SUCH AS FORKS, SPOONS ETC. INTO FEEDING CHUTE OR JUICE SPOUT.
It may cause an injury, an accident or a failure.
THIS APPLIANCE IS NOT INTENDED FOR USE BY PERSONS (INCLUDING CHILDREN) WITH REDUCED PHYSICAL, SENSORY OR MENTAL CAPABILITIES, OR LACK OF EXPERIENCE AND KNOWLEDGE, UNLESS THEY HAVE BEEN GIVEN SUPERVISION OR INSTRUCTION CONCERNING USE OF THE APPLIANCE BY A PERSON RESPONSIBLE FOR THEIR SAFETY.
Children should be supervised to ensure that they do not play with the appliance.
DO NOT OPERATE WITHOUT LOCKING THE LATCH ARMS PROPERLY.
It may cause an injury or a failure.

WHEN DETECTING A GAS LEAK, DO NOT INSERT THE POWER CORD INTO ITS SLOT. OPEN THE WINDOW TO VENTILATE FULLY AND IMMEDIATELY.
It may cause an injury or a failure.

NEVER PUT A FINGER, A FORK OR A SPOON ETC. INTO JUICE SPOUT.
It may cause an injury or a failure.

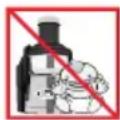
DURING THE OPERATION, DO NOT ATTEMPT TO MOVE THE BASE, DISASSEMBLE THE BOWL SET OR PARTS AND TRY TO UNLOCK THEM.
It may cause an injury or a failure. Switch off first and unplug the power cord prior to taking appliance apart.

WHEN USING THE APPLIANCE, BE CAREFUL FOR A NECKTIE, LONG NECKLACE, SCARF ETC. BECOMING ENTANGLED INTO FEEDING CHUTE.
It may cause an injury, a failure or a breakage.
PLACE THE APPLIANCE ON A FLAT AND STABLE SURFACE.
It may cause an injury or a failure.

DO NOT OPERATE THE APPLIANCE FOR MORE THAN 30 MINUTES AT A TIME.
It may cause a motor failure due to overheating. Cool it down sufficiently for 5 minutes and operate it again.

WHEN PLACING INGREDIENTS INTO THE FEEDING CHUTE, ONLY USE THE PUSHER PROVIDED.
It may cause an injury or a failure.

DO NOT ALLOW A SEVERE SHOCK TO THE APPLIANCE OR DROP IT.
It may cause an electric shock, a fire or damage
IF THE APPLIANCE GIVES OFF AN UNPLEASANT SMELL, EXCESSIVE HEATING, OR SMOKE, STOP USING IMMEDIATELY AND CONTACT THE LOCAL CUSTOMER CARE CENTER.
When using a new appliance, it will give off a smell and the smell disappears naturally over time.

ALWAYS UNPLUG THE APPLIANCE AFTER USE. WHEN UNPLUGGING THE POWER CORD, MAKE SURE TO HOLD THE POWER CORD.
If holding the wire to unplug, it may cause an electric shock or a fire.
WHEN MOVING THE APPLIANCE, ENSURE TO MOVE IT HOLDING GRIPS TIGHTLY AT THE BASE BOTTOM WITH BOTH HANDS.
If attempting to hold bowl or the edge of the base, the base may fall causing an injury or a failure.
THIS APPLIANCE HAS A POLARIZED PLUG (ONE BLADE IS WIDER THAN THE OTHER).
- To reduce the risk of electric shock, this plug will fit in a polarized outlet only one way.
- If the plug does not fit fully in the outlet, reverse the plug.
- If it still does not fit, contact a qualified electrician.
- Do not modify the plug in any way.

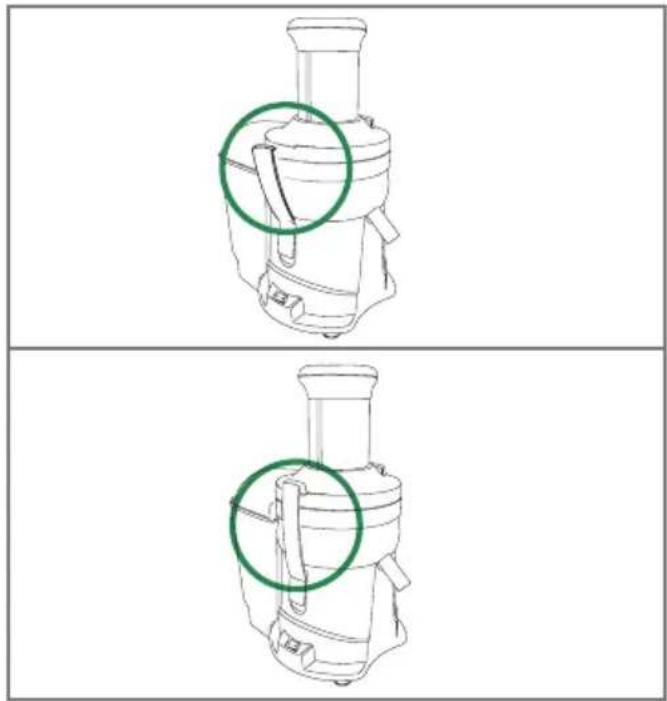
IF YOUR JUICER ISN'T WORKING
IF YOUR JUICER ISN'T WORKING
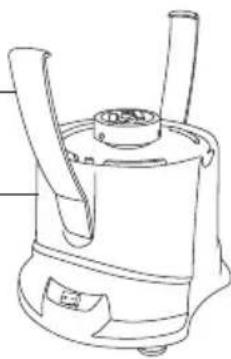
natural_image
Line drawings of a juice maker with green circular annotations highlighting the blade and handle (no text or symbols)If the latch arm on the right side is not secure and properly in place the juicer's safety switch will not engage. Therefore, the juicer will not work. Assemble the juicer properly.
If the juicer still is not working, please contact
Omega Customer Service
Online www.omegajuicers.com/contact-omega-juicers.

HINTS & TIPS
HINTS & TIPS
• Make sure the machine is running at full speed before beginning to juice.
- Do not force food in to the juicer. For most fruits and vegetables, a slow, steady push down the chute will provide optimal juicing.
- The Mega Mouth Juicer is capable of juicing many types of large fruits and vegetables without the need for cutting. If a fruit or vegetable must be cut, cut only into large pieces that easily fit down the feed chute.
- When preparing a drink that uses a combination of more than one fruit or vegetable, we suggest alternating the various fruits or vegetables when placing them in the machine. For example: Carrot Apple Juice – place one or two pieces of carrot into the feed chute, then a piece or two of apple. Continue alternating this manner.
- When juicing leafy greens we suggest that you twist and roll the greens into a ball roughly the size of a golf ball. Always place the greens into the juicer first, followed by crisper vegetables such as carrots, celery, etc.
- When juicing very soft fruits and vegetables, such as tomatoes, grapes and peaches, we suggest that you alternate with firmer fruits and vegetables.
- Cleaning the Fruits and Vegetables: Before you begin juicing, thoroughly wash all fruits and vegetables. A vegetable brush may be used to clean carrots, cucumbers, celery, etc. Cut away any decaying, diseased, or spoiled portions of all fruits and vegetables.
- Preparing the Fruits and Vegetables: It is not necessary to peel your fruits and vegetables. Many of the nutrients are contained under the surface near the skin. Some exceptions that should be peeled include cucumbers, pineapples, oranges, and grapefruit. These should always be peeled.
- Uses of Pulp: With the Omega Mega Mouth Juicer, nothing is wasted. The pulp has a variety of uses, including flavoring in soups, cakes and salads, as compost in gardens and plants, feed for small pets, and even baby food (after mixing the remaining pulp with juice/water to dilute).
SPECIAL NOTE: Bananas can not be juiced, only pulverized, therefore it is not recommended to try to juice bananas with a Mega Mouth Juicer.

TROUBLESHOOTING
TROUBLESHOOTING
Please troubleshoot using the details below before contacting Omega Customer Service for repair or service. When contacting Omega for after-sales service, please have the manufacturer's serial number or bar code available.
The Appliance Does Not Work
- Make sure the power cord is plugged in correctly.
- Make sure the juicer is assembled correctly. If the right latch arm is not locked into place, the appliance will not operate.
- Make sure the appliance is assembled according to the instructions in this manual. Refer to the instructions.
- If the appliance still does not work, please contact Omega Customer Service for additional support.
The Appliance Stops During Normal Operation
- Check for large pieces of food stuck in the appliance.
- If the appliance still does not work, please contact Omega Customer Service for additional support.
Fine Lines or Scratch Marks
- This is normal. Do not be concerned. These are molding marks resulting from the normal manufacturing process.
Juice Leaks Over the Base
- Check to make sure a cup is properly located under the juice spout.
- Do not force too much food into the juicer. Push food gradually for extraction.
- Check to make sure the pulp receptacle bin is properly placed behind the motor case housing.
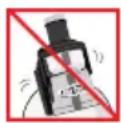
Juicer Shakes When In-Use
- This is normal as the strainer basket rotates. It is not a malfunction. Hard ingredients such as carrots, potatoes, radishes, beets, etc. may cause shaking more so than soft ingredients.
- Depending on the firmness of the ingredient, there may be a more pronounced shaking of the motor.
- Slight shaking may be caused by the motor.
CONTACT US:
Online: www.OmegaJuicers.com/contact-omega-juicers

PRODUCT SPECIFICATIONS
PRODUCT SPECIFICATIONS
Product Name Juicer
Model Name OMG500S
Rated Voltage 120V
Rated Frequency 60 Hz
Rated Power Consumption 350W
Cord Length 59 (1.5 m)
Motor 1/2 HP Universal Motor
Weight 7.5 lbs (3.4 kg)
Dimension
13" Depth (330 mm)
16.2" Height (410 mm)
7" Width (180 mm)
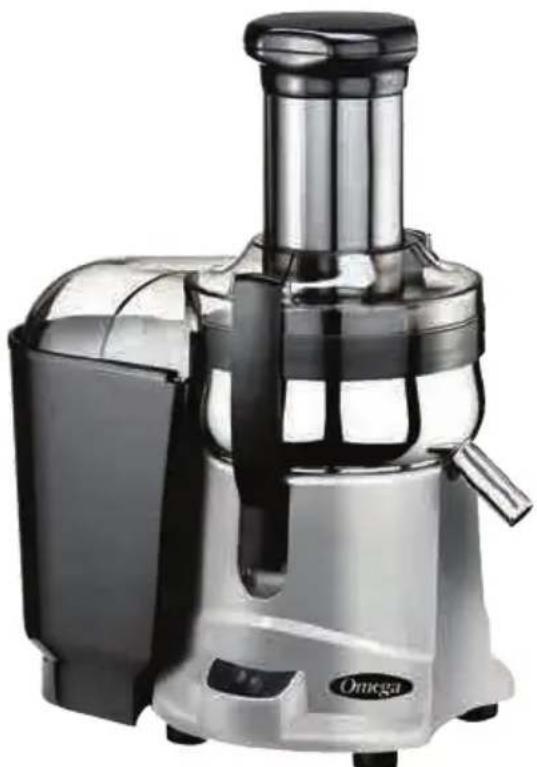
natural_image
Exterior view of a modern organic juice maker (no visible text or symbols)OMG500S
Grapefruit Orange Celery Juice
What You'll Need:
1 grapefruit
2 oranges
2 stalks of celery
How To Prepare:
1 Wash all produce well.
2 Peel the oranges and the grapefruit.
3 Juice in an Omega juicer.
4 Serve and Enjoy!
PREP 2 minutes JUICE 4 minutes
Australian Dream
What You'll Need:
2 beets (australian beetroot)
2 organic carrots
1 cup organic strawberries
How To Prepare:
1 Wash all produce well.
2 Juice in an Omega juicer.
3 Pour over ice and enjoy.
Morning Glory Citrus
What You'll Need:
2 grapefruits (peeled) 1 red bell pepper 2 pears 6 carrots
How To Prepare:
1 Wash all produce well.
2 Juice all produce in an Omega Juicer and enjoy!
Serving Size: 16 - 18 oz.
Bursting with vitamin C and beta-carotene, as well as vitamins A & K and even copper.
PREP 5 minutes JUICE 3 minutes
Melon-of-Mine
What You'll Need:
2 apples
6-8 leaves swiss chard
PREP
5 minutes
JUICE
3 minutes
How To Prepare:
1 Wash all produce well.
2 Peel cantaloupe.
3 Cut as needed to fit into hopper.
4 Twist and roll swiss chard into a ball.
5 Juice all ingredients in an Omega Juicer.
6 Serve and enjoy.
Omega®
Félicitations!
POUR GARANTIE O ENREGISTRER LE PRODUIT, VISITEZ: www.omegajuicers.com/omega-warranty-registration
POUR LES RECETTES, VISITEZ: www.omegajuicers.com/recipes
SERVICE À LA CLIENTÈLE: Visitez le site: www.omegajuicers.com/contact-omega-juicers
RECOMMANDATIONS IMPORTANTES
RECOMMANDATIONS IMPORTANTES
text_image
A B C D E F G H I J OmegaRetirez le couvercle.
natural_image
Line drawings of a juice maker with green circular annotations highlighting the blade and handle (no text or symbols)En ligne: www.OmegaJuicers.com/contact-omega-juicers

SPÉCIFICATIONS DU PRODUIT
SPÉCIFICATIONS DU PRODUIT
natural_image
Exterior view of a modern Omega juice maker (no text or symbols visible on the device body)OMG500S
Jus pamplemousse orange et céleri
Ingrédients:
1 pamplemousse 2 oranges 2 branches de céleri
Préparation:
SERVICIO AL CLIENTE: Visite: www.omegajuicers.com/contact-omega-juicers
natural_image
Glass of orange juice with fresh green slices and carrot pieces beside it (no text or symbols visible)
CONOZCA SU OMEGA
CONOZCA SU OMEGA
text_image
A B C D H E F G I J Omeganatural_image
Line drawing of a mechanical component with a cylindrical top and base, no text or symbols present2
3
4
5
natural_image
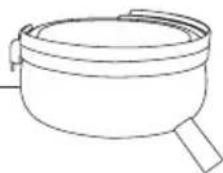
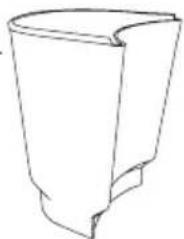
Line drawing of a conical container or container with curved sides (no text or symbols)6
7
natural_image
Line drawing of a portable electric stove with two blades and a central top (no text or symbols)1 Empujador
2 Tapa
3 Canasta coladera/ Conjunto de cuchilla
4 Tolva de pulpa
5 Tazón
6 Cubo receptor de pulpa
text_image
Three-step diagram illustrating a food cleaning procedure: step 1 shows hand pressing into a blender, step 2 shows a cherry on a tray with a drop, and step 3 shows hand pressing into a blender.natural_image
Line drawings of a juice maker with green circular annotations highlighting the blade and handle (no text or symbols)Peso 7.5 lbs (3.4 kg)
Dimensiones
8" ancho (203 mm)
natural_image
Exterior view of a modern Omega brand juice maker (no signage or text visible on device body)OMG500S
Jugo de toronja, naranja y apio
www.OmegaJuicers.com