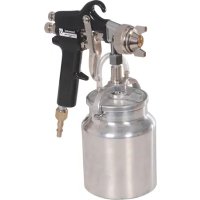
763556 - Paint spray SILVERLINE - Free user manual and instructions
Find the device manual for free 763556 SILVERLINE in PDF.


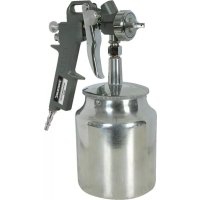
| Product type | Suction feed pneumatic paint spray gun |
| Brand | Silverline |
| Model | 763556 |
| Maximum working pressure | 5 bar |
| Working pressure | 3.5 bar |
| Air inlet | 1/4" BSP connection (supplied: EN-6 and EQ-4) |
| Reservoir capacity | 1000 cm³ |
| Nozzle diameter | 1.8 mm |
| Flow rate | 180-350 ml/min |
| Air consumption | 142-283 L/min |
| Weight | 0.74 kg |
| Supply | Clean, dry compressed air with water separator and filter |
| Main functions | Spraying of medium-viscosity paints and coatings; adjustment of flow rate, spray pattern and orientation |
| Safety | Safety goggles, gloves, respirator mask, protective clothing; do not use with halogenated solvents on aluminium; avoid flames |
| Maintenance and cleaning | Clean after each use with the appropriate solvent; soak nozzles and needles; do not immerse the body; lubricate lightly |
| Warranty | 3 years (registration within 30 days) |
| Spare parts and repairability | Nozzles, needles, seals, springs available; repair by Silverline or authorized agents |
| General information | Compliant with EU directives (2006/42/EC, EN1953:1998+A1:2009) |
Frequently Asked Questions - 763556 SILVERLINE
User questions about 763556 SILVERLINE
0 question about this device. Answer the ones you know or ask your own.
Ask a new question about this device
Download the instructions for your Paint spray in PDF format for free! Find your manual 763556 - SILVERLINE and take your electronic device back in hand. On this page are published all the documents necessary for the use of your device. 763556 by SILVERLINE.
USER MANUAL 763556 SILVERLINE
Spray Gun High Pressure 1000ml

natural_image
Exterior view of a spray gun with metallic casing and nozzle (no text or symbols visible)
GB Spray Gun High Pressure
F Pistolet à peinture haute pression
D Hochdruck-Spritzpistole
www.silverlinetools.com

SILVERLINEC® High Pressure
Spray Gun High Pressure 1000ml
English 4
Français ...... 10
Deutsch 16
Español 22
Italiano 28
Nederlands......34
Description of Symbols
The rating plate on your tool may show symbols. These represent important information about the product or instructions on its use


Wear hearing protection
Wear eye protection
Wear breathing protection
Wear head protection
Wear hand protection
Read instruction manual
Caution!
Toxic fumes or gases!
Risk of fire!
Risk of explosion!
NO open flames!
DO NOT use with compressed gas cylinders!
Conforms to relevant legislation and safety standards
Environmental Protection
Air tools should not be disposed of with household waste.
Please recycle where facilities exist. Check with your local authority or retailer for recycling advice.
Specification
Maximum operating pressure: 5bar (73 psi)
Working pressure: 3.5bar (50psi)
Air Inlet:.... ^1/4 " BSP, supplied with two male airline quick connectors (EN-6 'UK' and EQ-4 'European' types)
Spray gun body material: ....Coated cast aluminium
Paint container material:....Aluminium
Paint container volume: 1000cm ^4
Type of feed: Suction
Nozzle diameter: 1.8mm
Fluid output: 180-350ml/min
Min. hose diameters:... 8mm ( 516 ) for supply hose length up to 15m 9.5mm ( 38 ) for longer supply hoses
Air consumption: 142-283L/min (5-10cfm)
Weight....0.74kg
As part of our ongoing product development, specifications of Silverline products may alter without notice.
General Safety Warnings
- For multiple hazards, read and understand the safety instructions before installing, operating, repairing, maintaining, changing accessories on, or working near this tool. Failure to do so can result in serious bodily injury
- Only qualified and trained operators should install, adjust, or use this tool
- Do not modify this tool. Modifications can reduce the effectiveness of safety measures and increase the risks to the operator
- Do not discard the safety instructions; give them to the operator
- Do not use this tool if it has been damaged
- Tools shall be inspected periodically to verify that the ratings and markings required by this part of ISO 11148 are legibly marked on the tool. The employer/user should contact the manufacturer to obtain replacement marking labels when necessary
WARNING: This appliance is not intended for use by persons (including children) with reduced, physical or mental capabilities or lack of experience or knowledge unless they have been given supervision or instruction concerning use of the appliance by a person responsible for their safety. Children must be supervised to ensure that they do not play with the appliance.
Projectile hazards
- Be aware that failure of the workpiece or accessories, or even of the tool itself, can generate high-velocity projectiles
- Always wear impact-resistant eye protection during operation of this tool. The grade of protection required should be assessed for each use
• For overhead work, wear a safety helmet
• The risks to others should also be assessed at this time - Ensure that the workpiece is securely fixed
Entanglement hazards
- Choking, scalping and/or lacerations can occur if loose clothing, personal jewellery, neck wear, hair or gloves are not kept away from the tool and its accessories
Operating hazards
- Use of the tool can expose the operator's hands to hazards, including cuts, abrasions and heat
- Wear suitable gloves to protect hands
- Operators and maintenance personnel should be physically able to handle the bulk, weight and power of the tool
- Hold the tool correctly; be ready to counteract normal or sudden movements and have both hands available
- Maintain a balanced body position and secure footing
- Release the start-and-stop device in the case of an interruption of the energy supply
• Use only lubricants recommended by the manufacturer - Personal protective safety glasses should be used; suitable gloves and protective clothing are recommended
- Avoid direct contact with moving parts in order to prevent pinching or cutting of hands or other body parts. Wear suitable gloves to protect hands
- Never run the tool unless it is directed towards the workpiece
- There is a risk of electrostatic discharge if used on plastic and other non-conductive materials
- Potentially explosive atmospheres can be caused by aerosols and fumes resulting from spraying
- Always use dust extraction or suppression systems which are suitable for the material being processed
Repetitive motions hazards
- When using this tool to perform work-related activities, the operator can experience discomfort in the hands, arms, shoulders, neck or other parts of the body
- While using this tool, the operator should adopt a comfortable posture whilst maintaining secure footing and avoiding awkward or off-balance postures. The operator should change posture during extended tasks; this can help avoid discomfort and fatigue
- If the operator experiences symptoms such as persistent or recurring discomfort, pain, throbbing, aching, tingling, numbness, burning sensations or stiffness, these warning signs should not be ignored. The operator should inform the employer and consult a qualified health professional
Accessory hazards
- Disconnect the tool from the energy supply before filling or changing accessories
- Use only sizes and types of accessories and consumables that are recommended by the manufacturer of this tool; do not use other types or sizes of accessories or consumables
Workplace hazards
- Slips, trips and falls are major causes of workplace injury. Be aware of slippery surfaces caused by use of the tool and also of trip hazards caused by the air line or hydraulic hose
- This tool is not intended for use in potentially explosive atmospheres and is not insulated against contact with electric power
Dust and fume hazards
- Dust and fumes generated when using this tool can cause ill health (for example cancer, birth defects, asthma and/or dermatitis); risk assessment and implementation of appropriate controls for these hazards are essential
- Risk assessment should include dust created by the use of the tool and the potential for disturbing existing dust
- Operate and maintain this tool as recommended in these instructions, to minimise dust or fume emissions
- Direct the exhaust so as to minimise disturbance of dust in a dust-filled environment
- Where dust or fumes are created, the priority should be to control them at the point of emission
- All integral features or accessories for the collection, extraction or suppression of airborne dust or fumes should be correctly used and maintained in accordance with the manufacturer's instructions
- Select, maintain and replace the consumable/inserted tool as recommended in the instruction handbook, to prevent an unnecessary increase in dust or fumes
- Use respiratory protection in accordance with employer's instructions and as required by occupational health and safety regulations
Safety Instructions for Pneumatic Tools
Air under pressure can cause severe injury:
- Always shut off air supply, drain hose of air pressure and disconnect tool from air supply when not in use, before changing accessories or when making repairs
- Never direct air at yourself or anyone else
- Whipping hoses can cause severe injury. Always check for damaged or loose hoses and fittings
- Whenever universal twist couplings (claw couplings) are used, lock pins should be installed and whipcheck safety cables should be used to safeguard against possible hose-to-tool or hose-to-hose connection failure
- Do not exceed the maximum air pressure stated on the tool
• Never carry an air tool by the hose
Spray Gun Safety
Dangerous environment
Ensure there is adequate clear space around the work area. Only use spraying tools in a well-ventilated area or a specialist spray booth. Be aware that air hoses can present a trip hazard; always lay hoses in a way that minimises hazards.
Protect your eyes
Always wear safety goggles or safety glasses.
Protect your hearing
Always wear ear protection.
Protection from vibration
Hand-held air tools may produce vibration and should not be used for long periods without a break. Vibration can cause disease. Gloves may help to maintain good blood circulation in the fingers.
Protective equipment
Always wear appropriate protective equipment including but not limited to overalls, gloves, facemask etc.
It is the user's responsibility to ensure that other persons in the vicinity of the work area are also equipped with the appropriate protective equipment.
Use the correct air hose
Use lightweight hose to connect the tool to the air compressor.
Air should be supplied by a suitable length of 8mm (5/16") diameter air hose fitted with a female 1/4" NPS connection at gun end. For hose lengths over 15m (50'), use 9.5mm (3/8") diameter hose.
When spraying, ensure that the gun is connected to a clean, filtered air supply.
Always disconnect
Ensure that your air tool has completely stopped functioning before putting it down.
Disconnect an air tool from the air supply before performing any servicing or refilling Ensure the air tool is switched OFF before connecting to air supply. Be aware that air tools may hold residual pressure after use. Always bleed air pressure from the tool after shutting off air supply.
Do not abuse the tool
Do not increase air pressure above the recommended level; excessive pressure leads to wear of moving parts, possible failure and may cause the tool casing to split.
Do not attempt to modify air tools. Any attempt to modify this air tool could result in serious injury to you or others, and will invalidate its warranty.
Use of spray guns
Do not aim a spray gun at people or animals!
When spraying keep away from heat and naked flames!
WARNING: Solvents and paints are harmful and can even be toxic. Some solvents and paints are extremely flammable. Handle with care, according to the manufacturer's recommendations. Store solvents and paint in sealed, leak proof containers made of a material that is chemically resistant to the specific solvent. Always wear suitable protective equipment and dispose of solvents and paints, as well as contaminated items, as special waste, according to laws and regulations.
WARNING: Solvents that are chemically based on halogenated hydrocarbon, like trichloroethane and methylene chloride 1,1,1, may cause chemical reactions in combination with aluminium and galvanised or hot galvanised components, and may therefore represent a potential explosion hazard.
WARNING: When spraying coating materials, dangerous vapours or aerosols, which are detrimental to your health, are produced. Please read all labels and safety instructions carefully, and observe all indicated instructions and recommendations. In case of doubt, please ask the material supplier. Use respiratory protection when spraying. The respiratory equipment used must be suitable for the material in use and adapted to the degree of the vapour concentration. When spraying paint, use respiratory equipment independent of the ambient atmosphere, or equipment with filter combination A1/A2-P2. Ensure a sufficient protection of your skin during all spraying and cleaning procedures. Wear appropriate protective clothes and use suitable protective skin ointments.
Product Familiarisation
| 1 Paint Container |
| 2 Lid with Locking Lever |
| 3 Equalisation Tube |
| 4 Fluid Connector |
| 5 Material Nozzle |
| 6 Air Nozzle |
| 7 Air Nozzle Locking Ring |
| 8 Hanging Hook |
| 9 Knurled Pattern Adjustment Screw |
| 10 Knurled Needle Adjustment Screw |
| 11 Trigger |
| 12 Handle |
| 13 Quick Connector |
Intended Use
- Atomising suction feed spray gun, powered by filtered compressed air from a compressor, for spraying of medium viscosity paint and coatings
Unpacking Your Tool
- Carefully unpack and inspect your tool. Fully familiarise yourself with all its features and functions
- Ensure that all parts of the tool are present and in good condition. If any parts are missing or damaged, have such parts replaced before attempting to use this tool
Before Use
Fitting the quick connector
Note: This tool is supplied with two different male airline quick connectors:
EQ-4 – commonly used in Europe
EN-6 – mainly used in the UK

natural_image
Technical line drawing of a threaded connector labeled EQ-4 and Europe (no additional text or symbols)
natural_image
Technical line drawing of a threaded pipe fitting labeled EN-6 UK (no additional text or symbols)- Please choose the connector that is compatible with the airline system you are using, and install as outlined below:
- Apply some PTFE tape (not included) to the screw threads of the Quick Connector (13). This will help to maintain an air tight seal
Note: Apply PTFE tape tightly and in a clockwise direction, so it does not come off when the thread is screwed into the tool. - Remove the protective plug from the air inlet
- Using a spanner (not included) screw the quick connector into the air inlet located at the base of the handle
- Connect to airline, pressurise carefully and carry out a leak check (e.g. by spraying small amounts of soapy water on to the outside of the connectors)
• Air lines fitted with matching female quick connectors will now be a push fit to the tool - Fit the Paint Container (1) by screwing it to the Fluid Connector (4) of the spray gun. Gently tighten with a suitable spanner (not included)
Fitting the paint container
Air supply connection

- This tool should be connected to a clean, dry air supply with water separator and filter WARNING: Under no circumstances can the spray gun be used in a compressed air system with integrated oiler.
Note: Achieving a fine spray finish without the use of a high quality separator filter is virtually impossible.
- Do not allow supply pressure to exceed the maximum stated (see "Specifications")
- Ensure that water is drained from air system daily
- Ensure that all parts of the system (hoses, couplers, etc.) are correctly rated for the air pressure to be used
- Do not use non-conductive tubing to help prevent build-up of electrostatic charge
Setting the air pressure
- Atomizing pressure must be set properly to allow for the drop in air pressure between the compressor/regulator and the spray gun
- Use recommended hose diameter to minimise pressure drop and adjust supply air pressure according to 'Specifications'
IMPORTANT: To reduce overspray and in order to obtain maximum efficiency, always spray with the lowest possible atomizing air pressure.
Paint preparation
WARNING: Ensure the type of paint, solvent used and the viscosity is suitable for the material and type of this spray gun.
- Mix, condition and filter the material to be sprayed according to the manufacturer's recommendations
- Refer to the manufacturer's guidelines for storing and disposal of prepared material
Filling the paint container
- Ensure the spray gun is disconnected from the air supply
- Open the Lid with Locking Lever (2)
- Inspect the seal inside the lid for wear and damage
- Fill the paint container to the required level
Note: The maximum filling height is approximately 10mm below the shoulder of the cup 5. Re-fit the lid of the paint container. Close tightly by hand
Note: The lid features a small opening with the Equalisation Tube (3) attached. The paint canister is therefore not completely sealed. Take care not to spill material through this tube. Always ensure the hole in the lid and tube remain clean and unblocked.
Adjusting the spray gun
- Bring the spray gun into the default position:
- Carefully screw the Knurled Needle Adjustment Screw (10) clockwise until it stops
WARNING: The paint needle can easily be damaged. Be careful not to use too much force. - Carefully screw the Knurled Pattern Adjustment Screw (9) clockwise until it stops
WARNING: DO NOT use too much force, as this may damage the valve seat.
- Loosen the Air Nozzle Locking Ring (7) about a quarter turn, to allow the Air Nozzle (6) to be adjusted
Adjust the material output:
- Connect the spray gun to the air supply
- Direct the gun towards a large piece of cardboard or similar material
- Hold the spray gun steady and depress the Trigger (11)
Note: In default position, there should be no material output.
- Slowly turn the Knurled Needle Adjustment Screw (10) anticlockwise to open the material flow
- Adjust until the desired material output is reached
Adjust the spray pattern:
Note: Always readjust the material output when modifying the width or shape of the spray beam.
- Slowly turn the Knurled Pattern Adjustment Screw (9) anticlockwise to adjust the spray pattern. Turn until the desired spray pattern is reached
Note: Turning the pattern adjustment screw anticlockwise increases the spread, turning it clockwise leads to a narrower, more circular spray pattern.
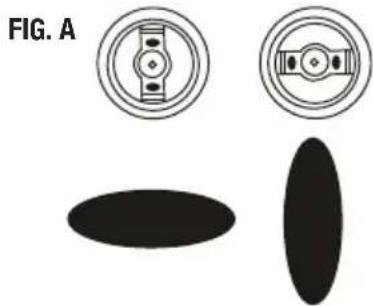
- Turn the Air Nozzle (6) to adjust the orientation of the spray pattern (see Fig. A)
- Once you reached the desired spray pattern, release the Trigger (11) and tighten the Air Nozzle Locking Ring (7) by hand, to lock the air nozzle in place
Note: In most operations the wings on the air nozzle should be horizontal to provide a vertical spray pattern which gives maximum coverage as the gun is moved backwards and forwards parallel to the surface being painted.
natural_image
Diagram showing two circular components with internal features and a separate oval shape below (no text or symbols)Operation
Trigger operation
• The trigger has a 2-stage mechanism:
- Press to the first stage, the air will flow through the gun
- Press further and the paint is released
Note: Adjusting the Knurled Needle Adjustment Screw (10) will determine how far the trigger can be depressed
Spray technique
- To achieve a smooth even coat the material must be prepared and thinned in accordance to the manufacturer's guidelines
- The gun must be clean and correctly loaded, the spray pattern adjusted and the compressor set at the correct pressure
- Always carry out a test spray and follow the procedures described in 'Adjusting the spray gun', to establish the best settings
- Keep the distance of the spray gun approximately 200-250mm away from the workpiece
- Spray workpiece edges first. Overlap approximately 50% of each applied spray beam
- Spray in continuous, even motion. Keep your hand as steady as possible and move the spray in a straight pass across the workpiece (see Fig. B)
- Do not operate in an arc motion. Arcing will lead to an uneven finish (see Fig. B)
- Avoid intensive waving, as it will cause the air jacket to become unstable, allowing clouds of atomized spray material to escape
- Before spraying it is good practice to visualise the entire spraying process. Start with the least visible areas and work towards the parts that will be seen. This will create an even finish, allow you to identify problematic areas of the workpiece, and let you work around spots that may already have been covered
• After use, immediately disconnect the spray gun from the air supply
WARNING: Be aware that air tools may hold residual pressure after use. Always bleed air pressure from the tool after shutting off air supply.

Maintenance
WARNING: Always disconnect from the air supply and depressurise before disassembly or carrying out any maintenance.
WARNING: Always wear suitable protective equipment including eye and respiratory protection as well as gloves when carrying out cleaning or maintenance procedures.
WARNING: The majority of solvents used for painting applications are toxic and highly flammable. Comply with local laws and regulations with regards to handling, storage and disposal of solvents and other harmful and potentially dangerous substances.
Note: Your spray gun is a fine precision instrument and must be treated and maintained accordingly, in order to achieve consistent professional looking uniform results.
- The most common problems with spray guns are caused by paint being allowed to dry inside the tip, nozzle or internal air/fluid passages
- Clean the entire spray gun thoroughly after each project, and when changing the type of material being sprayed
• Always use the same solvent for cleaning that was used to thin the paint
General cleaning after every use
- Remove the paint container, empty remaining material into a suitable sealed container, and clean thoroughly with the appropriate solvent and clean cloths
- Clean the nozzle assembly of the gun, lid and gasket of the paint container
- Pour a small amount of solvent into the clean paint container and re-fit it to the gun
- Connect the gun to the air supply
- Direct the gun towards an empty container and spray the solvent through the gun into the container, until the spray is clear of any paint
- Turn off the air supply and disconnect the gun
- Release the paint container, empty remaining solvent into the disposal container, and let all components dry thoroughly
- Re-fit paint container for storage
WARNING: In order to prevent solvents and other harmful substances from entering the atmosphere, open solvent cleaning is not permitted in some territories, and special cleaning procedures apply (e.g. cleaning inside special closed bags and containers, etc.). Make yourself familiar with local regulations, and apply the recommended procedures.
Special cleaning procedures for air and fluid nozzles and needles
WARNING: All nozzles and needles are precision made. They must be handled with utmost care. Damage and alterations will cause decreased performance or faulty spray.
WARNING: Needles have a sharp point. Handle with care to avoid puncture wounds and other injuries.
- Referring to the 'Assembly Diagram', carefully disassemble the spray gun, remove the nozzle assembly and fluid needle
- To clean, soak nozzles and needle in a suitable solvent that dissolves any dried material and clean with a suitable soft brush
Note: Never soak the entire spray gun in solvent, as this will damage the packings and remove lubrication.
- Carefully blow all components clean with filtered compressed air
WARNING: Do not probe any of the holes in the nozzles with metal instruments. If mechanical cleaning becomes necessary, use only implements from materials softer than brass, like specialised nozzle cleaning aids.
Lubrication
- Even though the air and material passages of the spray gun must remain free of oil and other contaminants, some components require frequent lubrication
- Slightly lubricate all packings, bearings and dynamic O-rings with a specialised spray gun lube, and apply a small amount of petroleum jelly to springs
Storage
- Store this tool carefully in a secure, dry place out of the reach of children
Disposal
• Air tools should not be disposed of with household waste
- Spray guns may contain traces of solvents and paint residue, and must be recycled accordingly
- Surplus paints, solvents and cleaning solutions must be disposed of according to the manufacturer's instructions
- Contact your local waste disposal authority for information on the correct way to dispose of air tools
Troubleshooting
| Problem Possible Cause Solution | ||
| Spray gun will not spray | No air pressure Check air supply | |
| Material viscosity far too high Regulate material viscosity | ||
| Filter clogged Remove filter element inside paint container connection and clean with solvent | ||
| Spray gun wrongly adjusted Follow adjustment procedure to readjust spray gun | ||
Intermittent/sputtering spray  | Fluid level too low Refill paint container | |
| Dry or worn needle packing seat; air seeping into fluid passage | Tighten packing; lubricate | |
| Leaking paint container connection Check O-ring of paint container connection; tighten paint container | ||
| Obstruction in fluid passage Remove filter element inside paint container connection and clean with solvent; flush spray gun with solvent to dissolve blockage | ||
| Packing fluid needle too loose causing leaking Tighten or replace packing | ||
Arc-shaped spray pattern  | Hom holes clogged | Remove obstructions from horn holes; soak in suitable solvent and wipe clean |
| Uneven volume of fluid from horn holes cause fluid deviation | ||
Spray pattern is not evenly spread  | Material builds up on the outside of the fluid tip or centre hole or partially clogs the nozzle orifice | Remove obstruction |
| Loose fluid nozzle | Tighten fluid nozzle | |
Centre of spray pattern too narrow  | Atomising air pressure too high Reduce air pressure | |
| Material too thin Regulate material viscosity | ||
Pattern width too small  | Atomising air pressure too low Increase air pressure | |
| Material too thick Regulate material viscosity | ||
| No or very little paint output | Fluid passage clogged | Remove obstructions |
| Air holes in the nozzle blocked | ||
| Fluid needle stroke too small (Material flow too low) Increase material flow | ||
| Excessive overspray | Atomising air pressure too high Reduce air pressure | |
| Spray gun too far from work surface | Use proper distance to workpiece | |
| Wrong spray gun movement (arcing, too fast) | Move at moderate pace, parallel to the workpiece | |
| Dry spray | Atomising air pressure too high Reduce air pressure | |
| Material not properly prepared Adjust viscosity and re-filter material | ||
| Spray gun too far from work surface | Use proper distance to workpiece | |
| Spray gun motion too fast | Move at moderate pace | |
| Spray gun wrongly adjusted Follow adjustment procedure to readjust spray gun | ||
Runs and sags 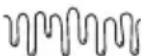 | Material flow too high | Reduce material flow |
| Material too thin Regulate material viscosity | ||
| Gun tilted on an angle | Hold gun at right angle to the workpiece; improve spraying technique | |
| If the above troubleshooting solutions fail, contact your dealer or an authorised Silverline service centre. | ||
Silverline Tools Guarantee
This Silverline product comes with a 3 year guarantee
Register this product at www.silverlinetools.com within 30 days of purchase in order to qualify for the 3 year guarantee. Guarantee period begins according to the date of purchase on your sales receipt.
Registering your purchase
Registration is made at silverlinetools.com by selecting the Guarantee Registration button. You will need to enter:-
- Your personal details
• Details of the product and purchase information
Once this information is entered your guarantee certificate will be created in PDF format for you to print out and keep with your purchase.
Terms & Conditions
Guarantee period becomes effective from the date of retail purchase as detailed on your sales receipt.
PLEASE KEEP YOUR SALES RECEIPT
If this product develops a fault within 30 days of purchase, return it to the stockist where it was purchased, with your receipt, stating details of the fault. You will receive a replacement or refund.
If this product develops a fault after the 30 day period, return it to:
Silverline Tools Service Centre
PO Box 2988
Yeovil
BA21 1WU, UK
The guarantee claim must be submitted during the guarantee period.
You must provide the original sales receipt indicating the purchase date, your name, address and place of purchase before any work can be carried out.
You must provide precise details of the fault requiring correction.
Claims made within the guarantee period will be verified by Silverline Tools to establish if the deficiencies are related to material or manufacturing of the product.
Carriage will not be refunded. Items for return must be in a suitably clean and safe state for repair, and should be packaged carefully to prevent damage or injury during transportation. We may reject unsuitable or unsafe deliveries.
All work will be carried out by Silverline Tools or its authorized repair agents.
The repair or replacement of the product will not extend the period of guarantee
Defects recognised by us as being covered by the guarantee shall be corrected by means of repair of the tool, free of charge (excluding carriage charges) or by replacement with a tool in perfect working order.
Retained tools, or parts, for which a replacement has been issued, will become the property of Silverline Tools.
The repair or replacement of your product under guarantee provides benefits which are additional to and do not affect your statutory rights as a consumer.
What is covered:
The repair of the product, if it can be verified to the satisfaction of Silverline Tools that the deficiencies were due to faulty materials or workmanship within the guarantee period.
If any part is no longer available or out of manufacture, Silverline Tools will replace it with a functional replacement part.
Use of this product in the EU.
What is not covered:
Silverline Tools does not guarantee repairs required as a result of:
Normal wear and tear caused by use in accordance with the operating instructions eg blades, brushes, belts, bulbs, batteries etc.
The replacement of any provided accessories drill bits, blades, sanding sheets, cutting discs and other related items.
Accidental damage, faults caused by negligent use or care, misuse, neglect, careless operation or handling of the product.
Use of the product for anything other than normal domestic purposes.
Change or modification of the product in any way.
Use of parts and accessories which are not genuine Silverline Tools components.
Faulty installation (except installed by Silverline Tools).
Repairs or alterations carried out by parties other than Silverline Tools or its authorized repair agents.
Claims other than the right to correction of faults on the tool named in these guarantee conditions are not covered by the guarantee.
CE Declaration of Conformity
The undersigned: Mr Darrell Morris
as authorised by: Silverline Tools
Declares that
Identification code: 763556
Description: Spray Gun High Pressure
Conforms to the following directives and standards:
• Machinery Directive 2006/42/EC
• EN1953:1998+A1:2009
The technical documentation is kept by: Silverline Tools
Date: 11/06/13
Signed:

Director
Name and address of the manufacturer:
Powerbox International Ltd, Boundary Way, Lufton Trading Estate, Yeovil,
Somerset, BA22 8HZ United Kingdom
Read instruction manual

Attention

natural_image
Technical line drawing of a threaded connector labeled EN-6 UK (no additional text or symbols)natural_image
Three abstract symbols: circular gauges, a camera, and an oval shape (no text or labels)Silverline Tools Service Centre
PO Box 2988
Yeovil
Powerbox International Ltd, Boundary Way, Lufton Trading Estate, Yeovil,
Direttore
Powerbox International Ltd, Boundary Way, Lufton Trading Estate, Yeovil,
Somerset, BA22 8HZ, Regno Unito
natural_image
Technical line drawing of a threaded connector labeled EN-6 UK (no additional text or symbols)natural_image
Pure electrical circuit lines without any symbolsGebruik
Trekker bediening
Powerbox International Ltd, Boundary Way, Lufton Trading Estate, Yeovil,

IMPORTANT NOTE: THE PARTS DIAGRAMS SUPPLIED IN THIS MANUAL ARE FOR REFERENCE ONLY. THE MANUFACTURER MAKES NO REPRESENTATION OR WARRANTY OF ANY KIND TO THE CUSTOMER THAT HE OR SHE IS QUALIFIED TO MAKE ANY REPAIRS TO THE PRODUCT, OR CARRY OUT OTHER ASSEMBLY/DISASSEMBLY PROCEDURES. THE MANU--FACTURER EXPRESSLY STATES THAT ALL REPAIRS AND PART REPLACEMENTS MUST BE UNDERTAKEN ONLY BY A CERTIFIED TECHNICIAN AT AN AUTHORISED SILVERLINE SERVICE CENTRE, AND NOT BY THE CUSTOMER. THE CUSTOMER ASSUMES ALL RISK AND LIABILITY ARISING THROUGH HIS OR HER REPAIRS TO THE ORIGINAL PRODUCT, REPLACEMENT OF PARTS OR OTHER MODIFICATION OF THE ORIGINAL PRODUCT. DIAGRAMS ARE FOR ILLUSTRATION PURPOSES ONLY. SILVERLINE DOES NOT SUPPLY SPARE PARTS FOR THIS ITEM.

IMPORTANT : LES DIFFÉRENTES PIÈCES ILLUSTRÉES DANS LE SCHÉMA FIGURANT DANS CE MANUEL NE SONT PRÉSENTÉES QU'À TITRE DE RÉFERENCE. LE FABRICANT N'OFFRE NI IMPLICATION NI GARANTIE QUE SES CLIENTS PUISSENT ÉTRE QUALIFIÉS POUR EFFECTUER DES RÉPARATIONS SUR L'APPAREIL, OU EFFECTUER LES OPÉRATIONS D'ASSEMBLAGE OU DE DÉSASSEMBLAGE. LE FABRICANT STIPULE EXPRESSÉMENT QUE TOUTE RÉPARATION ET TOUT REMPLACEMENT DE PIÈCES DOIVENT ÊTRE UNIQUEMENT RÉALISÉS PAR UN TECHNICIEN QUALIFIÉ DANS UN CENTRE DE RÉPARATION AGRÉÉ SILVERLINE, ET NON PAS PAR LE CLIENT. LE CLIENT ASSUME L'INTÉGRALITÉ DES RISQUES ET DES RESPONSABILITÉS DE SES PROPRES RÉPARATIONS, REMPLACEMENTS DE PIÈCES ET MODIFICATIONS EFFECTUÉS SUR LE PRODUIT INITIAL. LES SCHÉMAS NE SONT PRÉSENTÉS QU'À TITRE D'ILLUSTRATION. SILVERLINE NE FOURNIT AUCUNE PIÈCE DE RECHANGE POUR CE PRODUIT.

natural_image
Exterior view of a spray gun and plastic spray can (no text or symbols visible)
3 Year Guarantee
*Register online within 30 days. Terms & Conditions apply

Garantie de 3 ans
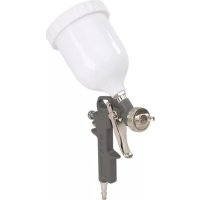
- Spray Gun High Pressure 1000ml
- SILVERLINEC® High Pressure
- Description of Symbols
- Environmental Protection
- Specification
- General Safety Warnings
- Projectile hazards
- Entanglement hazards
- Operating hazards
- Repetitive motions hazards
- Accessory hazards
- Workplace hazards
- Dust and fume hazards
- Safety Instructions for Pneumatic Tools
- Air under pressure can cause severe injury:
- Spray Gun Safety
- Dangerous environment
- Protect your eyes
- Protect your hearing
- Protection from vibration
- Protective equipment
- Use the correct air hose
- Always disconnect
- Do not abuse the tool
- Use of spray guns
- Product Familiarisation
- Intended Use
- Unpacking Your Tool
- Before Use
- Fitting the quick connector
- Fitting the paint container
- Air supply connection
- Setting the air pressure
- Paint preparation
- Filling the paint container
- Adjusting the spray gun
- Operation
- Trigger operation
- Spray technique
- Maintenance
- General cleaning after every use
- Special cleaning procedures for air and fluid nozzles and needles
- Lubrication
- Storage
- Disposal
- Troubleshooting
- Silverline Tools Guarantee
- This Silverline product comes with a 3 year guarantee
- Registering your purchase
- Terms & Conditions
- PLEASE KEEP YOUR SALES RECEIPT
- Silverline Tools Service Centre
- PO Box 2988
- Yeovil
- BA21 1WU, UK
- What is covered:
- What is not covered:
- CE Declaration of Conformity
- Gebruik
- Trekker bediening
- Year Guarantee
- Garantie de 3 ans
Brand : SILVERLINE
Model : 763556
Category : Paint spray