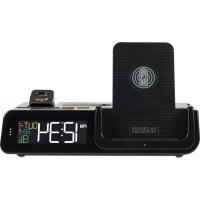
CA74962 - Alarm Clock LA CROSSE TECHNOLOGY - Free user manual and instructions
Find the device manual for free CA74962 LA CROSSE TECHNOLOGY in PDF.


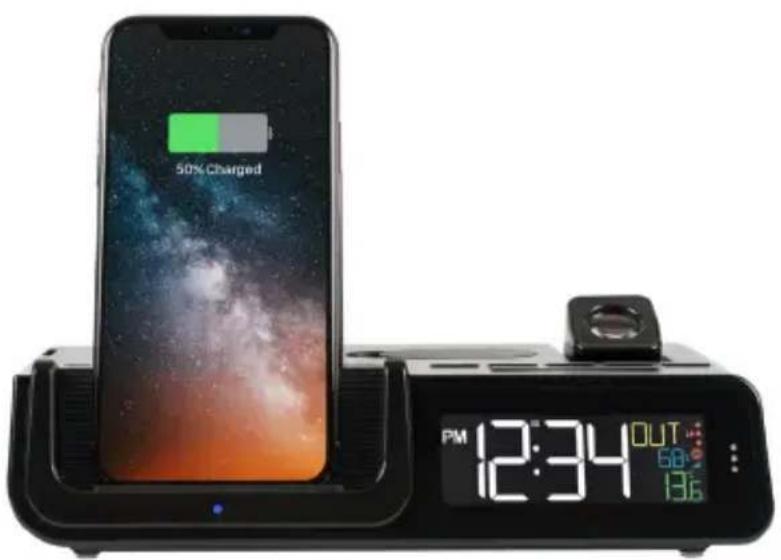
| Product Type | Clock radio with weather station and wireless charger |
| Brand | La Crosse Technology |
| Model | CA74962 |
| Power Supply | 5V AC adapter (included); 2 AA batteries for outdoor sensor; CR2032 button cell for backup |
| Display | LCD screen with adjustable backlight (4 levels + auto-dim) |
| Projection | Projects time or outdoor temperature/humidity, adjustable brightness (HI/LOW/OFF), orientation and rotation |
| Clock Functions | 12/24 hour display, alarm with ascending beep, adjustable snooze (5-120 min), date and day display |
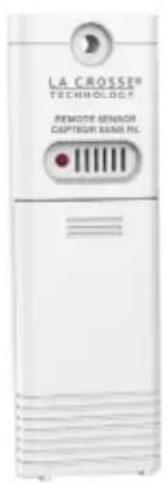
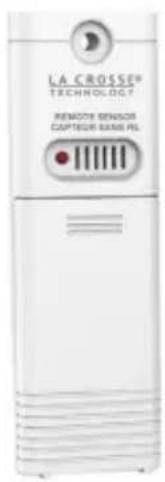
| Measurements | Indoor temperature and humidity (0-50°C, 10-99% RH) and outdoor (-40 to 60°C, 10-99% RH) via wireless sensor TX141TH-Bv3 |
| Sensor Range | Over 100 m (330 feet) in open field, RF 433 MHz |
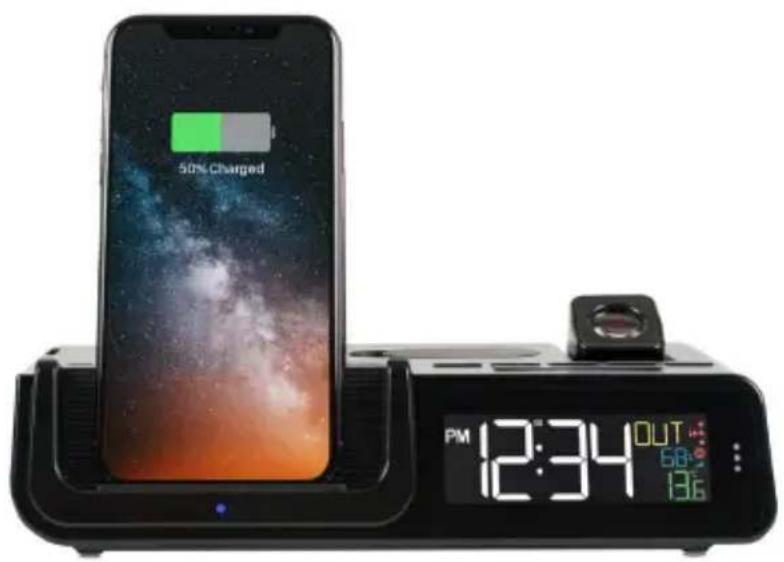
| Wireless Charging | 5W Qi charger for compatible phones (iPhone X+, Galaxy S8+, etc.) |
| USB Ports | 1 USB-A port and 1 USB-C port, max 1A each |
| Accessories | Dock for earbuds, smartwatch stand, cable organizer, storage compartment |
| Maintenance | Clean with a soft, dry cloth; do not use abrasive products |
| Safety | Keep batteries out of reach of children; do not expose to moisture; use only the provided adapter |
| Warranty | 1-year limited (see manual) |
Frequently Asked Questions - CA74962 LA CROSSE TECHNOLOGY
User questions about CA74962 LA CROSSE TECHNOLOGY
0 question about this device. Answer the ones you know or ask your own.
Ask a new question about this device
Download the instructions for your Alarm Clock in PDF format for free! Find your manual CA74962 - LA CROSSE TECHNOLOGY and take your electronic device back in hand. On this page are published all the documents necessary for the use of your device. CA74962 by LA CROSSE TECHNOLOGY.
USER MANUAL CA74962 LA CROSSE TECHNOLOGY
LA CROSSE TECHNOLOGY
Wattz ^2.0
time & weather station
5-in-1
- in/out temperature/humidity
- wireless charger
- projection display
- alarm clock
- USB charging ports
SETUPGUIDE
Model: CA74962
Table of Contents
BASICS
Initial Setup 02
03
LCD Display 04
Accessories & Ports 04
LCD Display Brightness 05
Auto-Dim Settings 05
Display Modes 06
Display Mode Options 06
ALARM
Setting the Alarm
Activate/Deactivate
Snoopze Duration
PROJECTION
07 Projection Brightness 09
08 Adjusting the Projection 09
08 Projection Image Options 10
CHARGING
5W Wireless Charger 11
Phone Compatibility 11
Adjustable Charging Coil 12
USB Charging Ports 12
Earbud Charging 13
Accessory Storage 13
Smart Watch Stand 14
Cable Organizer 14
SENSOR
Search for Sensor
Lost Connection
Low Battery
Sensor Data
Position Sensor
APPENDIX
15 Specifications 17
15 Button Cell Battery 18
15 Battery Warning 18
16 Trademarks & Warning 19
16 Recycling & Disposal 19
Cautions 19
Warranty 20
Canada Statement 20
BASICS
Initial Setup
Power Up
Insert 2 "AA" batteries into the Outdoor Sensor.
Insert the 5V Power Adapter into an outlet, and then plug it into the Power Jack on the bottom of the weather station. Next, remove the Insulation Tab from the Station's Battery Compartment.
A greeting will appear on the LCD and the station will then automatically move into the Settings Menu.
Settings Menu Order
Beep On/Off·12/24 Format·Hour·Minutes·Year·Month·Date·Celsius/Fahrenheit
Note: To enter the Settings Menu after the initial startup, hold the SET button on the top of the station.
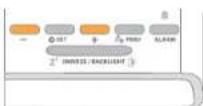
Use the +/- buttons on the top of the station to adjust the values.
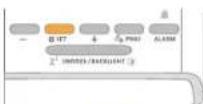
Press the SET button to confirm selection and move to next setting.
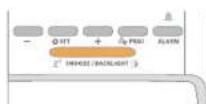
You may exit the Settings
Menu at any time by
pressing the SNOOZE/
BACKLIGHT button.
Note: Weekday will set automatically after year, month, & date settings are adjusted.
BASICS
Buttons LCD Display
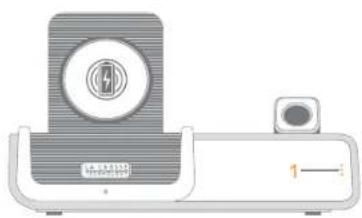
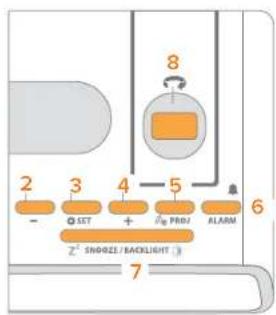
1. DISPLAY OPTION
Tap to select LCD display mode options
2. MINUS
Press to decrease values, hold to change values quickly
3. SET
Hold to enter Settings
4. PLUS
Press to increase values. hold to change values quickly Hold to search for Outdoor Sensor.
5.4PROJ.
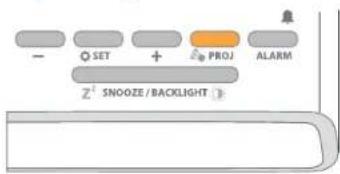
Press to adjust projection intensity. Hold to change projection mode.
6. ALARM
Press to activate/deactivate alarm. Hold to enter alarm settings
7.2'SNOOZE/BACKLIGHT
Press to adjust seeklight or snooze a sounding alarm. Hold for Auto-Dim Settings.
8. ROTATION WHEEL
Scroll to rotate the projection image (left or right)


Accessories
Use,Organize & Store
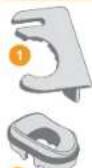
- Smart Watch Stand
- Earbuds Dock
- Dock Cover
- Thin Cable Fitting
- Thick Cable Fitting


Ports
1yCOSH 1yAOSH
Cherging For Chrging Fort
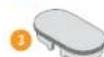
Accessories are stored in the bottom compartment of your weather station. The Dock Cover is on the top.

BASICS1
LCD Display Brightness Display Modes
Adjusting the LCD Display Brightness
Press the SNOOZE/BACKLIGHT button on the top of the station to adjust the backlight intensity. There are 4 brightness levels, plus an off option.
Auto-Dim Settings
Program your LCD display to automatically dim during preselected times.
- Hold the SNOOZE/BACKLIGHT button to enter the Auto-Dim Settings Menu.
- Press the +/- buttons to turn the Auto-Dim feature on or off. Press the SNOOZE/BACKLIGHT to confirm.
- Press the +/- buttons to adjust the starting hour. Press the SNOOZE/ BACKLIGHT to confirm.
- Press the +/- buttons to adjust the stopping hour. Press the SNOOZE/ BACKLIGHT to confirm and exit.
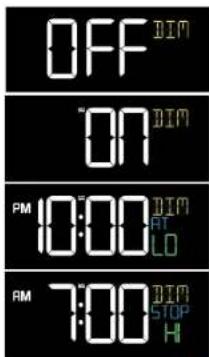
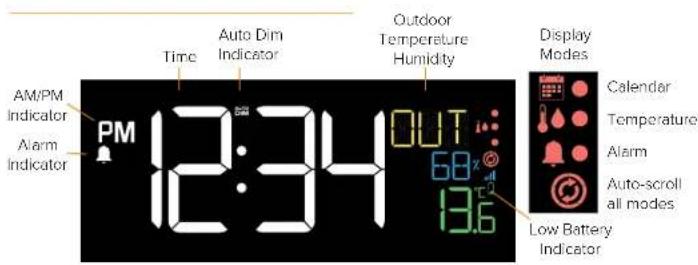
The Auto DIM icon will appear on the LCD when activated.
#
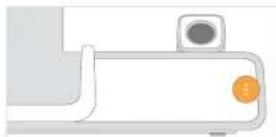
Selecting the Display Mode
Tap the button on the front of the station to select a display mode or automatically cycle through all of the available options.
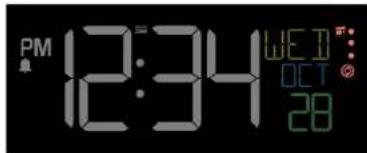
Display Modes
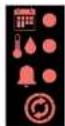
Calendar Temperature
Aem
Auto-write
all modes
The Red Ions on the right side of the LCD indicate the current display mode.
The Icon will appear on the LCD when the Cycle Mode is active. This setting will automatically toggle through the available display mode options.
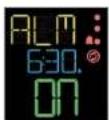
Display Mode Options
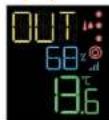
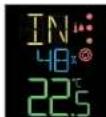
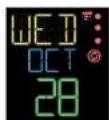
Outdoor Temp./Humidity*
Indoor Temp./humidity
Weekday Month + Date
Alarm Time ON/OFF
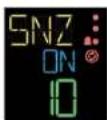
Snoopze Countdown
ALARM
Time Alarm
Setting the Alarm
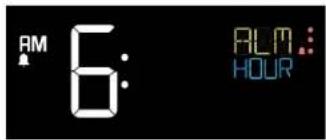
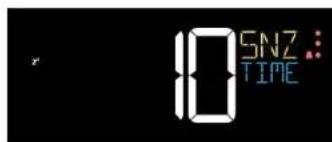
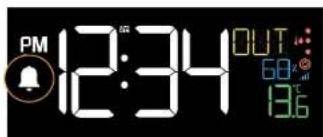
- Hold the ALARM button on the top of the station to enter the Alarm Settings Menu.
- Use the +/- buttons to set your desired time. Press the ALARM button to confirm.
- Next, use the +/- buttons to set your desired snooze duration (5 to 120 minutes). Press the ALARM button to confirm and exit the Alarm Settings Menu.
- Your time alarm is now activated, indicated by the icon on the LCD.

Time Alarm
Activating & Deactivating the Alarm
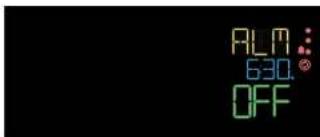
- Press the ALARM button to activate/deactivate the alarm (ON/OFF).
The icon will appear on the normal time display when the alarm is active.
Ascending Alarm
The alarm will increase in frequency over a 2-minute period. After the 2-minute time frame, the alarm will stop if not snoozed or turned off.
Snoopze Duration Countdown
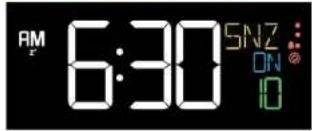
When your alarm sounds, press the SNOOZE/BACKLIGHT button to snooze your alarm for your preselected snoozeduration. A countdown will appear on screen.
When the snooz time reaches "00," the alarm will sound again. The snooz feature can be repeated as many times as desired.


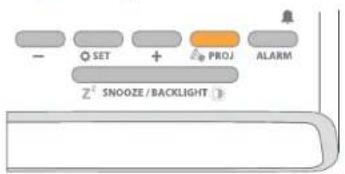
Projection Brightness
Press the PROJ. button to adjust the projection's brightness (HI/ LOW/OFF).
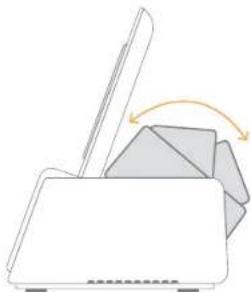
The Projection Arm tilts forwards and backwards to adjust the location of the projection image.
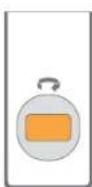

Use the Rotation Wheel on the Projection Arm to rotate the viewing angle of the image.
Note: The fixed focus projection image will look best at about 7ft. (2.1m).
PROJECTION
Projection OptionsAdjusting the Project
Projection Image Options
You can choose to see the (1) time, (2) outdoor temperature and humidity, or (3) cycle through both options.
Selecting Your Projection Image
- When an outdoor sensor is connected, hold the PROJ. button on the top of the station to toggle between the projection options. If no sensor is connected, this button will only adjust the projection's brightness.
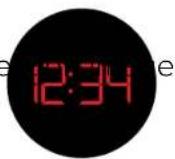
Current Time
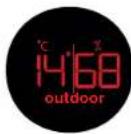
Outdoor Temperature and Humidity
- Time will be the default projection image. Hold and release the PROJ button each time to switch between projection modes.

Time-Only Projection
Outdoor: Temperature & Humidity-Only Projection
Cycle Through Both Options
10
CHARGING
5W Wireless Charger
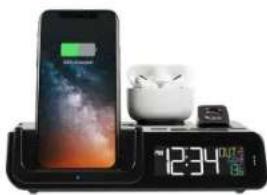
Charging your Qi-Enabled Phone
- Place your Qi-Enabled phone on the platform. Your phone should be centered and should sit flush to the charging cradle.
The blue Charging Indicator Light below the platform will be solid when your phone is successfully charging.
The light will flash slowly if your device is not positioned properly or if your device is not compatible with the Qi wireless charging technology. If this problem persists, try removing any large/bulky cases.
Phone Compatibility
Works with all Qi-Enabled phones, such as:
iPhone 8 or newer
Galaxy S8 or newer
Galaxy Note 8 or newer
Compatibility may vary based on phone model and/or case selection.
This list is not comprehensive. Please check your phone's manual for details regarding Qi-Enabled capabilities.
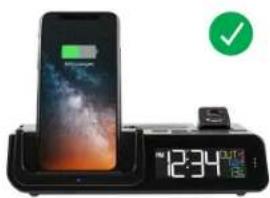
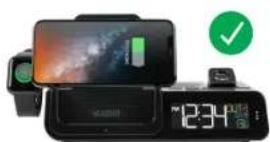

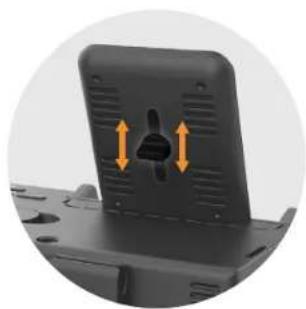
Adjustable Charging Coil
As phone sizes can vary greatly, simply slide the Phone Charger Adjustment Handle up or down to best match your device and get it charging correctly.
Note: Although this station is capable of delivering SW wireless charging, actual charging times will be determined by your mobile device.
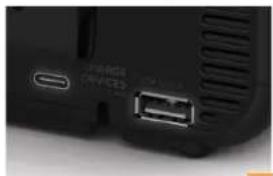
USB Charging Ports
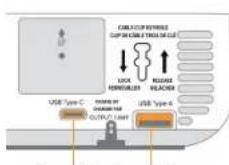
There is a USB Type "A" Charging Port, and a USB Type "C" Charging Port located on the back of your station.
Connect your external device's USB charging cable (not included) into the USB Charging Port.
- Charging times may vary.
USB Power Output: 1 Amp maximum current

1Amp
CHARGING
Earbud Charging
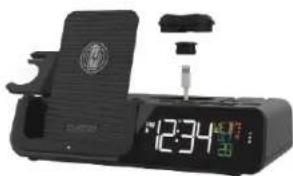
- Remove the Dock Cover from the top of the station.
- Open the bottom Accessory Compartment and find the Earbud Dock and Cable Fittings.
- Feed your earbud charging cable (not included) up through the Earbud Dock, securing it with the correct Thick or Thin size Cable Fitting.
- Wrap any extra cord up inside the Accessory Compartment and feed the charging end through the bottom hole.
- Plug the cord into the appropriate 1 amp USB Charging Port.
Accessory Storage
The Earbud Dock, Cable Fittings, and Smart Watch Stand can all be stored in the Accessory Compartment on the bottom of the station when not in use.

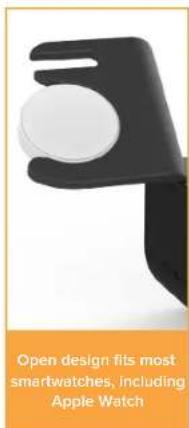
Smart Watch Stand
The removable Smart Watch Stand is engineered to fit a variety of smart watch brands. Its open design allows for easy access to your device's unique charging port location, for use with the included USB Charging Port.
How to attach the Smart Watch Stand
- Remove the Smart Watch Stand from the Accessory Compartment on the bottom of the weather station.
- Insert the watch stand into the left side of the unit.
- Place your watch on the stand and attach its charging cord.
- Plug the charging cord into the correct USB port.
Note: Smartwatch and charging cords not included.
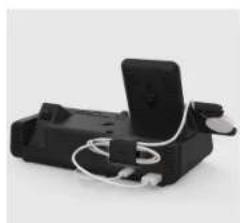
Cable Organizer
Use the included Cable Organizer to keep your charging cords neat and secure. Insert the organizer into the Cable Clip Keyhole and slide it down to lock in place. Lift up and pull the Cable Organizer out to remove it.

SENSOR
Search for Sensor
Lost Connection
If the sensor loses connection to the station for any reason, the station will show NO after 30 minutes of disconnection.
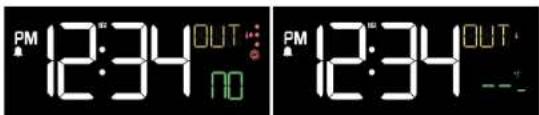
- The Sensor Reception Icon will disappear from the bottom right of the LCD and the station will search for up to 3 minutes every hour to try to reestablish the connection.
- To manually reconnect, hold the + button on the top of the station to search for the sensor.
- Dashes will show while searching for the sensor and the icon will flash for up to 3 minutes or until the sensor is connected.
Low Battery
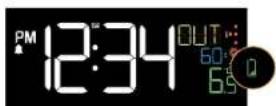
The icon will appear when the sensor batteries needs to be replaced.

SENSOR
Sensor Data
The sensor's data should then be viewable on your LCD and as an option to be projected.
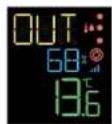
Outdoor Temp/Humidity
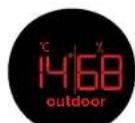
Projection Image
Position Sensor
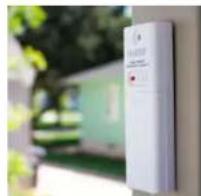
Insert a screw through the front hanging hole to mount the sensor outside in a shaded location.
For more details, watch our video here: bit.ly/th SENSORmounting.

APPENDIX
Specifications
Weather Station CA74962
Power Requirements: Input: 5.0VDC 3.5A Power Cord
Included)HX20A-0503500-AU
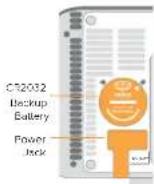
CR2032 Battery for backup (Included)
The plug on the power adapter is intended to serve as the disconnect device, the socket-outlet shall be installed near the equipment and shall be easily accessible.
Indoor Temperature Range:
0^ to 50^ (32°F to 122°F)
Indoor Humidity Range: 10% to 99% RH
LCD Brightness: 4 Intensity Levels + OFF
(Programmable Auto-Dim Backlight option)
Projection Brightness: 2 Intensity Levels + OFF
Programmable Snooze Duration:
5 to 120 Minutes
Dimensions:
21.31cm Lx11.98cm Wx12.34cm H
(8.39inLx4.72inWx4.86inH)
Settings Backup: The CR2032 Battery will
save Time and Alarm Settings when power is lost.
Projection will not show.
Charging:
Wireless Charger Power Output: 5 Watts
USB "A" and "C" Charging Port 1 Amp
Maximum Current (Charging Cords Not Included)
Outdoor Sensor TX141TH-Bv3
Outdoor Temperature Range:
-40°C to 60°C (-40°F to 140°F)
Outdoor Humidity Range: 10% to 99% RH
Transmission Range: Over 100 meters (330 feet) in open air RF 433MHz
Power Requirement: 2AA LR6 Batteries (included)
Battery Life: Over 24 months with repeatabile betteeries
Dimensions:
3.98cm L x 2.0cm W x 13.0cm H
(157)Lx0.79Wx5.11H)
This product operates on alkaline batteries. However, it is suggested to use lithium batteries in areas where the temperatures is consistently below -30^(-22^)
APPENDIX
Button Cell Battery
Replace the Coil Cell Battery
- Use a coin to turn the battery cover to the left to remove it
2 Pull back the metal pin and gently remove the battery. - Insert a fresh CR2032 battery with the side up and snap
- Replace the battery cover and use the coin to turn it to the right to lock.
Battery replacement instruction:
When batteries of different brand or type are used together, or new and old batteries are used together, some batteries may be over-discharged due to a difference of voltage or capacity. This can result in vomiting, leaks, and rupture and may cause personal injury.
- Always purchase the correct size and grade of battery
Always replace the whole set of batteries at one time.
taking care not to mix old and new ones, or batterie c different types. - Clean the battery contacts and those of the device prior to battery installation.
- Ensure the batteries are installed correctly with regard to polarity and
Remove beaclores from product during periods of nurnuse. Battery leakage can cause corrosion and damage to this product. - Remove used batteries promptly.
- For recycling and disposal of biotics, and to protect the environment please check the internet or your local phone directory for local recycling centers and/or follow local government regulations.
#
WARNING
- This product contains a button battery.
- If swallowed, it could cause severe injury or death in 1/3 of cases.
- Sces medical atcition immedlity
WARNING:
KEEP BATTERIES OUT OF REACH OF CHILDREN
- Swallowing may lead to serious injury in as little as 2 hours or death due to chemical burns and potential perforation of the esophagus.
- if you suspect your child has swallowed or inserted a button battery, immediately seek urgent medical assistance.
3.Examination devices are made sure the battery compartment is correctly secured, e.g. that the screw or other mechanical fastener is fitted. - Do not use if compa nment is not secure.
- Dispos of used button batteries immediately and safely Flat batricians can still be incongruous.
- Tell others about the risk associated with button batteries and how to keep their children safe.
A
WARNING: CHOKING HAZARD—Small Parts
Not for children under 3 yrs.
APPENDIX
Trademarks & Warning
Important:
Wireless charging uses magnetic induction to charge your compatible smartphone. Do not place anything between your phone and the charging pad. Keep the charging pad clear of all foreign objects. Magnetic mounts, magnetic cases, or other objects between your phone and the wireless charger may reduce performance or damage magnetic strips or RFID chips found in some credit cards, security badges, passports, and key bags. If your phone case holds any of these sensitive items, be sure to remove them before charging or make sure they are not between the back of your phone and the charging pad.
La Crosse Technology is not responsible for any damage or loss of performance with iPhone, iPod, or iPad while being used in associated with this accessory.
Apple is not responsible for the operation of this device or its compliance with safety and regulatory standards. Please note that the use of this accessory with iPhone, iPod, or iPad may affect wireless performance.
Apple, the Apple logo, iPod, iPhone, iPod, iPod touch, iTunes, Retina, Mac, Mac OS and OS X are trademarks of Applic Inc., registered in the U.S. and other countries. Other company names and product names including Samsung, Galaxy, and Note are registered trademarks or trademarks of the respective companies.
Phone, charging accessories, and smart watch not included.
Caution!
The manufacturer is not responsible for any radio or TV interference caused by unauthorized changes or modifications to this equipment. Such changes or modifications could void the user authority to operate the equipment.
All rights reserved. This manuie may not be reproduced in any form, even in part, or duplicated or processed using electronic, mechanical or chemical process without the written permission of the publisher.
This booklet may contain errors or misprints. The information it contains is regularly checked and corrections are included in subsequent editions. We discard any responsibility for any technical error or printing error, or their consequences. All trademarks and patents are recognized.
Recycling & Disposal
Please consider the environment when deciding to dispose of this product. Although household electronics are generally safe to use on a daily basis, incorrect disposal can cause negative and potentially irreversible impacts on our environment.
Check with local donation centers to see if your product can be donated for future use. If disposal is the only option, federal agencies, local governments, and certified retailers may have electronic recycling programs in place. Programs may vary based on location:
Please help in the preservation of the environment and return used batteries to an authorized depot.

Please Recycle

APPENDIX
Warranty
La Crosse Technology, Ltd. provides a 1-year limited time warranty (from date of purchase) on this product relating to manufacturing defects in materials and workmanship.
Self-help: bitly@ca74962
Before returning a product, please contact our friendly customer support with questions:
Springfield Instruments Inc.
104 Barr St.
Saint Laurent, Quebec
H4T 1Y4
Customer Service: 1-844-687-4040
info@springfieldinstruments.com
Canada Statement
This device complies with the Canada Industry licence-exempt RSS standards. Operation is subject to the following two conditions:
(1) This device may not cause interference and
(2) This device must accept any interference, including interference that may cause undesired operation of the device.
CAN RSS-216 / CNR-216
Radiation Exposure Statement
This equipment complies with IC radiation exposure limits, set forth for an uncontrolled environment. This equipment should be installed and operated with a minimum of 20 cm between the radiator and your body.
This transmitter must not be co-located or operating in conjunction with any other antenna or transmitter. This equipment should be installed and operated with a minimum distance of 20 centimeters between the radiator and your body.
LA CROSSE
TECHNOLOGY
LA CROSSE TECHNOLOGY
Wattz ^2.0
station hora & meteod
5-en-1
Press to adjust projection intensity. Hold to change projection mode.
7. RAPPEL D'ALARME / RETROECLAIRAGE
Projection Brightness
Weather Station CA74962
Alimentation Cordon d-alimentation Input: 5.0VDC 3.5A Power Cord (inclc
HX20A-0503500-AU & CR2032 Batterie de secours (Inclusive)
21,31cm L x 11,98cm W x 12,34cm H
[8,39InLx4.72inWx4.86nH]
Sauvegarde des parametes: la plo CR2032
Alimentation 2 piles AA LR6 (incluses)
Adverse: Sprains/Instruments, Inc.
104, rue Barr. Saint-Laurent (Quebec) H4T 1Y4

- LA CROSSE TECHNOLOGY
- Wattz 2.0
- 5-in-1
- Table of Contents
- BASICS
- ALARM
- PROJECTION
- CHARGING
- SENSOR
- APPENDIX
- Initial Setup
- Power Up
- Settings Menu Order
- Buttons LCD Display
- DISPLAY OPTION
- MINUS
- SET
- PLUS
- 5.4PROJ.
- ALARM
- 7.2'SNOOZE/BACKLIGHT
- ROTATION WHEEL
- Accessories
- Ports
- BASICS1
- LCD Display Brightness Display Modes
- Adjusting the LCD Display Brightness
- Auto-Dim Settings
- #
- Selecting the Display Mode
- Display Mode Options
- Time Alarm
- Setting the Alarm
- Activating & Deactivating the Alarm
- Ascending Alarm
- Snoopze Duration Countdown
- Projection OptionsAdjusting the Project
- Projection Image Options
- Selecting Your Projection Image
- 5W Wireless Charger
- Charging your Qi-Enabled Phone
- Phone Compatibility
- Adjustable Charging Coil
- USB Charging Ports
- Earbud Charging
- Accessory Storage
- Smart Watch Stand
- How to attach the Smart Watch Stand
- Cable Organizer
- Search for Sensor
- Lost Connection
- Low Battery
- Sensor Data
- Position Sensor
- Specifications
- Button Cell Battery
- A
- Trademarks & Warning
- Important:
- Caution!
- Recycling & Disposal
- Please Recycle
- Warranty
- Canada Statement
- 5-en-1
- RAPPEL D'ALARME / RETROECLAIRAGE
Brand : LA CROSSE TECHNOLOGY
Model : CA74962
Category : Alarm Clock