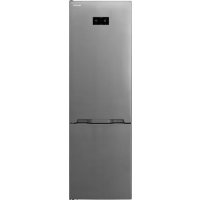
SJFF560EVAEU - Fridge SHARP - Free user manual and instructions
Find the device manual for free SJFF560EVAEU SHARP in PDF.
Download the instructions for your Fridge in PDF format for free! Find your manual SJFF560EVAEU - SHARP and take your electronic device back in hand. On this page are published all the documents necessary for the use of your device. SJFF560EVAEU by SHARP.
USER MANUAL SJFF560EVAEU SHARP
Your fridge freezer conforms to current safety requirements. Inappropriate use can lead to personal injury and damage to property. To avoid the risk of damage read this manual carefully before using your fridge freezer for the rst time. It contains important safety information on the installation, safety, use and maintenance of your Fridge Freezer. Retain this manual for future use. Symbol ISO 7010 W021 Warning; Risk of re / ammable materialsEN -2-
CHAPTER -1: GENERAL WARNINGS
WARNING: Keep the ventilation openings of the Fridge
clear from obstruction.
WARNING: Do not use mechanical devices or other
means to accelerate the defrosting process.
WARNING: Do not use other electrical appliances inside
WARNING: Do not damage the refrigerant circuit.
WARNING: When positioning the appliance, ensure the
supply cord is not trapped or damaged.
WARNING: Do not locate multiple portable socket-outlets
or portable power supplies at the rear of the appliance.
WARNING: To avoid personal injury or damage this
appliance must be installed in accordance with the manufacturer instructions. The small quantity of refrigerant used in this fridge is eco- friendly R600a (an isobutene) and is ammable and explosive if ignited in enclosed conditions.
- While carrying and positioning the fridge, do not damage the cooler gas circuit.
- Do not store any containers with ammable materials, such as spray cans or re extinguisher rell cartridges in the vicinity of the fridge.
- This appliance is intended to be used in household and similar applications such as; - sta kitchen areas in shops, oces and other working environments which can be equated with ordinary household - farm houses and by clients in hotels, motels and other residential type environments which can be equated with ordinary household - bed and breakfast type environments which can be equated with ordinary householdEN -3-
CHAPTER -1: GENERAL WARNINGS
- catering and similar non-retail applications which can be equated with ordinary household
- Your fridge requires a 220-240V, 50Hz mains supply. Do not use any other supply. Before connecting your fridge, ensure that the information on the data plate (voltage and connected load) matches the mains electricity supply. If in doubt, consult a qualied electrician)
- This appliance can be used by children aged from 8 years and above and persons with reduced physical, sensory or mental capabilities or lack of experience and knowledge if they have been given supervision or instruction concerning use of the appliance in a safe way and understand the hazard involved. Children shall not play with the appliance. Cleaning and user maintenance, shall not be made by children without supervision.
- Children aged from 3 to 8 years are allowed to load and unload refrigerating appliances. Children are not expected to perform cleaning or user maintenance of the appliance, very young children (0-3 years old) are not expected to use appliances, young children (3-8 years old) are not expected to use appliances safely unless continuous supervision is given, older children (8-14 years old) and vulnerable people can use appliances safely after they have been given appropriate supervision or instruction concerning use of the appliance. Very vulnerable people are not expected to use appliances safely unless continuous supervision is given.
- A damaged power cord /plug can cause re or give you an electric shock. When damaged it must be replaced, this should only be done by qualied personnel.
- This appliance is not intended for use at altitudes exceeding 2000 m.EN -4- To avoid contamination of food, please respect the following instructions:
- Opening the door for long periods can cause a signicant increase of the temperature in the compartments of the appliance.
- Clean regularly surfaces that can come in contact with food and accessible drainage systems.
- Store raw meat and sh in suitable containers in the refrigerator, so that it is not in contact with or drip onto other food.
- Two-star frozen-food compartments are suitable for storing pre-frozen food, storing or making ice cream and making ice cubes.
- One-, two- and three-star compartments are not suitable for the freezing of fresh food.
- If the refrigerating appliance is left empty for long periods, switch o, defrost, clean, dry, and leave the door open to prevent mould developing within the appliance.
- All packaging and materials used are environmentally friendly and recyclable. Please dispose of any packaging in an environmentally friendly manner. Consult your local council for further details.
- When the appliance is to be scrapped, cut o the electrical supply cable and destroy the plug and cable. Disable the door catch in order to prevent children becoming trapped inside.
- A cut o plug inserted into a 16 amp socket is a serious safety (shock) hazard. Please ensure the cut o plug is disposed of safely. Notes:
- Please read the instruction manual carefully before installing and using your appliance. We are not responsible for the damage occurred due to misuse.
- Follow all instructions on your appliance and instruction manual, and keep this manual in a safe place to resolve the problems that may occur in the future.
- This appliance is produced to be used in homes and it can only be used in domestic environments and for the specied purposes. It is not suitable for commercial or common use. Such use will cause the guarantee of the appliance to be cancelled and our company will not be responsible for the losses to be occurred.
- This appliance is produced to be used in houses and it is only suitable for cooling / storing foods. It is not suitable for commercial or common use and/or for storing substances except for food. Our company is not responsible for the losses to be occurred in the contrary case. During Usage
- Do not connect your fridge freezer to the mains electricity supply using an extension lead.
- Do not use damaged, torn or old plugs.
- Do not pull, bend or damage the cord.
- This appliance is designed for use by adults. Do not allow children to play with the appliance or hang o the door.
- Never touch the power cord/plug with wet hands. This may cause a short circuit or electric shock.
- Do not place glass bottles or cans in the ice-making compartment as they will burst when the contents freeze.
- Do not place explosive or ammable material in your fridge. Place drinks with high alcohol content vertically in the fridge compartment and make sure their tops are tightly closed.
- When removing ice from the ice-making compartment, do not touch it. Ice may cause frost burns and/or cuts.
- Do not touch frozen goods with wet hands. Do not eat ice-cream or ice cubes immediately after they are removed from the ice-making compartment.
- Do not re-freeze thawed frozen food. This may cause health issues such as food poisoning.Old and Out-of- order Fridges
- If your old fridge or freezer has a lock, break or remove the lock before discarding it, because children may get trapped inside it and may cause an accident.
- Old fridges and freezers contain isolation material and refrigerant with CFC. Therefore, take care not to harm environment when you are discarding your old fridges. Disposal of your old appliance The symbol on the product or on its packaging indicates that this product may not be treated as household waste. Instead it shall be handed over to the applicable collection point for the recycling of electrical and electronic equipment. By ensuring this product is disposed of correctly, you will help prevent potential negative consequences for the environment and human health, which could otherwise be caused by inappropriate waste handling of this product. For more detailed information about recycling of this product, please contact your local city oce, your household waste disposal service or the shop where you purchased the product. Installation Information Before unpacking and manoeuvring your fridge freezer please take some time to familiarise yourself with the following points.
- Position away from direct sunlight and away from any heat source such as a radiator.
- Your appliance should be at least 50 cm away from stoves, Gas ovens and heater cores, and should be at least 5 cm away from electrical ovens.
- Do not expose your fridge freezer to moisture or rain.
- Your fridge freezer should be positioned at least 20mm away from another freezer.
- Clearance of at least 150 mm is required at the top of your appliance. Do not place anything on top of your appliance.
- For safe operation it is important that your fridge freezer is safe and balanced. The adjustable feet are used to level your fridge freezer. Make sure that your appliance is level before placing any foodstus inside it.
CHAPTER -1: SAFETY INSTRUCTIONS
For Denmark products: The appliance is equipped with a plug approved in the EU ( EU-Schuko Plug) and can be used in Finland, Norway and Sweden. In Denmark, the appliance is only approved for use with a wall outlet type E or type CEE7 // 7-S with a ground leg. If there is only wall outlet type K at the connection point, Replacing EU-Schuko plug with the Danish plug must be performed by only an authorized service personel. Alternatively, connect a suitable and approved power adapter to transition between Schuko plug and Danish earth system. This adapter (min. 10 amps and up to max. 13 amps) can be ordered via at well assorted whitegoods dealer or authorized electrician. Only with one of these methods it can be ensured that the appliance is the correct safety ground. In the absence of earthing installation, an authorised electrician should carry out an earthing installation. In the case of use without earthing installed, we will not be responsible for any loss of use that may occur.EN -6-
CHAPTER -1: SAFETY INSTRUCTIONS
Before Using your Fridge Freezer
- Before setting up your fridge freezer, check for any visible damage. Do not install or use your fridge freezer if it is damaged
- When using your fridge freezer for the rst time, keep it in an upright position for at least 3 hours before plugging into the mains. This will allow ecient operation and prevents damage to the compressor.
- You may notice a light odour when using your fridge freezer for the rst time. This is perfectly normal and will fade away as the fridge starts to cool. NO FROST technology Diers from many other standard fridge freezers. Other appliances may experience ice in the freezer compartment due to the opening of the doors and humidity caused by the food. In such appliances defrosting is required. They have to be turned o periodically, the food inside moved and the ice removed. Your "no frost" fridge freezer prevents such problems by evenly distributing in the fridge and freezer compartments through the use of a fan. This cools your food evenly and uniformly, preventing humidity and freezing. Blue arrows: Blow cold air Red arrows: Returning hot air
- We recommend that you wipe all shelving and trays with a cloth soaked in warm water mixed with a teaspoon of bicarbonate of soda before use. After cleaning rinse with warm water and dry.
- Install using the plastic distance guides, which can be found at the rear of the appliance. Turn 90 degrees (as shown in the diagram). This will keep the condenser from touching the wall.
- Refrigerator should be placed against a wall with a free distance not exceeding 75 mm. General notes: Fresh Food Compartment (Fridge): Most ecient use of energy is ensured in the conguration with the drawers in the bottom part of the appliance, and shelves evenly distributed, position of door bins does not aect energy consumption. Freezer Compartment (Freezer): Most Ecient use of energy is ensured in the conguration with the drawers and bins are on stock position.EN -7-
CHAPTER -2: YOUR FRIDGE FREEZER
This gure has been drawn for information purposes to show the various parts and accessories in the appliance. Parts may vary according to the model of the appliance. A) Fridge compartment B) Fridge / Freezer compartment B1. Zone-1 / B2. Zone-2
1) Fridge compartment shelves
4) Cheese-Butter shelf covers *
8) Door bottle shelves
- In some models Ice-matic (In some models)
This appliance is not intended to be used as a built-in appliance.EN -8-
CHAPTER -3: USING YOUR FRIDGE FREEZER
Using the Control Panel
1. Fridge compartment temperature indicator
2. Left freezer compartment temperature indicator
3. Right freezer compartment Temperature indicator
The values on the screen indicate the temperature selected by the user. The standby display is protected against faulty contact. You must touch any key on the display before making an action. After 2 seconds, a beep will sound and the display can be used. Wait 20 seconds at the end of the process and the display will return to Standby mode. Operating Your Fridge Freezer Lighting (If available) When the product is plugged in for the rst time, the interior lights may turn on 1 minute late due to opening tests. Beverage Cooling (QDRINK) Press the 'q.drink' button to activate drink cool mode. Each press will increase the time by 5 minutes, up to a maximum of 30 minutes, after which it will return to zero. You can view the time on the "Qdrink alarm timer" section. An alarm will sound when the mode is complete. Important: Drink cool mode should not be confused with cooling. Adjust the time according to the temperature of the bottles before you put them in the zone 1 and/or zone 2 compartments. For example, the time may initially be set for 5 minutes. If your drinks have not cooled suciently after this time, you may set a further 5 or 10 minutes cooling time. While this mode is active, you must check the temperature of the bottles regularly. When the bottles are cool enough, they must be removed from the appliance otherwise they may burst or explode. Economy Mode (eco) Economy mode ensures that your refrigerator operates at the most ecient temperature. To activate 'ECO' mode, press the 'mode' button until the 'eco' symbol and 'e' illuminate. Holiday Mode (H) Holiday mode is represented by a symbol of an umbrella and the sun. If the cooler compartment will not be used for some time, such as during a holiday, activate holiday mode. To activate holiday mode, press the mode button until the holiday mode symbol and 'H' illuminate. Quick-Freezing (SF, SUPER FREEZE) Press the 'zone1' or 'zone2' button until 'SF' shows on the electronic display. If no button is pressed while 'SF' is displayed, a beep will sound to conrm the mode is active. This mode can be used to freeze prepared meals or freeze large amounts of food quickly. Quick-freezing mode will automatically deactivate after 24 hours or once the freezer compartment temperature sensor reaches the correct temperature. For quick-freezing, select the zone 1 compartment. Quick-Cooling (SC, SUPER-COOL) Press the cooler button until 'SC' shows on the electronic display. If no button is pressed while 'SC' is displayed, a beep will sound to conrm the mode is active. You can use this mode to cool prepared meals or large amounts of food quickly. Quick-cooling mode will automatically deactivate after 4 to 6 hours, depending on the ambient temperature, or when the cooler compartment reaches a suciently low temperature. Cooler (COOLER) The cooler mode is used for setting the temperature of the cooler compartment. Press the cooler button to set the temperature to 2, 3, 4, 5, 6, 7 or 8 °C. Freezer / Cooler 1 (ZONE 1) To use the zone 1 compartment as a freezer, press the 'zone1' button to set the temperature of the bottom-left compartment to -16, -17, -18, -19, -20, -21, -22, -23 or -24 °C. To use the bottom-left compartment as a cooler, press and hold the 'zone1' button for 3 seconds. Then, set the temperature to 2, 3, 4, 5, 6, 7 or 8 °C. Freezer (ZONE 2) Press the 'zone2' button to set the temperature of the bottom-left compartment to -16, -17, -18, -19, -20, -21, -22, -23 or -24 °C. Child Lock (Key Symbol) To activate the child lock, press and hold the cooler and 'zone2' buttons simultaneously for 3 seconds. The child lock prevents changes from being made to the settings as the buttons will be deactivated. To deactivate the child lock, press and hold the cooler and 'zone2' buttons simultaneously for 3 seconds. Screensaver (s.saver) This function saves energy by switching the lights on the electronic display panel o. To activate the screensaver, press and hold the 's.saver' button for 3 seconds. To deactivate the screensaver, press and hold the 's.saver' button for 3 seconds. Night Sensor This night sensor function saves energy by switching the lights inside the refrigerator o if there is sucient illuminationEN -10-
CHAPTER -3: USING YOUR FRIDGE FREEZER
in the room. To activate this function, press and hold the mode and 's.saver' buttons for 3 seconds. Demo Mode This mode is reserved for service and is not related to the use of refrigerator. Alarm If an alarm light illuminates, contact an authorised service centre. Press the 's.saver' button to switch the alarm sound o when there is an alarm and an exclamation mark on the display. The exclamation mark will continue to show on the electronic display panel until the error is xed. Compartment On-O Mode To turn o Zone1, Zone2 and the cooler at the same time; Press and hold the [mode] and [cooler] buttons simultaneously for 3 seconds. All gures indicating the part turned o will disappear on the digital indicator panel.
Press and hold the [mode] and [zone 2] buttons simultaneously for 3 seconds. All gures indicating the part turned o will disappear on the digital indicator panel. To turn o the Zone1 compartment; Press and hold the [mode] and [zone 1] buttons simultaneously for 3 seconds. All gures indicating the part turned o will disappear on the digital indicator panel. To reactivate the turned-o compartment, use the same combination of buttons. Using a Freezer Compartment as a Cooler Compartment The bottom left compartment on the appliance can be used either as freezer or as a cooler. Press and hold the [zone 1] button for 3 seconds to change the bottom-left compartment from a freezer to a cooler. IMPORTANT: If the Zone1 compartment is going to be converted from a freezer to a cooler:
- Empty the food from the Zone1 compartment and leave the door closed for four hours. Then food can be placed in the compartment.
- Baskets and/or shelves removed from the compartment should be re-tted. Similarly, in order to utilize any of bottom compartments used as a cooler, as freezers again, press and hold the related compartment button for 3 seconds. IMPORTANT: If the Zone1 compartment is going to be converted from cooler to freezer:
- Empty the food from the Zone1 compartment and leave the door closed for two hours. Then food can be placed in the compartment.
- When the zone 1 compartment is used as a cooler and the appliance is switched to Holiday or Economic setting, the zone 1 compartment will keep on running as cooler. Temperature Adjustment Warnings
- The ambient temperature, temperature of the freshly stored food and how often the door is opened aects the temperature in the refrigerator compartment. If required, change the temperature setting.
- It is not recommended that you operate your fridge in environments colder than 10°C in terms of its eciency.
- Do not start another adjustment while you are already making an adjustment.
- Temperature adjustments should be made according to the frequency of door openings, the quantity of food kept inside the fridge and the ambient temperature in the location of your fridge.
- In order to allow your fridge to reach the operating temperature after being connected to mains, do not open the doors frequently or place large quantities of food in the fridge. Please note that, depending on the ambient temperature, it may take 24 hours for your fridge to reach the operating temperature.
- A 5 minute delay function is applied to prevent damage to the compressor of your fridge when connecting or disconnecting to mains, or when a power cut. Your fridge will begin to operate normally after 5 minutes. Climate class and meaning: T (tropical): This refrigerating appliance is intended to be used at ambient temperatures ranging from 16 °C to 43 °C. ST (subtropical): This refrigerating appliance is intended to be used at ambient temperatures ranging from 16 °C to 38 °C. N (temperate): This refrigerating appliance is intended to be used at ambient temperatures ranging from 16 °C to 32 °C. SN (extended temperate): This refrigerating appliance is intended to be used at ambient temperatures ranging from 10 °C to 32 °C. NOTE: If the ambient temperature is higher than 42 °C, the compartment temperature cannot be set to -23 °C or -24 °C. It can only be set to -16°C, -17°C, -18 °C, -19 °C, -20 °C, -21 °C or -22 °C. Climate Class Ambient Temperature
Temperature indicator In order to help you better set your refrigerator, we have equipped it with a temperature indicator located i n the coldest area. To better store the food in your refrigerator, especially in the coldest area, make sure the message “OK” appears on the temperature indicator. If « OK » does not appear, this means temperature has not been set properly It may be dicult to see the indicator, make sure it is properly lit.Each time the temperature setting device i s changed, wait for the stabilisation of the temperature inside the appliance before proceeding, if necessary, with a new temperature setting. Please change the position of the temperature setting device progressively and wait at least 12 hours before starting a new check and potential change. NOTE: Following repeated openings (or prolonged opening) of the door or after putting fresh food into the appliance, it is normal for the indication “OK” not to appear in the temperature setting indicator. If there is an abnormal build up of ice crystals (bottom wall of the appliance) on the refrigerator compartment, evaporator (overloaded appliance, high room temperature, frequent door openings), put the temperature setting device on a lower position until compressor o periods are obtained again. Store food in the coldest area of the refrigerator. Your foods will be better stored if you put them in the most appropriate cooling area. The coldest area is just above the crisper. The following symbol indicates the coldest area of your refrigerator. To be sure to have a low temperature in this area, make sure the shelf is located at the level of this symbol, as shown in the illustration. The upper limit of the coldest area is indicated by the lower side of the sticker (head of the arrow). The coldest area upper shelf must be at the same level with the arrow head. The coldest area is below this level. As these shelves are removable, make sure they are always at the same level with these zone limits described on the stickers, in order to guarantee temperatures in this area. Use of VacPac Pro
1. The food to be kept is placed on one side embossed vacuum bag.
2. The opening of the vacuum bag should be held tightly from either side as shown in the gure 1 and inserted into
the compartment in the indicator it should be inserted by 5 cm, up to the red strip on the bag.EN -12-
Important Note: To prevent incorrect operation, the key lock must be deactivated. Open the key lock: When the start button is pressed for the rst time, the start and ready LEDs will light up. After this activation process, the start button should be pressed again. The key lock will engage again, if no operation is performed into 2 minutes.
4. When the vacuuming process is complete, a LED will light on the display. The vacuum bag can then be removed
from the compartment. (Figure 3). VacPac Pro Working Process
5. After pressing the button, the mechanism moves up and starts to compress the bag. The ready LED will light.
6. After the bag is compressed, the vacuum process is commenced by the vacuum pump. The vacuum LED will light.
7. When the system reaches its intended vacuum limit, resistance starts to melt the mouth of the bag. The seal LED
8. After the sealing process is complete, the mechanism moves down and the seal done LED will light. As the motor
returns to the rst position, the done LED goes out and the process is complete.
- All lights are turned o for 1 minute after the process is completed, during this time the system cannot be activated.
- When the start and ready lights switch on, the system is ready for use again. Cancelling Process:
- If you require the vacuum process to be canceled (except the sealing stage), press the start button for twoEN -13-
- The Start LED goes o when the process is cancelled. Important Note: Working noise may be heard from the motor and pump during the operation of the system. If engine noise persists for a long time, call for technical service. When vacuuming and locking processes are not complete, this may have been caused by any misuse. Therefore, the recommendations section must be read. If the same error is encountered in successive operations, call technical service. Recommendations to Consider During Use
1. The vacuum bag should denitely be a one sided embossed bag and a maximum of 18 cm wide.
2. It is not appropriate to put too much food in the vacuum bag. Any wrinkles on the mouth of the bag may prevent
3. Sucient space should be left at the open end of the bag, so it can be placed correctly into the compartment.
4. The vacuum bag should be placed up to the red lines. (About 5 cm / 3 nger)
5. The outer surface of the bag should not be wet especially lock part of bag. Otherwise, the sealing process may
not complete correctly.
6. Do not use more than one bag at the same time.
7. The mouth of the bag must be tight during the vacuuming and sealing. There should be also no wrinkles on it.
Otherwise, the sealing process may not complete correctly.
8. Vacuuming time is a maximum of 40 seconds. If the bag is not placed properly into the compartment, the system
will fail because the vacuum process is not complete and the mechanism will be in the starting position.
9. The bag should not have any holes.
10. Do not leave too much air in the bag. Before the bag is placed in the compartment, remove any excess air by
squeezing the surface of the bag as hard as possible. Otherwise the vacuum pump may not vacuum all of the air out of the bag.EN -15-
CHAPTER -3: USING YOUR FRIDGE FREEZER
11. Sharp-edged materials must not be vacuumed. They may pierce the bag while vacuuming and the operation will
not complete. (Fishbone, hard-shelled foods, etc.).
12. If the vacuum bags are to be re-used for food, it can be cut by scissors on the red line (1 cm below the melted
mouth). It must not be re-used for new food, only residue food can be used again. Example of Incorrect Use: Open the mouth of the bag containing salami and then put cheese into the bag is wrong. This usage may result in the mixing of smells between the two foods and deteriorate the cheese. Example of Correct Use: Open the mouth of the bag containing salami and then after consuming, return some of the salami back into the bag. During these operations, the environment and hands should be clean and hygienic.
13. VacPac Pro technology helps maintain the freshness of the food under proper storage conditions. Vacuuming
should be done for the freshest foods possible. Older food and food residues should not be vacuumed.
14. Do not use vacuum bags in the microwave or oven.
15. It is recommended to store granulated foods (semolina, bulgur, our etc.) without vacuuming. If some foods
in granular form are to be vacuumed, it is recommended that they should be covered by paper towels or lter paper.
16. It is recommended that wet-surfaced food such as hamburger patties or pancakes which can possibly stick
together should not be vacuumed without placing greaseproof paper between them.
17. Before vacuuming soup, casserole or succulent foods, they should be frozen in an unbreakable container then
put into the bag. After that they should be stored in a freezer compartment.
18. When it is desired to vacuum the large volume foods and the vacuum process is not completed, it is
recommended to repeat the process by leaving a gap at the bottom and side edges of the bag. Food Storage Recommendations Recommendations to be taken into consideration for the storage of foods after the vacuuming process is nished are stated below.
1. Before vacuum sealing, it’s necessary to clean your hands, and all utensils and surfaces to be used for cutting and
vacuum sealing foods.
2. If perishable foods have been heated, defrosted or unrefrigerated, consume them immediately. Refrigerate or
freeze the perishable foods immediately after you have vacuum-sealed them, and do not leave them sitting at room temperature.
3. Storage of food stored in a vacuum bag or in low oxygen environments (anaerobic environments) over a few hours
outside the refrigerator (in room conditions, etc.) is not recommended for consumption.EN -16-
CHAPTER -3: USING YOUR FRIDGE FREEZER
4. Two dierent food groups should not be vacuumed at the same time in the vacuum bag. Otherwise, there may be
cross contamination between foods.
5. It is advisable to vacuum the water-releasing food after it is frozen.
6. Once produce is vacuumed sealed into a bag, they are suitable for sous vide style cooking.
Vacuum Process Refrigerator Freezer Room Temperature RECOMMENDATIONS MEAT Piece of meat, steak, ground beef, chicken breast, chicken drumstick, etc. Meat products should be stored only in the freezer after vacuuming.
Meat products should not be vacuumed if stored in the refrigerator.
For the meat products, it's recommended to freeze them for two hours before attempting the vacuum process. After freezing, make sure that the meat solidies. It should be conrmed that there is no blood water before vacuuming the meat products. Remove the water on the surface of meat with a paper towel before the vacuum process. SEAFOODS Sardines, shrimp, squid etc. Small sh such as anchovies, sardines and seafoods should be frozen and then vacuumed.
Vacuuming should not be done if sea foods are to be stored in the refrigerator.
Do not vacuum pack objects with sharp edges, such as shbone and hard shells. Sharp-edged objects can cause the bag to rupture and tear. The freezing of the food before the vacuuming will preserve the structure of the food and the water content. GREEN LEAFY VEGETABLES Lettuce, parsley, spinach etc.
Due to the nature of green leafy vegetables, it is recommended to store without vacuuming. In addition, it is recommended to store fresh mushrooms, onions and garlic without vacuuming. OTHER VEGETABLES Peas, broccoli, cauliower, corn, green beans, cabbage etc. Vegetables should only be stored in the freezer after vacuuming.
Vacuuming should not be done if the vegetables are to be stored in refrigerator.
It is recommended to keep the vegetables specied in this section in accordance with the blanching instructions in the Placing The Food section of this user manual. For vegetables, it is recommended to freeze them for two hours before attempting the vacuum process. Once your vegetables have been vacuumed, they should only be stored in the freezer.EN -17-
Vacuum Process Refrigerator Freezer Room Temperature RECOMMENDATIONS FRUITS Apple, lemon, plum, apricot, nectarine etc. Fruits should be stored only in the freezer after vacuuming. Vacuuming should not be done if the vegetables are to be stored in the refrigerator. It is recommended to keep the vegetables specied in this section in accordance with the blanching instructions in the Placing The Food section of this user manual. Vacuuming is recommended after freezing for ~ 2 hours until the vegetables are solidied before vacuuming. Once your fruits have been vacuumed, they should only be stored in the freezer. SOFT FRUITS Strawberry, mulberry, black mulberry, grape etc.
It is recommended to store soft textured fruits without vacuuming. DELICATESSEN PRODUCTS Salami, sausage, fermented sausage, processed meat products etc. You can store your delicatessen products in the refrigerator or freezer by vacuuming. HARD CHEESES Cheddar cheese, parmesan cheese etc. Hard cheeses can be stored in the refrigerator or freezer by vacuuming.
Caution should be taken to ensure that the cheese to be vacuumed does not contain salt. OTHER FOODS 1 Soft cheeses, yogurt, butter, cream, olives, eggs etc.
It is recommended to store these products in the refrigerator without vacuuming. AQUEOUS FOODS 1 Honey, jam, water, drinks, liquid oil etc.
Aqueous food should be stored without vacuuming. Otherwise, liquid may escape into the vacuum mechanism during the vacuuming process. AQUEOUS FOODS 2 Soup, stew, aqueous meals etc. To store liquid food such as soup, casserole or juicy food by vacuuming, you must rst freeze these foods in a unbreakable container and then vacuum them. Store the contents in your freezer. DRIED FOODS Dried fruits, nuts etc. You can store your dried fruits in the refrigerator by vacuuming.
Care should be taken to ensure that there is no dust inside the nuts and dried foods.EN -18-
Vacuum Process Refrigerator Freezer Room Temperature RECOMMENDATIONS PACKAGED FOODS 1 Pulses, frozen foods etc. Pulses can be stored at room temperature by vacuuming. Frozen foods must be stored in the freezer by vacuuming. PACKAGED FOODS 2 Canned foods, sauces, soups etc.
Canned foods, appetizer-like meals, sauces and soups should be stored in the cooler without vacuuming. POWDERY FOODS Flour, sugar, salt, semolina, powder blends, tea, coee, spices etc.
Granulated foods must be stored without vacuuming. OTHER FOODS 2 Confectionery, ravioli, noodles etc. Foods such as confectionery, ravioli and noodles can be stored in the refrigerator or freezer by vacuuming.
Care should be taken to ensure that the food is not granular and / or liquid before vacuuming. Granulated and / or liquid foods should be stored without vacuuming. The vacuuming process can be applied.
Not suitable for vacuuming. Vacuuming is not recommended.
It should be noted. Warning/suggestion. The storage conditions specied in the refrigerator, freezer and room temperature columns must be observed. Foods that need to be stored at room temperature, It is recommended to store at temperatures below 20 °C. Safety Warnings Please consider the following precautions for safe use of vacuum bag technology.
1. Do not vacuum food which contains liquids.
2. Do not use any other bags other than the recommended vacuum bag.
3. Do not insert any other tools into the vacuum device.
4. If the vacuum device malfunctions, call the technical service.
5. Make sure the vacuum bag and your hands are completely dry.
6. Do not use the vacuum device for any purpose other than vacuum.
7. Clean the display with a damp cloth. When cleaning the surface, make sure that no water gets into the vacuum
8. Do not attempt to open the vacuum device with any tool.
9. Do not pull the vacuum bag before vacuuming is completed.
10. Do not let go of the vacuum bag during the vacuum process. Hold the bag until the process is complete.EN -19-
Guidelines for Food Safety Recommendations for food safety are listed below.
1. Chemical reactions in the food to air, temperature, moisture as well as enzyme actions, growth of microorganisms
or contamination from insects will cause food spoilage.
2. One of the reasons for the food to lose its nutritional value and freshness is oxygen in the air. Whilst food is not
protected by moisture-proof packagings, it is possible for air to encourage the growth of many micro-organisms. The rate of growth depends on the internal and external humidication of the food.
3. Clostridium botulinum is one of the species that can grow in an anaerobic environment. Conditions for growth are
foods lacking acid, low oxygen environment.
4. Frozen, dried, high in acid, salt or sugar foods are resistant to botulinum. Non-acidic foods which include meat,
seafood, lye-cured olives, poultry, sh, eggs and mushrooms; low-acid foods which are mostly vegetables; medium-acid foods include overripe tomatoes, onions, chili peppers, gs and cucumbers are prone to being infected by botulinum.
5. Foods most susceptible to botulinum should be refrigerated for short term and frozen for long-term storage, and
consumed immediately after heating.
6. Since the micro-organisms can grow in a low oxygen environment, foods should be stored at low temperatures
7. It is recommended that you store your deli produce and dried fruits in the chiller compartment.
Accessories The Icematic (In some models)
- Pull the lever towards you and remove the ice maker tray
- Fill with water to the marked level
- Hold the left end of the lever and set the ice-tray on the icebox
- When ice cubes have formed, twist the lever to drop the ice cubes into the icebox. Note: Do not ll the icebox with water in order to make ice. It can be broken. The movement of the ice maker may be dicult while the refrigerator is running. In such a case should be cleaned by removing the glass shelves. Vegetable Bowl and Chiller (Breakfast) Zero Degree Zone / Breakfast This compartment can be used as a chill drawer, where food can be kept at 0°C. Frozen food can be kept in this compartment to defrost. Meat and/or clean sh (in plastic bags or packets), which will be consumed within 1 to 2 days, can also be stored here. Water freezes at 0°C, but food containing salt or sugar freezes at colder temperatures. Do not put food to be frozen or iceboxes in this compartment. Chill drawer / Breakfast Crispers Crisper air ow adjustment If the salad crispers are full turn the knob (located between the chiller and the crisper) to the open position. This will increase the air ow and ensure food stays fresher for longer. Crisper air adjustment button Visual and text descriptions on the accessories section may vary according which model you have..EN -21-
CHAPTER -4: FOOD STORAGE GUIDE
Refrigerator Compartment For normal operating conditions, set the temperature of the cooler compartment to +4 or +6
- To reduce humidity and avoid the consequent formation of frost, always store liquids in sealed containers in the refrigerator. Frost tends to concentrate in the coldest parts of the evaporating liquid and, in time, your appliance will require more frequent defrosting.
- Never place warm food in the refrigerator. Warm food should be allowed to cool at room temperature and should be arranged to ensure adequate air circulation in the refrigerator compartment.
- Make sure no items are in direct contact with the rear wall of the appliance as frost will develop and packaging will stick to it. Do not open the refrigerator door frequently.
- We recommend that meat and clean sh are loosely wrapped and stored on the glass shelf just above the vegetable bin where the air is cooler, as this provides the best storage conditions.
- Store loose fruit and vegetable items in the crisper containers.
- Store loose fruit and vegetables in the crisper.
- Storing fruit and vegetables separately helps prevent ethylene-sensitive vegetables (green leaves, broccoli, carrot, etc.) being aected by ethylene-releaser fruits (banana, peach, apricot, g etc.).
- Do not put wet vegetables into the refrigerator.
- Storage time for all food products depends on the initial quality of the food and an uninterrupted refrigeration cycle before refrigerator storage.
- To avoid cross-contamination do not store meat products with fruit and vegetables. Water leaking from meat may contaminate other products in the refrigerator. You should package meat products and clean any leakages on the shelves.
- Do not put food in front of the air ow passage.
- Consume packaged foods before the recommended expiry date.
- For normal working conditions, it will be sucient to adjust the temperature setting of your refrigerator to +4 °C.
- The temperature of the fridge compartment should be in the range of 0-8 °C, fresh foods below 0 °C are iced and rotted, bacterial load increases above 8 °C, and spoils.
- Do not put hot food in the refrigerator immediately, wait for the temperature to pass outside. Hot foods increase the degree of your refrigerator and cause food poisoning and unnecessary spoiling of the food.
- Meat, sh, etc. should be store in the chiller compartment of the food, and the vegetable compartment is preferred for vegetables. (if available)
- To prevent cross contamination, meat products and fruit vegetables are not stored together.
- Foods should be placed in the refrigerator in closed containers or covered to prevent moisture and odors. Freezer Compartment For normal operating conditions, set the temperature of the freezer compartment to -18 or -20
- The freezer compartment is used for freezing fresh food, for storing frozen food, and for making ice cubes.
- If the freezer door has been left open for a long time or not closed properly, frost will form and can prevent ecient air circulation. To resolve this, unplug the freezer and wait for it to defrost. Clean the freezer once it has fully defrosted.
- Remove baskets, covers, and so on, to increase the storage volume of freezer.
- The freezer volume stated on the label is the volume without baskets, covers, and so on. Cleaning
- Beforecleaningyourfridgefreezer,turnyourmainssupplyoandremovetheplugfromthesocket.
- Do not wash your fridge freezer by pouring water on to it.
- Use a warm, soapy cloth or sponge to wipe the interior and exterior of your fridge freezer.
- Carefully remove all shelves and drawers by sliding upwards or outwards and clean with soapy water. Do not wash in a washing machine or dishwasher.
- Do not use solvents, abrasive cleaners, glass cleaners or all purpose cleaning agents to clean your fridge freezer. This may cause damage to the plastic surfaces and other components with the chemicals they contain.
- Clean the condenser at the back of your fridge freezer at least once a year with a soft brush or vacuum cleaner. Makesurethatyourfridgeisunpluggedwhilecleaning. Cleaning evaporation bowl Your fridge defrosts automatically. Water produced by defrosting ows to the evaporating container passing through the water collecting groove, and vaporizes here by itself. Replacing LED Lighting If your fridge freezer has LED lighting contact the Sharp help desk as this should be changed by authorized personnel only. CHAPTER -3: USING YOUR FRIDGE FREEZEREN -22- IMPORTANT
- Do not refreeze thawed food. It may pose a danger to your health and cause problems such as food poisoning.
- Do not put warm food in the deep freeze compartment until it has completely cooled. It will thaw already frozen food, which may then rot.
- When purchasing frozen food, make sure it has been stored under appropriate conditions and the packaging is not damaged.
- Do not purchase frozen food if the packaging shows signs of humidity or if it has a foul odour. The food may not have been stored correctly and may have gone rotten.
- The storage life of frozen food depends on the room temperature, the thermostat setting, how often the door is opened, the type of food, and the length of time required to transport the product from the shop to your freezer. Always follow the instructions printed on the packaging and never exceed the maximum storage life indicated. Remove frozen food from the freezer the day before consumption, and put in the bottom compartment of the refrigerator. This helps reduce the temperature in the refrigerator, which in turn saves energy. If the frozen food defrosts in an open area, energy loss will occur.
Errors Your fridge will warn you if the temperatures for the cooler and freezer are at improper levels or if a problem occurs with the appliance. Warning codes are displayed in the freezer and cooler indicators. ERROR TYPE MEANING WHY WHAT TO DO and audible warning "Failure" Warning There is/are some part(s) out of order or there is a failure in the cooling process. Call a service agent for assistance as soon as possible.
Freezer compartment is not cold enough This warning especially appears if there has been a power failure for a long period or when the refrigerator is operated for the rst time.
1. Use food within a short time
period. Do not freeze foods that has thawed.
2. Set the freezer temperature to
colder values or set the Super Freeze until the compartment gets to normal temperature.
3. Do not put fresh food in the
appliance until the fault has cleared. Refrigerator compartment is not cold enough This warning especially appears if there has been a power failure for a long period or when the refrigerator is operated for the rst time. Ideal temperature for the refrigerator compartment is +4
If you see this warning, your foods are at risk of spoiling.
1. Set the refrigerator temperature
to colder values or set the Super Cooling mode until the compartment reaches normal temperature.
2. Open the door as little as
possible until the fault clears. Refrigerator compartment too cold The food will start to freeze because the temperature is too cold.
1. Check if the Super Cooling
mode is switched on.
2. Decrease the refrigerator
temperature values. "Low voltage" Warning This is seen when the power supply becomes lower than 170 V. This not a failure. This prevents any damage to the compressor. This warning will clear after the voltage reaches the required level.EN -23- If you are experiencing a problem with your refrigerator, please check the following before contacting the after-sales service. Your refrigerator does not operate Check if:
- Your fridge is plugged in and switched on
- Is the temperature adjustment right?
- The socket is faulty. To check this, plug another working appliance into the same socket. Your refrigerator is performing poorly Check if:
- The appliance is overloaded
- The doors are closed properly
- There is any dust on the condenser
- There is an adequate distance between the appliance and surrounding walls If your fridge is operating too loudly; To maintain the set cooling level, the compressor may be activated from time to time. Noises from your fridge at this time are normal and due to its function. When the required cooling level is reached, noises will decrease automatically. If the noises persist;
- Is your appliance stable? Are the legs adjusted?
- Is there anything behind your fridge?
- Are the shelves or dishes on the shelves vibrating? Re-place the shelves and/or dishes if this is the case.
- Are items placed on your fridge vibrating? Your refrigerator is operating noisily The following noises can be heard during normal operation of the appliance. Cracking (Ice cracking) Noise:
- During automatic defrosting.
- When the appliance is cooled or warmed (due to expansion of appliance material). Short cracking: Heard when the thermostat switches the compressor on/o. Compressor noise (Normal motor noise): This noise means that the compressor operates normally. The compressor may cause more noise for a short time when it is activated. Bubbling noise and splash: This noise is caused by the ow of the refrigerant in the tubes of the system. Water ow noise: Normal ow noise of water owing to the evaporation container during defrosting. This noise can be heard during defrosting. Air Blowing Noise (Normal fan noise): This noise can be heard in a No-Frost fridge during normal operation of the system due to the circulation of air. There is a build-up of humidity inside the fridge Check if:
- All food is packed properly. Containers must be dry before being placed in the fridge.
- The fridge doors are opened frequently. Humidity of the room will enter the fridge each time the doors are opened. Humidity increases faster if the doors are opened frequently, especially if the humidity of the room is high.
- There is a build-up of water droplets on the rear wall. This is normal after automatic defrosting (in Static Models). The doors are not opening or closing properly Check if:
- There is food or packaging preventing the door from closing
- The door compartments, shelves and drawers are placed properly
- The door gaskets are broken or torn
- Your fridge is level. If the edges of fridge cabinet that the door joint contact are warm; Especially in summer (hot weather), the surfaces that the joint contact may get warmer during the operation of the compressor, this is normal. IMPORTANT NOTES:
- The compressor protection thermal fuse will cut out after sudden power breakdowns or after unplugging the appliance, because the gas in the cooling system is not stabilised. This is quite normal, and the fridge will restart after 4 or 5 minutes.
- The cooling unit of your refrigerator is hidden in the rear wall. Therefore, water droplets or ice may occur on the rear surface of your fridge due to the operation of the compressor in specied intervals. This is normal. There is no need to perform a defrosting operation unless the ice is excessive.
- If you will not use your fridge for a long time (e.g. in summer holidays) unplug it. Clean your fridge according to
1. Always allow foodstus to cool before storing in the appliance.
2. Thaw food in the fridge compartment, this helps save energy.
Part 4 and leave the door open to prevent humidity and smell.
- The appliance you have purchased is designed for home type use and can be used only at home and for the stated purposes. It is not suitable for commercial or common use. if the consumer uses the appliance in a way that does not comply with these features, we emphasise that the producer and the dealer shall not be responsible for any repair and failure within the guarantee period.
- If the problem persists after you have followed all the instructions above, please consult an authorised service provider.
The technical information is situated in the rating plate on the internal side of the appliance and on the energy label. The QR code on the energy label supplied with the appliance provides a web link to the information related to the performance of the appliance in the EU EPREL database. Keep the energy label for reference together with the user manual and all other documents provided with this appliance. It is also possible to nd the same information in EPREL using the link https://eprel.ec.europa.eu and the model name and product number that you nd on the rating plate of the appliance. See the link www.theenergylabel.eu for detailed information about the energy label. Always use original spare parts. When contacting our Authorised Service Centre, ensure that you have the following data available: Model, Serial Number and Service Index. The information can be found on the rating plate. You can nd the rating label inside the fridge zone on the left lower side. The original spare parts for some specic components are available for a minimum of 7 or 10 years, based on the type of component, from the placing on the market of the last unit of the model. Visit our website to: www.sharphomeappliances.comDE -25- Inhalt