LCD4015A - TV CURTIS - Free user manual and instructions
Find the device manual for free LCD4015A CURTIS in PDF.
Document temporarily unavailable
The manual is currently being transferred to our new server. It will be accessible again in a few hours. Thank you for your patience.
| Product Type | LCD TV |
| Brand | CURTIS |
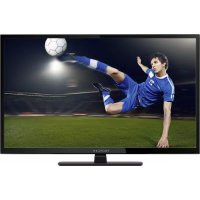
| Model | LCD4015A |
| Screen Size | 40 inches (101.6 cm) |
| Display Resolution | 1920 x 1080 pixels (Full HD) |
| Power Supply | AC 100-240 V, 50/60 Hz |
| Power Consumption | Operation: ≤ 250 W; Standby: ≤ 1 W |
| Audio Power | 7 W + 7 W (2 channels) |
| Connectivity | 3 HDMI inputs, 1 VGA input, 2 YPbPr inputs, 2 AV (composite) inputs, 1 S-Video input, 1 RF (75 ohm antenna) input, PC audio input |
| Main Features | Remote control, multilingual OSD menu (French, English, Spanish), sleep timer, parental control, closed captioning (CC), automatic channel search, favorites list |
| Picture Modes | Standard, Dynamic, Soft, Personal |
| Audio Modes | Standard, Music, Movie, Personal |
| Picture Formats | 4:3, 16:9, Zoom, Cinema |
| Safety Instructions | Do not expose to moisture, do not open the cabinet, unplug before cleaning, use a grounded outlet |
| Care and Cleaning | Clean the screen with a soft cloth dampened with warm water; do not use abrasive products |
| Operating Temperature | 5°C to 35°C |
| Included Accessories | Remote control, AAA batteries (2), power cord, user manual |
Frequently Asked Questions - LCD4015A CURTIS
User questions about LCD4015A CURTIS
0 question about this device. Answer the ones you know or ask your own.
Ask a new question about this device
Download the instructions for your TV in PDF format for free! Find your manual LCD4015A - CURTIS and take your electronic device back in hand. On this page are published all the documents necessary for the use of your device. LCD4015A by CURTIS.