
Morning CM2M13 - Coffee maker TEFAL - Free user manual and instructions
Find the device manual for free Morning CM2M13 TEFAL in PDF.
| Product type | Drip coffee maker |
| Brand | Tefal |
| Model | Morning CM2M13 |
| Carafe capacity | 4 to 10 cups |
| Mug capacity | Up to 320 ml water (280 ml coffee) |
| Filter type | Permanent filter |
| Functions | Brewing/drip-stop, Mug, Carafe, Auto shut-off after 30 min |
| Keep warm | Yes, up to 30 minutes after the end of the cycle |
| Power supply | 220-240 V, 50-60 Hz |
| Power | Not specified |
| Dimensions | Not specified |
| Weight | Not specified |
| Care and cleaning | Clean with a damp cloth; do not immerse; do not put filters in dishwasher; descale every 40 cycles |
| Safety | Auto shut-off, hot surface, power cord, do not use if damaged |
| Warranty | Warranty excludes descaling defects |
Frequently Asked Questions - Morning CM2M13 TEFAL
User questions about Morning CM2M13 TEFAL
0 question about this device. Answer the ones you know or ask your own.
Ask a new question about this device
Download the instructions for your Coffee maker in PDF format for free! Find your manual Morning CM2M13 - TEFAL and take your electronic device back in hand. On this page are published all the documents necessary for the use of your device. Morning CM2M13 by TEFAL.
USER MANUAL Morning CM2M13 TEFAL
natural_image
Line drawing of a coffee maker with a handle and control panel (no text or symbols)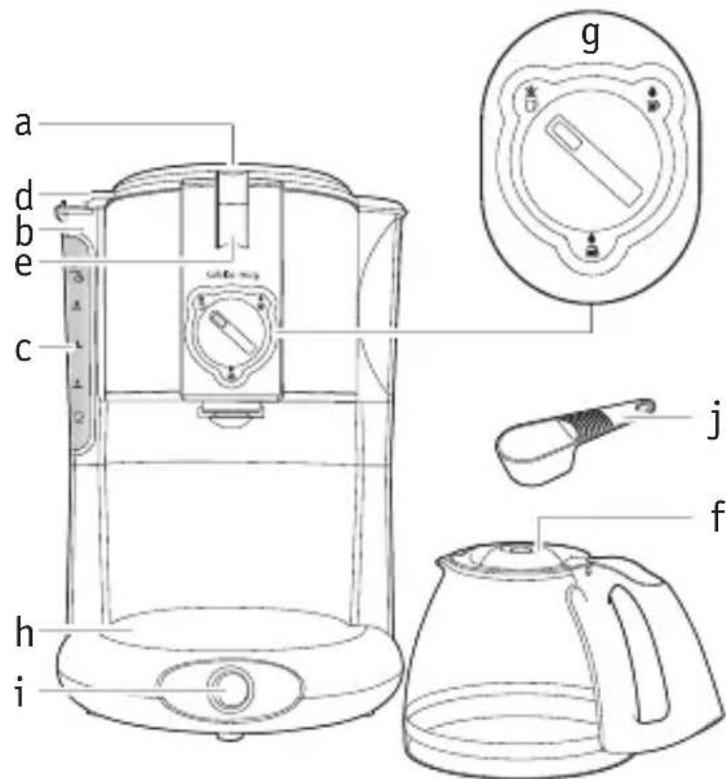
a. Couvercle - Cover - Deksel - Deckel - Coperchio - Kapak - Pokrywa - Kaas - Väks - Dangtelis - Poklopac - Kapak - Poklopac - Capac - Poklopac - Pokrov
b. Réservoir d'eau - Water tank - Waterreservoir - Wassertank - Serbatoio dell'acqua - Su haznesi - Zbiornik na wode - Vee mahuti - Üdens tvertne - Vandens indas - Rezervoar vode - Pezerboar za voda - Spremnik vode - Rezervor de apă - Rezervoar za vodu - Posoda za vodo
c. Graduation du niveau d'eau - Water level scale - Aanduiding van waterniveau - Wasserstandsskala - Indicatore del livello dell'acqua - Su seviyesi göstergesi - Wyskalowany wskaźnik poziomu wody - Veetaseme skaala - Udens limeną iedałas - Vandens lygio żymėjimas - Pokazatelj nivoa vode - Индикатор за ниво на водата - Pokazatelj razine vode - Gradația nivelului de apă - Pokazatelj nivoa vode - Merilec nivoja vode
d. Porte-filtre amovible - Removable filter basket - Uitneembare filterhouder - Abnehmbarer Filterhalter - Porta-filtro removibile - Takilip çıkarılabilir filtre taşıyıcı - Wyjmowany uchwyt na filtr - Eemaldatav filtrihoidik - Nonemams filtra turētājs - Nuimamas filtro laikiklis - Odvojivi držač filtera - Подвижен филтърен носач - Odvojivi držač filtra - Suport de filtru detaşabil - Demontažni držač filtera - Neodstranljiva posoda za filter
e. Filtre permanent (réutilisable) - Permanent filter (reusable) - Permanente filter (herbruikbaar) - Permanentfilter (wiederverwendbar) - Filtro permanente (riutilizzabile) - Kalici filtre (yeniden kullanilanilir) - Filtr niewymienny (wielokrotnego użytku) - Püsifilter (korduvkasutatav) - Pastāvīgs filtrs (atkārtoti lietojams) - Nekeičiamas filtras (daugkartinio naudojimo) - Trajni filter (višekratni) - Несменяем филтър (за многократна употреба) - Trajni filtar (višekratni) - Filtru permanent (reutilizabil) - Stalni filter (koji se može ponovo koristiti) - Filter za večkratno uporabo
f. Verseuse - Coffee pot - Koffiekan - Kanne - Caraffa - Sürahi - Dzbanek - Kann - Mérkrüze - Kavos indas - Vrč - Kana - Vrč - Carafã - Bokal - Posoda za kavo
g. Sélecteur central 3 positions « Verseuse / Mug / Infusion ou stop-goutte Mug » - 3-position central selector (Coffee Pot / Mug / Infusion or Drip-Stop Mug) - Centrale regelaar met 3 standen "Koffiekan / Mok / Aftreksel of Druppelstop bij mok" - Hauptschalter mit 3 Einstellungen „Kanne/Becher/Aufbrühen oder Becher-Tropf-Stopp" - Selettore centrale 3 posizioni "Caraffa / Tazza / Infusione o Tazza salva-goccia" - 3 konumlu seçici düğme « Sūrahi / Bardak / Süzgeçli veya damlatmaz bardak » - Centralny 3-pozycjny przełącznik wyboru „Dzbanek/Kubek/Parženie do kubka z blokadą kapania" - 3-asendiline valikunupp (kann / kruus / tömbamine ja tilgapüüdjaga kruusi jaoks) - Galvenā izvělne, 3 pozicijas "Mērkrūze / Krūze / Krūze-apliešana vai pilienu apturēšana" - 3 paděčių jungiklis: „Kavos indas / Puodelis / Užplikymas ar lašejimo sustabdymas su funkcija „Puodelis" - Izaberite centralna 3 položaja « Vrč / šoljica / sipanje i funkcija 'zaustavljanje kapljica' u šoljicu » - Централен ключ с 3 позиции "Kana / Голяма чаша / Приготвяне или спиране на капенето в голямата чаша" - Odabirnik 3 središnja položaja „posuda/točenje ili zaustavljanje kapanja posude" - Selector central 3 poziții « Carafă / Cană / Cană infuzie sau antipicurare » - Izaberite centralna 3 položaja « Bokal / šolja / sipanje i funkcija 'zaustavljanje kapljica' u šolju » - Glavni gumb za izbiro treh možnosti « Posoda za kavo / Lonček / Lonček za mešanico ali preprečevanje kapljanja»
h. Plaque chauffante - Heating plate - Warmhoudplaat - Warmhalteplatte - Piastra riscaldante - Mutfak ocağı - Phyta grzewcza - Kuumutusplaat - Sildoša virsma - Sildytuvas - Grijača ploča - Hargряваща плоча - Grijača ploča - Suport de încălzire - Grejna ploča - Grelna plošča
i. Bouton Marche/arrêt -On/Off button - Aan/uit knop -Ein-/Aus-Taste - Pulsante Avvio/Arresto - Botón de encendido/apagado - Açma / kapama düğmesi - Przycisk Wł./Wyt. - Sisse-/väljalülitamise nupp - leslëgšanas/izslëgšanas poga - Jjungimo / išjungimo mygtukas - Gumb za uklj/isklj - Бутон за включване/изключване - Gumb za uključivanje/isključivanje - Buton de pornire/oprire - Taster On/Off - Gumb Zagon / Ustavi
j. Cuillère doseuse - Measuring spoon - Maatlepel - Messlöffel - Cucchiaio dosatore - Ölçü kaşığı - Łyżeczka-miarka - Doseerimislusikas - Mërkarote - Dozavimo šaukštelis - Mjerna žlica - Дозираща лъжица - Mjerna žlica - Lingură dozatoare - Merna kašika - Žlička za
2 odmerjanje
natural_image
Line drawing of a hand using a coffee maker to press a mug, enclosed in a circle (no text or symbols)123
456
natural_image
Simple line drawing of a mug inside a circular frame with a handle and scroll (no text or symbols)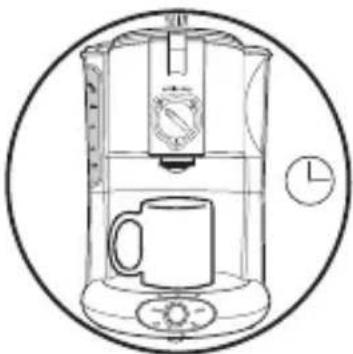
natural_image
Line drawing of a coffee maker with a mug and side table, enclosed in a circular frame (no text or symbols)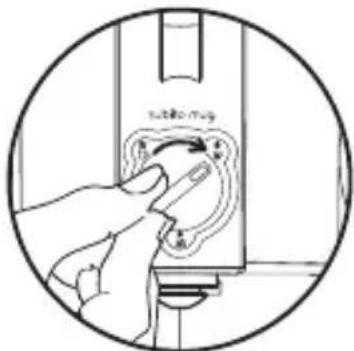
789
natural_image
Line drawing of a coffee maker with a mug and coffee cup, showing a clock and directional arrow (no text or symbols)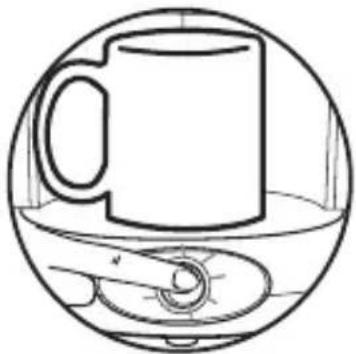
natural_image
Simple line drawing of a mug inside a circular frame with a handle and ring (no text or symbols)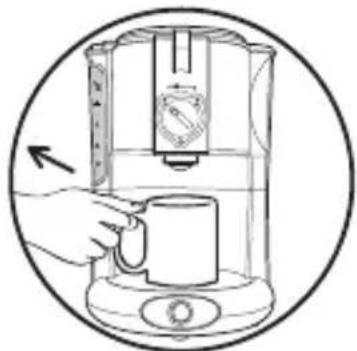
natural_image
Line drawing of a hand pouring liquid into a coffee maker using a stand mixer (no text or symbols)10
natural_image
Line drawing of a coffee maker with a hand operating it, showing no text or symbols123
natural_image
Illustration of a coffee maker with a hand operating the top panel, showing no text or symbols on the device itself.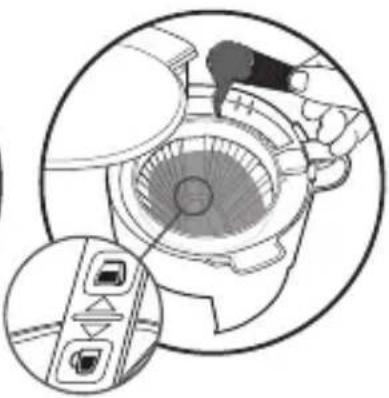
natural_image
Diagram of a car interior with hand operating controls and a close-up of the dashboard (no text or symbols)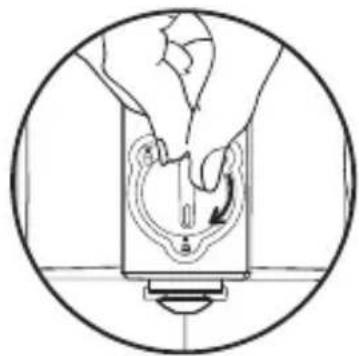
natural_image
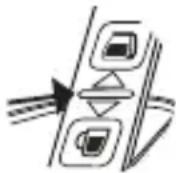
Diagram of hands performing a mechanical or electrical operation with a valve and rotating button (no text or symbols)456
natural_image
Technical line drawing of a mechanical component with no visible text or symbols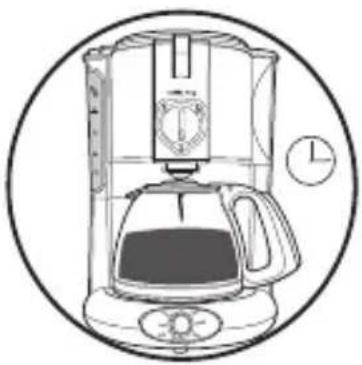
natural_image
Line drawing of a coffee maker with a digital clock, enclosed in a circular frame (no text or symbols)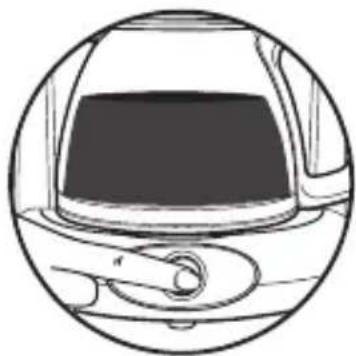
natural_image
Line drawing of a car interior showing dashboard and steering wheel (no text or symbols)7

natural_image
Line drawing of a coffee maker with a hand pressing a cup, showing liquid level (no text or symbols)8
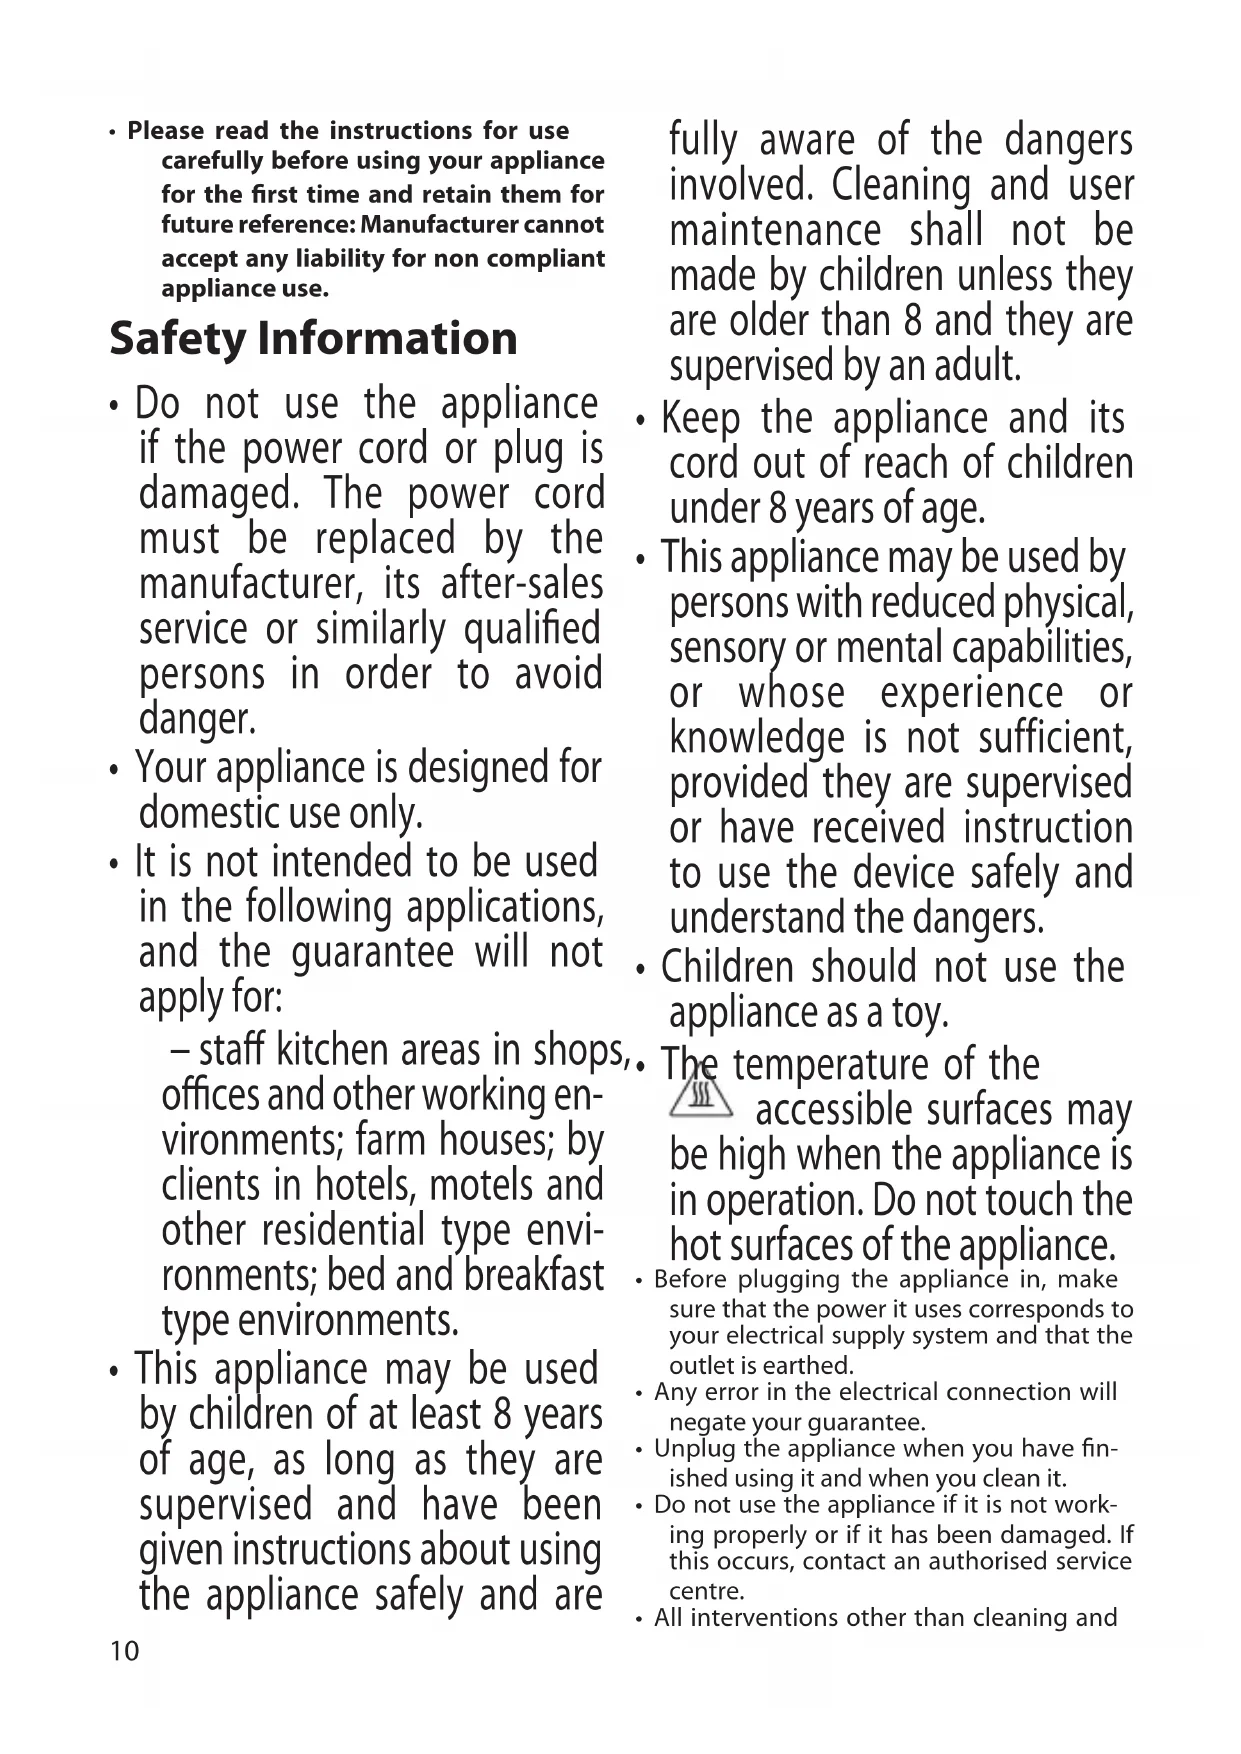
- Please read the instructions for use carefully before using your appliance for the first time and retain them for future reference: Manufacturer cannot accept any liability for non compliant appliance use.
Safety Information
- Do not use the appliance if the power cord or plug is damaged. The power cord must be replaced by the manufacturer, its after-sales service or similarly qualified persons in order to avoid danger.
- Your appliance is designed for domestic use only.
- It is not intended to be used in the following applications, and the guarantee will not apply for:
- staff kitchen areas in shops, offices and other working environments; farm houses; by clients in hotels, motels and other residential type environments; bed and breakfast type environments.
- This appliance may be used by children of at least 8 years of age, as long as they are supervised and have been given instructions about using the appliance safely and are
fully aware of the dangers involved. Cleaning and user maintenance shall not be made by children unless they are older than 8 and they are supervised by an adult.
- Keep the appliance and its cord out of reach of children under 8 years of age.
- This appliance may be used by persons with reduced physical, sensory or mental capabilities, or whose experience or knowledge is not sufficient, provided they are supervised or have received instruction to use the device safely and understand the dangers.
• Children should not use the appliance as a toy.
- The temperature of the accessible surfaces may be high when the appliance is in operation. Do not touch the hot surfaces of the appliance.
- Before plugging the appliance in, make sure that the power it uses corresponds to your electrical supply system and that the outlet is earthed.
- Any error in the electrical connection will negate your guarantee.
- Unplug the appliance when you have finished using it and when you clean it.
- Do not use the appliance if it is not working properly or if it has been damaged. If this occurs, contact an authorised service centre.
- All interventions other than cleaning and
everyday maintenance by the customer must be performed by an authorised service centre.
- The power cord must never be close to or in contact with the hot parts of your appliance, near a source of heat or over a sharp edge.
- For your safety, only use the manufacturer's accessories and spare parts designed for your appliance.
- Do not pull on the cord to unplug the appliance.
- Never put your coffee jug in a microwave oven, on a flame or a electric cooking plates.
- Do not fill the appliance with water if it is still hot.
- All appliances are subject to strict quality control procedures. These include actual usage tests on randomly selected appliances, which would explain any traces of use.
• Always close the lid when running the coffee maker. - Do not use the jug without the lid.
- Do not pour hot water in the tanks.
- Do not immerse the appliance, power cord or plug in water or any other liquid.
- Place the appliance on a flat, stable, heat resistant surface away from water splashes and any other sources of heat.
SELECTOR DESCRIPTION
| Position | Description Use | |
 | Coffee pot | Use to prepare 4 to 10 cups of coffee |
 | Infusion or Drip-Stop Mug | This function is ideal for good infusion of your coffee when using a mug: after having prepared the water and coffee for a mug, set the selector to this position, turn on your machine and then set the selector to 'Mug' when there is no water left in the water tank. This function also enables users to stop the flow of drips on the heating plate when using a mug. |
 | Mug | This position enables the flow of infused coffee into your mug. Set the selector to this position after having used the Infusion function. |
FIRST USE
- Before using your coffee maker for the first time, run it without coffee using the equivalent of a coffee pot of water to rinse it.
- Plug the appliance into the mains socket outlet.
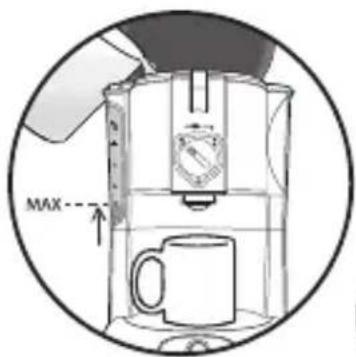
- Fill the water tank with cold water without exceeding the maximum level indicated.
- Place the coffee pot on the heating plate correctly.
- Put the selector in the position.
- Start the cycle by pushing the On button ⏻. The indicator light turns on.
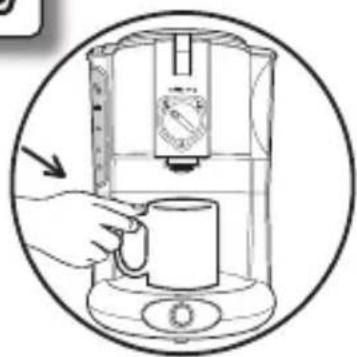
PREPARING COFFEE FOR A MUG
WARNING: Only use ground coffee (pods are not compatible)
This coffee maker is equipped with a specially designed system for the 'Mug' function, which enables users to infuse coffee in the filter basket before pouring it into your mug, for improved aroma.
Follow the "Mug" instructions 1 to 10.
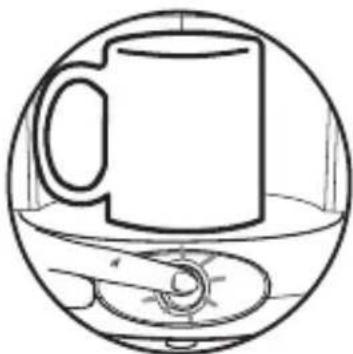
- Place your mug in the centre of the heating plate.
- Refill the water tank with cold water to the 320 ml maximum, or the □mark on the water level.
Note: Taking into account evaporation and water absorption during preparation, using 320 ml of water results in 280 ml of brewed coffee.
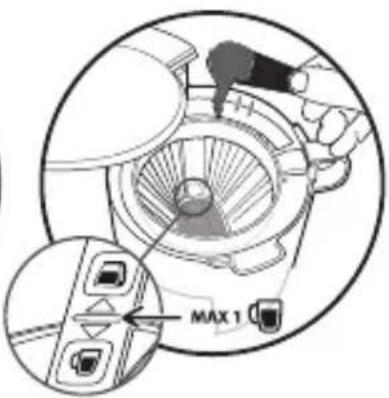
- Open the filter basket compartment to access the permanent filter and refill the ground coffee.
• Quantity: The recommended quantity of ground coffee required to make 280ml of prepared coffee using 320ml of water is indicated by a mark on the inside of the filter basket using 1 - 2 level spoons of ground coffee (using the measuring spoon provided).
- Adapt the quantity of coffee based on the capacity of your mug.
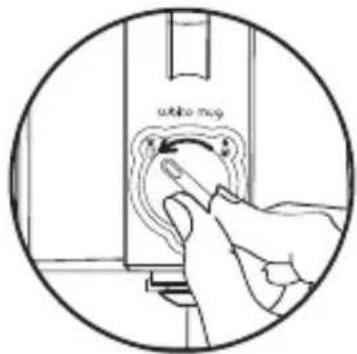
- Turn the selector to the Infusion function.
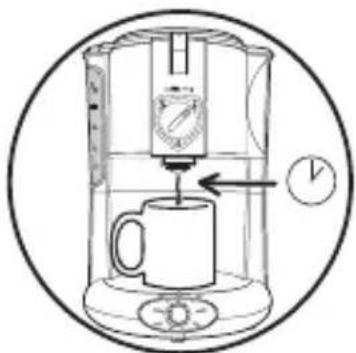
- Press the 'On' button to start the cycle and wait until there is no longer any water in the water tank.
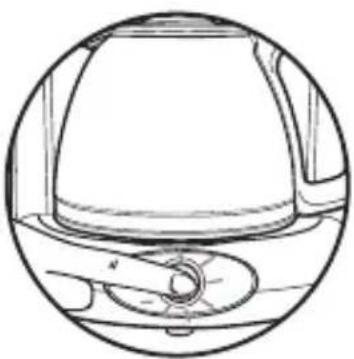
- Turn the selector to the position: your infused coffee flows into your mug.
- Turn off your coffee maker by pressing the 'Stop' button and remove your mug to drink your coffee.
To ensure optimal use of your machine and its functions, we recommend that you return the selector to before turning it off and removing your mug: you then use the 'Drip-Stop' function, which enables you to cleanly remove the mug without having remaining coffee dripping on the heating plate.
WARNING: The Drip-Stop or Mug functions do not turn off your coffee maker. This will remain in operation for about 30
minutes after there is no longer any water in the water tank before turning itself off automatically. For these 30 minutes, the heating plate is on and at a high temperature.
The drip-stop function should not be used as a "Pause" or "OFF" function.
You can turn off your coffee maker at any time by pressing the On/Off button 🔊
Do not forget to reposition the selector to the "Mug" or "Coffee pot" function for the next time you brew coffee to avoid any spills.
- Wait several minutes after the machine stops before brewing more coffee.
Recommendation
For breakfast, you can even replace the large cup or mug with a French coffee bowl!
Important
- It is normal for there to be a small amount of coffee grounds in your cup. This is due to using a permanent filter.
WARNING: Make sure to use a cup or mug large enough to contain the quantity of coffee expected when using the Mug function, which is 280 ml of coffee.
- If the cup or mug is too small, there is a risk of the hot coffee overflowing and causing burns.
- In case of overflow, turn the coffee maker off by pressing the Off button and wait for the appliance to cool completely before removing your mug and cleaning the machine.
- For a cup or mug that holds less than 280 ml of coffee, we recommend that you fill the water tank with the quantity of water that corresponds to the size of the cup or mug selected.
WARNING: During use of the Infusion/Drip-Stop and Mug functions, the heating plate is on and at high temperature. Make sure to use a large cup or mug made out of materials able to withstand the temperature in order to:
- Avoid burns from conduction when picking up your mug.
- Avoid melting your mug.
Do not use products sensitive to heat, such as any materials made of plastic, cardboard, polystyrene, etc.
PREPARING COFFEE WITH THE COFFEE POT
Follow the "Coffee pot" instructions 1 to 8.
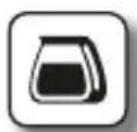
- Place the coffee pot with its lid on the heating plate.
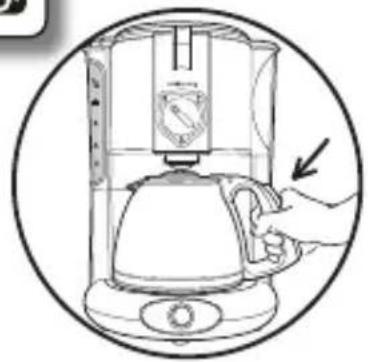
- Refill the water tank with cold water based on the number of cups desired using the gradations on the side.
- Pay attention to the maximum water level indicated on the water tank.
- Open the filter basket compartment to access the permanent filter and refill the ground coffee.
- Quantity: One level spoon (using the measuring spoon provided) of ground coffee per large cup.
- Turn the selector to the position.
- Press the "On" button to start the cycle.
- This coffee maker is equipped with a drip-stop system enabling you to serve coffee from the coffee pot before the end of the cycle. Once you have poured your coffee, replace the coffee pot quickly to avoid any spills.
- Wait several minutes after the machine stops before brewing more coffee.
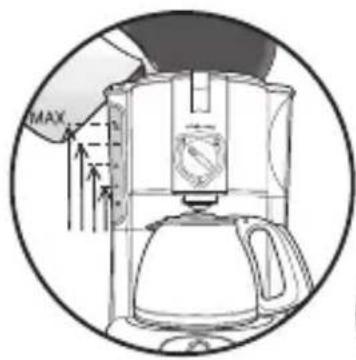
AUTOMATIC OFF
- To save energy, your coffee maker will turn itself off automatically about 30 minutes after the end of the coffee brewing cycle (more precisely, about 30 minutes after there is no more water in the water tank). The indicator light for the on/off button turns off. Over this 30-minute period, your coffee is kept warm and at the proper temperature, whether in the 'Coffee Pot' or 'Mug' or 'Infusion/Drip-Stop' function.
IMPORTANT: When keeping warm, the heating plate is on and at a high temperature.
CLEANING
WARNING:
Do not forget to let the rest of the coffee in the filter basket flow out before removing the grounds.
- Unplug the appliance and let it cool completely.
- To drain the used grounds, remove the filter basket and/or permanent filter from the coffee maker.
- Do not clean the appliance when it is hot.
- Clean it with a damp cloth.
- Empty and rinse the filter basket and the permanent filter with water after each use.
- Never immerse the appliance, its power cord, or its socket in water or any other liquid.
- Do not put the filter basket or permanent filter in the dishwasher.
DESCALING
- Descale your coffee maker about every 40 cycles.
You can use:
– either a descaling packet diluted in 2 large cups of water.
– or 2 large cups of white vinegar.
- Pour in water tank (b). Put the selector in the coffee pot 🔒 position and turn on the coffee maker (without coffee) by pressing ⏻.
- Let the equivalent of one cup pour into the coffee pot (f), then turn the coffee maker off.
- Leave the solution to work for one hour.
- Turn the coffee maker on to finish draining it.
- Run the coffee maker 2 or 3 times using the equivalent of a coffee pot of water to rinse it.
The guarantee excludes coffee makers that do not work or work poorly due to lack of descaling.
Note: when the coffee cycle gets longer or more noisy, it's time to think of descaling.
TROUBLESHOOTING
| Questions Likely causes Corrective actions | ||
| I cannot start a new brew cycle with my coffee pot | The central selector is still in "position | Return the selector to the position quickly to avoid any spills. Or, turn off the appliance by pressing the button. |
| The appliance has not cooled off yet. | You need to wait about 10 minutes between brews to let the appliance cool. | |
| I have turned off my coffee maker, but there is still water in the filter basket. | Your selector is still in the drip-stop "position or the coffee pot has not been replaced. | Place the coffee pot or a container on the heating plate and move the selector to the for position so that water can finish draining from the rest of the filter basket. |
| I have coffee grounds in my mug | This is due to using a permanent filter |
Help protect the environment!
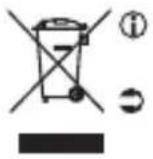
Your machine contains many recoverable or recyclable materials.
Take these to a collection centre, or to an approved service centre for processing.
- European Directive 2012/19/EU on Waste from Electrical and Electronic Equipment (WEEE), mandates that used household appliances are not to be discarded in the regular municipal waste stream. Used appliances must be collected separately to optimize the recovery and recycling rate for the materials which compose them and to reduce the impact on human health and the environment.
Brand : TEFAL
Model : Morning CM2M13
Category : Coffee maker