USER MANUAL HOELTAB4124 HIGH ONE
Thank you for choosing this HIGHONE product. HIGHONE products are chosen, tested, and recommended by ELECTRO DEPOT, so you can be sure you are getting a top-quality, easy-to-use product that won't let you down. We're confident your new device will be a pleasure to use every day!
Welcome to ELECTRO DEPOT.
Table of Contents

Product overview
Parts
Product overview
Intended use
Specifications

Product usage
Before first use
Assembly
Operation
Safety feature

Cleaning and maintenance
Cleaning and maintenance
Storage
A Product overview
Parts
A Grill rack
Circuit box Power cable (underneath, not shown)
Thermostat knob
Heating indicator light
Heating elements (built-in)
Water tray
D Base
Low rack/high rack position guides
A Product overview
Product overview
- Unpack and remove all labels from the unit except the nameplate. Please check that all parts are included and intact. If the unit is damaged or faulty, do not use it and take it to your retailer or after-sales service centre.
- Keep all packaging out of the reach of children. There is a risk of accidents if children play with packaging materials.
Intended use
- This unit is intended for household use only. It is not intended for industrial, commercial, or outdoor use. This unit is designed exclusively for grilling foods.
- Use the unit indoors only, in a dry and well-ventilated area.
- Any other use may damage the unit or result in fire, electric shock, or injury.
Specifications
Model: 10002250
Operating voltage: 220 - 240V ,50-60 Hz
Rated power: 2000 W
Protection class: Class I
Off mode power consumption: 0 W
The period after which the equipment goes into off mode:
0 minutes
B Product usage
Before first use
- Remove all packing materials from the unit.
- Assemble the unit. Turn on the unit and set it to the maximum temperature for approximately 5 minutes to burn off the protective lubricant from the heating elements Assembly, Operation).

NOTE:
The process may produce a slight smoke and odour, which is normal. Open a window to ventilate the room.
- Clean the unit before first use (Cleaning and maintenance).
Assembly
Place the unit on a stable, level, dry and heat resistant surface. Use a non-slip heat-resistant mat under the unit to protect your tabletop from heat if required.
To assemble the unit:
- Place the base (D) of the unit on the center of a table.
- Place the water tray (C) on the base.
- Align the Circuit box [B] with the front of the base and push it down.
- Place the grill rack (A) on the base. You can insert the legs of the rack into the low rack or high rack position guides (D1).
To disassemble the unit for cleaning:
- Disconnect the unit from the mains socket and reverse the above steps.
Operation
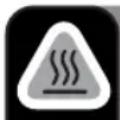
WARNING: Hot surfaces. Risk of burns!
B Product usage
- You can brush a thin layer of cooking oil on the grill rack (A) to help prevent food from sticking.

WARNING!
- During use, always ensure the water tray contains water. Do not allow the water tray to dry out to avoid the risk of flames or fire that can be caused by dripping fat from food.
-
Do not pour water on the heating elements or circuit box when refilling the water tray to avoid the risk of electric shock, fire, or damage to the appliance.
-
Make sure the Thermostat knob (B1) is turned anti-clockwise to the "0" (Off) position, then connect the power cable firmly to a suitable mains socket.
-
To turn the unit on, turn the Thermostat knob (B1) clockwise to the desired temperature. The heating indicator light (B2) will turn on. Allow the unit to preheat until the heating indicator light turns off. The indicator light will cycle on and off during cooking to indicate that the unit is maintaining the set temperature.
-
Low or Medium setting - For slow or moderate grilling.
-
High setting - For fast grilling.
-
Place the prepared foods directly on the grill rack (A) to start grilling. Cooking time varies depending on the type and thickness of the food. It is recommended to cut meats and vegetables into thin slices for easier cooking.
- Turn food with a pair of heat-resistant tongs and adjust the Thermostat knob (B1) as needed.

CAUTION!
When grilling, never cover or place aluminum foil, a plate or tray under food, as this can cause a fire or cause the grill rack to fall.
- To turn the unit off, turn the Thermostat knob to the "0" (Off) position. Disconnect the power cable from the mains socket after each use.
Safety feature
The unit is designed with a safety switch that prevents the heating element from turning on if the circuit box is not positioned correctly on the base. If the heating element does not turn on, turn off the unit and reassemble the circuit box onto the base.
C Cleaning and maintenance
Cleaning and maintenance

WARNING: Risk of electric shock, fire, or injury!
- Before cleaning, always unplug the unit from the mains socket and allow it to cool down.
- Never immerse the circuit box, heating elements, power cable or plug in water or any liquid. Never rinse them under the tap.

Important: Do not use solvents, chemical or abrasive cleaning agents, wire brushes, sharp objects, or scouring pads to clean the unit.
- Clean the unit after each use. Disassemble the unit before cleaning (Assembly).
- Clean the circuit box and heating elements (B) and the base (D) with a cloth slightly moistened with water or soapy water. Allow to air dry completely after cleaning.
- Clean the grill rack (A) and water tray (C) with a non-abrasive sponge and warm soapy water. Rinse well and dry completely.
Storage
- Always unplug the unit before storing, and make sure that it is completely cool and dry.
- Store the unit in a cool, dry and dust-free place, out of the reach of children and pets.
- Please retain the packaging and use it to store your unit when it is not in use for an extended period of time.

Merci!
This product is guaranteed against faults caused by defects in manufacturing or the materials used for a period of two years, starting from the date of purchase. * This warranty does not cover defects or damage caused by failure to install the device correctly, incorrect use of the product, or excessive wear and tear.
*proof of purchase required.
CONDITION DE GARANTIE
FR