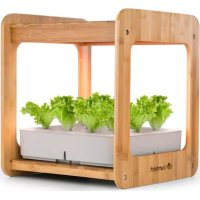
Urban Bamboo - Smart Home Blumfeldt - Free user manual and instructions
Find the device manual for free Urban Bamboo Blumfeldt in PDF.


User questions about Urban Bamboo Blumfeldt
0 question about this device. Answer the ones you know or ask your own.
Ask a new question about this device
Download the instructions for your Smart Home in PDF format for free! Find your manual Urban Bamboo - Blumfeldt and take your electronic device back in hand. On this page are published all the documents necessary for the use of your device. Urban Bamboo by Blumfeldt.
USER MANUAL Urban Bamboo Blumfeldt
natural_image
Abstract green circular logo with three curved segments (no text or symbols)
natural_image
Abstract green circular logo with two leaf-like shapes (no text or symbols)
natural_image
Abstract green circular logo with three leaf-like shapes forming a Y-shape (no text or symbols)text_image
QR code image containing encoded data, no visible human-readable textINHALTSVERZEICHNIS
natural_image
Line drawing of a rectangular electronic device with a grid pattern and control buttons (no text or symbols)② Basisplatte (x2)
natural_image
Isometric line drawing of a metal plate with multiple slots and a triangular support (no text or symbols)Aufkleber
natural_image
Simple line drawing of a device with a cable and plug (no text or symbols)8 Kleinteile
natural_image
Illustration of a Sechskantschrauben screw (no text or symbols on the screw itself)natural_image
Three stylized plant diagrams: a seedling, a potted plant with roots, and a leafy plant with roots (no text or symbols)natural_image
Symbol of a trash bin crossed with a diagonal line, representing no waste or discharge (no text or labels)Congratulations on purchasing this equipment. Please read this manual carefully and take care of the following hints to avoid damages. Any failure caused by ignoring the items and cautions mentioned in the instruction manual is not covered by our warranty and any liability. Scan the QR code to get access to the latest user manual and other information about the product

text_image
QR code image containing encoded data, no visible human-readable textCONTENT
Safety Instructions 18
Packing Content 19
Assembly 20
Planting and Growing 24
Hints on Disposal 29
TECHNICAL DATA
| Item number 10033199 | |
| Power supply 220-240 V ~ 50/60 Hz | |
| Water tank capacity 7 L |
DECLARATION OF CONFORMITY

text_image
C€Producer:
This product is conform to the following European Directives:
2014/30/EU (EMC)
2014/35/EU (LVD)
2011/65/EU (RoHS)
SAFETY INSTRUCTIONS
- Use tap water for planting. Do not connect the power until the tank is full.
- When the light is on, never look directly into it to prevent damage to your eyes.
- Keep the surface of the lamps clean to ensure optimum lighting effects. Use a soft cloth to clean the lampshades.
- Never clean the lampshades with chemicals, alcohol or petrol, as this can discolour or damage the lamps.
- Disconnect the plug from the socket if you no longer use the device for planting.
- Do not install the unit in a flammable, explosive or humid environment.
- Place the unit on a level, stable surface.
- If the device malfunctions, immediately switch off the power supply and contact a specialist company for inspection and repair.
- If the power cord or plug is damaged, it must be replaced by the manufacturer, an authorized service center or a similarly qualified person.
- The device contains parts that are not accessible to the user. Repairs may only be carried out by qualified specialists.
PACKING CONTENT
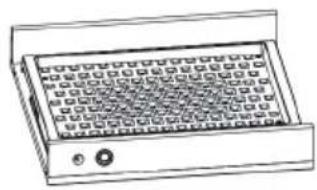
1 Top plate (x1)
natural_image
Illustration of a rectangular electronic device with a grid pattern and control buttons (no visible text or symbols)② Base plate (x2)
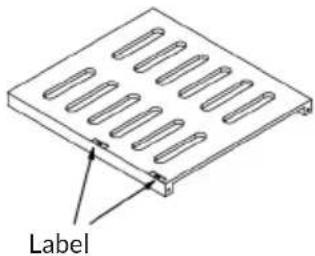
text_image
Label③ Lateral plates (x2)
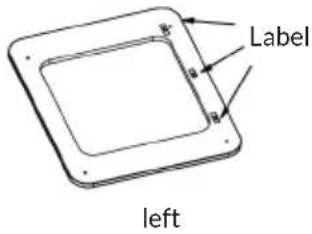
text_image
Label left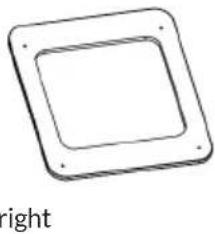
natural_image
Simple line drawing of a square frame with rounded corners and dots, labeled 'right' below (no other text or symbols)4 Tank (with tank lid and water pump)
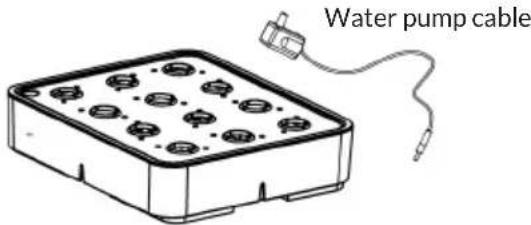
text_image
Water pump cable5 Plant baskets (x12) Foam (x6)
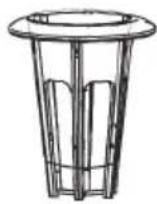
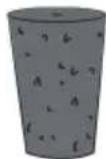
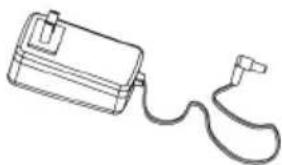
7 Power adapter (x1)
natural_image
Simple line drawing of a device with a cable and plug (no text or symbols)8 Hardware
text_image
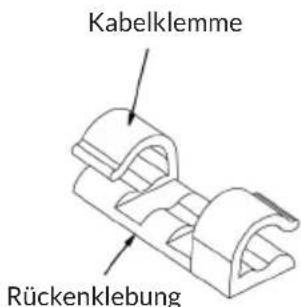
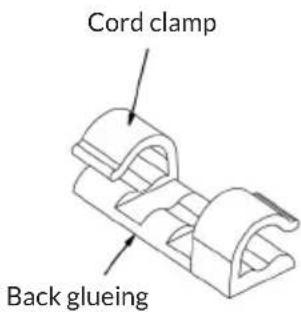
Cord clamp Back glueingCord clamps (x5)
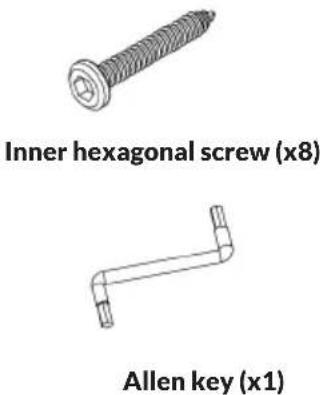
text_image
Inner hexagonal screw (x8) Allen key (x1)ASSEMBLY
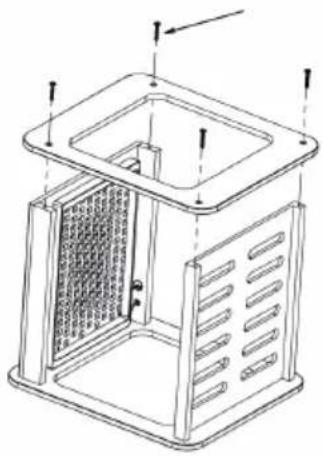
Step 1: Installation of the wooden support
| 1 Remove all parts from their packaging and check for missing or damaged parts. | |
| 2 | Place the top plate on a soft surface. Fasten the side plate to the top plate with the 3 plates with screws. Use the Allen key for fastening. |
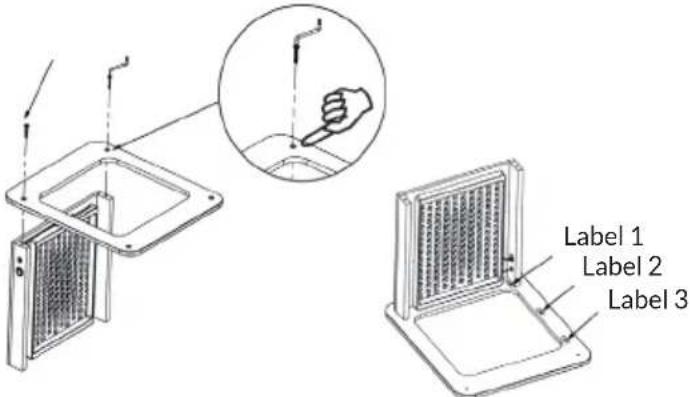 | |
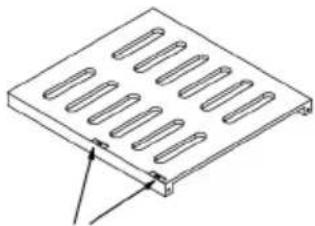
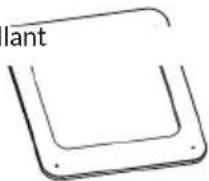
| 3 | Fasten one of the base plates to the side plate with screws. Make sure that the label on the base plate points to the side to which the labels on the side plate also point. |
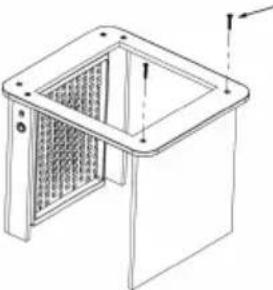 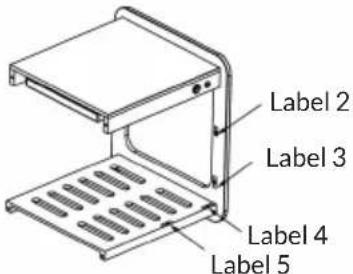 | |
| 4 | Then fasten the second side plate to the frame with screws. |
 |
Step 2: Install the cord clamp and the water pump extension cord
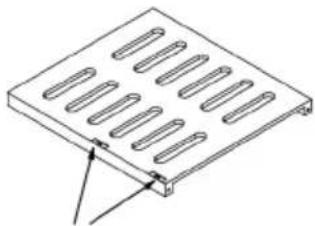
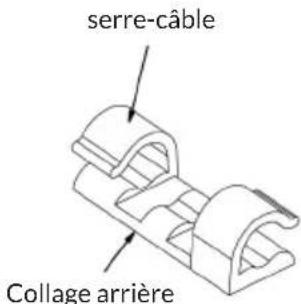
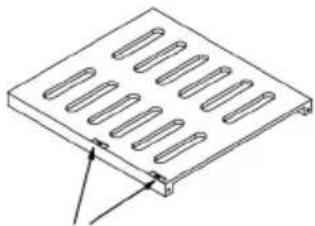
| 1 | Remove sticker 1 and stick the back of the cable clamp to where the sticker was. |
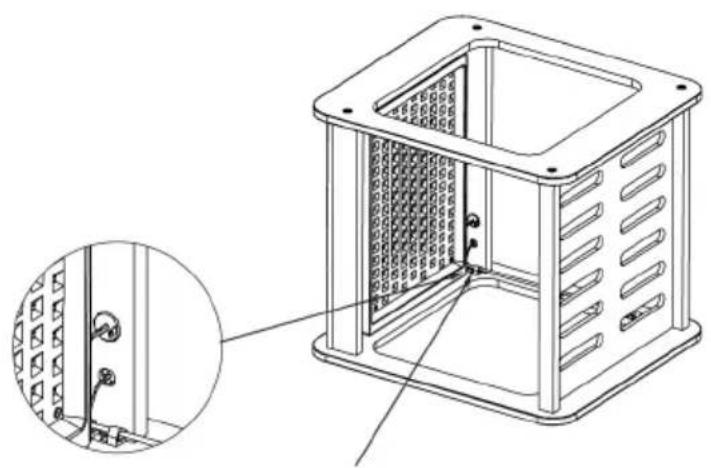 Cord clamp 1 Cord clamp 1 | |
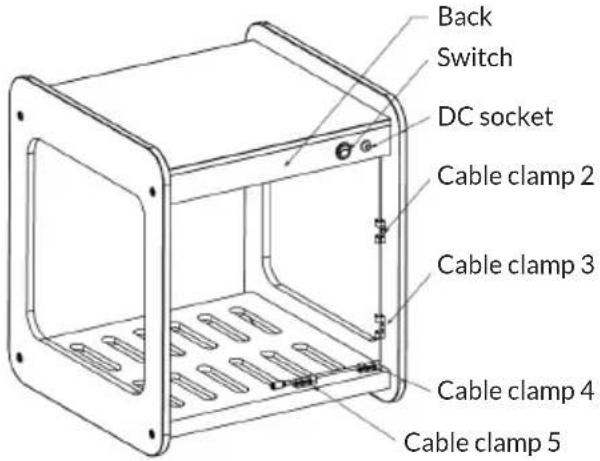
| 2 | Repeat this process by removing labels 2 and 3 on the side panel and attaching cable clamps to the locations of the labels. |
| 3 | Repeat this process by removing labels 4 and 5 from the base plate and attaching cable clamps to the locations on the labels. |
| 4 | Attach the water pump extension cable to the 5 cable clamps. |
 |
Step 3: Installation and use of tank:
| 1 | Remove the tank cap and add water and nutrient solution to the tank. Detailed information on the concentration of the nutrient solution can be found in the chapter PLANTING AND GROWING. |
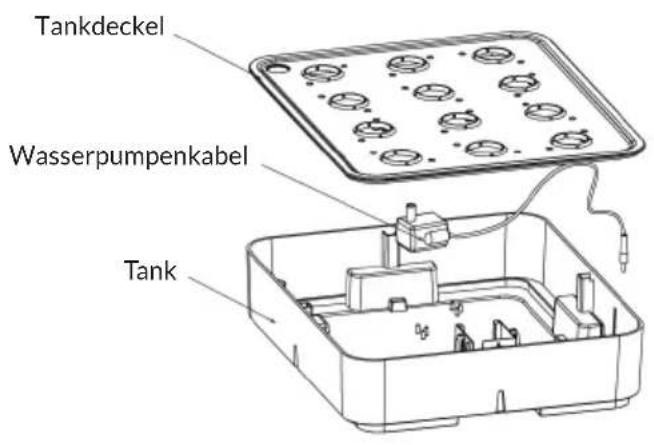 | |
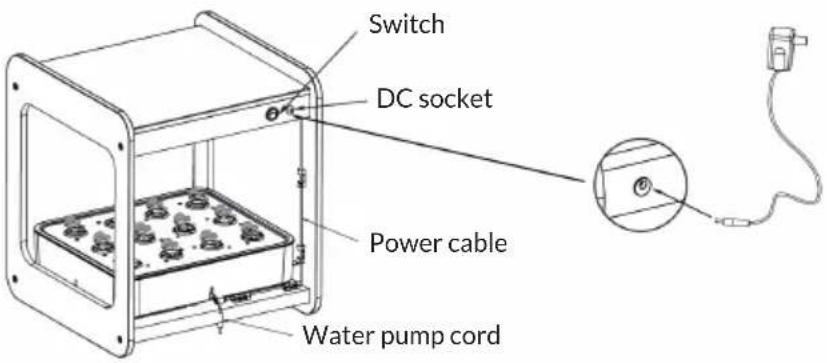
| 2 | Place the tank (water pump cable and water pump extension cable are on the same side) on the base plate in the frame and connect the water pump cable to the extension cable. |
| 3 | The light switch is located on the back of the unit and is used to switch the LED plant light on and off. |
| 4 | Close the power supply and start planting. |
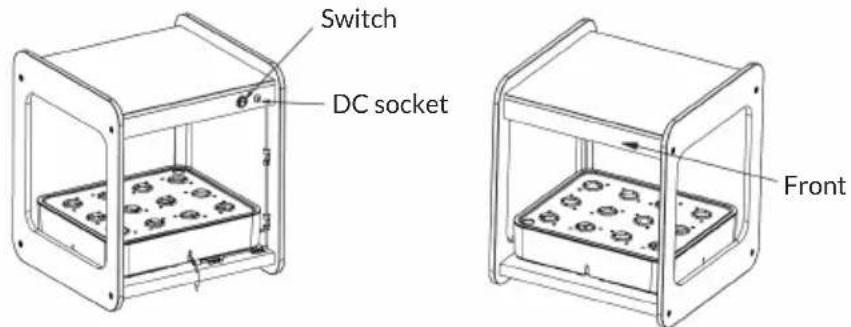 |
Notes on the Smart Control System
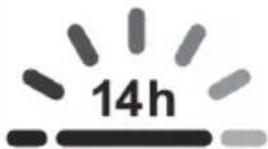 | When the switch is set to (O), the plant lighting goes out for a long time. When the switch is set to (I), the plant lighting is switched on and the timer starts. The plant light switches off automatically after 14 hours and switches on again automatically after 10 hours.The water pump is alternately switched on and off for 15 minutes. After the system lighting is automatically switched off, the water pump remains switched on and continues to operate. |
PLANTING AND GROWING
Tips for planting
- Please buy seeds and nutrient solutions on site, for example at the DIY or plant market.
- Seedling foams, seeds and nutrient solutions are disposable products that cannot be reused. Please replenish the products necessary for planting in good time.
- If possible, use filtered and purified water.
Step 1: Preparing the nutrient solution
| 1 Get nutrient concentrate and dilute with water as indicated on the package. | |
| 2 | Fill the tank with clean, fresh water to the MAX mark. Above the MAX mark there must be 1.5 cm space to the edge. |
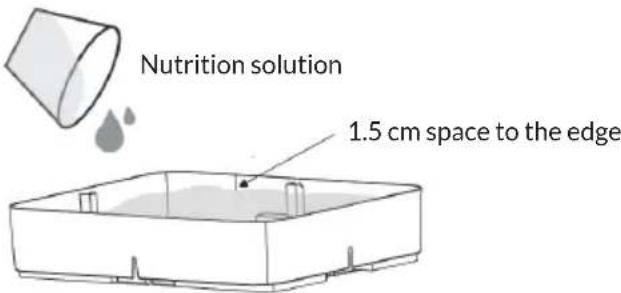 | |
Step 2: Planting
(A) Seed planting
| 1 | Place the seedling foam in the planting basket. | The bottom of the planting basket is in the water |
| 2 Put 2-3 seeds into the seedling foam. | ||
| 3 | Insert the plant baskets into the holes in the tank cap. | |
| 4 | Place the tank in the frame and make sure that the bottoms of the plant baskets touch the water. | |
| 5 Turn on the unit and the lamp. | ||
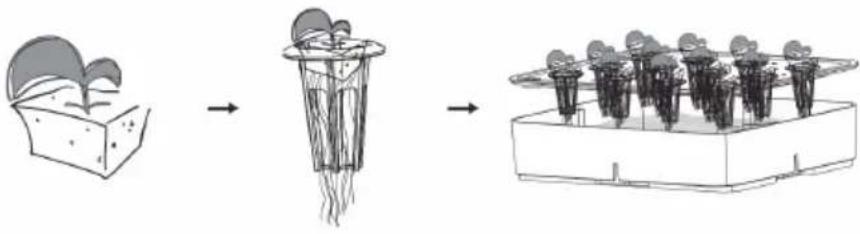
| 6 | After 3-7 days, select the strongest shoot per planting basket for further cultivation and dispose of the other seedlings.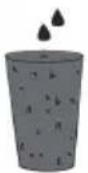 → → 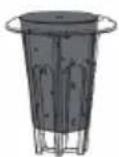 → → 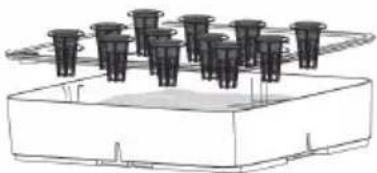 | |
(B) Planting with purchased seedlings
| 1 | Place the seedlings in the planting baskets. Take care not to damage the roots of the seedlings. |
| 2 Insert the plant baskets into the holes in the tank cap. | |
| 3 | Place the tank in the frame and make sure that the bottoms of the plant baskets touch the water. |
| 4 | Switch on the device and the light. |
 | |
 | |
Step 3: Cultivation and care
| 1 | When withered leaves are detected, open the tank cap and check the water level. Check the water level and roots at least once a week. |
| 2 Stir new nutrient solution regularly in a measuring cup. | |
| 3 | Add the nutrient solution to the tank. |
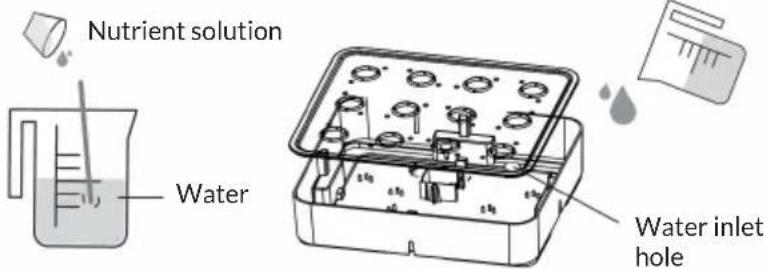 | |
Note: The water level of the tank must not be below the water pump, otherwise the product will trigger an alarm.
Step 4: Sprout-Seedling-Grow
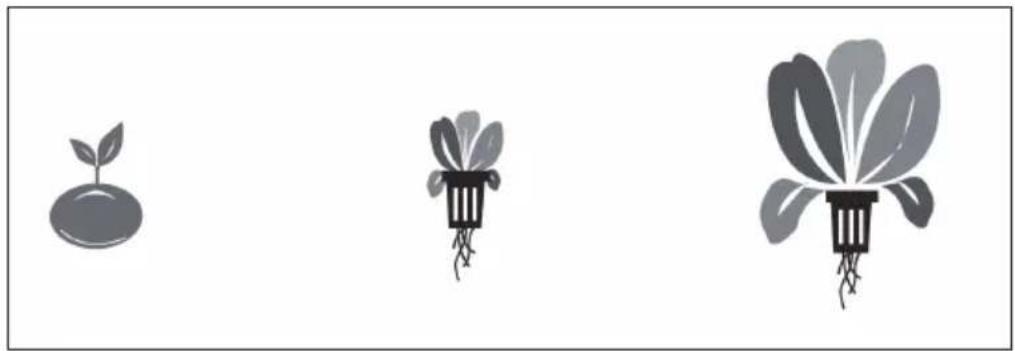
natural_image
Three stylized plant icons: a seedling, a potted plant with roots, and a leafy plant with roots (no text or symbols)Step 5: Harvesting and Cleaning
| 1 When the plants are ripe, harvest them. | |
| 2 | When all the plants have been harvested, unite the tank, the filler cap and the plant baskets. |
| 3 | If you do not grow any other plants for the time being, disconnect the device from the power supply. |
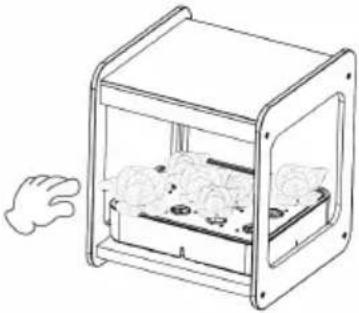 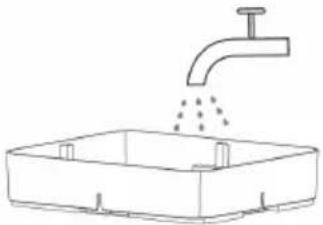 | |
Growth Period
| Germination Stage 3-7 days Leaf vegetables: 25-40 days | |
| Seedling Stage 7-15 days | |
| Growing Period 25-30 days |
| Influence of ambient temperature on growth | ||
| 20-28 °Crow normally | ≤ 15 °Cgrow slowly | ≥ 35 °Croot rot |
natural_image
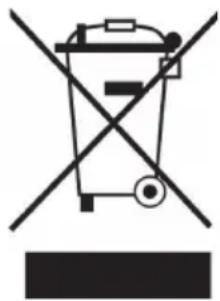
Symbol of a trash bin crossed with a diagonal line, no text or numbers presentAccording to the European waste regulation 2012/19/EU this symbol on the product or on its packaging indicates that this product may not be treated as household waste. Instead it should be taken to the appropriate collection point for the recycling of electrical and electronic equipment. By ensuring this product is disposed of correctly, you will help prevent potential negative consequences for the environment and human health, which could otherwise be caused by inappropriate waste handling of this product. For more detailed information about recycling of this product, please contact your local council or your household waste disposal service.
Estimado cliente:
text_image
QR code image containing encoded data, no visible human-readable textÍNDICE DE CONTENIDOS
natural_image
Line drawing of a rectangular electronic device with a grid pattern and control buttons (no text or symbols)② Placa de base (x2)
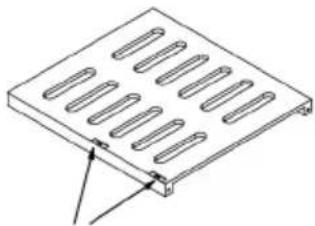
natural_image
Isometric line drawing of a metal plate with multiple slots and a triangular support (no text or symbols)Aufkleber
3 Placas laterales (x2)
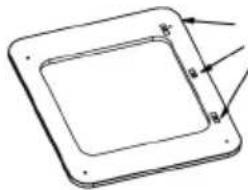
text_image
Technical diagram of a square component with labeled dimensions a, b, and cIzquierda
Adhesivo
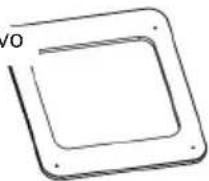
Derecha
natural_image
Simple line drawing of a device with a cable and plug (no text or symbols)8 Piezas pequeñas

natural_image
Three stylized plant icons: a seedling, a potted plant with roots, and a leafy plant with roots (no text or symbols)natural_image
Symbol of a trash bin crossed out by a diagonal line, with no text or labels present.text_image
QR code image containing encoded data, no visible human-readable textSOMMAIRE
DÉCLARATION DE CONFORMITÉ
Fabricant :
Chal-Tec GmbH, Wallstraße 16, 10179 Berlin, Allemagne.

text_image
C€natural_image
Line drawing of a rectangular electronic device with a grid pattern and control buttons (no text or symbols)② Plaque de base (x2)
natural_image
Isometric line drawing of a metal plate with multiple slots and a small arrow pointing to the edge (no text or symbols)autocollant
text_image
Technical diagram of a square component with labeled dimensions a, b, and cgauche
autocollant
droit
natural_image
Simple line drawing of a device with a cable and plug (no text or symbols)8 petites pièces
natural_image
Three stylized plant diagrams: a seedling, a potted plant with roots, and a leafy plant with roots (no text or symbols)natural_image
Symbol of a trash bin crossed with a diagonal line, representing no waste or discharge (no text or labels)text_image
QR code image containing encoded data, no visible human-readable textINDICE
natural_image
Line drawing of a rectangular electronic device with a grid pattern and control buttons (no text or symbols)② Pannello base (x2)
natural_image
Isometric line drawing of a metal plate with multiple slots and a triangular support (no text or symbols)Adesivi
3 Pannelli laterali (x2)
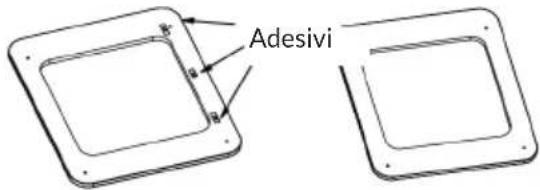
text_image
AdesiviSinistra
Destra