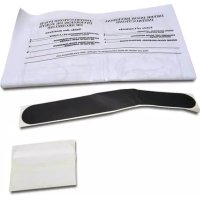
W10277499 - Doors WHIRLPOOL - Free user manual and instructions
Find the device manual for free W10277499 WHIRLPOOL in PDF.


| Product Type | Dryer door |
| Brand | Whirlpool |
| Model | W10277499 |
| Compatibility | Whirlpool dryers with semi-square or round door |
| Material | Steel and plastic |
| Color | White |
| Dimensions (approx.) | 60 x 50 x 10 cm |
| Weight (approx.) | 3 kg |
| Main Function | Closing and access to dryer drum |
| Specific Feature | Reversible door swing (from right to left) |
| Required Tools | Flathead screwdriver, Phillips screwdriver |
| Included Parts | Hole cover labels (2 small, 1 large) |
| Assembly Instructions | Detailed instructions for door reversal included |
| Maintenance | Clean with a soft cloth and mild detergent |
| Repairability | Spare parts available: hinges, covers, screws |
| General Information | Manual available for free PDF download |
Frequently Asked Questions - W10277499 WHIRLPOOL
User questions about W10277499 WHIRLPOOL
0 question about this device. Answer the ones you know or ask your own.
Ask a new question about this device
Download the instructions for your Doors in PDF format for free! Find your manual W10277499 - WHIRLPOOL and take your electronic device back in hand. On this page are published all the documents necessary for the use of your device. W10277499 by WHIRLPOOL.
USER MANUAL W10277499 WHIRLPOOL
If desired you may change your door to open from the left instead of the right, using the following directions:
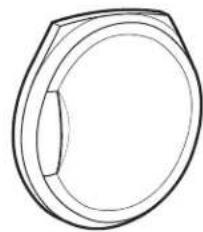
If your door looks like this, follow the Squared-Off Dryer Door Instructions (steps 1-15):
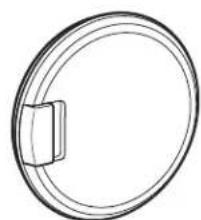
If your door looks like this, follow the Round Dryer Door Instructions (steps 16-29):
TOOLS AND PARTS
Gather the required tools and parts before starting installation.
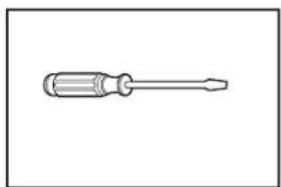
Tools needed:
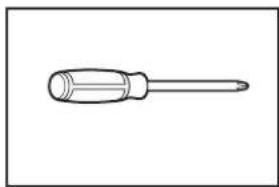
Flat-blade screwdriver
Phillips screwdriver
Parts supplied:
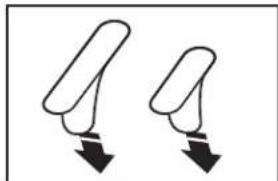
Bolt hole cover labels (2 small, 1 large)
NOTE: If your dryer already has plastic bolt hole covers, you may reuse them to complete door reversal, or you may replace plastic covers with labels provided.
SQUARED-OFF DOOR REVERSAL INSTRUCTIONS
1. Remove screws from door hinge
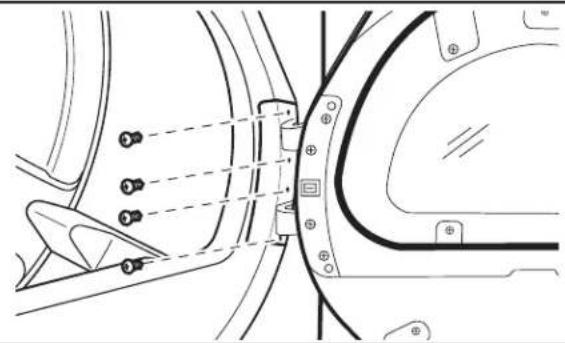
Detach door from its original location by removing all four screws from door hinge, as shown.
2. Remove screws from door
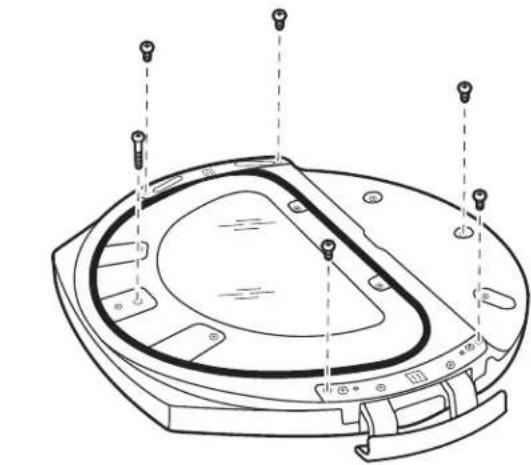
IMPORTANT: Avoid damaging or scratching door by laying on a soft cloth in your work space.
Remove all six screws to separate the inner door assembly from the outer door assembly, as shown.
3. Lift out inner door assembly
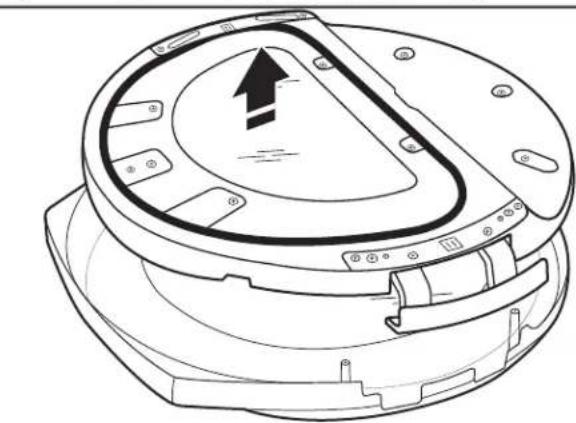
Lift out inner door assembly and set aside in a safe location.
4. Snap off hinge plate cover and move to other side of door
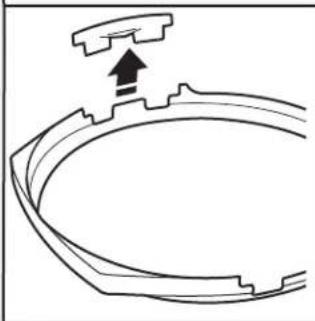
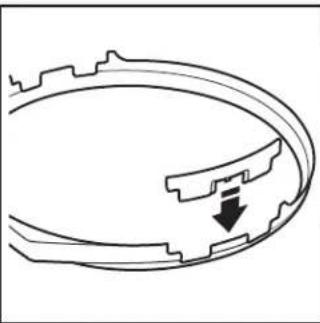
Along edge of outer door ring, find removable plastic hinge plate cover. Snap out and lock into slot on other side of door.
5. Rotate window panel
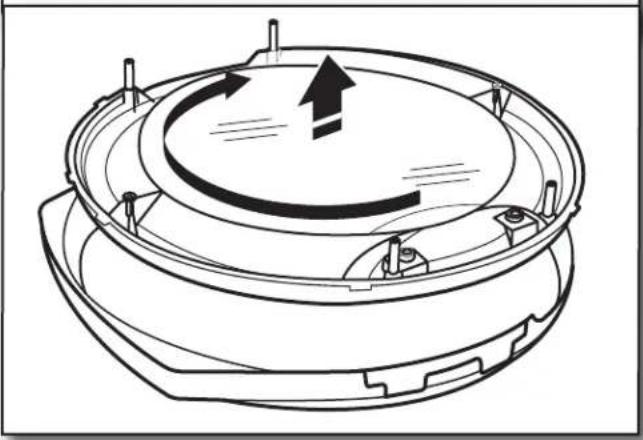
Remove interior section of outer door ring from the frame, rotate 180^ and snap back into place.
6. Remove bolt hole covers
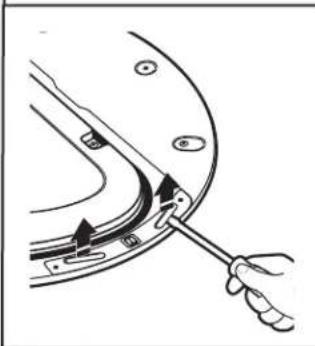
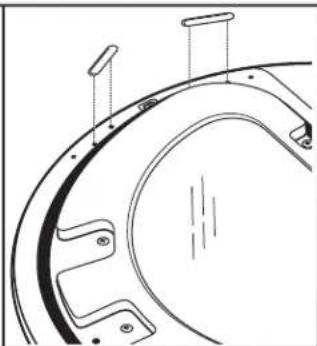
Your dryer will either have plastic strips or labels covering the bolt hole openings. If you have plastic covers, use a screwdriver to gently pry off plastic bolt hole covers. If your bolt holes are covered with labels, gently peel the labels off.
7. Remove screws from hinge panel
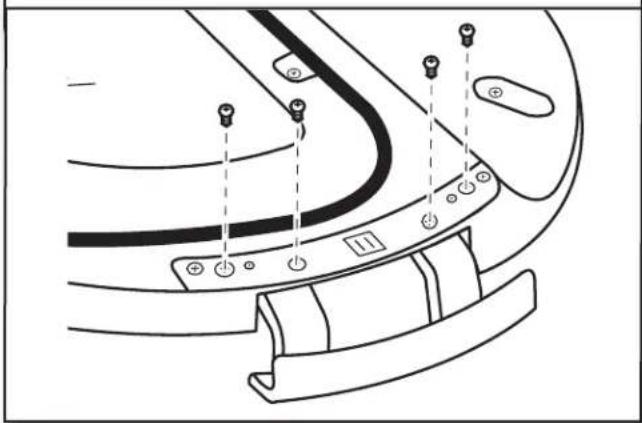
Remove all four screws that hold hinge to door frame, as shown above.
8. Move hinge to other side and replace screws
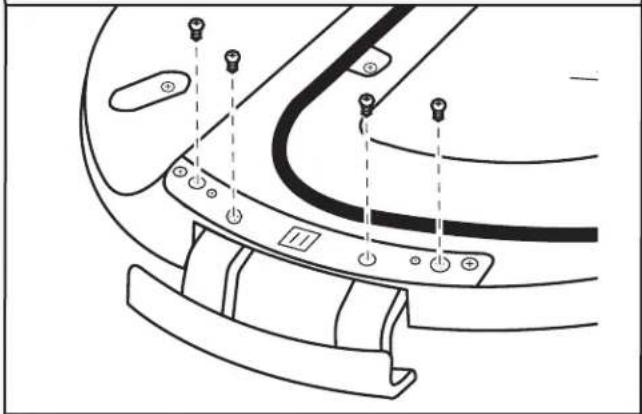
Place frame in slot on other side of door and reattach, using screws that were just removed.
9. Replace bolt hole covers on other side
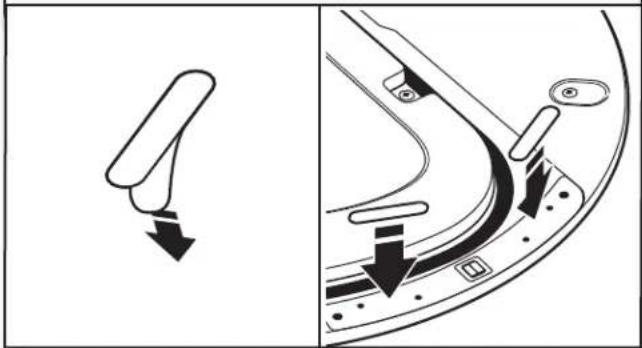
Use bolt hole covers to avoid damaging previously used screw openings on dryer door. If your bolt hole covers are labels, you will find replacement labels with parts included with door reversal kit. Peel replacement labels off paper backing and press over bolt holes. If you have plastic bolt hole covers, you may reuse them by snapping them into screw holes, or you may replace with the provided labels as previously described.
10. Replace inner door assembly
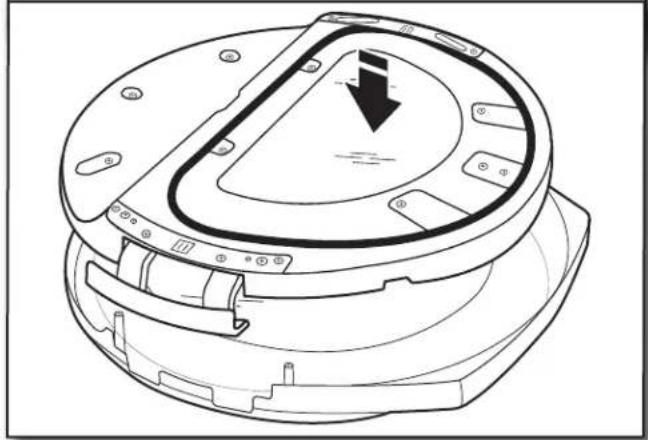
Place inner door assembly back into the outer door assembly.
11. Reassemble door
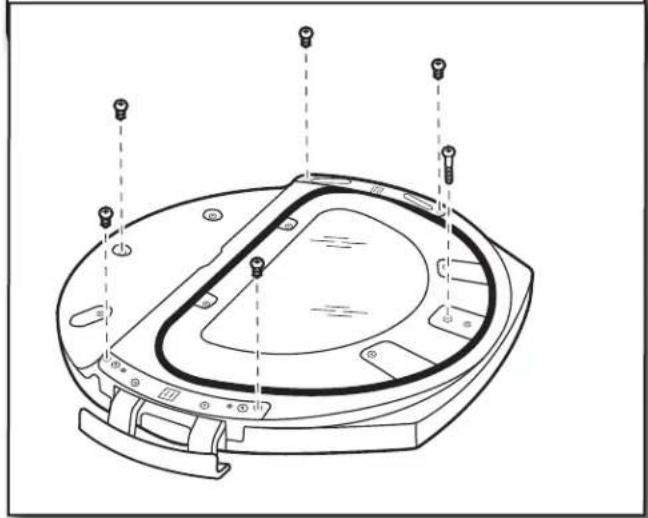
Rettach the two door sections by replacing all six screws, as shown.
12. Remove hinge hole cover
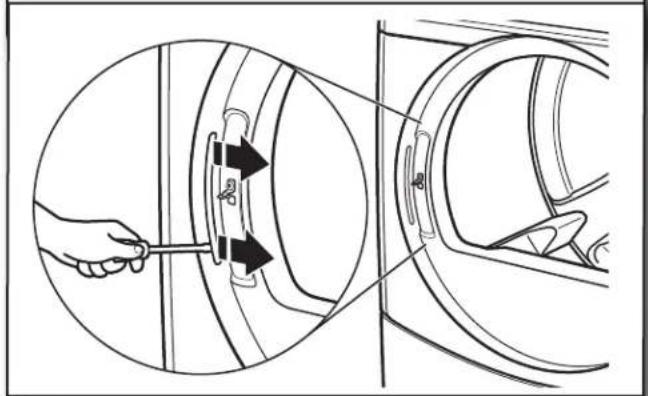
Your dryer will either have a plastic strip or label covering the hinge holes. If you have a plastic cover, use a screwdriver to gently pry off the plastic bolt hole cover. If your bolt holes are covered with a label, gently peel the label off.
13. Remove the door strike and insert on opposite side
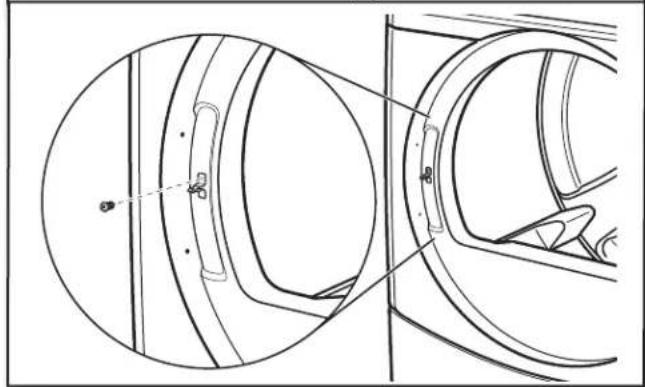
Remove strike and insert in corresponding hole on other side of front panel.
14. Replace hinge hole cover on other side
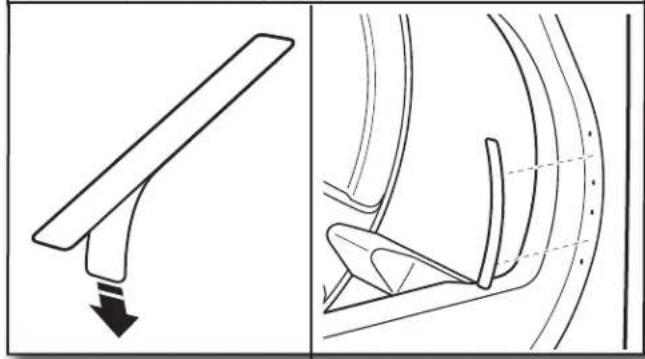
Use hinge hole covers to avoid damaging previously used screw openings on dryer door. If your hinge hole cover is a label, you will find a replacement label with parts included in door reversal kit. Peel replacement label off paper backing and press over screw holes. If you have a plastic hinge hole cover, you may reuse by snapping it into screw holes, or you may replace with label covers as previously described.
15. Reattach door hinge to other side of dryer
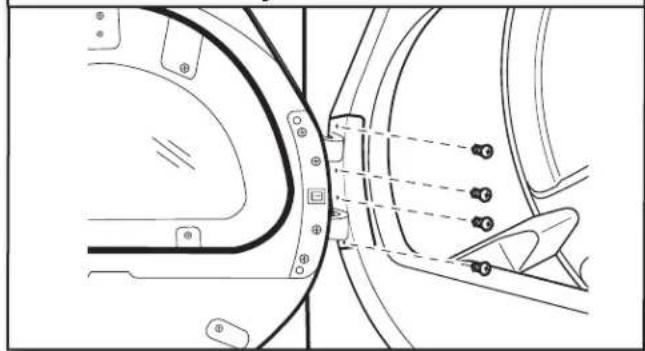
Reattach door on left side of dryer, using four screws, as shown. Now, continue with the Door Reversal Completion Checklist.
ROUND DOOR REVERSAL INSTRUCTIONS
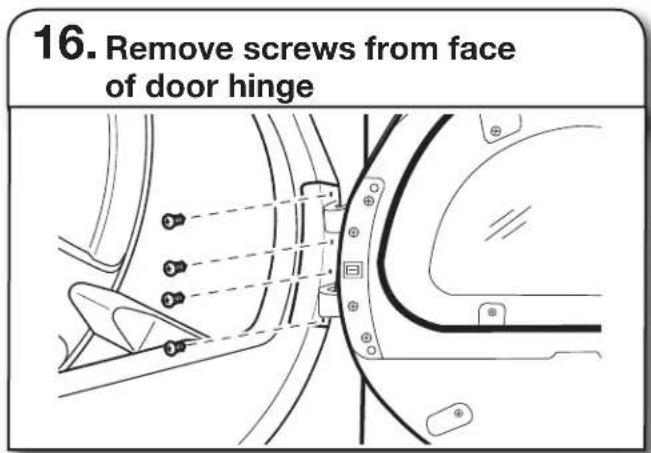
Detach door from its original location by removing all four screws from door hinge, as shown.
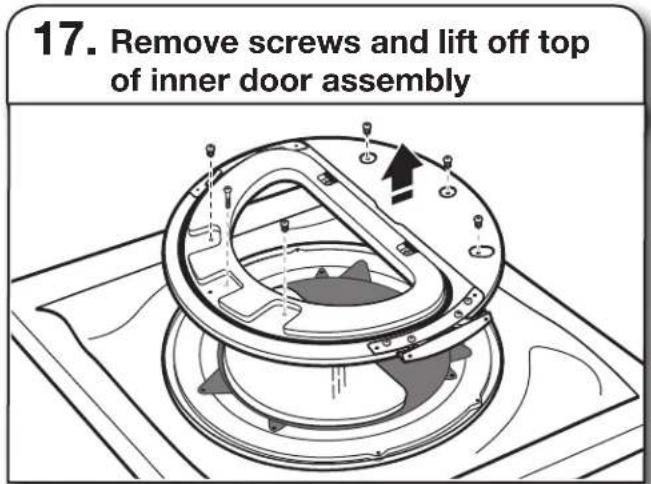
IMPORTANT: Avoid damaging or scratching door by laying on a soft cloth in your work space.
Remove all six screws from door assembly, as shown, to separate the inner door assembly from the outer frame. Lift the inner door assembly off the outer door assembly. Set the inner door assembly aside to work on later.
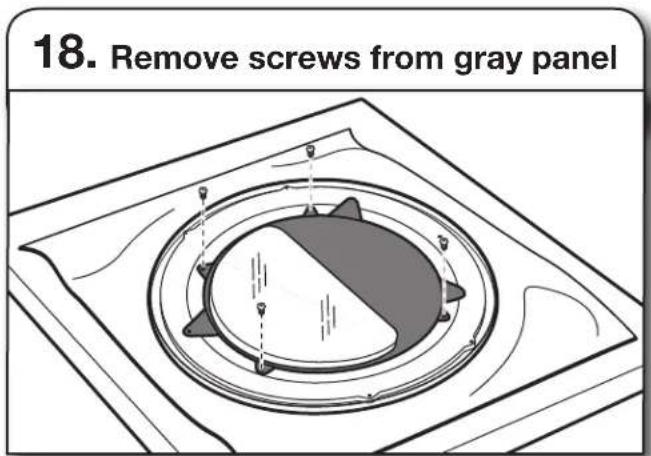
Remove the four screws that hold the gray panel with glass window to the door panel.
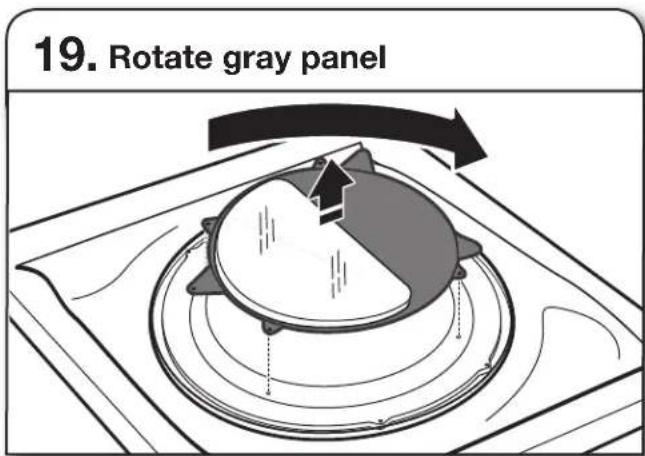
Lift up the gray panel and rotate 180^ so that glass window is in the correct position to reverse the door. Then reattach with the four screws that previously held the gray panel in place.
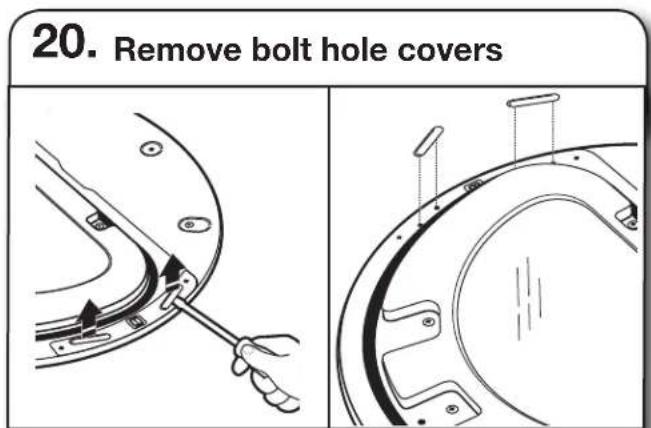
Your dryer will either have plastic strips or labels covering the bolt hole openings. If you have plastic covers, use a screwdriver to gently pry off plastic bolt hole covers. If your bolt holes are covered with labels, gently peel the labels off.

Remove all 4 screws attaching inner door to hinge.
22. Move hinge to other side and replace screws
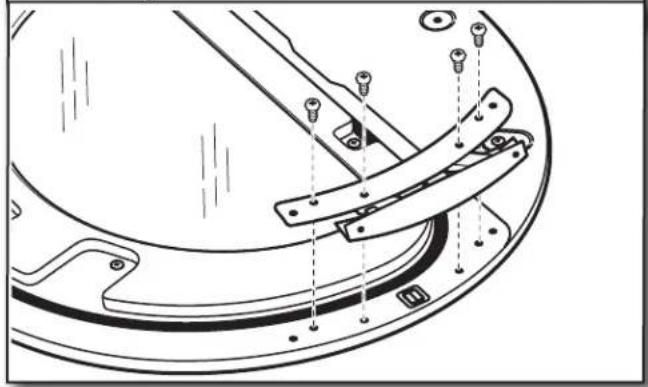
Move hinge to other side of door and reattach using four screws.
23. Replace bolt hole covers on other side

Use bolt hole covers to avoid damaging previously used screw openings on dryer door. If your bolt hole covers are labels, you will find replacement labels with parts included with door reversal kit. Peel replacement labels off paper backing and press over bolt holes. If you have plastic bolt hole covers, you may reuse them by snapping them into screw holes, or you may replace with the provided labels as previously described.
24. Replace inner door assembly
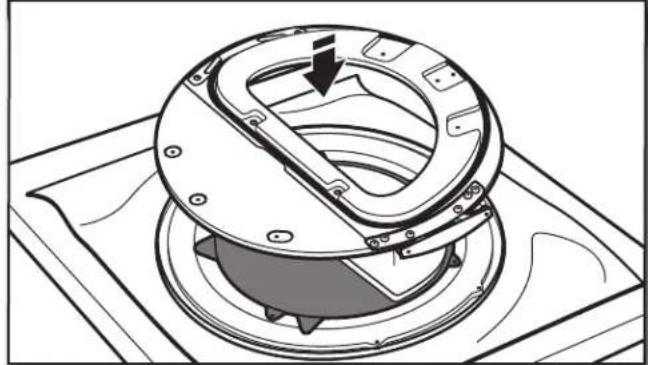
Place the inner door assembly back onto the outer assembly, gently lining up the window areas so that they match.
HELPFUL TIP: Use a soft cloth to remove any fingerprints from the inside glass panels before putting the two pieces back together.
25. Reassemble door
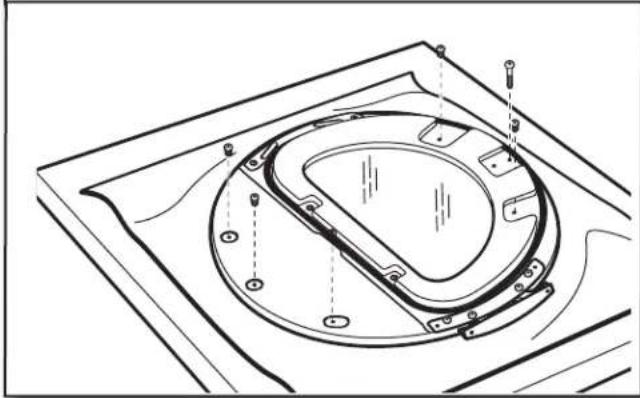
Reattach the two door sections by replacing all six screws, as shown.
26. Remove hinge hole cover
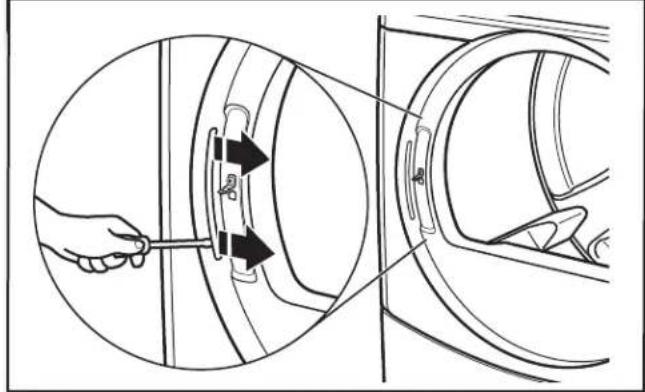
Your dryer will either have a plastic strip or label covering the hinge holes. If you have a plastic cover, use a screwdriver to gently pry off the plastic bolt hole cover. If your bolt holes are covered with a label, gently peel the label off.
27. Remove the door strike and insert on opposite side
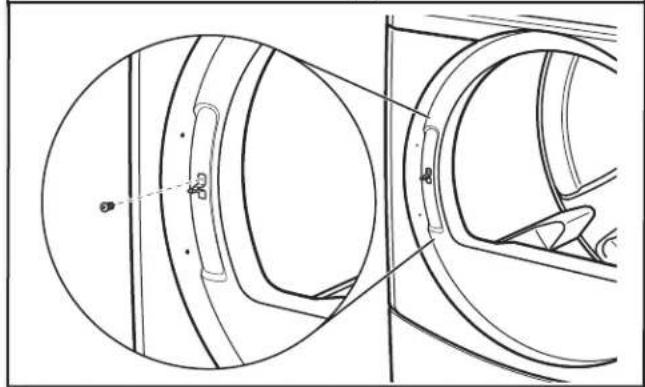
Remove strike and insert in coresponding hole on other side of front panel.
28. Replace hinge hole cover on other side
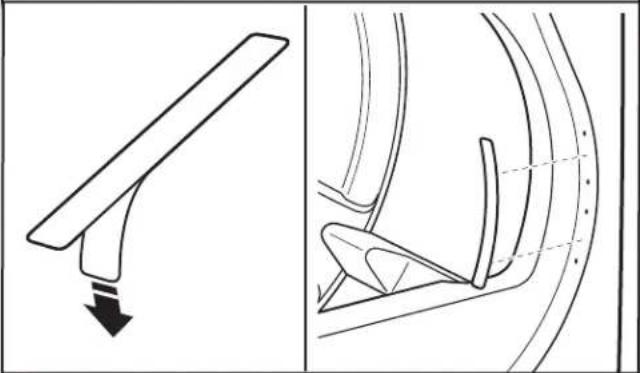
Use hinge hole covers to avoid damaging previously used screw openings on dryer door. If your hinge hole cover is a label, you will find a replacement label with parts included in door reversal kit. Peel replacement label off paper backing and press over screw holes. If you have a plastic hinge hole cover, you may reuse by snapping it into screw holes, or you may replace with label covers as previously described.
29. Reattach door to dryer
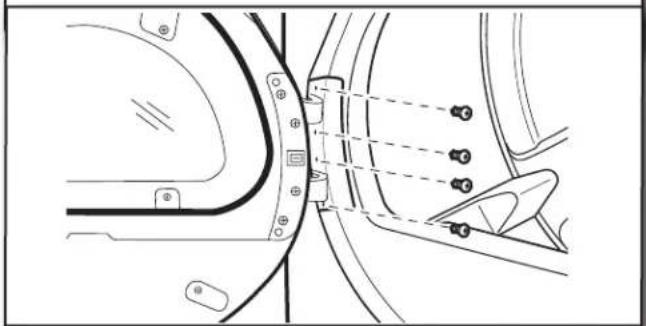
Reattach door to dryer front panel with 4 screws removed from step 16.
DOOR REVERSAL COMPLETION CHECKLIST
Check that all parts are now installed. If there is an extra part, go back through steps to see what was skipped.
Dispose of/recycle all packaging materials.
Check dryer's final location. Be sure door can open fully.
Check for fingerprints on glass; clean if necessary.
Close door and check that it latches securely.
OPTIONS D'INVERSION DE LA PORTE
- TOOLS AND PARTS
- SQUARED-OFF DOOR REVERSAL INSTRUCTIONS
- Remove screws from door hinge
- Remove screws from door
- Lift out inner door assembly
- Snap off hinge plate cover and move to other side of door
- Rotate window panel
- Remove bolt hole covers
- Remove screws from hinge panel
- Move hinge to other side and replace screws
- Replace bolt hole covers on other side
- Replace inner door assembly
- Reassemble door
- Remove hinge hole cover
- Remove the door strike and insert on opposite side
- Replace hinge hole cover on other side
- Reattach door hinge to other side of dryer
- ROUND DOOR REVERSAL INSTRUCTIONS
- Move hinge to other side and replace screws
- Replace bolt hole covers on other side
- Replace inner door assembly
- Reassemble door
- Remove hinge hole cover
- Remove the door strike and insert on opposite side
- Replace hinge hole cover on other side
- Reattach door to dryer
- DOOR REVERSAL COMPLETION CHECKLIST
- OPTIONS D'INVERSION DE LA PORTE
Brand : WHIRLPOOL
Model : W10277499
Category : Doors