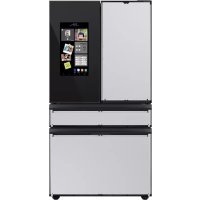
RF23BB8900AC - Fridge SAMSUNG - Free user manual and instructions
Find the device manual for free RF23BB8900AC SAMSUNG in PDF.


User questions about RF23BB8900AC SAMSUNG
0 question about this device. Answer the ones you know or ask your own.
Ask a new question about this device
Download the instructions for your Fridge in PDF format for free! Find your manual RF23BB8900AC - SAMSUNG and take your electronic device back in hand. On this page are published all the documents necessary for the use of your device. RF23BB8900AC by SAMSUNG.
USER MANUAL RF23BB8900AC SAMSUNG
Free Standing Appliance
natural_image
Black and white illustration of ice cubes with bubbles rising, no text or symbols present
natural_image
Abstract black-and-white photo of a cube partially submerged in ice with bubbles rising (no text or symbols)SAMSUNG
Contents
Safety information 4
What you need to know about the safety instructions 4 Important safety symbols and precautions: 5 State of California Proposition 65 Warning 5 Important safety precautions 5 Severe warning signs for transportation and site 7 Critical installation warnings 8 Installation cautions 9 Critical usage warnings 10 Usage cautions 12 Cleaning cautions 13 Critical disposal warnings 14
Installation 15
Refrigerator at a glance 16 Step-by-step installation 19
Operations 36
Main panel 36
SmartThings 42
SMART GRID Function (Demand Response, applicable models only) 45
Special features 48
Maintenance 55
Handling and care 55 Cleaning 63 Replacement 64
Troubleshooting 67
General 67
Do you hear abnormal sounds from the refrigerator? 71
SmartThings 73
Smart Grid (applicable models only) 74
LIMITED WARRANTY (U.S.A.) 75
SAMSUNG REFRIGERATOR 75
English2
Warranty Information (CANADA) 78
If your refrigerator needs service 78 Limited Warranty for Original Purchaser 78 Obligation to the Original Owner 79 Exclusions of the Warranty 79
Regulatory Notice 80
FCC Notice 80 IC Notice 81
Open Source Announcement 82
Safety information
Before using your new Samsung Refrigerator, please read this manual thoroughly to ensure that you know how to operate the features and functions that your new appliance offers safely and efficiently.
What you need to know about the safety instructions
- This appliance is not intended for use by persons (including children) with reduced physical, sensory or mental capabilities, or lack of experience and knowledge, unless they have been given supervision or instruction concerning use of the appliance by a person responsible for their safety. Children should be supervised to ensure that they do not play with the appliance.
- Because the following instructions cover various models, the characteristics of your refrigerator may differ slightly from the refrigerator described in this manual.
- If you have any question, contact us at 1-800-SAMSUNG or find help and information online at www.samsung.com.
- Refrigerant squirting out of the pipes could ignite or cause an eye injury. When refrigerant leaks from the pipe, avoid any naked flames and move anything flammable away from the product and ventilate the room immediately.
- Failing to do so may result in fire or explosion.
- Improper use of the grounding plug can result in a risk of electric shock. If it is necessary to use an extension cord, use only a 3-wire extension cord that has a 3-blade grounding plug and a 3-slot receptacle that will accept the plug on the appliance. The marked rating of the extension cord should be AC 115-120 V, 10 A, or more. If a grounding adapter is used, make sure the receptacle box is fully grounded.
English4
Important safety symbols and precautions:
Please follow all safety instructions in this manual. This manual uses the following safety symbols.

WARNING
Hazards or unsafe practices that may result in severe personal injury, property damage, and/or death.

CAUTION
Hazards or unsafe practices that may result in severe personal injury and/or property damage.

NOTE
Useful information that helps users understand or benefit from the refrigerator.
These warning signs are here to prevent injury to you and others.
Please follow them carefully.
After reading this section, keep it in a safe place for future reference.
State of California Proposition 65 Warning

WARNING
Cancer and Reproductive Harm - www.P65Warnings.ca.gov.
Important safety precautions
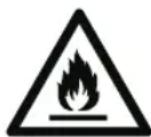
Warning; Risk of fire / flammable materials

WARNING
- R-600a is used as a refrigerant. This product contains flammable gas (Refrigerant R-600a), contact your local authority in regard to safe disposal of this product.
- In order to avoid the creation of a flammable gas-air mixture if a leak in the refrigerating circuit occurs, the size of the room in which the appliance may be sited depends on the amount of refrigerant used. The room must be 35.3 ft ^3 in size for every 8 g of R-600a refrigerant inside the appliance.
- The installation location should not be exposed to direct sunlight and not placed near any electric appliance or heat source, e.g. stove, oven or hob, radiator, etc.
Safety information
- If you use two products side by side, for safety reason, be sure to use certified products in explosive gas atmospheres.
- Never start up an appliance showing any signs of damage. If in doubt, consult your dealer.
- If the supply cord is damaged, it must be replaced by the manufacturer, its service agent or similarly qualified persons in order to avoid a hazard.
- The socket must be easily accessible so that the appliance can be quickly disconnected from the supply in an emergency. It must be outside the area of the rear of the appliance.
- Do not store explosive substances such as aerosol cans with a flammable propellant in this appliance.
- New hose-sets supplied with the appliance are to be used and that old hose-sets should not be reused.
- When positioning the appliance, ensure the supply cord is not trapped or damaged.
- Do not locate multiple portable socket-outlets or portable power supplies at the rear of the appliance.
WARNING
- Fill with potable water only.
- Keep ventilation openings, in the appliance enclosure or in the built-in structure, clear of obstruction.
- Do not use mechanical devices or other means to accelerate the defrosting process, other than those recommended by the manufacturer.
- Do not damage the refrigerant circuit.
- Do not use electrical appliances inside the food storage compartments of The appliance, unless they are of the type recommended by the manufacturer.
- Connect to potable water supply only.
WARNING
- Risk of child entrapment. Before you throw away your old refrigerator or freezer:
- Take off the doors.
- Leave the shelves in place so that children may not easily climb inside.
English6
CAUTION
- Risk Of Fire Or Explosion. Flammable Refrigerant Used. Do Not Use Mechanical Devices To Defrost Refrigerator. Do Not Puncture Refrigerant Tubing.
- Risk Of Fire Or Explosion. Flammable Refrigerant Used. To Be Repaired Only By Trained Service Personnel. Do Not Puncture Refrigerant Tubing.
- Risk Of Fire Or Explosion. Flammable Refrigerant Used. Consult Repair Manual/Owner's Guide Before Attempting to Service This Product. All Safety Precautions Must Be Followed.
- Risk Of Fire Or Explosion. Dispose Of Properly In Accordance With Federal Or Local Regulations. Flammable Refrigerant Used.
- Risk Of Fire Or Explosion Due To Puncture Of Refrigerant Tubing; Follow Handling Instructions Carefully. Flammable Refrigerant Used.
- To Prevent A Child From Being Entrapped, Keep Out Of Reach Of Children And Not In The Vicinity Of Freezer Or Refrigerator.
This appliance is intended to be used in household and similar applications such as
- staff kitchen areas in shops, offices and other working environments;
- farm houses and by clients in hotels, motels and other residential type environments;
• bed and breakfast type environments;
• catering and similar non-retail applications.
Severe warning signs for transportation and site
WARNING
- When transporting and installing the appliance, care should be taken to ensure that no parts of the refrigerating circuit are damaged.
- Refrigerant leaking from the pipe work could ignite or cause an eye injury. If a leak is detected, avoid any naked flames or potential sources of ignition and air the room in which the appliance is standing for several minutes.
- This appliance contains a small amount of isobutane refrigerant (R-600a), a natural gas with high environmental compatibility that is, however, also flammable.
Safety information
Critical installation warnings
WARNING
- Do not install the refrigerator in a damp location or place where it may come in contact with water.
- Deteriorated insulation on electrical parts may cause an electric shock or fire.
- Do not place this refrigerator in direct sunlight or expose it to the heat from stoves, room heaters, or other appliances.
- Do not plug several appliances and the refrigerator into the same multiple power strip. The refrigerator should always be plugged into its own individual electrical outlet which has a voltage rating that matches the voltage listed on the refrigerator's rating plate.
- This provides the best performance and also prevents overloading of house wiring circuits, which could overheat the wires and cause a fire hazard.
- If the wall socket is loose, do not insert the power plug.
- There is a risk of electric shock or fire.
- Do not use a power cord that has cracks or abrasion damage along its length or at either end.
- Do not bend the power cord excessively or place heavy objects on it.
- Do not pull or excessively bend the power cord.
- Do not twist or tie the power cord.
- Do not hook the power cord over a metal object, place a heavy object on the power cord, insert the power cord between objects, or push the power cord into the space behind the appliance.
- When moving the refrigerator, be careful not to roll over or damage the power cord.
- This may result in an electric shock or fire.
- Never unplug your refrigerator by pulling on the power cord. Always grip the plug firmly and pull straight out from the outlet.
- Damage to the cord may cause a short-circuit, fire, and/or electric shock.
- Do not install this appliance near a heater or flammable material.
- Do not install this appliance in a location where gas may leak.
- This may result in an electric shock or fire.
- This refrigerator must be properly located and installed in accordance with the instructions in this manual before you use it.
- Connect the power plug in the proper position with the cord hanging down.
- If you connect the power plug upside down, the wire can get cut off and cause a fire or electric shock.
- Make sure that the power plug is not crushed or damaged by the back of the refrigerator.
- Keep the packing materials out of reach of children.
- There is a risk of death from suffocation if a child puts the packing materials on his or her head.
- The appliance must be positioned so that the plug is accessible after installation.
- Failing to do so may result in an electric shock or fire due to electric leakage.
- Do not install this appliance in a humid, oily or dusty location, or in a location exposed to direct sunlight or to water (rain drops).
- Deteriorated insulation on electrical parts may cause an electric shock or fire.
English8
- If large amounts of dust or water enter the refrigerator, disconnect the power plug and contact a Samsung Electronics service center.
Otherwise there is a risk of fire. - Do not stand on top of the appliance or place objects (such as laundry, lighted candles, lighted cigarettes, dishes, chemicals, metal objects, etc.) on the appliance.
This may result in an electric shock, fire, problems with the product, or injury. - You need to remove all the protective plastic film before you initially plug the product in.
- Children should be supervised to ensure that they do not play with the snap rings used for door adjustment or the water tube clips.
- There is risk of death by suffocation if a child swallows a snap ring or water tube clip. Keep the snap rings and water tube clips out of children's reach.
- The refrigerator must be safely grounded.
- Always make sure that you have grounded the refrigerator before attempting to investigate or repair any part of the appliance. Power leakages can cause severe electric shock.
- Never use gas pipes, telephone lines, or other potential lightning attractors as an electrical ground.
- You must ground the refrigerator to prevent any power leakages or electric shocks caused by current leakage from the refrigerator.
- Current leakage may result in an electric shock, fire, explosion, or problems with the product.
- You must ground the refrigerator to prevent any power leakages or electric shocks caused by current leakage from the refrigerator.
- Current leakage may result in an electric shock, fire, explosion, or problems with the product.
- Plug the power plug into the wall socket firmly. Do not use a damaged power plug, damaged power cord, or loose wall socket.
- This may result in an electric shock or fire.
- Only a qualified technician or service company should be allowed to change the fuse in the refrigerator.
- Failing to do so may result in an electric shock or personal injury.
Installation cautions

CAUTION
- Allow sufficient space around the refrigerator and install it on a flat surface.
- Keep the ventilation space in the appliance enclosure or mounting structure clear of obstructions.
- After you have installed the refrigerator and turned it on, allow the appliance to stand for 2 hours before loading it with food.
- It is strongly recommended you have a qualified technician or service company install the refrigerator.
- Failing to do so may result in an electric shock, fire, explosion, problems with the product, or injury.
• Overloading one door may make the refrigerator fall, causing physical injury.
Safety information
Critical usage warnings
WARNING
- Do not insert the power plug into a wall socket with wet hands.
- This may result in an electric shock.
- Do not store articles on the top of the appliance.
- When you open or close the door, the articles may fall and cause personal injury and/or material damage.
- Do not insert hands, feet, or metal objects (such as chopsticks, etc.) into the bottom or the back of the refrigerator.
- This may result in an electric shock or injury.
- Any sharp edges may cause a personal injury.
- Do not touch the inside walls of the freezer or products stored in the freezer with wet hands.
This may cause frostbite. - Do not put a container filled with water on the refrigerator.
If spilled, there is a risk of fire or electric shock. - Do not keep volatile or flammable objects or substances (benzene, thinner, propane gas, alcohol, ether, LP gas, and other such products) in the refrigerator.
- This refrigerator is for storing food only.
- This may result in fire or explosion.
• Children should be supervised to ensure that they do not play with the appliance. - Keep fingers out of "pinch point" areas. Clearances between the doors and cabinet are necessarily small. Be careful when you open the doors if children are in the area.
- Do not let children hang on the door or door bins. A serious injury may occur.
- Do not let children go inside the refrigerator. They could become trapped.
- Do not insert your hands into the area under the appliance.
- Any sharp edges may cause personal injury.
- Do not store pharmaceutical products, scientific materials, or temperature sensitive products in the refrigerator.
- Products that require strict temperature controls must not be stored in the refrigerator.
- Do not place or use electrical appliances inside the refrigerator/freezer, unless they are of a type recommended by the manufacturer.
- If you smell smoke, pull out the power plug immediately, and then contact a Samsung Electronics service center.
- If large amounts of dust or water enter the refrigerator, disconnect the power plug and contact your Samsung Electronics service center.
- Otherwise there is a risk of fire.
- Do not let children step on a drawer.
- The drawer may break and cause them to slip.
- Do not leave the doors of the refrigerator open while the refrigerator is unattended and do not let children enter the refrigerator.
- Do not allow babies or children to go into a drawer.
- It can cause death from suffocation by entrapment or personal injury.
English10
- Do not overfill the refrigerator with food.
- When you open the door, an item may fall out and cause personal injury or material damage.
- Do not spray volatile material such as insecticide onto the surface of the appliance.
As well as being harmful to humans, it may also result in an electric shock, fire, or problems with the product.
- Never put fingers or any objects into the water dispenser outlet, ice chute, or ice maker bucket.
- It may cause a personal injury or material damage.
- Do not use or place any substances sensitive to temperature such as flammable sprays, flammable objects, dry ice, medicine, or chemicals near or inside the refrigerator.
- Do not use a hair dryer to dry the inside of the refrigerator. Do not place a lighted candle in the refrigerator to remove bad odors.
- This may result in an electric shock or fire.
- Fill the water tank and ice cube trays with potable water only (tap water, mineral water, or purified water).
- Do not fill the tank with tea, juice, or a sports drink. They can damage the refrigerator.
- Do not stand on top of the appliance or place objects (such as laundry, lighted candles, lighted cigarettes, dishes, chemicals, metal objects, etc.) on the appliance. This may result in an electric shock, fire, problems with the product, or injury. Do not put a container filled with water on the appliance.
- If spilled, there is a risk of fire or electric shock.
- Never stare directly at the UV LED lamp for long periods of time.
- This may result in eye strain due to the ultraviolet rays.
- Do not put a fridge shelf into the refrigerator upside down. The shelf stopper will not work.
- The glass shelf could fall and cause personal injury.
- Keep fingers out of "pinch point" areas. Clearances between the doors and cabinet are necessarily small. Be careful when you open the doors if children are in the area.
- If a gas leak is detected, avoid any naked flames or potential sources of ignition, and air the room in which the appliance is standing for several minutes.
- Do not touch the appliance or power cord.
- Do not use a ventilating fan.
- A spark may result in an explosion or fire.
- Use only the LED Lamps provided by the manufacturer or its service agents.
- Bottles should be stored tightly together so that they do not fall over or out.
- This product is intended only for the storage of food in a domestic environment.
- Do not attempt to repair, disassemble, or modify the refrigerator yourself.
- Unauthorized modifications can cause safety problems. To reverse an unauthorized modification, we will charge the full cost of parts and labor.
- Do not use any fuse (such as cooper, steel wire, etc.) other than a standard fuse.
- If your refrigerator needs to be repaired or reinstalled, contact your nearest Samsung service center.
- Failing to do so may result in an electric shock, fire, problems with the product, or injury.
- If the interior or exterior LED lamp has gone out, contact your nearest Samsung service center.
Safety information
- If the refrigerator emits a burning smell or smoke, unplug the refrigerator immediately and contact a Samsung service center.
Failing to do so may result in an electric or fire hazards.
- Pull the power plug out of the socket before changing the interior lamps of the refrigerator.
Otherwise, there is a risk of electric shock.
- If you experience difficulty changing a non-LED light, contact a Samsung service center.
- If the product is equipped with LED lamps, do not disassemble the Lamp Covers and LED lamps yourself.
- Contact a Samsung service center.
- Plug the power plug into the wall socket firmly.
- Do not use a damaged power plug, damaged power cord, or loose wall socket.
- This may result in an electric shock or fire.
Usage cautions
CAUTION
- Do not re-freeze frozen foods that have thawed completely.
-
Use only the ice maker provided with the refrigerator.
• To get the best performance from the product: -
Do not place food too close to the vents at the rear of the refrigerator as this can obstruct free air circulation in the refrigerator compartment.
- Wrap food up properly or place it in airtight containers before putting it into the refrigerator.
-
Please observe maximum storage times and expiration dates of frozen goods.
-
Do not put glass containers or bottles or carbonated beverages into the freezer.
- The container may freeze and break, and this may result in injury.
• Service Warranty and Modification.
- Any changes or modifications performed by a 3rd party on this finished appliance are not covered under Samsung warranty service, nor is Samsung responsible for safety issues that result from 3rd party modifications.
- Do not block the air vents inside the refrigerator.
- If the air vents are blocked, especially with a plastic bag, the refrigerator can be over cooled. If a cooling period lasts too long, the water filter may break and cause water leakage.
- If the refrigerator is disconnected from the power supply, you should wait for at least five minutes before plugging it back in.
- If large amounts of water enter the refrigerator, pull out the power plug and contact a Samsung service center.
- Do not strike or apply excessive force to any glass surface.
- Broken glass may result in a personal injury and/or property damage.
- Fill the water tank and ice cube trays with potable water only (tap water, mineral water, or purified water).
- Do not fill the tank with tea, juice, or a sports drink. They can damage the refrigerator.
English12
- If the refrigerator is flooded, shut off the power to the refrigerator and contact your nearest Samsung service center.
There is a risk of electric shock or fire.
- Do not keep vegetable oil in your refrigerator's door bins. The oil can solidify, making it foul-tasting and difficult to use. In addition, the open container can leak and the leaked oil can cause the door bin to crack. After opening an oil container, it is best to keep the container in a cool and shaded place such as a cupboard or pantry.
- Examples of vegetable oil: olive oil, corn oil, grape-seed oil, etc.
Cleaning cautions
CAUTION
- Do not spray water directly on the inside or outside of the refrigerator. - There is a risk of fire or electric shock.
- Do not use a hair dryer to dry the inside of the refrigerator.
- Do not place a lighted candle in the refrigerator to remove bad odors. - This may result in an electric shock or fire.
- Do not spray cleaning products directly on the display.
- Printed letters on the display may come off.
- If any foreign substance such as water has entered the appliance, unplug the power plug and contact your nearest Samsung service center.
- Failing to do so may result in an electric shock or fire.
- Use a clean, dry cloth to remove any foreign matter or dust from the power plug blades. Do not use a wet or damp cloth when cleaning the plug.
- Otherwise, there is a risk of fire or electric shock.
- Do not clean the appliance by spraying water directly onto it.
- Do not use benzene, thinner, or Clorox (bleach) to clean the refrigerator. - They may damage the surface of the appliance and may cause a fire.
- Never put fingers or any objects into the dispenser outlet.
- This can cause a personal injury or material damage.
- Before cleaning or performing maintenance, unplug the appliance from the wall socket.
- Failing to do so may result in an electric shock or fire.
- Use a clean sponge or soft cloth and a mild detergent in warm water to clean the refrigerator.
- Do not use abrasive or harsh cleansers such as window sprays, scouring cleansers, flammable fluids, muriatic acid, cleaning waxes, concentrated detergents, bleaches, or cleansers containing petroleum products on exterior surfaces (doors and cabinet), plastic parts, door and interior liners, and gaskets.
- These can scratch or damage the material.
- Do not clean glass shelves or covers with warm water when they are cold. Glass shelves and covers may break if exposed to sudden temperature changes or impacts such as bumping or dropping.
Safety information
Critical disposal warnings
WARNING
• Children trapped inside a refrigerator can hurt themselves or suffocate to death.
- Please dispose of the packaging material from this product in an environmentally friendly manner.
- Ensure that none of the pipes on the back of the refrigerator are damaged prior to disposal.
- This product contains R-600a, a flammable gas, which is used as the refrigerant. Contact your local authorities regarding safe disposal of this product.
- When disposing of this refrigerator, remove the door/door seals and door latch so that small children or animals cannot become trapped inside. Children should be supervised to ensure that they do not play with the appliance.
If trapped inside, the child could be injured or suffocate to death.
- Cyclopentane is used in the insulation. The gases in the insulation material require a special disposal procedure. Please contact your local authorities in regard to the environmentally safe disposal of this product.
- Keep all packaging materials well out of the reach of children, as packaging materials can be dangerous to children.
- If a child places a bag over his or her head, the child could suffocate.
English14
Installation
Follow these instructions carefully to ensure a proper installation of this refrigerator and to prevent accidents before using it.

WARNING
- Use the refrigerator only for its intended purpose as described in this manual.
- Any servicing must be performed by a qualified technician.
- Dispose of the product packaging material in compliance with the local regulations.
- To prevent electric shock, unplug the power plug before servicing or replacing parts.
Installation
Refrigerator at a glance
The actual refrigerator and provided component parts of your refrigerator may differ from the illustrations in this manual, depending on the model and the country.
Type A
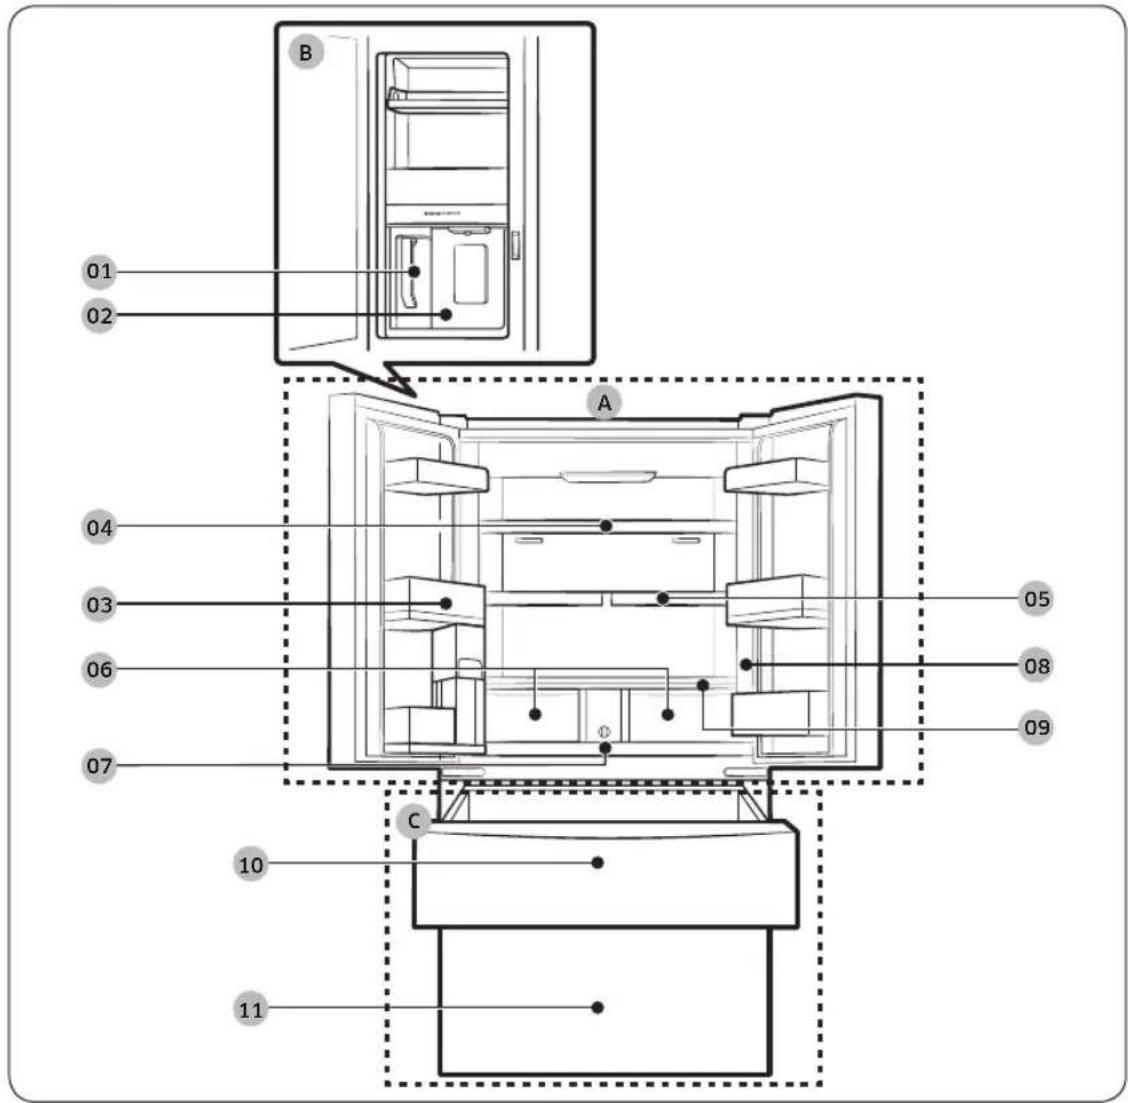
text_image
B 01 02 A 04 03 06 07 C 10 11 05 08 09English16
Type B
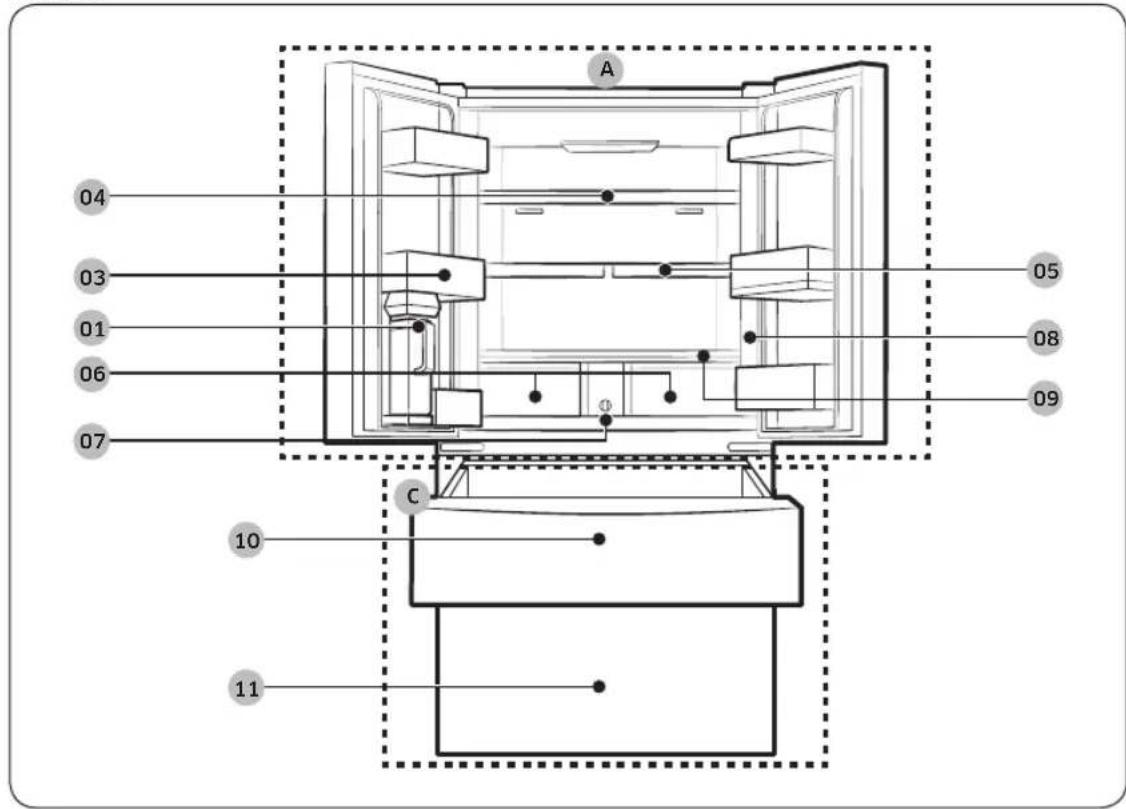
text_image
A 04 03 01 06 07 05 08 09 C 10 1101 AutoFill pitcher *
02 Water dispenser **
03 Fridge door bin
04 Fridge shelf
05 Quick Space shelf *
06 Crisper / Flex Crisper Drawers *
07 Water filter *
08 Control panel
09 Vegetable shelf
10 FlexZone
11 Freezer
A. Fridge
B. Beverage Center **
C. Freezer
* Applicable models only
** Dispenser models only
Installation
NOTE
- For energy efficiency, keep all shelves, drawers, and baskets in their original positions.
- When closing the door, make sure the vertical hinged section is in the correct position to avoid scratching the other door.
- If the vertical hinged section is reversed, put it back into the correct position, and then close the door.
- Moisture may form at times on the vertical hinged section.
• If you close a door forcefully, the other door may open. - If the internal or external LED lamp is not working, contact a local Samsung service center.
Door bins
Your refrigerator ships with door bins of different types and sizes. If the door bins for your refrigerator were packaged separately, use the figure below to help you position the bins properly.
NOTE
The actual refrigerator and provided component parts of your refrigerator may differ from the illustrations in this manual, depending on the model and the country.
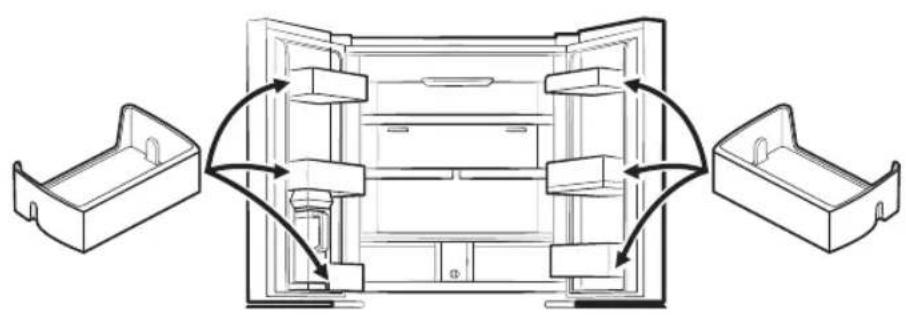
natural_image
Diagram of a refrigerator interior showing door, drawer, and front compartment layout (no text or labels)English18-
Step-by-step installation
STEP 1 Select a site
The site must:
- Have a solid level surface without carpeting or flooring that may obstruct ventilation
- Be out of direct sunlight
• Have adequate room for opening and closing the door - Be away from any heat source
- Provide room for maintenance and servicing
- Have a temperature range between 50^ (10 °C) and 110^ (43 °C)
Clearance
See the following figures and tables for installation space requirements.
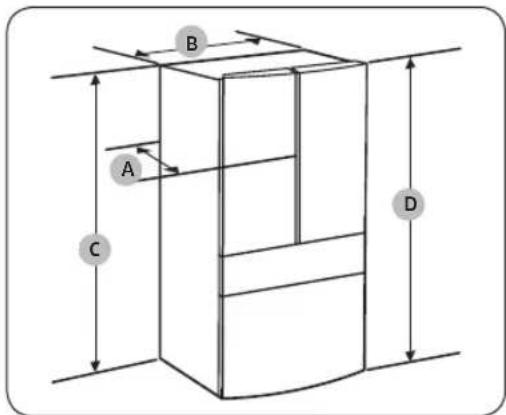
text_image
A B C D| Model RF23BB8***** RF29BB8***** | ||
| A | 28 ^6/_8 " (730 mm) | 34 ^1/_4 " (868 mm) |
| B 35 | ^6/_8 " (908 mm) | |
| C 68 | ^7/_8 " (1749 mm) | |
| D 70" | (1778 mm) | |
Installation
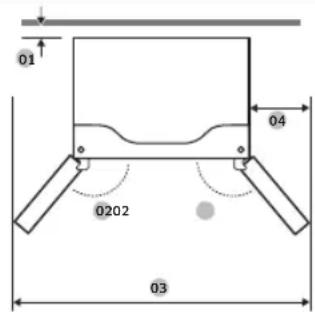
text_image
01 04 0202 03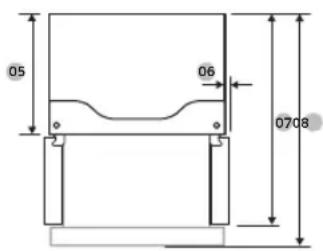
text_image
05 06 0708| Model RF23BB8**** RF29BB8**** | ||
| 01 | more than 50 mm recommended | |
| 02 125° | ||
| 03 58 | ^2/_4 " (1485 mm) | |
| 04 11 | ^3/_8 " (289 mm) | |
| 05 | 24"(610 mm) | 29 ^3/_8 "(748 mm) |
| 06 2 | ^1/_8 " (54 mm) | |
| 07 | 43"(1093 mm) | 48 ^2/_4 "(1231 mm) |
| 08 | 44 ^2/_4 "(1131 mm) | 53 ^1/_4 "(1353 mm) |
NOTE
The measurements in the tables may differ slightly from the actual measurements, depending on the measuring and rounding method.
English20
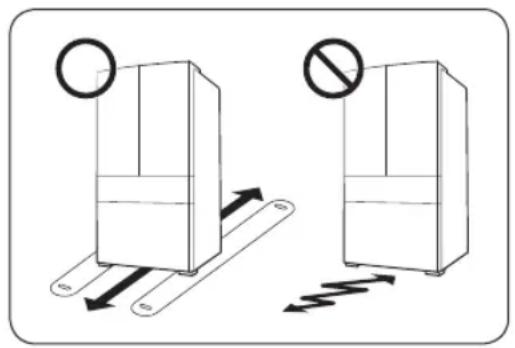
STEP 2 Flooring
If the refrigerator cannot pass through the entrance due to its size, see Door removal for entrance.
natural_image
Diagram showing two containers with directional arrows indicating movement, one marked with a circle and the other with a prohibition sign (no text or symbols present)NOTE
To prevent floor damage, make sure the front leveling legs are in the upright position.
- The surface you install the refrigerator on must support a fully loaded refrigerator.
- To protect the floor, put a large piece of cardboard along the path to the refrigerator's final installation location.
- Once the refrigerator is in its final position, do not move it unless necessary to protect the floor. If you have to move the refrigerator, place thick paper or cloth such as old carpets along the path of movement.
Installation
STEP 3 Door removal for entrance
If the refrigerator cannot pass through the entrance to your home or kitchen due to its size, follow these instructions to remove and then re-install the refrigerator's doors. If you do not need to remove the doors, go to page 30 to continue the installation procedure.

WARNING
Unplug the power cord of the refrigerator before removing the doors.
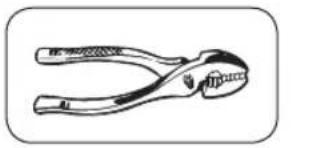
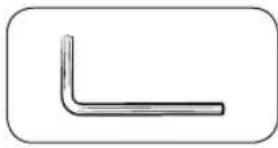
Tools required (not provided)
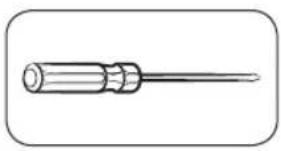
natural_image
Simple line drawing of a screwdriver (no text or symbols)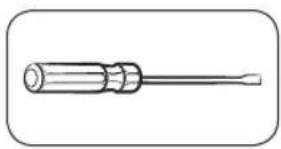
natural_image
Line drawing of a screwdriver with a cylindrical head and shaft (no text or symbols)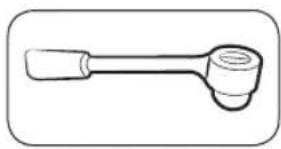
natural_image
Line drawing of a mechanical tool with a handle and lever (no text or symbols)Phillips screwdriver Flat-head screwdriver Socket wrench
^3/_8 " (10 mm)
natural_image
Line drawing of a pair of pliers (no text or symbols)Pliers Allen wrench
natural_image
Simple L-shaped metal bracket diagram without any text or symbols^1/_4 " (5 mm)
Detach the fridge doors
natural_image
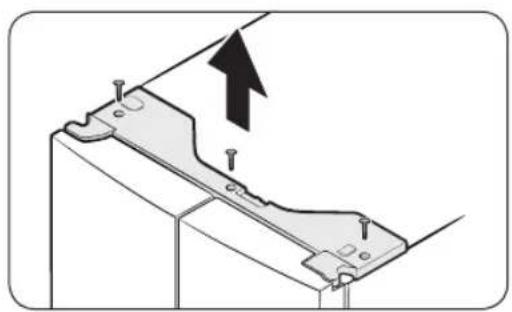
Technical diagram of a mechanical assembly with mounting holes and a directional arrow (no text or symbols)- With the doors closed, use a Phillips screwdriver to remove the screws (x3) from the top cover. Pull up and remove the top cover with the connectors.
English22-
natural_image
Diagram showing mechanical assembly with directional arrows and a magnified inset of connected components (no text or symbols)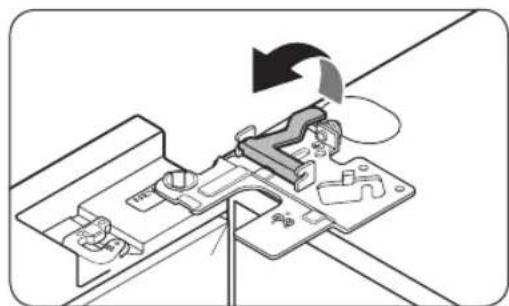
natural_image
Mechanical assembly diagram showing a clamping mechanism with rotating arrow and motion indicator (no text or symbols)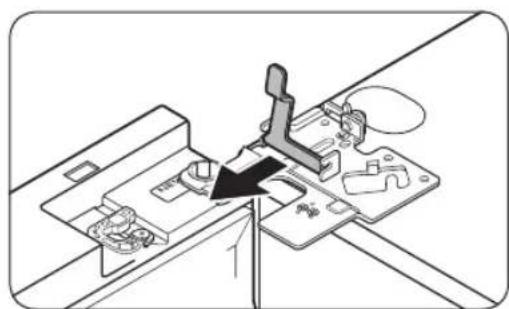
natural_image
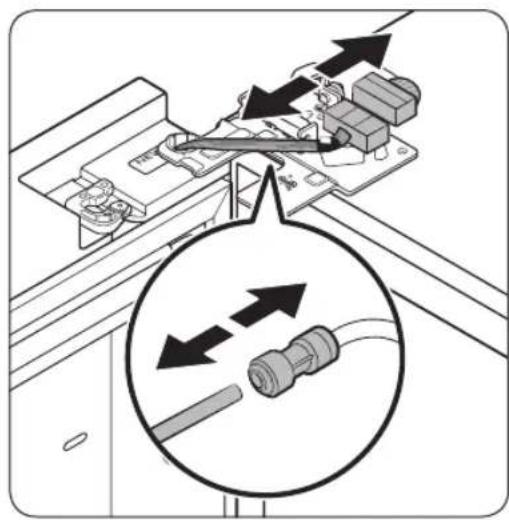
Technical diagram showing a mechanical assembly with a lever and base plate (no text or symbols)- Disconnect the two wire connectors on the left door. The position of the connectors differs with the model.
CAUTION
- Do not remove both doors simultaneously. Make sure to remove one door at a time. Otherwise, any of the doors may fall and cause physical injury.
- Make sure the refrigerator is off before disconnecting the connectors.
- Disconnect the water tube from the coupler on the left door as shown.
- This step does not apply to the models without the AutoFill Pitcher and the water dispenser.
- Gently draw up the clamp in several steps. To prevent finger injuries, do not apply a sudden force to the clamp.
- Pull up the clamp to remove.
Installation
natural_image
Mechanical assembly diagram showing a clamping mechanism with a black arrow indicating motion (no text or symbols present)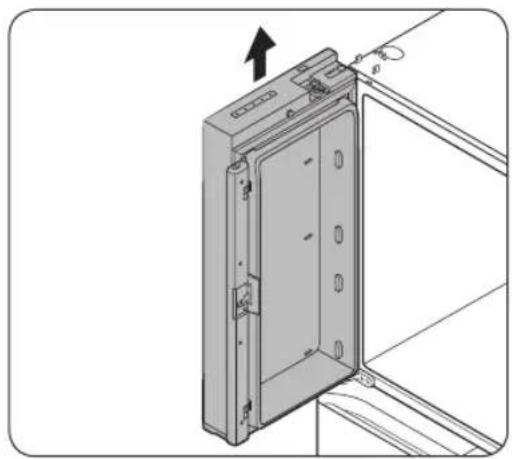
natural_image
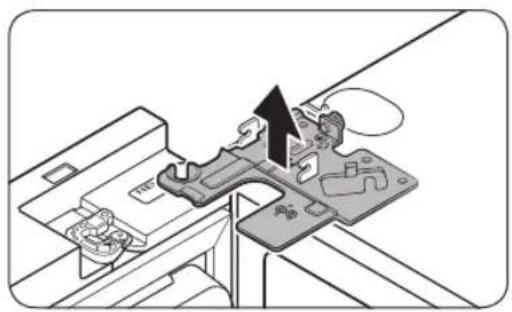
Technical line drawing of a door panel with mounting bracket and directional arrow (no text or symbols)- Open the door 90 degrees. While holding the door, pull up and remove the top hinge. Be careful not to damage the connector wires when you remove the hinge.
- Gently pull up the door vertically to remove. Do not apply excessive force to the door. The door may fall, causing physical injury.
- Lay the door down on a flat surface.
- Repeat steps 1-8 for the other door, except for step 3. There is no water tube on the right side door.
- Step 2 does not apply to the models without the Showcase door.
English24
To reattach the fridge doors
natural_image
Diagram of a door hinge with a black arrow pointing to a corner detail (no text or symbols)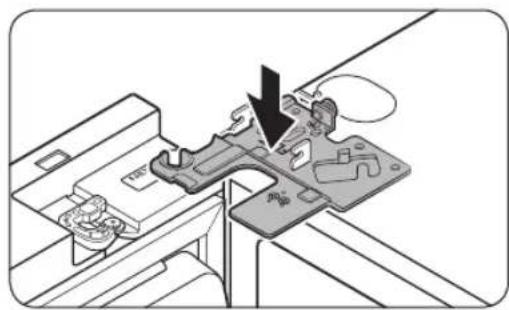
natural_image
Mechanical assembly diagram showing a clamping device interacting with a bracket (no text or symbols visible)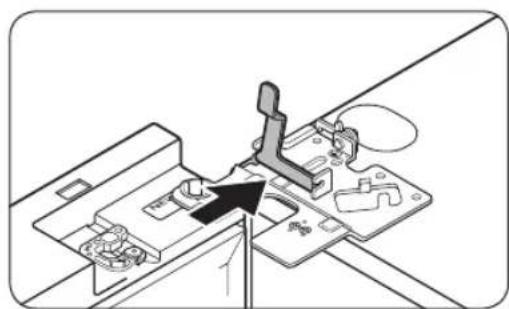
natural_image
Mechanical assembly diagram showing a lever mechanism interacting with a base plate (no text or symbols visible)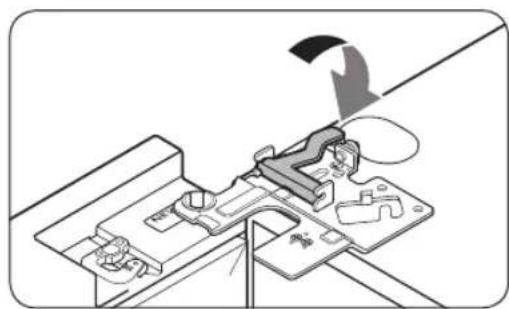
natural_image
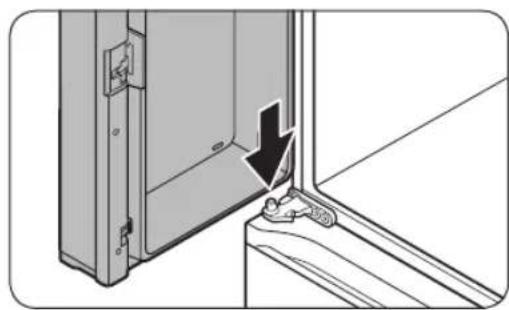
Mechanical assembly diagram showing a clamping mechanism with no visible text or symbols- While holding the door open by more than 90 degrees, insert the shaft on the middle hinge into the hole on the bottom of the door.
- Put the top hinge into position on the top of the refrigerator, and then insert the hinge shaft into the top hole of the door. Make sure the wires from the door pass through the hole in the hinge shaft.
- Insert the clamp in the direction of the arrow.
- Push back the clamp as shown.
Installation
Installation
natural_image
Diagram showing mechanical assembly with directional arrows and a magnified inset of connected components (no text or symbols)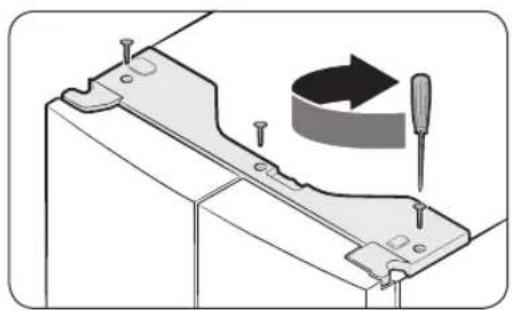
natural_image
Technical illustration of a mechanical assembly with screwdriver and curved arrow indicating rotation (no text or symbols)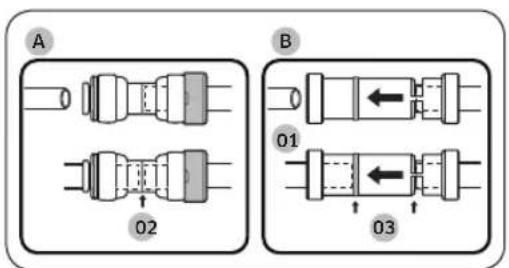
text_image
A 0 02 B 01 0301 Dispenser
02 Center of transparent coupler
03 Guidelines
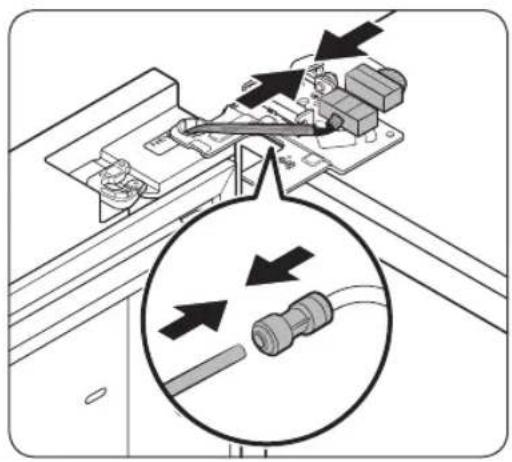
- Connect the wire connectors.
CAUTION
- Make sure the wire connectors are connected properly. Otherwise, the display will not operate.
- Connect the water tube.
- This step does not apply to the models without the AutoFill Pitcher and the water dispenser.
CAUTION
• To prevent water leaks, make sure the red clips tighten the coupler properly.
- Keep the clips out of children's reach.
- Repeat steps 1-5 for the other door.
- Step 5 does not apply to the models without the Showcase door.
- Attach the top cover with the front side first, and then press down on its back to get it into position. Then, tighten the screws (x3).
CAUTION
To prevent water leaks from the dispenser, the water line must be fully connected. Make sure both tubes of the water line are inserted fully to the center of transparent coupler (A) or the guidelines (B).
English26
Detach the FlexZone drawer
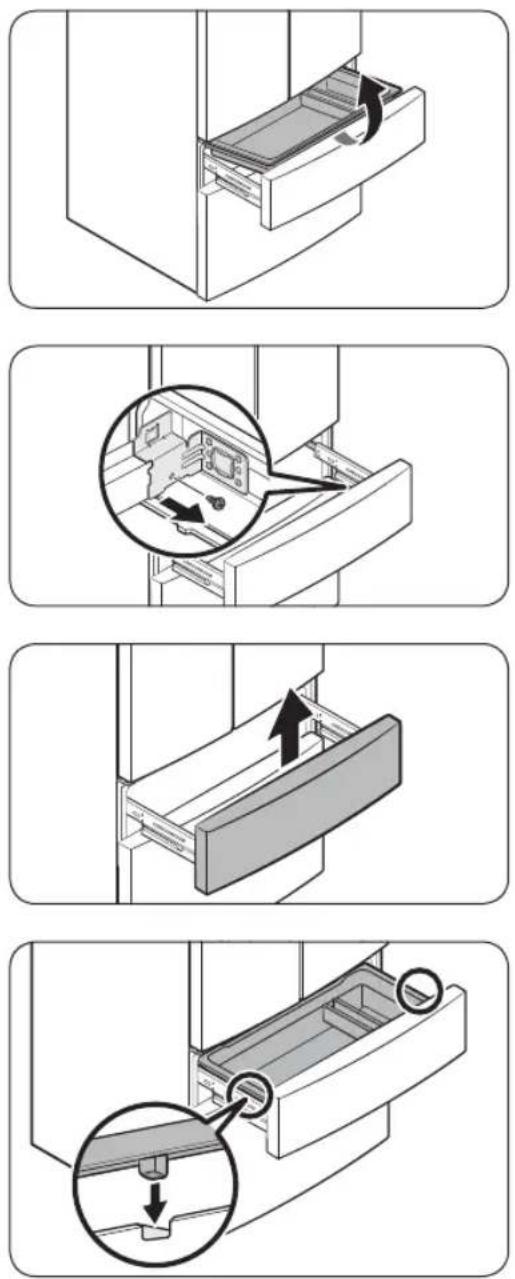
- Lift up to remove the FlexZone basket.
- Remove the hex-head bolt on each side of the drawer using a 10 mm socket wrench.
- Lift up to remove the drawer front of the FlexZone from the rail assembly.
CAUTION
- Use caution when removing the rail assembly, which may fall off causing damage to the floor.
- Make sure to put the FlexZone drawer in place after removing or mounting the FlexZone basket. The FlexZone drawer may not open or close if the freezer drawer is not in place.
- Do not store too much food in the FlexZone drawer. This prevents the FlexZone drawer from closing properly, resulting in frost buildup.
Installation
To reattach the FlexZone drawer
After you have moved the refrigerator to its final location, re-attach the FlexZone drawer by following the removal instructions in reverse order.
CAUTION
If the FlexZone or the indicator does not operate properly, make sure the connectors are connected properly.
To detach the freezer drawer
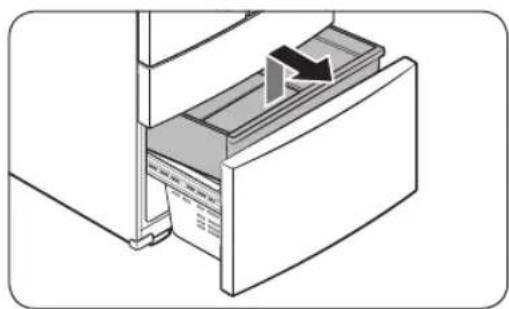
natural_image
Diagram of a refrigerator interior showing a door, drawer, and shelf with an arrow indicating direction (no text or symbols)- Push the upper basket to the end, and then pull up to remove.
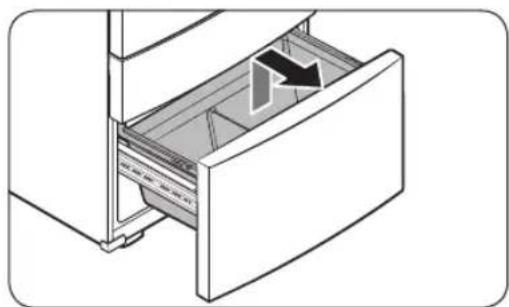
natural_image
Diagram of a refrigerator drawer with an arrow indicating direction (no text or symbols present)- Then, pull up to remove the lower basket from the rail assembly.
natural_image
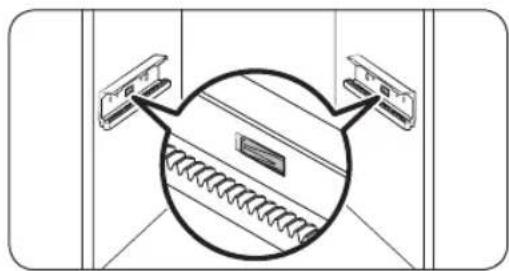
Diagram showing two connected devices with a magnified circular view of a mechanical component (no text or symbols)- Press down the hooks to unlock the rail assembly.
English28-

Installation

natural_image
Diagram of a cabinet drawer with an arrow indicating direction (no text or symbols present)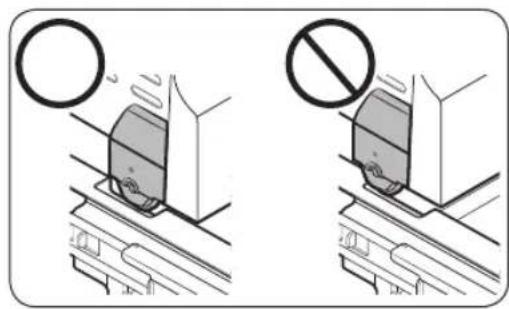
natural_image
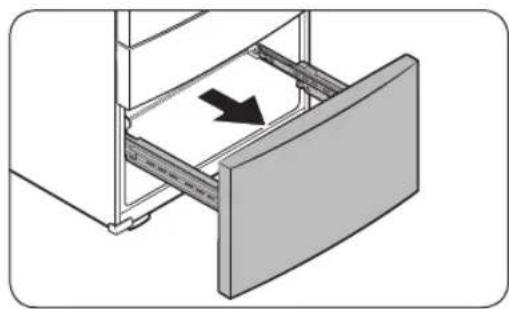
Two technical diagrams showing a train on tracks with a circular warning symbol and a prohibition sign (no text or labels present)- While holding the upper area of the freezer drawer front, slide the drawer out all the way to remove the freezer drawer from the rail assembly.
CAUTION
- Be careful not to scratch or dent the rail assembly.
• Make sure you mount the freezer baskets in the correct position. Otherwise, the door will not open or close properly, which causes frost to build up. - Do not store too much food in the freezer drawer. This prevents the freezer drawer from closing properly, resulting in frost buildup.
To reattach the freezer drawer
Once the refrigerator is in or near it's final location, re-attach the freezer drawer by following the directions in the reverse order of removal.
Installation
STEP 4 Leveling the refrigerator
CAUTION
- When installed, the refrigerator must be leveled on a flat, solid floor. Not leveling the refrigerator can cause damage to the refrigerator or physical injury.
- Leveling must be performed with the refrigerator empty. Make sure no food items are inside the refrigerator.
- For safety reasons, adjust the front a little higher than the rear.
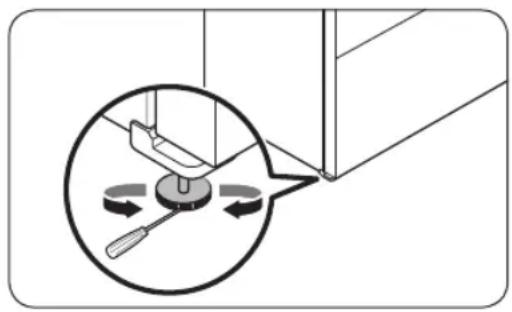
Level the refrigerator using the special screws (levelers) on the front legs. Use a flat-head screwdriver to turn the levelers.
natural_image
Diagram showing a mechanical device with a lever and rotating arrows, no text or symbols present- To adjust the height of the left side: Insert a flat-head screwdriver into the leveler of the left side front leg. Turn the leveler clockwise to raise the left side or turn it counterclockwise to lower.
- To adjust the height of the right side: Insert a flat-head screwdriver into the leveler of the right side front leg. Turn the leveler clockwise to raise the right side or turn it counterclockwise to lower.
English30-
STEP 5 Adjust the door height and the door gap
natural_image
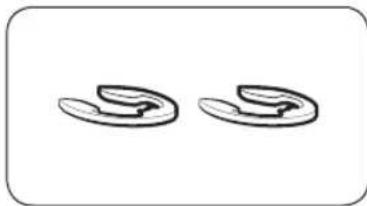
Two identical curved, segmented shapes resembling stylized fish or gear (no text or symbols)Snap rings
The height of a door can be adjusted using the provided snap rings, which come in 4 different sizes (1 mm, 1.5 mm, 2 mm, and 2.5 mm).
To adjust the height of a door
natural_image
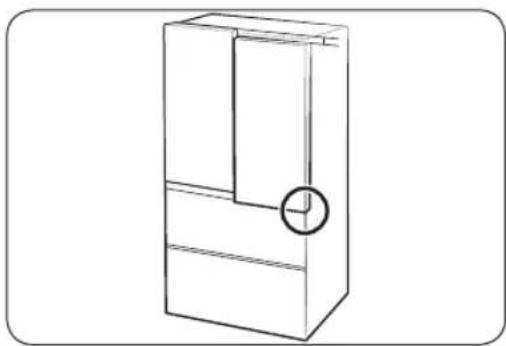
Line drawing of a refrigerator with a circular button on the door (no text or symbols)- Check the height difference between the doors, and then lift up and hold the door with the lower height.
text_image
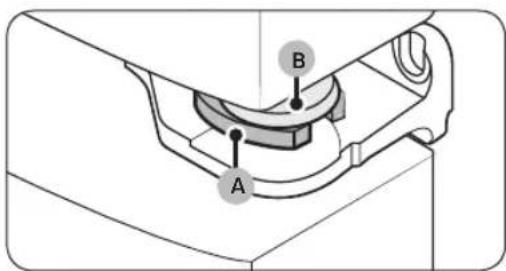
Technical diagram showing a mechanical component with labeled parts A and B- Insert a suitable-sized snap ring (A) between the door grommet (B) and the hinge as shown.

CAUTION
- Insert only one snap ring. If you insert two or more snap rings, the rings may slip out or make a rubbing noise.
- Keep the snap rings out of children's reach and keep them for future use.
- Do not raise the door too much. The door can contact and damage the top cover.
Installation
STEP 6 Connect the water dispenser line (applicable models only)
A water dispenser with a filter is one of the helpful features on your new refrigerator. To help promote better health, the water filter removes unwanted particles from your water. However, it does not sterilize or destroy microorganisms. You may need to purchase a water purifying system to do that.
The water line also connects to the ice maker. For the ice maker to operate properly, water pressure must be between 30-125 psi (206-861 kPa).
If the refrigerator is installed in an area with low water pressure (below 30 psi / 206 kPa), you can install a booster pump to compensate for the low pressure.
After you have connected the water line, check if the water dispenser works properly.
Press the water dispenser lever until the water runs from the water outlet.
NOTE
- Water line installation kits are available at extra cost from your retailer. We recommend using a water line installation kit that contains copper tubing and a ^1/4 " (6 mm) compression nut.
text_image
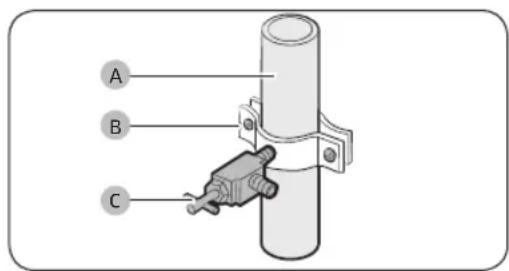
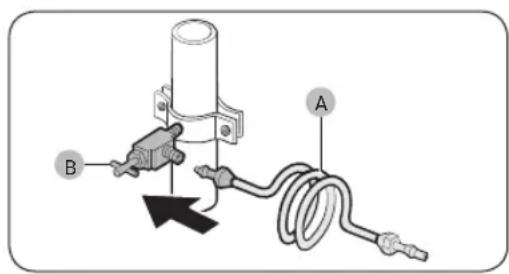
A B C- Shut off the main water source.
- Insert the pipe clamp (B) and the shutoff valve (C) into the cold water line (A).
text_image
Diagram showing a mechanical or electrical component with labeled parts A and B, including a directional arrow indicating movement.- Connect the water line installation kit (A) to the shutoff valve (B).
English32-
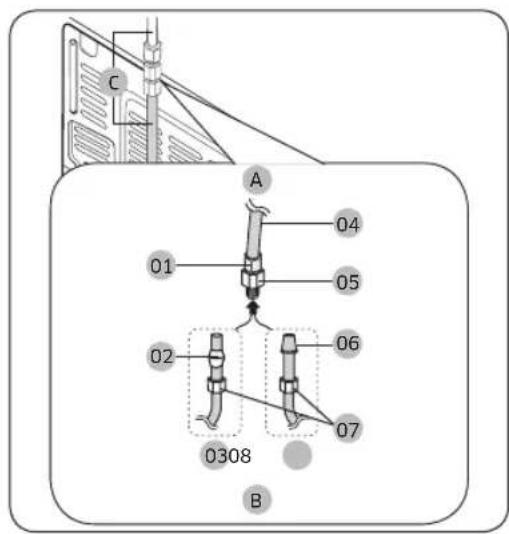
Connect the water supply line to the refrigerator
There are several items you must purchase to complete this connection. You may find these items sold as a kit at your local hardware store.
| Copper Tubing | ^1/_4" copper tubing ^1/_4" compression nut (1 pc)Ferrule (2 pc) |
| Plastic Tubing | ^1/_4" plastic tubing → Molded end (Bulb) ^1/_4" compression nut (1 pc) |
text_image
C A 04 05 01 02 06 07 0308 BA. Refrigerator
B. Household water supply line
C. Water Line: must be kept straight.
01 Compression Nut ( ^1/_4 ) (Assembled)
02 Ferrule (Not supplied)
03 Copper tubing (Not supplied)
04 Plastic Tubing (Assembled)
05 Compression Fitting (Assembled)
06 Molded end (Bulb)
07 Compression nut (B) (1/4") (Not supplied)
08 Plastic Tubing (A) (Not supplied)
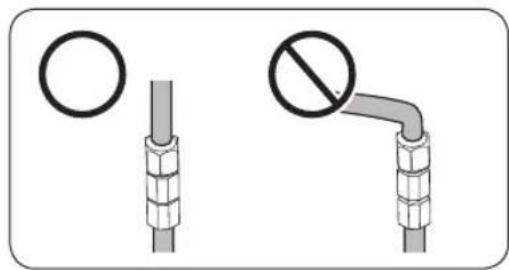
NOTE
If you have to relocate the refrigerator after connecting the water line (C), make sure the joined section of the water line is straight.
text_image
Safety warning illustration showing a pipe knot with a circle and a prohibition sign indicating no protection.Installation
text_image
Diagram showing a prohibition symbol and three labeled arrows pointing to a device with a plus sign, likely indicating a safety or hazard warning.CAUTION
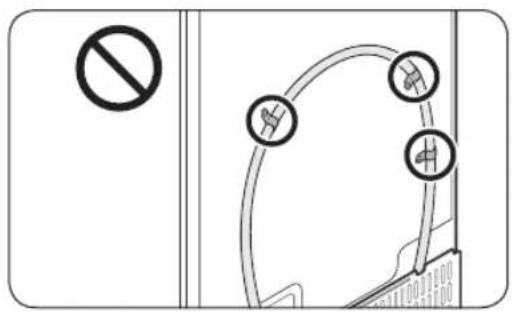
Do not mount the water filter on any part of the refrigerator. This may damage the refrigerator.
-
Connect the household water line to the assembled compression fitting.
-
If you are using copper tubing, slip the compression nut (B) (not supplied) and ferrule (not supplied) on the copper tubing (not supplied) as shown.
- If you are using plastic tubing (A), insert the molded end (Bulb) of the plastic tubing (A) into the compression fitting.
CAUTION
• If you use plastic tubing (A), do not use it without the molded end (Bulb).
- Leaving the water line disconnected may cause the water valve to produce a buzzing sound over time. If this is the case, make sure that the ice making function is turned "OFF" and do not attempt to use the water dispenser.
2. Tighten the compression nut (B) onto the compression fitting. Do not over-tighten the compression nut (B).
3. Turn the water on and check for any leakage. If you find water drops or leakage in the connection areas, turn off the main water supply. Check the connections and, if necessary, tighten.
4. Flush 3 gallons of water through the filter before drinking or using the water from the refrigerator. (Flush approximately 5-6 minutes.) To flush, press a large glass or cup against the water dispenser lever. Fill the glass, empty it, and then repeat.
5. After you turn on the refrigerator, let the ice maker make ice for 1 to 2 days. Over that period of time, throw out the first 1 or 2 buckets of ice the ice maker makes to ensure all impurities have been removed from the water line.
NOTE
Only connect the water line to a potable water source.
- If you have to repair or disassemble the water line, cut off 14 " of the plastic tubing to make sure you get a snug, leak-free connection.
- You can test the water line quickly using a paper cup. Under normal conditions, the water dispenser can fill a 5 34 oz. (170 cc) cup in about 10 seconds.
English34
STEP 7 Initial settings
By completing the following steps, the refrigerator should be fully functioning.
- Plug the power cord into the wall socket to turn the refrigerator on.
- Open the door, and check if the interior light lights up.
- Set the temperature to the coldest setting, and wait for about an hour. Then, the freezer will be slightly chilled, and the motor should be running smoothly.
- Wait until the refrigerator reaches the set temperature. Now the refrigerator is ready for use.
STEP 8 Final check
When installation is complete, confirm that:
- The refrigerator is plugged into an electrical outlet and grounded properly.
- The refrigerator is installed on a flat, level surface with a reasonable clearance from walls and cabinets.
- The refrigerator is level and is sitting firmly on the floor.
- The door opens and closes freely, and the interior light turns on automatically when you open the door.
Operations
Main panel
text_image
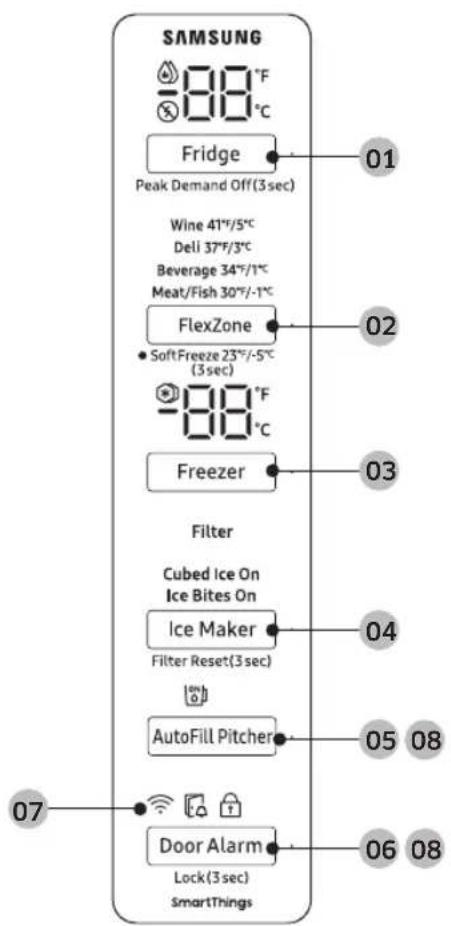
SAMSUNG 88°F Fridge Peak Demand Off(3 sec) 01 Wine 41°F/5°C Dell 37°F/3°C Beverage 34°F/1°C Meat/Fish 30°F/-1°C FlexZone SoftFreeze 23°F/-5°C (3sec) 88°F Freezer 02 03 Filter Cubed Ice On Ice Bites On Ice Maker Filter Reset(3 sec) 04 AutoFill Pitcher 05 08 Door Alarm Lock(3 sec) SmartThings 06 08 0701 Fridge / Peak Demand Off 02 FlexZone / Soft Freeze
03 Freezer / °F ↔ °C
04 Ice Maker / Filter Reset
05 AutoFill Pitcher * 06 Door Alarm / Lock
07 Network connection 08 Sabbath Mode
* applicable models only
English36

NOTE
- When you change the temperature on the panel, the panel displays the actual temperature inside the refrigerator until the temperature matches the temperature you set. Then, the panel displays the new set temperature. Note that it will take time for the refrigerator to reach the new temperature. This is normal. During this time, you do not need to set the temperature again.
- The temperature in the refrigerator may rise if you open the door frequently or put a large amount of food into the refrigerator. If this happens, the temperature display blinks until the refrigerator returns to the specified temperature settings. While the temperature display is blinking, an alarm may occur. To stop the alarm, tap any button on the display.
- If a communication error occurs between the temperature display and the main controller, this blinking continues for an extended time. Contact a local Samsung service center for technical assistance.
- The display of the main panel turns on only if the door is opened and turns off if the door is closed.
- If you set Control Lock on the main panel, the main panel locks automatically 1 minute after inactivity.
01 Fridge / Peak Demand Off (3 sec)
| Fridge | You can use theFridgebutton to set the fridge temperature or to activate Power Cool.PressFridgerepeatedly to select a desired temperature between 34 °F (1 °C) and 44 °F (7 °C).- The temperature indicator displays the currently set or selected temperature.To activate Power Cool, pressFridgerepeatedly until the Power Cool indicator ( lights up.- To deactivate Power Cool, simply pressFridg again while the Power Cool function is on.- Power Cool speeds up the cooling process at maximum power to lower the fridge temperature. The Power Cool process continues to run for several hours, and then turns off and the fridge returns to the previous temperature setting.- Use Power Cool to rapidly cool food that spoils quickly or to rapidly cool the refrigerator after the door has been left open for some time.NOTEUsing Power Cool increases power consumption. Make sure you turn it off manually if you no longer need it, and then select the desired refrigerator temperature. |
Operations
| Peak Demand Off | The Peak Demand Off function activates/deactivates Smart Grid. (See Page 45)PressFridgefor 3 seconds to set/clear the Peak Demand Off function. |
02 FlexZone / Soft Freeze (3 sec)
| FlexZone | You can set the FlexZone mode from one of the following modes.Wine: The temperature sets to 41 °F (5 °C).Deli: The temperature sets to 37 °F (3 °C).Beverage: The temperature sets to 34 °F (1 °C).Meat/Fish: The temperature sets to 30 °F (-1 °C). |
| Soft Freeze | You can use this mode to keep meat and fish fresh for an extended time. The temperature sets to 23 °F (-5 °C) in this mode.Press and hold FlexZone for 3 seconds to activate the Soft Freeze mode.To deactivate the Soft Freeze mode, press and hold FlexZone again for 3 seconds.The Soft Freeze mode deactivates and the FlexZone returns to the mode that you previously used. |
CAUTION
- Select the FlexZone mode accordingly to the type of food you store in there.
- Do not store meat or food in the FlexZone with the Wine, Deli, or Beverage mode. Meat or food may spoil.
- Do not store glass bottles in the FlexZone in Soft Freeze mode. They may break and cause physical injury.
English38
03 Freezer / °F ↔ °C
| Freezer | You can use the Freezer button to set the freezer temperature or to activate Power Freeze.Press Freezer repeatedly to select a desired temperature between 5 °F (-15 °C) and -8 °F (-23 °C).- The temperature indicator displays the currently set or selected temperature.To activate Power Freeze, press Freezer repeatedly until the Power Freeze indicator ( lights up.- To deactivate Power Freeze, simply press Freezer again while the Power Freeze function is on.- Power Freeze speeds up the freezing process at maximum power to lower the freezer temperature. The Power Freeze process continues to run for several hours, and then turns off and the freezer returns to the previous temperature setting.- To freeze large amounts of food, activate Power Freeze for at least 20 hours before putting the food in the freezer.NOTEUsing Power Freeze increases power consumption. Make sure you turn it off manually if you no longer need it, and then select the desired freezer temperature. |
| °F ↔°C | You can also use the Freezer button to switch the temperature scale between Celsius and Fahrenheit. To switch the temperature scale, press and hold Freezer for 3 seconds to change the current temperature scale. |
04 Ice Maker / Filter Reset (3 sec)
| Ice Maker | The ice maker has 2 indicators (Cubed Ice On/Ice Bites On) to indicate its operating status.· Cubed Ice * : You can start or stop making cubed ice.· Ice Bites * : You can start or stop making ice bites. |
Operations
| Filter Reset | After about 6 months (and typically, about 300 gallons (1200 L) of water), the Filter indicator blinks red for several seconds when you open the door, reminding you that the filter needs to be replaced.When this happens, replace the filter, and then press and holdFilter Resetfor 3 seconds. The filter lifecycle will be reset and the Filter indicator turns off.NOTESome regions have relatively large amounts of lime in their water.This can reduce the lifecycle of the filter. In these areas, you will have to replace the water filter more often than specified above.If water is not dispensing properly, the water filter is most likely clogged. Replace the water filter. |
05 AutoFill Pitcher
| AutoFill Pitcher* | You can set the AutoFill Pitcher mode from one of the following modes.On: Set to fill your water pitcher automatically.Off: Set to turn off the function.NOTEYou can put tea or fruit into the infuser to make infused tea or water. If you want to keep the infused water in its initial concentration, turn the AutoFill Pitcher function off. (For more information, see the Water pitcher (AutoFill Pitcher) (applicable models only) section on page 48.) |
06 Door Alarm / Lock (3 sec)
| Door Alarm | If the door is left open for more than 2 minutes, an alarm will sound and the alarm indicator will blink. You can toggle the alarm on and off by pressing Door Alarm. The alarm is enabled by factory default. |
| Lock | To prevent accidental setting changes, press and hold Door Alarm for 3 seconds. The main panel will be disabled and the Lock indicator (💡) will turn on.When Lock is on, the indicator blinks if any button on the main panel is pressed.If you press and hold the button again for more than 3 seconds, Lock will be deactivated.However, Lock will be reactivated if no button is pressed within 1 minute. |
English40
07 Network connection
You can control and monitor your refrigerator on the SmartThings app. For more information, see the SmartThings section.
- If the Wi-Fi indicator flashes when opening or closing the fridge door, this indicates that the refrigerator is not connected with the SmartThings app. If this is the case, it is recommended to make connection again before using the refrigerator.
08 Sabbath Mode
The Sabbath mode stays active for 85 hours once it is activated. After that, it will be deactivated automatically.
- To activate Sabbath Mode, press and hold Door Alarm and AutoFill Pitcher simultaneously for 5 seconds. When the refrigerator is in Sabbath mode, the buttons, the display, and the internal lights do not function. The refrigerator and freezer, however, continue to cool.
- To deactivate Sabbath Mode, press and hold Door Alarm and AutoFill Pitcher simultaneously again for 5 seconds.
NOTE
If the refrigerator powers off and restarts (for example, if there is a power failure), the Sabbath mode remains active. To end Sabbath Mode, you must deactivate it as described above.
09 Cooling Off
Cooling Off mode (also called Shop mode) is designed for use by retailers when they are displaying refrigerators on a retail floor.
In Cooling Off mode, the refrigerator's fan motor and lights operate normally, but the compressors do not run so neither the refrigerator nor the freezer become cold.
To enter or exit the Cooling Off mode, press and hold Fridge and FlexZone simultaneously for 6 seconds. Then, when the display blinks, press Door Alarm.
When the Cooling Off mode is on, the refrigerator chime sounds, and the refrigerator shows "0" on the fridge temperature display and "FF" on the freezer temperature display.
Operations
SmartThings
Installation
Visit the Google Play Store, Galaxy Apps, or Apple App Store and search for "SmartThings". Download and install the SmartThings app provided by Samsung Electronics to your smart device.
NOTE
- The supporting software version of the SmartThings app is subject to change according to the OS supporting policy the manufacturer provides. In addition, as for the SmartThings app or the functions that the app supports, the new application update policy on the existing OS version can be suspended due to usability or security reasons.
- The SmartThings app is subject to change without notice to improve usability or performance. As the mobile phone OS version is updated every year, the SmartThings is also updated continually according to the latest OS. If you have enquiries regarding the items mentioned above, please contact us on st.service@samsung.com
- Recommended encryption systems include WPA/TKIP and WPA2/AES. Any newer or non-standard Wi-Fi authentication protocols are not supported.
- Wireless networks may be affected by the surrounding wireless communication environment.
- If your Internet service provider has registered the MAC address of your PC or modem for identification, your Samsung Smart Refrigerator may fail to connect to the Internet. If this happens, contact your Internet service provider for technical assistance.
- The firewall settings of your network system may prevent your Samsung Smart Refrigerator from accessing the Internet. Contact your Internet service provider for technical assistance. If this symptom continues, contact a local Samsung service center or retailer.
- To configure the wireless access point (AP) settings, see the user manual of the AP (router).
- Samsung Smart Refrigerators support both Wi-Fi 2.4 GHz with IEEE 802.11 b/g/n and Soft-AP protocols. (IEEE 802.11 n is recommended.)
- Unauthorized Wi-Fi wireless routers may fail to connect to applicable Samsung Smart Refrigerators.
English42-
Samsung account
You are required to register your Samsung account to use the app. If you don't have a Samsung account, follow the app's onscreen instructions to create a free Samsung account.
Getting started
Turn on the device you want to connect, open the SmartThings app on your phone, and then follow the instructions below.
If a pop-up appears saying that a new device has been found, tap ADD NOW.
If a pop-up doesn't appear, tap the + button, and then select the device you want to connect from the list of available devices.
If your device isn't in the list of available devices, tap Supported Devices, select the device type (Refrigerator), and then select the specific device model.
Follow the instructions in the app to set up your device. Once setup is complete, your refrigerator will appear as a "card" on your Devices screen.
Refrigerator app
Integrated control
You can monitor and control your refrigerator at home and on the go.
- Tap the refrigerator icon on the SmartThings Dashboard or tap the Devices icon at the bottom of the Dashboard, and then tap the refrigerator "card" to open the Refrigerator page.
- Check the operation status or notifications related to your refrigerator, and then change options or settings if necessary.
NOTE
Some options or settings of the refrigerator may not be available for remote control.
Operations
| Category Item | Description | |
| Monitoring | Fridge temperature | Displays the desired temperature setting of the fridge. |
| Freezer temperature | Displays the desired temperature setting of the freezer. | |
| FlexZone settings Displays the settings of the FlexZone. | ||
| Energy monitoring | Checks the accumulated power consumption of the refrigerator for the last 180 days. | |
| Functions | Ice making | You can turn the ice making function on or off, and check the current settings of the function. |
| You can also check the status and progress of ice making. | ||
| Power Cool | You can turn Power Cool on or off, and check the current settings. | |
| Power Freeze | You can turn Power Freeze on or off, and check the current settings. | |
| Fridge temperature | You can set the desired temperature of the fridge. | |
| Freezer temperature | You can set the desired temperature of the freezer. | |
| FlexZone settings You can set the desired FlexZone mode. | ||
| Sabbath Mode | You can activate and deactivate the Sabbath mode. | |
| Alarms | Abnormally high temperature | This alarm is triggered when the fridge, the freezer, or the FlexZone has abnormally high temperatures. |
| Door opening | This alarm is triggered if the fridge door, the freezer drawer, or the FlexZone drawer is open for a specific time. | |
| AutoFill Pitcher overflowing | If the AutoFill Pitcher function senses an overflow, it triggers this alarm to let you know the status of the overflow. | |
| Water filter replacement | This alarm reminds you that the water filter must be replaced. | |
English44
SMART GRID Function (Demand Response, applicable models only)
When the refrigerator operates in SMART GRID (Demand Response) mode, the Energy Management Refrigerator function can control energy usage or delay the operation of some functions to save money when energy prices or demand are the highest.

NOTE
- You can deactivate the SMART GRID (Demand Response) function at any time using the Peak Demand Off function.
- To use the SMART GRID (Demand Response) function, you need a separate contract with your electric utility company.
In addition, to use the Smart Grid (Demand Response) function, you must register for the service with your electric company. The company must have an EMS (Energy Management System) that supports SEP (Smart Energy profile).
Using the SMART GRID (Demand Response) Function
This feature monitors energy prices and demand information from your utility company and sends notifications to the refrigerator to run high energy consuming tasks during off-peak times when electricity costs and demand are lower.
If the refrigerator receives a control signal from the utility company, the refrigerator will display the DAL \~ TALR levels on the refrigerator display and control the power consumption according to the level.
[Exception condition] The DAL and TALR control signals from a utility company work as long as product performance is maintained.
If the refrigerator receives the SMART GRID (Demand Response) signal (DAL or TALR), the refrigerator will operate in Delay Appliance Load (DAL) or Temporary Appliance Load Reduction (TALR) mode.
- Delay Appliance Load (DAL): The refrigerator responds to a DAL signal by providing a moderate load reduction for the duration of the delay period. This function controls functions that consume a lot of energy such as adjusting the Cooling system, running the defrost cycle, and making ice.
- When the refrigerator operates in DAL mode, "L3" is displayed on the refrigerator display.
- DAL mode is automatically deactivated after it lasts for the amount of time stipulated by the DAL signal (max. 4.5 hours) or when the Peak Demand Off key is pressed.
- Temporary Appliance Load Reduction (TALR): The refrigerator responds to a TALR signal by aggressively reducing the load for a short time period. This function reduces energy consumption by stopping the compressor and controlling the functions that consume a lot of energy such as the defrost cycle and making ice.
- When the refrigerator operates in TALR mode, "L4" is displayed on the refrigerator display.
- TALR mode is automatically deactivated after it lasts for the received duration (max. 15 minutes), or when the Peak Demand Off key is pressed. The mode is immediately deactivated and the refrigerator returns to the normal state when the door is opened or closed, or the dispenser is used.
Operations
To check the MAC address
text_image
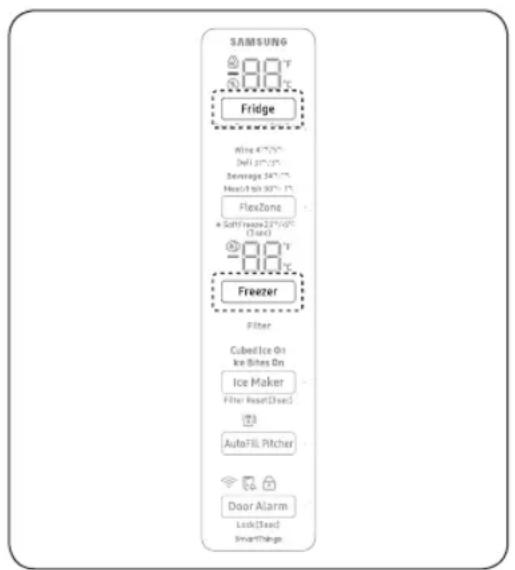
SAMSUNG Fridge Wine 47°C Dell 30°C Beverage 34°C Heat/Heat 50°C FlexZone + Soft Reason 25%/V (3 sec) Freezer Filter CubeIce On Ice Bites On Ice Maker Filter Resetased AutoFill Pitcher Door Alarm Lockased Smart Things- In this mode, the MAC address appears on the temperature panel (on both the freezer and the fridge sections of the panel) sequentially for 1 minute.
Press and hold both Freezer and Fridge for 6 seconds. The temperature panel blinks. Then, press Freezer again to display the MAC address. The fridge beeps.
- For example, if the MAC address is "11-22-33-44-55-66", the temperature panel displays the address for 1 minute in this sequence: "-- / --" → "11 / 22" → "33 / 44" → "55 / 66" → "-- / --".
After 1 minute, the MAC address disappears and the temperature panel returns to the normal state.
NOTE
The temperature panel displays "-- / --" for an unknown MAC address or if a Wi-Fi connection is not established or is lost.
Peak Demand Off (Override mode)
When you want the refrigerator to ignore the SMART GRID (Demand Response) signal from the utility company, you can activate Peak Demand Off (Override mode).
When you activate Peak Demand Off (Override mode), the refrigerator ignores the SMART GRID (Demand Response) signal and is not controlled by the utility company.
Activating and deactivating Peak Demand Off (Override mode)
- Press and hold Fridge for 3 seconds.
- A buzzer sounds and the Peak Demand Off (Override mode) icon (✗) turns on.
- If the refrigerator receives a SMART GRID (Demand Response) signal from the utility company, 'Or' is displayed in the fridge temperature display.
- To deactivate Peak Demand Off (Override mode), press and hold Fridge for 3 seconds.
- A buzzer sounds and the Peak Demand Off (Override mode) icon (✗) turns off.
NOTE
- Alternatively, you can activate or deactivate Peak Demand Off (Override mode) using the SmartThings app and the Energy Management function. See the next page.
English46
Using the Energy Management Function
The Energy Management function enables you to control and monitor your Energy Management refrigerator using the SmartThings app for your convenience.
NOTE
- To use the Energy Management refrigerator functions, you have to install the corresponding app first.
- Operational Status
-
You can check the DR and Peak Demand status.
-
Energy Consumption Reporting
- Shows the accumulated power consumption. Power consumption data is updated every 10 minutes.
NOTE
The energy consumption report may differ from the power consumption specifications of the product depending on the operating environment and the stored food.
- Delay Defrost Capability
- The Delay Defrost Capability function saves energy by delaying the defrost operation to a time specified by the user. You can configure the time. and this function will save energy during the specified period in a 24 hour cycle. If the time is not set, the function works with the default time settings. The default time settings are below:
- 6 am to 10 am: 1st. November \~ 30th. April
- 3 pm to 7 pm: 1st. May \~ 31th. October
To change the time setting for the Delay Defrost Capability
You can change the time setting for the Delay Defrost Capability on the app.
Provision for Open Access to the Connected Product Requirements
- SGIP Open Standards (Smart Energy Profile 2.0 - http://www.csep.org/)
- Energy Consumption Reporting
- Demand Response
-
Samsung OPEN API
-
Operational Status, User Settings & Messages
- ICE Maker Status: GET /icemaker/status/vs/0
- Door Open Alarm: GET /doors/vs/0
- DR Status: GET /drlc/vs/0
- Delay Defrost Capability
- Set Schedule of the Defrost Delay: POST /defrost/reservation/vs/0?op=add
- Get Schedule of the Defrost Delay : GET /defrost/reservation/vs/0
- Delete Schedule of the Defrost Delay: POST /defrost/reservation/vs/0?op=remove
- Defrost Delay On/OFF: POST /defrost/delay/vs/0
Operations
Special features
Beverage Center
text_image
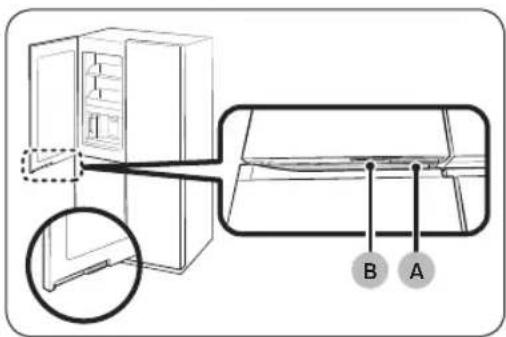
Diagram showing a refrigerator with labeled parts A and B, including an inset view of the door opening.A. Fridge door handle
B. Beverage Center handle
The left fridge door has two handles on the bottom. To use the autofill pitcher, drink cold or purified water, press handle (B) to open the Beverage Center.
Water pitcher (AutoFill Pitcher) (applicable models only)
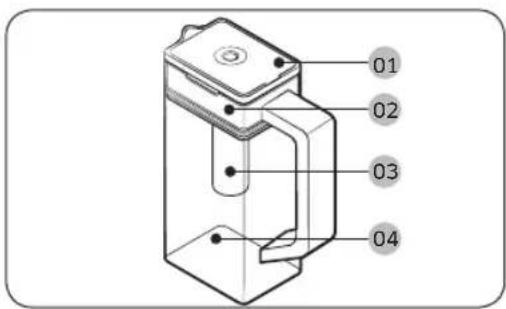
Cold, purified water is always ready in the AutoFill Pitcher. You can put tea or fruits in the infuser to enjoy the various infused water you like.
text_image
01 02 03 0401 Lid
02 Infuser holder
03 Infuser
04 Body
English48
To fill the Water pitcher
natural_image
Diagram of a mechanical device with a central component and an upward arrow, no text or symbols present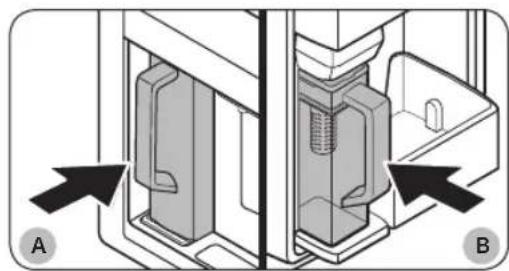
natural_image
Technical diagram showing two mechanical components with arrows indicating assembly or movement (no text or symbols present)A. Type A models
B. Type B models
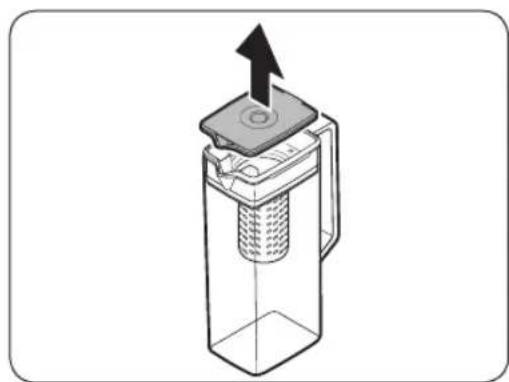
- Grasp a handle groove of the lid, and then pull up to open the lid.
- Put tea leaves or fruit to your taste into the infuser.
NOTE
If you want to keep the infused water in its initial concentration, turn the AutoFill Pitcher function off.
- Enable the AutoFill Pitcher function on the control panel. Open the Beverage Center door (Type A) or the left door of the fridge (Type B), and then mount the water pitcher onto the holder. Push it straight in as shown in the figure.
CAUTION
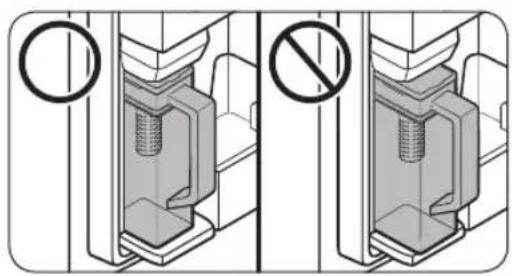
Make sure the water pitcher fits in the water pitcher holder.
- Close the door. The water pitcher will start to fill with chilled water a short time later.
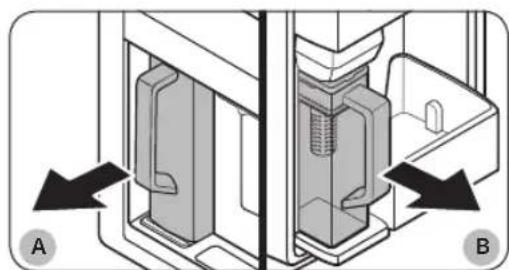
- To drink tea, open the Beverage Center door (Type A) or the left door of the fridge (Type B), and then detach the water pitcher. Pull it straight out.
natural_image
Technical diagram of a mechanical assembly with labeled components A and B, showing internal components without any text or symbols.A. Type A models
B. Type B models
Operations
CAUTION
• We recommend consuming fruit infused water within 24 hours. After that, the infused water can spoil over time.
- You must clean the water pitcher after you have consumed the infused water. Also clean the water pitcher if you haven't used it for a long time.
natural_image
Technical illustration of a mechanical assembly with no visible text or symbols• To prevent the water pitcher from tipping over or leaking, make sure the water pitcher fits in the water pitcher holder.
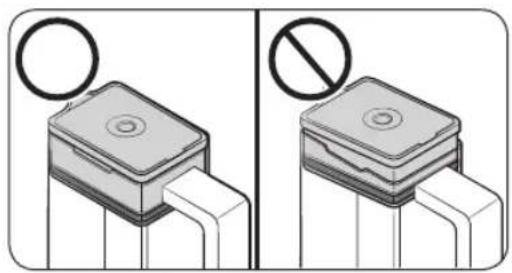
natural_image
Two technical diagrams showing a component with a circular symbol above and a prohibition sign below, no text or labels present.• To prevent the water pitcher from spilling over or leaking, make sure the infuser holder is properly inserted.
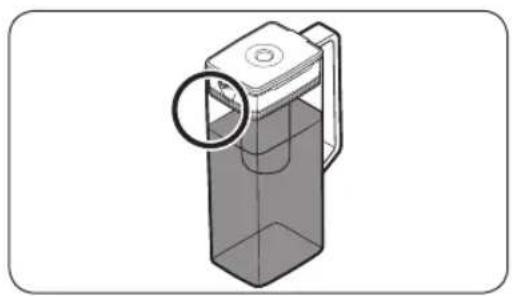
natural_image
3D diagram of a mechanical device with a circular aperture and rectangular body (no text or symbols)NOTE
- If the front side (specifically marked area) of the water pitcher has too much moisture, the water pitcher may not fully fill. Remove the moisture, and then try again.
- AutoFill Pitcher function will stop supplying water to the water pitcher if the water pitcher does not fill after a certain amount of time. If this happens, check if the water line is properly connected. Remove and reinsert the water pitcher, and then try again.
English50-
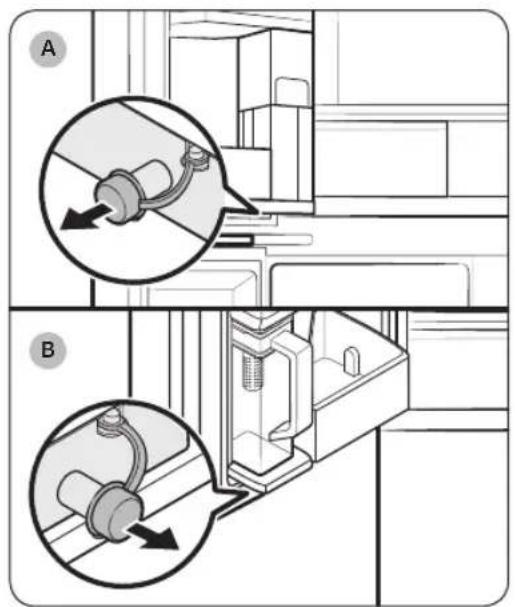
text_image
Technical diagram showing two views (A and B) of a mechanical assembly with labeled components and directional arrows indicating motion or force.A. Type A models
B. Type B models
NOTE
- You must clean the water pitcher after you have consumed the infused water. You must also clean the water pitcher if you have not used it for a long time or left the full pitcher for more than three days.
- If the infuser is not properly cleaned, the scent of the tea or fruits you previously used in the infuser may remain. If you are not going to use the infuser, separate it from the pitcher and store it safely.
- If you have not used the water filter for a long time, pour away the first two pitchers of water. Then, clean the water pitcher thoroughly and use it.
NOTE
- Wipe around the water pitcher holder if the water pitcher overflows or leaks.
• Water drops off if the rubber cap is opened. - An alert message appears on the control panel if there is a leak. In case of a leak, open the rubber cap so that the leaked water drains. If the alert message does not disappear after draining, there might be a system failure. Contact your local Samsung service center.
Operations
Water dispenser (applicable models only)
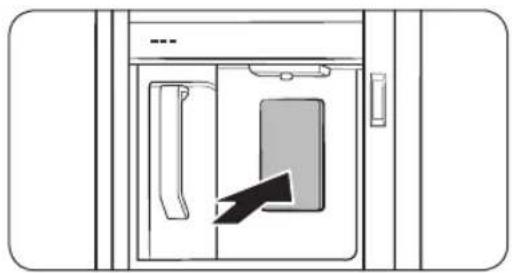
natural_image
Diagram of a door with a door handle and internal panel, showing a black arrow pointing to a component (no text or symbols)To dispense chilled water, open the Beverage Center and press the dispenser lever.
NOTE
- The dispenser will stop dispensing if you keep pushing the dispenser lever for about 1 minute. To dispense more water, release and push the lever again.
- Make sure the glass is in line with the dispenser to prevent the dispensed water from spilling out.
- If you do not use the water dispenser for 2-3 days, the dispensed water may have an abnormal smell or taste. This is not a system failure. Discard the first 1-2 glasses of water.
Water clouding
Water supplied to the refrigerator flows through a core alkaline filter. During this filtering process, the water pressure of the water increases and the water becomes saturated with oxygen and nitrogen. This causes the water to look misty or cloudy temporarily when dispensed. This is normal and the water will look clear after a few seconds.
Ice maker
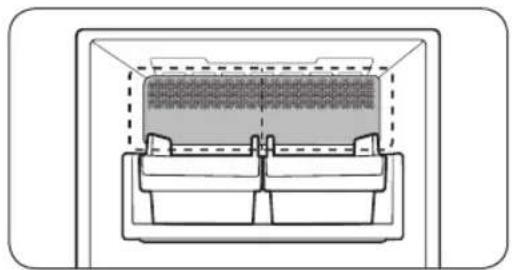
The refrigerator has a built-in ice maker that automatically dispenses ice.
- The overall design and/or accessories may differ with the model.
natural_image
Cross-sectional diagram of a mechanical or electrical component with no visible text or symbols• This product has two types of ice makers.
WARNING
Choking hazard: Ice may cause choking in small children.
Ice making
After you have installed your refrigerator and plugged it in, follow these instructions to ensure proper ice making and to keep the ice bucket full of ice.
English52-
For first-time use
- Let the ice maker make ice for 1-2 days.
- Discard the first 1-2 buckets of ice to remove impurities in the water supply system.
Diagnosis
natural_image
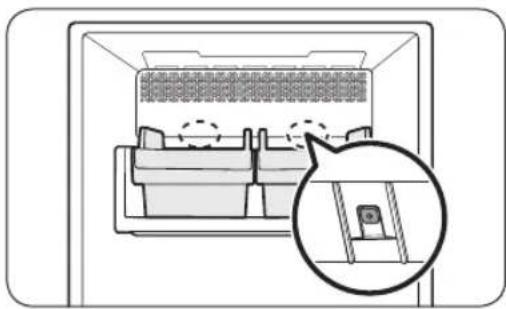
Diagram of a refrigerator interior showing seating arrangement and a magnified view of the seat (no text or symbols)- The overall design and/or accessories may differ with the model.
- If ice does not dispense, first check the status of ice maker using the Test button on the bottom of the ice maker.
- Press the Test button on the bottom of the ice maker. You will hear a chime (ding-dong) when you press the button. You will hear another chime if the ice maker is operating properly.
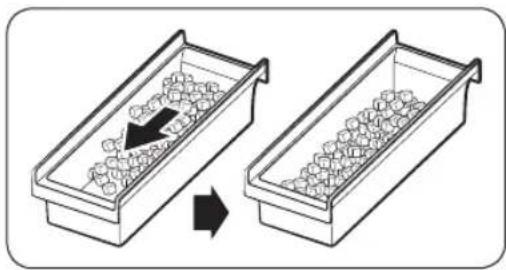
- Ice accumulating on one side of the tray is normal. Arrange the ice evenly in the tray to store more ice.
natural_image
Diagram showing two containers with granular material inside, one moving right and the other horizontally (no text or symbols)CAUTION
- Leaving the water line disconnected may cause the water valve to produce a buzzing sound over time. If this is the case, make sure to turn the ice making function (Cubed Ice / Ice Bites) off.
- If the ice making chime rings repeatedly, contact the waterline installer or a local Samsung service center.
- Do not put food in the ice bucket. The frozen food may damage the ice maker, especially when you open or close the door.
- When the refrigerator recovers power after a power failure, the ice bucket may contain a mix of melted and jammed ice cubes, which can prevent the ice maker from working properly. To prevent this, make sure to empty the ice bucket before using the refrigerator.
- Do not put fingers or any objects into the ice maker. This can cause physical injury or property damage.
- Due to sublimation, ice stored in the freezer for a long time gets smaller and then forms large ice chunks. Therefore, if it will be a long time before you use ice, turn the ice maker off.
- Use the new hose-sets supplied with the appliance only. Do not re-use an old hose set.
Operations
natural_image
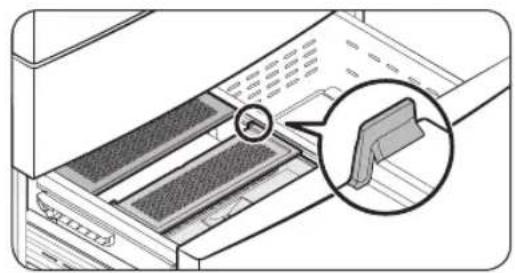
Diagram of a computer rack with a magnified inset showing a component (no text or symbols present)The ice maker cover is designed to wrap up the ice bucket when the freezer door is opened. Improper insertion as shown below may cause the door not to be closed properly.
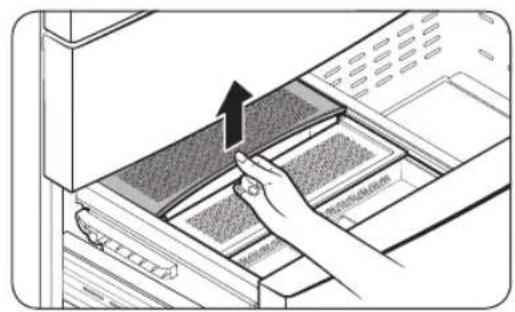
natural_image
Illustration of a hand inserting a device into a file drawer with an arrow indicating the process (no text or symbols present)If the cover breaks away from its correct course, lift up the cover and insert it again properly. See the figure below.
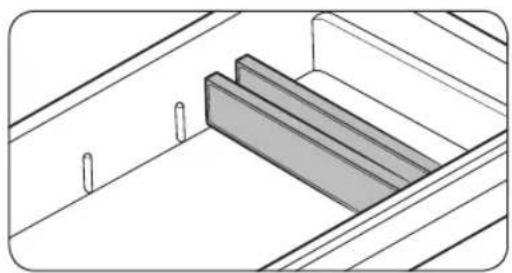
FlexZone divider
natural_image
Architectural diagram showing a window with two vertical posts and a shaded rectangular block (no text or symbols)The FlexZone is a full-width drawer with adjustable temperature control.
The FlexZone can be used for large party trays, deli items, pizza, beverages, or miscellaneous items.

CAUTION
- Do not use the FlexZone to store most kinds of fruit or leafy vegetables. These food items may suffer coldtemperature damage.
- Do not store glass bottles in the FlexZone in Beverage mode. They may break and cause physical injury
English54
Maintenance
Handling and care
Ice bucket (applicable models only)
If you do not dispense ice for an extended period, ice may form clumps inside the bucket. If this happens, remove and empty the ice bucket.

CAUTION
• To prevent injury, make sure to clean up any ice or water that has fallen on the floor.
• To prevent accidents or injury, do not let children play with the water dispenser or the ice maker.
- Use only the provided ice bucket. Third-party ice buckets may cause a system failure.

NOTE
- The water pressure required for ice making is between 30-125 psi (206-861 kPa).
- Noise from the ice maker as it produces ice during the ice making process is normal.
Maintenance
AutoFill Pitcher (applicable models only)
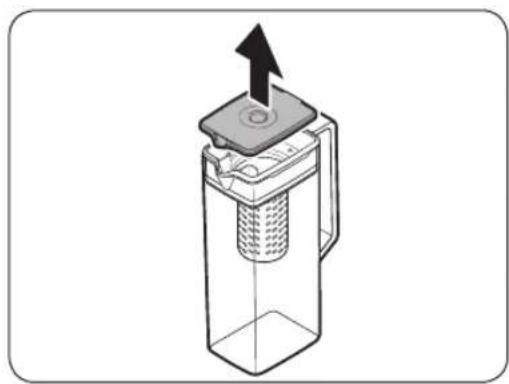
natural_image
Diagram of a mechanical device with a central component and an upward arrow, no text or symbols present- Grasp a handle groove of the lid, and then pull up to remove.
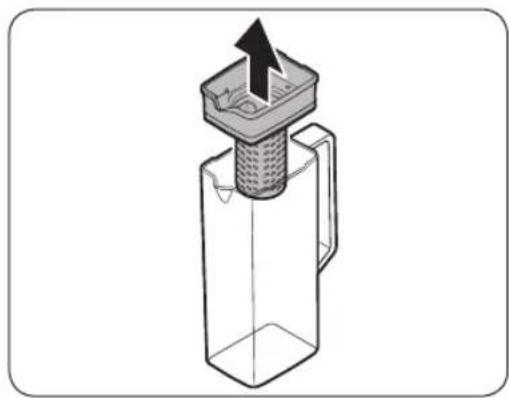
natural_image
Diagram of a mechanical component with a handle and internal structure, no text or symbols present- Grasp both sides of the infuser holder, and then lift to remove.
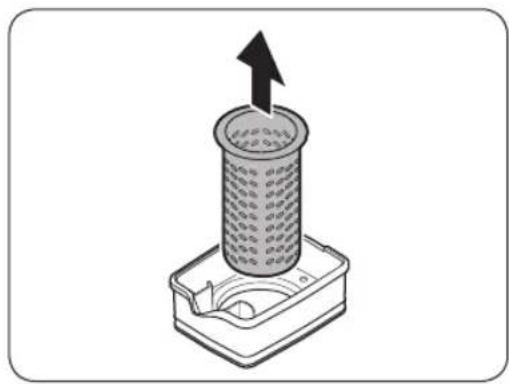
natural_image
Diagram of a cylindrical device with an upward arrow, mounted on a base with a small inset showing internal components (no text or symbols)- While slightly twisting the infuser, pull it out of the sealed mouth.
- Clean the infuser with neutral agents and running water. Rinse and dry well.
- Reassemble the AutoFill Pitcher in the reverse order of disassembly.
CAUTION
The water pitcher and lid are not microwave safe and can melt or deform if exposed to heat (including hot water). Please hand wash in cool or warm water as needed.
English56-
Fridge shelves
The appearance of the shelves differs by model.
Top shelf
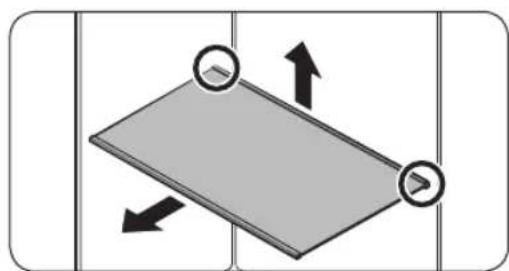
natural_image
Diagram of a tilted rectangular plate with two circular arrows indicating upward and downward motion (no text or symbols)- Lift the rear side of the shelf with one hand, and then pull it out.
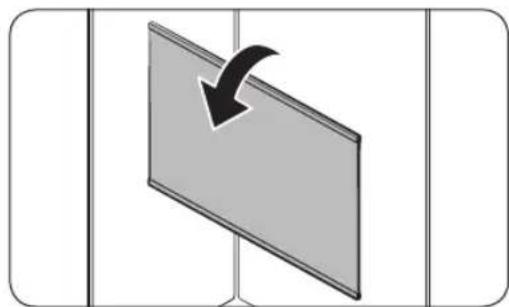
natural_image
Simple 3D diagram showing a curved arrow pointing to a rectangular panel (no text or symbols)- Tilt the shelf vertically as shown in the figure.
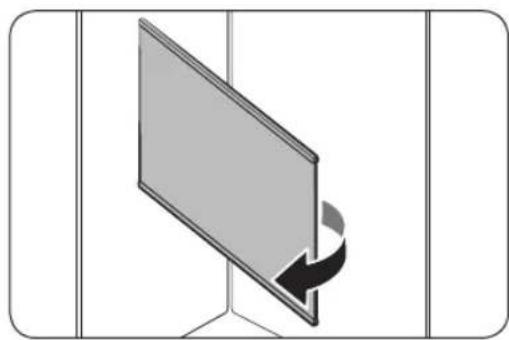
natural_image
Diagram of a screen with an arrow indicating rotation or change, no text or symbols present- Carefully pull out the shelf as shown in the figure.
Maintenance
Quick Space shelf *
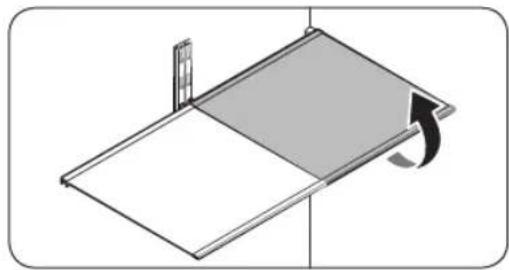
natural_image
Diagram of a folding panel with a rotating arrow indicating rotation (no text or symbols)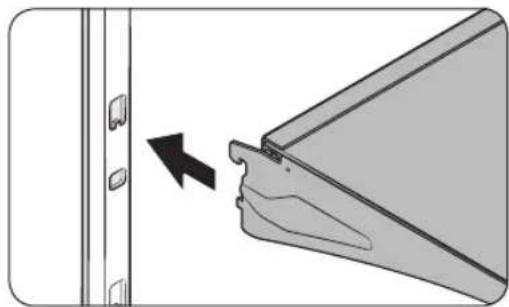
natural_image
Diagram showing a device with a bracket and a close-up of its edge, no text or symbols present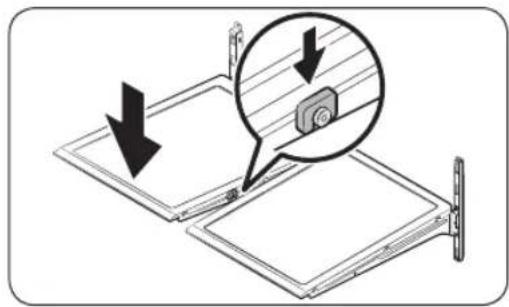
natural_image
Diagram showing a device with two panels, one highlighted by arrows and the other with a magnified inset (no text or symbols)• To remove a shelf, fully open the corresponding door. Hold the front of the shelf, and then gently lift up and pull out.
NOTE
Do not lift up the shelf fully when removing or reinserting the shelf. The rear wall of the fridge room can be dented.
- To reinsert, hold the shelf at an angle so the front is higher than the back, and then insert the top hook into the top shelf notch. Then, lower the shelf and insert the bottom shelf hook into the bottom shelf notch.
CAUTION
- The tempered glass shelves are heavy. Use caution when removing them.
- The shelf must be inserted correctly. Do not insert upside down.
• Glass containers may scratch the surface of glass shelves.
English58-
Vegetable shelf
NOTE
You must remove the Quick Space shelf before removing the Vegetable shelf.
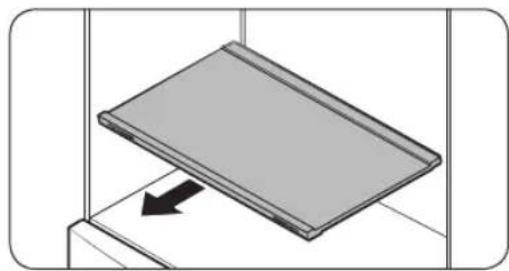
natural_image
Diagram of a tilted rectangular object with an arrow indicating upward motion, no text or symbols present- Pull the shelf out.
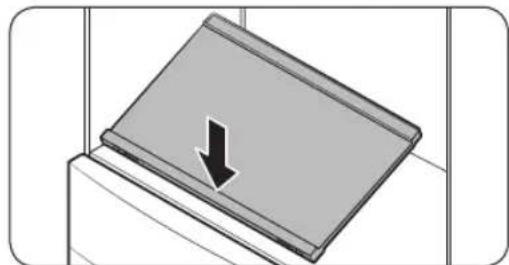
natural_image
Simple 3D diagram of a rectangular object with a downward arrow, no text or symbols present- Press the front of the shelf to lift the rear side of it.
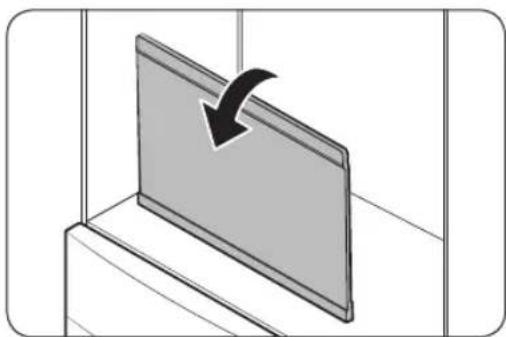
natural_image
Diagram of a folder with a black arrow indicating direction, no text or symbols present- Hold the rear side of the shelf and tilt it vertically.
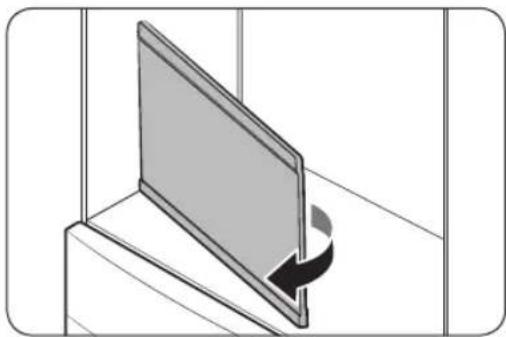
natural_image
Diagram of a panel being tilted with an arrow indicating rotation (no text or symbols)- Carefully pull out the shelf as shown in the figure.
Maintenance
Door bins
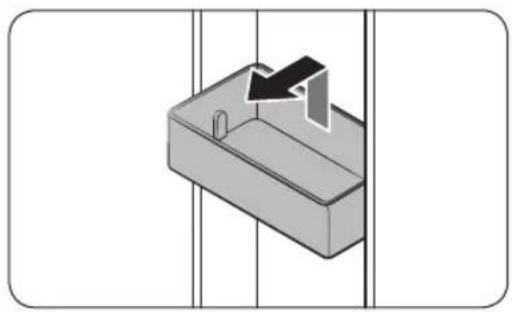
natural_image
3D diagram of a rectangular container with a black arrow pointing to the top section, no text or symbols present- To remove the door bin, hold the front sides of the bin, and then gently lift up to remove. - To reinsert, insert the door bin slightly above its final location making sure that the back of the bin is against the door. Hold the rear of the door bin with both hands, and then press down so that it fits snugly.

CAUTION
- Do not remove a bin that is filled with food. Empty the bin beforehand.
- Use caution when opening the door if the bottom bin contains larger bottles, which may fall over.
- Do not allow children to play with the bins. Sharp corners of the bin may cause injury.
Fridge drawers
Crisper+ / Flex Crisper (applicable models only)
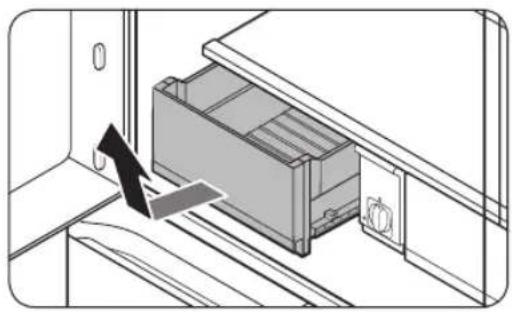
natural_image
Diagram of a refrigerator interior with an open refrigerator and a black arrow indicating direction (no text or symbols)Gently lift up the front of the drawer and slide out.
• We recommend that you remove the door bins before removing the drawer. This is to prevent damage to the door bins.
- To reinsert, insert the drawer into the frame rails and then slide inward.
English60-
FlexZone basket
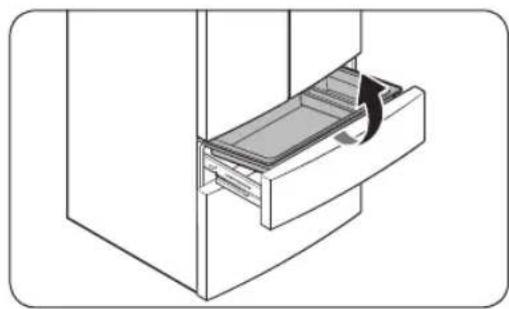
natural_image
Diagram of a refrigerator interior showing a drawer with an arrow indicating rotation (no text or symbols)Freezer baskets
Upper basket
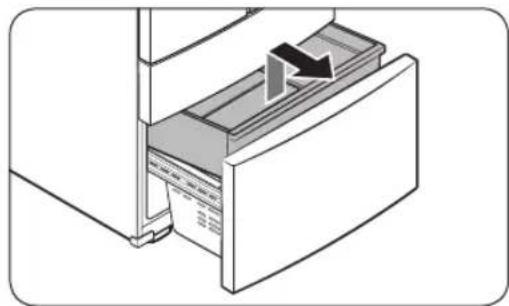
natural_image
Diagram of a refrigerator drawer with an arrow indicating direction (no text or symbols present)Lower basket
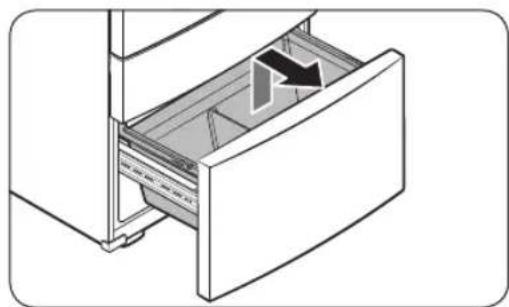
natural_image
Diagram of a refrigerator drawer with an arrow indicating direction (no text or symbols present)• To remove, fully open the FlexZone drawer. Lift up the FlexZone basket, and then pull out with both hands.
- To reinsert, fully open the FlexZone drawer. While tilting up the front of the basket, insert the rear of the basket into the rail assembly. Lower the front until the basket is in place.
- If the divider lock does not function, wipe the bars to remove moisture on them.
• To remove, fully slide open the freezer drawer. Push the upper basket to the end, and then pull up to remove.
- To reinsert, align the front wheels of the upper basket with the end of the lower basket. Slide the upper basket to the front.
• To remove, first remove the upper basket. Then, tilt up the front of the lower basket to pull out.
- To reinsert, put the basket onto the rail assembly rear side first.
Maintenance
CAUTION
- Do not twist the basket when removing or reinserting the basket. The basket can be scratched.
- To prevent physical injury, property damage, or suffocation, keep children away from freezer baskets that have been removed.
- Do not remove the divider.
- Put the wheels of the upper basket on the end of the rails of the lower basket. Then, slide the upper basket all the way to the front. Otherwise, the drawer will not open or close properly, which will cause frost to build up.
English62-
Cleaning
Interior and exterior

WARNING
- Do not use benzene, thinner, home/car detergent, or Clorox™ to clean the refrigerator. They may damage the surface of the refrigerator and cause a fire.
- Do not spray water onto the refrigerator. This may cause electric shock.
Regularly use a dry cloth to remove all foreign substances such as dust or water from the power plug terminals and contact points.
- Unplug the power cord.
- When done, use a dry cloth or paper towel to dry well.
-
Plug in the power cord.
-
Use a moistened, soft, lint-free cloth or paper towel to clean the refrigerator's interior and exterior.
Dispenser nozzle (applicable models only)
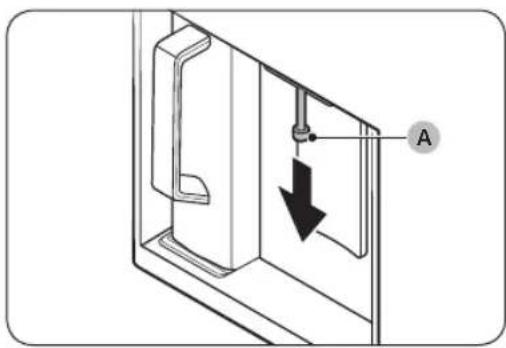
natural_image
Technical line drawing of a door frame with a downward arrow and labeled point A (no text or symbols beyond label)- Hold the end of the dispenser nozzle (A).
-
While turning the dispenser nozzle (A) left, pull it down to remove it from the dispenser.
-
Clean the dispenser nozzle thoroughly, and then assemble it back.
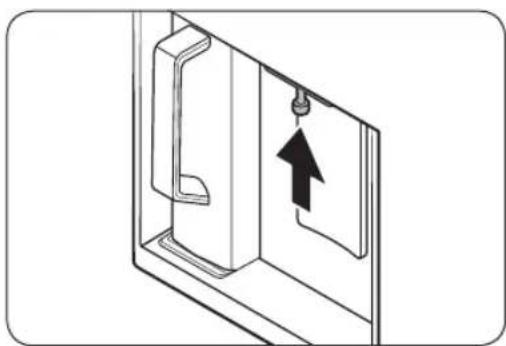
natural_image
Diagram of a door with a hanging hook and an upward arrow, no text or symbols present
CAUTION
- Fully insert the dispenser nozzle, so it is back to its original position.
- Do not use a sponge with rough textures for cleaning the dispenser nozzle.
Maintenance
Rubber seals
If the rubber seals of a door become dirty, the door may not close properly and reducing refrigerator performance and efficiency. Use a mild detergent and damp cloth to clean the rubber seals. Then, dry well with a cloth.
Rear panel
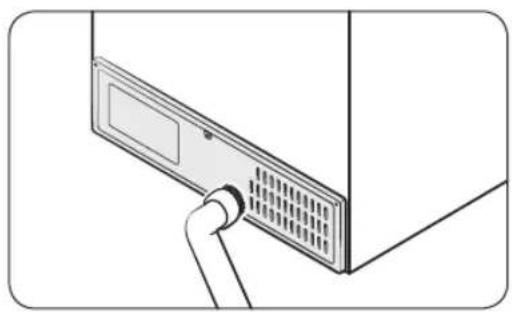
natural_image
Diagram of a computer monitor with ventilation slots and a cable inserted, showing no text or symbolsTo keep cords and exposed parts of the rear panel free of dirt, vacuum the panel once or twice a year.
CAUTION
Do not remove the rear panel cover. Electric shock may occur.
Replacement
Water filter
WARNING
- Do not use third-party water filters. Use only Samsung-provided or -approved filters.
- Unapproved filters may leak and damage the refrigerator, causing electric shock. Samsung is not responsible for any damage that may occur from use of third-party water filters.
The Filter Reset indicator (Filters red to let you know it is time to replace the water filter. Before replacing the filter, make sure the water supply line is shut off.
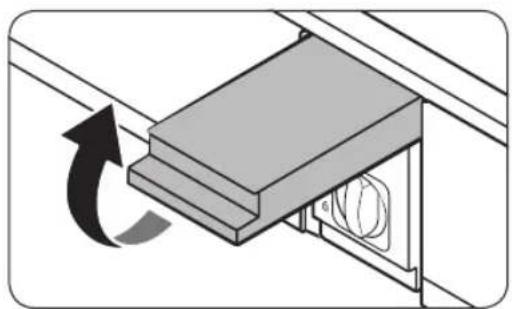
natural_image
Diagram of a mechanical assembly with a rotating component and directional arrow (no text or symbols)- Shut off the water supply line.
- Open the filter cartridge cover.
English64
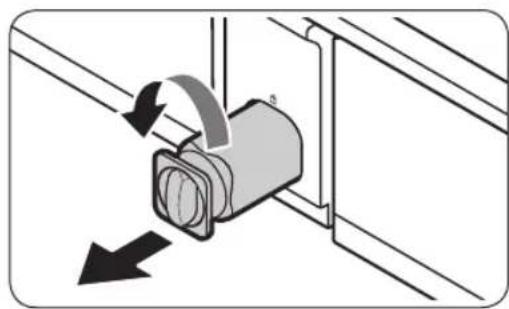
natural_image
Diagram of a mechanical component with directional arrows indicating motion (no text or symbols)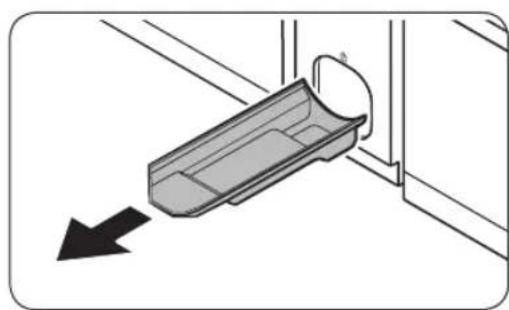
natural_image
Diagram of a mechanical component with an arrow indicating direction, no text or symbols present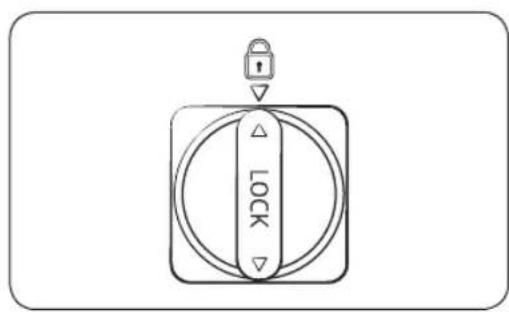
text_image
LOCK-
Turn the knob of the filter cartridge counter clockwise 90 degrees ( ^1/_4 turn). The filter cartridge unlocks.
-
Pull out to remove the cartridge.
- If the water filter is severely contaminated, the cartridge may not be easy to remove. If that is the case, use force to remove the cartridge.
- To prevent water leaks from the filter opening, pull the cartridge straight out while removing it.
-
Insert a new filter cartridge. Use only Samsung-provided or approved filters.
-
Turn the cartridge knob clockwise to lock into place.
-
Close the filter cartridge cover.
-
Press and hold Filter Reset on the main panel for 3 seconds to reset the life cycle detector. The Filter Reset indicator (Filters off.
-
When you are done replacing the filter, open the water valve and run water through the dispenser for about 7 minutes. This is to remove impurities and air from the water line.
NOTE
- A newly installed filter may cause the water dispenser to spurt water briefly. This is because air has entered the waterline.
- The replacement process may cause the water dispenser to drip for a short period of time. If it drips, simply wipe up any water on the floor with a dry towel.
Maintenance
Reverse osmosis water filtration system
The water pressure of the water supply system to a reverse osmosis water filtration system must be between 30-125 psi (206-861 kPa).
The water pressure of the reverse osmosis water filtration system to the refrigerator's cold water line must be at least 30 psi (206 kPa). If the water pressure is below these specifications:
- Check if the sediment filter in the reverse osmosis system is blocked. Replace the filter if necessary.
- Refill the water tank in the reverse osmosis system with water.
- If your refrigerator has a water filter, it may further reduce the water pressure when used in conjunction with a reverse osmosis system. Remove the water filter.
For more information or servicing, contact a licensed plumbing professional.
Ordering a new filter
To purchase a new water filter, contact a local Samsung service center or visit www.samsungparts.com on the web.
LED Lamps
To replace the lamps of the refrigerator, contact a local Samsung service center.

WARNING
- The lamps are not user-serviceable. Do not attempt to replace a lamp yourself. This can cause electric shock.
Door panel (applicable models only)
You can select the door panel you prefer for your BESPOKE refrigerator. Purchase the door panel at a Samsung retail store and an authorized installer will install the panel for you.

CAUTION
- Disassembling or assembling the door panel on your own may result in product damage or personal injury. If you find any problems with the door panel, contact a Samsung service center
- A service fee may be charged for panel replacement even within the warranty period.
English66
Troubleshooting
Before calling for service, review the symptoms and recommended solutions below. If none of the suggested solutions resolve your problem, please visit our website at www.samsung.com or call Samsung Customer Care at 1-800-SAMSUNG (726-7864). Note that you will be charged for any service visits in which no defects were found.
General
Temperature
| Symptom Possible causes Solution | ||
| Fridge/freezer does not operate.Fridge/freezer temperature is warm. | Power cord is not plugged in properly. | Properly plug in the power cord. |
| Temperature control is not set correctly. | Set the temperature lower. | |
| Refrigerator is located near a heat source or direct sunlight. | Keep the refrigerator away from direct sunlight or a heat source. | |
| Not enough clearance between refrigerator and nearby walls or cabinets. | Make sure there is a gap of at least 2.5 inches (5 cm) between the refrigerator back and sides and any nearby walls or cabinets. | |
| The refrigerator is overloaded. Food is blocking the refrigerator vents. | Do not overload the refrigerator. Do not allow food to block vents. | |
| Fridge/freezer is over-cooling. | Temperature control is not set correctly. | Set the temperature higher. |
| Interior wall is hot. | Refrigerator has heat-proof piping in the interior wall. | To prevent condensation from forming, the refrigerator has heat-proof piping in the front corners. If the ambient temperature rises, this equipment may not work effectively. This is not a system failure.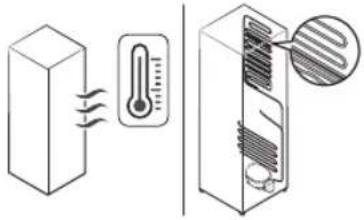 |
English 67
Troubleshooting
Odors
| Symptom Possible causes Solution | ||
| Refrigerator has odors. | • Spoiled food. | • Clean the refrigerator and remove any spoiled food. |
| • Food with strong odors. | • Make sure strong smelling food is wrapped airtight. | |
Frost
| Symptom Possible causes Solution | ||
| Frost around the vents. | ·Food is blocking the vents. | ·Make sure no food blocks the refrigerator vents. |
| Frost on interior walls. | ·Door is not closed properly. | ·Make sure food does not block the door. Clean the door gasket. |
| Fruits or vegetables are frozen. | ·Fruits or vegetables are stored in the FlexZone. | ·Do not store most kinds of fruit or vegetables in the FlexZone. |
Condensation
| Symptom Possible causes Solution | ||
| Condensation forms on the interior walls. | ·If door is left open, moisture enters the refrigerator. | ·Remove the moisture and do not leave a door open for extended periods of time. |
| ·Food with high moisture content. | ·Make sure food is wrapped airtight. | |
Water/ice (dispenser models only)
| Symptom Possible causes Solution | ||
| Water flow is weaker than normal. | • Water pressure is too low. | • Make sure the water pressure is between 30-125 psi (206-861 kPa) |
| Ice maker makes a buzzing sound. | • The ice maker function is activated, but the water supply to the refrigerator has not been connected. | • Turn off the Ice Maker. |
English68
| Symptom Possible causes Solution | ||
| Ice maker does not make ice. | · Ice maker has just been installed. | · You must wait for 12 hours for the refrigerator to make ice. |
| · Freezer temperature is too high. | · Set the freezer temperature below 0 °F (-18 °C) or -4 °F (-20 °C) in warm ambient air. | |
| · Ice maker is off. · Turn on the ice maker. | ||
| Ice does not dispense. | · Ice may jam if the ice dispenser is not used for a long time (approx. 3 weeks). | · If you won't be using the refrigerator for a long time, empty the ice bucket and turn off the ice maker. |
| · Ice bucket is not properly inserted. | · Make sure the ice bucket is properly inserted. | |
| · Water line is not connected properly or water supply is not on. | · Check if the water line is installed correctly. Check if the water line stop valve is closed.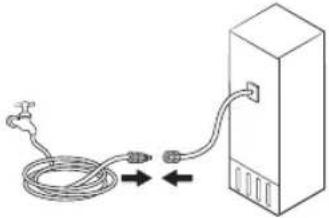 | |
Troubleshooting
| Symptom Possible causes Solution | |
| Water does not dispense. | • Water line is not connected properly or water supply is not on. |
| • A third-party water filter was installed. | |
| • The "Replace water filter" message appears on the control panel. |
English70
Do you hear abnormal sounds from the refrigerator?
Before calling for service, review the information below. If you still have questions about sounds your refrigerator is making, please call Samsung Customer Care at 1-800-SAMSUNG (726-7864). Note that you will be charged for any service visits related to normal operating sounds in which no defects were found.
These sounds are normal.
- When starting or ending an operation, the refrigerator may make sounds similar to a car engine ignition. As the operation stabilizes, the sounds will decrease.
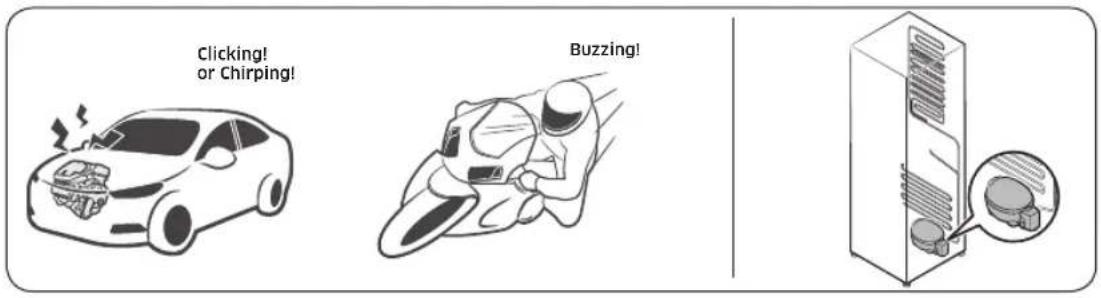
text_image
Clicking! or Chirping! Buzzing!- While the fan is operating, these sounds may occur. When the refrigerator reaches the set temperature, the fan sound will stop.
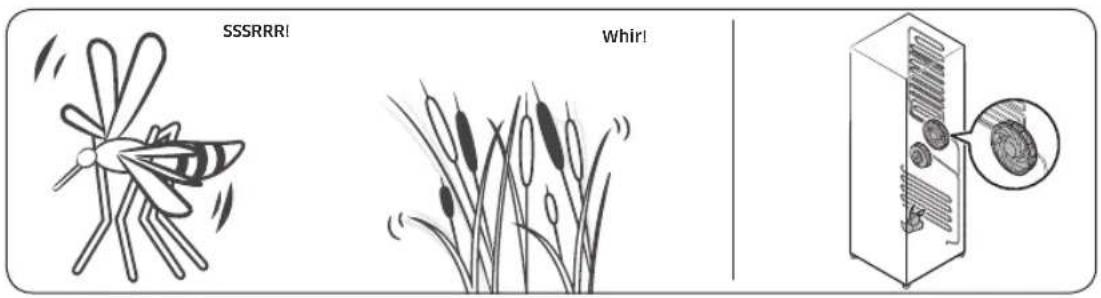
text_image
SSSRRR! Whir!Troubleshooting
- During a defrost cycle, water may drip on the defrost heater, causing sizzling sounds.
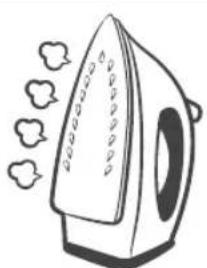
natural_image
Illustration of a steam iron with steam bubbles (no text or symbols)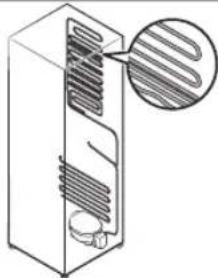
natural_image
Diagram of a refrigerator internal structure with a magnified inset showing internal airflow or heat distribution (no text or symbols)- As the refrigerator cools or freezes, refrigerant gas moves through sealed pipes, causing bubbling sounds.
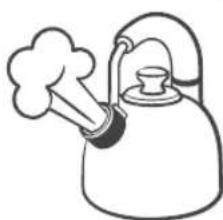
natural_image
Simple line drawing of a kettle emitting smoke (no text or symbols)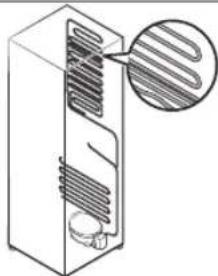
natural_image
Diagram of a refrigerator interior showing heat exchanger and cooling unit (no text or labels)- As the refrigerator temperature increases or decreases, plastic parts contract and expand, creating knocking noises. These noises occur during the defrosting cycle or when electronic parts are working.
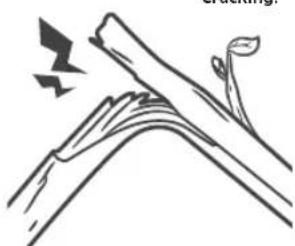
natural_image
Simple line drawing of a tree with leaves and a bird, no text or symbols present
- For ice maker models: When the water valve opens to fill the ice maker, you may hear a buzzing sound.
- Due to pressure equalizing when you open and close the refrigerator door, you may hear a whooshing sound.
English72-
SmartThings
| Symptom Action | |
| Could not find "SmartThings" in the app market. | The supporting software version of the SmartThings app is subject to change according to the OS supporting policy the manufacturer provides. In addition, as for the SmartThings app or the functions that the app supports, the new application update policy on the existing OS version can be suspended due to usability or security reasons. |
| The SmartThings app fails to operate. | The SmartThings app is available for applicable models only.The old Samsung Smart Refrigerator app cannot connect with Samsung Smart Home models. |
| The SmartThings app is installed but is not connected to my refrigerator. | You must log into your Samsung account to use the app.Make sure that your router is operating normally.If the Wi-Fi icon on the refrigerator's display is off, this indicates that no network connection has been established yet. In this case, use the SmartThings app to connect and register your refrigerator to the access point (AP) of your house. |
| Could not log into the app. | You must log into your Samsung account to use the app.If you don't have a Samsung account, follow the app's onscreen instructions to create one. |
| An error message appears when I try to register my refrigerator. | Easy Connection may fail due to the distance from your access point (AP) or electrical interference from the surrounding environment. Wait a moment and try again. |
| The SmartThings app is successfully connected to my refrigerator but does not run. | Exit and restart the SmartThings app, or disconnect and reconnect the router.Power off the refrigerator, and then power it on again after 1 minute. |
| The Wi-Fi icon is blinking. ( [IMAGE] | Connect your refrigerator with the SmartThings app before use. When the connection is made successfully, the indicator stops blinking.- If you fail to make connection or don't want to use the app, press and hold the Door Alarm button for 10 seconds. The indicator stops blinking with "O FF" shown on the temperature display. |
Troubleshooting
Smart Grid (applicable models only)
| Symptom Action | |
| What Do I Need to use the Energy Management and Smart Grid functions? | To use the Smart Grid (Demand Response) and Energy Management functions on your refrigerator, you need the following:DevicesA wireless access point (router)A Samsung Energy Management-supported refrigeratorA smartphoneRegistrationConnect your refrigerator to your home Wi-Fi network.Register for the EMS service with your electric company.Your electric company must have an EMS (Energy Management System) supporting SEP (Smart Energy profile).AppDownload the SmartThings app from the Google Play Store, Apple App Store, or Samsung Galaxy Apps.Install and run the SmartThings app on your smartphone. |
| Why isn't the Energy Management function working normally? | Make sure that your home router is operating normally with proper Internet service and connection.Make sure that the refrigerator is connected to the AP (router).CheckpointsConnect your smartphone to the router (AP, Access Point), and then check if you can browse the Internet on the smartphone. |
| Why isn't the Delay Defrost Capability working normally? | Make sure that your home router is operating normally with proper Internet service and connection. |
English74
LIMITED WARRANTY (U.S.A.)
SAMSUNG REFRIGERATOR
LIMITED WARRANTY TO ORIGINAL CONSUMER PURCHASER WITH PROOF OF PURCHASE
This SAMSUNG brand product, as supplied and distributed by Samsung Electronics America, Inc. (SAMSUNG) and delivered new, in the original carton to the original consumer purchaser, is warranted by SAMSUNG against manufacturing defects in materials or workmanship for the limited warranty period of:
One (1) year parts and labor
Five (5) years parts and labor on Sealed Refrigeration System Only (Compressor, Evaporator, Condenser, Drier, and Connecting Tubing)
Ten (10) years part and Five (5) years labor on Digital Inverter Compressor Only
This limited warranty is valid only on products purchased and used in the United States that have been installed, operated, and maintained according to the instructions attached to or furnished with the product. To receive warranty service, the purchaser must contact SAMSUNG at the address or phone number provided below for problem determination and service procedures. Warranty service can only be performed by a SAMSUNG authorized service center. The original dated bill of sale must be presented upon request as proof of purchase to SAMSUNG or SAMSUNG's authorized service center to receive warranty service.
SAMSUNG will provide in-home service within the contiguous United States during the warranty period at no charge, subject to availability of SAMSUNG authorized servicers within the customer's geographic area. If in-home service is not available, SAMSUNG may elect, at its option, to provide transportation of the product to and from an authorized service center. If the product is located in an area where service by a SAMSUNG authorized servicer is not available, you may be responsible for a trip charge or required to bring the product to a SAMSUNG authorized service center for service.
To receive in-home service, product must be unobstructed and accessible to the service agent.
During the applicable warranty period, a product will be repaired, replaced, or the purchase price refunded, at the sole option of SAMSUNG. SAMSUNG may use new or reconditioned parts in repairing a product, or replace the product with a new or reconditioned product. Replacement parts and products are warranted for the remaining portion of the original product's warranty or ninety (90) days, whichever is longer. All replaced parts and products are the property of SAMSUNG and you must return them to SAMSUNG.
LIMITED WARRANTY (U.S.A.)
This limited warranty covers manufacturing defects in materials or workmanship encountered in normal household, noncommercial use of this product and shall not cover the following: damage that occurs in shipment, delivery, installation, and uses for which this product was not intended; damage caused by unauthorized modification or alteration of the product; product where the original factory serial numbers have been removed, defaced, changed in any way, or cannot be readily determined; cosmetic damage including scratches, dents, chips, and other damage to the product's finishes; damage caused by abuse, misuse, pest infestations, accident, fire, floods, or other acts of nature or God; damage caused by use of equipment, utilities, services, parts, supplies, accessories, applications, installations, repairs, external wiring or connectors not supplied or authorized by SAMSUNG; damage caused by incorrect electrical line current, voltage, fluctuations and surges; damage caused by failure to operate and maintain the product according to instructions; in-home instruction on how to use your product; and service to correct installation not in accordance with electrical or plumbing codes or correction of household electrical or plumbing (i.e., house wiring, fuses, or water inlet hoses). The cost of repair or replacement under these excluded circumstances shall be the customer's responsibility.
Visits by an authorized servicer to explain product functions, maintenance or installation are not covered by this limited warranty. Please contact SAMSUNG at the number below for assistance with any of these issues.
EXCLUSION OF IMPLIED WARRANTIES
IMPLIED WARRANTIES, INCLUDING THE IMPLIED WARRANTIES OF MERCHANTABILITY OR FITNESS FOR A PARTICULAR PURPOSE, ARE LIMITED TO ONE YEAR OR THE SHORTEST PERIOD ALLOWED BY LAW. Some states do not allow limitations on how long an implied warranty lasts, so the above limitations or exclusions may not apply to you. This warranty gives you specific rights, and you may also have other rights, which vary from state to state.
English76
LIMITATION OF REMEDIES
YOUR SOLE AND EXCLUSIVE REMEDY IS PRODUCT REPAIR, PRODUCT REPLACEMENT, OR REFUND OF THE PURCHASE PRICE AT SAMSUNG'S OPTION, AS PROVIDED IN THIS LIMITED WARRANTY. SAMSUNG SHALL NOT BE LIABLE FOR SPECIAL, INCIDENTAL OR CONSEQUENTIAL DAMAGES, INCLUDING BUT NOT LIMITED TO TIME AWAY FROM WORK, HOTELS AND/OR RESTAURANT MEALS, REMODELING EXPENSES, LOSS OF REVENUE OR PROFITS, FAILURE TO REALIZE SAVINGS OR OTHER BENEFITS REGARDLESS OF THE LEGAL THEORY ON WHICH THE CLAIM IS BASED, AND EVEN IF SAMSUNG HAS BEEN ADVISED OF THE POSSIBILITY OF SUCH DAMAGES. Some states do not allow exclusion or limitation of incidental or consequential damages, so the above limitations or exclusions may not apply to you. This warranty gives you specific rights, and you may also have other rights, which vary from state to state.
SAMSUNG does not warrant uninterrupted or error-free operation of the product. No warranty or guarantee given by any other person, firm, or corporation with respect to this product shall be binding on SAMSUNG.
To obtain warranty service, please contact SAMSUNG at:
Samsung Electronics America, Inc.
85 Challenger Road
Ridgefield Park, NJ 07660
If your refrigerator needs service
Do not hesitate to call any Samsung Authorized Service Center nearby giving them your name, address and telephone number if your product is not functioning properly.
Limited Warranty for Original Purchaser
This Samsung product is warranted by Samsung Electronics Canada Inc. (hereafter referred to as SECA) against manufacturing defects in material or workmanship for the following periods:
Labor: 1 year (in-home)
Parts: 1 year
Inverter Compressor: 10 years (Part only)
SECA further warrants that if this product fails to operate properly within the specified warranty period and the failure is due to improper workmanship or defective material, SECA will repair or replace the product at its option. In-home service is not available in all areas. Contact us to find out if in-home service is currently available in your area by using the contact information at the back of this warranty.
All warranty repairs or part replacements must be performed by a SECA Authorized Service Center. (To find the nearest SECA Service Center, call 1-800-SAMSUNG (7267864) or visit our web site at www.samsung.com/ca)
English78-
Obligation to the Original Owner
The original dated sales receipt must be retained by the customer and is the only acceptable proof of purchase. It must be presented to a SECA Authorized Service Center at the time service is requested before warranty services are rendered. On all carry-in models, transportation to and from the Authorized Service Center is the responsibility of the customer.
Exclusions of the Warranty
This warranty does not cover damage due to accident, fire, flood, and/or other Acts of God, misuse, incorrect line voltage, improper installation, improper or unauthorized repairs, commercial use, or damage that occurs during shipping. Customer adjustments which are explained in this owners manual are not covered under the terms of this warranty. This warranty will automatically be voided for any unit found with a missing or altered serial number. This warranty is valid only on products purchased and used in Canada.
SAMSUNG CUSTOMER CARE CENTER
Samsung Electronics Canada Inc.
2050 Derry Road West
Mississauga, Ontario L5N 0B9
Canada
www.samsung.com/ca/support (English)
www.samsung.com/ca_fr/support (French)
Regulatory Notice
FCC Notice
! FCC CAUTION:
Any changes or modifications not expressly approved by the party responsible for compliance could void the user's authority to operate the equipment.
Contains Transmitter Module FCC ID: A3LCCAR210R
This device complies with Part 15 of FCC Rules. Operation is Subject to the following two conditions:
(1) This device may not cause harmful interference, and
(2) This device must accept any interference received including interference that cause undesired operation.
For products available in the US and Canadian markets, only channels 1\~11 are available. You cannot select other channels.
FCC STATEMENT:
This equipment has been tested and found to comply within the limits for a Class B digital device, pursuant to part 15 of the FCC Rules. These limits are designed to provide reasonable protection against harmful interference in a residential installation.
This equipment generates, uses, and can radiate radio frequency energy and, if not installed and used in accordance with the instructions, may cause harmful interference to radio communications. However, there is no guarantee that interference will not occur in a particular installation. If this equipment does cause harmful interference to radio or television reception, which can be determined by turning the equipment off and on, the user is encouraged to try to correct the interference by one or more of the following measures:
• Reorient or relocate the receiving antenna
- Increase the separation between the equipment and receiver
- Connect the equipment to an outlet that is on a different circuit than the receiver.
- Consult the dealer or an experienced radio/TV technician for help.
FCC RADIATION EXPOSURE STATEMENT:
This equipment complies with FCC radiation exposure limits set forth for an uncontrolled environment.
This equipment should be installed and operated so there is at least 8 inches (20 cm) between the radiator and your body. This device and it's antennas must not be co-located or operated in conjunction with any other antenna or transmitter except in accordance with FCC multi-transmitter product procedures.
English80-
IC Notice
Contains Transmitter Module IC: 649E-CCAR210R
The term "IC" before the radio certification number only signifies that Industry Canada technical specifications were met. Operation is subject to the following two conditions: (1) this device may not cause interference, and (2) this device must accept any interference, including interference that may cause undesired operation of the device.
This Class B digital apparatus complies with Canadian ICES-003.
For products available in the US and Canadian markets, only channels 1\~11 are available. You cannot select other channels.
IC RADIATION EXPOSURE STATEMENT:
This equipment complies with IC RSS-102 radiation exposure limits set forth for an uncontrolled environment. This equipment should be installed and operated so there is at least 8 inches (20 cm) between the radiator and your body. This device and it's antennas must not be co-located or operated in conjunction with any other antenna or transmitter except in accordance with FCC multi-transmitter product procedures.
SAVE THESE INSTRUCTIONS
English 81
Open Source Announcement
The software included in this product contains open source software.
The following URL http://opensource.samsung.com/opensource/SMART_TP1_0/seq/0 leads to open source license information as related to this product.
text_image
QR code image containing encoded data, no visible human-readable textEnglish82-
Memo
SAMSUNG
Scan this with your smartphone.
Scan the QR code* or visit www.samsung.com/spsn to view our helpful How-to Videos and Live Shows
* Requires reader to be installed on your smartphone
Contact SAMSUNG WORLD WIDE
If you have any questions or comments relating to Samsung products, please contact the SAMSUNG Customer Care Center.
| Country Contact Center Web Site | ||
| U.S.A | 1-800-SAMSUNG (726-7864)1-844-SAM-PAYS (726-7297) | www.samsung.com/us/support |
| CANADA | 1-800-SAMSUNG (726-7864)1-844-SAM-PAYS (726-7297) | www.samsung.com/ca/support (English)www.samsung.com/ca_fr/support (French) |

DA68-04402B-00
Refrigerador
Manual del usuario
natural_image
Black and white illustration of ice cubes with bubbles rising, no text or symbols present
natural_image
Abstract black-and-white photo of a cube partially submerged in ice with bubbles rising (no text or symbols)SAMSUNG
Contenido
Open Source Announcement 82
natural_image
Diagram of a refrigerator interior showing door, drawer, and front compartment layout (no text or labels)Español 18-
natural_image
Diagram showing two containers with directional arrows indicating movement, one marked with a circle and the other with a prohibition sign (no text or symbols present)NOTA
natural_image
Simple line drawing of a screwdriver (no text or symbols)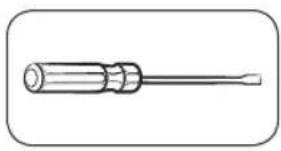
natural_image
Line drawing of a screwdriver with a cylindrical head and threaded shaft (no text or symbols)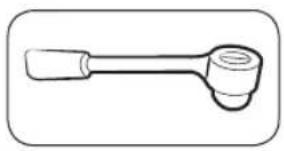
natural_image
Simple line drawing of a mechanical lever or wrench (no text or symbols)natural_image
Line drawing of a pair of pliers (no text or symbols)Pinzas Llave Allen
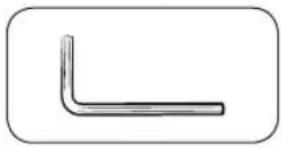
natural_image
Simple L-shaped metal bracket diagram without any text or symbols^1/_4 " (5 mm)
natural_image
Technical diagram of a mechanical assembly with mounting holes and a directional arrow (no text or symbols)natural_image
Diagram showing mechanical assembly with directional arrows and a magnified inset of connected components (no text or symbols)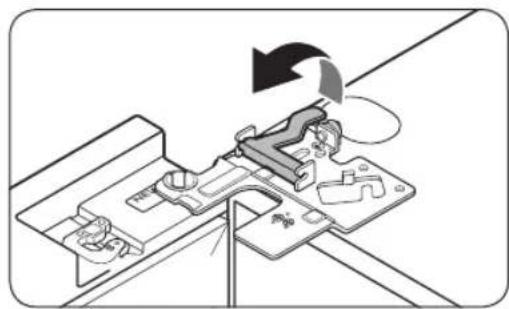
natural_image
Technical diagram showing a mechanical assembly with a person operating a workpiece, no visible text or symbols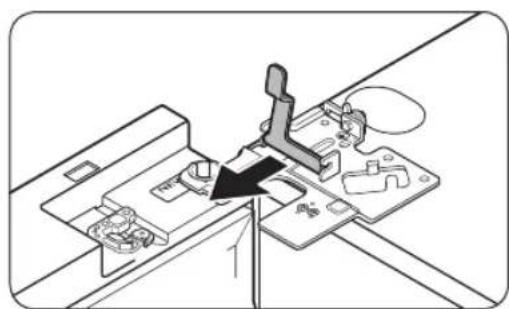
natural_image
Technical diagram of a mechanical assembly with a lever and base plate (no text or symbols)natural_image
Mechanical assembly diagram showing a component being inserted into a housing (no text or symbols visible)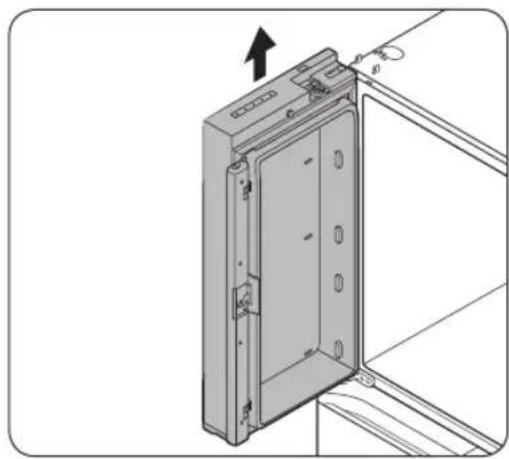
natural_image
Technical line drawing of a door panel with an arrow indicating direction (no text or symbols)natural_image
Diagram of a door hinge with a black arrow pointing to a corner detail (no text or symbols)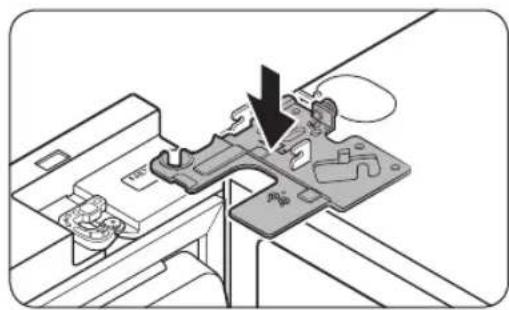
natural_image
Mechanical assembly diagram showing a clamping device interacting with a bracket (no text or symbols visible)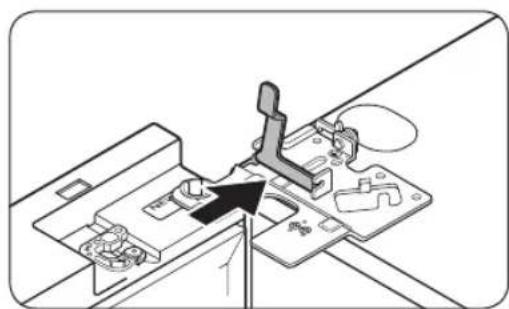
natural_image
Technical diagram of a mechanical assembly with a lever and base plate (no text or symbols)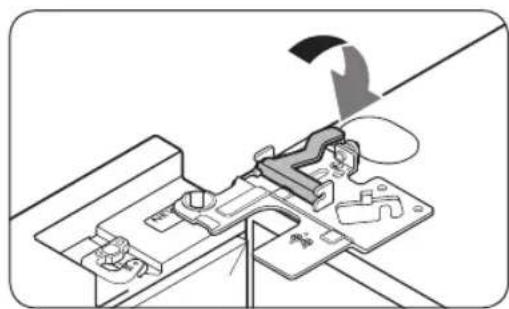
natural_image
Mechanical assembly diagram showing a clamping mechanism with no visible text or symbolsnatural_image
Diagram showing mechanical assembly with directional arrows and a magnified inset of connected components (no text or symbols)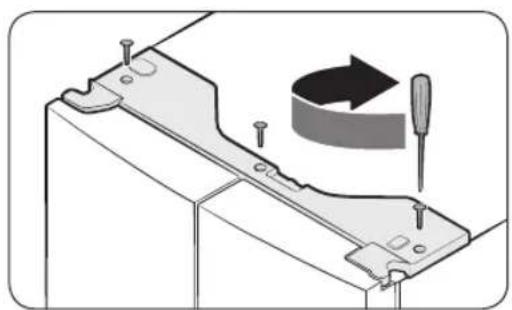
natural_image
Mechanical assembly diagram showing a tool interacting with a bracket and a curved arrow indicating rotation (no text or symbols present)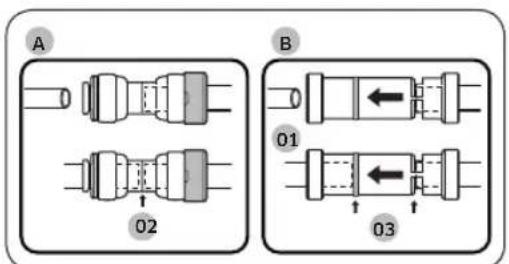
text_image
A 02 B 01 03natural_image
Diagram of a refrigerator interior showing a drawer with an arrow indicating direction (no text or symbols present)natural_image
Diagram of a refrigerator drawer with an arrow indicating direction (no text or symbols present)natural_image
Diagram showing two devices connected to a central screen with a coiled cable (no text or symbols)natural_image
Diagram of a cabinet drawer with an arrow indicating direction (no text or symbols present)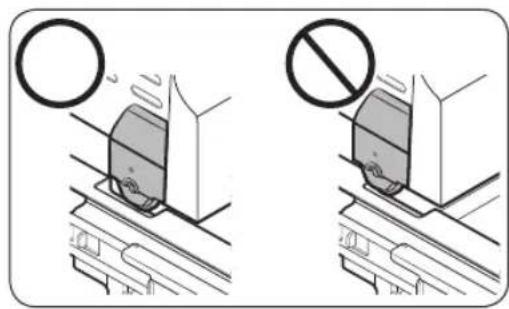
text_image
Diagram showing two scenarios of a train on tracks with a prohibition sign, indicating no movement or restriction.natural_image
Diagram showing a mechanical device with a rotating lever and directional arrows, no text or symbols present.natural_image
Two identical abstract curved shapes with no text or symbolsAnillos elásticos
natural_image
Line drawing of a refrigerator with a circular button on the door (no text or symbols)text_image
Technical diagram showing a mechanical component with labeled parts A and Btext_image
Diagram showing a mechanical or electrical component with labeled parts A and B, including a directional arrow indicating movement.text_image
Safety warning illustration showing a pipe knot with a circle and a prohibition sign indicating no protection.text_image
Diagram showing a prohibition symbol and three labeled safety symbols with arrows indicating movement or flow.PRECAUCIÓN
text_image
Diagram showing a refrigerator with labeled parts A and B, including an inset view of the door opening.natural_image
Diagram of a mechanical device with an upward arrow indicating force or direction (no text or symbols present)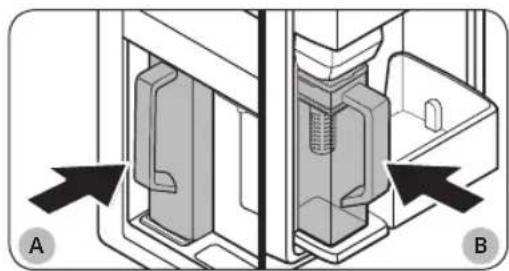
natural_image
Technical diagram showing two mechanical components with arrows pointing to features, labeled A and B (no text or symbols present)natural_image
Technical diagram of a mechanical assembly with labeled components A and B, showing internal components without any text or symbols.natural_image
Technical illustration of a mechanical assembly with two views showing internal components and a no-smoking symbol (no text or labels present)natural_image
Two technical diagrams showing a component with a circular symbol and a prohibition sign, no text or labels present.natural_image
3D technical illustration of a mechanical device with a circular component and handle (no text or symbols)
NOTA
text_image
Technical diagram showing two views (A and B) of a kitchen appliance with mechanical components and directional arrows indicating movement or assembly.natural_image
Diagram of a door with a door handle and internal panel, showing a black arrow pointing to the door panel (no text or symbols present)natural_image
Cross-sectional diagram of a mechanical or electrical component with layered structure (no text or symbols)natural_image
Diagram of a refrigerator interior with a magnified inset showing the exterior view (no text or symbols)natural_image
Diagram showing two containers with granular material inside, one moving right and the other horizontally (no text or symbols)
PRECAUCIÓN
natural_image
Diagram of a computer interface showing a drive or scanner with a magnified inset highlighting the component (no text or symbols present)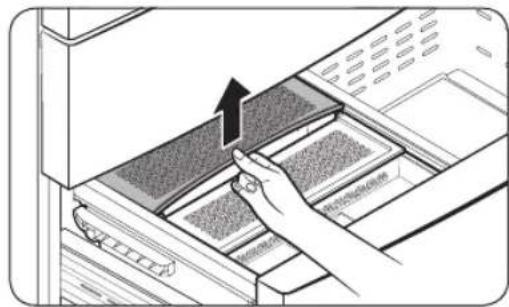
natural_image
Illustration of a hand inserting a device into a file drawer (no text or symbols visible)Separador de FlexZone
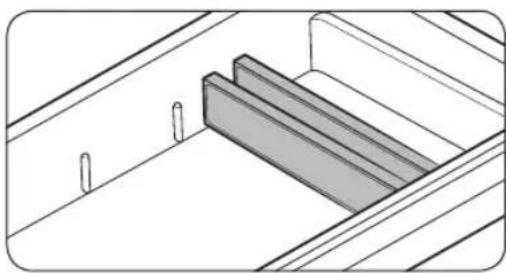
natural_image
Architectural line drawing of a window or cabinet with two vertical slats and a shaded rectangular component (no text or symbols)natural_image
Diagram of a mechanical device with a piston and arrow indicating upward movement (no text or symbols)natural_image
Diagram of a mechanical component with a handle and internal structure, no text or symbols presentnatural_image
Diagram of a cylindrical device with an upward arrow, mounted on a base (no text or symbols)natural_image
Diagram of a tilted rectangular plate with two circular components and directional arrows indicating movement (no text or symbols)natural_image
Simple diagram showing a curved arrow pointing to a tilted rectangular panel (no text or symbols)natural_image
Diagram of a screen with an arrow indicating rotation, no text or symbols presentnatural_image
Diagram of a mechanical assembly with a rotating component and a vertical rod (no text or symbols)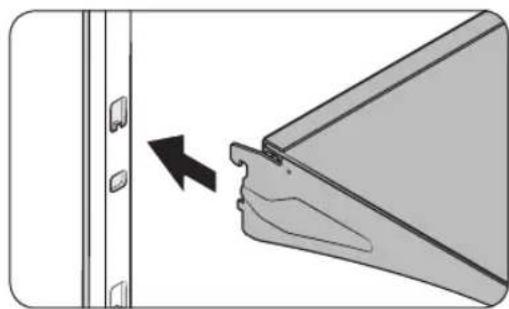
natural_image
Diagram showing a device with a lock and a close-up of its port, no text or symbols present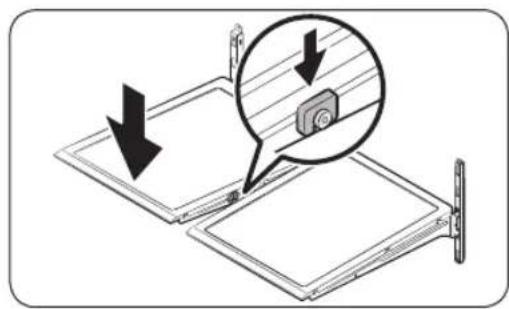
natural_image
Diagram showing a device with two arrows pointing to a screen, one magnified and one highlighted (no text or symbols present)natural_image
Diagram of a tilted rectangular object with an arrow indicating upward motion, no text or symbols presentnatural_image
3D diagram of a mechanical component with a downward arrow indicating force or direction (no text or symbols)natural_image
Simple 3D diagram of a folder with a black arrow pointing to it, placed on a pedestal (no text or symbols)natural_image
Diagram of a panel being tilted with an arrow indicating rotation (no text or symbols)natural_image
3D diagram of a rectangular container with a black arrow pointing to a vertical line, no text or symbols presentnatural_image
Diagram of a refrigerator with an open drawer and a black arrow indicating a directional change (no text or symbols present)natural_image
Technical line drawing of a door handle assembly with a curved arrow indicating rotation (no text or symbols)natural_image
Diagram of a refrigerator drawer with an arrow indicating direction (no text or symbols present)Cesta inferior
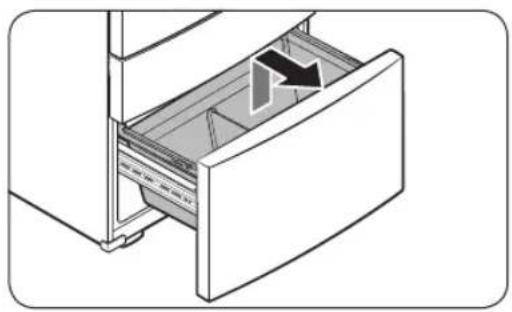
natural_image
Diagram of a refrigerator drawer with an arrow indicating direction (no text or symbols present)natural_image
Technical diagram of a door handle assembly with a downward arrow indicating force or direction (no text or symbols present)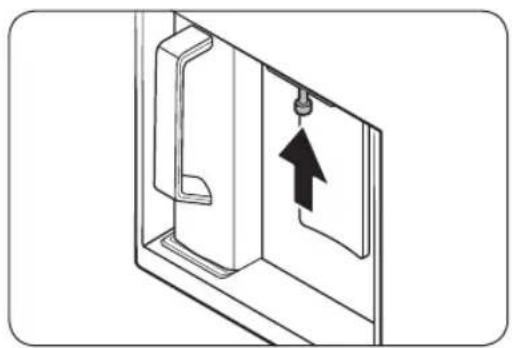
natural_image
Diagram of a door with an upward arrow indicating direction (no text or symbols)natural_image
Diagram of a device rear panel with a pipe inserted, showing ventilation slots and a scroll wheel (no text or symbols)natural_image
Diagram of a mechanical assembly with a rotating component and directional arrow (no text or symbols)natural_image
Diagram of a mechanical component with directional arrows indicating motion (no text or symbols)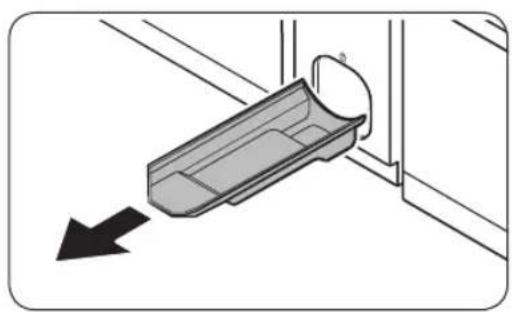
natural_image
Diagram of a mechanical component with an arrow indicating direction, no text or symbols present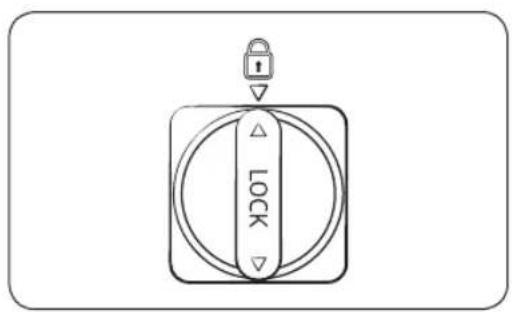
text_image
LOCKtext_image
Aleteo RunrúnEspañol72-
Ridgefield Park, NJ 07660
Open Source Announcement
The software included in this product contains open source software.
The following URL http://opensource.samsung.com/opensource/SMART_TP1_0/seq/0 leads to open source license information as related to this product.
text_image
QR code image containing encoded data, no visible human-readable textEspañol82-
Notas
SAMSUNG
Scan this with your smartphone
Scan the QR code* or visit www.samsung.com/spsn to view our helpful How-to Videos and Live Shows
* Requires reader to be installed on your smartphone
Contacte a SAMSUNG WORLD WIDE
natural_image
Black and white illustration of ice cubes with bubbles rising, no text or symbols present
natural_image
Abstract black-and-white photo of a cube partially submerged in ice with bubbles rising (no text or symbols)SAMSUNG
Sommaire
Open Source Announcement 82
natural_image
Diagram of a refrigerator interior showing door, drawer, and front compartment layout (no text or labels)Français18
natural_image
Diagram showing two containers with directional arrows indicating movement, one marked with a circle and the other with a prohibition sign (no text or symbols present)REMARQUE
natural_image
Technical diagram of a mechanical assembly with mounting holes and a directional arrow (no text or symbols)natural_image
Diagram showing mechanical assembly with directional arrows and a magnified inset of connected components (no text or symbols)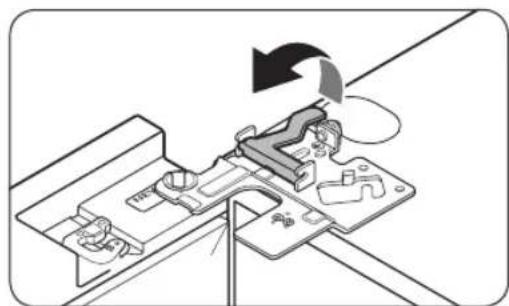
natural_image
Mechanical assembly diagram showing a clamping mechanism with no visible text or symbols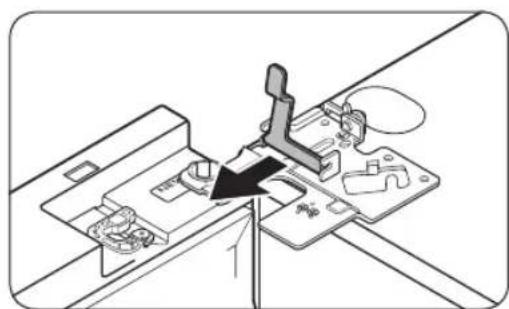
natural_image
Technical diagram showing a mechanical assembly with a lever and base plate (no text or symbols)natural_image
Mechanical assembly diagram showing a component being inserted into a housing (no text or symbols visible)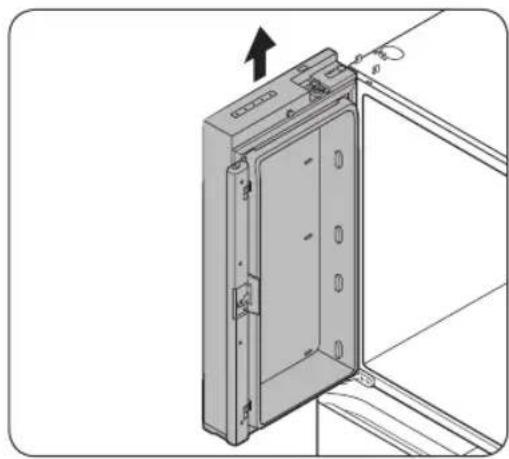
natural_image
Technical line drawing of a door panel with an arrow indicating direction (no text or symbols)natural_image
Diagram of a door hinge with a black arrow pointing to a corner detail (no text or symbols)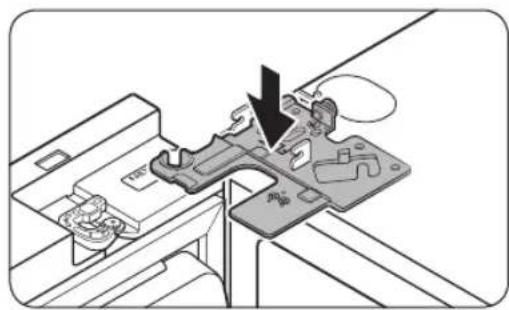
natural_image
Mechanical assembly diagram showing a clamping device interacting with a bracket (no text or symbols visible)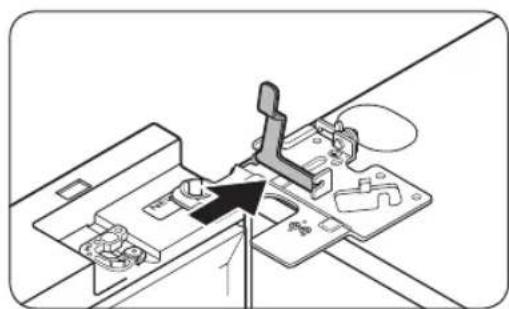
natural_image
Mechanical assembly diagram showing a lever mechanism interacting with a base plate (no text or symbols visible)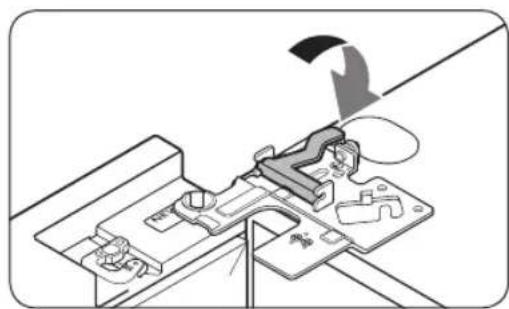
natural_image
Mechanical assembly diagram showing a clamping mechanism with no visible text or symbolsnatural_image
Diagram showing mechanical assembly with directional arrows and a magnified inset of connected components (no text or symbols)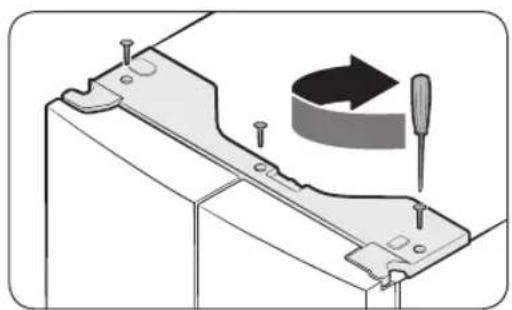
natural_image
Technical illustration of a mechanical component with screw fasteners and a curved arrow indicating rotation (no text or symbols)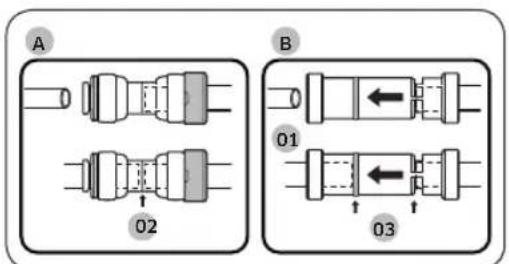
text_image
A 02 B 01 03natural_image
Diagram of a refrigerator interior showing a door, drawer, and shelf with an arrow indicating direction (no text or symbols)natural_image
Diagram of a refrigerator drawer with an arrow indicating direction (no text or symbols present)natural_image
Diagram showing two devices connected to a central screen with a coiled cable (no text or symbols)natural_image
Diagram of a cabinet drawer with an arrow indicating direction (no text or symbols present)natural_image
Two technical diagrams showing a device on a conveyor belt with no visible text or symbolsATTENTION
natural_image
Diagram showing a mechanical device with rotating arrows and a magnified inset view (no text or symbols)natural_image
Two identical curved, segmented shapes resembling stylized fish or gear (no text or symbols)Circlips
natural_image
Line drawing of a refrigerator with a circular button on the door (no text or symbols)text_image
Technical diagram showing labeled components A and B in a mechanical assembly or assembly viewtext_image
Diagram showing a mechanical or electrical component with labeled parts A and B, including a directional arrow indicating movement.Français32
text_image
Safety warning illustration showing a pipe knot with a circle and a prohibition sign, indicating no protection or disapproval.text_image
Diagram showing a prohibition symbol and three labeled circular symbols connected by lines, likely indicating safety or installation instructions.ATTENTION
text_image
Diagram showing a refrigerator interior with labeled parts A and B, including a close-up of the door opening.natural_image
Diagram of a mechanical device with an upward arrow indicating force or direction (no text or symbols present)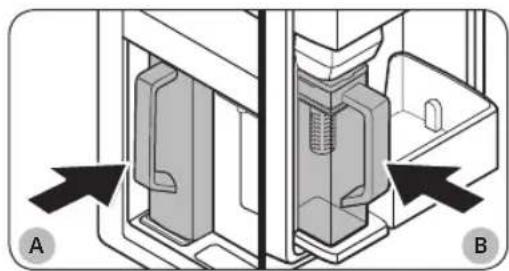
natural_image
Technical diagram showing two mechanical components with arrows pointing to features, labeled A and B (no text or symbols present)natural_image
Technical diagram showing two mechanical components with arrows indicating assembly or movement (no text or symbols present)natural_image
Technical diagram showing two views of a mechanical component with no visible text or symbolsnatural_image
Two technical diagrams showing a component with a circular symbol and a prohibition sign, no text or labels present.natural_image
3D diagram of a mechanical device with a circular aperture and rectangular base (no text or symbols)REMARQUE
text_image
Technical diagram showing two views (A and B) of a kitchen appliance with mechanical components and directional arrows indicating movement or assembly.natural_image
Diagram of a door with a door handle and internal panel, showing a black arrow pointing to the door (no text or symbols present)natural_image
Cross-sectional diagram of a mechanical or electrical component with layered structure (no text or symbols)natural_image
Diagram of a refrigerator interior showing seating arrangement and a magnified view of the refrigerator (no text or symbols)natural_image
Diagram showing two containers with granular material inside, one moving right and the other horizontally (no text or symbols)ATTENTION
natural_image
Diagram of a computer interface showing a drive or scanner with a magnified inset highlighting the component (no text or symbols present)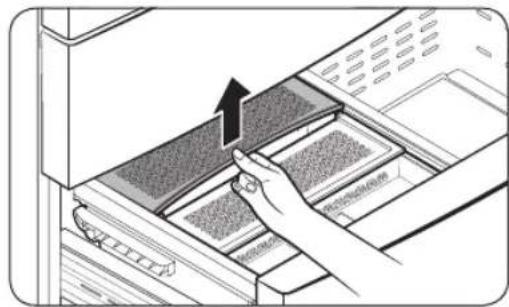
natural_image
Illustration of a hand inserting a device into a rack with a black arrow indicating the direction (no text or symbols present)natural_image
Architectural diagram showing a window with two vertical slats and a shaded rectangular block inside (no text or symbols)natural_image
Diagram of a mechanical device with an upward arrow indicating force or direction (no text or symbols present)natural_image
Diagram of a mechanical component with a handle and internal structure, no text or symbols presentnatural_image
Diagram of a cylindrical device with an upward arrow, mounted on a base with a small hole (no text or symbols)natural_image
Diagram of a tilted rectangular plate with two circular components and directional arrows indicating movement (no text or symbols)natural_image
Simple diagram showing a curved arrow pointing to a tilted rectangular panel (no text or symbols)natural_image
Illustration of a screen with an arrow indicating rotation or change, mounted on a stand (no text or symbols)natural_image
Diagram of a mechanical assembly with a rotating component and a vertical rod (no text or symbols)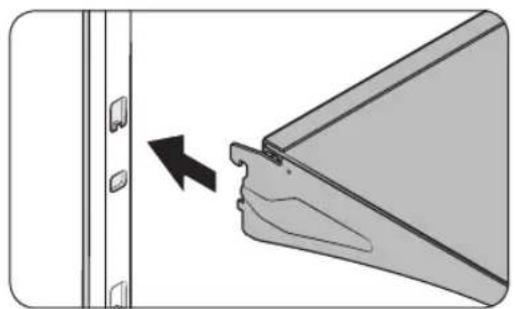
natural_image
Diagram showing a device with a black arrow pointing to a component, no text or symbols present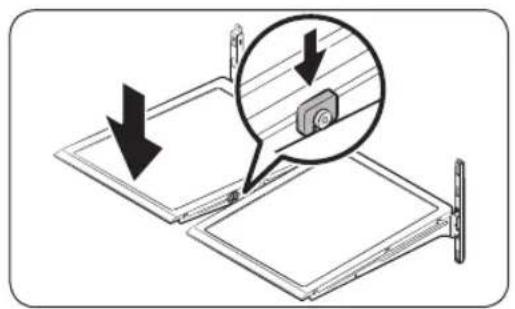
natural_image
Diagram showing a device with two panels, one highlighted by arrows and the other with a magnified inset (no text or symbols)natural_image
Diagram of a rectangular object with an arrow indicating direction, no text or symbols present- Sortez la clayette.
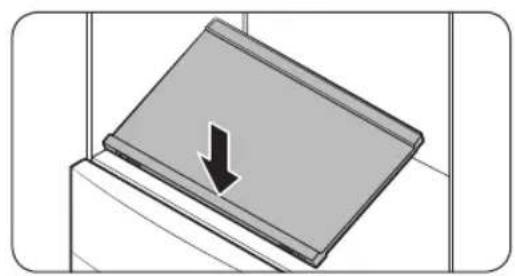
natural_image
Diagram of a mechanical component with a downward arrow indicating force or direction (no text or symbols)natural_image
Diagram of a folder with a black arrow indicating direction, no text or symbols presentnatural_image
Diagram of a panel being tilted with an arrow indicating rotation (no text or symbols)text_image
Maintenance
Bacs de la porte
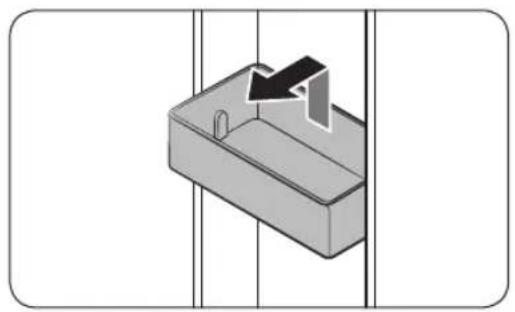
natural_image
3D diagram of a rectangular container with a black arrow pointing to the top portion, no text or symbols presentnatural_image
Diagram of a refrigerator interior showing a door opening and a hanging bag with a black arrow indicating direction (no text or symbols)natural_image
Technical line drawing of a mechanical assembly with a clamping mechanism (no text or symbols)Bacs du congélateur
Bac supérieur
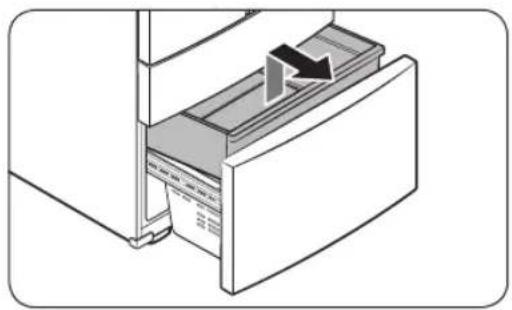
natural_image
Diagram of a refrigerator drawer with an arrow indicating direction (no text or symbols present)Bac inférieur
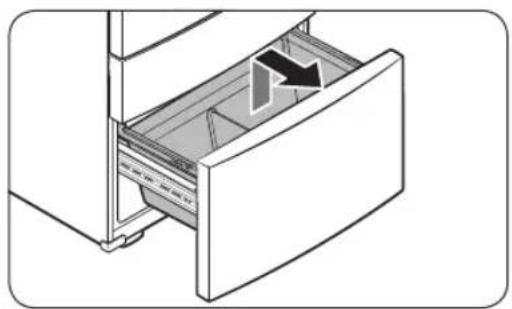
natural_image
Diagram of a refrigerator drawer with an arrow indicating direction (no text or symbols present)natural_image
Diagram of a door handle assembly with a black arrow indicating direction, labeled 'A' (no text or symbols beyond label)natural_image
Diagram of a door opening with a hanging hook and an upward arrow indicating direction (no text or symbols)natural_image
Diagram of a computer monitor with ventilation slots and a cable inserted, showing no text or symbolsnatural_image
Diagram of a mechanical assembly with a rotating component and directional arrow (no text or symbols)natural_image
Diagram of a mechanical component with directional arrows indicating motion (no text or symbols)natural_image
Diagram of a mechanical component with an arrow indicating direction, no text or symbols presentnatural_image
Line drawing of a steam iron with steam bubbles (no text or symbols)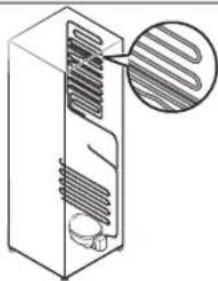
natural_image
Diagram of a refrigerator interior showing heat distribution patterns (no text or labels)natural_image
Simple line drawing of a kettle emitting smoke (no text or symbols)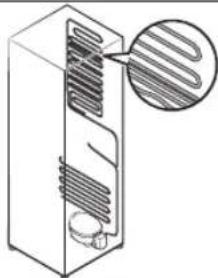
natural_image
Diagram of a refrigerator interior showing heat exchanger and ventilation slots (no text or labels)Français74
Samsung Electronics Canada Inc.
2050 Derry Road West,
Mississauga, Ontario L5N 0B9
Canada
www.samsung.com/ca/support (English)
www.samsung.com/ca_fr/support (French)
Open Source Announcement
The software included in this product contains open source software.
The following URL http://opensource.samsung.com/opensource/SMART_TP1_0/seq/0 leads to open source license information as related to this product.
text_image
QR code image containing encoded data, no visible human-readable textFrançais82
Mémo


SAMSUNG
Scan this with your smartphone.
Scan the QR code* or visit www.samsung.com/spsn to view our helpful How-to Videos and Live Shows
* Requires reader to be installed on your smartphone