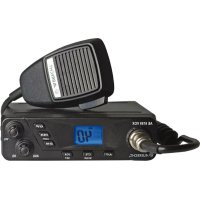
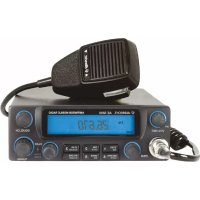
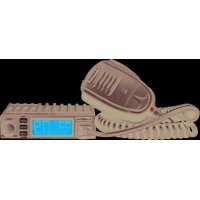
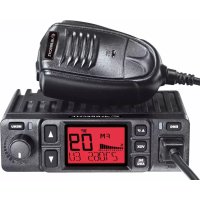
DR 790 CD - Radio ALBRECHT - Free user manual and instructions
Find the device manual for free DR 790 CD ALBRECHT in PDF.
Download the instructions for your Radio in PDF format for free! Find your manual DR 790 CD - ALBRECHT and take your electronic device back in hand. On this page are published all the documents necessary for the use of your device. DR 790 CD by ALBRECHT.
USER MANUAL DR 790 CD ALBRECHT
1.1. Language If you would like to change the language, press „LANGUAGE“ on the remote control to switch bet- ween German, English or French. 1.2. Package Contents Please make sure that the following contents are included in the package:
3. 3.5mm to RCA audio cable
1.3. Getting started Connect the power cord (included) to the AC input on the back of the DR 790 CD and plug it into a power socket. To turn the radio on, press the power button on the back of the unit. For the best possible reception in DAB and FM, the telescopic antenna must be fully extended and aligned in such a way that the display shows the highest signal strength and thus the best sound quality is achieved. The icon at the top right of the display indicates the strength of the received transmission signal.22 English
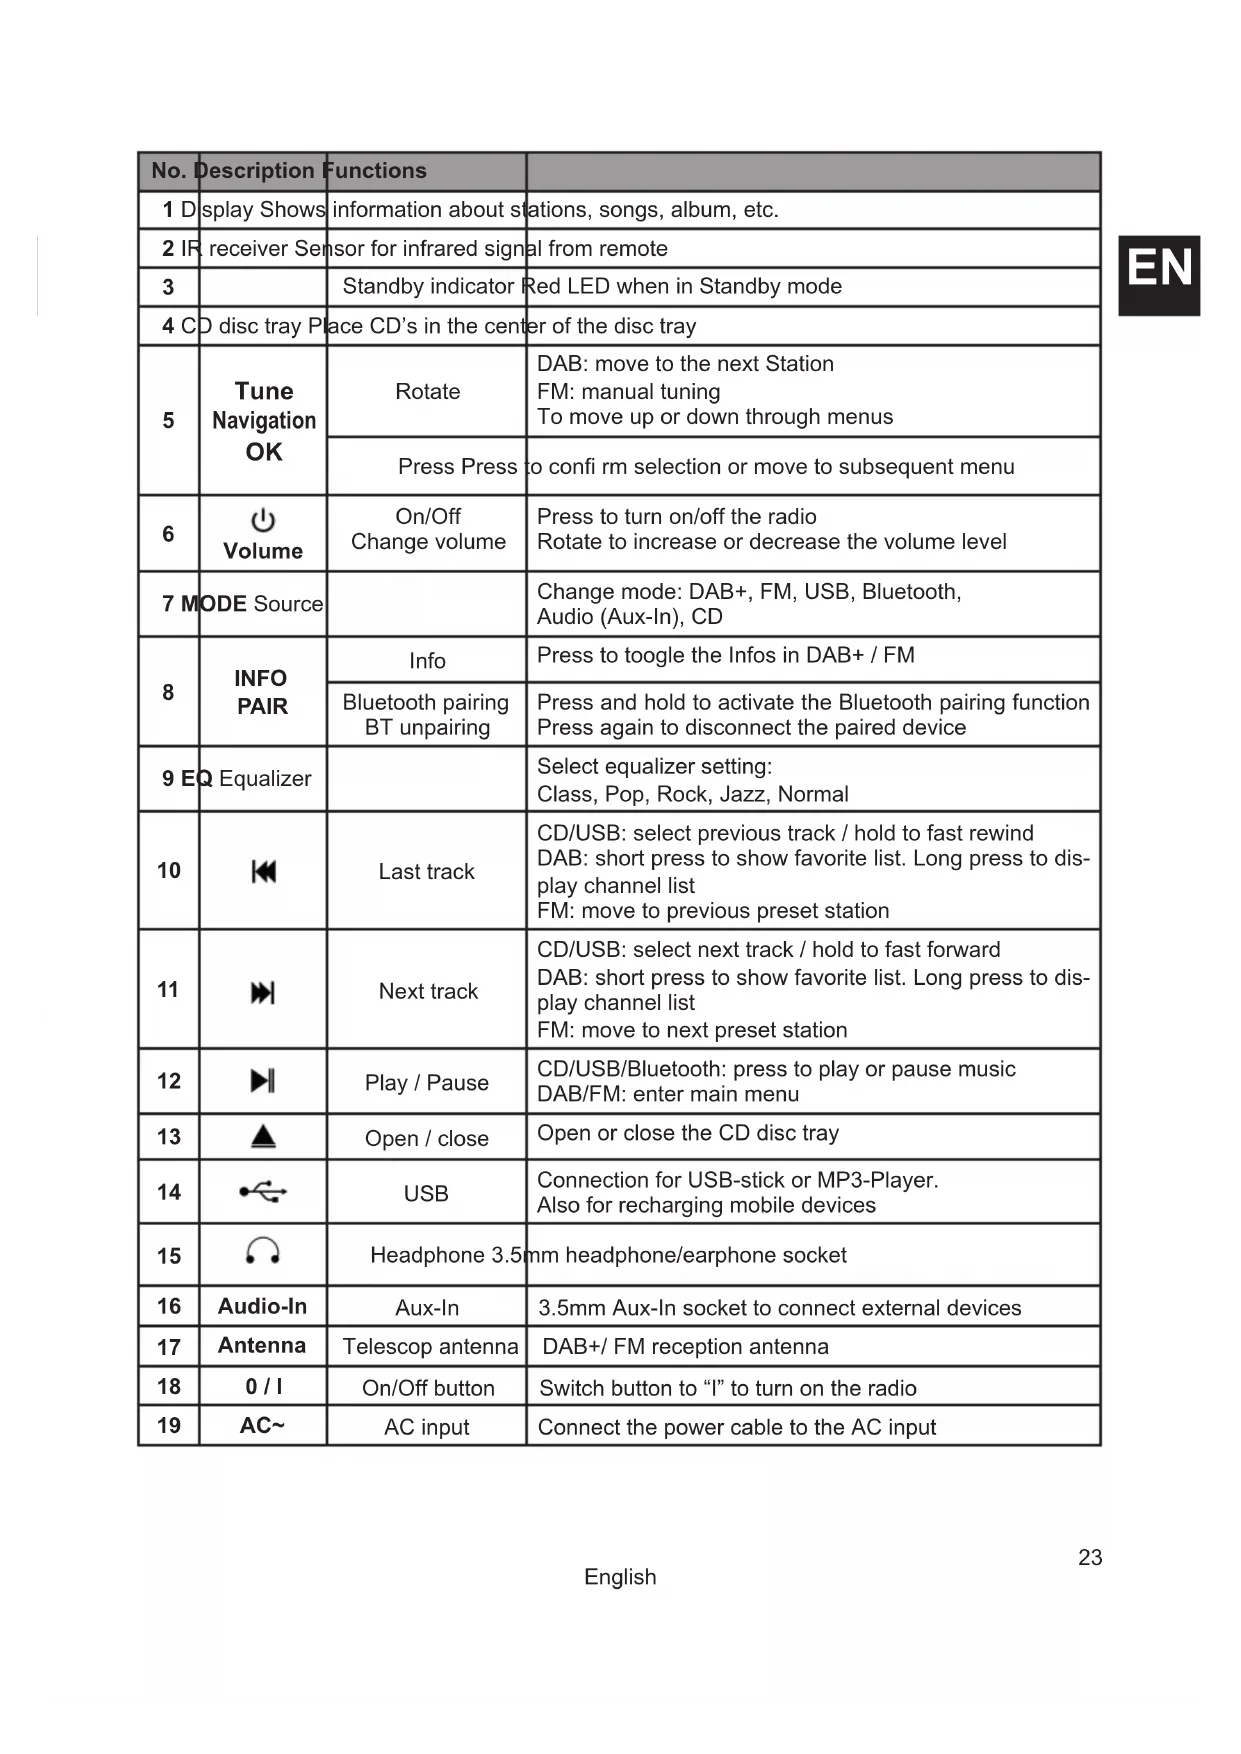
No. Description Functions 1 Display Shows information about stations, songs, album, etc. 2 IR receiver Sensor for infrared signal from remote
Standby indicator Red LED when in Standby mode 4 CD disc tray Place CD’s in the center of the disc tray
Rotate DAB: move to the next Station FM: manual tuning To move up or down through menus Press Press to con rm selection or move to subsequent menu
Volume On/Off Change volume Press to turn on/off the radio Rotate to increase or decrease the volume level 7 MODE Source Change mode: DAB+, FM, USB, Bluetooth, Audio (Aux-In), CD
INFO PAIR Info Press to toogle the Infos in DAB+ / FM Bluetooth pairing BT unpairing Press and hold to activate the Bluetooth pairing function Press again to disconnect the paired device 9 EQ Equalizer Select equalizer setting: Class, Pop, Rock, Jazz, Normal
Last track CD/USB: select previous track / hold to fast rewind DAB: short press to show favorite list. Long press to dis- play channel list FM: move to previous preset station
Next track CD/USB: select next track / hold to fast forward DAB: short press to show favorite list. Long press to dis- play channel list FM: move to next preset station
USB Connection for USB-stick or MP3-Player. Also for recharging mobile devices
Headphone 3.5mm headphone/earphone socket
Audio-In Aux-In 3.5mm Aux-In socket to connect external devices
0 / I On/Off button Switch button to “I” to turn on the radio
2.3. Remote Control Standby Press to turn on/off Eject Open/close CD disc tray MODE Select Source CD, USB, DAB-Radio, BT (Bluetooth) FM-Radio, AUDIO (Aux-in) Repeat Select repeat playback (CD/USB) Random Play tracks randomly in CD/USB EQ Equalizer Class, Pop, Rock, Jazz, Normal my EQ myEqualizer Individual EQ setting of Bass / Treble + / - Bass Adjust Bass in my EQ + / - Treble Adjust Treble in my EQ TIME Clock Hold to set the clock Short press to switch 12/24 h Sleep Set the sleep timer Dimmer Change brightness of display Alarm Long press to enter Alarm settings Short press to de-/activate PAIR Pair Press and hold to activate BT pairing Rewind Rewind or go to last track Play/Pause
Play/Pause music in CD/USB/BT Press to con rm selection Fast forward Fast forward or go to next track Stop Stop music in CD/USB/BT Favorite Recall/Save favorites Program songs playback in CD/USB Mute Press to mute the sound
Move to next/previous album Last/next favorite station Hold to tune to next available station INFO Info Show information in DAB/FM/CD MENU Menu Open menu in DAB/FM mode + V - Volume Increase / decrease volume 0-9 Recall favorites directly SCAN Scan Intro DAB/FM: start scanning for channels CD/USB: play short intro of all tracks25 English
Language Select: German, English, French 2.4. Batteries for Remote Control To insert AAA batteries into the battery compartment, open the cover on the backside of the remote. The correct polarity is shown in the battery compartment. Dispose used batteries according to the federal laws. 2.5. Modes Press MODE repeatedly to select one of the following modes: DAB+/FM/USB/Bluetooth/Audio/CD. You can also select the desired mode directly through the remote control.
DAB radio mode receives DAB/DAB+ digital radio and displays information about the station and program/track as broadcasted. 3.1. Scanning for stations The rst time you use the unit (or if the station list is empty) the radio automatically performs a full scan. You may also need to start a scan manually to update the list of stations for one of the following reasons:
- New stations may become available from time to time.
- Stations close or can no longer be received (In the station list, invalid stations are indicated with a “?” in front of their name).
- If reception was not good after the original scan (e.g. no antenna connected), this may result in an empty or incomplete list of available stations.
- If you have poor reception of some stations, you may wish to list only stations with good signal strength.
3.1.1. Perform a Full Scan manually
Select MENU > Full scan. Alternatively you can also press SCAN on the remote control. Once the scan is complete, the radio returns to playing the previously selected station or rst station on the station list.
3.1.2. Clear Unavailable Stations from the Station List
Select MENU > Prune This removes all invalid stations, indicated in the station list with a “?” in front of the station name. OPEN USB BT
3.2. Changing stations Use the / buttons on the remote control or rotate the TUNE knob on the unit to scroll through the list of station and press the on remote control or OK to select the desired station. 3.3. Favorites You can save up to 40 stations in your favorites for DAB+.
3.3.1. To Store a Station as a Favorite
Press the button on the remote control, the display shows the Favorites. Favorites (1-40) are displayed as either Empty or with the currently stored station name. Use the / buttons on the remote control or rotate the TUNE knob on the unit to choose a favorite, then press and hold on the remote control to store the currently played station. After conrmation, the preset station is stored and the display returns to the Now playing screen.
3.3.2. To Recall a Favorite
Press the button briey (the display will show the Favorites). Select one by using the / buttons on the remote control, then press to choose the favorite. 3.4. Manual Tune You can manually tune to a particular channel/frequency. This can be useful while adjusting your antenna to achieve the best possible reception and scanning a particular channel to update the station list. Press MENU > Manual tune then use the / buttons on the remote control or rotate the TUNE knob on the unit to nd a par- ticular channel/frequency and press on the remote control or OK on the unit to conrm. The display shows a live indication of the received signal strength on the selected frequency. Adjustments to your antenna will be shown in the received signal strength indicator. 3.5. Now playing information While a station is playing, the display shows its name and DLS (Dynamic Label Segment) information broadcasted by the station such as programme name, track title, album name, etc. If the information has over 16 characters, it will scroll across the display. Each time you press the INFO button, the next set of information is displayed, cycling through: DLS text, DLS Plus information (this is only displayed if broadcast by the station), signal strength, programme type, ensemble name, channel number/frequency, signal error rate, bit rate, time and date.27 English
3.6. Dynamic range compression (DRC) This function reduces the difference between the loudest and quietest audio being broadcast. Effectively, this makes quiet sounds comparatively louder, and loud sounds comparatively quieter. Note: DRC only works if it is enabled by the broadcaster for a specic station. To change the DRC setting select MENU > DRC. The options available are: DRC: off | on. 3.7. Factory Reset A factory reset returns all user settings to default values, so that favorites, time/ date and other indi- vidual settings are lost. To reset the device press MENU > Factory reset and conrm with 3.8. SW-Version If you want to view the SW version press MENU > SW version and conrm with 3.9. Language The default language is German. If you would like to change the language, press MENU > Langua- ge or press „LANGUAGE“ on the remote control to switch between German, English or French.
FM mode receives analogue radio from the FM band and displays RDS (Radio Data System) infor- mation about the station (if broadcasted). The rst time you select FM radio, the unit is set to the lowest frequency in the FM band. 4.1. Scan for Stations in FM Mode To scan for the next available FM station press and hold P+ or P-. The unit scans up/down through the FM band frequencies, showing the current frequency on the display. The scan stops when a signal is found. The unit can be set to stop at each station or only at stations with a strong signal (for details see „4.4. Scan Settings“ auf Seite 27). Alternatively, you can use the / buttons to tune manually in 0.05 MHz steps. If you press the SCAN button, the radio scans the complete FM frequency band and automatically saves the rst 40 found stations to the preset memory. Attention: all your previously saved presets will be overwritten by this! 4.2. Favorites The unit has 40 favorites for FM, which work in the same way as the DAB favorites, described ear- lier in chapter „3.3. Favorites“ auf Seite 26. 4.3. Now Playing Information While FM radio is playing, the screen shows its frequency, or if RDS information is available, station name and any further “Radio Text” information. Each time you press the INFO button the next set of information is displayed, cycling through: RDS Radio Text, programme type, frequency, mono/stereo, time and date. 4.4. Scan Settings By default, FM scans stop at any available station (All Stations). This may result in poor quality audio from weak stations. To change the scan settings (to stop only at stations with good signal strength) go to MENU > Scan setting and select Strong Stations.28 English
4.5. Audio settings By default, all stereo stations are reproduced in stereo. For weak stations, this may result in poor audio quality. The audio quality can be improved by changing the audio setting to Mono. To play weak stations in mono select MENU > Audio setting > Mono. You can select between these options: Stereo | Mono 4.6. Factory Reset A factory reset returns all user settings to default values, so that favorites, time/ date and other indi- vidual settings are lost. To reset the device press MENU > Factory reset and conrm with 4.7. SW-Version If you want to view the SW version press MENU > SW version and conrm with 4.8. Language The default language is German. If you would like to change the language, press MENU > Language or press „LANGUAGE“ on the remote control to switch between German, English or French.
Supported Compatible Disc Types are: Disc Types Disc Logo Recorded Content CD-R (CD Recordable - Audio/MP3/WMA)
AUDIO-CD (Compact Disc Digital Audio) Di gita l Au dio AUDIO Some recorded files may not be able to be played due to the type and format of disc or condition of the recording. 5.1. CD Playing
- Press the MODE button until “CD” is displayed or press the CD button on the remote control to select CD function.
- Press the button to open the disc door, and put the CD on the disc tray (with the printed side up).
- Press the button to close the disc door, the unit will automatically start playing.
- Press the button to pause the playback.
- To resume playback, press the button again.
- Press the button on the remote control to stop the playing. 5.2. To Skip or Search in CD mode
- Press the button to skip backward one track on the disc
- Press the button to skip forward one track on the disc
- Press and hold the button on the remote control to fast backward to a track position
- Press and hold the button on the remote control to fast forward to a track position
- Press the button to stop fast forward/backward29 English
5.3. Repeat Function (CD and USB) In CD mode repeat play can be set by pressing the button on the remote control. The following options are available:
- SINGLE: repeat a single song
- DIR: repeat all songs in this directory
- ALL: repeat all songs
- OFF: repeat mode off 5.4. Playing Random (CD and USB) For CD mode random play can be set by pressing the button on the remote control. The music will then be played in a randomly order. 5.5. Program (CD and USB) When playing music, press the button on remote control, then press the button and the fol- lowing information will be displayed on the screen. You can choose a track with the remote control numeric keys to store as P01, P02 etc. In this pro- cess, press the button each time to select a certain track. After you selected all desired tracks, press the button to begin the playback. You can program a maximum of 20 tracks. In programmed play back, the numeric keys on the remote control are invalid, you can only press the / buttons to change the track. Change source or press the button twice to clear the program setting.
6. USB Music Playback Mode
Connect an USB mass storage device (e.g. MP3-Player, USB ash memory stick, etc.) to this unit to enjoy the device’s stored music through the powerful speakers of this radio.
- Insert the device’s USB plug into the port at the rear of the unit.
- Press the MODE button or press the USB button on the remote control to select the USB function.
- The device’s stored music will be played automatically.
You can listen to music from a mobile device if it is connected to the DR 790 CD via Bluetooth. You need to pair your Bluetooth device rst with this unit before you can use it. Note: In order to avoid interferences, deactivate Wi-Fi on your device (Smartphone, tablet, etc...) when playing music using Bluetooth. Please note: The functions Repeat, Random and Program are also available in the USB mode. For a detailed description of the functions, refer to chapters 5.3. to 5.5.30 English
- Press the BT button on the remote control to select the Bluetooth mode or change source to Bluetooth by pressing MODE on the unit. If the unit is not paired to any Bluetooth device, the system enters automatically into pairing mode; or you need to press and hold the PAIR button to start pairing.
- Activate the Bluetooth function on your mobile device and select the search mode.
- Search for “DR 790 CD” on your Bluetooth device.
- To disconnect the Bluetooth function, switch to another function on the unit or disable the func- tion on your mobile device. Note:
- The maximum operational range between this radio and a Bluetooth device is approximately 10 meters (without any object between the Bluetooth device and the unit).
- If the signal strength is weak, your Bluetooth device may disconnect, but will re-enter automa- tically into pairing mode. Tips:
- To connect an new device to the radio, press the PAIR button to re-activate the pairing mode. The existing connection will be interrupted.
- The last connected mobile device will connect automatically again when it is within the operati- onal range of the DR 790 CD. 7.2. Listen to Music from Bluetooth Device
- Pair your mobile device with the Albrecht DR 790 CD radio
- Play music from your mobile device (if it supports A2DP).
- Use supplied remote control to control play (if it supports AVRCP).
8. Audio In / Aux-In
- Press the AUDIO button on the remote control or press the MODE button on the unit to select the desired source.
- Operate your audio device directly for playback features. Press the V+ / V- button to adjust the volume to your desired level. Use the supplied 3.5mm to RCA audio cable to connect the DR 790 CD to your existing home stereo system, sound bar, TV or similar. Connect the radio to the AUX (L/R) input socket of your other device.
9.1. Date & Time To set the date and time manually, follow these steps:
- Press and hold the TIME button on the remote control.
- Input the date, hour and minutes with the numeric keys or / ./ INFO / on the remote control.
- Finally press the TIME button to con rm setting. To view the date in DAB or FM mode press the INFO button on the remote control. In DAB mode, the unit automatically receives the date and time during playback of a station. 9.2. Sleep Timer Use the sleep timer to automatically turn the system off after a certain number of minutes in play mode. By setting the sleep timer, you can fall asleep to music and know that your system will turn off by itself rather than playing all night. To set the sleep timer press the button on the remote control repeatedly, it changes the number of minutes shown on the display in this sequence: After setting the number of minutes for the sleep timer, the display will return to the previous display. The system is now set to turn off after the number of minutes you have set.
9.2.1. Remaining time of Sleep Timer
When the button on the remote control is pressed once, the remaining sleep time is displayed. The display returns to the original display automatically.
9.2.2. To Cancel the Sleep Timer
Press the button repeatedly on the remote control until “off” is displayed. Turning off the radio also cancels the sleep timer. 9.3. Alarm You can use the setting Alarm to make the unit automatically turn on at a desired time everyday from standby. Note, for all steps you need to press the button to con rm and go to the next step. If there is no operation within 10 seconds, the settings will exit automatically.
- Press and hold the button for the setting. Select the source by / , then input the time the alarm should start by the numeric keys on remote control
- Set the volume by pressing
- When the alarm is activated, an alarm icon will appear in the upper left corner of the display.
- By pressing the button the alarm clock can be switched off and on again. Note: The clock must be correctly set for the alarm to operate correctly. 9.4. Equalizer
Press the my EQ button on the remote control, then press the Bass or Treble +/- buttons on the remote control to increase/decrease the bass or trebles.
You can select one of the preset equalizer setting such as CLASS/POP/ROCK/JAZZ/NORMAL by pressing the EQ button. The default selection is ROCK.32 English
9.5. Backlight You can dim or switch off the backlight by pressing the button. Three brightness levels and off are available.
- Ensure that the mains cable is connected securely.
- Ensure that the unit is switched on. The remote control does not function
- Use the remote control near to the unit.
- Point the remote control at the remote control sensor on the unit.
- Replace the batteries in the remote control with new ones.
- Remove any obstacles between the remote control and the unit. Loud hum or noise is heard
- The plugs and sockets are dirty. Wipe them with a cloth slightly moistened with an appropriate non-abrasive cleaning solution.
- The unit may freeze up during use. Switch off and then switch on the unit again at the mains socket to reset it. No sound output
- Make sure that the unit is not muted.
- Press the V+ button or turn the Volume knob to increase the volume. I can’t nd the Bluetooth name of this unit on my Bluetooth device for pairing
- Ensure that the unit is switched on.
- Ensure that the Bluetooth function is activated on your Bluetooth device.
- The unit has a Bluetooth function that can receive a signal within 10 meters.
- In order to avoid interferences, de-activate Wi-Fi on your device (Smartphone, tablet, etc...) when playing music using Bluetooth. Disc in place but the unit won’t play
- Ensure that the disc label is facing up.
- Ensure that the disc is clean.
- PAUSE mode may be activated, deactivate it.
- Disc may be damaged or dirty; check and clean the disc.
- Please check that your CD is recorded in the right format (see chapter „5. CD Mode“ auf Seite 28) Disc skips
- Ensure the unit is on a secure spot. Vibrations or jarring can cause the disc to skip.
- Please make sure that there are no scratches on the CD FM reception
- Ensure the FM antenna is fully extended.
- Electrical interference in your home can cause poor reception. Move the unit away from them (especially those with motors and transformers). The unit switches off automatically during playing
- Increase the volume level on your input source player like MP3-player. Interferences in Speakers
- Check that you have not left a mobile phone near the unit.33 English
Please read these instructions carefully. They contain important information which will help you get the best from your product and ensure safe and correct installation and operation. General safety information
- Keep the product and all its parts out of reach of small children.
- Do not attempt to open the product. This product does not contain any user serviceable parts. Unauthorised handling of the device may damage it and will void your warranty.
- Do not use your Radio near emergency/intensive care medical equipment; if you have a pace- maker tted or during an electrical storm.
- To avoid possible hearing damage, do not listen to this radio at high volume levels for long periods of time. Always keep the volume within reasonable limits. Power source
- The device may only be connected to a mains voltage of 230 V ~, 50 Hz. Never try to operate the device with a different voltage.
- The mains plug may only be connected after the installation has been completed correctly.
- If the mains plug is defective or if the device has other damage, it must not be put into operation.
- When removing the plug from the socket, pull on the plug - not on the cable.
- Always check that you have completely switched off your Radio, before disconnecting the po- wer cord.
- If the radio is not used for a long period of time, switch off the device on the back or disconnect the power plug. This is to avoid the risk of re. Moisture and water
- Keep it dry. Avoid exposure to precipitation, humidity and liquids which could all affect the pro- duct circuitry.
- Do not leave it in low temperatures as moisture can form inside the product, which may damage the circuit board.
- Do not use it in the dust environment as dust can damage the interior electronic components and lead to malfunctions in the device. Ventilation
- If the radio is moved from a cold environment into a warmer one, do let it adapt to the new temperature before operate the device. Otherwise, it might lead to condensation and cause malfunctions in the device.
- Do not block or cover slots, holes or openings on the product by placing on soft furnishings such as carpets, rugs or beds as these are provided for functionality and/or ventilation to ensure safe operation of the product Heat sources and ames
- Do not leave it in high temperatures as electronic devices and plastic parts may warp in heat.
- Keep it away from bright sunlight or heat sources, such as a radiator.35 English