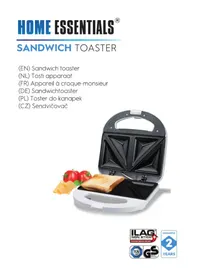
ST123520 - Sandwich maker Emerio - Free user manual and instructions
Find the device manual for free ST123520 Emerio in PDF.
| Brand | Emerio |
| Model | ST123520 |
| Product type | Panini press / Sandwich toaster |
| Power | 750 W |
| Power supply voltage | 220-240 V, 50-60 Hz |
| Number of sandwiches | 2 (one at a time) |
| Plate coating | Non-stick (Teflon) |
| Indicator lights | Red power light, green ready light |
| Adjustable thermostat | No, fixed integrated thermostat |
| Locking handle | Yes, with latch |
| Housing material | Plastic |
| Dimensions (approx.) | 25 x 15 x 10 cm |
| Weight (approx.) | 1.5 kg |
| Cable length | Approx. 80 cm |
| Cleaning | Damp cloth, do not immerse |
| Commercial use | No, household use only |
| Safety | Built-in thermal cut-out |
| Maintenance | Wipe after cooling |
| Included accessories | None (spatula not included) |
| Warranty | Standard 2 years (according to retailer) |
Frequently Asked Questions - ST123520 Emerio
User questions about ST123520 Emerio
0 question about this device. Answer the ones you know or ask your own.
Ask a new question about this device
Download the instructions for your Sandwich maker in PDF format for free! Find your manual ST123520 - Emerio and take your electronic device back in hand. On this page are published all the documents necessary for the use of your device. ST123520 by Emerio.
USER MANUAL ST123520 Emerio
Before use make sure to read all of the below instructions in order to avoid injury or damage, and to get the best results from the appliance. Make sure to keep this manual in a safe place. If you give or transfer this appliance to someone else make sure to also include this manual.
In case of damage caused by user failing to follow the instructions in this manual the warranty will be void. The manufacturer/importer accepts no liability for damages caused by failure to follow the manual, a negligent use or use not in accordance with the requirements of this manual.
- This appliance can be used by children aged from 8 years and above and persons with reduced physical, sensory or mental capabilities or lack of experience and knowledge if they have been given supervision or instruction concerning use of the appliance in a safe way and understand the hazards involved.
- Children shall not play with the appliance.
- Cleaning and user maintenance shall not be made by children unless they are older than 8 years and supervised.
- Keep the appliance and its cord out of reach of children less than 8 years.
- If the supply cord is damaged, it must be replaced by the manufacturer, its service agent or similarly qualified persons in order to avoid a hazard.
- Regarding the instructions for cleaning the surfaces which come in contact with food or oil, please refer to the paragraph "cleaning and maintenance" of the manual.
- This appliance is not intended to be operated by means of an external timer or separate remote-control system.
-
Before inserting the plug into the mains socket, please check that the voltage and frequency comply with the specifications on the rating label.
-
Disconnect the mains plug from the socket when the appliance is not in use and before cleaning.
- Ensure that the mains cable is not hung over sharp edges and keep it away from hot objects and open flames.
- Do not immerse the appliance or the mains plug in water or other liquids. There is danger to life due to electric shock!
- To remove the plug from the plug socket, pull the plug. Do not pull the power cord.
- Do not touch the appliance if it falls into water. Remove the plug from its socket and send it to an authorized service center for repair.
- Do not plug or unplug the appliance from the electrical outlet with a wet hand.
- Never attempt to open the housing of the appliance, or to repair the appliance yourself. This could cause electric shock.
- Never leave the appliance unattended during use.
- This appliance is not designed for commercial use.
- Do not use the appliance for other than intended use.
- Do not wind the cord around the appliance and do not bend it.
- Place the appliance on a stable, level surface from which it cannot fall off.
- If you use products with non-stick surfaces, please make sure no birds are in the same room and that the room can be completely closed off and well-ventilated.
- WARNING!!
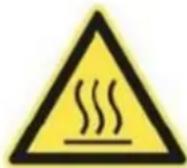
Please do not touch surface while in use. The temperature of accessible surfaces may be high when the appliance is operating.
PARTS DESCRIPTION
- Red power light
- Green control light
- Non-stick cooking plates
- Handle
5.Catch

BEFORE INITIAL USE
- Remove all packaging.
- Clean the toasting surfaces with a soft damp cloth and then dry them.
- Unwind the mains cable completely.
NOTE: When your appliance is heated for the first time, it may emit slight smoke or odor. This is normal with many heating appliances. This does not affect the safety or your appliance.
OPERATING INSTRUCTIONS
- Connect the appliance to an appropriate socket. The red power light will glow to indicate when the appliance is switched on.
- The green control light will turn off during heating. Once the temperature is reached, then the green control light will turn on. This means the appliance is ready for use.
- The appliance must be heated up before you toast a sandwich. In the meantime prepare your sandwich.
- Open the appliance at the handle by unlocking the catch.
- Put the slices of bread on the lower toasting surface. Ensure that the buttered sides are facing outwards.
- Now put the filling on the bread slices (e.g. cheese, ham, pineapple, etc.) and cover this with the second slice of bread. Once again, ensure that the buttered sides are facing outwards.
- Close the appliance making sure the catch is engaged.
- Caution: If the slices of bread have too much filling on them, it will not be possible to close the appliance. Take some of the filling off. Never use force to close the appliance.
- During toasting the temperature regulating thermostat switches off and on again. The green control light also switches off and on again.
- After completion of the toasting process (approx. 2-4 minutes) open the appliance and remove the sandwiches with the help of a flat wooden or plastic spatula. Never use sharp or metal objects (e.g. knives, metal spatulas, etc.) as this will damage the non-stick coating.
- If you wish to toast more sandwiches, close the appliance again and wait until the toasting surfaces have reheated sufficiently.
- When the control light illuminates again you can repeat the toasting process as described above.
- After completion of the toasting process disconnect the mains plug immediately. With the appliance open allow it to cool down.
TIPS FOR TASTY SANDWICHES
- Allow the appliance to heat up completely before you begin toasting.
- Lay the buttered side facing outwards.
- All kinds of spiced butters and lards can be used.
- With fruit fillings the toasted bread will be crispier if you sprinkle a little sugar on the buttered side.
- The following ingredients are particularly recommended: cheese, ham, pineapple, tomatoes, cooked meat, onions, herbs and spices.
CLEANING AND MAINTENANCE
- First, disconnect the mains plug!
- Only clean when the appliance has completely cooled down.
- Clean the housing surface and the toasting surfaces of the sandwich toaster with a soft, damp cloth.
- It is easiest to remove toast or food crumbs with a very soft brush.
- Never use abrasive cleaning agents or sharp objects (e.g. scrubbing brush or knife) for cleaning.
- Caution: Do not immerse the appliance in water or other liquids. There is danger to life due to electric shock!
TECHNICAL DATA
Operating voltage: 220-240V ~ 50-60Hz
Power: 750W
ENVIRONMENT FRIENDLY DISPOSAL
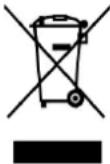
Recycling - European Directive 2012/19/EU
This marking indicates that this product should not be disposed with other household wastes. To prevent possible harm to the environment or human health from uncontrolled waste disposal, recycle it responsibly to promote the sustainable reuse of material resources. To return your used device,
please use the return and collection systems or contact the retailer where the product was purchased. They can take this product for environmental safe recycling.
Emerio Holland B.V.
Zomervaart 1A
2033 DA Haarlem
The Netherlands
T: +31(0)23 3034369