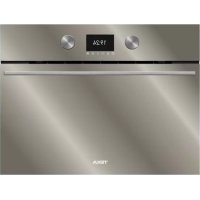
HLB 840 WH - Oven TEKA - Free user manual and instructions
Find the device manual for free HLB 840 WH TEKA in PDF.
Download the instructions for your Oven in PDF format for free! Find your manual HLB 840 WH - TEKA and take your electronic device back in hand. On this page are published all the documents necessary for the use of your device. HLB 840 WH by TEKA.
USER MANUAL HLB 840 WH TEKA
- Cleaning the oven exterior and accessories p. 36
- Cleaning the oven interior p. 36
- Assembling the side supports p. 36
- Assembling the supports p. 36
- Dismantling the bottom panel p. 36
- Ovens with a folding grill p. 37
- Cleaning the oven door p. 37
- Dismantling/assembling the door with hinge on body p. 37
- Dismantling/assembling the door with hinge on door p. 37
- Dismantling/assembling the interior glass panes of the door p. 38
- Changing the oven light bulb p. 38
- Changing the upper bulb p. 38
- Changing the side bulb p. 38
- Changing the LED lamp p. 38
- Trouble shooting p. 39
- Technical Specifications p. 40
- FIGURES Installation & Maintenance English SAFETY INSTRUCTIONS Read these instructions carefully to obtain the best perfor- mance from your oven, safely and correctly. Keep this manual so that it can be read by a new owner. Electrical safety p. 6729
- Inordertoconnecttheoventothemains,thetechnician should use an H05RR-F, H05SS-F or H07RN-F power cable. The connection diagram is shown in Figure 1.
- Theovenmustalwaysbepluggedintoasoundearthcon- nection and its installation must comply with current regula- tions.
- Wheninstallingtheoven,totaldisconnectionmeansmust be incorporated into the fixed installation in accordance with the installation regulations (adapted to the current to be supported and with a minimum space between the con- tacts of 3 mm) based on surge protection category III con- ditions, for disconnection in the event of an emergency and when cleaning or changing the bulb. Under no circumstanc- es must the earth wire pass through this switch.
- Thisswitchmaybereplacedbyaplug,provideditisacces- sible for normal use.
- Any handling or repair to the appliance, including replace- ment of the power cable, should be carried out by author- ised Technical Service Personnel using original spare parts. Repairs or handling by others may damage the appliance or cause malfunctioning that could be hazardous to your safety.
- Unplugyourovenifitmalfunctions.
- Incombinedovenswithcountertopsandtoavoidpotential risks, only those recommended by the manufacturer may be assembled.30 Installation & Maintenance Child safety
- Donotallowchildrentocomeneartheovenwhileinuseor during the pyrolytic cleaning cycle as it can reach very high temperatures.
- Childrenunder8yearsofageshouldbekeptawayfromthe appliance unless they are under constant supervision. Chil- dren should not be allowed to play with the appliance.
- Theappliancemaybeusedbychildrenovertheageof8and people with reduced physical, sensory or mental capacities or a lack of experience or know-how, provided they have been given appropriate instructions or supervision on how to use the appliance safely and they understand the dangers involved. Oven use safety
- Theovenmustalwaysbeoperatedwiththedoorclosed.
- Onlyusetheovenafterithasbeeninstalledinsidethekitch- en unit (See Installing the oven).
- Themanufacturerisnotresponsibleforanyuseoftheoven other than for the home preparation of food.
- Do not store oil, fats or inammable materials inside the oven. This may be dangerous if the oven is turned on.
- Donotleanorsitontheopenovendoor.Itcouldbedam- aged and you could be injured.
- The tray and rack have a system for easy partial removal andhandlingoffood.Alwaysplacetheseaccessoriesinside theoven,asindicatedintheAccessoriessection.
- The oven heats up when in use, so always use oven gloves when performing operations inside the oven and avoid touching the heating elements.
- Onlyusethesuppliedtemperatureprobeinsidetheoven(in models that come with this feature).31 Installation & Maintenance English Safety for cleaning and maintenance
- Disconnecttheappliancefromthemainspowersupplybe- fore any operation.
- Donotusesteamcleanersorpressurisedwatertocleanthe oven.
- Donotusemetalscouringpads,wirebrushesorcommer- cially available or abrasive powder cleansers to clean the oven door as they can scratch the surface and cause the glass to break.
- Cleaning and maintenance tasks to be carried out by the user should not be done by children without supervision.
- Beforereplacingabulb,rstmakesurethattheovenhas been disconnected from the mains to avoid the possibility of receiving an electric shock.
- Removeallaccessoriesanddishesfromtheoven,including the shelf supports and/or telescopic runners.
- Cleananyspillagesorexcessdirt,asduringthepyrolytic cleaning cycle these could ignite and become a fire hazard.
- For your safety, never operate the oven without the back panel (that protects the fan) in place. Safety when using the pyrolytic cleaning cycle Beforestartingthecleaningcycle:
- CAUTION:Removeallaccessoriesanddishesfromtheoven, including the shelf supports and/or telescopic runners.
- Cleananyspillagesorexcessdirt,asduringthepyrolytic cleaning cycle these could ignite and become a fire hazard.
- Removeanydirtfromtheovengasket.
- Carefullyfollowtheinstructionsforprogrammingthepyro- lytic cleaning cycle.32 Installation & Maintenance Duringthepyrolyticcleaningprocess:
- Donotleaveanyclothsorfabrichangingfromtheovenhan- dle or in close contact with it.
- Forsafetyreasons,iftheovenhasbeeninstalledbelowthe counter, the hob must not be in use while the oven is in py- rolytic mode.
- Theoven’sinsidelightwillremainoffandcannotbeturnedon.
- Theovenisequippedwithasafetylockmechanismthatpre- vents the door from being opened during the cleaning cycle. Donottrytoopenthedoorwhilethelockisactivated. INFORMATION This manual describes general oven characteristics, and so they may not correspond in full to those of your oven. Consult the User’s guide accompanying this manual to learn aboutthespecicfeaturesand equipmentof your oven. The manufacturer reserves the right to change the prod- uct characteristics in order to improve its operation.33 Installation & Maintenance English Installation This information is exclusively for the installer who is responsible for assembly and electrical connection. The manufacturer will not accept liability for possible damage caused if you install the oven yourself. BEFOREINSTALLATION
- To handle the oven, use the grips at the sides. Do not use the door handle to lift the oven.
- Do not install the oven behind decorative doors. This can cause it to overheat.
- When installing the oven under a counter, follow the instructions for installing it.
- Ingeneral,protrudingelements(furniturere- inforcements,pipes,socket bases,etc.)at the back of the unit must be avoided.
- Whenthebaseofthemainpowersocketis insidetheunitinwhichtheovenisinstalled, this must be done in the shaded area. Figure 2.
- Theunit in whichtheoven is installedand adjacent units must withstand temperatures higher than 85 ºC.
- The installation instructions must be ad- heredtostrictly.Ifnot,theoven’sventilation circuitmay become blocked,causing high temperatures that could damage the kitchen unit and the appliance itself.
- For thispurpose, checkthe unit measure- ments and those of the holes to be drilled in theunits,asshowninthefollowinggures: Column installation. 60cmoven:Figure7*. 45cmoven:Figure8*. CAUTION *Wheninstallingpyrolyticovens,DONOT drill any holes in the unit inside the shaded areas. Undercounter installation. 60cmoven:Figure9*. 45cmoven:Figure10*. WARNING *Wheninstallingpyrolyticovens,DONOT drill any holes in the unit inside the shaded areas. ELECTRICALCONNECTION Thettermustensurethat:
- The mains power voltage and frequency correspond to what is marked on the identi- cationplate.
- Thedomesticwiringsystemcanwithstand themaximumpowermarkedontheidenti- cation plate.
- After connecting the power supply, check that all electrical parts of the oven are work- ing correctly. OVENINSTALLATION For all ovens. After the electrical connection has beendone:
1. Position the oven inside the unit and ensure
that the feed cable is not trapped or in con- tact with parts of the oven that heat up.
2. Make sure that the body of the oven is not
in contact with the walls of the unit and that there is a minimum space of 2 mm between adjacent units.
3. Centre the oven in the unit so that there is a
minimum space of 5mm between the oven and the doors of the furniture that surrounds it. Figure 3.
4. Open the door and insert the plastic plugs
supplied with the oven into their respective housings. Figure 11.
5. Fasten the oven to the unit with the screws
supplied, screwing them into the unit through the stops.34 Installation & Maintenance Beforerstuse There may be traces of fat and other substanc- es in the oven as a result of the manufacturing process. These should be removed using the followingprocedure:
1. Removeallthepackaging fromyouroven,
includingtheprotectiveplastic,ifany.
2. Turn your oven to ,orifthissettingisnot
available to ,at200ºCfor1hour.Consult theUser’sguideaccompanyingthismanual on how to do this.
3. Cool the oven with the door open so that it
ventilates and no odours remain inside it.
4. Oncecold,cleantheovenandtheaccesso-
ries. During this rst operation, smoke and smells will be produced. The kitchen should therefore be well ventilated. Other important instructions Do not cover the bottom of the oven with alu- minium foil as this may affect cooking perfor- mance and damage the enamel inside the oven and the interior of your kitchen unit. Do not pour water on the bottom surface when in use; this may damage the enamel. Environmental information
DISPOSAL OF THE ECOLOGICAL PACK-
AGING The packaging is made from totally recyclable materials which can be put to other uses. Con- sult your local council regarding the necessary procedures for disposing of these materials. PRODUCTDISPOSAL WARNING The symbol on the product or pack- aging indicates that this appliance can- not be disposed of as normal household waste. It should be taken to an electrical and electronic equipment collection point forrecycling.Inthisway,anynegativecon- sequences for the environment and pub- lic health from incorrect handling can be avoided. Contactyourlocalcouncil,householdwaste disposal service or the establishment where you bought the product from for more infor- mation on recycling the appliance. ENERGYINFORMATION Testedtocomplywiththerequirementsofthe 66/2014 (Eco-Design) and 65/2014 (Energy Labelling)regulationsinaccordancewithRegu- lation EN 60350-1. Energy consumption measurements taken un- der different conditions may give different val- ues from those indicated for your oven. Consult the User’s guide accompanying this manual to learn about the energy consumption of your oven. WARNING Do not lean on the open door of the oven whileexecutingsteps4and5,astheoven is not secured to the unit and it could move forwards and fall to the floor.35 Installation & Maintenance English Itisnormalforcondensationtooccuronthe ovendoorwhencookingfoodwithahighliquid content. When closing the oven door during cooking, the sound of the air inside it can be heard. This effect is normal due to the pressure exerted by the door when it is closed, guaranteeing the sealing of the cavity. Accessories Do not leave any containers or food on the oven floor. Always use the trays and racks supplied with the oven. Toprepareyoghurt,placethejarsontheoven floor. Tocookanyotherfood,insertthetrayorrack into the runners inside the oven.
1. Between the two rails of the side supports or
onanyoftheextractablerunners,iftheoven has them.
2. The rack and some of the trays have reten-
tion grooves to prevent them from acciden- tally being removed. Place these grooves towardsthebackoftheoven,facingdown- wards. Figure 4.
3. The surface of the rack on which the con-
tainer will rest must be below the side rails. This prevents the container from accidentally sliding. Figure 5.
4. The trays have a tab at the front to facilitate
their removal. Place the tray with the tab facing towards the outside of the oven. Fig- ure 6.
ASSEMBLING THE TELESCOPIC RUN-
NERS. Some oven models have a telescopic runner kit accessory. To assemble the telescopic runners on the chrome-platedsupports,proceedasfollows: Telescopic runners with folding clip WARNING The runners must be placed at height 2, starting from below. Figure 12.
1. Removetheprotectivelm.
2. Hook the large clips on the upper rail and
extend the runner until it hooks on the small clips on the lower rail. Figure 12.
3. You will hear a "click" when the runner is
correctly secured. Figure 13.
4. The notch to x the tray/support must re-
main at the front part of the oven. Figure 13. Telescopic runners with direct clip WARNING The single extraction runners must be placedatheights1,2,3and5startingfrom below. Figure 14. The double extraction runners must be placed at heights 1, 2 and 3startingfrom below. Figure 15. In 45 cm ovens, the telescopic runners are positioned at height 1. Figure 16.
1. Hook the clip on the top rail at the desired
2. You will hear a "click" when the runner is
correctly secured. Figure 18.
3. Thenotchtoxthetray/racksupportmust
remain at the front part of the oven. Fig- ure 18.36 Installation & Maintenance Cleaning and maintenance toes,vinegarandsalt-bakeddishesmaycause the enamel to change colour. This is normal and does not affect the functioning of the oven. Do not try to remove these stains using aggres- sivemethodssuchasthosedescribed,asthis could cause permanent damage to the surface. Clean the oven seal regularly to eliminate all traces of fat or food. This will prevent the seal from becoming damaged and breaking during subsequentcookingoperations. Itisadvisabletocleanthissealwithoutremov- ing it. Dismantlingthesidesupports
1. Remove all accessories from inside the oven.
2. Completely loosen the nut at the front of the
4. Fix the front fastening nut (C) in the front
notch of the support. Figure 20.
5. Securethesupportwiththenut(D)andturn
untilitisfullyadjusted(E).Figure20. Dismantlingthebottompanel INFORMATION Todismantlethebottompanelrstdisman- tlethesidesupports,followingtheinstruc- tions set out in the previous section. Then:
the reverse order. WARNING Disconnect the appliance from the mains power supply before any operation. CLEANINGTHEOVENEXTERIORAND OVENACCESSORIES Clean the outside of the oven and accessories with warm soapy water or with a mild deter- gent. Take great care when cleaning stainless steel or painted surfaces. Use only sponges or cloths that do not scratch. CAUTION The telescopic runners must not be placed in the dishwasher. This will remove the fat that enables them to slide and the runners willbecomeblocked,makingthemuseless. CLEANINGTHEOVENINTERIOR Clean the oven interior regularly to remove trac- esoffatorfood,whichcanlatergiveoffsmoke and odours and cause stains to appear. Use nylon brushes or sponges with warm soapy water to clean enamelled surfaces such as the bottom of the oven. Clean when the oven is cold. Use oven-cleaning products only on enamelled surfaces and always follow the manufacturer’sinstructions. WARNING Do not clean the oven interior with steam or pressurised-watercleaningequipment. Donotusemetalscouringpads,wirebrushes or any utensil that can scratch the enamel. Overtime,certaintypesoffoodsuchastoma-37 Installation & Maintenance English
3. Close the door to the locked position. Fig-
4. Hold the door with both hands holding on to
bothsides,liftupandpullouttheovendoor until the hinges are fully detached Figure 25. Assembling the door
5. Hold the door with both hands at the lower
partofthesides,insertthehingearmsinto their housings and let the door fall as far as it will go. Figure 26.
6. Open the oven door fully. Figure 26.
7. Turn the latches back to their original posi-
tion. WARNING Make sure the door is inserted completely byturningthelatches.Ifnot,itcanbecome blocked when trying to close it. INFORMATION Ifthelatchesarehardtoturn,useaattool to turn them. Dismantling/assemblingthedoor with hinge on door
1. Open the oven door fully.
2. Block the hinge by turning both latches . Fig-
3. Close the door to the locked position. Figure
4. Hold the door with both hands holding on to
bothsides,liftupandpullouttheovendoor until the hinges are fully detached. Figure 28. Toassemblethedoor,carryoutthestepsinthe reverse order. WARNING Foryoursafety,neveroperatetheovenwith- outthebackpanel(thatprotectsthefan)in place. Ovens with a folding grill Tocleanthetoppartoftheoven:
3. Let the element fall and clean the top part of
the oven. Figure 23.
4. Then put the grill element back in place in its
original position and proceed in the reverse order. Ovens with the Teka Hydroclean® function PleaseconsulttheovenUser’sguide. Ovens with the Pyrolytic Self-Cleaning Function PleaseconsulttheovenUser’sguide. CLEANINGTHEOVENDOOR Foreasycleaning,thedoorcanbedismantled. Todothis,followtheinstructionsforthetypeof door your oven has. Dismantling/assemblingthedoorwith hinge on body
1. Open the oven door fully.
2. Block the hinge by turning the latches.
Figure 24.38 Installation & Maintenance Dismantling/assemblingtheinteriorglass of the door WARNING Ifdismantlingtheglasspaneswiththedoor ttedintheoven,alwaysdoitwiththehinge in the locked position. If not, the door will close and the unmounted glass panes could break and cause injury. INFORMATION To prevent this,dismantlethe glass panes withthedoorremoved,followingtheinstruc- tions in the previous section. Dependingonthemodel,yourovenmayhave 2,3or4panesofglass.Followtheinstructions for the type of door your oven has.
1. Usingyourngers,pressthebuttonslocat-
ed at the top of both sides of the oven door. Figure 29.
2. Keep them pressed and pull on the plastic
seal above the door. Figure 30.
3. Remove the glass panes from the door.
Clean them with a glass cleaner or soap and water and a soft cloth. WARNING Pay attention to the order and position of the glass panes when removing them as they must be reassembled in the same order and posi- tionwhenyouhavenishedcleaningthem.
4. Onceclean,insertpaneno.3intothesame
position so that the TERMOGLASS indica- tion printed on it is visible as shown in Fig- ure 31.
5. In pyrolyticovens,theTERMOGLASSindi-
cation on panes numbers 3 and 4 must be visible as shown in Figure 32.
6. Insertpaneno.2withtheprintedpartfacing
toward the iner side of the door.
7. Re-attachthetopsealofthedoor,making
surethatthesidetabstintotheirhousings. WARNING Never switch the oven on if any of the glass panes on the door are missing. CHANGINGTHEOVENLIGHTBULB WARNING Make sure the oven has been disconnected from the mains before changing the bulb. The replacement bulb must withstand temper- atures up to 300 ºC. You can order them from the Technical Assistance Service Department. Changing the upper bulb
1. Unscrew the glass cover of the bulb-holder.
2. Replace the bulb and reassemble the glass
cover. Changing the side bulb
1. Lift off the bulb-holder glass cover with a
flat-ended tool. Figure 34.
2. Change the bulb and reassemble the glass
cover, ensuring that everything ts in the correct position. ChangingtheLEDlamp Call the Technical Assistance Service Depart- ment.39 Installation & Maintenance English The oven stops working
- Checkthepositionofthecontrolandtem- perature dial. The inside light does not go on
- Checkithasbeenproperlyinstalledasset outintheInstallationInstructions. The heating pilot light does not turn on
- It should only come on while the oven is heating up to the selected temperature. Oven smoking during use
- Cleantheovenregularly.
- Reducetheamountoffatoroilinthetray.
- Donotcookattemperatureshigherthan those indicated in the cooking chart. The expected cooking results are not achieved
- Checkthecookingchartsforguidanceon how your oven operates. Myaccessoriesandshelfsupportsare damaged
- Youdidnotremovedtheaccessoriesand supports during the pyrolytic cleaning cy- cle.
- Youmustreplacethemandremovethem duringsubsequentcleaningcycles. The enamel colour has changed or stains have appeared
- Thechemical composition ofsome food- stuffs may cause changes in the enamel.
- Thisis normal and doesnot damage the properties of the enamel. The oven is off, the symbol lights up and the door will not open
- Thedoorlockisactivated.
- Deactivatethe doorlock followingthein- structionsintheUser’sguidesuppliedwith this manual. The oven is on, the symbol lights up but the door will not open
- Thedoorlockisactivated.
- Turnthecontroldialtoposition . Trouble shooting This section describes some of the most fre- quent problems that can affect your oven, along with the most common causes and pos- sible solutions.40 Installation & Maintenance
- Deactivatethedoorlockfollowingthein- structionsintheUser’sguidesuppliedwith this manual.
- Tocontinuecooking,re-selectthedesired cooking function. I have turned the control dial to position and selected a pyrolysis programme (P1, P2 or P3) but the symbolashes quicklyandabuzzersounds
- The oven door is not closed properly, so the door cannot be locked and the pyrolyt- ic process has been blocked.
- Checkthedoorandmakesureitisprop- erly closed. Then set the control dial to the requiredpositionandrepeatthesequence to activate the pyrolysis. I have turned the control dial to position and selected a pyrolysis programme (P1, P2 or P3) but the symbol does not light up and the oven does not heat
- The door switch is not working even though the door is properly closed.
- CalltheTechnicalAssistanceServiceDe- partment as there is a fault in the door switch. The pyrolysis programme has ended and the oven is cold, but the door is locked and symbol and0:00areashing
- Youdidnotturnthecontroldialtoposition when the pyrolysis programme ended.
- Setthecontroldialtoposition . The control dial is in position and the door is still locked
- Theovenhasnotcooleddowntothesafe temperature limit.
- Waituntiltheovencoolsand the symbol goes off. Technical specifications WARNING Iftheseproblemspersistdespitethesetips, contact the Technical Service Department. InformtheTechnicalServiceDepartmentofthe kind of problem you are experiencing and give the: