
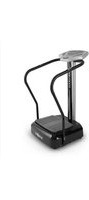
Float - Scooter Klarfit - Free user manual and instructions
Find the device manual for free Float Klarfit in PDF.

| Product type | Sport & fitness scooter |
| Brand | Klarfit |
| Model | Float |
| Maximum user weight | 100 kg (220 lb) |
| Use | One person at a time, on dry and clear ground |
| Recommended age | Adult and teenager (under supervision) |
| Materials | Aluminum and plastic |
| Height-adjustable handlebar | Yes, via quick-release lever |
| Removable grips | Yes, with spring button |
| Folding mechanism | Yes, with lock lever and quick release |
| Brake | Rear brake (protection plate) |
| Dimensions (folded) | Approx. 110 x 30 x 20 cm (estimate) |
| Dimensions (unfolded) | Approx. 110 x 50 x 100 cm (estimate) |
| Weight | Approx. 8-10 kg (estimate) |
| Wheels | Two wheels, ball bearings |
| Recommended protective gear | Helmet, elbow pads, knee pads, gloves |
| Maintenance | Regularly check screws, bearings and brakes |
| Spare parts | Only original parts |
| Recycling | Compliant with WEEE directive (2012/19/EU) |
Frequently Asked Questions - Float Klarfit
User questions about Float Klarfit
0 question about this device. Answer the ones you know or ask your own.
Ask a new question about this device
Download the instructions for your Scooter in PDF format for free! Find your manual Float - Klarfit and take your electronic device back in hand. On this page are published all the documents necessary for the use of your device. Float by Klarfit.
USER MANUAL Float Klarfit
Congratulations on purchasing this equipment. Please read this manual carefully and take care of the following hints to avoid damages. Any failure caused by ignoring the mentioned items and cautions mentioned in the instruction manual are not covered by our warranty and any liability.
CONTENT
Declaration of Conformity 9
Safety Instructions 11
Product Overview 12
Assembly 13
Maintenance 16
Hints on Disposal 16
SAFETY INSTRUCTIONS
- This product is not a toy; it is sport and fun article.
- To brake: use your pushing foot to press on the brake.
- As the majority of serious accidents take place during the initial month, take the time to learn the basics of the sport.
- For the safety, we advise you to use this appliance with protective equipment: helmet, elbow pads, knee pads and gloves.
Note: The maximum weight of the user is 100kg ( 220 Lbs)
- This scooter can only be used by one person at a time.
- Respect the current Highway Code.
- Avoid places with heavy traffic or that are too busy.
- Avoid slippery or wet surfaces.
- Avoid steep slopes, and ensure that the brake is in good working order.
- Always wear shoes (for example: training shoes).
- Take care to always keep two hands on the handlebars.
- Do not change the purpose of this product. This scooter is not made for acrobatic use. Do not jump over obstacles.
- In all situations, take care both of yourself and others.
- You are advised not to use the scooter at night.
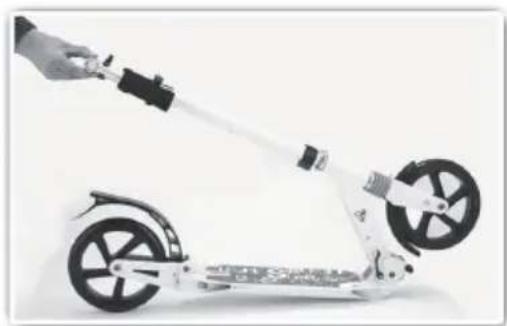
PRODUCT OVERVIEW
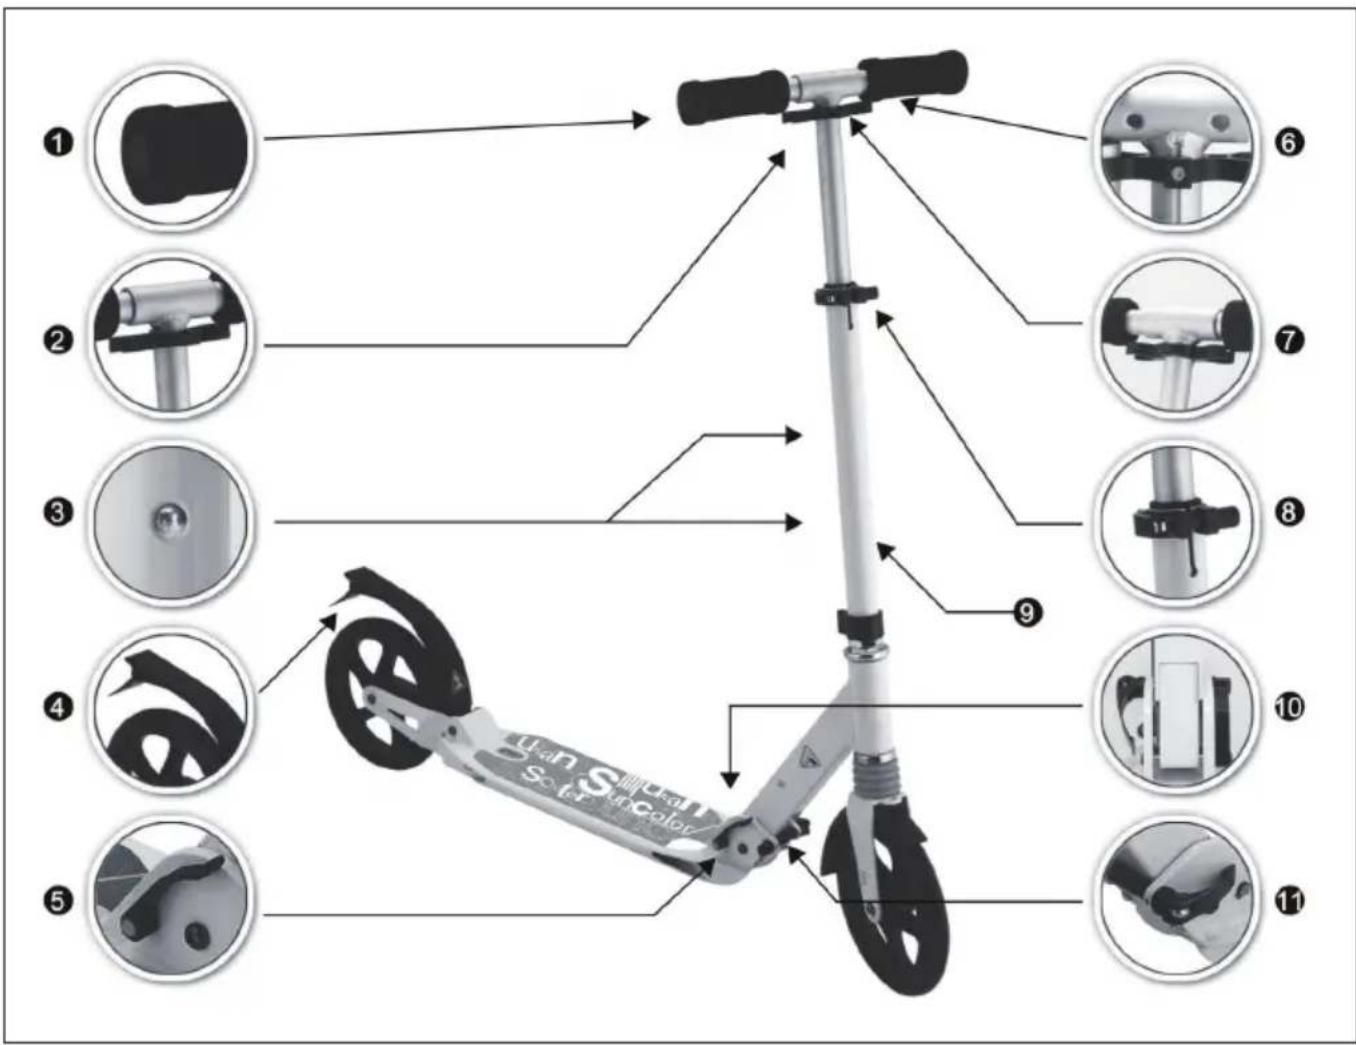
| 1 Handles 7 Handlebar stem | ||
| 2 Rapid tightening lever for handles 8 Rapid tightening lever for steering column | ||
| 3 Steering column spring button 9 Steering column | ||
| 4 Brake/Mudguard 10 Folding mechanism | ||
| 5 Locking lever for folding mechanism | 11 Rapid tightening lever for folding mechanism | |
| 6 Handle spring button |
ASSEMBLY
Your scooter is easy to handle and practical and can be used anywhere: fold it and store it in the blink of an eye. It is quick and green: you will help to protect the environment without wasting any time. You have chosen tomorrow's mode of transport - thank you for choosing OUR SCOOTER
Notes on Use
Before each use, check that your scooter is correctly assembled: there must be a "click" at each moment of engagement in the vertical locking position of the steering column, and rapid tightening of the steering column and of the folding mechanism.
Note: the brake may become hot during use. Do not touch it after use.
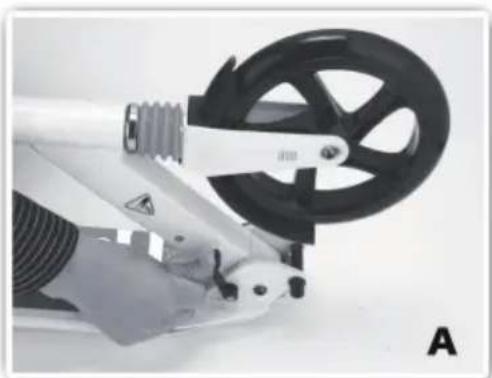
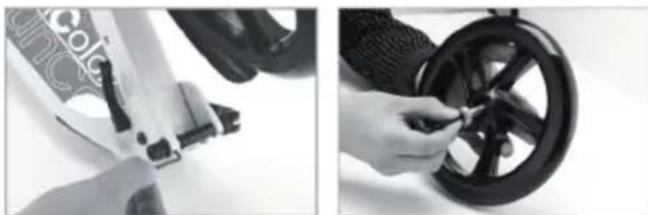
A Unfolding the steering column
1 Open the rapid tightening lever (11), then push the locking lever forward (5) to unlock the folding mechanism (10).
2 Then lift up the steering column (9) until it reaches the vertical locking position (you should hear a "click" of engagement).
3 Then firmly tighten the rapid tightening lever (11).
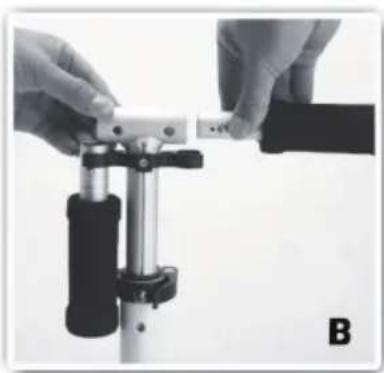
B Positioning the handles
-
Take the two handles (1) out of their plastic cover, insert them into the right and left parts of the stem (7).
-
For each of the two handles, you should hear a "click", indicating that the handles are engaged (1). Check that the two spring buttons are effectively out and visible.
-
The scooter with suspension, open the handle quick-release lever(2) and follow the instructions below before tightening it firmly.
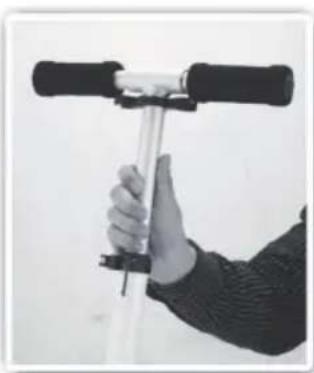
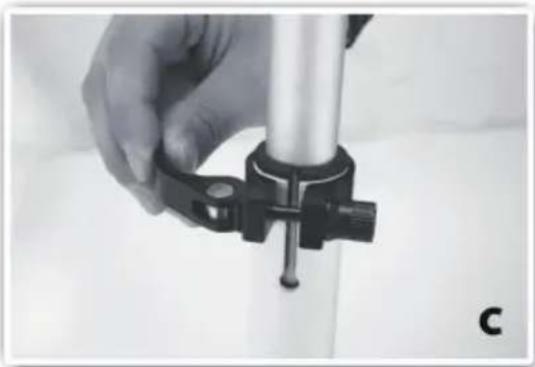
C Adjusting the handlebar height
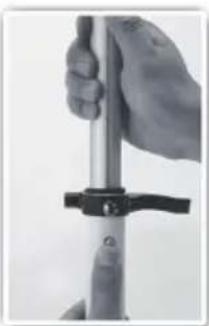
- Open the steering column rapid tightening lever (8).
- Adjust the height of the handlebars until you hear a "click", indicating engagement in one of the two indexed positions.
- Then firmly tighten the steering column rapid tightening lever (8).
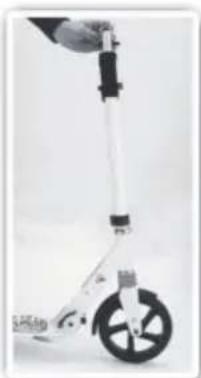
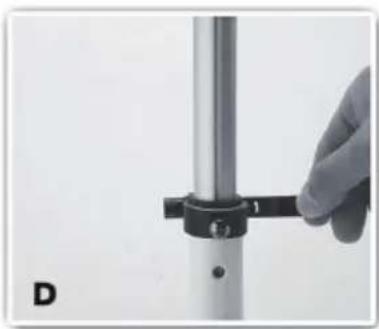
D Folding down the handlebars
- Open the steering column rapid tightening lever(8), press in steering column spring button (3).
- lower the handlebars, then tighten the steering column rapid tightening lever (8).
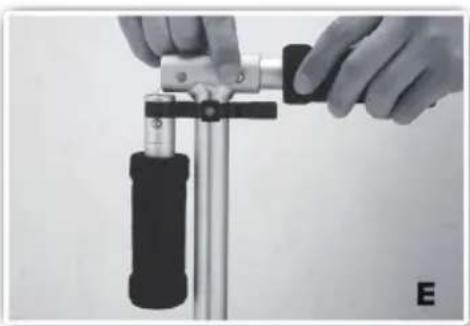
E Packing away the handles
1 For each handle (1), press in the spring button(6).
2 Take the handle out (1) from its place in the stem (7).
3 Put it in its plastic cover.
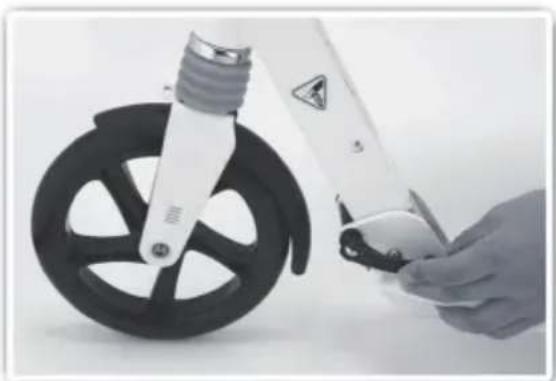
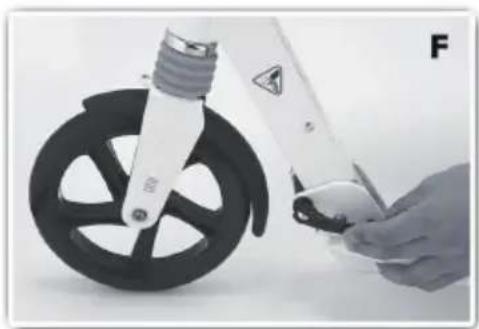
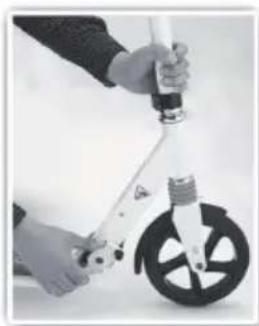
F Folding the steering column
1 Open the rapid tightening lever (11), then push the locking lever towards the front (5) to unlock the folding mechanism (10).
2 It will be easier to unlock if you push the steering column forwards (9).
3 Then lower the steering column (9) until you reach the locking position.
4 Then tighten the rapid tightening lever(11).
MAINTENANCE
- Regularly check that the various screwed parts are tight, particularly the wheels axles, the fold axis, the brake shaft, and the head tube locking collar and suspension because the
- self -tightening screws or other attachment may lose their effectiveness.
Always replace used parts with original parts. - Remove any sharp fragments caused by use.
- Keep the scoter in a dry, dust-free place.
- Do not modify or transform the scooter, specifically the steering column and socket, the stem,
- The folding mechanism and back brake.
- Check the condition of the bearing and wheels regularly, and replae them if necessary.
HINTS ON DISPOSAL
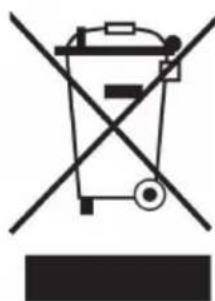
According to the European waste regulation 2012/19/EU this symbol on the product or on its packaging indicates that this product may not be treated as household waste. Instead it should be taken to the appropriate collection point for the recycling of electrical and electronic equipment. By ensuring this product is disposed of correctly, you will help prevent potential negative consequences for the environment and human health, which could otherwise be caused by inappropriate waste handling of this product. For more detailed information about recycling of this product, please contact your local council or your household waste disposal service.
Gentile cliente,
Chere cliente, cher client,


- CONTENT
- SAFETY INSTRUCTIONS
- PRODUCT OVERVIEW
- ASSEMBLY
- Notes on Use
- A Unfolding the steering column
- B Positioning the handles
- C Adjusting the handlebar height
- D Folding down the handlebars
- E Packing away the handles
- F Folding the steering column
- MAINTENANCE
- HINTS ON DISPOSAL
- Gentile cliente,
- Chere cliente, cher client,
Brand : Klarfit
Model : Float
Category : Scooter