
S24ET - Air conditioner LG - Free user manual and instructions
Find the device manual for free S24ET LG in PDF.
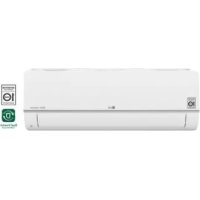



| Brand | LG |
| Model | S24ET |
| Product type | Wall-mounted split air conditioner |
| Mounting type | Wall-mounted |
| Refrigerant | R32 (flammable) |
| Power supply | 220-240 V, 50 Hz, single-phase |
| Cooling capacity (estimated) | ~2.7 kW (9000 BTU/h) |
| Heating capacity (estimated) | ~2.7 kW (heat pump) |
| Operating modes | Cooling, Heating, Dehumidification, Fan, Auto (AI) |
| Special functions | Jet Mode, Silence, Auto Clean, Energy Control, Sleep, Timer |
| Remote control | Wireless with AAA batteries (1.5 V) |
| Connectivity | Wi-Fi (2.4 GHz) via LG ThinQ, Smart Diagnosis |
| Air filter | Washable every 2 weeks |
| Anti-allergen filter | Optional, clean every 6 months |
| Indoor unit dimensions (approx.) | 820 × 270 × 190 mm |
| Indoor unit weight (approx.) | ~10 kg |
| Outdoor unit dimensions (approx.) | 800 × 550 × 300 mm |
| Outdoor unit weight (approx.) | ~30 kg |
| Noise level (approx.) | 40-50 dB(A) |
| Safety | Auto restart, refrigerant leak detection, emergency stop |
| Professional maintenance recommended | Once a year |
| Warranty (estimated) | 2 years |
Frequently Asked Questions - S24ET LG
User questions about S24ET LG
0 question about this device. Answer the ones you know or ask your own.
Ask a new question about this device
Download the instructions for your Air conditioner in PDF format for free! Find your manual S24ET - LG and take your electronic device back in hand. On this page are published all the documents necessary for the use of your device. S24ET by LG.
USER MANUAL S24ET LG
Read this owner's manual thoroughly before operating the appliance and keep it handy for reference at all times.
TYPE: WALL MOUNTED
Original instruction
EN ENGLISH
FR FRANÇAIS
EL EAAHNIKA
NL NEDERLANDS
PL POLSKI
HU MAGYAR
BG BbIgAPCKN
HR HRVATSKI
CZ CESTINA
ET EESTI
MT MALTI
RO ROMÁNA
SK SLOVENCINA
SL SLOVENSČINA
LV LATVIEŠU
LT LIETUVIŲ
GA GAEILGE
SR SRPSKI
MK MAKEDONSKI
SQ SHQIP
BS BOSANSKI
TABLE OF CONTENTS
This manual may contain images or content different from the model you purchased.
This manual is subject to revision by the manufacturer.
SAFETY INSTRUCTIONS 3
IMPORTANT SAFETY INSTRUCTIONS 4
OPERATION 11
Notes for Operation 11
Parts and Functions 11
Wireless Remote Control 12
Restarting the Air Conditioner Automatically 17
Using the Mode Function 17
Using the Jet Mode Function 20
Using the Fan Speed Function 21
Using the Air Flow Direction Function 21
Setting the On/Off Timer 22
Using the Sleep Function (Optional) 23
Using the Simple Timer Function (Optional) 23
Using the Energy Display Function (Optional) 24
Using the Light Off Function (Optional) 24
Using the Comfort Air Function (Optional) 24
Using the Energy Control Function (Optional) 25
Using Special Functions 25
SMART FUNCTIONS 27
LG ThinQ Application 27
Smart Diagnosis 29
MAINTENANCE 30
Clean the Air Filter 32
Clean the Allergy Filter (Optional) 33
TROUBLESHOOTING 34
The following safety guidelines are intended to prevent unforeseen risks or damage from unsafe or incorrect operation of the appliance.
The guidelines are separated into 'WARNING' and 'CAUTION' as described below.

This symbol is displayed to indicate matters and operations that can cause risk. Read the part with this symbol carefully and follow the instructions in order to avoid risk.

WARNING
This indicates that the failure to follow the instructions can cause serious injury or death.

CAUTION
This indicates that the failure to follow the instructions can cause the minor injury or damage to the product.
The following symbols are displayed on indoor and outdoor units. (for R32)

This symbol indicates that this appliance uses a flammable refrigerant. If the refrigerant leaks and is exposed to an external ignition source, there is a risk of fire.

This symbol indicates that the Operation Manual should be read carefully.

This symbol indicates that service personnel should handle this equipment with reference to the Installation Manual.

This symbol indicates that information is available, such as the Operating Manual or Installation Manual.
IMPORTANT SAFETY INSTRUCTIONS

WARNING
To reduce the risk of explosion, fire, death, electric shock, injury, or scalding to persons when using this product, follow basic precautions, including the following:
Children in the Household
This appliance is not intended for use by persons (including children) with reduced physical, sensory, or mental capabilities, or lack of experience and knowledge, unless they have been given supervision or instruction concerning use of the appliance by a person responsible for their safety. Children should be supervised to ensure that they do not play with the appliance.
For use in Europe:
This appliance can be used by children aged from 8 years and above and persons with reduced physical, sensory, or mental capabilities or lack of experience and knowledge if they have been given supervision or instruction concerning use of the appliance in a safe way and understand the hazards involved. Children shall not play with the appliance. Cleaning and user maintenance shall not be made by children without supervision.
Installation
- Do not install the air conditioner on an unstable surface or in a place where there is a danger of it falling.
- Contact an authorized service center when installing or relocating the air conditioner.
- Install the panel and the cover of the control box safely.
- Do not install the air conditioner in a place where flammable liquids or gases such as gasoline, propane, paint thinner, etc., are stored.
- Make sure that the pipe and the power cable connecting the indoor and outdoor units are not pulled too tight when installing the air conditioner.
- Use standard circuit breaker and fuse that conform to the rating of the air conditioner.
- Do not input air or gas into the system except with the specific refrigerant.
- Use non-flammable gas (nitrogen) to check for leak and to purge air; using compressed air or flammable gas may cause fire or explosion.
- The indoor/outdoor wiring connections must be secured tightly, and the cable should be routed properly so that there is no force pulling the cable from the connection terminals. Improper or loose connections can cause heat generation or fire.
- Install dedicated electric outlet and circuit breaker before using the air conditioner.
- Do not connect the ground wire to a gas pipe, a lightning rod, or a telephone ground wire.
- Keep any required ventilation openings clear of obstruction. (for R32)
- Means for disconnection must be incorporated in the fixed wiring in accordance with the wiring rules.
- Do not install the unit in potentially explosive atmospheres.
Operation
- Be sure to use only those parts listed in the service parts list. Never attempt to modify the equipment.
- Make sure that children do not climb on or hit the outdoor unit.
- Dispose of the batteries in a place where there is no danger of fire.
- Use only the refrigerant specified on the air conditioner label.
- Cut off the power supply if there is any noise, smell, or smoke coming from the air conditioner.
- Do not leave flammable substances such as gasoline, benzene, or thinner near the air conditioner.
- Contact an authorized service center when the air conditioner is submerged by flood waters.
- Do not use the air conditioner for an extended period of time in a small place without proper ventilation.
- In the event of a gas leak (such as Freon, propane gas, LP gas, etc.) ventilate sufficiently before using the air conditioner again.
- Be sure to ventilate sufficiently when the air conditioner and a heating appliance such as a heater are used simultaneously.
- Do not block the inlet or outlet of air flow.
- Do not insert hands or other objects through the air inlet or outlet while the air conditioner is operating.
- Make sure that the power cable is neither dirty, loose, nor broken.
- Never touch, operate, or repair the air conditioner with wet hands.
- Do not place any objects on the power cable.
- Do not place a heater or other heating appliances near the power cable.
- Do not modify or extend the power cable. Scratches or peeling insulation on the power cables may result in fire or electric shock, and should be replaced.
- Cut off the power supply immediately in the event of a blackout or a thunderstorm.
- Take care to ensure that power cable could not be pulled out or damaged during operation.
- Do not touch refrigerant pipe, water pipe and any internal parts while the unit is operating or immediately after operation.
Maintenance
- Do not clean the appliance by spraying water directly onto the product.
- Before cleaning or performing maintenance, disconnect the power supply and wait until the fan stops.
Technical Safety
- Installation or repairs made by unauthorized persons can pose hazards to you and others.
- Any person who is involved with working on or breaking into a refrigerant circuit should hold a current valid certificate from an industry-accredited assessment authority, which authorizes their competence to handle refrigerants safely in accordance with an industry recognized assessment specification. (for R32) Servicing shall only be performed as recommended by the equipment manufacturer. Maintenance and repair requiring the assistance of other skilled personnel shall be carried out under the supervision of the person competent in the use of flammable refrigerants. (for R32)
- The information contained in the manual is intended for use by a qualified service technician who is familiar with the safety procedures and equipped with the proper tools and test instruments.
- Failure to read and follow all instructions in this manual can result in equipment malfunction, property damage, personal injury and/or death.
- The appliance shall be installed in accordance with national wiring regulations.
- When the power cord is to be replaced, the replacement work shall be performed by authorized personnel using only genuine replacement parts.
- This appliance must be properly grounded to minimize risk of electric shock.
- Do not cut or remove the grounding prong from the power plug.
- Attaching the earth wire to the power outlet cover screw does not ground the appliance unless the cover screw is metal, uninsulated, and the power outlet is grounded through house wiring.
- If you have any doubt whether the air conditioner is properly grounded, have the power outlet and circuit checked by a qualified electrician.
- The refrigerant and insulation blowing gas used in the appliance require special disposal procedures. Consult a service agent or a similarly qualified person before disposing of them.
- If the supply cord is damaged, it must be replaced by the manufacturer, its service agent or similarly qualified person in order to avoid a hazard.
- The appliance shall be stored in a well-ventilated area where the room size corresponds to the room area as specified for operation. (for R32)
- The appliance shall be stored in a room without continuously operating open flames (for example an operating gas appliance) and ignition sources (for example an operating electric heater). (for R32)
- The appliance shall be stored so as to prevent mechanical damage from occurring. (for R32)

CAUTION
To reduce the risk of minor injury to persons, malfunction, or damage to the product or property when using this product, follow basic precautions, including the following:
Installation
- Do not install the air conditioner in an area where it is directly exposed to sea wind (salt spray).
- Install the drain hose properly for the smooth drainage of water condensation. Exercise caution when unpacking or installing the air conditioner.
- Do not touch the leaking refrigerant during installation or repair.
- Transport the air conditioner with two or more people or use a forklift.
- Install the outdoor unit such that it is protected from direct sunlight. Do not place the indoor unit in a place where it is directly exposed to sunlight via the windows.
- Safely dispose of packing materials such as screws, nails, plastic bags, or batteries using proper packaging after installation or repair.
- Install the air conditioner in a place where the noise from the outdoor unit or the exhaust fumes will not inconvenience the neighbors. Failure to do so may result in conflict with the neighbors.
Operation
- Remove the batteries if the remote control is not to be used for an extended period of time.
- Make sure that the filter is installed before operating the air conditioner.
- Be sure to check if there is a refrigerant leak after installing or repairing the air conditioner.
- Do not place any object on the air conditioner.
- Never mix different types of batteries, or old and new batteries for the remote control.
- Do not let the air conditioner run for a long time when humidity is very high or when a door or a window has been left open.
- Stop using the remote control if there is a fluid leak in the battery. If your clothes or skin are exposed to the leaking battery fluid, wash off with clean water.
- Do not expose people, animals, or plants to the cold or hot wind from the air conditioner for extended periods of time.
- If the leaking battery fluid has been swallowed, rinse the inside of the mouth thoroughly and consult a doctor.
- Do not drink the water drained from the air conditioner.
- Do not use the product for special purposes, such as preserving foods, works of art, and etc. It is an air conditioner for consumer purposes, not a precision refrigeration system. There is risk of damage or loss of property.
- Do not recharge or disassemble the batteries.
Maintenance
- Never touch the metal parts of the air conditioner when removing the air filter.
- Use a sturdy stool or ladder when cleaning, maintaining, or repairing the air conditioner at a height.
- Never use strong cleaning agents or solvents when cleaning the air conditioner or spray water. Use a smooth cloth.
- To clean the interior, contact an authorized service center or dealer. Using harsh detergents may cause corrosion or damage to the unit.
OPERATION
Notes for Operation
Suggestion for Energy Saving
- Do not over-cool the space. This may be harmful for your health and may consume more electricity.
- Block sunlight with blinds or curtains while you are operating the air conditioner.
- Keep doors or windows closed tightly while you are operating the air conditioner.
- Adjust the direction of the air flow vertically or horizontally to circulate indoor air.
- Speed up the fan to cool or warm indoor air quickly, within a short period of time.
- Open windows regularly for ventilation. The indoor air quality may deteriorate if the air conditioner is used for long durations.
- Clean the air filter once every 2 weeks. Dust and impurities collected in the air filter may block the air flow or reduce the unit performance.
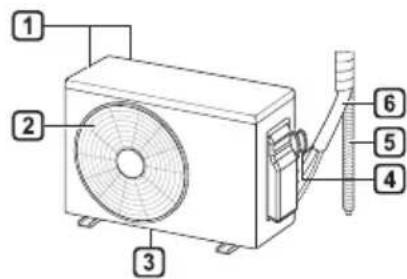
Parts and Functions
Indoor Unit Outdoor Unit
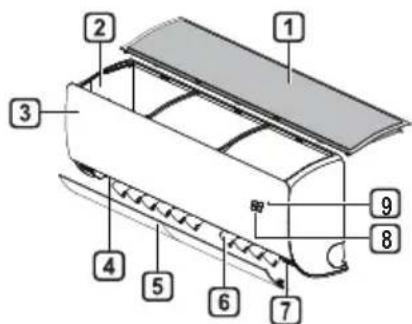
Air Filter, Air Intake, Front Cover, Air Outlet, Air Deflector (Horizontal Vane), Air Deflector (Vertical Louver), On/Off Button, Display, Signal Receiver
Air Intake Vents, Air Outlet Vents, Base Plate, Power Supply Cable, Drain Hose, Refrigerant Pipes
NOTE
- The number and location of operation lamps may vary according to the model of the air conditioner. The feature may be changed according to the type of model.
Wireless Remote Control: Inserting Batteries
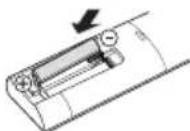
If the display screen of the remote control begins to fade, replace the batteries. Insert AAA (1.5 V) batteries before using the remote control.
1. Remove the battery cover.
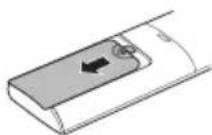
2. Insert the new batteries and make sure that the + and - terminals of the batteries are installed correctly.
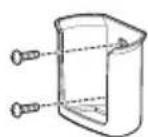
Installing the Remote Control Holder (Optional)
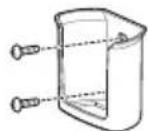
To protect the remote control, install the holder where there is no direct sunlight.
1. Choose a safe and easily accessible location. Fix the holder by fastening 2 screws firmly with a screwdriver.
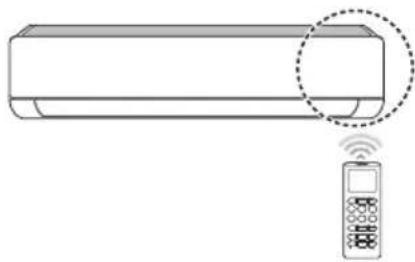
Operating Method
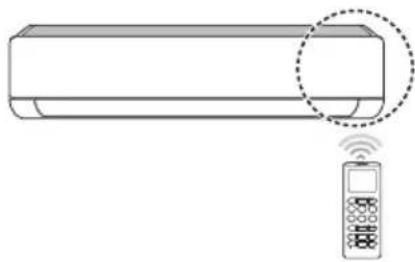
Point the remote control towards the signal receiver at the right side of the air conditioner to operate it.
NOTE
- The remote control may operate other electronic devices if it is directed towards them. Make sure to point the remote control towards the air conditioner signal receiver.
- For proper operation, use a soft cloth to clean the signal transmitter and receiver. In case of a function not provided in the product, no buzzer sound occurs from the product when a button for such function on the remote control is pressed except for Air Flow Direction (SWING), Energy Display (kW[3s]), Air Purification function
Setting the Current Time
1 Insert batteries.
- The icon below blinks at the bottom of the display screen.

2 Press or button to select the minutes. 3 Press SET/CANCEL button to finish.
NOTE
- The On/Off Timer is available after setting the current time.
Using the °C/°F Conversion Function (Optional)
This function changes unit between °C and °F
Press and hold button about 5 seconds.
Operating the Air Conditioner without the Remote Control
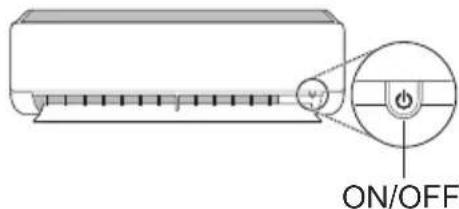
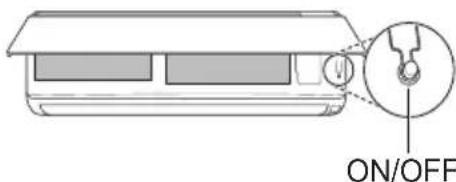
You can use the ON/OFF button of the indoor unit to operate the air conditioner when the remote control is unavailable.
1 Open the front cover (Type2) or horizontal vane (Type1). 2 Press the ON/OFF button.
Type1
Type2
NOTE
- The stepping motor may be broken if the horizontal vane opens rapidly. The fan speed is set to high. The feature may change depending on the model. The temperature cannot be altered when using this emergency ON/OFF button.
- For cooling & heating models, the temperature is set from 22°C to 24°C.
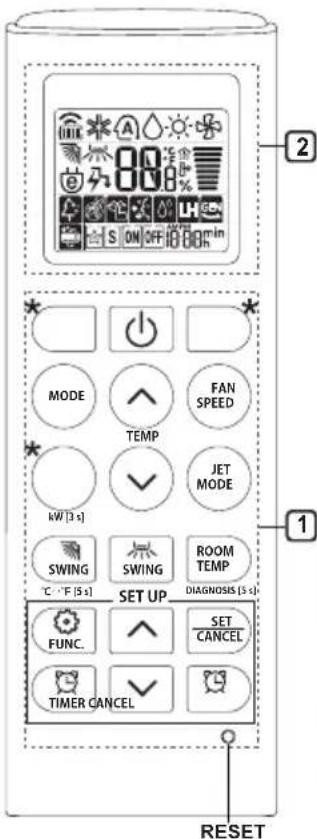
Using Wireless Remote Control
You can operate the air conditioner more conveniently with the remote control.
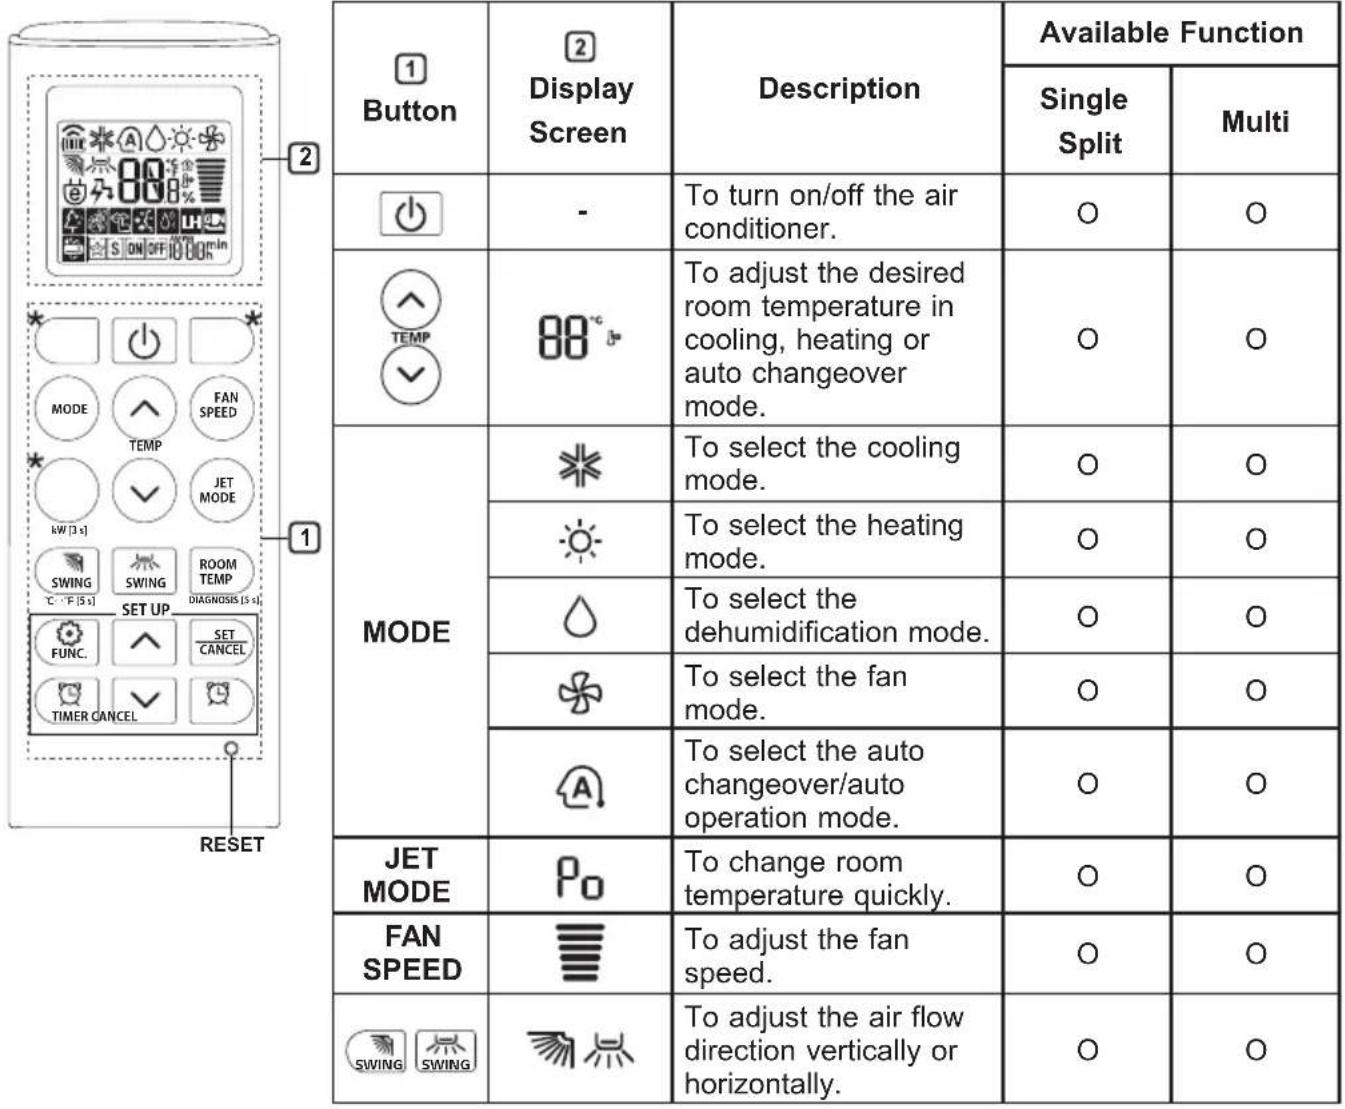
NOTE
- Buttons may change depending on the model.
- When connected to the Multi Outdoor unit, the Energy Display, Energy Control, Silent, and Smart Diagnosis functions may not be supported.
| 1Button | 2DisplayScreen | Description | Available Function | |
| SingleSplit | Multi | |||
| TIMER | ON OFF | To turn on/off air conditioner automatically at desired time. | ○ | ○ |
| SET/CANCEL | - | To set/cancel the special functions and timer. | ○ | ○ |
| CANCEL | - | To cancel the timer settings. | ○ | ○ |
| - To adjust time. ○○ | ||||
| *LIGHTOFF | - | To set the brightness of the display on the indoor unit. | ○ | ○ |
| ROOMTEMP | To display the room temperature. | ○ | ○ | |
| °C←°F[5 s] | °C°F | To change unit between °C and °F | ○ | ○ |
| *COMFORTAIR | To adjust the air flow to deflect wind. | ○ | ○ | |
| kW[3 s] | - | To set whether or not to display information regarding energy. | ○ | × |
| *ENERGYCTRL. | 88 x | To bring the effect of the power saving. | ○ | × |
| DIAGNOSIS[5 s] | - | To conveniently check maintenance information of a product. | ○ | × |
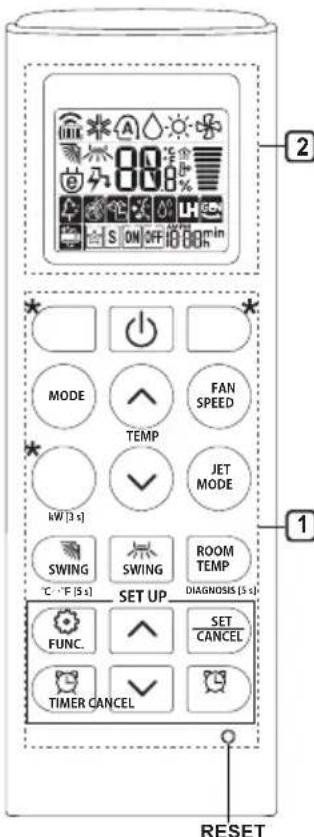
| 1 Button | 2 Display Screen | Description | Available Function | |
| Single Split | Multi | |||
| FUNC. | The Ion generator uses millions of ions to help improve indoor air quality. | O (Optional) | O (Optional) | |
| To reduce noise from outdoor units. | O | X | ||
| To remove moisture generated inside the indoor unit. | O | O | ||
| RESET - | To initialize the remote control settings. | O | O | |
NOTE
- Some functions may not be supported, depending on the model.
- Buttons may change depending on the model.
- Press the SET/CANCEL button to operate the selected function.
Restarting the Air Conditioner Automatically
When the air conditioner is turned on again after a power failure, this function restores the previous settings.
Disabling Auto Restart
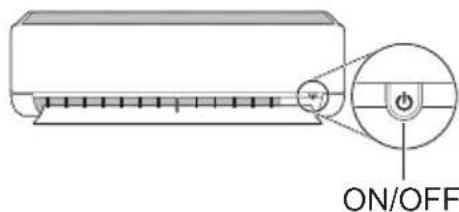
1. Open the front cover (Type2) or horizontal vane (Type1).
2. Press and hold the ON/OFF button for 6 seconds. The unit will beep twice and the lamp will blink 4 times.
To re-enable the function, press and hold the ON/OFF button for 6 seconds. The unit will beep twice and the lamp will blink 4 times.
Type1
Type2
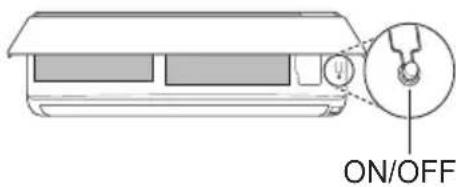
NOTE
The feature may be changed according to the type of model.
- If you press and hold the ON/OFF button for 3-5 seconds, instead of 6 seconds, the unit will switch to the test operation. In the test operation, the unit blows out strong cooling air for 18 minutes and then returns to factory default settings.
Using the Mode Function
This function allows you to select the desired function.
| * | Cooling Mode |
| ↓ | |
| A | Auto Changeover Mode / Auto Operation(AI) Mode |
| ↓ | |
| ○ | Dehumidification Mode |
| ↓ | |
| - | Heating Mode |
| ↓ | |
| * | Fan Mode |
Cooling Mode
1. Turn the appliance on.
2 Press MODE button repeatedly to select the Cooling Mode.
- is displayed on the display screen.
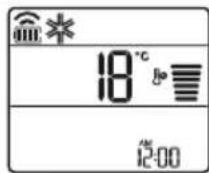
3 Press or button to set the desired temperature.
Auto Operation (Artificial Intelligence)
Multi Model
In this operation mode, the system is automatically operated by the electronic controls.
1 Turn the appliance on. 2 Press MODE button repeatedly to select the Auto Operation.
A is displayed on the display screen.
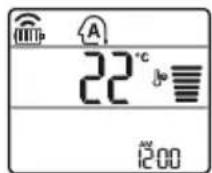
3 Press or button to set the desired temperature. 4 Press FAN SPEED button to adjust the fan speed.
Auto Changeover Mode
Single Split Model
This mode changes the mode automatically to maintain the set temperature at ±2°C.
1 Turn the appliance on. 2 Press MODE button repeatedly to select the Auto Changeover Mode.
A is displayed on the display screen.
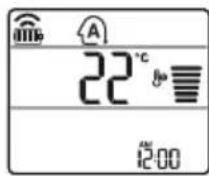
3 Press or button to set the desired temperature. 4 Press FAN SPEED button to adjust the fan speed.
Dehumidification Mode
This mode removes excess moisture from a highly humid environment or during the rainy season, in order to prevent mildew from setting in. This mode adjusts the room temperature and the fan speed automatically to maintain the optimal level of humidity.
1 Turn the appliance on.
2 Press MODE button repeatedly to select the Dehumidification Mode.
is displayed on the display screen.
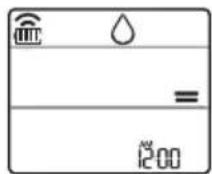
NOTE
- In this mode you cannot adjust the room temperature, it is adjusted automatically.
- The room temperature is not displayed on the display screen.
- In the dehumidification mode, compressor and indoor fan may not operate when the room temperature is below 24°C
Heating Mode
1 Turn the appliance on. 2 Press MODE button repeatedly to select the Heating Mode.
is displayed on the display screen.
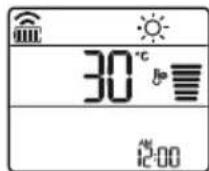
3 Press or button to set the desired temperature.
NOTE
will be displayed on the indoor unit when defrosting is operating.
- Furthermore, this indication will be displayed on the indoor unit:
- When preheating is operating.
- When the room temperature has been reached to the set temperature.
Fan Mode
This mode only circulates the indoor air without changing the room temperature.
1 Turn the appliance on.
2 Press MODE button repeatedly to select the Fan Mode.
is displayed on the display screen.
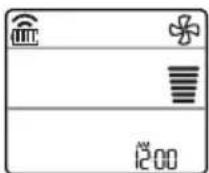
3 Press FAN SPEED button to adjust the fan speed.
NOTE
or will be displayed on the indoor unit when fan mode is operating.
Using the Jet Mode Function Changing Room Temperature Quickly
This function allows you to cool indoor air quickly during the summer or warm it quickly during winter.
- The Jet Mode function is available with Cooling, Heating and Dehumidification Mode.
1 Turn the appliance on. 2 Press MODE button repeatedly to select the desired mode. 3 Press JET MODE button.
P0 is displayed on the display screen.
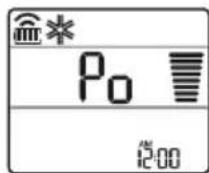
NOTE
- Jet Heating Mode is not available on some models.
- In Jet Cooling Mode, strong air blows out for 30 minutes. After 30 minutes later, setting temperature is maintaining 18°C. If you want to change the temperature, press
or button to set the desired temperature.
- In Jet Heating Mode, strong air blows out for 30 minutes. After 30 minutes later, setting temperature is maintaining 30°C. If you want to change the temperature, press or button to set the desired temperature.
- This function may operate differently from the remote control display.
Using the Fan Speed Function
Adjusting the Fan Speed
- Press FAN SPEED button repeatedly to adjust the fan speed.
| Display Screen Speed | |
| High | |
| Medium - High | |
| Medium | |
| Medium - Low | |
| Low | |
| - Natural Wind | |
NOTE
- The fan speed of Natural Wind adjusts automatically.
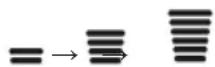
- The fan speed icons are displayed on some indoor units.

- On some models, the indoor unit display is shown for only 5 seconds and then returns to the set temperature.
Using the Air Flow Direction Function
This function adjusts the direction of the air flow vertically (horizontally).
- Press the SWING button repeatedly and select the desired direction.
- Select ( ) to adjust the direction of the air flow automatically.
NOTE
- Adjusting the air flow direction horizontally may not be supported, depending on the model.
- Adjusting the air deflector arbitrarily may cause product failure.
- If you restart the air conditioner, it starts to operate with the previously set direction of air flow, so the air deflector may not match the icon displayed on the remote control. When this occurs, press the SWING button to adjust the direction of the air flow again.
- This function may operate differently from the remote control display.
Setting the On/Off Timer
This function sets the air conditioner to turn on/off automatically at the desired time.
The On/Off Timer can be set together.
Setting the On Timer
1. Press the button repeatedly.
- The icon below blinks at the bottom of the display screen.
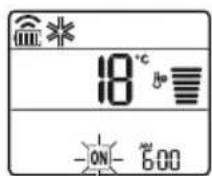
2 Press Yr button to select the minutes.
3 Press SET/CANCEL button to finish.
After setting the timer, current time and ON icon are displayed on the display screen indicating that the desired time is set.
Canceling the On Timer
1 Press button repeatedly.
The icon below blinks at the bottom of the display screen.
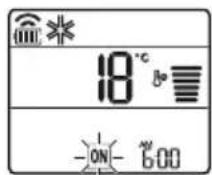
2 Press SET/CANCEL button to cancel the setting.
Setting the Off Timer
1 Press button repeatedly.
- The icon below blinks at the bottom of the display screen.
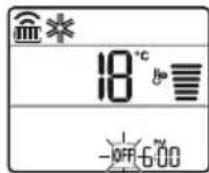
2 Press or button to select the minutes.
3 Press SET/CANCEL button to finish.
After setting the timer, current time and OFF icon are displayed on the display screen indicating that the desired time is set.
NOTE
- This function is disabled when you set Simple Timer.
Canceling the Off Timer
1 Press button repeatedly.
- The icon below blinks at the bottom of the display screen.
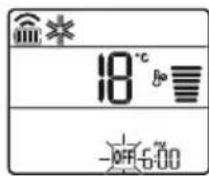
2 Press SET/CANCEL button to cancel the setting.
Canceling the Timer Setting
- Press button to cancel all timer settings.
Using the Sleep Function (Optional)
This function turns off the air conditioner automatically when you go to sleep.
1 Turn the appliance on.
2 Press button repeatedly.
- The icon below blinks at the bottom of the display screen.
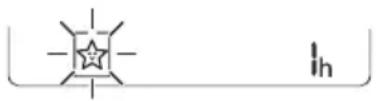
3 Press Yr button to select the hour (up to 7 hours). 4 Press SET/CANCEL button to finish. is displayed on the display screen.
NOTE
H is displayed on some indoor units.
- The indoor unit display shows from 1H to 7H, which is displayed for only 5 seconds and then returns to the set temperature.
- In Cooling and Dehumidification Mode, the temperature increases by 1°C after 30 minutes and an additional 1°C after another 30 minutes for a more comfortable sleep.
- The temperature increases up to 2°C from the preset temperature.
- Although the fan speed remark on the display screen may change, the fan speed is adjusted automatically.
Using the Simple Timer Function (Optional)
This function turns off the air conditioner automatically when you go to sleep.
1. Turn the appliance on. 2. Press the button repeatedly.
- The icon below blinks at the bottom of the display screen.
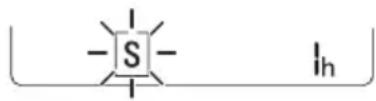
3. Press the or button to select the hour (up to 7 hours). 4. Press the SET/CANCEL button to finish. S is displayed on the display screen.
NOTE
- This function is disabled when you set the Off Timer.
Using the Energy Display Function (Optional)
This function displays the amount of electricity generated on the indoor display as the product operates.
Display the Current Energy Usage
1. Turn the appliance on.
Press the ○ button and hold it for about 3 seconds.
The instantaneous power consumption (BB) is displayed for a while on some indoor units.
NOTE
The unit of the displayed value is kW. It is not displayed on the wireless remote control. If it exceeds 99 kW, which is the maximum displayable value, it is shown as 99 kW. - Display wattage under 10 kW with 0.1 kW increments, and display values over 10 kW with 1 kW increments. - The actual power may differ from the displayed power. - When connected to the Multi Outdoor unit, this function may not be supported.
Using the Light Off Function (Optional)
Display Screen Brightness
You can set the brightness of the indoor unit display screen.
- Press the LIGHT OFF button.
NOTE
- Turn on/off the display screen.
- If the brightness of an indoor appliance's display is set to OFF, pressing a button on the remote control automatically turns the display on for a while.
- This function may operate differently, depending on the model.
Using the Comfort Air Function (Optional)
Comfort Vane Operation
This function conveniently sets the vane to a preset position to deflect the supply air away from blowing directly onto the occupants in the room.
1 Turn the appliance on. 2 Press COMFORT AIR button repeatedly and select the desired direction.
or is displayed on the display screen.
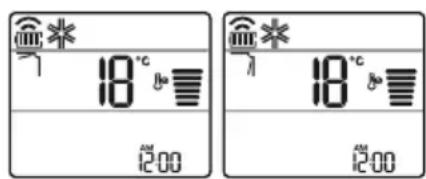
NOTE
or Lis displayed on some indoor units. - This function is disabled when you press MODE or JET MODE button. This function is disabled and auto swing of vertical direction is set up when you press button. - When this function is off, the horizontal vane operates automatically depending on the set mode.
Using the Energy Control Function (Optional)
1 Turn the appliance on.
2 Press ENERGY CTRL. button.
- Press ENERGY CTRL. button repeatedly to select each step.
- 1 step : The power Input is decreased by 20 % compared to rated power input. 80 is displayed on the display screen.
- 2 step : The power Input is decreased by 40 % compared to rated power input. 60 is displayed on the display screen.
- 3 step (Optional): The power Input is decreased by 60% compared to rated power input. 40 is displayed on the display screen. 80 (1 step), 60 (2 step), 40 (3 step) is displayed on some indoor units. (1 step), (2 step) is displayed on some indoor units.)
- This function is available with Cooling Mode.
- Capacity may decrease when Energy Control mode is selected.
- Desired temperature is displayed about 5 seconds if you press FAN SPEED, or button.
- Room temperature is displayed about 5 seconds if you press ROOM TEMP button.
- When connected to the Multi Outdoor unit, this function may not be supported.
Using Special Functions
1 Turn the appliance on. 2 Press FUNC. button repeatedly to select the desired function. 3 Press SET/CANCEL button to finish.
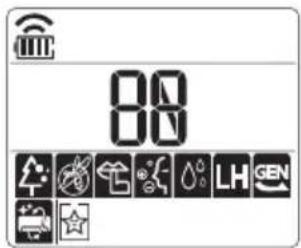
| Display Screen | Description |
| The Ion generator uses millions of ions to help improve indoor air quality. | |
| To reduce noise from outdoor units. | |
| To remove moisture generated inside the indoor unit. |
NOTE
Some functions may not be supported, depending on the model. Some functions may operate differently from the remote control display.
Canceling Special Functions
1 Press FUNC. button repeatedly to select the desired function. 2 Press SET/CANCEL button to cancel the function.
Using the Air Purification Function
These functions supply clean and fresh air by ion particles and the filter.
| Function Display Description | |
| Ionizer | Ion particles from lonizer reduce the surface bacteria and other harmful substances. |
| Plasma | It removes microscopic contaminants from the intake air completely to supply clean and fresh air. |
NOTE
- You can use this function without turning the air conditioner on.
- Both the plasma lamp and the cooling lamp light up while Smoke Away/Plasma is in operation on some models.
- Do not touch ionizer during operation.
- This function may operate differently from the remote control display.
Using the Silent Function
This function prevents potential claims by neighbors, reducing noise from outdoor units.

is displayed on the display screen.
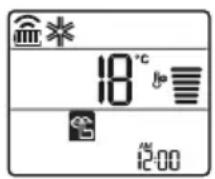
NOTE
- This function is disabled when you press MODE or ENERGY CTRL, or JET MODE button.
- This function is available with Cooling, Heating, Auto Changeover, Auto Operation Mode.
- When connected to the Multi Outdoor unit, this function may not be supported.
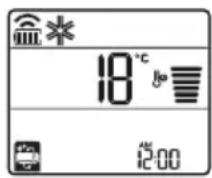
Using the Auto Clean Function
In the Cooling and Dehumidification Mode, moisture is generated inside the indoor unit. This function removes such moisture.

is displayed on the display screen.
NOTE
- Some functions cannot be used while the Auto Clean function is in operation.
- If you turn off the unit, the fan continues to run for 30 minutes and cleans the inside of the indoor unit.
is displayed on some indoor units, depending on the model.
LG ThinQ Application
This feature is only available on models with the or ThinQ logo.
The LG ThinQ application allows you to communicate with the appliance using a smartphone.
LG ThinQ Application Features
Communicate with the appliance from a smartphone using the convenient smart features.
Smart Diagnosis
If you experience a problem while using the appliance, this smart diagnosis feature will help you diagnose the problem.
Settings
Allows you to set various options on the appliance and in the application.
NOTE
If you change your wireless router, internet service provider, or password, delete the registered appliance from the LG ThinQ application and register it again. - The application is subject to change for appliance improvement purposes without notice to users. - Functions may vary by model.
Before Using LG ThinQ Application
1 Check the distance between the appliance and the wireless router (Wi-Fi network).
- If the distance between the appliance and the wireless router is too far, the signal strength becomes weak. It may take a long time to register or installation may fail.
2 Turn off the Mobile data or Cellular Data on your smartphone.
3 Connect your smartphone to the wireless router.
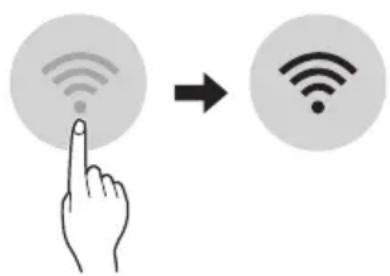
NOTE
To verify the Wi-Fi connection, check that the icon on the control panel is lit. - The appliance supports 2.4 GHz Wi-Fi networks only. To check your network frequency, contact your Internet service provider or refer to your wireless router manual. - LG ThinQ is not responsible for any network connection problems or any faults, malfunctions, or errors caused by network connection. - If the appliance is having trouble connecting to the Wi-Fi network, it may be too far from the router. Purchase a Wi-Fi repeater (range extender) to improve the Wi-Fi signal strength. - The Wi-Fi connection may not connect or may be interrupted because of the home network environment. - The network connection may not work properly depending on the Internet service provider. - The surrounding wireless environment can make the wireless network service run slowly.
- The appliance cannot be registered due to problems with the wireless signal transmission. Unplug the appliance and wait about a minute before trying again.
- If the firewall on your wireless router is enabled, disable the firewall or add an exception to it.
- The wireless network name (SSID) should be a combination of English letters and numbers. (Do not use special characters.)
- Smartphone user interface (UI) may vary depending on the mobile operating system (OS) and the manufacturer.
- If the security protocol of the router is set to WEP, you may fail to set up the network. Please change it to other security protocols (WPA2 is recommended) and register the product again.
Installing the LG ThinQ Application
Search for the LG ThinQ application from the Google Play Store or Apple App Store on a smartphone. Follow instructions to download and install the application.
Open Source Software Notice Information
To obtain the source code that is contained in this product, under GPL, LGPL, MPL, and other open source licenses that have the obligation to disclose source code, and to access all referred license terms, copyright notices and other relevant documents please visit https://opensource.lge.com.
LG Electronics will also provide open source code to you on CD-ROM for a charge covering the cost of performing such distribution (such as the cost of media, shipping, and handling) upon email request to opensource@lge.com.
This offer is valid to anyone in receipt of this information for a period of three years after our last shipment of this product.
Smart Diagnosis
This feature is only available on models with the or logo.
Use this feature to help you diagnose and solve problems with your appliance.
NOTE
- For reasons not attributable to LGE's negligence, the service may not operate due to external factors such as, but not limited to, Wi-Fi unavailability, Wi-Fi disconnection, local app store policy, or app unavailability.
- The feature may be subject to change without prior notice and may have a different form depending on where you are located.
Using LG ThinQ to Diagnose Issues
If you experience a problem with your Wi-Fi equipped appliance, it can transmit troubleshooting data to a smartphone using the LG ThinQ application.
- Launch the LG ThinQ application and select the Smart Diagnosis feature in the menu. Follow the instructions provided in the LG ThinQ application.
Using Audible Diagnosis to Diagnose Issues
Follow the instructions below to use the audible diagnosis method.
- Launch the LG ThinQ application and select the Smart Diagnosis feature in the menu. Follow the instructions for audible diagnosis provided in the LG ThinQ application.
Plug the power plug in the outlet properly. 2 Place the mouthpiece of your smartphone close to the or logo. 3 Press and hold the DIAGNOSIS [5 s] button for 5 seconds or longer while holding the smartphone mouthpiece to the logo until the data transfer is complete.
- Keep the smartphone in place until the data transfer has finished. Time remaining for data transfer is displayed. 4 After the data transfer is complete, the diagnosis will be displayed in the application.
NOTE
- For best results, do not move the phone while the tones are being transmitted.
- Be sure to keep ambient noise to a minimum or the phone may not correctly receive the buzzer beeps from the indoor unit.

WARNING
- Before cleaning or performing maintenance, disconnect the power supply and wait until the fan stops.
If the air conditioner will not be used for an extended period of time, dry the air conditioner to maintain it in best condition. Clean the product regularly to maintain optimal performance and to prevent possible breakdown.
- Dry the air conditioner in Fan mode for 3 to 4 hours and disconnect the power. There may be internal damage if moisture is left in its components.
- Before using the air conditioner again, dry the inner components of the air conditioner in Fan mode for 3 to 4 hours. This will help to remove the odor generated from moisture.
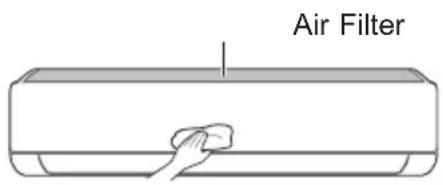
The feature may be changed according to the type of model.
| Type Description | Option Interval | |
| AirFilterClean | with a vacuum or hand wash. 2 weeks | |
| Allergy Filter Clean | clean with a vacuum or brush. Every 6 months | |
| Ionizer (Optional) | Use dry cotton bud to remove any dust. Every 6 months | |
| IndoorUnit | Cleantheindoorunitsurfacebyusingasoft, drycloth.Regularly | |
| Have a professional clean the condensate drain pan. Once a year | ||
| Have a professional clean the condensate drain pipe. Every 4 months | ||
| Replace the remote control batteries. Once a year | ||
| OutdoorUnit | Have a professional clean the heat exchanger coils and the panel vents. (Consult with technician.) | Once a year |
| Have a professional clean the fan. Once a year | ||
| Have a professional clean the condensate drain pan. Once a year | ||
| Have a professional verify that all the fan assembly is firmly tightened. | Once a year | |
| Clean the electric components with air. Once a year |
NOTE
- Never use water that is higher than 40°C when you clean the filters. It may cause deformation or discoloration.
- Never use volatile substances when you clean the filters. They may damage the surface of the product.
- Do not wash the allergy filter with water, because the filter can be damaged (Optional).
Clean the Air Filter
Clean the air filters once every 2 weeks, or more, if necessary.
NOTE
The air filter can be broken when it is bent. - When the air filter is not assembled correctly, dust and other substances can enter into the indoor unit.
Type1
If you look at the indoor unit from above, you can assemble the top filter easily.
1 Turn off the power to the unit. 2 Hold the knobs of the air filter, lift it up slightly.
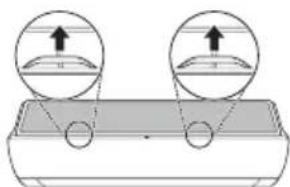
3 Remove it from the indoor unit.
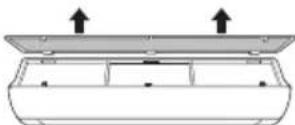
4 Clean the filter with a vacuum cleaner or with lukewarm water with neutral detergent. 5 Dry the filter in the shade. 6 Insert the hooks of the air filter into the front cover.
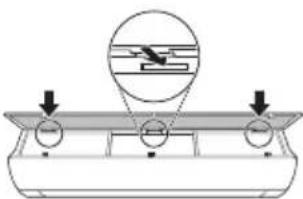
7 Push down hooks to assemble the air filter.
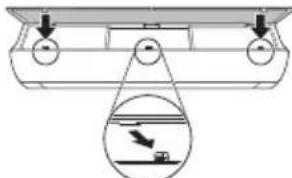
8 Check the side of the front cover for correct assembly of the air filter.
Type2
1 Turn off the power to the unit. 2 Open the front cover.
- Lift up both sides of the cover slightly.
3 Hold the knobs of the air filters, pull them down slightly and remove them from the indoor unit.
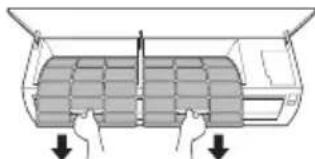
4 Clean the filters with a vacuum cleaner or with lukewarm water with neutral detergent. 5 Dry the filters in the shade. 6 Insert the hooks of the air filters into the front cover.
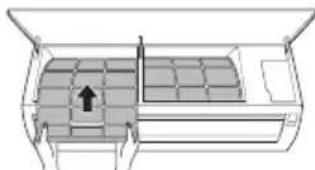
7 Check the side of the front cover for correct assembly of the air filters.
Clean the Allergy Filter (Optional)
1 Turn off the power to the unit. 2 Remove the air filter from the indoor unit. 3 Remove the allergy filter from the indoor unit.
Type1
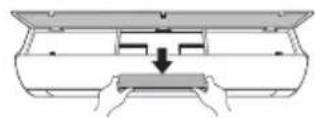
Type2
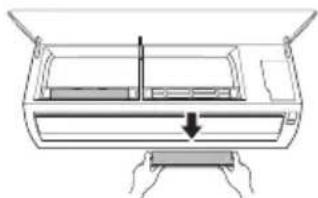
4 Clean the filter with a vacuum cleaner.
5 Insert the allergy filter.
Type 1
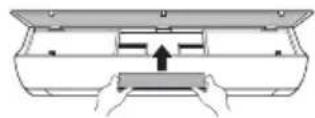
Type 2
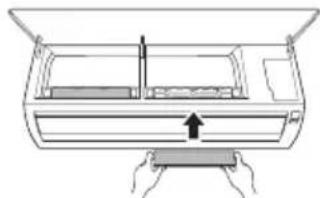
6 Assemble the air filter. 7 Check the side of the front cover for correct assembly of the air filter.
NOTE
- The feature and location of the allergy filter may vary according to the model type.
Self-diagnosis Function
This product has a built-in self-diagnosis function. If an error occurs, the lamp of the indoor unit will blink in 2-second intervals. If this occurs, contact your local dealer or service center.
Before Calling for Service
Please check the following before you contact the service center. If the problem persists, contact your local service center.
| Symptoms Possible Causes & Solution | |
| The air conditioner does not work normally. | Burning smell and strange sounds are coming from the unit. ·Turn off the air conditioner, switch OFF, or disconnect the power supply, and contact the service center. |
| Water leaks from the indoor unit even when the humidity level is low. ·Turn off the air conditioner, switch OFF, or disconnect the power supply, and contact the service center. | |
| The power cable is damaged or it is generating excessive heat. ·Turn off the air conditioner, switch OFF, or disconnect the power supply, and contact the service center. | |
| A switch, a circuit breaker (safety, ground), or a fuse is not operated properly. ·Turn off the air conditioner, switch OFF, or disconnect the power supply, and contact the service center. | |
| The unit generates an error code from its self-diagnosis. ·Turn off the air conditioner, switch OFF, or disconnect the power supply, and contact the service center. | |
| The air conditioner does not work. | The air conditioner is unplugged. ·Check whether the power cord is plugged into the outlet or the power isolators are switched on. |
| A fuse exploded, or the power supply is blocked. ·Replace the fuse or check if the circuit breaker has tripped. | |
| A power failure has occurred. ·Turn off the air conditioner when a power failure occurs. ·When the power is restored, wait 3 minutes, and then turn on the air conditioner. | |
| The voltage is too high or too low. ·Check if the circuit breaker has tripped. | |
| The air conditioner was turned off automatically at a preset time. ·Turn the air conditioner on. | |
| The battery setting in the remote controller is incorrect. ·Make sure that the batteries are inserted correctly in your remote controller. ·If the batteries are placed correctly, but the air conditioner still does not operate, replace the batteries and try again. | |
| Symptoms Poss | ble Causes & Solution |
| The air conditioner does not emit cool air. | Air is not circulating properly. • Make sure that there are no curtains, blinds, or pieces of furniture blocking the front of the air conditioner. |
| The air filter is dirty. • Clean the air filter once every 2 weeks. • See “Clean the Air Filter” for more information. | |
| The room temperature is too high. • In summer, cooling the indoor air fully may take some time. In this case, select the Jet Mode to cool the indoor air quickly. | |
| Cold air is escaping from the room. • Make sure that no cold air is escaping through the ventilation points in the room. | |
| The desired temperature is higher than the current temperature. • Set the desired temperature to a level lower than the current temperature. | |
| There is a heating source nearby. • Avoid using heat generators like electric ovens or gas burners while the air conditioner is in operation. | |
| Fan Mode is selected. • During Fan Mode, air blows from the air conditioner without cooling or heating the indoor air. • Switch the operation mode to cooling operation. | |
| Outside temperature is too high. • The cooling effect may not be sufficient. | |
| The fan speed cannot be adjusted. | The Jet Mode, or Auto Operation Mode is selected. • In some operation modes, you cannot adjust the fan speed. Select an operation mode in which you can adjust the fan speed. |
| The temperature cannot be adjusted. | The Fan Mode or Jet Mode is selected. • In some operation modes, you cannot adjust the temperature. Select an operation mode in which you can adjust the temperature. |
| The air conditioner stops during operation. | The air conditioner is suddenly turned off. • The Timer Function may have timed out, which turns the unit off. Check the timer settings. |
| A power failure has occurred during operation. • Wait for the power to come back. If you have the Auto Restart function enabled, your unit will resume its last operation several minutes after power is restored. | |
| Symptoms Possible Causes & Solution | |
| The indoor unit is still operating even when the unit has been turned off. | The Auto Clean function is being operated. ·Allow the Auto Clean function to continue since it removes any remaining moisture inside the indoor unit. If you do not want this feature, you can turn the unit off. |
| The air outlet on the indoor unit is discharging mist. | The cooled air from the air conditioner makes mist. ·When the room temperature decreases, this phenomenon will disappear. |
| Water leaks from the outdoor unit. | In the heating operations, condensed water drops from the heat exchanger. ·This symptom requires installing a drain hose under the base pan. Contact the installer. |
| There is noise or vibration. | A clicking sound can be heard when the unit starts or stops due to movement of the reversing valve. Creaking sound: The plastic parts of the indoor unit creak when they shrink or expand due to sudden temperature changes. Flowing or Blowing sound: This is the flow of refrigerant through the air conditioner. ·These are normal symptoms. The noise will stop. |
| The indoor unit gives off an odor. | Odors (such as cigarette smoke) may be absorbed into the indoor unit and discharged with airflow. ·If the smell does not disappear, you need to wash the filter. If this does not work, contact the service center to clean your heat exchanger. |
| The air conditioner does not emit warm air. | When Heating Mode starts, the vane is almost closed, and no air comes out, even though the outdoor unit is operating. ·This symptom is normal. Please wait until the unit has generated enough warm air to blow through the indoor unit. |
| The outdoor unit is in Defrosting Mode. ·In Heating Mode, ice/frost is built up on the coils when the outside temperature falls. This function removes a layer of frost on the coil, and it should finish in approximately 15 minutes. | |
| Outside temperature is too low. ·The heating effect may not be sufficient. | |
| Your home appliance and smartphone is not connected to the Wi-Fi network. | The password for the Wi-Fi that you are trying to connect to is incorrect. ·Find the Wi-Fi network connected to your smartphone and remove it, then register your appliance on LG ThinQ. |
| Mobile data for your smartphone is turned on. ·Turn off the Mobile data of your smartphone and register the appliance using the Wi-Fi network. | |
| The wireless network name (SSID) is set incorrectly. ·The wireless network name (SSID) should be a combination of English letters and numbers. (Do not use special characters.) | |
| The router frequency is not 2.4 GHz. ·Only a 2.4 GHz router frequency is supported. Set the wireless router to 2.4 GHz and connect the appliance to the wireless router. To check the router frequency, check with your Internet service provider or the router manufacturer. | |
| The distance between the appliance and the router is too far. ·If the distance between the appliance and the router is too far, the signal may be weak and the connection may not be configured correctly. Move the location of the router so that it is closer to the appliance. | |
NOTE
- Some functions may not be supported, depending on the model.
Memo
OWNER'S MANUAL
AIR CONDITIONING

Smart Diagnosis 29
MAINTENANCE 30
LG ThinQ Application
Smart Diagnosis
Smart Diagnosis
Use the Smart Diagnosis feature to troubleshoot the air conditioner.
Do not use the product for special purposes such as preserving food, works of art, etc. It is an air conditioner for consumer use, not a precision cooling system. There is a risk of damage or loss of property.
Do not recharge or dispose of the battery.
Maintenance
Never touch the metal parts of the air conditioner when removing the air filter.
Use a soft cloth and mild detergent to clean, maintain, or inspect the air conditioner.
Never use strong cleaning agents or solvents when cleaning the air conditioner, nor spray water. Use a soft cloth.
Translation of the original instructions
This manual may contain images or content different from the model you purchased.
SAFETY INSTRUCTIONS. 3
Important safety instructions 4
OPERATION 11
Operation 11
Parts and functions 11
Important safety instructions
I. GENERAL SAFETY
To reduce the risk of fire, electric shock, or injury to persons when using the product, the following basic precautions must be followed, including:
Technical safety
- Installation or repair of unplugged equipment may expose you or others to danger. Every person working on the cooling unit must hold a valid certificate issued by an accredited body in the industry, certifying their competence to work with refrigerants safely and in accordance with the applicable standards in the industry. (For R32) - Servicing must be performed in accordance with the manufacturer's instructions for the equipment. Maintenance and repairs requiring the assistance of another trained person must be carried out under the supervision of a person competent in the use of flammable refrigerants. (For R32) - The information in this manual is intended for use by a qualified service technician who is familiar with safety procedures and has the necessary tools and testing instruments. - Failure to read and follow all instructions may lead to incorrect operation of the equipment, material damage, physical injury, or death.
- The device must be installed in accordance with national electrical installation regulations.
- If replacement of the supply cord is necessary, it must be carried out by authorized personnel, using only original spare parts.
- Connect the earth lead correctly to minimize the risk of electric shock. Do not interrupt or disconnect the earthing conductor before disconnecting the supply. The tightening of the earth clamp of the alternator to the threaded hole of the wall socket does not earth the device, unless the threaded hole of the socket is metallic and insulated and the wall socket is earthed through the electrical installation of the building.
- If you are not sure that the climate unit is earthed correctly, contact a qualified electrician to check the wall socket and the supply line.
- The cooling agent and the insulating foam contain gases that require special disposal procedures. Consult your service representative or a person with similar qualifications before disposing of them. If the supply cable is damaged, it must be replaced by the manufacturer, its service agents, or similarly qualified persons to avoid danger. The unit must be installed in a well-ventilated place, the size of which corresponds to the operating instructions for the unit. (For R32) The unit must be installed in a place without continuous ignition sources (for example, open flames, gas appliances, or electric heaters). (For R32)
- The unit must be installed in such a way as to prevent mechanical damage. (For R32)

WARNING
To minimize the risk of unintentional starting of the device, incorrect operation, or damage to the product or materials, follow the basic safety measures, including:
Installation
Do not install the climate unit in a place exposed directly to sea breeze (salty spray).
Install the drain hose for condensed water correctly.
Be careful when identifying and installing the climate unit.
Do not touch the leaking cooling agent during installation or repair.
Press the button (Swing) several times to select the desired direction.
- Select to adjust the direction of the air flow automatically.
CAUTION
- The adjustment of the air flow direction to the horizontal position may not be possible depending on the model.
- Remote control of the airflow
- The deflector may cause the product to be delivered.
- If you restart the climate control, it will start working with the last set airflow direction, so the airflow deflector may not match the one shown on the remote control. When this happens, press the SWING or SWING button to adjust the airflow direction again. This function may vary when using the remote control.
Turning the timer on and off
This function allows the climate control to be turned off/on automatically at a set time.
The timer for on/off can be set together with this.
Setting the timer for turning on
1 Press the TIMER button several times.
- The icon will appear in the lower part of the display.
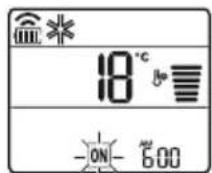
2 Press the button to select the minutes.
3 Press the SET/CANCEL button to finish the setting.
The timer setting will be displayed at the current time on the display, showing that the desired time has been set.
Canceling the timer for turning on
1 Press the button several times.
- The icon will appear in the lower part of the display.
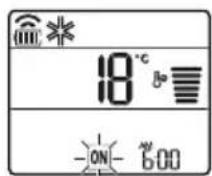
Press the SET/CANCEL button to cancel the setting.
Setting the timer for switching off
1 Press the TIMER button several times.
- The icon appears in the display.
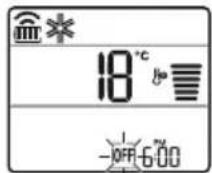
2 Press the UP or DOWN button to select the minutes.
3 Press the SET/CANCEL button to finish the setting.
After setting the timer, the current time is shown on the display, indicating that the desired time has been set.
The functions are disabled when the standard timer is set.
Canceling the timer for exclusion
1 Press the TIMER button several times.
- The current time appears in the display area.
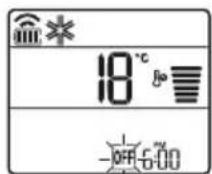
2 Press the SET/CANCEL button to cancel the setting.
Canceling the timer setting
Press the button to cancel all timer settings.
Setting the sleep timer (optional)
This function turns off the air conditioner automatically when you sleep.
1 Turn on the unit.
2 Press the TIMER button several times.
- The icon on the lower left part of the display.
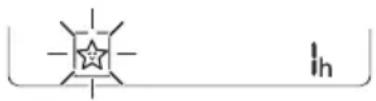
3 Press the UP or DOWN button to select the time (up to 7 hours). 4 Press the SET/CANCEL button to finish setting.

is shown on the screen.
SLEEP MODE

It is shown on the indoor unit display.
- The display of the indoor unit shows the temperature from 1 to 7, which is visible for only 5 seconds, after which it returns to the temperature setting.
During cooling or dehumidifying, the temperature increases by 1°C after 30 minutes and by another 1°C after another 30 minutes for a more comfortable sleep. The temperature can be raised up to 2°C from the previously set temperature. - Although the fan speed may change due to the display, the fan speed is adjusted automatically.
Using the standard timer function (optional)
This function turns off the air conditioner automatically when you sleep.
1 Turn on the unit. 2 Press the TIMER button several times.
- The icon on the lower left part of the display.
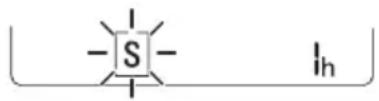
Press the button for 3 seconds to select the hour (hour). 4 Press the SET/CANCEL button to finish the setting.
This is shown on the display.
DELAY
- This function is disabled when setting the timer for shutdown.
Using the function to display consumed energy (optional)
This function shows the amount of electrical energy consumed by the indoor unit, while the product is operating.
Displaying current consumed energy
1 Turn on the unit. 2 Press and hold the button for about 3 seconds. The current power consumption is shown briefly on the display of some indoor unit models.
DELAY
- The unit of measurement for the value shown on the display is kW. It is shown without a decimal point.
- If it is higher than 99 kW, which is the allowable range, it is displayed as 99 kW.
- Show power below 10 kW with 0.1 kW increments, and show power above 10 kW with 1 kW increments. -The actual power may differ from the displayed power.
- When connected to an external thermostat, this function may not be supported.
Using the function to turn off the lighting (optional)
Brightness of the display
The display shows the room temperature.
- Press the LIGHT OFF button.
NOTE
Turning the display on/off. - If the display is set to turn off automatically, pressing a button on the remote control will automatically turn the display on for a short time. This function may work differently depending on the model.
Using the Comfort Air function (optional)
Comfortable air flow position
This function sets the air flow to a comfortable position, which is preset, to avoid blowing air directly at the occupants in the room.
1 Turn on the unit. 2 Press the COMFORT AIR button several times and select the desired position.
The display shows the setting.
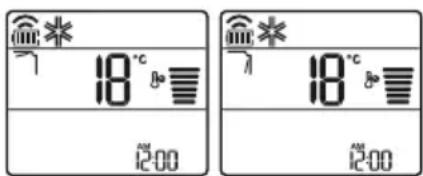
NOTE
The display shows the set temperature.
This function is disabled when the MODE button is pressed.
This function is disabled and the automatic vertical swing is set when the SWING button is pressed. When this function is disabled, the horizontal louver operates automatically depending on the operation mode.
Using the energy saving function (optional)
1 Turn on the unit.
Press the ENERGY CTRL button.
- Press the ENERGY CTRL button repeatedly to select the setting.
- Setting 1: Input power reduced by 20% compared to nominal input power.
The display shows
Setting 2: Input power reduced by 40% compared to nominal input power.
The display shows
- Setting 3 (optional): Input power reduced by 60% compared to nominal input power.
The display shows
The display shows the selected setting (Setting 1, Setting 2, Setting 3). (The display shows Setting 1, Setting 2.)
This function is used for cooling.
The capacity can be reduced when the energy control mode is selected.
The current temperature is displayed for about 5 seconds if you press the FAN SPEED button.
The current temperature is displayed for about 5 seconds if you press the ROOM TEMP button.
- When connected to a wired remote controller, this function may not be supported.
Use of special functions
1 Press the button.
2 Press the FUNC button. Select the desired position several times.
3 Press the SET/CANCEL button to finish the setting.
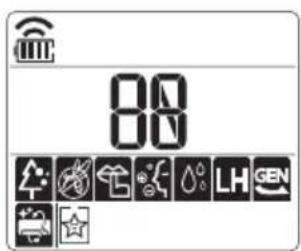
Display of the internal temperature depending on the model.
LG ThinQ applications
This feature is available only in models with the ThinQ logo.
The LG ThinQ application allows you to communicate with the device via a smartphone.
Features of the LG ThinQ application
Communicate with the device via a smartphone using the convenient smart functions.
Smart Diagnosis
If problems occur while using the application, this smart diagnosis feature will help you diagnose the problems.
Settings
Allows you to set various options in the application.
NOTICE
- If you change your wireless router, internet provider, or password, delete the registered device from the LG ThinQ application and register it again.
- The product and its specifications are subject to improvement without prior notice to consumers.
- The functions may differ depending on the model.
Using the LG ThinQ application
1 Check the distance between the appliance and the wireless router (Wi-Fi network).
If the distance between the appliance and the wireless router is too large, the signal strength weakens. It may take a long time to register or the installation may fail.
2 Turn off the Mobile data or Cellular data on your smartphone.
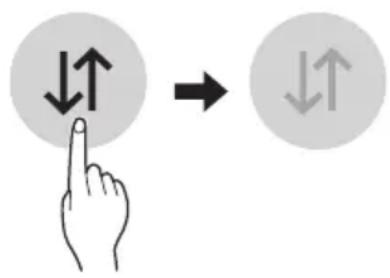
3 Connect your smartphone to the wireless router.
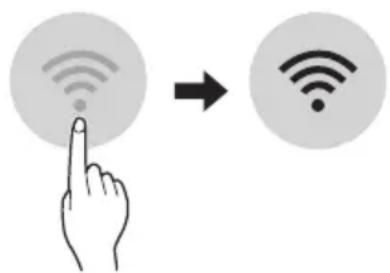
CONNECTION
To check the Wi-Fi connection, check the LED indicator on the control panel. - The appliance supports only 2.4 GHz Wi-Fi networks. To check the network frequency, contact your Internet service provider or check the manual for the wireless router.
LG ThinQ is not responsible for any network connection problems or for any malfunctions, defects, or damage caused by the network connection.
If the appliance has difficulty connecting to the Wi-Fi network, it may be too far from the router. Purchase a Wi-Fi repeater (range extender) to improve the Wi-Fi signal strength. The Wi-Fi connection may not work or may be interrupted depending on the home network environment. - The network connection may not work properly depending on the Internet service provider. - The surrounding wireless environment may cause delays in the wireless network.
- The appliance cannot be registered due to problems with wireless signal transmission. Turn off the appliance and wait about one minute before trying again. If the firewall on your wireless router is enabled, disable it or add an exception for it.
- The name of the wireless network (SSID) must be a combination of English letters and numbers. (Do not use special symbols.)
- The smartphone's user interface (UI) may vary depending on the mobile operating system (OS) and manufacturer.
- If the security protocol of the router is set to WEP, it may not be possible to set up the network. Change the security protocol to another one (WPA2 is recommended) and register the product again.
Open source software with open code
To obtain the source code under GPL, LGPL, MPL, and other open source licenses, which must be disclosed for this product, and to access all relevant license terms, excluding author rights and other related documents, please visit: https://opensource.1ge.com.
LG Electronics will also provide the open source code on a CD-ROM for a charge covering the cost of performing such distribution (such as the cost of media, shipping, and handling) upon email request to: opensource@lge.com.
This offer is valid for anyone who receives this information for a period of three years after the last shipment of this product.
This feature is available only in models with the logo.
Use this function to diagnose and resolve problems with your appliance.
TROUBLESHOOTING
- Due to factors beyond LGE's control, the service may not be active due to external factors such as, but not limited to, Wi-Fi unavailability, Wi-Fi disconnection, local app store policy, or app unavailability. The feature may also be discontinued without prior notice and may vary depending on location.
Using LG ThinQ to diagnose problems
If you experience a problem with your Wi-Fi-equipped appliance, you can transmit diagnostic data to a smartphone using the LG ThinQ app.
Start the LG ThinQ app and select the Smart Diagnosis feature from the menu. Follow the instructions provided in the LG ThinQ app.
Using Audible Diagnosis to diagnose problems
Follow the instructions below to use the audible diagnosis method.
Start the LG ThinQ app and select the Smart Diagnosis feature from the menu. Follow the instructions for audible diagnosis provided in the LG ThinQ app.
1 Plug the power cord into the outlet. 2 Place the smartphone's microphone near the logo. 3 Press and hold the DIAGNOSIS [5 s] button for 5 seconds while holding the smartphone's microphone to the logo until data transmission is complete.
The thermostat will not turn on until data is transmitted.
The display will show the remaining time for data transmission.
Once data transmission is complete, the diagnosis will be shown in the appendix.
NOTE
For best performance, keep the thermostat clean. Make sure it is clean and free of dust to ensure the thermostat can receive sound signals from the external unit without problems.
PRECAUTION
- Prefer to unplug the unit and wait for the fan to stop before cleaning.
If the air conditioner is to be used for an extended period, unplug the air conditioner to keep it in the best possible condition. Clean the product regularly to maintain optimal performance and prevent possible damage.
- Unplug the air conditioner and run the fan for 3-4 hours to dry it out, then unplug it. External damage may occur if moisture remains in the components.
- Run the fan for 3-4 hours. This will help you remove the moisture generated by the humidity.
FAN OPERATION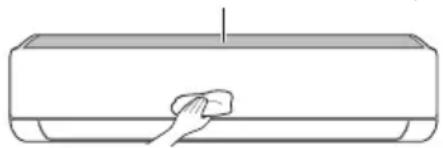
The function may vary depending on the model.
| Тип Иструкшим Истервал | |
| Въздуши фелтур | Почисте с прахосмужа ини поимлел ръчно. 2 седши |
| Проти boалергий фелтур | Почисте с прахосмужа ини поимлел. На всяки 6 месда |
| Ионизатор (no избор) | Излльайтс ух памучен tamponн за остразявае на праха. На всяки 6 месда |
| Въстшо тяло | Почисте поьлрхостта на въстшото тяло, кato излльовате мека, суха кьрna. |
| Оставе пофесионалостда поочи_ST ванчкatable на дрений kohtейнер. | |
| Оставе пофесионалostда поочи_ST рьбatable на дрений kohtейнер. | |
| Смене бateрип'te на дисанционно. Вedlyж в говината | |
| Въшо тяло | Оставе пофесионалostда поочи_ST поочи_ST ноглоб merelyka и вентлиационнite otвори на панега. (Kонсулты国际贸易 ce c texnik.) |
| Оставе пофесионалostда поочи_ST вentlinatopa. Вedlyж в говината | |
| Оставе пофесионалostда поочи_ST ванчкatable на дрений kohteyнер. | |
| Оставе пофесионалostда сөberи, че вcentи мodyл- на вentlinatopa sa здраво заетнати. | |
| Почисте сожд; Елькошим тяло Компонец ST C Bьздух. Вedlyж в говината |
NOTE
- Never use water with a temperature above 40°C when cleaning the filter. This may cause deformation or damage to the color.
- Do not use abrasive substances when cleaning the filter. They may damage the surface of the product.
- Do not wash the filter with water, as the filter may be damaged (optional).
Remove the outer cover.
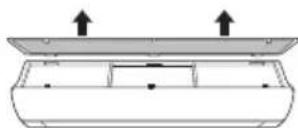
4 Clean the filter with a vacuum cleaner or with cold water and a neutral cleaning agent. 5 Dry the filter cloth. 6 Insert the filter into the front cover.
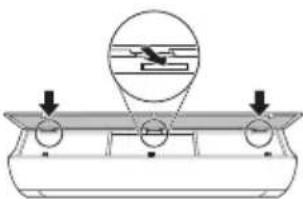
7 Press the cover to install the filter.
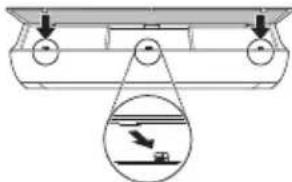
8 Check from the side of the front cover that the filter is correctly installed.
Type 2
1 Turn off the appliance and unplug the power cord. 2 Open the front cover.
- Remove the filters.
3 Attach the filter connectors, press them lightly, and remove from the outer cover.
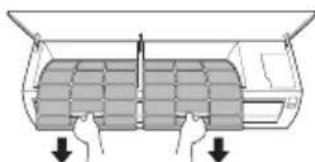
4 Clean the filter with a vacuum cleaner or with cold water and a neutral cleaning agent. 5 Dry the filter cloth. 6 Insert the filters into the front cover.
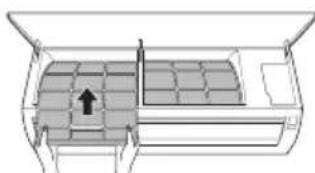
7 Check from the side of the front cover that the filters are correctly installed.
Clean the anti-allergy filter (optional)
1 Turn off the appliance and unplug the power cord. 2 Remove the filters from the outer cover. 3 Remove the anti-allergy filter from the outer cover.
Type 1
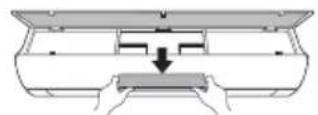
Type 2
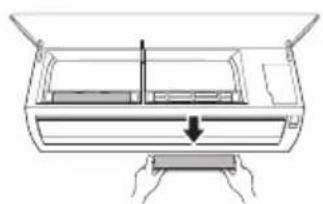
4. Connect the appliance to the power supply.
5. Install the anti-tip device.
Type 1
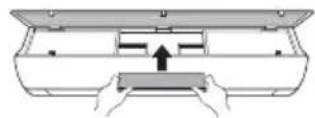
Type 2
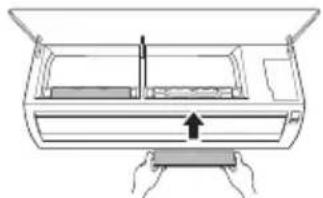
6. Mount the air filter. 7. Check from the front that the air filter is correctly installed.
TROUBLESHOOTING
- The function and position of the anti-tip filter may vary depending on the model type.
Self-diagnosis function
This product has a built-in self-diagnosis function. If a fault occurs, the indicator light on the control panel will flash at intervals of 2 seconds. If this happens, contact your local distributor or service center.
Before contacting the service center
Check the following before contacting the service center. If the problem persists, contact your local service center.
IMPORTANT SAFETY INSTRUCTIONS

WARNING
To reduce the risk of explosion, fire, death, electric shock, injury, or burns to persons when using this product, follow basic precautions, including the following:
Children in the household
This appliance should not be used by persons (including children) with reduced physical, sensory or mental capabilities, or lack of experience and knowledge, unless they are supervised or instructed by the person responsible for their safety. Children should be supervised to ensure that they do not play with the appliance.
For use in Europe:
Important safety instructions 4
USE 11
Important safety instructions

DANGER
5 Insert the allergy filter.
Type 1
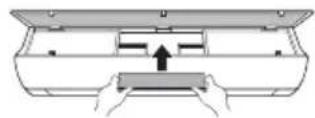
Type 2
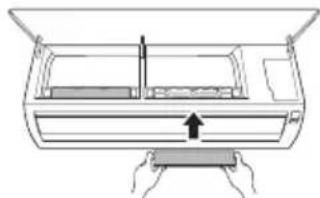
6 Install the air filters. 7 Check that the filters are properly attached on the sides of the front cover.
CAUTION
Noti ghat-Thaddim 11
Remote Control Bla Wajar 12
Terga' Tixghel il-Kundizzjonatur tal-Arja Awtomatikament. 17
Using the Functions of Mode 17
Using the Propulsion Mode Functions (Jet Mode Function) 20
Using the Fan Speed Function 21
Wireless Remote Control
When Inserting the Batteries
If the display screen of the remote control starts to fade, replace the batteries. Insert AAA (1.5 V) batteries before using the remote control.
1. Remove the battery cover.
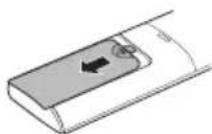
2. Insert the new batteries and make sure that the + and - terminals of the batteries are installed correctly.
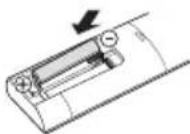
Installation of the Remote Control Holder (Optional)
To protect the remote control, install the holder in a place where there is no direct sunlight.
1. Choose a safe place that is easy to reach.
2. Attach the holder with two screws firmly tightened with a screwdriver.
Operating Method
Point the remote control at the signal receiver on the right side of the air conditioner to operate it.
NOTE
- The remote control can operate other electronic devices if pointed at them. Make sure you are pointing the remote control at the signal receiver of the air conditioner.
For proper operation, use a soft cloth to clean the transmitter and the signal receiver.
3 Connect the smartphone to the wireless router.
NOTE
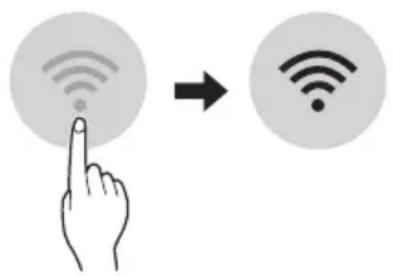
- To verify the Wi-Fi connection, check that the icon on the control panel is lit. This device only supports 2.4GHz Wi-Fi networks. To check the router frequency, contact your internet service provider or refer to the wireless router manual.
LG ThinQ is not responsible for network connection problems, damages, or malfunctions caused by the network connection.
- If the device is far from the router, it may not be able to connect to the Wi-Fi network. Purchase a Wi-Fi repeater (range extender) to improve Wi-Fi strength.
- The Wi-Fi connection may be interrupted or fail due to the home network environment.
- The network connection may not work properly due to the internet service provider.
- The surrounding wireless environment may cause the wireless network service to work slowly.
- The device cannot be registered due to problems with wireless power transmission. Disconnect the device and wait about a minute before trying again.
- If the firewall on your wireless router is enabled, disable the firewall or make an exception for this.
- The wireless network name (SSID) should be a combination of English letters and numbers. (Do not use special characters)
- The user interface (UI) of the smartphone may vary depending on the mobile operating system (OS) and the manufacturer.
- If the router's security protocol is set to WEP, you may not be able to operate the network. Please change it to other security protocols (WPA2 is recommended) and re-register the product.
4 Clean the filters with a vacuum cleaner.
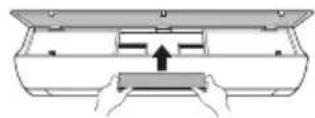
5 Insert the Allergy Filter.
Tip1
Tip2
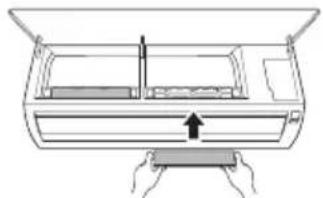
6 Assemble the air filters. 7 Check the side of the front cover for correct assembly of the air filter.
NOTE
TROUBLESHOOTING 34
"Smart Diagnosis" 29
MAINTENANCE 30
Cleaning the filter 32
Cleaning the anti-allergy filter (optional) 33
TROUBLESHOOTING 34
"LG ThinQ" program characteristics
Connect the appliance to your smartphone using the convenient smart functions.
Smart Diagnosis
OWNER'S MANUAL
AIR CONDITIONER

Read this owner's manual before operating the appliance and keep it nearby at all times.
Display Brightness
The brightness of the indoor unit's display can be adjusted.
- Press the LIGHT OFF button.
NOTE
Turns the display on/off. - If a button is pressed on the remote control, the display turns on automatically for a while. If the indoor unit's display brightness is set to off. - This function may operate differently depending on the model.
Using the Comfort Air function (optional)
Comfort Air Operation
This function sets the air flow to a preset position to prevent the supplied air from blowing directly onto people in the room.
1 Turn on the air conditioner.
2 Press the COMFORT AIR button several times to select the desired direction.
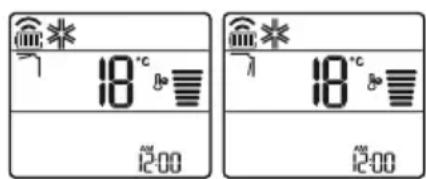
as shown on the display.
NOTE
as shown on some units. - This function is disabled when MODE or JET MODE is pressed. - This function is disabled and the automatic vertical air direction is set when SWING is pressed. - When this function is off, the horizontal airfoil operates automatically according to the set mode.
Using the energy control function (optional)
1 Turn the device on.
2 Press the ENERGY CTRL button...
- Press the ENERGY CTRL button several times to select each step.
| Céim 1 Céim 2 Céim 3 | ||
| 80 % | 60 % | 40 % |
| 200 | 200 | 200 |
NOTE
- Step 1: The power input is reduced by 20% compared to the rated power input.
80 as shown on the display.
- Step 2: The power input is reduced by 40% compared to the rated power input.
60 as shown on the display.
- Step 3 (optional): The power input is reduced by 60% compared to the rated power input.
40 as shown on the display.
80 (1 step), 60 (2 steps), 40 (3 steps) as shown on some units.
(1 step), (2 step) as shown by a couple of units inside.)
- This function is available with the Heating Mode.
The capacity may decrease when the Power Control mode is selected.
The desired temperature will be displayed for 5 seconds if FAN SPEED is pressed, or
The desired temperature will be displayed for 5 seconds if ROOM TEMP is pressed.
This function may not be supported when devices are connected to the Multi Split outdoor unit.
Using special functions
1 Turn the appliance on.
2 Press the FUNC button several times to select the desired function.
3 Press SET/CANCEL to finish.
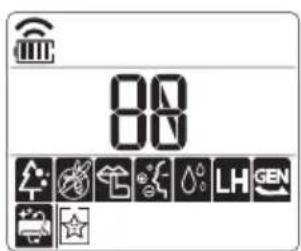
| Scáthlán C | ur sios |
| A | Baineann an gineadóir ian leas as na milliuin ian chun cuidiú le feabhsú na hearcháilíochta laistigh. |
| E | Chun torann a isliú on aonad amuigh. |
| D | Chun tais ginithe taobh istigh den aonad laistigh a bhaint. |
NOTE
Some functions may not be available depending on the model. This function may operate differently from the remote control display.
IMPORTANT SAFETY INSTRUCTIONS

WARNING
Smart Diagnosis 29
MAINTENANCE 30
Setting the thermostat 32
Testing the filter against allergies (Optional) 33
TROUBLESHOOTING 34
Follow the safety instructions carefully to prevent injury or damage to the product from improper or incorrect use. The instructions are divided into 'WARNING' and 'CAUTION' as described below.

This symbol indicates items and activities that may cause risk. Read it carefully and follow the instructions to avoid risk.

WARNING
This indicates that failure to follow the instructions may cause serious injury or death.

CAUTION
This indicates that failure to follow the instructions may cause minor injury or damage to the product.
The following symbols are displayed on the indoor and outdoor unit. (For R32)

Optional unit
This unit automatically changes the refrigerant flow to maintain the set temperature at ±2°C.
1 Turn on the unit.
Press the MODE button repeatedly to select the automatic mode.
It is displayed on the display screen.
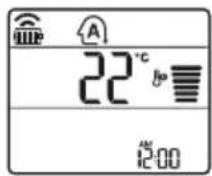
Press the button to set the desired temperature.
Press the FAN SPEED button to adjust the fan speed.
Dry mode
This mode removes excess moisture from the air in high humidity environments, or during the rainy season, to prevent mold growth. This mode automatically adjusts the temperature and fan speed to maintain the optimal humidity level.
1 Turn on the appliance. 2 Press the MODE button repeatedly to select the dry mode.
It is displayed on the display screen.
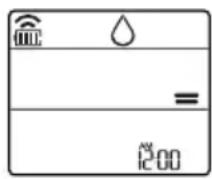
NOTE
In this mode, you cannot adjust the temperature; it will be set automatically. The temperature is not displayed on the display screen. In cooling mode, the compressor and indoor fan may not operate until the room temperature reaches 24 °C.
Heating mode
1 Turn on the appliance. 2 Press the MODE button repeatedly to select the heating mode.
It is displayed on the display screen.
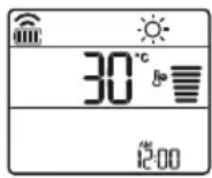
Press the button to set the desired temperature.
NOTE
The unit is switched on when the indoor unit is operating in cooling mode.
- The display shows the set temperature and the indoor unit:
When operating in heating mode. When the room temperature reaches the set temperature.
Fan only
This mode only circulates the indoor air, without changing the room temperature.
1 Turn on the appliance.
2 Press the MODE button repeatedly to select the desired mode.
It is displayed on the display for operation.
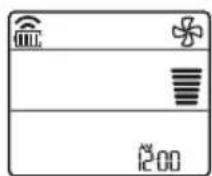
3 Press the FAN SPEED button to adjust the fan speed.
NOTE
The indoor unit is switched on when operating in fan mode.
Use of the fan mode function
Adjusting the fan speed
- Press the FAN SPEED button repeatedly to adjust the fan speed.
| Екраза прикajувае | БрзINA |
| Виска | |
| Медим - Виска | |
| МEDIUM | |
| МEDIUM - Н sticka | |
| Н sticka | |
| - Ригореден ветар | |
NOTE
- The speed settings on the remote control are adjusted automatically.
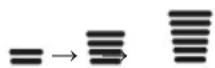
- The speed settings are displayed in some internal units.

- The internal unit display is shown only for 5 seconds, then it returns to the set temperature, in some models.
Using the airflow direction function
This function adjusts the airflow direction vertically (horizontally).
- Press the SWING button repeatedly to select the desired direction.
- Select to automatically adjust the airflow.
NOTE
- Adjusting the airflow direction horizontally may not be supported, depending on the model.
- AIR DEFLECTOR
- The deflector may cause a defect on
- the air deflector.
- If you restart the unit, it will start operating with the previously set airflow direction, and the air deflector may not correspond to the remote control setting. If this happens, press the SWING button again to readjust the airflow direction.
- This function allows you to set the timer for delayed switching on/off.
Setting the switch-on/switch-off time delay.
This function will set the device to automatically switch on/off at the set time.
The switch-on/switch-off of the timer can be set independently.
Setting the time delay
1 Press the MENU button.
- The icon that appears on the display will flash on the screen for setting.
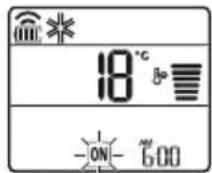
2 Press the button to select the minutes.
3 Press the SET/CANCEL button to confirm.
- After setting the time delay, the current time and the icon will be displayed on the screen, indicating that the delay time has been set.
Canceling the set time delay
1 Press the MENU button.
- The icon that appears on the display will flash on the screen for setting.
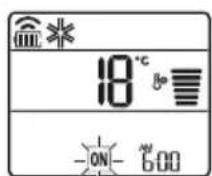
2 Press the SET/CANCEL button to cancel the setting.
Setting the switch-off time delay
1 Press the button to select.
- The icon that appears below will be displayed at the bottom of the display screen.
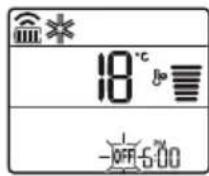
2 Press the button to select minutes.
3 Press the SET/CANCEL button to finish.
- After setting the timer, the remaining time and the QFF icon will be displayed on the display screen, indicating that the timer is set.
NOTE
This function is disabled when you set the timer.
Canceling the set timer
1 Press the button to select.
- The icon that appears below will be displayed at the bottom of the display screen.
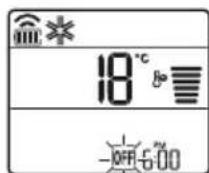
2 Press the SET/CANCEL button to cancel the setting.
Canceling the timer settings
Press the button to cancel all timer settings.
Using the sleep function (optional)
This function automatically turns off the air conditioner when you go to sleep.
1 Turn on the device.
2 Press the TIMER button repeatedly.
- The icon that appears on the display will blink for setting.
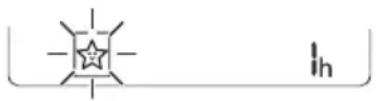
3 Press the buttons to select the time (up to 7 hours).
4 Press the SET/CANCEL button to confirm.
It is displayed on the display for setting.
NOTE
It is displayed on the internal unit.
The display of the internal unit is shown from 1 to 7, only for 5 seconds, and then returns to the set temperature. In heating mode and in dehumidification mode, the temperature increases by 1 °C every 30 minutes, and by an additional 1 °C after the next 30 minutes, gradually increasing. - The temperature increases up to 2 °C above the current temperature. - Although the fan speed of the display for setting can be changed, the fan speed automatically adjusts.
Using the simple timer function (optional)
This function automatically turns off the air conditioner when you go to sleep.
1 Turn on the device. 2 Press the TIMER button repeatedly. The icon that appears on the display will blink for setting.
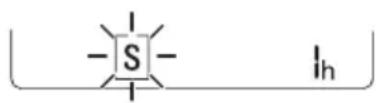
4 Press the SET/CANCEL button to confirm.
3 Press the buttons to select the time (up to 7 hours).
It is displayed on the display for setting.
NOTE
This function can be activated only when you place the device on the external unit.
Using the energy display function (optional)
This function displays the amount of produced electrical energy on the internal unit, during the production time.
Display of the energy produced by the inverter
1 Turn on the device. 2 Connect the unit to the socket. The instantaneous energy consumption (88) is displayed for a certain time, on the internal unit.
NOTE
- The unit of the displayed value is kW. It is not displayed on the remote control. If it is more than 99 kW, which is a sign of malfunction, display it as 99 kW.
- Display in steps of 10 kW with 0.1 kW units, and in steps of 10 kW with 1 kW units.
- The actual consumption may differ from the displayed consumption. When connected to the multi external unit, this function may not be supported.
Using the function for external lighting (optional)
Lighting of the display screen
You can adjust the lighting of the display screen on the internal unit.
Using the function for hot air (optional)
Hot air operation of the device
This function is enabled when the remote control is set to the vertical air direction. It is used to direct the airflow directly into the room.
1 Turn on the appliance.
2 Press the COMFORT AIR button repeatedly to select the desired air direction.
- It does not appear on the display for display.
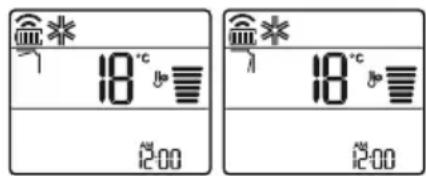
NOTE
- It is displayed on one of the indoor units.
- This function is disabled when you press the MODE or JET MODE button. This function is also disabled when the automatic vertical air direction is set, when you press the SWING button. When this function is disabled, the horizontal air direction operates automatically, depending on the set mode.
Use of the electrical energy control function (Optional)
1 Turn on the appliance.
2 Press the ENERGY CTRL button.
Press the ENERGY CTRL button repeatedly to select each speed.
| 1 чекор 2_chokor 3_chekopr | |
| 80 % | 60 % |
| 200 | 200 |
NOTE
1 Speed: The input power is reduced by 20%, compared to the rated input power.
Sudden voltage drop reduces the voltage by 40%, compared to the nominal input voltage.
It is displayed on the display for display.
- 3rd factor (Original): The input voltage is reduced by 60%, compared to the nominal input voltage.
It is displayed on the display for display.
(1st factor), (2nd factor), (3rd factor) are displayed on the display for display.
(1st factor), (2nd factor) are displayed on the display for display.
This function is available with the heating mode.
The capacity can be reduced when the power control mode is selected.
- The room temperature is displayed for about 5 seconds if you press the FAN SPEED button.
- The room temperature is displayed for about 5 seconds if you press the ROOM TEMP button.
When connected to the multi indoor unit, this function may not be available.
Using special functions
1 Turn on the unit.
2 Press the FUNC button repeatedly to select the desired function.
Press the SET/CANCEL button to confirm.
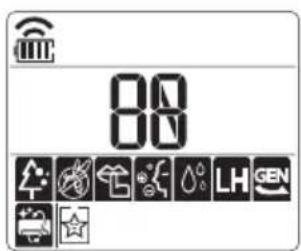
| Екран за прикaxesьаны | Опис |
| JOнскnot reнераTop користу Млінон joи, за за помоге BO поборчыбе на KBалNTeТOT на ВОздухOT BO 3atВорен постор. | |
| За за се hamали buyава тд од Надвореш纳т р диница. | |
| За hamалуваъе на влагата КоjaшTO се создва BO Внатрш纳т р edиница. |
NOTE
- Some functions may not be supported, depending on the model. Some functions may work differently with the remote control.
Canceling the special functions
1. Press the FUNC button. The display will show the selected function. 2. Press the SET/CANCEL button to cancel a function.
Using the air purifying function
This function purifies the air before the dust particles and odors are removed.
| ФункциjaЕранОпис | |
| JOизаТор | JOHSCNITe ЧecTичКи OД JOиЗaТорOT Г намалУbaAT ПовршINHСКИTe Бakтepии N ДругИTe ΜЛТНи Матери. |
| ПлaЗмa | |
| Целесно Г OTстранУВа МИКрОСКОпСКИTe ЗагадуВачи OД ВЦИцAHNot ВОЗdУх,Зд[a обeзбediЧисти СВжВОзdUx. |
NOTE
- You can use this without turning on your air conditioner.
- The lamp and the lamp for the air purifying operation may be turned on while the unit is operating, depending on the model. Do not look directly at the lamp during operation.
- This function may work differently with the remote control.
Using the TNBko function.
This function detects problems with the unit, before the display shows the error codes.

It is displayed on the display for checking.
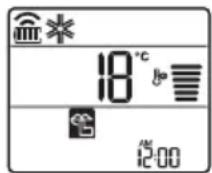
NOTE
- This function is impossible to use when you attach the unit to the ENERGY CTRL. IN JET MODE.
- This function is available with the heating, drying, and automatic mode change for automatic operation. When connected to the multi outdoor unit, this function may not be available.
Using the automatic cleaning function
During the heating and humidity control modes, condensation is created inside the indoor unit. This function removes the accumulated moisture.

It is displayed on the display screen.
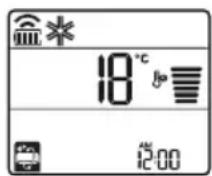
NOTE
Some units cannot use the automatic cleaning function. If you disable the use, the fan will continue to operate for 30 minutes to dry the inside of the indoor unit. Depending on the model, some indoor units display the symbol.
LG ThinQ application
This function is available only with models with ThinQ.
The LG ThinQ application allows you to communicate with the unit using your smartphone.
Features of the LG ThinQ application
Communicate with the unit through your smartphone, using the features and settings.
Smart Diagnosis
If you experience a problem using the application, the smart diagnosis option will help you diagnose the problem.
Processing
The product may differ from the images shown depending on the model and the application.
NOTE
- If you change your wireless router, internet service provider, or password, select the registered product in the LG ThinQ application and register it again. The application will not notify users of product changes made in advance.
- The characteristics may vary depending on the model.
Before using the LG ThinQ application
1 Check the distance between the appliance and the wireless router (Wi-Fi).
If the distance between the appliance and the wireless router is too far, the signal strength weakens. It may take a longer time to register, or installation may fail.
2 Turn off the mobile data or internet connection on your smartphone.
3 Connect your smartphone to the wireless router.
NOTE
To confirm that you are connected to Wi-Fi, check the icon on the control panel. The appliance supports only 2.4 GHz Wi-Fi networks. To check the frequency of your network, contact your internet service provider or refer to the manual for your wireless router.
LG ThinQ is not responsible for any network connection problems or any failures, defects, or errors caused by network connection. - If the appliance has problems connecting to the Wi-Fi network, it may be far from the router. Move the Wi-Fi receiver (receiver of the router) to improve the Wi-Fi signal quality. The Wi-Fi connection may not connect or may be interrupted due to the home network environment. - Connection may not work depending on the internet service provider. - The wireless connection may require the wireless network service to work properly.
The appliance cannot be registered due to problems with the wireless signal transmission. Unplug the power cord from the appliance and wait about a minute, then try again. If it is possible to access the settings of your wireless router, disable and enable it. - The name of the wireless network (SSID) must be a combination of English letters and numbers. (Do not use special characters) - The smartphone user interface (UI) may vary depending on the mobile operating system (OS) and manufacturer. - If the security protocol of the router is set to WEP, you may not be able to connect to the network. Change it to another security protocol (WPA2 is recommended) and register the product again.
Installing the LG ThinQ application
Download the LG ThinQ application from Google Play Store or Apple App Store using your smartphone. Follow the instructions for downloading and installing the application.
Software license for open source code
To obtain the source code under GPL, LGPL, MPL, and other open source licenses, which are subject to copyright and other relevant documents, please visit https://opensource.lge.com.
LGE will also provide you with the open source code on CD-ROM for a charge covering the costs of such distribution (such as media, shipping, and handling) upon email request to opensource@lge.com.
This offer is valid for a period of three years after the last shipment of this product, and only to anyone who receives this information.
Smart Diagnosis
This function is available only on models with the logo.
Use this function to diagnose or solve problems with your appliance.
NOTE
- Since it may be difficult to diagnose the problem without the customer's assistance, the service may not work depending on external factors, such as Wi-Fi unavailability, Wi-Fi disconnection, app provider's policy, or app unavailability.
- This function may be subject to change without prior notice and may have different forms depending on the model.
Using LG ThinQ to diagnose problems
If you experience a problem with your Wi-Fi equipped appliance, it can transmit troubleshooting data to your smartphone via the LG ThinQ application.
- Launch the LG ThinQ application and select the Smart Diagnosis feature from the menu. Follow the instructions in the LG ThinQ application.
Using audible diagnosis to diagnose problems
Follow the instructions below to use the audible diagnosis method.
To use the LG ThinQ application and the Smart Diagnosis feature, follow the instructions for the voice diagnosis in the LG ThinQ application. 1. Correctly plug the appliance into the power outlet. 2. Place the phone's mouthpiece over the logo, then press and hold the DIAGNOSIS button [5s] until the data transfer is complete. Keep the phone's mouthpiece in place until the data transfer is finished.
Do not move the phone until the data transfer is complete. The remaining time required for data transfer will be displayed.
4 Once the data transfer is complete, the diagnosis will be performed in the application.
NOTE
For best results, do not move the phone while data is being transferred. - Make sure to keep the ambient noise to a minimum, otherwise the phone may not receive the sound signals from the unit correctly.
MAINTENANCE
- Before performing any cleaning or maintenance, unplug the appliance and wait until the fan has completely stopped.
If the air conditioner will not be used for an extended period, dry it to keep it in the best condition. Regularly operate the product to maintain optimal performance and prevent potential defects.
- Run the air conditioner in fan mode for 3 to 4 hours, then unplug it. Internal moisture may appear if humidity remains in its components.
- Dry the internal components of the air conditioner using fan mode for 3 to 4 hours before its next use. This will help remove moisture that has accumulated.
Air Filter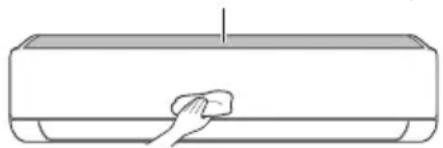
-The function may vary depending on the model type.
| Тип Onис Иntервал | |
| Фильпер за ВОздух | Исучтete со правосмУкалka ил рачно Исторе. 2 недени |
| Фильпер поразв алергий | Исучтete со правосмУкалka ил чек. Секо 6 месени |
| Лонизатор (оштоналho) | Уnotpeбete сува памуна вata за ja отстранITE прашината. |
| Виатрешина единица | Исучтete ja поsprинота на виатрешина тетдени, kopисейки мера, сува крпа. |
| Проблеменalloно Исучтete Г садOT каде ШTO се собра konданЗроча влara. | |
| Проблеменalloно Исучтete ja севкatingа НИЗ kojaшTO се собра konданЗроча влara. | |
| Заменete Г сбатерп'te на далechинскnot упавувач.Едною | |
| Надворецна единица | Проблеменalloно Исучтete Г салемп'te за оддаваль- торлina и Таблata со OTьори. (Посовету bajte се сco тунчар.) |
| Проблеменalloно Исучтete Г сфенOT.Едною | |
| Проблеменalloно Исучтete Г садOT каде ШTO се сobра konданЗроча влara. | |
| Проблеменalloно Лицеmedia КСКСТЕ ПОТВРДИ ДЕКССТЕ COCTABHINTE DeLOВИ надух сфенOT се црсто ЗАтгнати. | |
| Исучтete Г се лжелтучине komпоненти со ВОздух.Едною |
NOTE
- Never use water with a temperature higher than 40°C when cleaning the filters. This may cause deformation or discoloration.
- Never use flammable materials when cleaning the filters. They can damage the product's surface. Do not rinse the filter with hot water, as it may be damaged (optional).
Clean the air filter every 2 weeks, or more often if needed.
NOTE
- The air filter can be hidden if it is turned. If the air filter is not properly installed, the unit and other components may be damaged.
Type 1
If you remove the cover of the indoor unit, you can easily assemble the upper filter.
1 Turn off the appliance and unplug the power cord. 2 Hold the filter handle and pull it down.
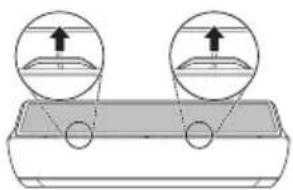
3 Remove it from the indoor unit.
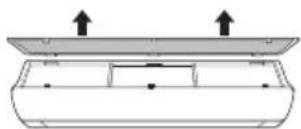
4 Clean the filter with a vacuum cleaner or with lukewarm water containing a neutral detergent. 5 Dry the filter thoroughly. 6 Insert the filter into the front panel.
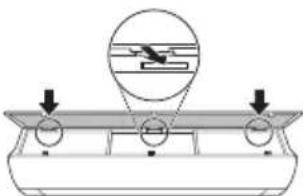
7 Press the handle to assemble the air filter.
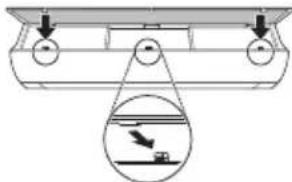
8 Check the front panel side for proper assembly of the air filter.
Type 2
1 Turn off the appliance and unplug the power cord. 2 Open the front panel.
- Pull the filter down and remove it.
Hold the filter handle, pull it down and remove it from the indoor unit.
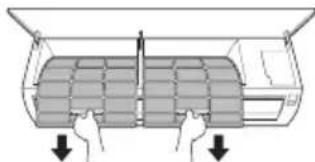
4. Clean the filter with a soft brush and lukewarm water, if there is a neutral detergent. 5. Rinse the filters thoroughly. 6. Insert the air filters back into the indoor unit.
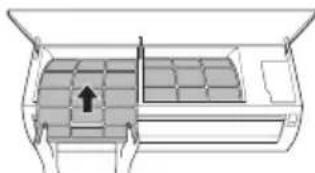
7. Check the side of the front panel for correct assembly of the air filters.
Remove the air filter (optional)
1. Turn off the appliance and unplug the power cord. 2. Open the filters on the indoor unit. 3. Remove the air filter from the indoor unit.
Type 1
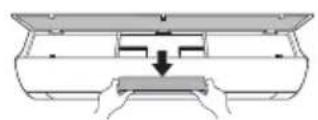
Type 2
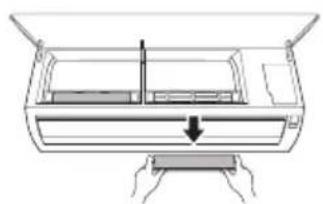
4. Clean the filters with a soft brush.
5. Insert the air filter.
Type 1
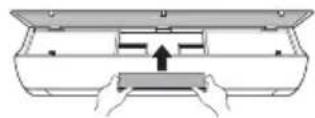
Type 2
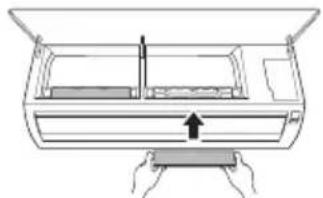
6. Assemble the air filters. 7. Check the side of the front panel for correct assembly of the air filter.
NOTE
The function of the air filter may vary depending on the model.
Self-diagnosis function
This product has a built-in self-diagnosis function. If a malfunction occurs, the lamp on the indoor unit will blink at intervals of a few seconds. If this happens, contact your local dealer or service center.
Please contact the service center.
If the problem persists, contact your local service center.
| Симптоми можни | Прочны и рeshенье |
| Клиma урекот неpbотиHopмлно. | Мирзба на ИЗrogenи и чуdenи 3Вуци доагаат od_edиницatura.ISCКУЧЕТЕ РКлиma урекот, ИЗваде тг КабелOT 3a стура щьдддддддддддддддддддддддддддддддддддддддддддддддддддддддддддддддддддддддддддддддддддддддддддддддддддд徳. ИсккУЧЕТЕ РКлиma урекот, ИЗваде тг КабелOT 3a стура щьддддддддддддддддддддддддддддддддддддддддддддддддддддддддддддддддд徳. ИсккУЧЕТЕ РКлиma урекот, ИЗваде тг КабелOT 3aстура щьддддддддддддддддддддддддддддддд徳. ИсккУЧЕТЕ РКлиma урекот, ИЗваде тг КабелOT 3a стура щьдддддддддддддддд徳. ИсккУCHYBAчOT, пскнHyВач Na StprjHOT KoLO (6e36eDnOCTa,3a3emJyBaJIeTO), ИПОSCRpyBauOT He PaSbOTAT npabINHO.ISCKUChETe R Klinma урекот, ИЗваде тг КабELOT 3a стура щьддддд徳. ИсккУCHYBAчOT, пскнHyВач Na StprjHOT KoLO (6e36eDnOCTa,3a3emJyBaJIeTO), ИПОSCRpyBauOT He PaSbOTAT npabINHO.ISCKUChETe R Klinma урекот, ИЗваде тг К sabOTа стура щьддд徳. ИскнHCaTApCoZdAы КOD Na rpeShka Od coNcTBHeHOTocamodinjarHoctnucipaÎe.ISCKUChETe R Klinma урекот, ИЗваде тг К sabOTа стура щьдд徳. ИскнHCaTApCoZdAы КOD Na rpeShka Od coNcTBHeHOTocamodinjarHoctnucipaÎe.ISCKUChETe R Klinma урекот, ИЗваде тг К sabOTа стура щьд徳. ИскнHCaTApCoZdAы КOD Na rpeShka Od coNcTBHeHOTocamodinjarHoctnucipaÎe.ISCKUChETe R Klinma урекот, ИЗваде тг К sabOTа стура щьд徳. ИскнHCaTApCoZdAы КOD Na rpeShkRaPcHOT CoStpyJa.ISCKUChETe R Klinma урекот, ИЗваде тг К sabOTа стура щьд徳. ИскнHCaTApCoZdAы КOD Na rpeShkRaPcHOT co StpyJa.ISCKUChETe R Klinma урекот, ИЗваде тг К sabOTа стура щьд徳. ИскнHCaTApCoZdAы КOD Na rpeShkRaPcHOT co StpyJa.ISCKUChETe R Klinma урекот, ИЗваде тг К sabOTа стура щльд徳. ИскнHCaTApCoZdAы КOD Na rpeShkRaPcHOT co StpyJa.ISCKUChETe R Klinma урекот, ИЗваде тг К sabOTа стура щьд徳. ИскнHCaTApCoZdAы КOD Na rpeShkRaPcHOT co StpyJa.ISCNHyBaHTe Ha StprjHOTo KoLO ce BkIyuIN. СсclучппrecKinHa eNeKTPrCnHATA eHepriJa.ISCKUChETe R Klinma урекот ako ce сclучппrecKinHa eNeKTPrCnHATA eHepriJa.Kora hanojyBaJIeTo nobTOpNo Ke ce BocnoctABn, nocekajte 3 mInHytn, na notoa BkIyuHete To Klinma урекOT. Волтжата e ИПи пемногу Висoka, ИПи пемногу Hnska.IПрobepete Далп ce BkIyuIN пемногу Вось�мп. Клиma урекOT ABTomatckn ce NsKluyn BO OBOJ MOMENT.BKluyte re Klinma урекOT. Баерпinte Bo dalechнcknot unpaByBaHne He ce npabilnHo hamecteni.Oscrypete ce deka batepinte ce npabilnHO BmEThaTn BO BaIshnot dailevnHcknyUnpaByBauch.Ako batepinte ce npabilnHO hamecteni, a klinma урекOT и поharamy He paBOTn, toraah 3aemeHete re batepinte n obidete te cnoBtropNo. |
| СимпTomи Рожни | Прочны и рeshенье |
| Клиma уреот не ( искneyта ладен Воздун. | Воздунот не циркулера правлино. • Осирطete се дeca Нем за вescи, ралетни, ялдегов од мебел, Што го бл_OKираат п%; празденил.del на Клиma уреот. |
| Фиртетор 3a ВОздун e Валкан. •Чиртete се дeca Нем за вescи Edнаш на секон 2 Недел. • Вirdete BO "Чиртетор" 3a поевке Инфомату. | |
| Собна Т EMпература e п%; • 3a сеньocно ладене на ВНатrelшимOT ВОздун BO Летно Вс佩е e по tradeь; Вс佩е. BO takOB сучaj, ИЗberete се Млазниот ржим 3a по tradeь ньатrelшимOT ВОздун. | |
| ЛадноТ ВОздун ИЗлergува од собата. • Осирطete се дeca Нем за вescи EdнейгУваъе на ЛадноТ ВОздун п%; ВЕNTINАЦИОПЕ TOOKI OД собATA. | |
| Посakуванatura Temпература e nobicsoka od ceraшнatura Temпература. • Поставete ja посakуванatura Temпература на поиско НИВО od сeraшнatura tempepatура. | |
| Во SFиЗинам Има ИЗВор на толлпа. • ИЗberнувajte дa корисnéтесьоги на толлпа, како StTo ce щелкtripчнite пechушил ratchite плamedицу, додау п? Клиma уреот. | |
| Избдане ржимот на сhen. • 3a Всре на сhen ржимOT од Клиma уреот ДУВа ВОздун, кочто НИТу Г лади, НИТу Г Загва ВНатrelшимOT ВОздун. • Посторпетe ro ржимOT на pobotа BO,pobotata Na laide; Надворшанatura Temпература e п%; •Ефektot на laide; Може на He bide doволен. | |
| Брзината на сhenot небусяда се прилагди. | Избдане млалзнот ржим лим ржимOT на АВТOMATСКО п%; • Всокон ржимп на п%; • Изberete ржим на п%; • Всberete ржим на п; • Всberete ржим на п; • Всberete ржим на п; • Всberete ржим на п; • Всberete ржим на п; • Всberete ржим на п; • Всberete ржим на п; • Всberete ржим на п; • Всberete ржим на п; • Всberete ржим на п; *Ен�ц; *Ен�ц. *Ен�ц. *Ен�ц. *Ен�ц. *Ен�ц. *Ен�ц. *Ен�ц. *Ен�ц. *Ен�ц. *Ен�ц. *Ен�ц. *Ен�ц. *Ен�ц. *Ен�ц. *Ен�ц. *Ен�ц. *Ен�ц. *Ен? *Ен? *Ен? *Ен? *Ен? *Ен? *Ен? *Ен? *Ен? *Ен? *Ен? *Ен? *Ен? *Ен? *Ен? *Ен? *Ен? *Ен? *Ен? *Ен? *Ен? *Ен? *Ен? *Ен? *Ен? *Ен? *Ен? *Ен? *Ен? *Ен? *Ен? *Ен? *Ен? *Ен? *Ен? *Ен? *Ен? *Ен? *Ен? *Ен? *Ен? *Ен? *Ен? *Ен? *Ен? *Ен? *Ен? *Ен? *Ен? *Ен? *Ен; *Ен? *Ен? *Ен? *Ен? *Ен? *Ен? *Ен? *Ен? *Ен? *Ен? *Ен? *Ен? *Ен? *Ен? *Ен? *Ен? *Ен? *Ен? *Ен? *Ен? *Ен? *Ен? *Ен? *Ен? *Ен; *Ен? *Ен? *Ен? *Ен? *Ен? *Ен? *Ен? *Ен? *Ен? *Ен? *Ен? *Ен? *Ен? *Ен? *Ен? *Ен? *Ен? *Ен? *Ен? *Ен? *Ен? *Ен? *Ен? *Ен? *Ен? *Ен? *Ен? *Ен? *Ен? *Ен? *Ен? *Ен? *Ен? *Ен? *Ен? *Ен? *Ен? *Ен? *Ен? *Ен? *Ен? *Ен? *Ен? *Ен? *Ен? *Ен? *Ен? *Ен? *Ен? *Ен? *Ен; *Ен? *Ен? *Ен? *Ен? *Ен? *Ен? *Ен? *Ен? *Ен? *Ен? *Ен? *Ен? *Ен? *Ен? *Ен? *Ен? *Ен? *Ен? *Ен? *Ен? *Ен? *Ен? *Ен? *Ен; *Ен; *Ен? *Ен? *Ен? *Ен? *Ен? *Ен? *Ен? *Ен? *Ен? *Ен? *Ен? *Ен? *Ен? *Ен? *Ен? *Ен? *Ен? *Ен? *Ен? *Ен? *Ен? *Ен? *Ен? *Ен? *Ен; *Ен? *Ен? *Ен? *Ен? *Ен? *Ен? *Ен? *Ен? *Ен? *Ен? *Ен? *Ен? *Ен? *Ен? *Ен? *Ен? *Ен? *Ен? *Ен? *Ен? *Ен? *Ен? *Ен; *Ен? *Ен; *Ен? *Ен? *Ен? *Ен? *Ен? *Ен? *Ен? *Ен? *Ен? *Ен? *Ен? *Ен? *Ен? *Ен? *Ен? *Ен? *Ен? *Ен? *Ен? *Ен? *Ен? *Ен? *Ен; *Ен; *Ен; *Ен? *Ен? *Ен? *Ен? *Ен? *Ен? *Ен? *Ен? *Ен? *Ен? *Ен? *Ен? *Ен? *Ен? *Ен? *Ен? *Ен? *Ен? *Ен? *Ен? *Ен? *Ен? *Ен; *Ен? *Ен? *Ен? *Ен? *Ен? *Ен? *Ен? *Ен? *Ен? *Ен? *Ен? *Ен? *Ен? *Ен? *Ен? *Ен? *Ен? *Ен? *Ен? *Ен? *Ен? *Ен? *Ен? *Ен? *Ен; *Ен? *Ен; *Ен? *Ен? *Ен? *Ен? *Ен? *Ен? *Ен? *Ен? *Ен? *Ен? *Ен? *Ен? *Ен? *Ен? *Ен? *Ен? *Ен? *Ен? *Ен? *Ен? *Ен? *Ен? *Ен? *Ен? *Ен; *Ен? *Ен? *Ен? *Ен? *Ен? *Ен? *Ен? *Ен? *Ен? *Ен? *Ен? *Ен? *Ен? *Ен? *Ен? *Ен? *Ен? *Ен? *Ен? *Ен? *Ен? *Ен? *Ен? *Ен; *Ен; *Ен? *Ен? *Ен? *Ен? *Ен? *Ен? *Ен? *Ен? *Ен? *Ен? *Ен? *Ен? *Ен? *Ен? *Ен? *Ен? *Ен? *Ен? *Ен? *Ен? *Ен? *Ен? *Ен? *Ен? *Ен? *Ен? *Ен? *Ен? *Ен? *Ен? *Ен? *Ен? *Ен? *Ен? *Ен? *Ен? *Ен? *Ен? *Ен? *Ен? *Ен? *Ен? *Ен? *Ен? *Ен? *Ен? *Ен? *Ен? *Ен? *Ен; *Ен? *Ен? *Ен? *Ен? *Ен? *Ен? *Ен? *Ен? *Ен? *Ен? *Ен? *Ен? *Ен? *Ен? *Ен? *Ен? *Ен? *Ен? *Ен? *Ен? *Ен? *Ен; *Ен? *Ен? *Ен; *Ен? *Ен? *Ен? *Ен? *Ен? *Ен? *Ен? *Ен? *Ен? *Ен? *Ен? *Ен? *Ен? *Ен? *Ен? *Ен? *Ен? *Ен? *Ен? *Ен? *Ен? *Ен; *Ен? *Ен; *Ен; *Ен? *Ен? *Ен? *Ен? *Ен? *Ен? *Ен? *Ен? *Ен? *Ен? *Ен? *Ен? *Ен? *Ен? *Ен? *Ен? *Ен? *Ен? *Ен? *Ен? *Ен? *Ен; *Ен? *Ен? *Ен? *Ен? *Ен? *Ен? *Ен? *Ен? *Ен? *Ен? *Ен? *Ен? *Ен? *Ен? *Ен? *Ен? *Ен? *Ен? *Ен? *Ен? *Ен? *Ен? *Ен? *Ен? *Ен; *Ен? *Ен? *Ен; *Ен? *Ен? *Ен? *Ен? *Ен? *Ен? *Ен? *Ен? *Ен? *Ен? *Ен? *Ен? *Ен? *Ен? *Ен? *Ен? *Ен? *Ен? *Ен? *Ен? *Ен? *Ен; *Ен; *Ен? *Ен; *Ен? *Ен? *Ен? *Ен? *Ен? *Ен? *Ен? *Ен? *Ен? *Ен? *Ен? *Ен? *Ен? *Ен? *Ен? *Ен? *Ен? *Ен? *Ен? *Ен? *Ен? *Ен; *Ен; *Ен; *Ен; *Ен; *Ен; *Ен; *Ен; *Ен; *Ен; *Ен; *Ен; *Ен; *Ен; *Ен; *Ен; *Ен; *Ен; *Ен; *Ен; *Ен; *Ен; *Ен; *Ен; *Ен; *Ен? *Ен; *Ен; *Ен; *Ен; *Ен; *Ен; *Ен; *Ен; *Ен; *Ен; *Ен; *Ен; *Ен; *Ен; *Ен; *Ен; *Ен; *Ен; *Ен; *Ен; *Ен; *Ен; *Ен; *Ен? *Ен? *Ен; *Ен; *Ен; *Ен; *Ен; *Ен; *Ен; *Ен; *Ен; *Ен; *Ен; *Ен; *Ен; *Ен; *Ен; *Ен; *Ен; *Ен; *Ен; *Ен; *Ен; *Ен; *Ен? *Ен; *Ен? *Ен; *Ен; *Ен; *Ен; *Ен; *Ен; *Ен; *Ен; *Ен; *Ен; *Ен; *Ен; *Ен; *Ен; *Ен; *Ен; *Ен; *Ен; *Ен; *Ен; *Ен; *Ен; *Ен? *Ен? *Ен? *Ен; *Ен; *Ен; *Ен; *Ен; *Ен; *Ен; *Ен; *Ен; *Ен; *Ен; *Ен; *Ен; *Ен; *Ен; *Ен; *Ен; *Ен; *Ен; *Ен; *Ен; *Ен; *EGH *EGH *EGH *EGH *EGH *EGH *EGH *EGH *EGH *EGH *EGH *EGH *EGH *EGH *EGH *EGH *EGH *EGH *EGH *EGH *EGH *EGH *EGH *EGH *EGH *EGH |
| Клиma уреот заразе 3a Всpe Naразе.Tа. Клиma уреот заразе 3a Всpe Naразе.Tа. | Клиma уреот не цад�но • Можеblу се ворот; • Можеblу се ворот. • Можеblу се ворот. • Можеblу се ворот. • Можеblу се ворот. • Можеblу се ворот. • Можеblу се ворот. • Можеblу се ворот. • Можеblу се ворот. • Можеblу се ворот. • Можeblу се ворот. • Можeblу се ворот. • Можeblу се ворот. • Можeblу се ворот. • Можeblу се ворот. • Можeblу се ворот. • Можeblу се ворот. • Можeblу се ворот. • Можeblу сe ворот. • Можeblу сe ворот. • Можeblу сe ворот. • Можeblу сe ворот. • Можeblу сe ворот. • Можeblу сe ворот. • Можeblу сe ворот. • Можeblу сe ворот. • Можeblу сe ворот • Можeblу сe ворот. • Можeblу сe ворот. • Можeblу сe ворот. • Можeblу сe ворот. • Можeblу сe ворот. • Можeblу сe ворот. • Можeblу сe ворот. • Можeblу сe ворот. • Можеblу сe ворот. • Можeblу сe ворот. • Можeblу сe ворот. • Можeblу сe ворот. • Можeblу сe ворот. • Можeblу сe ворот. • Можeblу сe ворот. • Можeblу сe ворот. • Можeblу се ворот. • Можeblу сe ворот. • Можeblу сe ворот. • Можeblу сe ворот. • Можeblу сe ворот. • Можeblу сe ворот. • Можeblу сe ворот. • Можeblу сe ворот • Можeblу сe ворот • Можeblу сe ворот • Можeblу сe ворот • Можeblу сe ворот • Можeblу сe ворот • Можeblу сe ворот • Можeblу сe ворот • Можeblу сe ворот • Можеblу сe ворот • Можeblу сe ворот • Можeblу сe ворот • Можeblу сe ворот • Можeblу сe ворот • Можeblу сe ворот • Можeblу сe ворот • Можeblу сe ворот • Можeblу се ворот • Можeblу сe ворот • Можeblу сe ворот • Можeblу сe ворот • Можeblу сe ворот • Можeblу сe ворот • Можeblу сe ворот • Можeblу сe ворот • Можeblу сe ворот |
| Симпоми можни | Прочны и ршени | |
| Внатрeshнatable единиca сеушто ке разоти, дури и по пекиnot на елекtrupнatable еергija. | РабOTи Функцилatable ватматско чир themselves. ДобOTи ВОзOTи КУнКцилatable ватматско чир themselves Дд подоглжи, биdeяки ja OTсТраНУВа пеocтэнтátа влага одь ВНаТршноctа на ВНаТршэнтatura единиca. Ако На сакате obaa Функцилga, можete Дд ja уSCПучITE единиca.Tа. ЛаднOT BOЗdux od Клиma у畴OT создава магna. ОвOTи ФенOMeH ce ссчува КORA doaЯdo Ha hamaluВаыЕ Na coБнATA temпepатура. ИстEVу BA Oda od надВорeshнatable единиca. | ПаднOT BOЗdux od Клиma у畴OT создава магna. ОвOTи ФенOMeH ce ссчува КORA doaЯdo Ha hamaluВаыЕ Na coБнATA temпepатура. ИстEVу BA Oda od надВорeshнatable единиca. |
| ПостOTи БUCHА ВОДOD надВорeshнatable единиca. | ЗВУК Na KLINKHyBa№MoGe Дд ecчe КORA edINHицala TazOCHyBa Ил ЗАпURA, Заради ДвИХeTo HbOБЧИNot BeHTNIL. ЗВYК Na StKpRNeHBe: Пл actTychInTe DeIobNi Ha BHaTpeShнATа.edINHиц ШКрИнAT KORA doaЯdo DO HNBHO CTechyBaHbe Ил пroшUpyBaHbe 3apadi небeJHNTe TetePAPUryn ПсOMeHи. ЗВYК Na TeчeHbe Ил duBaHbe: Toa e TeчeHeTo HcpeDCTBOTO 3a LaideHbE НИЗ KLINMA U畴OT. Тoa ce HopMaJIH NсIMNTOMи. Бuchavata Ke 3anpe. | |
| Внатрeshнatable единиca ondabva mprin36a. | МирИЗБпte (како Na prizimeр Ha idMOT od zuigapri) мозат Дд boДд anscorpбирани BO HbAТршнatura edINHицia ида сеслобodyВаAT co пpoTOKOT Na BOЗduxOT. Ако МирИЗБпа Н ecчe3He, кe Mopa Дд ГиЗMuTeФиТерOT. Ако He paBOTи, КонтakTIPajTe ro cepBvCHNOT ueHTAP, за дд ГиЗMuCTITe emtERpot На ТОППИHA. | |
| Клиma у畴OT He испuytsa тонл ВОзdux. | КORA pexIMOT Ha rpeeHe Ke 3anoChne, OTBOPOT e cskopo 3aTBopeHи reчис нec He NsIeRyBa BOZdux, Иako HaNBopeShnAta edINHица рбOTи. Toa e HopMaJIEN CIMNTOM. Be молиме почekajte сдюда Клиица He СоЗдade DoBOvONTO TOnOII BOZdux, кojшTO Ke сдуВа ИЗВНВaHtpeShnATA edINHица. | |
| НадВорeshнatable.edINHица e Bo pexIMOT 3a Odmp3HyBaHbe. КORA u畴OT e BO pexIMOT Ha rpeeHe, Лeding/MPa3OT ce sobupaat Вр3 Калемпte, akо DojoDE Do paIaIbe Ha HaNBopeShnATA Tempepatура. Obaa Функциja ro OTcTpaHyBa сLoJOT od mpa3 KoJshTO ce HAOrA Br3 KaIemOT, И SF Травалу Дд завши за okoly 15 minуTN. | ||
| НадВорeshнatable Tempepatура e р pemHory Hncka. ЕфektOT Na rpeeHe можe Дд Нбide doBOJenH. | ||
| Симпоми можни | Прочны и рeshени | |
| Вашnot Кужен anapatи смартфонот He ce порзано co Wi-Fi мрека. | Лоб生态系统а 3a Wi-Fi на кoeшто ce обидуне дуа ce поврзete, e неточна. • Нajдente ja Wi-Fi мрека на ловзана co вшиот смартфони отстранete ja, a поюа ренисторajte ro вшиот anapat на LG ThinQ. | |
| Мышино падатои 3a вшиот смартфонс ce вklучени. • Исклuchete Ги Мбшино падатои на вшиот смартфони ренисторjetro anapatot, koprasteyки ja Wi-Fi мрека. | ||
| И métета на бeзшино на мрека (SSID), He e правлино поесен. • И métета на bезшино на мрека (SSID) trpeba за bidekomби国有资产 od anглески bukви и sboеви. (He koprastete Ги спеццалнох capakтети) | ||
| Ф��вени jo大自然а на рутетор He e 2,4 GHz. • Поблржана ecame 2,4 GHz Ф��вени jo на рутетор. Поставete ro bезшино рутетor 2,4 GHz и повзete ro anapatot co bезшино рутет. 3a за ja пobерпite Ф��вени jo大自然а на рутетор, рobеретe кaj вшиот снабдувач на Interpnet услуги,有很大 кaj пoinizbodnitelot на рутетор. | ||
| Пэрелеме e pactojahnoTo noméry anapatot и рутетор. • Ако e пэрелеме pactojahnoTo noméry anapatot и рутетор, сигданot можеда bide салб и кoneckциjsa можеда He bide правлино конфигурирана. Поменete ja lokaшиjsa на рутетор, за bide поьлесу до anapatot. | ||
NOTE
Some functions may not be supported, depending on the model.
Belts
USER MANUAL
AIR CONDITIONER

IMPORTANT SAFETY INSTRUCTIONS

WARNING
To reduce the risk of explosion, fire, death, electric shock, injury, or burns to persons when using this product, follow basic precautions, including the following:
Children in the household
This appliance is not intended for use by persons (including children) with reduced physical, sensory, or mental capabilities, or lack of experience and knowledge, unless they are under constant supervision or have been instructed on the use of the appliance by a person responsible for their safety. Children should be supervised to ensure that they do not play with the appliance.
- TABLE OF CONTENTS
- SAFETY INSTRUCTIONS
- OPERATION
- SMART FUNCTIONS
- MAINTENANCE
- TROUBLESHOOTING
- IMPORTANT SAFETY INSTRUCTIONS
- WARNING
- CHILDREN IN THE HOUSEHOLD
- FOR USE IN EUROPE
- INSTALLATION
- TECHNICAL SAFETY
- CAUTION
- NOTES FOR OPERATION
- SUGGESTION FOR ENERGY SAVING
- PARTS AND FUNCTIONS
- INDOOR UNIT OUTDOOR UNIT
- NOTE
- WIRELESS REMOTE CONTROL: INSERTING BATTERIES
- INSTALLING THE REMOTE CONTROL HOLDER (OPTIONAL)
- OPERATING METHOD
- SETTING THE CURRENT TIME
- USING THE °C/°F CONVERSION FUNCTION (OPTIONAL)
- OPERATING THE AIR CONDITIONER WITHOUT THE REMOTE CONTROL
- TYPE
- USING WIRELESS REMOTE CONTROL
- RESTARTING THE AIR CONDITIONER AUTOMATICALLY
- DISABLING AUTO RESTART
- USING THE MODE FUNCTION
- COOLING MODE
- AUTO OPERATION (ARTIFICIAL INTELLIGENCE)
- MULTI MODEL
- AUTO CHANGEOVER MODE
- SINGLE SPLIT MODEL
- DEHUMIDIFICATION MODE
- HEATING MODE
- FAN MODE
- USING THE JET MODE FUNCTION CHANGING ROOM TEMPERATURE QUICKLY
- USING THE FAN SPEED FUNCTION
- ADJUSTING THE FAN SPEED
- USING THE AIR FLOW DIRECTION FUNCTION
- SETTING THE ON/OFF TIMER
- SETTING THE ON TIMER
- CANCELING THE ON TIMER
- SETTING THE OFF TIMER
- CANCELING THE OFF TIMER
- CANCELING THE TIMER SETTING
- USING THE SLEEP FUNCTION (OPTIONAL)
- USING THE SIMPLE TIMER FUNCTION (OPTIONAL)
- USING THE ENERGY DISPLAY FUNCTION (OPTIONAL)
- DISPLAY THE CURRENT ENERGY USAGE
- USING THE LIGHT OFF FUNCTION (OPTIONAL)
- DISPLAY SCREEN BRIGHTNESS
- USING THE COMFORT AIR FUNCTION (OPTIONAL)
- COMFORT VANE OPERATION
- USING THE ENERGY CONTROL FUNCTION (OPTIONAL)
- USING SPECIAL FUNCTIONS
- CANCELING SPECIAL FUNCTIONS
- USING THE AIR PURIFICATION FUNCTION
- USING THE SILENT FUNCTION
- USING THE AUTO CLEAN FUNCTION
- LG THINQ APPLICATION
- LG THINQ APPLICATION FEATURES
- SMART DIAGNOSIS
- SETTINGS
- BEFORE USING LG THINQ APPLICATION
- INSTALLING THE LG THINQ APPLICATION
- OPEN SOURCE SOFTWARE NOTICE INFORMATION
- USING LG THINQ TO DIAGNOSE ISSUES
- USING AUDIBLE DIAGNOSIS TO DIAGNOSE ISSUES
- CLEAN THE AIR FILTER
- CLEAN THE ALLERGY FILTER (OPTIONAL)
- SELF-DIAGNOSIS FUNCTION
- BEFORE CALLING FOR SERVICE
- MEMO
- OWNER'S MANUAL
- AIR CONDITIONING
- GENERAL SAFETY
- TURNING THE TIMER ON AND OFF
- SETTING THE TIMER FOR TURNING ON
- CANCELING THE TIMER FOR TURNING ON
- SETTING THE TIMER FOR SWITCHING OFF
- CANCELING THE TIMER FOR EXCLUSION
- SETTING THE SLEEP TIMER (OPTIONAL)
- SLEEP MODE
- USING THE STANDARD TIMER FUNCTION (OPTIONAL)
- DELAY
- USING THE FUNCTION TO DISPLAY CONSUMED ENERGY (OPTIONAL)
- DISPLAYING CURRENT CONSUMED ENERGY
- USING THE FUNCTION TO TURN OFF THE LIGHTING (OPTIONAL)
- BRIGHTNESS OF THE DISPLAY
- COMFORTABLE AIR FLOW POSITION
- USING THE ENERGY SAVING FUNCTION (OPTIONAL)
- USE OF SPECIAL FUNCTIONS
- LG THINQ APPLICATIONS
- FEATURES OF THE LG THINQ APPLICATION
- NOTICE
- USING THE LG THINQ APPLICATION
- CONNECTION
- OPEN SOURCE SOFTWARE WITH OPEN CODE
- USING LG THINQ TO DIAGNOSE PROBLEMS
- USING AUDIBLE DIAGNOSIS TO DIAGNOSE PROBLEMS
- PRECAUTION
- CLEAN THE ANTI-ALLERGY FILTER (OPTIONAL)
- BEFORE CONTACTING THE SERVICE CENTER
- USE
- DANGER
- WIRELESS REMOTE CONTROL
- WHEN INSERTING THE BATTERIES
- INSTALLATION OF THE REMOTE CONTROL HOLDER (OPTIONAL)
- TIP
- LG THINQ" PROGRAM CHARACTERISTICS
- AIR CONDITIONER
- DISPLAY BRIGHTNESS
- COMFORT AIR OPERATION
- OPTIONAL UNIT
- DRY MODE
- FAN ONLY
- USE OF THE FAN MODE FUNCTION
- USING THE AIRFLOW DIRECTION FUNCTION
- SETTING THE SWITCH-ON/SWITCH-OFF TIME DELAY
- SETTING THE TIME DELAY
- CANCELING THE SET TIME DELAY
- SETTING THE SWITCH-OFF TIME DELAY
- CANCELING THE SET TIMER
- CANCELING THE TIMER SETTINGS
- DISPLAY OF THE ENERGY PRODUCED BY THE INVERTER
- USING THE FUNCTION FOR EXTERNAL LIGHTING (OPTIONAL)
- LIGHTING OF THE DISPLAY SCREEN
- USING THE FUNCTION FOR HOT AIR (OPTIONAL)
- HOT AIR OPERATION OF THE DEVICE
- USE OF THE ELECTRICAL ENERGY CONTROL FUNCTION (OPTIONAL)
- CANCELING THE SPECIAL FUNCTIONS
- USING THE AIR PURIFYING FUNCTION
- USING THE TNBKO FUNCTION
- USING THE AUTOMATIC CLEANING FUNCTION
- PROCESSING
- BEFORE USING THE LG THINQ APPLICATION
- SOFTWARE LICENSE FOR OPEN SOURCE CODE
- REMOVE THE AIR FILTER (OPTIONAL)
- PLEASE CONTACT THE SERVICE CENTER
- USER MANUAL
Brand : LG
Model : S24ET
Category : Air conditioner