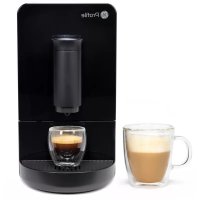
Profile P7CEBAS6RBB - Coffee machine GE - Free user manual and instructions
Find the device manual for free Profile P7CEBAS6RBB GE in PDF.


| Product Type | Automatic espresso machine with grinder |
| Brand / Model | GE Profile P7CEBAS6RBB |
| Power supply | 120 V, 60 Hz, grounded |
| Rated power | Approximately 1500 W |
| Dimensions (W x D x H) | Approximately 30 x 40 x 35 cm |
| Weight | Approximately 10 kg |
| Water tank capacity | Approximately 1.5 L |
| Bean hopper capacity | Approximately 250 g |
| Beverage functions | Espresso, Lungo, Americano, My Brew (Ristretto by default) |
| Hot water function | Yes, for preparing long drinks or warming cups |
| Steam wand | No (available on model P7CEBBS6RBB) |
| Integrated grinder | Yes, with grind adjustment (fine to coarse) |
| Connectivity | Built-in Wi-Fi compatible with SmartHQ app |
| Custom settings | Coffee amount, water volume, temperature via the app |
| Notification light indicator | Colors and patterns to alert (add water, beans, empty, descale) |
| Maintenance and cleaning | Manual cleaning of the brewing unit, monthly descaling recommended, emptying grounds after 8 coffees |
| Safety | Automatic shut-off, safety lock for brewing unit, protected hot surface |
| Spare parts and included accessories | Milk carafe (depending on model), cleaning brush, microfiber cloth, water hardness strip, descaling kit |
| Repairability | Removable and washable brewing unit, accessible service panel; no user repairs recommended beyond cleaning |
| Warranty | Limited 1-year warranty (parts and labor, terms apply) |
Frequently Asked Questions - Profile P7CEBAS6RBB GE
User questions about Profile P7CEBAS6RBB GE
0 question about this device. Answer the ones you know or ask your own.
Ask a new question about this device
Download the instructions for your Coffee machine in PDF format for free! Find your manual Profile P7CEBAS6RBB - GE and take your electronic device back in hand. On this page are published all the documents necessary for the use of your device. Profile P7CEBAS6RBB by GE.
USER MANUAL Profile P7CEBAS6RBB GE
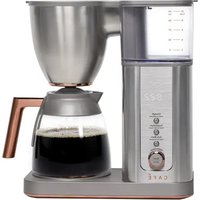
GE PROFILE AUTOMATIC ESPRESSO MACHINE + FROTHER
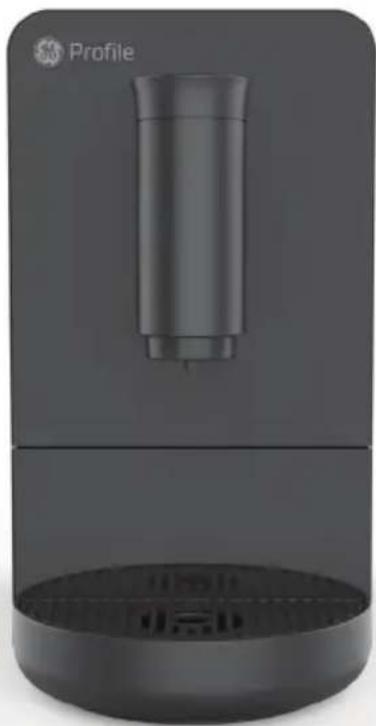
natural_image
3D rendering of a Profile water dispenser with a cylindrical tube and circular base (no text or symbols visible)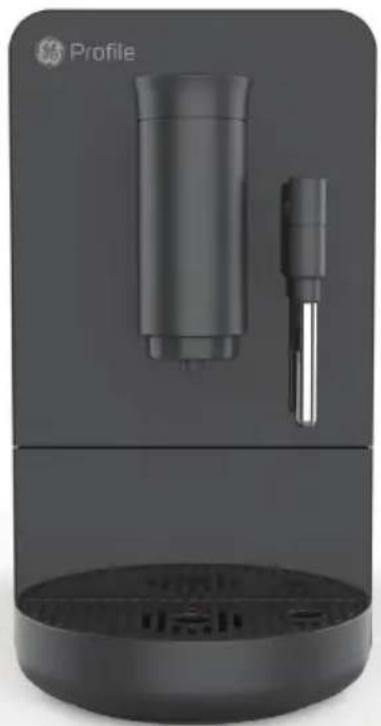
natural_image
Product photo of a Profile electric shaver with a cylindrical component and a metallic tool, shown in two views (no text or symbols on the device itself)P7CEBBS6RBB P7CEBAS6RBB
ENGLISH / FRANÇAIS
THANK YOU FOR MAKING GE APPLIANCES A PART OF YOUR HOME.
Whether you grew up with GE Appliances, or this is your first, we're happy to have you in the family.
We take pride in the craftsmanship, innovation and design that goes into every GE Appliances product, and we think you will too.
Among other things, registration of your appliance ensures that we can deliver important product information and warranty details when you need them.
Table of Contents
SAFETY INFORMATION 4
GETTING STARTED 6
COMPONENTS 7
ACCESSORIES 8
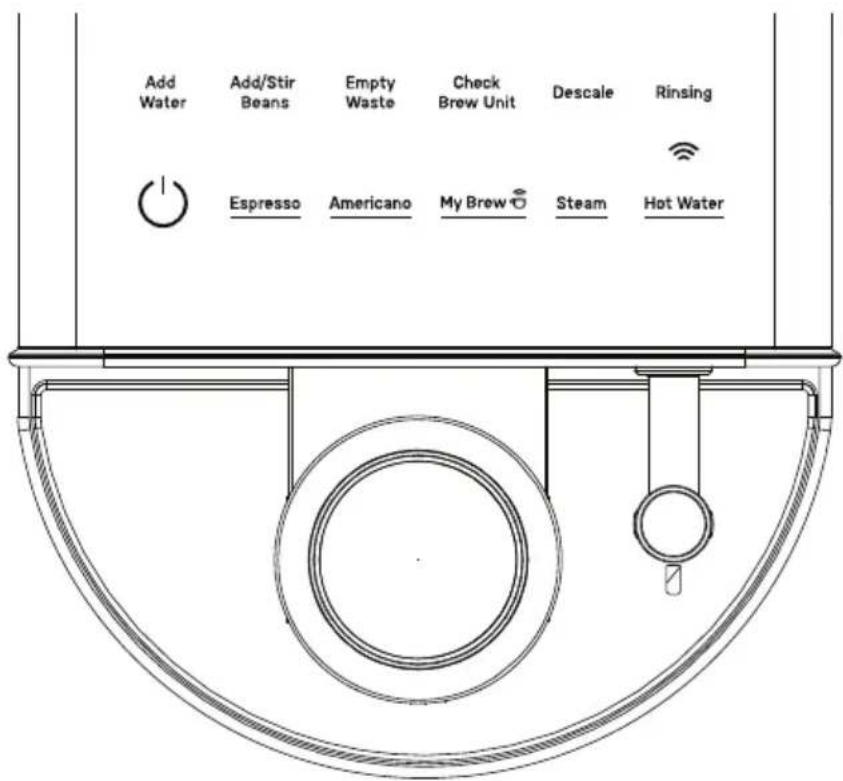
CONTROL PANEL....9
FUNCTIONS....10
ALERTS 11
USING YOUR ESPRESSO MACHINE 13
CARE AND CLEANING 16
TIPS 18
TROUBLESHOOTING....19
WiFi CONNECT SMARTHQ APP 21
FCC STATEMENT 22
LIMITED WARRANTY 24
CONSUMER SUPPORT....25
Product Registration
Write the model and serial numbers here:
Model # ____
Serial # ____
Find these numbers on a label on the back of the machine.
IMPORTANT SAFETY INFORMATION READ ALL INSTRUCTIONS BEFORE USING THE APPLIANCE
WARNING
Read the instructions carefully before using the appliance for the first time. Save these instructions for reference. The appliance is designed for domestic use and may only be operated in accordance with these instructions for use. Always handle with care and warn other users of potential danger.
SAVE THESE INSTRUCTIONS
IMPORTANT SAFEGUARDS
Always follow these safety precautions when using this appliance.
- Read all instructions before using
- Use only a 120 V, 60 Hz standard electrical supply that is properly grounded in accordance with the National Electric Code and local codes and ordinances.
- Make sure the appliance is set up on a flat and steady surface.
- Turn the appliance OFF, then unplug from the outlet when not in use, before assembling or disassembling parts and before cleaning. To unplug, grasp the plug and pull from the outlet. Never pull from the power cord.
- Do not use outdoors. Household use only.
- Use this product only for its intended purpose as described in this user manual.
- Use of any accessories not recommended by the manufacturer can cause injuries.
- This appliance is not intended for use by persons (including children) with reduced physical, sensory, or mental capabilities, or lack of experience and knowledge, unless they are closely supervised and instructed concerning use of the appliance by a person responsible for their safety. Close supervision is necessary when any appliance is used by or near children. Children should be supervised to ensure that they do not play with the appliance.
- Allow to cool before putting on or taking off parts, and before cleaning the appliance. DO NOT touch the steam wand after use. Doing so can cause serious burns.
• Make sure the drip tray is always present during use. - Always use cold water to make coffee in your espresso machine. Warm water or other liquids could cause damage to the coffee maker.
• DO NOT put any liquid other than water in the water tank. - To reduce the risk of fire or electric shock, do not attempt to disassemble, repair, modify, or replace any part of your product.
- If the power cord is damaged, it must be replaced by the manufacturer. DO NOT replace the power cord on your own.
- Do not operate any appliance with a damaged cord or plug or after the appliance malfunctions, or is dropped or damaged in any manner. Contact GE Appliances at the website listed in the Contact Us section for information on examination, repair, or adjustment.
- Use the coffee grinder to grind coffee beans only. DO NOT put coffee grounds in the espresso machine, only put whole coffee beans in the coffee bean container.
- Do not allow children to touch the appliance or the power cord during the operation
SAVE THESE INSTRUCTIONS
IMPORTANT SAFETY INFORMATION READ ALL INSTRUCTIONS BEFORE USING THE APPLIANCE
WARNING
Read the instructions carefully before using the appliance for the first time. Save these instructions for reference. The appliance is designed for domestic use and may only be operated in accordance with these instructions for use. Always handle with care and warn other users of potential danger.
SAVE THESE INSTRUCTIONS
IMPORTANT SAFEGUARDS
Always follow these safety precautions when using this appliance.
• DO NOT use the espresso machine if the drip tray is out of position.
- DO NOT immerse the appliance in water or any other liquids. This will damage the appliance and be a risk of an electric shock.
- Do not let cord hang over edge of table or counter.
- Do not let cord contact hot surface, including the stove.
- The use of accessories not included in the box is not recommended. It might be dangerous and should be avoided.
- Do not operate the hot water function continuously for more than one tank of water.
- Check hopper for presence of foreign objects before usage.
- Avoid contacting moving parts. Do not attempt to defeat any safety interlock mechanisms.
- Do not touch hot surfaces. Use handles or knobs.
- Do not place on or near a hot gas or electric burner, or in a heated oven.
- To disconnect, turn any control to "off," then remove plug from wall outlet.
WARNING
To avoid the risk of injury, do not open the brew chamber during the brew process.
Power Cord
a) A short power-supply cord (or detachable power-supply cord) is provided to reduce risks resulting from becoming entangled in or tripping over a longer cord.
b) Longer detachable power-supply cords or extension cords are available and may be used if care is exercised in their use.
c) If a long detachable power-supply cord or extension cord is used:
1) The marked electrical rating of the detachable power-supply cord or extension cord should be at least as great as the electrical rating of the appliance;
2) If the appliance is of the grounded type, the extension cord should be a grounding-type 3-wire cord; and
3) The longer cord should be arranged so that it will not drape over the counter top or table top where it can be pulled on by children or tripped over.
WARNING

SK OF FIRE OR ELECTRIC SHOCK
■ TO REDUCE THE RISK OF FIRE OR ELECTRIC SHOCK, DO NOT REMOVE COVER (OR BACK).
- Do not attempt to repair or replace any part of your espresso machine unless it is specifically recommended in this manual. All other servicing should be performed by authorized service personnel.
SAVE THESE INSTRUCTIONS
NOTE: For household use only.
General Information
■ We DO NOT recommend using oily beans (found in some dark roasts). See page 18 for more information.
■ Place drip tray before turning on the machine. The machine rinses upon first start up.
■ Recommend starting at medium grind size and adjusting slowly per taste.
Drip Tray
■ Remove the drip tray from the packaging and attach it to the front of the espresso machine, under the coffee spout.
NOTE: There are magnets that will allow the drip tray to lightly adhere to the machine. Remove drip tray before lifting or moving the machine.
Water Tank
■ Remove the water tank and fill it with water. Replace in the machine before using any functions.
■ Rinsing Cycle: The machine will rinse automatically at every power ON. After the machine is preheated, it will dispense a small amount of hot water directly into the drip tray. This is to keep the machine clear of coffee residue. Machine will only rinse if it was Powered ON from cold state.
NOTE: DO NOT add hot water to the water tank. This could damage the appliance.
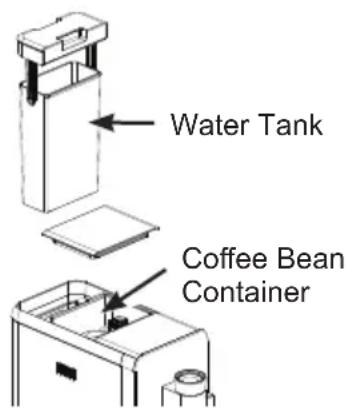
Coffee Bean Container
■ Lift the lid located on the top of the espresso machine and fill it with coffee beans. Close the lid tightly when finished. Make sure rubber seal is closed completely to preserve freshness of beans.
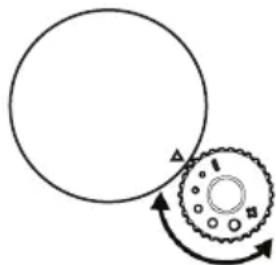
NOTE: When grinding is in process, turn the coffee bean dial to your desired grind size. Run with coffee bean container lid open to access grinder adjustment dial.
NOTE: It may take several tries to get a grind size that best fits your taste.
natural_image
Diagram showing a circular component rolling down an arrow with a gear-like ring, indicating rotational motion (no text or symbols)Ready to Use!
- Plug in your espresso machine. The Power button will flash. Press the power button.
- Choose your desired function and enjoy! See the "Using the Espresso Machine" section for instructions of each function.
Components
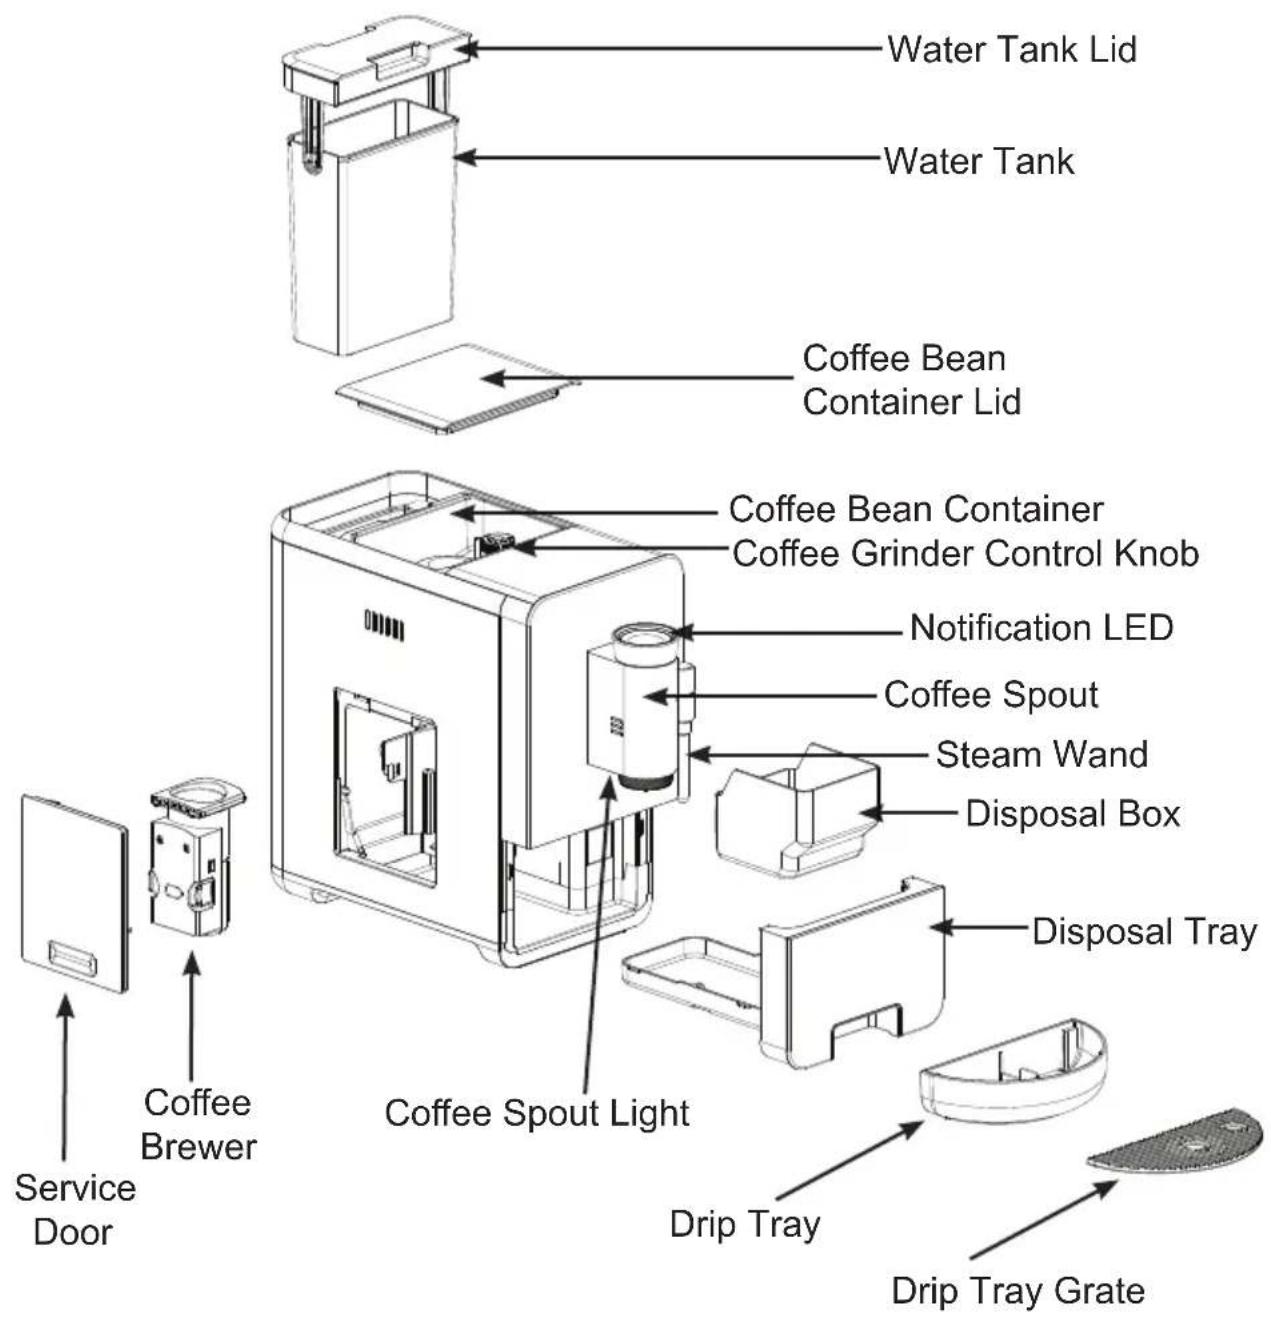
NOTE: Steam wand only available with model P7CEBBS6RBB
Cleaning Kit

natural_image
Simple line drawing of a horizontal line with a circular endpoint, no text or symbols presentCleaning Brush
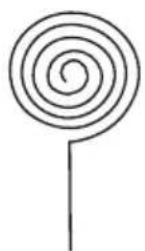
Cleaning Pin
NOTE: Recommended for steam wand cleaning
natural_image
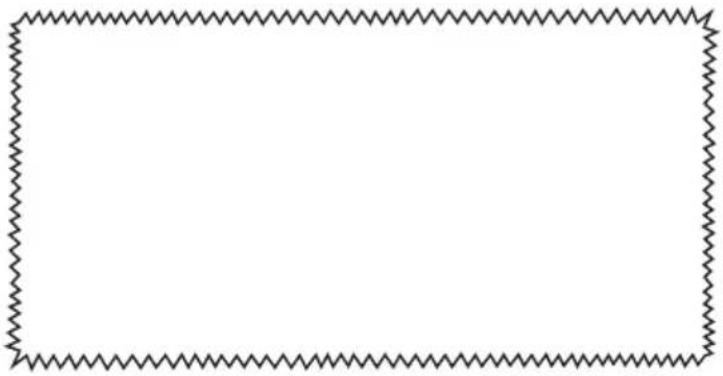
Empty rectangular frame with zigzag border (no text or symbols)Microfiber Cleaning Cloth
natural_image
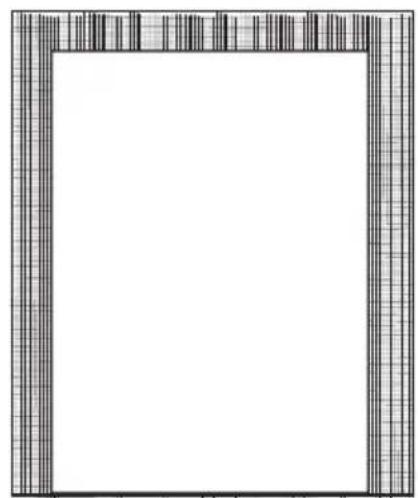
Blank white square frame with a decorative border and diagonal grid pattern at the top (no text or symbols)Cleaning Solution (3)

Water Hardness Strips
Milk Pitcher
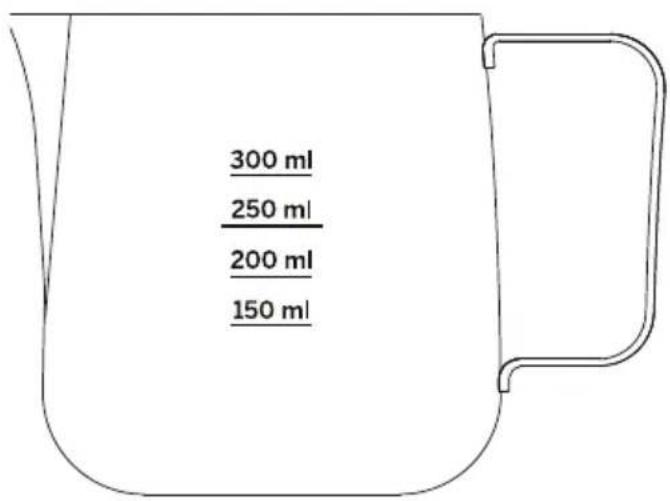
NOTE: Milk Pitcher is only included with model P7CEBBS6RBB
P7CEBAS6RBB
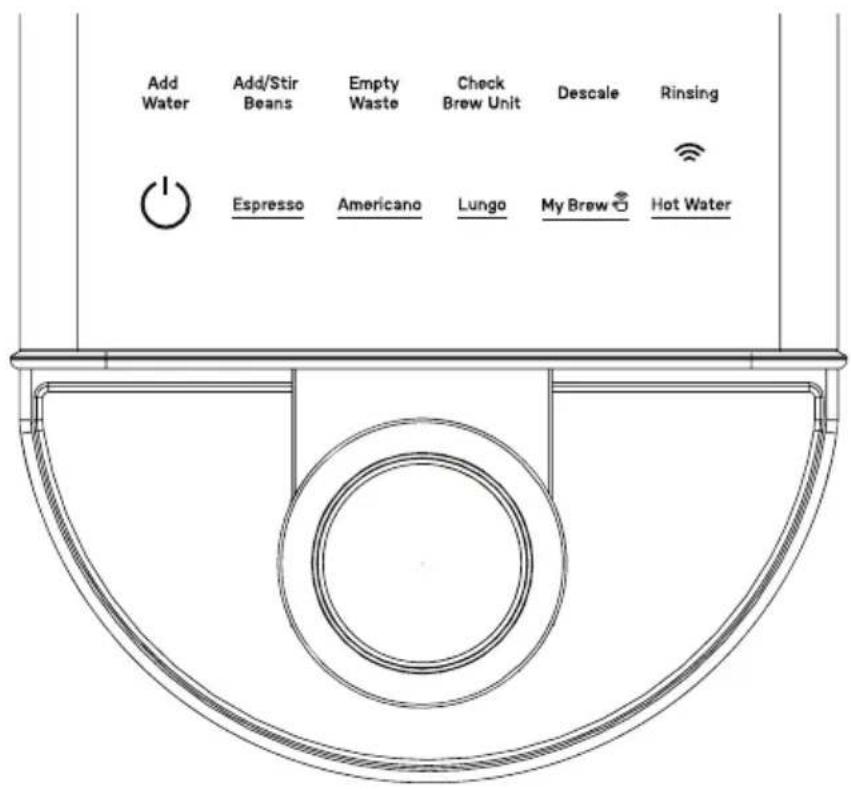
P7CEBBS6RBB
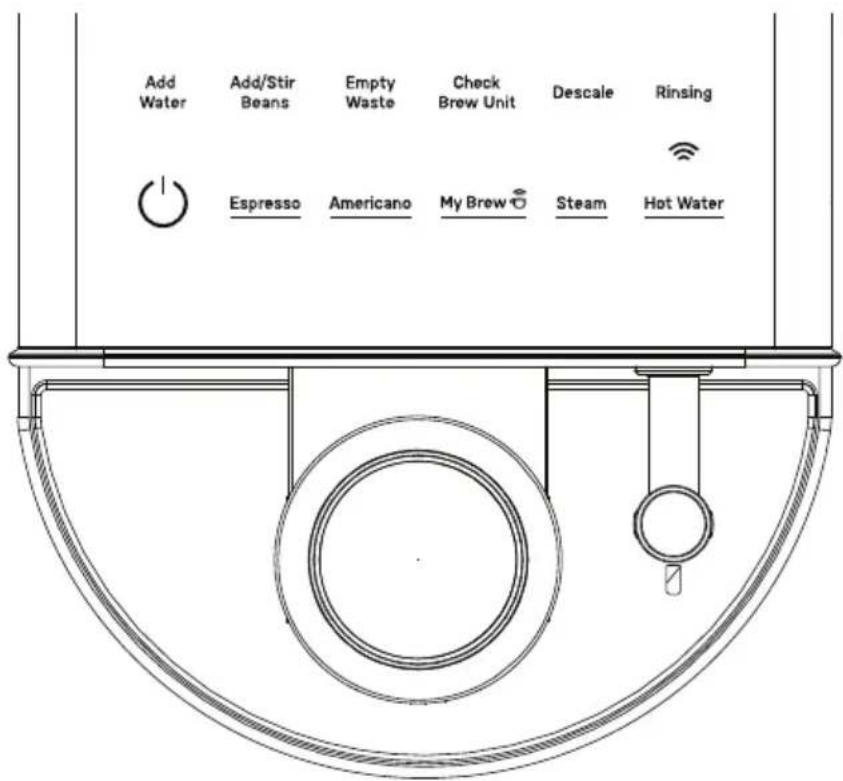
NOTE: Some settings can be changed through the SmartHQ App.
NOTE: Coffee ground amounts and espresso volumes may vary depending on bean type and machine settings.
Espresso
Espresso is a full-flavored coffee drink served as a concentrated shot. Cappuccinos, Flat Whites, and Lattes are all made with an espresso shot.
Default setting: \~ 8-12-grams of coffee yields \~ 30 mL of espresso (1oz).
Lungo
The Lungo, or "long". This will create a cup that increases the amount of water and extraction time.
Default setting: \~ 8-12 grams of coffee yields \~ 100 mL of espresso (3.5oz)
Lungo is only included with model P7CEBAS6RBB.
Americano
This is a coffee brew sized drink. It is made by the addition of hot water over the single shot of espresso. Your machine will brew espresso first, dispose of the used grounds, and pour hot water on top through the same coffee spout. Please wait for all cycles to complete before enjoying your Americano.
Default Setting: Brew Espresso (\~ 8-12 grams of coffee, \~ 50 mL [1.5oz]) Add hot water on top (\~ 100 mL [3.5oz]).
My Brew
When using the "My Brew" setting, the default is set to a Ristretto. This is similar to an espresso shot but is half the water volume. Often called a "short" espresso.
\~ 8-12 grams of coffee yields \~ 15 mL of espresso ( 12 oz).
The My Brew function can only be updated within the SmartHQ app.
Steam
Steam is used to heat up milk (or alternatives) and create microfoam for frothed milk drinks like Lattes and Cappuccinos.
Steam is only included with model P7CEBBS6RBB
CAUTION
To avoid possible burns to body parts
and/or other injury from hot steam, do not touch liquids or steam wand during or after steaming. Do not remove pitcher until steaming is complete. Hold milk pitcher by the handle.
Hot Water
The Hot Water function dispenses hot water from the spout or steam wand (P7CEBBS6RBB). Use this function when hot water is desired. No coffee is used during this function.
WiFi
Your espresso machine is WiFi compatible. See page 21 for how to connect and use the SmartHQ app.
Add Water
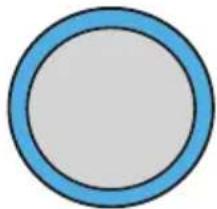
The Add Water indicator appears when there is no water left in the tank or the tank is removed from the machine. If this occurs during a cycle, simply add water then press the button of the desired function to continue the current cycle.
Add/Stir Beans
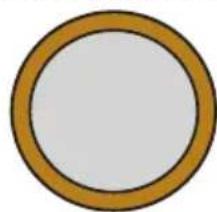
The Add/Stir Beans indicator appears when there are no beans left in the coffee bean container or when beans are not sliding into the grinder, typically due to oily beans. Add ONLY whole coffee beans to the container.
NOTE: If machine runs out of coffee beans in the middle of the cycle, it might terminate the brew or produce a drink of reduced strength.
NOTE: An alert will clear after the beans are refilled and the user restarts a new brew.
NOTE: Oily beans are not recommended for automatic espresso machines. If beans do not easily slide down into the grinder, it means oil is present. Please stir beans in the hopper.
Check Brew Unit
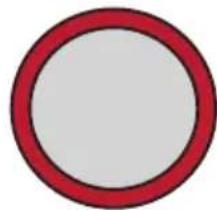
Coffee Brewer and/or Service door are not in place or not properly installed.
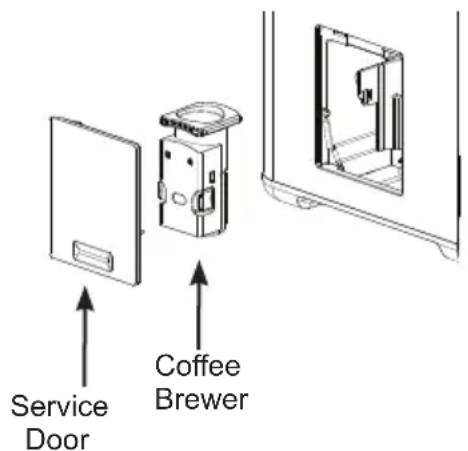
Empty Waste
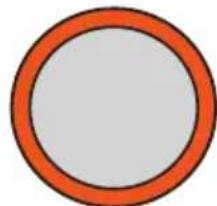
Empty Waste appears after 8 brews. Empty the waste basket and the alert will turn off. If the disposal drawer is open for more than 5 seconds, the counter is reset.

BE CAREFUL NOT TO ACCIDENTALLY
THROW AWAY THE DISPOSAL BOX.
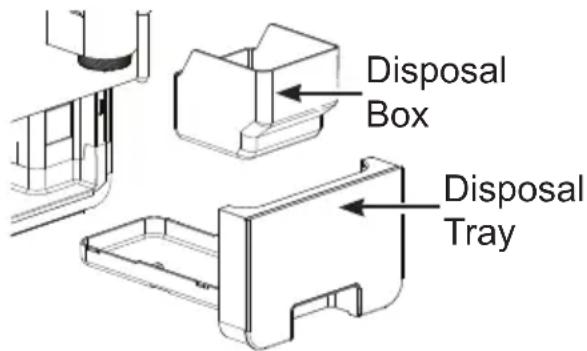
NOTE: Clean out, wash, and dry the Disposal Tray and Drip Tray before long periods of no use.
Descale
Descale alert will appear when it is time to run a descale cycle for best operation and life span of the machine.
Rinsing
An alert is on during automatic rinsing function which occurs on power ON after complete cool down.
Notification LED
See page 12 for full list of notification colors.
Pump Airlock Condition
Pump may airlock (pull air in) when machine runs out of water. This condition may occur when the outside of the water tank is wet. Airlock is indicated by the Add Water alert paired with flashing Hot Water button.
To prime the pump, refill tank, dry off outside of tank, and run Hot Water function until air is cleared out of the system.
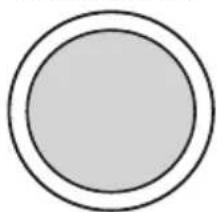
Solid White: Idle
natural_image
Simple geometric diagram of two concentric circles (no text or symbols)Clockwise fill from Light Blue to Magenta: Powering On
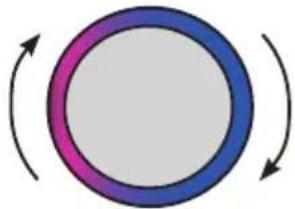
natural_image
Simple circular diagram with two curved arrows indicating rotation or cycle (no text or symbols)Rotating White: Rinsing, Hot Water Dispense, Descaling, System Emptying
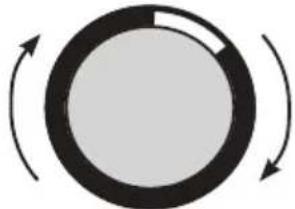
natural_image
Simple circular diagram with arrows indicating rotational direction (no text or symbols)Rotating Segment White: Grinding
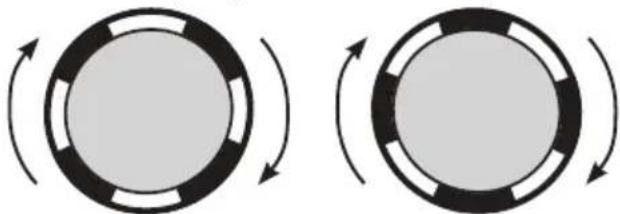
natural_image
Two circular diagrams with arrows indicating rotational or directional movement, no text or symbols present.Solid White to clockwise fill from Blue to Magenta: Brew in Progress
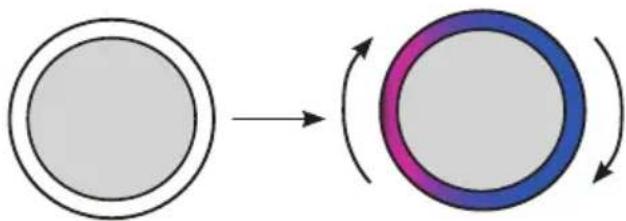
flowchart
graph LR
    A[" "] --> B[" "]
    B --> C[" "]
    C --> D[" "]
    D --> A
Blue: Add Water or Reinstall Water Tank
natural_image
Simple blue circular ring with a white center, no text or symbols present.Yellow: Add/Stir Beans
natural_image
Simple circular frame with a gold border and white interior (no text or symbols)Orange: Empty Waste
natural_image
Simple orange circular frame with white center, no text or symbols presentRed: Check Brew Unit
natural_image
Simple red circular border on white background (no text or symbols)Custom Dispense Amount
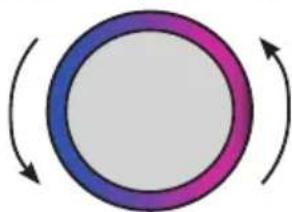
natural_image
Simple circular diagram with a gradient ring and curved arrows indicating rotation (no text or symbols)Counter Clockwise fill from full circle to all black: Power Off
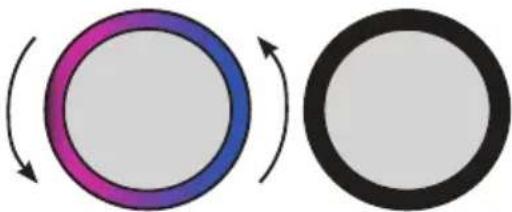
natural_image
Two circular diagrams with arrows indicating rotation or transformation, no text or symbols present.Rotating Red: Heating
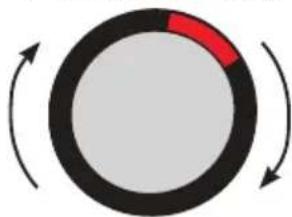
natural_image
Simple circular diagram with a red segment inside, surrounded by black arrows indicating rotation (no text or symbols)NOTE: For household use only.
Coffee Grinder Knob
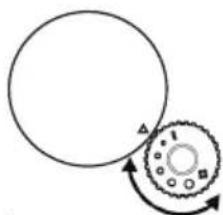
Add coffee beans to the coffee bean container. While grinding is occurring, adjust the coffee grinder knob to desired grind size. Align the desired grind circle to the arrow on the grinder top. Begin with medium setting and make incremental changes to grind size per taste.
The smallest circle is the smallest grind size and the largest circle is the largest grind size. The smaller the grind, the stronger the coffee. This may change if the grind settings are changed in the app.
NOTE: If machine runs out of coffee beans in the middle of the cycle it might terminate the brew or produce a drink of reduced strength.
NOTE: An alert will clear after the beans are refilled and the user restarts a new brew.
natural_image
Simple line drawing of a gear and wheel with an arrow indicating rotational motion (no text or symbols)Removable Steam Wand
The steam wand is removable for easier cleaning. First turn as shown to disengage, then pull down. The stainless steel cover is also removable from the steam wand.
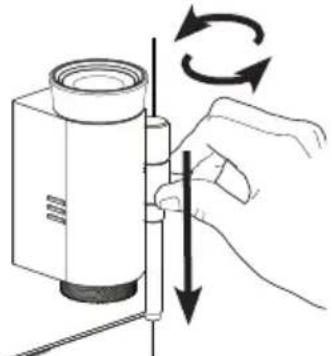
natural_image
Illustration of a hand holding a cylindrical device with rotating arrows indicating rotation (no text or symbols)Adjustable Steam Wand and Coffee Spout
The steam wand rotates away from the coffee spout for easier use. The coffee spout moves up and down to accommodate different size cups.
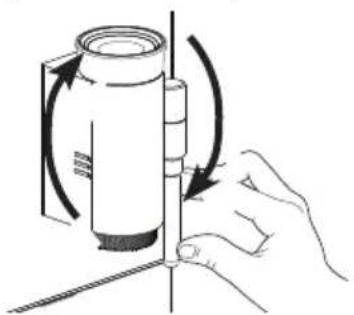
natural_image
Illustration of a hand holding a cylindrical object with rotating arrows indicating rotation (no text or symbols)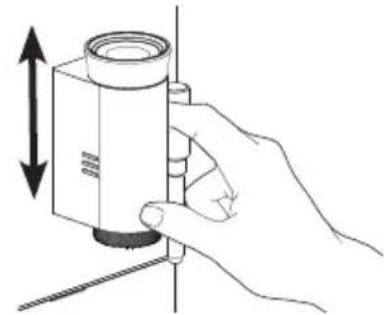
natural_image
Hand holding a cylindrical device with an arrow indicating vertical displacement (no text or symbols)Using your Espresso Machine
How to Turn on the Machine
Press the Power button to turn on the machine. The other buttons will appear after the Power button is pressed.
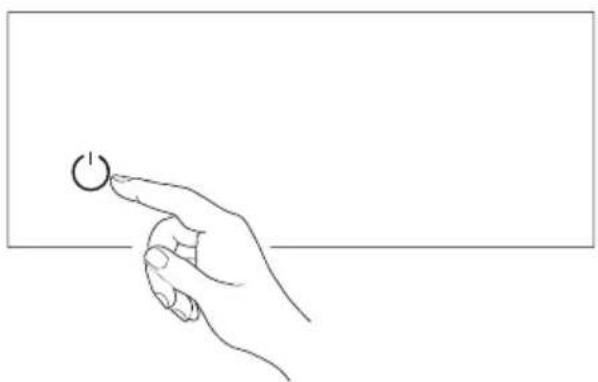
natural_image
Line drawing of a hand pressing a button with a power symbol (no text or labels)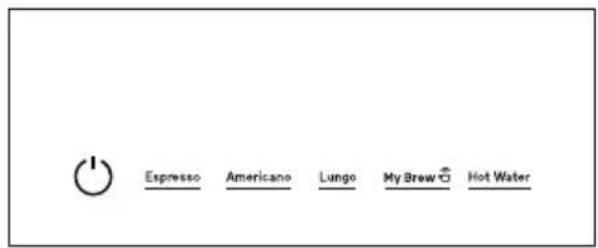
Espresso, Lungo, Americano, and My Brew Functions
NOTE: Make sure you have a coffee cup or container placed under the dispenser before using any function.
To use any function, press the desired button. All other buttons on the control panel will go dark, leaving the desired function and Power buttons illuminated. The espresso machine will start to grind the coffee beans. When the beans are ground, the espresso machine will dispense coffee.
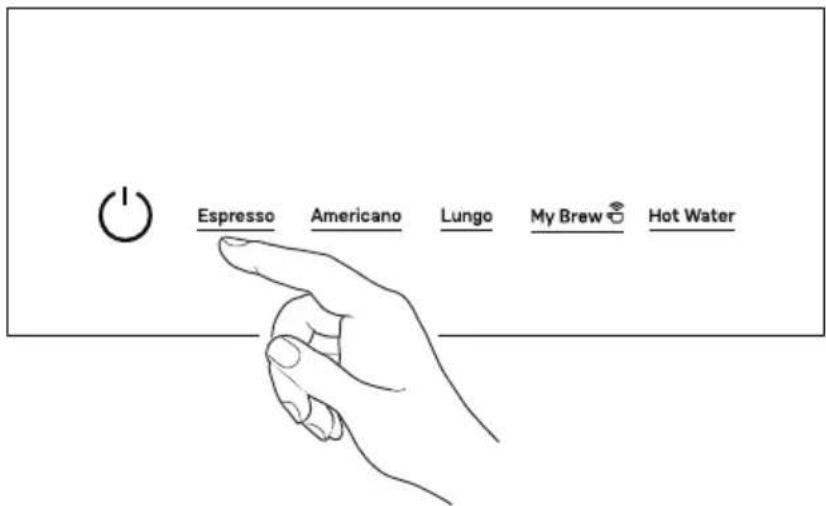
NOTE: Lungo is only available with model P7CEBAS6RBB.
NOTE: The My Brew function can only be adjusted through the SmartHQ app. The default setting is Ristretto. See page 21 for more information on the SmartHQ app and how to connect to the WiFi.
Steam and Hot Water
CAUTION
To avoid possible burns to body parts and/or other injury from hot steam, do not touch liquids or steam wand during or after steaming. Do
not remove pitcher until steaming is complete. Hold milk pitcher by the handle.
NOTE: Steam function is only available with model P7CEBBS6RBB.
NOTE: Make sure you have a coffee cup or container placed under the steam wand before using either function.
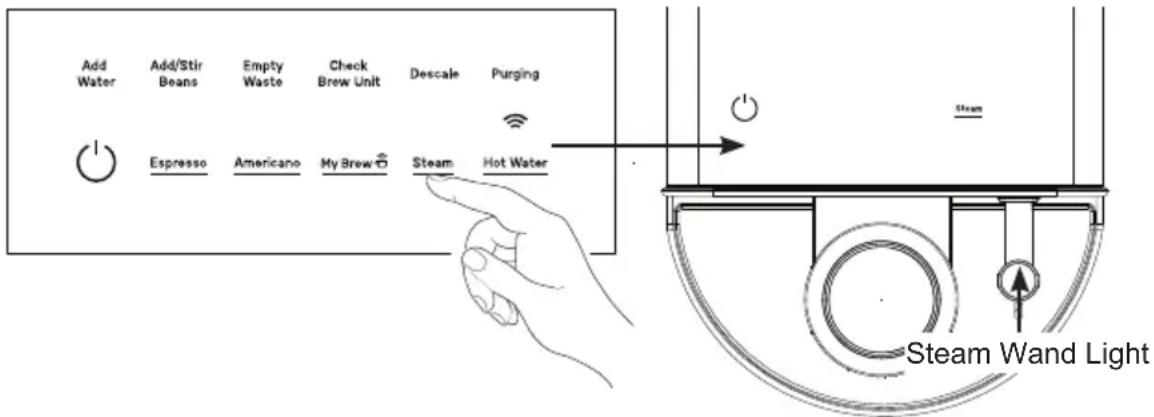
Hot water will dispense when the Hot Water button is pressed. To stop the water dispensing press Hot Water again.
To use the Steam function, press the Steam button to initiate the process. The Steam Wand Light will start flashing. While steam is preheating a small amount of water or steam may purge into drip tray. Point steam wand towards drip tray. Do not introduce milk until steam is preheated. To stop the steam dispensing press Steam again.
NOTE: No coffee beans are used for this function.
NOTE: Hot Water comes out of steam wand if present. Hot water comes out of spout for models without the steam wand.
Custom Dispense Amount
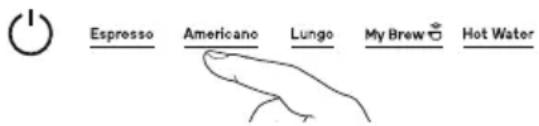
Press and hold any of the function buttons for 3 seconds until 2 beeps sound.
The machine will begin to dispense for the selected function.
To choose a new dispense volume, press the function button again. The machine will stop. 2 more beeps will sound and the new dispense volume will be set. The machine will return to idle state.
NOTE: If no custom dispense amount is set, the maximum volume will be the custom dispense amount.
NOTE: Adjustable volume ranges are different for each function. For detailed volume options, refer to the SmartHQ app.
NOTE: Changing the volume presets may alter the flavor and strength of the coffee.
NOTE: The Americano function has a different volume adjustment style. Hold for 3 seconds to start adjusting, then press once for coffee and again for water volume change. For other functions the selection happens only once.
NOTE: Pump may airlock (pull air in) when machine runs out of water. This condition may occur when the outside of the water tank is wet. Airlock is indicated by the Add Water alert paired with flashing Hot Water button. To prime the pump, refill tank, dry off outside of tank, and run Hot Water function until air is cleared out of the system.
WARNING
Allow heating element to completely cool to avoid risk of fire or connect power prior to cleaning or service.
CAUTION
To avoid possible burns to body parts and/or other injury from hot steam, do not touch liquids or steam wand during or after
steaming. Do not remove pitcher until steaming is complete. Hold milk pitcher by the handle.
Cleaning the Espresso Machine
■ Unplug the espresso machine from the wall.
■ Pour out all leftover water and wash and dry the water tank, drip tray, and disposal box.
■ Wipe down appliance using the provided microfiber cloth and non-abrasive cleaner.
■ DO NOT place any part of the espresso machine in the dishwasher. Hand wash only.
NOTE: When not in use for long periods of time, such as vacation, run system empty cycle, dry water tank, and open water tank lid.
Cleaning the Coffee Brewer and Service Area
The service area will get dirty over time with excess coffee grounds.
■ Unplug the espresso machine from the wall.
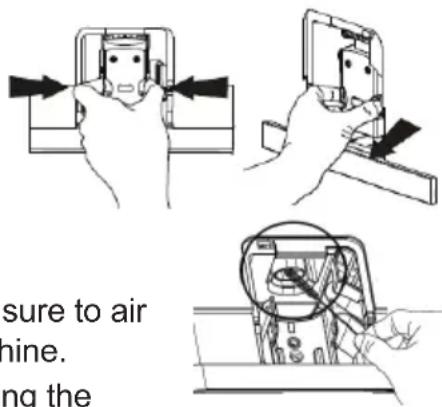
■ Remove the service door located on the side of the appliance by pressing the bottom of the service door.
■ To take out the brewer, pinch both orange tabs to release.
■ Use cleaning brush and microfiber cloth provided to wipe away access grounds from the service area and coffee grinder chute as shown.
■ Wash coffee brewer in the sink with warm water. Make sure to air dry or wipe with microfiber cloth before returning to machine.
■ Make sure to air dry the service area before reassembling the coffee brewer.
■ Replace the brewer by pressing the orange tabs again until it locks in place.
■ Replace service door before using machine. The service door will click into place.
Descaling Process
DO NOT use any cleaning agents not provided with the product or recommended in this manual.
NOTE: If descale is not properly completed, machine may timeout and return to Powered ON state. This will affect the quality of the coffee until all cleaning solution is removed as well as the quality of descaling process. Run descale again.
NOTE: During descaling the machine will dispense continuously as well as pulse dispense for a better cleaning.
■ It is recommended to descale once a month or more depending on the water hardness. Water hardness strip can be used to measure your water hardness and adjust the frequency of the descale alert accordingly under SmartHQ app.
■ Descale process consists of 2 stages. Descale alert will turn off after the second stage is completed. The whole process is expected to last 30-40 minutes start to finish.
STAGE 1:
- Fully fill the water tank.
- Add one pack of cleaning solution in the water tank and mix well.
- Remove the drip tray and place a 45 oz or larger container under the spout (spouts for Steam models).
- Press and hold the Hot Water and Steam (for Steam Wand machines) and My Brew and Hot Water for Espresso only Machines for 3 seconds to initiate the descaling process. A single beep sounds, all buttons turn off and Descale alert starts to flash.
- Water starts dispensing into the container. During this step, the machine will dispense continually as well as pulse.
- After all water is dispensed, Descale alert stops flashing, but stays ON. Add Water alert flashes.
STAGE 2:
- After Stage 1 is complete, remove, rinse, fully refill, and reinstall the water tank. Add Water alert will go off.
- Repeat steps 3 to 5 from Stage 1.
- After all water is dispensed, Descale alert turns OFF. Add Water alert turns ON.
- Refill the water tank again. Machine is ready for normal operation.
NOTE: As an alternative, a 1:1 ratio of water and white vinegar can be used as a cleaning solution for the descaling process.
System Emptying
The System Emptying process empties the system of all water. Use this function when storing the machine for long periods.
■ Press and hold the Hot Water and Power buttons together for 3 seconds the initiate the emptying process. Water will empty into the drip tray.
■ Remove the water tank. Place a small bowl under both spouts.
■ When the cycle ends, the Rinsing button will stop flashing and the machine will return to the Powered ON state.
Checking Your Water Hardness
Included with the machine is a Water Hardness Test Kit. Please follow the instructions on the package using the water you plan to use to make espresso. Once you have gathered your results, please refer to the SmartHQ app to set your water hardness level.
- Espresso is often mistakenly thought of as a drink made with darker roast beans. Some coffee roasters even mark their product as "Espresso Coffee". This is misleading because espresso is mainly distinguished from other coffee drinks by the correct grind size and brew process, not the type, origin, or roast of the coffee beans. Any coffee bean can be used in making your espresso!
However, in automatic espresso machines it is not recommended to use oily beans that most often come from darker roasts. Oil coats the inside components and may affect the usability and life span of the machine.
■ Use the hot water button to heat up your espresso cup before brewing. Espresso has a very small volume and will cool quicker if brewed in a cold cup.
■ Some functions can be adjusted within the SmartHQ App to meet your specific preferences or coffee type. Reference the SmartHQ section on page 21.
Your espresso machine can be used to make an unlimited number off espresso-based drinks. Frothed milk drinks like Cappuccinos and Lattes are classics enjoyed by many.
Make sure to brew espresso BEFORE using steam. Steam function requires higher temperatures than espresso and brewing espresso immediately after Steaming will affect the taste of espresso.
■ Cappuccino
This drink is made with espresso, milk, and large amounts of microfoam. Do not fill the milk pitcher above half way to avoid microfoam overflow during steaming. Frothed milk may be as much as double in volume.
Latte
This drink uses espresso and steamed milk with a smaller head of foam.
■ How to steam milk:
NOTE: Steam function is only included with model P7CEBBS6RBB
NOTE: During steam preheat, the wand will purge hot water. Do not insert steam wand into milk until preheat is complete.
-
After steam is preheated and ready, place the tip of the steam wand right under the surface of the milk at the edge of the milk pitcher at approximately a 45^ angle to create a vortex. Start steaming. The longer milk is steamed under the surface the more microfoam is created. Once desired amount of microfoam is reached, dip the steam wand lower into the milk and continue to steam until desired temperature is reached. Place a hand under the pitcher to feel the change in temperature. Once the bottom is warm enough to feel uncomfortable, optimal temperature is achieved.
-
Large bubbles can be broken into smaller bubbles by light tapping of the milk pitcher on your countertop.
NOTE: To heat up milk, you want to position the steam wand lower into the pitcher to prevent air from entering the milk and creating bubbles. This will result in a steamed milk with a smaller head of foam.
Troubleshooting
| Problem | Cause Solution | |
| Appliance does not work/does not turn on. | No power is connected to the appliance. ■ | Check cable and plug are connected to power and press the "on" button. ■ Check GFI plug. |
| No or delayed response from pressing buttons on control panel. | Panel may be dirty or wet. Unplug the machine and clean the panel with cloth provided and ensure panel is dry. | |
| Electromagnetic interference. Unplug the machine. Wait a few minutes then plug back in. | ||
| Coffee is not hot enough. | Cup is not preheated. Run hot water into the cup and swirl it lightly around to heat up the cup before brewing espresso. | |
| The coffee brewer is too cold. Dispense hot water to warm up the coffee brewer. | ||
| Coffee does not come out of spout. | Excessive scale has built up. Descale the appliance as directed on page 17. | |
| Empty system function may have been used. | Run the hot water function until water starts dispensing. | |
| Pump airlock (air in the water pump). Run the hot water function until water starts dispensing. | ||
| Something is blocking the spout. Run the hot water function until water starts dispensing. | ||
| Coffee is dispensing slower than normal | The coffee grounds are too fine. Adjust the coffee grinder so the grounds are slightly larger or until the water flow is back to normal. | |
| Espresso shot has no crema. | The coffee grounds are too coarse. Adjust coffee bean grind size to a smaller setting during grinding operation. | |
| Coffee beans are not fresh. Change or use appropriate coffee beans. | ||
| Brew temperature is incorrect for this type of coffee. | Connect appliance to SmartHQ app and change temperature. | |
| Steam wand is not making enough microfoam | The steam wand is dirty or something is blocking the output. | Refer to Care and Cleaning section. |
| The machine needs to be descaled. Follow the directions to descale the appliance on page 17. | ||
| Improper form or technique. | Refer to the Tips section on page 18. | |
| Appliance takes too long to heat up. | Excessive scale has built up. Follow the directions to descale the appliance on page 17. | |
| Water tank is empty but "Add Water" alert does not show up. | Water sensor is detecting water on the outside of the water tank. | ■ Wipe the exterior of the water tank and interior of the water tank housing completely dry. ■ Avoid pouring water directly into the water tank. It is recommended to pull out water tank, fill, then replace in the machine. |
| Internal Drip Tray is filled with large amount of water. | Coffee powder is too fine, coffee can not pass through grounds. | Adjust coffee bean grind size to a larger setting during grinding operation. |
| Restriction in the coffee or steam nozzle. | Check for restrictions. | |
| Too much hard water scale building on the internal tubing. | Descale the appliance. | |
Troubleshooting
| Problem | Cause Solution | |
| "Add/Stir Coffee Beans" indicator on but hopper still contains lots of coffee beans. | Internal coffee outlet is blocked. Clean the | coffee grinder shoot. Refer to the "Cleaning the Coffee Brewer and Service Area" on page 16. |
| Beans are too oily and do not slide freely into the grinder. | Stir the beans in the container to allow them to slide down and avoid using oily beans if possible. | |
| Grinder is making a very loud sharp noise. | There are foreign objects in the grinder. | Stop operations and call service. |
| Appliance disposes of unused coffee grounds without brewing coffee. | The function was canceled before completing or power outage during brew cycle. | |
| Bean container is empty and grind amount did not meet standards for good strength espresso. The shot was disposed. Oily beans can also get stuck and result in insufficient grounds. | Refill coffee bean container. | |
| Coffee dispensed is watery. | Commonly occurs on first brewing cycle. | Optimize the coffee extraction with the next brew. |
| Coffee brewer is dirty. Remove the coffee brewer and clean. | ||
| Grinder setting is too coarse. ▪ Adjust coffee bean grind size to a smaller setting during grinding operation. ▪ Go to the SmartHQ app and adjust coffee settings. | ||
| Low on coffee beans. Refill coffee bean container. | ||
| Coffee Brewer cannot be removed. | Coffee brewer not in neutral position. ▪ Machine is still in function mode, wait until function is complete before removing, Replace service door to ensure continuous function. ▪ If appliance is not running, ensure all parts are in place, and press the ON/OFF button to turn the appliance OFF. Wait until you hear no more sounds and press the ON/OFF button to turn the appliance back ON. Open the service door to try and remove again. Remove the coffee brewer and clean. NOTE: If coffee brewer has not returned to neutral position, call service (1-800-GECARES). | |
| Disposal Drawer cannot be removed. | Disposal Drawer can only be removed when the appliance is not mid-function. | Turn off the machine or wait until current function is complete before attempting to remove the disposal drawer. |
| Internal drip tray is filled with water | The coffee grounds are too fine. Adjust the coffee grinder so the grounds are larger. | |
| No steam or hot water is coming out of the steam wand. | The hole in the spout is clogged. Stop the cycle, unplug the machine, clear the steam wand spout using the cleaning tool as directed. | |
| Steam or hot water have stopped dispensing mid-process. | Water tank is empty. Refill the water tank to continue process. | |
| The function was cancelled early. Restart the function. | ||
| Poor crema formation and weak espresso. | High altitude affects boiling point and extraction. | Adjustments may be made using the SmartHQ app for high altitude settings. |
WiFi Connect
Press and hold the Espresso and Americano buttons simultaneously for 3 seconds to turn on the WiFi function. The espresso maker will beep to confirm the action and the WiFi icon will appear on the screen. WiFi icon will flash on UI. When the machine is successfully connected to WiFi the WiFi icon will go solid.
Follow the directions in the SmartHQ app to continue WiFi setup.
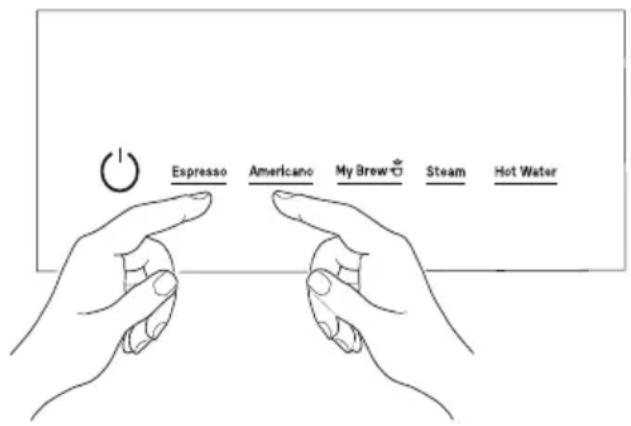
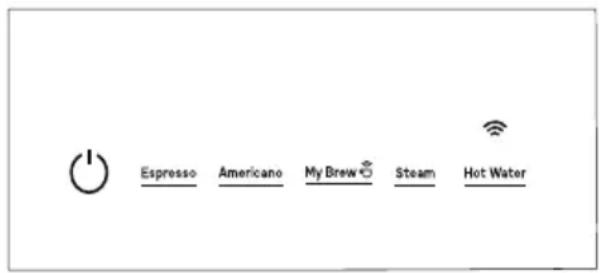
NOTE: To disconnect from WiFi, follow the same steps. The WiFi icon will disappear.
NOTE: Connecting the machine may take multiple attempts.
NOTE: In case of loss of power or connection, the machine may take a up to five minutes to reconnect to WiFi.
SmartHQ
Your Espresso Maker is WiFi Connect Enabled. A WiFi communication card is built into the product allowing it to communicate with your Smart Phone for remote monitoring, control, and notifications.
Please visit geappliances.com/ge/connected-appliances/ to learn more about connected appliance features and to learn what connected appliance App's will work with your Smart Phone.
FCC/IC COMPLIANCE STATEMENT:
This device complies with Part 15 of the FCC Rules. Operation is subject to the following two conditions:
- This device may not cause harmful interference, and
- This device must accept any interference received, including interference that may cause undesired operation.
Any changes or modifications not expressly approved by the party responsible for compliance could void the user's authority to operate the equipment.
NOTE: This equipment has been tested and found to comply with the limits for a Class B digital device, pursuant to Part 15 of the FCC Rules. These limits are designed to provide reasonable protection against harmful interference in a residential installation. This equipment generates uses and can radiate radio frequency energy and, if not installed and used in accordance with the instructions, may cause harmful interference to radio communications. However, there is no guarantee that interference will not occur in a particular installation. If this equipment does cause harmful interference to radio or television reception, which can be determined by turning the equipment off and on, the user is encouraged to try to correct the interference by one or more of the following measures:
- Reorient or relocate the receiving antenna.
- Increase the separation between the equipment and receiver.
- Connect the equipment into an outlet on a circuit different from that to which the receiver is connected.
- Consult the dealer or an experienced radio/television technician for help.
This device complies with Industry Canada licence-exempt RSS standard(s).
Operation is subject to the following two conditions: (1) This device may not cause interference, and (2) This device must accept any interference, including interference that may cause undesired operation of the device.
Labeling: Changes or modifications to this machine not expressly approved by the manufacturer could void the user's authority to operate the equipment.
ConnectPlus module only (or similar communication module)
RF Exposure - This device is only authorized for use in a mobile application. At least 20 cm of separation distance between the ConnectPlus device and the user's body must be maintained at all times.
FCC ID: ZKJ-WCATA006
IC ID: 10229A-WCATA006
GE Appliances Limited Warranty
If your appliance fails to operate properly while in use under normal household conditions within the warranty period, visit geappliances.com/contact for product care/maintenance self-help.
To initiate a warranty claim, please visit geappliances.com/contact, or call 1-800-GECARES. Please have your model number and serial number available. Return and packing instruction information will be provided at that time.
For the Period of: GE Appliances Covers
| One YearFrom the date of the original purchase | If the espresso maker fails due to a defect in materials or workmanship, during the limited one-year warranty, GE Appliances will either repair your product, replace your product with a new or remanufactured product, or refund the purchase price of the product at GE Appliances sole discretion. |
What GE Appliances Will Not Cover:
■ Service trips to your home.
■ Improper installation, delivery or maintenance.
■ Failure of the product if it is abused, misused or used for other than the intended purpose or used commercially.
■ Replacement of house fuses or resetting of circuit breakers.
■ Damage caused after delivery.
■ Damage to the product caused by accident, fire, floods or acts of God.
■ Incidental or consequential damage caused by possible defects with this appliance.
■ Labor and other charges to install and/or remove the product
EXCLUSION OF IMPLIED WARRANTIES
Your sole and exclusive remedies are product exchange or refund as provided in this Limited Warranty. Any implied warranties, including the implied warranties of merchantability or fitness for a particular purpose, are limited to one year or the shortest period allowed by law.
For US Customers: This limited warranty is extended to the original purchaser for products purchased for home use within the USA. In Alaska and Hawaii, the limited warranty does not include the costs of shipping units.
Some states do not allow the exclusion or limitation of incidental or consequential damages. This limited warranty gives you specific legal rights, and you may also have other rights which vary from state to state. To know what your legal rights are, consult your local or state consumer affairs office or your state's Attorney General.
Warrantor: GE Appliances, a Haier company Louisville, KY 40225
For Customers in Canada: This limited warranty is extended to the original purchaser and any succeeding owner for products purchased in Canada for home use within Canada. In-home warrant service will be provided in areas where it is available and deemed reasonable by Mabe to provide.
Warrantor Canada: MC Commercial, Burlington, Ontario, L7R 5B6
Service and Registration
Register your new appliance on-line at your convenience! Timely product registration will allow for enhanced communication and prompt service under the terms of your warranty, should the need arise.
Register your appliance at GEAppliances.com/register.
Contact Us
If you are not satisfied with the service you receive from GE Appliances, contact us on our Website with all the details including your phone number, or write to:
In the US: General Manager, Customer Relations | GE Appliances, Appliance Park | Louisville, KY 40225
GEAppliances.com/contact
In Canada: Director, Consumer Relations, MC Commercial Inc. | Suite 310, 1 Factory Lane | Moncton, N.B. E1C 9M3
GEAppliances.ca/en/contact-us

Profile
GE PROFILE AUTOMATIQUE MACHINE À ESPRESSO + MOUSSEUSE
natural_image
Exterior view of a modern office building (no signage)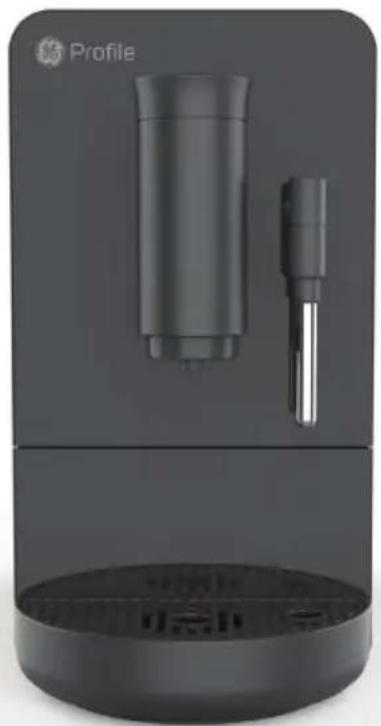
natural_image
Product photo of a Profile electric shaver with a cylindrical component and a metallic tool, shown in two views (no text or symbols on the device itself)P7CEBBS6RBB P7CEBAS6RBB
FRANÇAIS

Profile
NOUS VOUS REMERCIONS D'INTÉGRER GE APPLIANCES À VOTRE DEMEURE.
CONNEXION WI-FI....20
CONFORMITÉ DE LA FCC/IC 21
GARANTIE LIMITÉE DE GE APPLIANCES .... 2 2
SOUTIEN AU CONSOMMATEUR 23
natural_image
Diagram showing a circular object rolling down an arrow into a gear-like mechanical component (no text or symbols)Prêt à l'emploi!
P7CEBBS6RBB
My Brew (Mon infusion)
Hot Water (eau chaude)
natural_image
Simple geometric diagram of two concentric circles (no text or symbols)natural_image
Simple circular diagram with two curved arrows indicating rotation or cycle (no text or symbols)natural_image
Simple circular diagram with arrows indicating rotational direction (no text or symbols)natural_image
Two circular diagrams with arrows indicating rotational or directional movement, no text or symbols present.natural_image
Simple circular diagram with a blue ring and gray center (no text or symbols)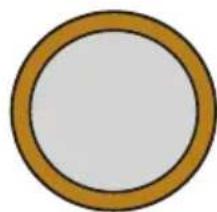
natural_image
Simple circular frame with a gold border and white interior (no text or symbols)natural_image
Simple orange circular frame with a white center, no text or symbols present.natural_image
Simple red circular frame with white center, no text or symbols presentnatural_image
Simple circular diagram with a gradient ring and curved arrows indicating rotation (no text or symbols)natural_image
Two circular diagrams showing a color transition from purple to black, with arrows indicating rotation (no text or symbols)natural_image
Simple circular diagram with black outer ring and red segment, surrounded by curved arrows (no text or symbols)natural_image
Diagram showing a circular component rolling down a gear with an arrow indicating rotational motion (no text or symbols)natural_image
Illustration of a hand holding a camera lens with rotational arrows indicating motion (no text or symbols)natural_image
Illustration of a hand holding a cylindrical device with rotating arrows indicating rotation (no text or symbols)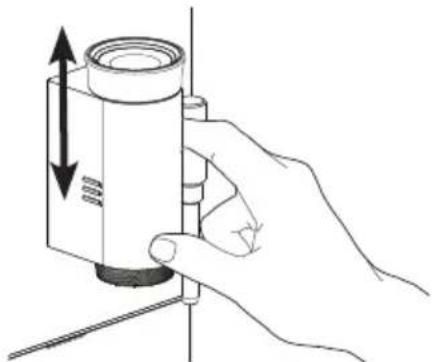
natural_image
Hand holding a cylindrical device with an arrow indicating upward motion (no text or symbols)natural_image
Line drawing of a hand holding a button with a power symbol (no text or labels)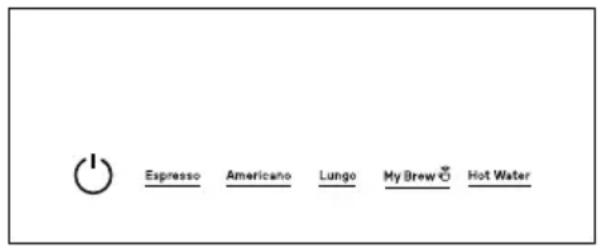
Fonctions Espresso, Lungo, Americano et My Brew
natural_image
Two-step diagram showing hand positioning of a device with arrows indicating movement (no text or symbols)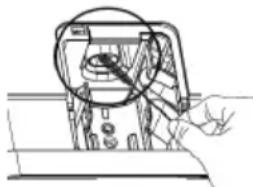
natural_image
Hand inserting a cable into an electronic device (no text or symbols visible)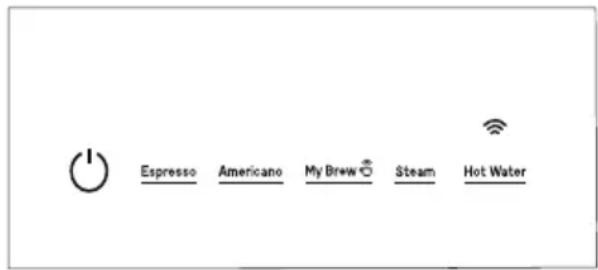
Louisville, KY 40225
Au Canada, service.geappliances.ca/servicio/fr_CA/
- GE PROFILE AUTOMATIC ESPRESSO MACHINE + FROTHER
- THANK YOU FOR MAKING GE APPLIANCES A PART OF YOUR HOME.
- Table of Contents
- SAFETY INFORMATION 4
- GETTING STARTED 6
- COMPONENTS 7
- ACCESSORIES 8
- CONTROL PANEL....9
- FUNCTIONS....10
- ALERTS 11
- USING YOUR ESPRESSO MACHINE 13
- CARE AND CLEANING 16
- TIPS 18
- TROUBLESHOOTING....19
- WiFi CONNECT SMARTHQ APP 21
- FCC STATEMENT 22
- LIMITED WARRANTY 24
- CONSUMER SUPPORT....25
- Product Registration
- IMPORTANT SAFETY INFORMATION READ ALL INSTRUCTIONS BEFORE USING THE APPLIANCE
- WARNING
- SAVE THESE INSTRUCTIONS
- IMPORTANT SAFEGUARDS
- Power Cord
- SK OF FIRE OR ELECTRIC SHOCK
- NOTE: For household use only.
- General Information
- Drip Tray
- Water Tank
- Coffee Bean Container
- Ready to Use!
- Components
- Espresso
- Lungo
- Americano
- My Brew
- Steam
- CAUTION
- Hot Water
- WiFi
- Add Water
- Add/Stir Beans
- Check Brew Unit
- Empty Waste
- Descale
- Rinsing
- Notification LED
- Pump Airlock Condition
- Coffee Grinder Knob
- Removable Steam Wand
- Adjustable Steam Wand and Coffee Spout
- Using your Espresso Machine
- How to Turn on the Machine
- Espresso, Lungo, Americano, and My Brew Functions
- Steam and Hot Water
- Custom Dispense Amount
- Cleaning the Espresso Machine
- Cleaning the Coffee Brewer and Service Area
- Descaling Process
- STAGE 1:
- STAGE 2:
- System Emptying
- Checking Your Water Hardness
- ■ Cappuccino
- Latte
- ■ How to steam milk:
- Troubleshooting
- WiFi Connect
- SmartHQ
- FCC/IC COMPLIANCE STATEMENT:
- GE Appliances Limited Warranty
- What GE Appliances Will Not Cover:
- EXCLUSION OF IMPLIED WARRANTIES
- Service and Registration
- Contact Us
- Profile
- GE PROFILE AUTOMATIQUE MACHINE À ESPRESSO + MOUSSEUSE
- NOUS VOUS REMERCIONS D'INTÉGRER GE APPLIANCES À VOTRE DEMEURE.
- CONNEXION WI-FI....20
- CONFORMITÉ DE LA FCC/IC 21
- GARANTIE LIMITÉE DE GE APPLIANCES .... 2 2
- SOUTIEN AU CONSOMMATEUR 23
- Prêt à l'emploi!
- My Brew (Mon infusion)
- Hot Water (eau chaude)
- Fonctions Espresso, Lungo, Americano et My Brew
Brand : GE
Model : Profile P7CEBAS6RBB
Category : Coffee machine