HCC3430AGS - Cooker HAIER - Free user manual and instructions
Find the device manual for free HCC3430AGS HAIER in PDF.
Download the instructions for your Cooker in PDF format for free! Find your manual HCC3430AGS - HAIER and take your electronic device back in hand. On this page are published all the documents necessary for the use of your device. HCC3430AGS by HAIER.
USER MANUAL HCC3430AGS HAIER
Cooktop Part / Material Suggested Cleaners ............................................................17 TROUBLESHOOTING ........................................................................................ 19 LIMITED WARRANTY ........................................................................................ 20 RECORD KEEPING Thank you for purchasing this Haier product. This user manual will help you get the best performance from your new cooktop. For future reference, record the model and serial number located on underside of the cooktop, and the date of purchase. Staple your proof of purchase to this manual to aid in obtaining warranty service if needed.
Your safety and the safety of others are very important. We have provided many important safety messages in this manual and on your appliance. Always read and obey all safety messages. DANGER WARNING CAUTION This is the safety alert symbol. This symbol alerts you to potential hazards that can kill or hurt you and others. All safety messages will follow the safety alert symbol and either the word “DANGER,” “WARNING” or “CAUTION.” These words mean: An imminently hazardous situation. You could be killed or seriously injured if you don’t immediately follow instructions. A potentially hazardous situation which, if not avoided, could result in death or serious bodily injury. A potentially hazardous situation which, if not avoided, may result in moderate or minor injury. All safety messages will tell you what the potential hazard is, tell you how to reduce the chance of injury, and tell you what can happen if the instructions are not followed.3 WARNING Fire Hazard If the information in this manual is not followed exactly, a fire or explosion may result causing property damage, personal injury or death. - Do not store or use gasoline or other flammable vapors and liquids in the vicinity of this or any other appliance. - WHAT TO DO IF YOU SMELL GAS
- Do not try to light any appliance.
- Do not touch any electrical switch.
- Do not use any phone in your building.
- Immediately call your gas supplier from a neighbor’s phone. Follow the gas supplier’s instructions.
- If you cannot reach your gas supplier, call the fire department. - Installation and service must be performed by a qualified installer, service agency or the gas supplier. WARNING The California Safe Drinking Water and Toxic Enforcement Act requires the Governor of California to publish a list of substances known to the State of California to cause cancer, birth defects, or other reproductive harm, and requires businesses to warn of potential exposure to such substances. This product contains a chemical known to the State of California to cause cancer, birth defects, or other reproductive harm. This appliance can cause low-level exposure to some of the substances listed, including benzene, formaldehyde, carbon monoxide, toluene, and soot.4 IMPORTANT SAFETY INSTRUCTIONS
WARNING: To reduce the risk of re, electrical shock, injury to persons,
or damage when using the cooktop, follow basic precautions, including the following:
This appliance is intended for normal family household use only.
Be sure your appliance is properly installed and grounded by a qualied technician. Have the installer show you where the gas shut- o valve is located.
Do not repair or replace any part of the appliance unless specically recommended in this manual. All other servicing should be referred to a qualied technician.
For proper lighting and performance of the burners, keep the igniters clean and dry.
In the event that a burner goes out and gas escapes, open a window or a door. Wait at least 5 minutes before using the cooktop.
Do not obstruct the ow of combustion and ventilation air.
Do not use aluminium foil to line any part of the cooktop.
If the cooktop is near a window, be certain that curtains or any other window covering do not blow over or near the burners.
Never use this appliance as a space heater to heat or warm the room. Doing so may result in carbon monoxide poisoning. To reduce the risk of injury to persons, in the event of a grease re, observe the following:
Flaming grease outside of utensil can be extinguished with baking soda or, if available, a multipurpose dry chemical or foam type extinguisher.
Never pick up a aming pan. Smother or use dry chemical or foam type extinguishers.
Wipe up spill over immediately.
Do not allow aluminum foil, plastic, paper or cloth to come in contact with a hot surface.
Always have a working smoke detector near the kitchen. For Units with Ventilating Hoods:
Clean Ventilating Hoods Frequently - Grease should not be allowed to accumulate on hood or lter.5 IMPORTANT SAFETY INSTRUCTIONS Do Not Leave Children Alone
Children or pets should not be left alone or unattended in area where appliance is in use. They should never be allowed to sit or stand on any part of the appliance.
Do not store items of interest to children in cabinets above a cooktop or on the blackguard of a cooktop; children climbing on the cooktop to reach items could be seriously injured. When using the cooktop
Do not touch the burner grates or the immediate surrounding area. Surface areas may become hot enough to cause burns.
Do not allow pans to boil dry.
Never leave the cooktop unattended when in use. Boilovers cause smoking, and greasy spillovers may ignite. A spill on a burner can smother all or part of the ame or hinder spark ignition. If a boilover occurs, turn o burner and check operation. If burner is operating normally, turn it back on.
During cooking, set the burner control so that the ame heats only the bottom of the pan and does not extend beyond the bottom of the pan.
Take care that drafts like those from fans or forced air vents do not blow ammable material toward the ames or push the ames so that they extend beyond the edges of the pan. Utensil Handles Should Be Turned Inward and Not Extend Over Adjacent Surface Units
To reduce the risk of burns, ignition of ammable materials, and spillage due to unintentional contact with the utensil, the handle of a utensil should be positioned so that it is turned inward, and does not extend over adjacent surface units. Use Only Dry Pot holders
Moist or damp pot holders on hot surfaces may result in burns from steam. Do not use a towel or other bulky cloth. Wear Proper Apparel
Loose-tting or hanging garments should never be worn while using the appliance.
Never let clothing, pot holders, or other ammable materials come in contact with hot burners or hot burner grates. Storage in or on Appliance
Flammable materials should not be stored near surface units. Do Not Use Water on Grease Fires
Smother re or ame or use dry chemical or foam-type extinguisher.6 IMPORTANT SAFETY INSTRUCTIONS Use Proper Pan Size and Type
Use only certain types of glass, heatproof glass ceramic, ceramic, earthenware, or other glazed utensils that are suitable for cooktop use. When Cleaning the Cooktop:
Make sure all controls are o and all surfaces are cool before cleaning any part of the cooktop.
Some cleaners can produce noxious fumes if applied to a hot surface.
WARNING Installation and service must be performed by a qualified installer, service agency or the gas supplier. Failure to do so can result in death, fire or electrical shock. In case of Propane gas installation
The cooktop is ready for use with natural gas. It may be converted for use with propane gas using the propane conversion kit supplied with the cooktop.
Be sure the unit being installed is correct for the type of gas being used.
Refer to the rating plate located on the underside burner box (see installation instruction).
When connecting the unit to propane gas, make certain the propane tank is equipped with its own high pressure regulator.
In addition, the pressure regulator supplied with the cooktop must be on the inlet gas pipe of this unit.7 WARNING Electrical Shock Hazard Always disconnect the electrical plug from the wall receptacle before servicing this unit. Plug into a grounded 3 prong outlet. Do not remove the ground prong from the power cord plug. Do not use an adapter. Do not use an extension cord. Failure to do so can result in death, fire or electrical shock. In case of electrical failure
If for any reason a gas control knob is turned ON and there is no electric power to operate the electronic igniter of the cooktop, turn OFF all gas control knobs and wait 5 minutes for the gas to dissipate before lighting the burner manually.
To light the burner manually, carefully hold a lighted match to the burner ports and push and turn the gas control knob to HI until it lights and then turn the knob to desired setting.8
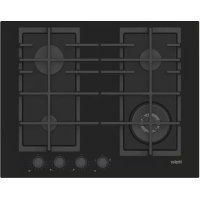
1. Left Front (700 to 18000 Btu/h
burner & control knob)
2. Left Rear (1,300 to 6,300 Btu/h
burner & control knob)
3. Right Rear (2,200 to 12,000 Btu/h
burner & control knob)
4. Right Front (1,000 to 4,000 Btu/h
burner & control knob)
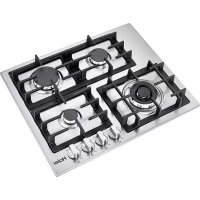
1. Left (700 to 18000 Btu/h burner &
2. Center Front (1,000 to 4,000 Btu/h
burner & control knob)
3. Center Rear (2,200 to 12,000 Btu/h
burner & control knob)
4. Right Rear (1,300 to 9,000 Btu/h burner
5. Right Front (1,300 to 6,300 Btu/h
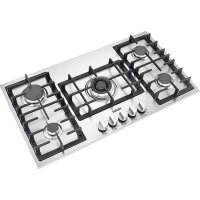
1. Left Front (1,300 to 6,300 Btu/h
burner & control knob)
2. Left Rear (1,300 to 9,000 Btu/h
burner & control knob)
3. Center (700 to 18,000 Btu/h burner &
4. Right Rear (2,200 to 12,000 Btu/h
burner & control knob)
5. Right Front (1,000 to
Appliance installed over 2,000 feet (610mt) De-rate eectCooktop Nominal values Btu/h from 0 to 2,000 (610)Elevation from 2,000 (610) to 4,000 (1220)Elevation from 4,000 (1220) to 6,000 (1829)Elevation from 6,000 (1829) to 8,000 (2438)Elevation from 8,000 (2438) to 10,000 (3048)24” 4 burners40,300 37,076 34,109 31,381 28,87030” 5 burners49,300 45,264 41,643 38,311 35,24636” 5 burners49,300 45,264 41,643 38,311 35,246(De-rate 4% per 1000 feet)
GAS COOKTOP OPERATION
WARNING Fire Hazard Do not operate a burner using empty cookware or without cookware on the grate. Do not touch the burner when the igniters are clicking (sparking). Do not let the burner flame extend beyond the edge of the pan. Turn off all controls when done cooking. Failure to do so can result in death or fire.
The gas burner uses an electric ignition device located near each burner that by means of spark igniters ensure its surface lights automatically.10 The electronic auto re-ignition, lights the surface burners when the control knobs are turned at any valve rotation that admits sucient gas ow to support a ame. If any burner ame goes out due to a draft or other reason, the igniter automatically sparks on all burners to relight the ame. NOTE: This feature is provided as a convenience and is not intended as a safety feature. To set: Push and turn knob counterclockwise, all (4 or 5) spark plugs will generate a clicking sound (spark), however only the burner with the control knob turned from HI _ LO will produce a ame and reignite automatically if the ame goes out. GAS BURNERS The gas burners design of these cooktop models, allow a pleasing option for cooking where size, power and simmering are a primary concern.
BURNERS WITH ONE-RING FLAME
This gas burner is designed for a wide range of pan sizes. The use of this burner is very simple; just push and turn the knob counterclockwise and set to the desired position from HI to LO heat level (see chart guide when setting heat level). Its ignition device is automatic re-ignition.
This special burner has two separate ame rings to provide a real full heat regulation from high power to simmering. To set:
1. Push and turn counterclockwise the knob
between HI-LO main ame, when the burner is turned on, the main ame and the Simmer ame will always light and stay on.
2. Setting heat level main ame from HI-LO
OFF Turn the knob clockwise as far as it will go to the o position.
Use the right front, right rear or left rear burners for simmering, or for cooking smaller quantities of food requiring small cookware.
Use the left front POWER burner for bringing liquids to a rapid boil, cooking large quantities of food, or for deep-fat frying requiring large cookware. The Burner Flames Turn each burner on. Flames should be blue in color with no trace of yellow. The burner ames should not utter or blow away from the burner. The inner cone of the ame should be between ” and ” long.
SUPER SEALED SURFACE BURNERS
IMPORTANT: Do not obstruct the ow of combustion and ventilation air around the burner grate edges. Burner cap and gas spreader Always keep the burner cap and gas spreader in place when using a surface burner. A clean burner cap and spreader will help prevent poor ignition and uneven ames. Always clean the part after a spillover and routinely remove and clean according to the “General Cleaning” section.12 Burner base and injector Gas must ow freely throughout the injector orice to light properly. Keep this area free of soil and do not allow spills, food, cleaning agents or any other material to enter the injector orice opening. Protect it during cleaning. 1/2” to 3/4” COOKTOP BURNER
Be sure when lighting the burner:
Gas spreader pin is properly aligned with burner base slot.
Cap pin is properly aligned with gas spreader slot. Burner ports Check burner ames occasionally. A good ame is blue in color, not yellow. Keep this area free of soil and do not allow spills, food, cleaning agents or any other material to enter the burner ports. To clean gas burner: CAUTION Toxic Fume Hazard Do not clean the cooktop while it is still hot. Some cleaners produce noxious fumes when applied to a hot surface. Failure to do so can result in moderate or minor bolily injury.13 WARNING Burn Hazard Before cleaning, make sure all controls are off and the cooktop is cool. Failure to do so can result in serious bodily injury.
1. Remove the burner cap from the burner base and clean according to cleaning
2. Remove the burner spreader. Clean the gas tube
opening and burner port according to cleaning section.
3. Clean the burner base with a damp cloth (keep
the gas injector area free of cleaning agents and any other material from entering the injector orice).
4. Replace the burner spreader and cap, making sure
the alignment pins are properly aligned with the slots.
5. Turn on the burner. If the burner does not light,
check cap and spreader alignment. If the burner still does not light, do not service the gas burner yourself. Contact a qualied repair technician.14 COOKWARE IMPORTANT: Never leave empty cookware on a hot surface cooking area, element or surface burner. Ideal cookware should have a at bottom, straight sides, a well tting lid and the material should be of medium-to-heavy thickness. Rough nishes may scratch the cooktop. Aluminum and copper may be used as a core or base in cookware. However, when used as a base it can leave permanent marks on the cooktop or grates. Cookware material is a factor in how quickly and evenly heat is transferred, which aects cooking results. A nonstick nish has the same characteristics as its base material. For example, aluminum cookware with a non-stick nish will take on the properties of aluminum. Use the following chart as a guide for cookware material characteristics. COOKWARE CHARACTERISTICS Aluminum: Heats quickly and evenly. Suitable for all types of cooking. Medium or heavy thickness is best for most cooking tasks. Cast Iron: Heats slowly and evenly. Good for browning and frying. Maintains heat for slow cooking. Ceramic or Ceramic glass: Follow manufacturer’s instructions. Heats slowly, but unevenly. Ideal results on low to medium heat settings. Copper: Heats very quickly and evenly. Earthenware: Follow manufacturer’s instructions. Use on low heat settings. Porcelain enamel on steel or cast Iron: See stainless steel or cast iron. Stainless steel: Heats quickly, but unevenly. A core or base of aluminum or copper on stainless steel provides even heating.15
MATCH PAN DIAMETER TO FLAME SIZE
The ame should be the same size as the bottom of the pan or smaller. Do not use small pans with high ame settings as the ames can lick up the sides of the pan. Oversize pans that span two burners are placed front to rear, not side to side. Use Balanced Pans Pans must sit level on the cooktop grate without rocking. Center the pan over the burner. Use a Lid That Fits Properly A well-tting lid helps shorten the cooking time. Flat, heavy bottom pans provide even heat and stability. BALANCED PAN UNBALANCED PAN CONVEX (ROUNDED) CONCAVE (HOLLOW)
FIT PROPERLY Canners and pressure cookers must meet the same requirements as described above. After bringing contents to a boil, use lowest heat setting possible to maintain a boil or pressure (for pressure canners/cookers).16
CLEANING THE COOKTOP
CAUTION Toxic Fume Hazard Do not clean the cooktop while it is still hot. Some cleaners produce noxious fumes when applied to a hot surface. Failure to do so can result in moderate or minor bolily injury. WARNING Burn Hazard Before cleaning make sure the burners are turned off and the grates are cool. Failure to do so can result in serious bodily injury. The entire cooktop can be safely cleaned by wiping it with a soapy sponge, and then rinsing and drying. If stubborn soil remains, follow the recommended cleaning methods below.
Always use the mildest cleaner that will do the job. Use clean, soft cloths, sponges or paper towels.
Rub stainless steel nishes in the direction of the grain. Wipe area dry to avoid water marks.
Do not clean removable cooktop parts in any self-cleaning oven.17
After cleaning, place all parts in their proper positions before using cooktop. The cleaners recommended below and on the following page indicate cleaner types and do not constitute an endorsement of a particular brand. Use all products according to package directions.
COOKTOP PART / MATERIAL SUGGESTED CLEANERS
Parts and Materials Suggested Cleaners Suggestions/Reminders Burner Base (Cast Aluminum)
Keep the gas injector area free of cleaning agents and any other material from entering the injector orice. Gas Spreader (Cast Aluminum)
Detergent and hot water; rinse and dry.
Sti nylon bristle toothbrush to clean port openings.
Abrasive cleansers: Revere ware
metal polish. Following package directions Use Brillo
pads. Rinse and dry.
Rub lightly, in a circular motion.
Aluminum cleaners may dull the surface.
To clean port opening, use a tooth brush or straightened paper clip. Burner cap and grate (Porcelain enamel on cast iron)
Non abrasive cleaners: Hot water and detergent, Fantastic, Formula 409. Rinse and dry immediately.
Abrasive cleaners for stubborn stains: soap- lled steel wool pad.
The grates are heavy; use care when lifting. Place on a protected surface.
Blisters/crazing/chips are common due to the extreme temperatures on grate ngers and rapid temperature changes.
Acidic and sugar-laden spills deteriorate the enamel. Remove soil immediately.
Abrasive cleaners, used too vigorously or too often, can eventually mar the enamel. Exterior nish (Porcelain enamel)
Hot sudsy water: rinse and dry thoroughly.
Liquid cleaners: Kleen King
Acidic and sugar-laden spills deteriorate the porcelain enamel. Remove soil immediately.
Always apply minimal pressure with abrasive cleaners.18 Parts and Materials Suggested Cleaners Suggestions/Reminders Control knobs (Metal)
Hot sudsy water: rinse and dry immediately.
Do not use abrasive scrubbers or cleansers.
Do not force knobs onto valve shaft.
Pull knobs straight away from control panel to remove.
When replacing knobs, make sure knobs are in the OFF position.
Do not remove seats under knobs. Exterior nish (Stainless Steel)
Nonabrasive cleaners: Hot water and detergent. Fantastic
. Rinse and dry immediately.
Cleaner polish: Stainless Steel Magic
to protect the nish from staining and pitting; enhances appearance.
Hard water spots: Household white vinegar.
stainless steel liquid cleaner, Cameo
aluminum & stainless steel cleaner, Bon Ami
Heat discoloration: Bar Keepers Friend
Stainless steel resists most food stains and pit marks provided the surface is kept clean and protected.
Never allow food stains or salt to remain on stainless steel for any length of time.
Rub lightly in the direction of polish lines.
Chlorine or chlorine compounds in some cleaners are corrosive to stainless steel.
Check ingredients on label before using.
Always apply minimal pressure with abrasive cleaners especially on graphics. Igniters (Ceramic)
Carefully wipe with a cotton swab dampened with water, ammonia or Formula 409
Gently scrape soil o with a toothpick.
Avoid excess water on the igniter. A damp igniter will prevent burner from lighting.
Remove any lint that may remain after cleaning.19 TROUBLESHOOTING Try the solutions suggested here rst in order to avoid the cost of an unnecessary service call.
Is the power supply cord unplugged? Plug into a grounded 3 prong outlet.
Has a household fuse been blown or has the circuit breaker been tripped? Replace the fuse or reset the circuit.
Is this the rst time the surface burners have been used? Turn on any one of the surface burner knobs to release air from the gas lines.
Is the control knob set correctly? Push in knob before turning to a setting.
Are the burner ports clogged? See “Super Sealed Surface Burners” section.
Are the burner caps positioned properly? See “Super Sealed Surface Burners” section.
Is propane gas being used? The appliance may have been converted improperly. Contact a service technician.
Is the burner wet? Let it dry.
Is the cap and gas spreader positioned correctly? Make sure the alignment pins are properly aligned see “Super Sealed Surface Burners” section.
Is the cookware the proper size? Use cookware about the same size as the surface cooking area, element or surface burner. Cookware should not extend more than 1” (2.5 cm) outside the cooking area.
COOKTOP COOKING RESULTS NOT WHAT EXPECTED
Is the proper cookware being used? See “Cookware” section.
FULL TWO YEAR WARRANTY
For 24 months from the date of original retail purchase, Haier will repair or replace any part free of charge including labor that fails due to a defect in materials or workmanship. Haier may replace or repair at their sole discretion any part, sub system including the entire product. Product must be accessible, without encumbrance and installed properly to receive for warranty repair service. LIMITED WARRANTY NOTE: This warranty commences on the date the item was purchased, and the original purchase receipt must be presented to the authorized service representative before warranty repairs are rendered. Exceptions: Commercial Use Warranty 90 days labor from date of original purchase 90 days parts from date of original purchase No other warranty applies.
FOR WARRANTY SERVICE
All service must be performed by a Haier authorized service center. For the name and telephone number of the nearest authorized service center, please call 1-877-337-3639. Before calling please have available the following information: Model number and serial number of your appliance. The name and address of the dealer you purchased the unit from and the date of purchase. A clear description of the problem. A proof of purchase (sales receipt). This warranty covers home appliance services within the contiguous United States and Canada and where available in Alaska, Hawaii and Puerto Rico. What is not covered by this warranty: Replacement or repair of household fuses, circuit breakers, wiring or plumbing. A product whose original serial number has been removed or altered. Any service charges not specically identied as normal such as normal service area or hours. Damage to clothing. Damage incurred in shipping. Damage caused by improper installation or maintenance. Damage from misuse, abuse accident, re, ood, or acts of nature. Damage from service other than an authorized Haier dealer or service center. Damage from incorrect electrical current, voltage or supply. Damage resulting from any product modication, alteration or adjustment not authorized by Haier. Adjustment of consumer operated controls as identied in the owner’s manual. Hoses, knobs, lint trays and all attachments, accessories and disposable parts. Labor, service transportation, and shipping charges for the removal and replacement of defective parts beyond the initial 24-month period. Damage from other than normal household use. Any transportation and shipping charges.
EXPRESS ED OR IMPLIED, INCLUDING BUT
PARTICULAR PURPOSE The remedy provided in this warranty is exclusive and is granted in lieu of all other remedies. This warranty does not cover incidental or consequential damages, so the above limitations may not apply to you. Some states do not allow limitations on how long an implied warranty lasts, so the above limitations may not apply to you. This warranty gives you specic legal rights, and you may have other rights, which vary from state to state. Haier America Wayne, NJ 0747021
stainless steel liquid cleaner, Cameo
stainless steel liquid cleaner, Cameo
HCC6430AGS Issued: March 2015 Printed in Italy Part # 00XXXXXXXXX