WDA518SHS - Dishwasher WHIRLPOOL - Free user manual and instructions
Find the device manual for free WDA518SHS WHIRLPOOL in PDF.
Download the instructions for your Dishwasher in PDF format for free! Find your manual WDA518SHS - WHIRLPOOL and take your electronic device back in hand. On this page are published all the documents necessary for the use of your device. WDA518SHS by WHIRLPOOL.
USER MANUAL WDA518SHS WHIRLPOOL
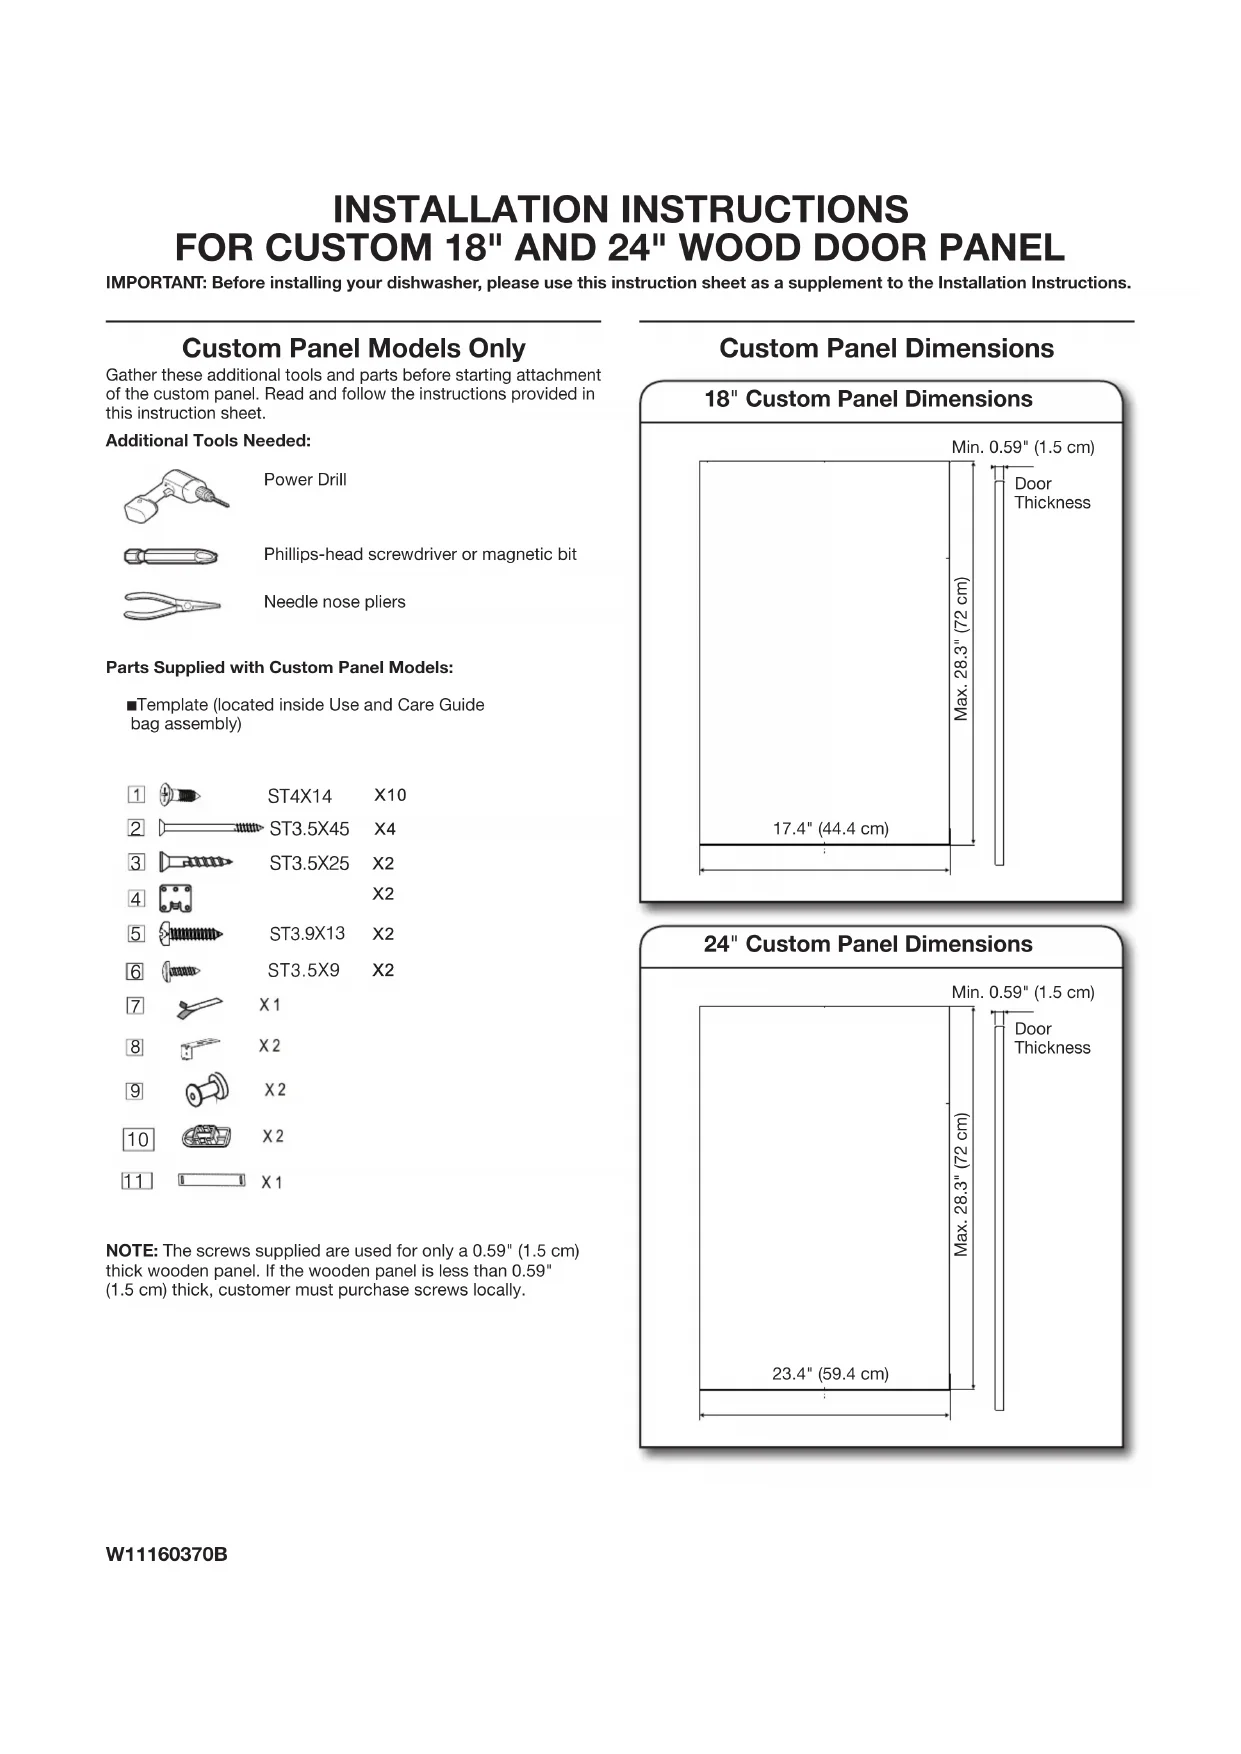
IMPORTANT: Before installing your dishwasher, please use this instruction sheet as a supplement to the Installation Instructions. Custom Panel Models Only Gather these additional tools and parts before starting attachment of the custom panel. Read and follow the instructions provided in this instruction sheet.Additional Tools Needed:Power DrillPhillips-head screwdriver or magnetic bitNeedle nose pliersParts Supplied with Custom Panel Models: ■ Template (located inside Use and Care Guidebag assembly)NOTE: The screws supplied are used for only a 0.59" (1.5 cm) thick wooden panel. If the wooden panel is less than 0.59" (1.5 cm) thick, customer must purchase screws locally. Custom Panel Dimensions Max. 28.3" (72 cm)17.4" (44.4 cm)Min. 0.59" (1.5 cm)Door Thickness 18" Custom Panel Dimensions Max. 28.3" (72 cm)23.4" (59.4 cm)Min. 0.59" (1.5 cm)Door Thickness 24" Custom Panel Dimensions ST3.5X25
3. Install brackets and studs
IMPORTANT: Make sure to countersink screw heads on back side of panel so that the screw heads are ush with the panel. NOTES: ■ The handle for the custom panel is not included. ■ All mounting hardware supplied is for a 0.59" (1.5 cm) thick wood panel. If a thinner wood panel or materials other than wood are used, it is the customer’s responsibility to obtain the proper length screws and adjust the pilot holes accordingly. IMPORTANT: Use a moisture-resistant sealer on both sides and all edges of the panel to avoid damage from moisture.
1. Attach template to wood panel
Attach the provided template to the back side of the custom panel with tape. Make sure that the center of the template is aligned with the center of the wooden panel and top of the template is aligned to the top face of the wooden panel.
2. Pre-drill holes for studs and brackets7. Check the spring tension
Open and close the door to check the spring tension of the door.
8. Adjust spring tension (if needed)
If needed, adjust the spring tension by using a Phillips-head screwdriver. Turn screws clockwise to increase tension or counterclockwise to decrease door tension.
5. Slide panel onto door
Align the studs on the custom panel to the keyhole slots on the door assembly. Ensure that the studs and brackets are engaged in the keyhole slots. Slide panel down until the top surface of the panel is ush with the top of the door. Secure the door panel by inserting the four anchor screws provided into the inner door frame holes. See screw hole locations in the above illustration. ©2018 All rights reserved.