
Create 4 E4T14ST - Toaster ELECTROLUX - Free user manual and instructions
Find the device manual for free Create 4 E4T14ST ELECTROLUX in PDF.
| Product type | Toaster |
| Brand | Electrolux |
| Model | Create 4 E4T14ST |
| Capacity (number of slots) | 4 (four) slots |
| Browning control | 7 levels (1 to 7) |
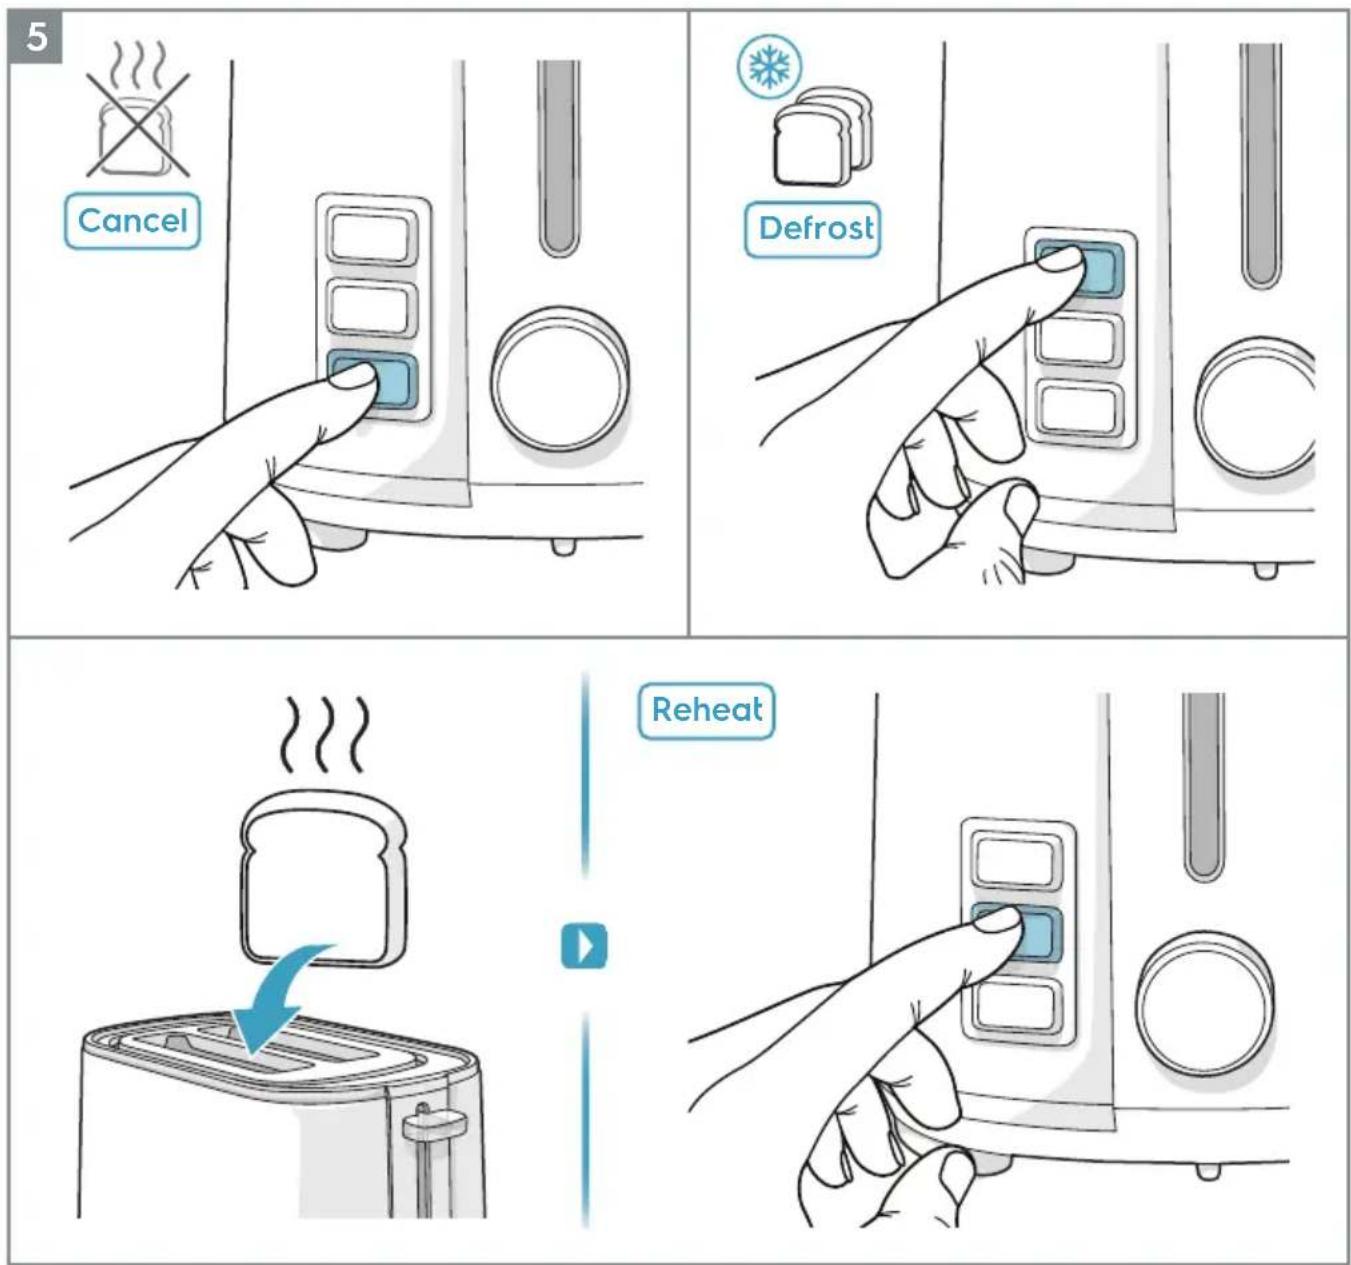
| Special functions | Defrost, Reheat, Cancel |
| Crumb tray | Removable, easy to empty |
| Cord storage | Under the toaster |
| Included accessory | Pastry rack |
| Housing material | Thermal insulation |
| Power | 900 W (estimated) |
| Voltage / Frequency | 230 V ~ 50/60 Hz (automatic adjustment) |
| Dimensions (W x D x H) | Approximately 30 x 20 x 20 cm |
| Weight | Approximately 1.5 kg |
| Cord length | Approximately 1 m |
| Safety | Automatic shut-off, insulated housing, dust cover |
| Maintenance and cleaning | Clean with a damp cloth, empty the crumb tray |
| Usage | Fresh bread, frozen bread, reheating toast, pastries |
| Environmental information | Recyclable, do not dispose of with household waste |
| Spare parts available | Crumb tray, pastry rack (on Electrolux website) |
Frequently Asked Questions - Create 4 E4T14ST ELECTROLUX
User questions about Create 4 E4T14ST ELECTROLUX
0 question about this device. Answer the ones you know or ask your own.
Ask a new question about this device
Download the instructions for your Toaster in PDF format for free! Find your manual Create 4 E4T14ST - ELECTROLUX and take your electronic device back in hand. On this page are published all the documents necessary for the use of your device. Create 4 E4T14ST by ELECTROLUX.
USER MANUAL Create 4 E4T14ST ELECTROLUX
natural_image
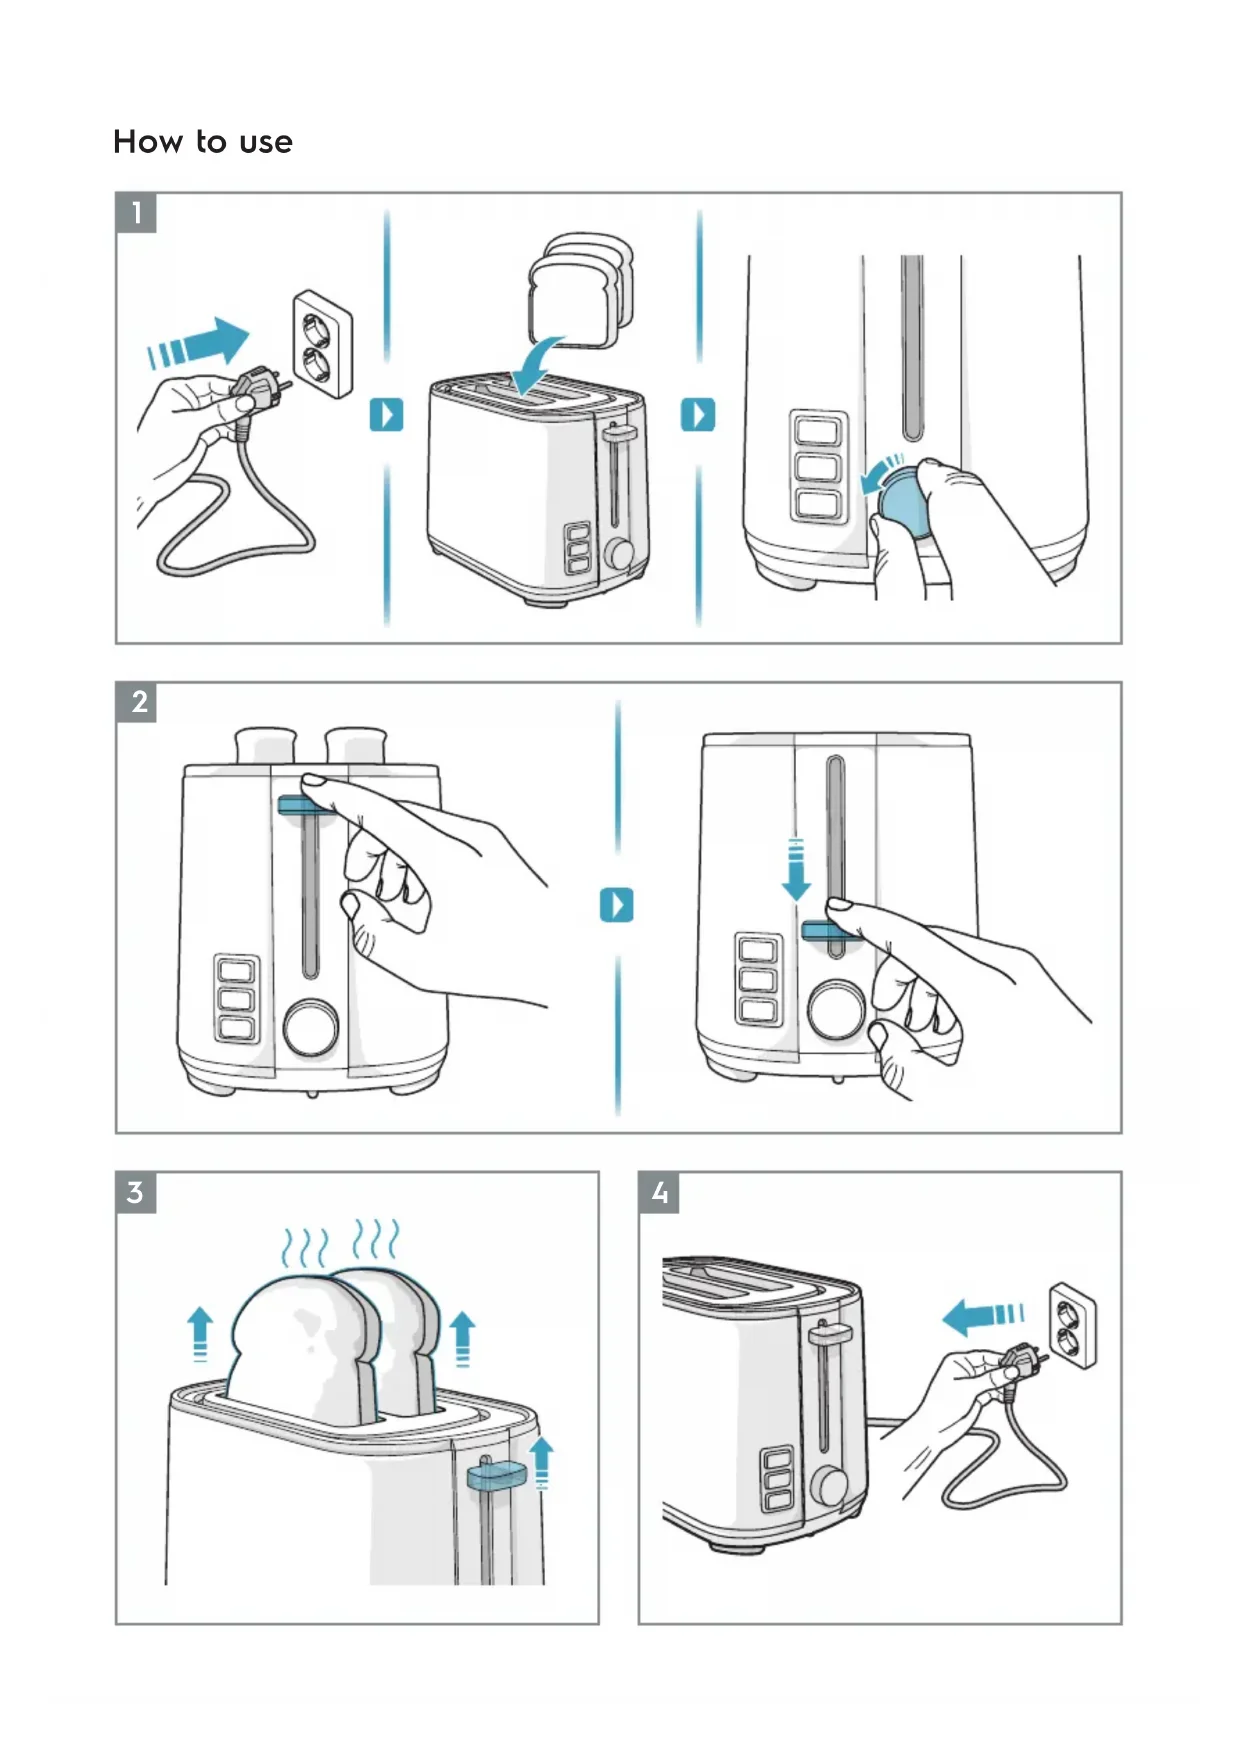
Line drawing of a standard 3D toaster with two side grilles and control buttons (no text or symbols)How to use
natural_image
Illustration of two hands operating a toaster with a play button, showing the process (no text or symbols)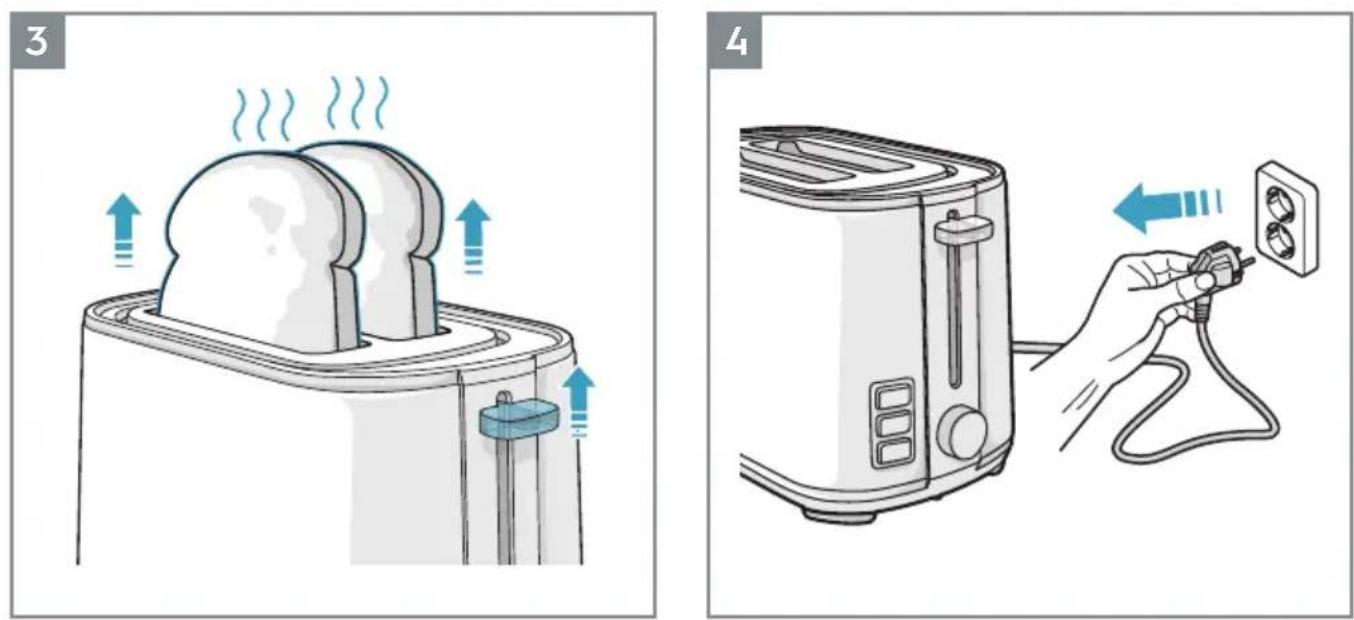
Button Function

Warning!
6

natural_image
Illustration of a hand holding a steaming cup with a diagonal line crossing through it (no text or symbols)Cleaning
Thank you for choosing an Electrolux product. In order to ensure the best results, always use original Electrolux accessories and spare parts. They have been designed especially for your product. This product is designed with the environment in mind. All plastic parts are marked for recycling purposes.
Visit our website to:
Get usage advice, brochures, trouble shooter, service information:
www.electrolux.com
Register your product for better service:
www.electrolux.com/productregistration
Buy Accessories and Consumables for your appliance:
www.electrolux.com/shop
CUSTOMER CARE AND SERVICE
When contacting Service, ensure that you have the following data available.
The information can be found on the rating plate.
Model, PNC, Serial Number.
Warning / Caution-Safety information
General information and tips
Environmental information
COMPONENTS
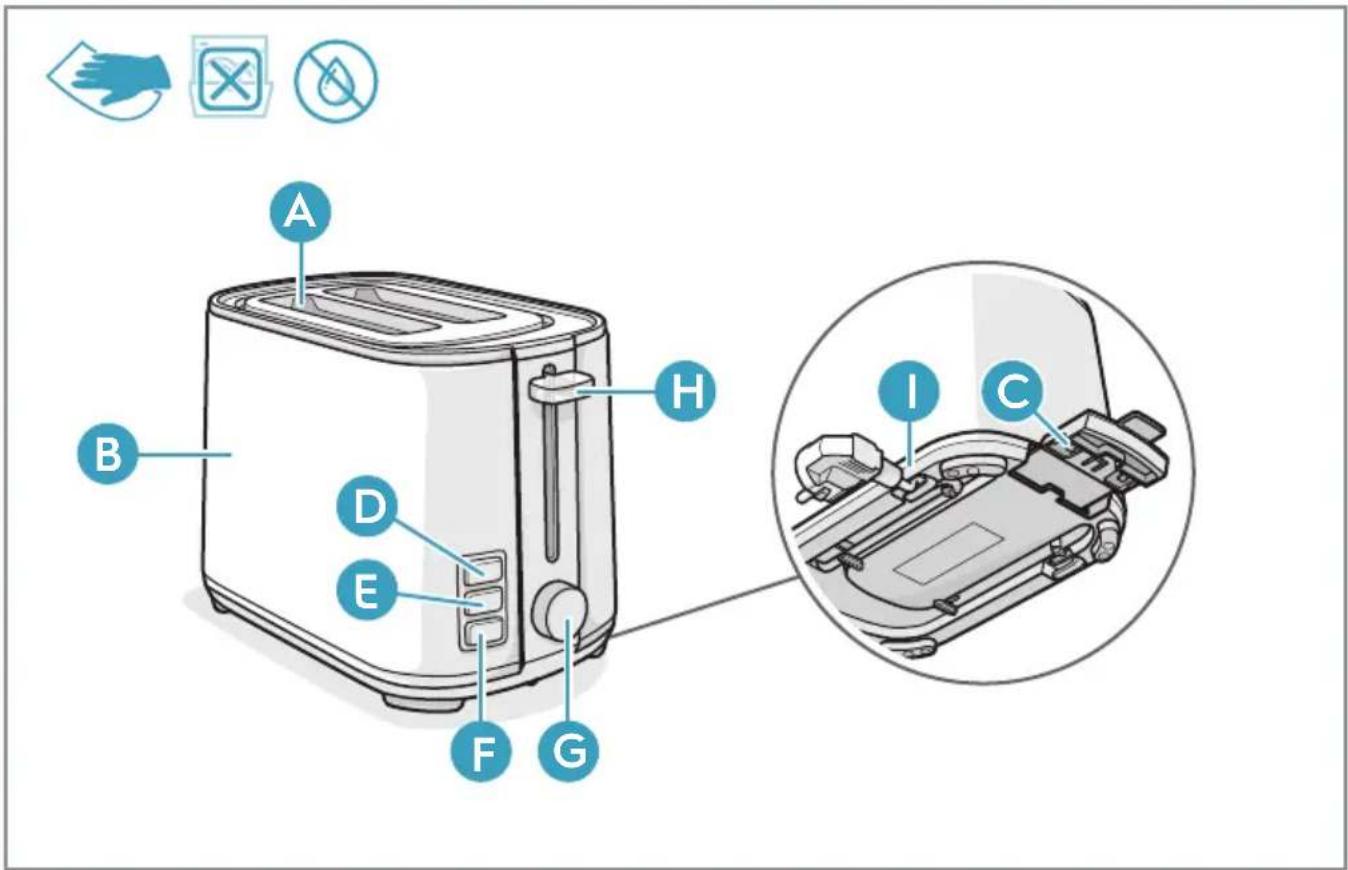
A Toasting slot
B Thermally insulated outer housing
C Crumb drawer
D Defrost button with indicator lamp
E Reheat button with indicator lamp
F Stop button with indicator lamp
G Browning control
H Start lever
I Cord storage (on the underside of the toaster)
GETTING STARTED
Before you start using the toaster for the first time, it should be placed near an open window and operated a few times at maximum browning setting without any bread.
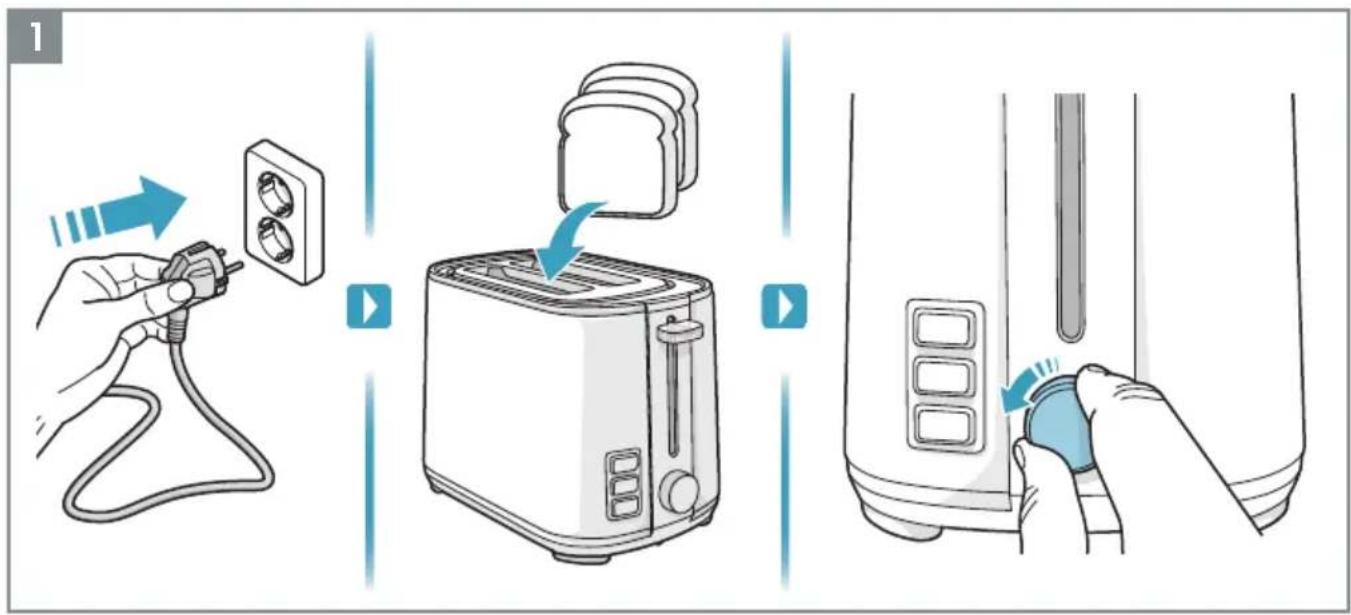
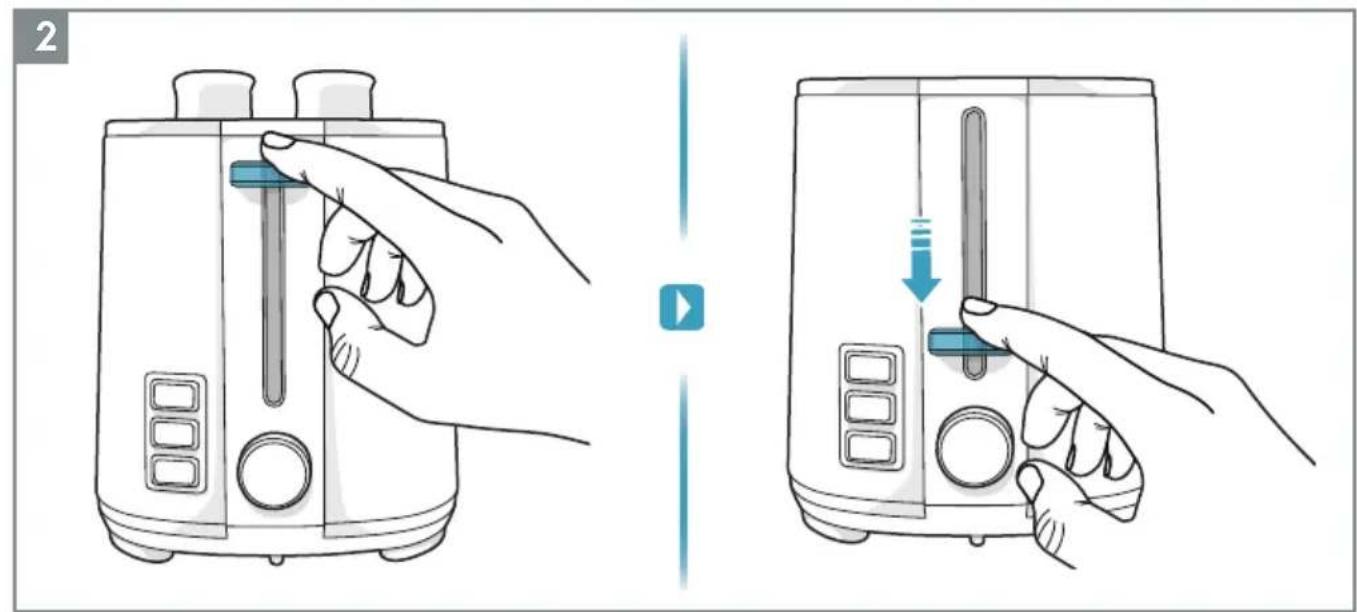
1 How to use the toaster: Plug the cord into the mains, insert bread and select browning setting (1-7). Press down the start lever.
2 When the bread has reached the desired degree of browning, the toaster switches off automatically and the bread is lifted up. You can raise it higher by lifting the start lever.
3 Operating features: to interrupt toasting, press the stop button (F). To toast frozen bread, press the defrost button (D) and to warm up already toasted bread, press the reheat button (E).
4 To warm buns, rolls, or other bread, use the bun warmer rack. Place the bun on the rack. Select browning setting 2 and then start the toaster by pressing down the start lever. Once finished, turn the bread over and repeat if necessary.
Caution - Do NOT touch the rack since it becomes very hot during use!
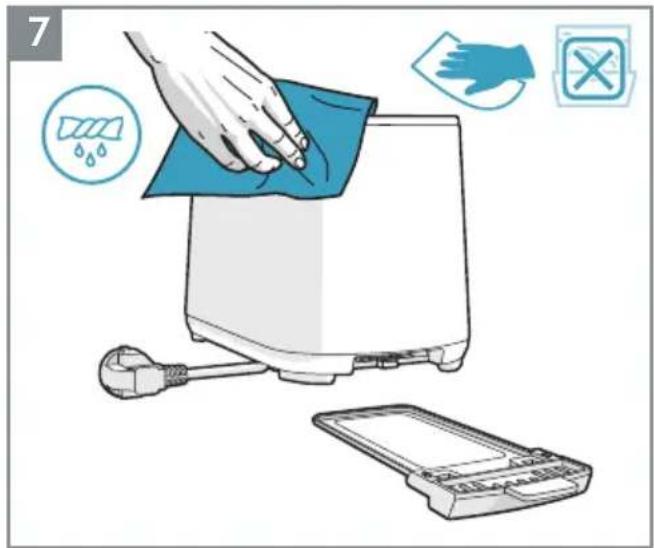
CLEANING AND CARE
Unplug the toaster and allow it to cool down. Empty the crumb drawer. Wipe the outer surfaces with a slightly moist cloth. Never use caustic or abrasive cleaners, and never immerse the machine in liquid!
Enjoy your new Electrolux product!
SAFETY ADVICE
This appliance can be used by children aged from 8 years and above and persons with reduced physical, sensory or mental capabilities or lack of experience and knowledge if they have been given supervision or instruction concerning use of the appliance in a safe way and understand the hazards involved. Children shall not play with the appliance. Cleaning and user maintenance shall not be made by children unless they are older than 8 and supervised.
Keep the appliance and its cord out of reach of children less than 8 years.
If the supply cord is damaged, it must be replaced by the manufacturer, its service agent or similarly qualified persons in order to avoid a hazard. The appliance is not intended to be operated by means of an external timer or separate remote-control system. The bread may burn, therefore do not use the toaster near or below combustible material, such as curtains.
This appliance is intended to be used in household and similar applications.
No action is needed to adapt the product to 50 or 60Hz. The product will adjust itself.
DISPOSAL
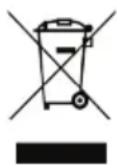
This symbol on the product or on its packaging indicates that the product may not be treated as household waste. To recycle your product, please take it to an official collection point or to an Electrolux service center that can remove and recycle the battery and electric parts in a safe and professional way. Follow your country's rules for the separate collection of electrical products and rechargeable batteries.
Electrolux reserves the right to change products, information and specifications without notice.
TROUBLESHOOTING
| Symptoms Possible causes | Solution | |
| The toasted bread is too brown. | The browning setting is too high. | Reduce the browning setting. |
| The toaster is not functioning. | The toaster is not switched on. | Make sure the toaster is switched on. |
www.electrolux.com/productregistration
www.electrolux.com/productregistration
www.electrolux.com/productregistration
www.electrolux.com/productregistration
www.electrolux.com/productregistration
www.electrolux.com/productregistration
www.electrolux.com/productregistration
www.electrolux.com/productregistration
www.electrolux.com/productregistration
www.electrolux.com/productregistration
www.electrolux.com/productregistration
A Brødristingsspor
B Varmeisolert ytterhus
C Smuleskuff
D Tineknapp med indikatorlampe
E Knapp med indikatorlampe for oppvarming på nytt
F Stoppknapp med indikatorlampe
G Bruningskontroll
H Startspak
I Lagringsrom til strømledning (på undersiden av brødristeren)
SLIK KOMMER DU I GANG
www.electrolux.com/productregistration
www.electrolux.com/productregistration
www.electrolux.com/productregistration
www.electrolux.com/productregistration
Kupite pribor i potrošni materijal za svoj uređaj:
www.electrolux.com/shop
BRIGA O KORISNIKU I SERVISIRANJE
Prilikom obraćanja servisnoj službi, uverite se su vam na raspolaganju sledeći podaci.
Informacije se nalaze na pločici sa tehničkim karakteristikama.
Model, broj proizvoda (PNC), serijski broj.
A Prorez za tost
B Termički izolovano spoljno kućište
C Fioka za mrvice
D Taster za odmrzavanje sa indikacionom lampicom
E Taster za podgrevanje sa indikacionom lampicom
F Taster za isključenje sa indikacionom lampicom
G Regulacija pečenja
H Polugica za uključenje
I Spremište za kabl (sa donje strane tostera)
PRVI KORACI
Pre uključenja tostera po prvi put, treba ga postaviti blizu otvorenog prozora i pustiti ga da radi nekoliko puta pri maksimalnom podešavanju za pečenje, bez hleba.
1 Kako se koristi toster: Uključite kabl u struju, stavite hleb i izaberite podešavanje za pečenje (1-7). Pritisnite polugicu za uključenje.
2 Kad je hleb dovoljno pečen, toster se automatski isključuje i hleb se izbacuje. Možete ga izdići više podizanjem polugice za uključenje.
3 Radne funkcije: da biste prekinuli tostiranje, pritisnite taster za isključivanje (F). Da biste tostirali zamrznuti hleb, pritisnite taster za odleđivanje (D) a za zagrevanje već tostiranog hleba, pritisnite taster za podgrevanje (E).
4 Da biste zagrejali lepinje, zemičke ili drugu vrstu hleba, koristite držač za zagrevanje lepinja. Stavite lepinju na držač. Izaberite podešavanje pečenja 1 a zatim uključite toster pritiskom na polugicu za uključenje. Kada se završi, okrenite hleb i ponovite postupak ako je neophodno.
Pažnja – NEMOJTE dodirivati držač obzirom da postaje veoma vruć tokom upotrebe!
ČIŠĆENJE I NEGA
Isključite toster iz napajanja i ostavite ga da se ohladi. Ispraznite fioku za mrvice. Obrišite spoljne površine blago vlažnom krpom. Nikada nemojte koristiti bazna ili abrazivna sredstva za čišćenje i aparat nikada nemojte uroniti u tečnost!
Uživajte u novom Electrolux proizvodu!
SIGURNOSNI SAVETI
www.electrolux.com/productregistration
www.electrolux.com/productregistration
Kupite dodatno opremo in potrošno blago za vašo napravo:
www.electrolux.com/shop
SKRB ZA STRANKE IN SERVIS
www.electrolux.com/productregistration
www.electrolux.com/productregistration
www.electrolux.com/productregistration

- How to use
- Button Function
- Visit our website to:
- www.electrolux.com
- www.electrolux.com/productregistration
- www.electrolux.com/shop
- CUSTOMER CARE AND SERVICE
- COMPONENTS
- GETTING STARTED
- CLEANING AND CARE
- SAFETY ADVICE
- DISPOSAL
- TROUBLESHOOTING
- SLIK KOMMER DU I GANG
- BRIGA O KORISNIKU I SERVISIRANJE
- PRVI KORACI
- ČIŠĆENJE I NEGA
- SIGURNOSNI SAVETI
- SKRB ZA STRANKE IN SERVIS
Brand : ELECTROLUX
Model : Create 4 E4T14ST
Category : Toaster