B0930042E4U - Server Tripp Lite - Free user manual and instructions
Find the device manual for free B0930042E4U Tripp Lite in PDF.


User questions about B0930042E4U Tripp Lite
0 question about this device. Answer the ones you know or ask your own.
Ask a new question about this device
Download the instructions for your Server in PDF format for free! Find your manual B0930042E4U - Tripp Lite and take your electronic device back in hand. On this page are published all the documents necessary for the use of your device. B0930042E4U by Tripp Lite.
USER MANUAL B0930042E4U Tripp Lite
Register your product for quicker service and ultimate peace of mind.
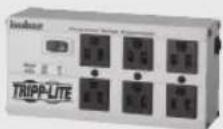
You could also win an ISOBAR6ULTRA surge protector— a \$100 value!

text_image
QR code image containing encoded data, no visible human-readable textwww.tripplite.com/warranty

text_image
TRIPP·LITE
Manufacturing Excellence.
1111 W. 35th Street, Chicago, IL 60609 USA • www.tripplite.com/support
Copyright © 2017 Tripp Lite. All rights reserved.
Package Includes
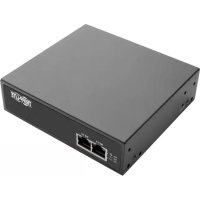
• B093-004-2E4U, B093-008-2E4U, or B093-008-2E4U-M Console Server
- External Power Supply with NEMA 1-15P (North America), CEE 7/16 Schuko (Europe), BS1363 (UK) and AS2112 (Australia) plug adapters (Input: 100-240V, 50/60 Hz, 0.4A; Output: 12V 1.25A)
- Mounting Hardware
- Rubber Feet
• DB9-to-RJ45 Crossover Serial Adapter
• Digital I/O Converter (Terminal Block)
- Quick Start Guide
Hardware Assembly
1 If free-standing: Attach the adhesive-backed rubber feet to the console server's base.
If rack-mounted: Attach the rack kit to the side of the console server to be fixed to the rack.
2 Connect the console server's NET1 port to your primary network.
3 Connect the console server's NET2 port to your Out-of-Band (OOB) management network.
Note: The B093-008-2E4U-M also includes Small Form-Factor Pluggable (SFP) ports for NET1 and NET2 fiber-optic connections. If an SFP module is plugged in and establishes a working link, the SFP port will activate and the paired RJ45 port will deactivate.
4 If you have a B093-008-2E4U-M, plug an RJ11 cable into the front-facing RJ11 port to connect to the built-in V.92 modem. Plug the other end of the RJ11 cable into a functioning landline port to allow the B093-008-2E4U-M's V.92 modem to dial-out
5 Connect additional devices to the console server's serial ports and USB ports.
6 If you have external sensors, plug them in to the terminal block and attach any sensors and DIO devices.
7 Plug in the 12V DC power supply and turn on the power to the console server.
Connect the Console Server
The B093-004-2E4U, B093-008-2E4U, and B093-008-2E4U-M Console Servers are addressable at one of two IP addresses:
1 Its built-in address (192.168.0.1/24).
2 The default address its DHCP client accepts from a DHCP server on your network.
3 Using a browser on the same network as the console server's NET1 port with an IP address in one of the network ranges (i.e. 192.168.0.x/24, or the range used by your DHCP server):
Enter https://192.168.0.1/ or https://[DHCP-supplied address]/ and press Return.
Note: The console server's self-signed SSL certificate "untrusted connection" error will be present.
4 Click through the error to load the console server login page.
5 Enter the default system username and passcode.
Username: root
Password: default
Press Submit or Return. The console interface welcome page will load.
Note: The console interface will log out after 20 minutes of inactivity. The current page will remain loaded, however, and clicking any UI element loads the login page. Logging back in will reload the requested page.
Configuration and management options present themselves in expanded-by-default menus along the left side of the interface. The top-level menus are Manage, Status, Serial & Network, Alerts & Logging, and System.
The remainder of the page lists configuration tasks required to turn the console server into a usable unit. Some of these tasks will be marked as completed due to the console server's factory settings. The procedures in the next section document initial configuration using the menus, rather than the task list.
Set a Strong, High-Entropy Passcode for the Root User
1 Click Serial & Network > Users & Groups.
2 Click Edit for the Root User.
3 Enter a strong, high-entropy passcode in the Password field.
4 Re-enter the passcode in the Confirm field.
5 Click Apply.
Set the NET1 Port's Network Configuration Method
1 Click System > IP.
2 Click Network Interface if it is not the front-most tab.
3 For Configuration Method, click either the DHCP or Static radio button.
4 If Static, enter an IP Address and Subnet Mask for the NET1 interface.
Set the NET2 Port's Network Configuration Method
The NET2 port is set to inactive by default. To activate:
1 Click System > IP.
2 Click Management LAN Interface to make it the front-most tab.
3 Click the Deactivate this network interface checkbox to de-select this option and activate NET2.
4 For Configuration Method, click either the DHCP or Static radio button.
5 If Static, enter an IP Address and Subnet Mask for the NET2 interface.
For out-of-band (OOB), set these for your management network.
For IP passthrough, set these to match an unused private IP range.
Note: The console server's firewall determines which protocols and services can access ports and devices. HTTPS and SSH are enabled to the console server by default. To change access settings for the console server and connected serial ports, click System > Services. Then click the Service Access tab and adjust, as required.
Configure Managed Devices
1 Click Serial & Network > Serial Port.
To configure a port:
2 Click Edit.
3 Set the Common Settings for Port x to match the device connected to serial port x.
4 To enable remote access to the device, check the Console Server Mode radio button in Console Server Settings and click the checkboxes for allowed protocols (e.g. Telnet, SSH and Web Terminal).
5 Click Apply.
Note: Configure user access policies for connecting to such ports in Serial & Network > Users & Groups. An AAA server can configure them remotely. See the Owner's Manual for more information.
Other Modes and Functions
Please refer to the Owner's Manual for details on advanced features, such as configuration, PDU and UPS power management, environmental monitoring, logging, and auto-response alerts.
Warranty and Product Registration
4-YEAR LIMITED WARRANTY
TRIPP LITE warrants its products to be free from defects in materials and workmanship for a period of four (4) years from the date of initial purchase. TRIPP LITE's obligation under this warranty is limited to repairing or replacing (at its sole option) any such defective products. To obtain service under this warranty, you must obtain a Returned Material Authorization (RMA) number from TRIPP LITE or an authorized TRIPP LITE service center. Products must be returned to TRIPP LITE or an authorized TRIPP LITE service center with transportation charges prepaid and must be accompanied by a brief description of the problem encountered and proof of date and place of purchase. This warranty does not apply to equipment, which has been damaged by accident, negligence or misapplication or has been altered or modified in any way.
EXCEPT AS PROVIDED HEREIN, TRIPP LITE MAKES NO WARRANTIES, EXPRESS OR IMPLIED, INCLUDING WARRANTIES OF MERCHANTABILITY AND FITNESS FOR A PARTICULAR PURPOSE.
Some states do not permit limitation or exclusion of implied warranties; therefore, the aforesaid limitation(s) or exclusion(s) may not apply to the purchaser.
EXCEPT AS PROVIDED ABOVE, IN NO EVENT WILL TRIPP LITE BE LIABLE FOR DIRECT, INDIRECT, SPECIAL, INCIDENTAL OR CONSEQUENTIAL DAMAGES ARISING OUT OF THE USE OF THIS PRODUCT, EVEN IF ADVISED OF THE POSSIBILITY OF SUCH DAMAGE. Specifically, TRIPP LITE is not liable for any costs, such as lost profits or revenue, loss of equipment, loss of use of equipment, loss of software, loss of data, costs of substitutes, claims by third parties, or otherwise.
PRODUCT REGISTRATION
Visit www.triplite.com/warranty today to register your new Tripp Lite product. You'll be automatically entered into a drawing for a chance to win a FREE Tripp Lite product!*
* No purchase necessary. Void where prohibited. Some restrictions apply. See website for details.
WEEE Compliance Information for Tripp Lite Customers and Recyclers (European Union)

Under the Waste Electrical and Electronic Equipment (WEEE) Directive and implementing regulations, when customers buy new electrical and electronic equipment from Tripp Lite they are entitled to:
- Send old equipment for recycling on a one-for-one, like-for-like basis (this varies depending on the country)
- Send the new equipment back for recycling when this ultimately becomes waste
Use of this equipment in life support applications where failure of this equipment can reasonably be expected to cause the failure of the life support equipment or to significantly affect its safety or effectiveness is not recommended.
Tripp Lite has a policy of continuous improvement. Specifications are subject to change without notice.

text_image
TRIPP·LITE
1111 W. 35th Street, Chicago, IL 60609 USA • www.tripplite.com/support
1111 W. 35th Street, Chicago, IL 60609 USA • www.tripplite.com/support
1111 W. 35th Street, Chicago, IL 60609 USA • www.tripplite.com/support
Краткое руководство
пользователя
Модели:
B093-004-2E4U, B093-008-2E4U,
B093-008-2E4U-M
English 1 • Español 6 • Français 11

text_image
TRIPP·LITE
Manufacturing Excellence.
1111 W. 35th Street, Chicago, IL 60609 USA • www.tripplite.com/support
1111 W. 35th Street, Chicago, IL 60609 USA • www.tripplite.com/support