
Sonicare DiamondClean 9000 HX9912 - Electric toothbrush PHILIPS - Free user manual and instructions
Find the device manual for free Sonicare DiamondClean 9000 HX9912 PHILIPS in PDF.
| Product Type | Electric toothbrush |
| Brand | Philips |
| Model | Sonicare DiamondClean 9000 HX9912 |
| Power Source | Integrated rechargeable battery; charges via charging base (mains) or travel case (USB 5V DC) |
| Brushing Modes | Clean, White+, Gum Health, Deep Clean+ |
| Intensity Settings | 3 levels: low, medium, high |
| BrushSync Technology | Automatic mode and intensity selection; brush head replacement reminder |
| Pressure Sensor | Yes, changes vibration if excessive pressure is applied |
| BrushPacer | Yes, signals to move to the next zone every 20 or 30 seconds depending on the mode |
| EasyStart Function | Gradually increases power over the first 14 brushings |
| Connectivity | Bluetooth; Sonicare app (compatible with Android and iOS) |
| Compatible Brush Heads | All Philips Sonicare brush heads; smart heads (C3, W3, G3) have BrushSync technology |
| Brush Head Lifespan | 3 months (2 two-minute brushings per day); automatic reminder |
| Waterproof | Yes, but do not use in the shower or wash in the dishwasher |
| Cleaning and Maintenance | Rinse with warm water; clean gently; do not use alcohol, vinegar, or household cleaners |
| Charger | Charging base with glass or stand; optional travel case |
| Battery Life | Not specified in the manual; full charge recommended 24 hours for first use |
| Safety | Do not immerse the charger; use only with recommended accessories; contains a rechargeable battery |
| Warranty | International warranty (see leaflet); does not cover brush heads or damage from misuse |
| After-Sales Service | Website: www.philips.com/support |
Frequently Asked Questions - Sonicare DiamondClean 9000 HX9912 PHILIPS
User questions about Sonicare DiamondClean 9000 HX9912 PHILIPS
0 question about this device. Answer the ones you know or ask your own.
Ask a new question about this device
Download the instructions for your Electric toothbrush in PDF format for free! Find your manual Sonicare DiamondClean 9000 HX9912 - PHILIPS and take your electronic device back in hand. On this page are published all the documents necessary for the use of your device. Sonicare DiamondClean 9000 HX9912 by PHILIPS.
USER MANUAL Sonicare DiamondClean 9000 HX9912 PHILIPS
natural_image
Diagram of a folded paper or scroll with two panels, each showing a grid pattern and an arrow indicating direction (no text or symbols)1
English 6
Deutsch 30
Español 58
Français 84
Italiano 111
Nederlands 137
Português 164
Ελληνικά 190
Introduction
Congratulations on your new Philips Sonicare power toothbrush!
Superior plaque removal, whiter teeth and healthier gums are at your fingertips. Using Sonicare's combination of gentle sonic technology and clinically developed and proven features, you can be confident that you're getting the very best clean, every time. Further support and product registration are available to you at:
http://www.philips.com/welcome.
Welcome to the Philips Sonicare family!
Intended Use
DiamondClean series power toothbrushes are intended to remove adherent plaque and food debris from the teeth to reduce tooth decay and improve and maintain oral health. DiamondClean series power toothbrushes are intended for consumer home use. Use by children should be with adult supervision.
Important safety information
Read this important information carefully before you use the appliance and save it for future reference.
Note: The accessories and features of different models vary. For example, some models come with a sanitizer or are equipped with Bluetooth.
Danger
- Keep the charger and/or sanitizer away from water. Do not place or store the appliance where it can fall or be pulled into a tub or sink.
- Do not immerse the charger and/or sanitizer in water or any other liquid.
- After cleaning, make sure the charger and/or sanitizer is completely dry before you connect it to the wall socket.
Warning
- This appliance can be used by children and persons with reduced physical, sensory or mental capabilities or lack of experience and knowledge if they have been given supervision or instruction concerning use of the appliance in a safe way and understand the hazards involved. Cleaning and user maintenance shall not be made by children without supervision.
- Children shall not play with the appliance.
- If the appliance is damaged in any way (brush head, toothbrush handle, charger and/or sanitizer), stop using it.
- The mains cord cannot be replaced. If the mains cord is damaged, discard the charger and/or sanitizer.
- Always replace the charger and/or sanitizer with one of the original type in order to avoid a hazard.
- This appliance contains no user-serviceable parts. If the appliance is damaged, contact the Consumer Care Center in your country (see 'Warranty and support').
- Keep the cord away from heated surfaces.
- Do not use the charger and/or sanitizer outdoors or near heated surfaces.
Caution
- Do not clean the brush head, handle, charger, charger cover or sanitizer in the dishwasher.
- If you have had oral or gum surgery in the previous 2 months, consult your dentist before you use this appliance.
-
Consult your dentist if excessive bleeding occurs after using this appliance or if bleeding continues to occur after 1 week of use. Also consult your dentist if you experience discomfort or pain when you use this appliance.
-
This Philips appliance complies with the safety standards for electromagnetic devices. If you have a pacemaker or other implanted device, contact your doctor or the appliance manufacturer of the implanted appliance prior to use.
- If you have medical concerns, consult your doctor before you use this appliance.
- This appliance has only been designed for cleaning teeth, gums and tongue. Do not use it for any other purpose. Stop using the appliance and contact your doctor if you experience any discomfort or pain.
- This appliance is a personal care device and is not intended for use on multiple patients in a dental practice or institution.
- Do not use other brush heads than the ones recommended by Philips Sonicare.
-
Stop using a brush head with crushed or bent bristles. Replace the brush head every 3 months or sooner if signs of wear appear.
-
If your toothpaste contains peroxide, baking soda or bicarbonate (common in whitening toothpastes), thoroughly clean the brush head with soap and water after each use. This prevents possible cracking of the plastic.
- Avoid direct contact with products that contain essential oils or coconut oil. Contact may result in bristle tufts dislodging.
Electromagnetic fields (EMF)
This Philips appliance complies with all applicable standards and regulations regarding exposure to electromagnetic fields.
Radio Equipment Directive
Hereby, Philips declares that electric toothbrushes with radio frequency interface (Bluetooth) are in compliance with Directive 2014/53/EU.
The full text of the EU declaration of conformity is available at the following internet address: www.philips.com/support
The radio frequency interface in this product operates at 13.56 MHz. The maximum RF power transmitted by the appliance is 30.16 dBm.
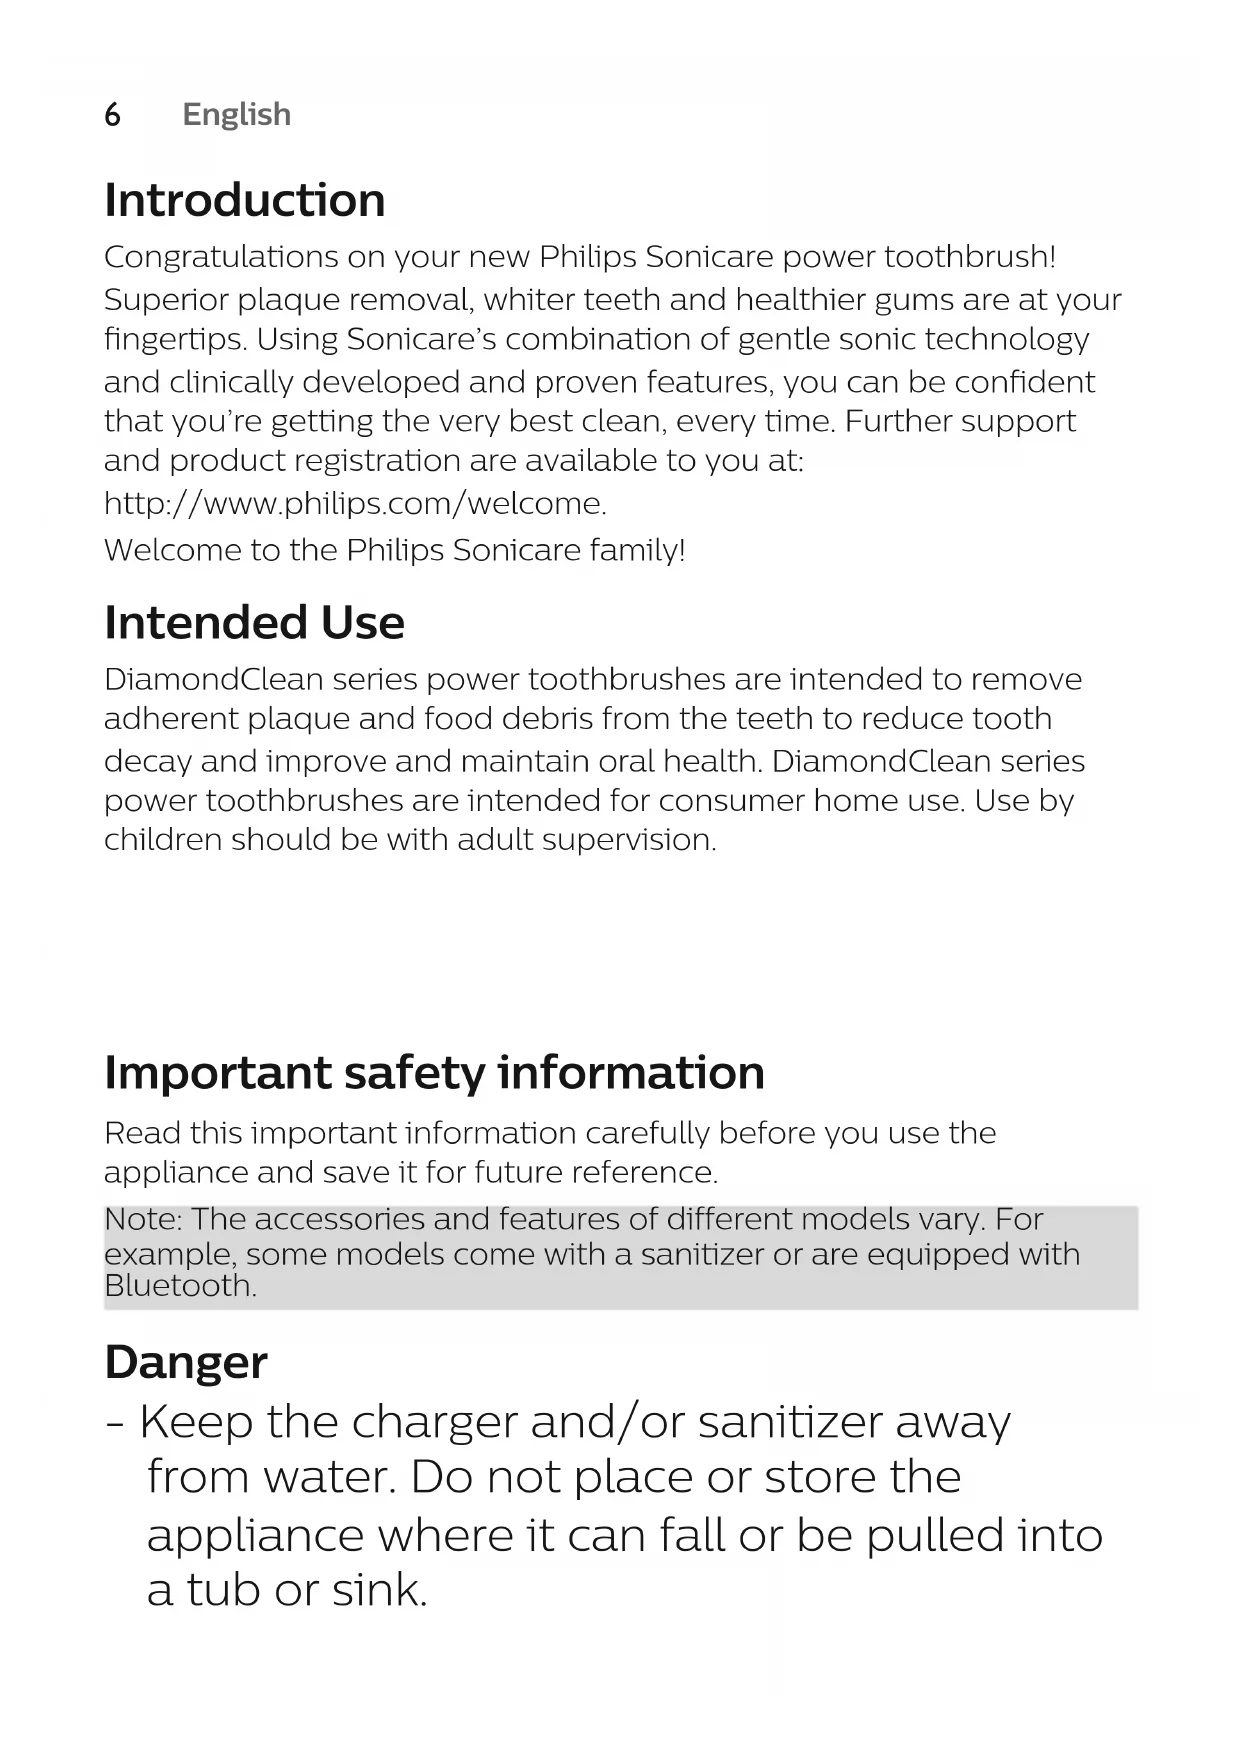
Your Philips Sonicare (Fig. 1)
1 Hygienic travel cap
2 Smart brush heads*
3 Handle
4 Power on/off button
5 Intensity light
6 Mode/intensity button
7 Modes
8 Brush head replacement reminder light
9 Battery indication
10 Charging glass
11 Charging stand
12 Charging base
13 (Charging)Travel case*
14 USB wall adapter*
* Note: The content of the box may vary based on the model purchased.
Sonicare app – Getting Started
The Sonicare app pairs with your toothbrush to provide you a connected experience. By connecting your toothbrush to your Sonicare app account, you will be able to:
- Easily review your progress report for ways to improve your brushing routine
- Receive personalized tips and recommendations for managing your oral health
To start using the Sonicare app:
1 Download the Sonicare app to your phone
2 Open the app and follow the guided steps
3 Pair your toothbrush with the app
4 Create your account
5 Complete firmware update, if prompted, to access the latest improvements and features.
6 Brush regularly
You are ready to start your connected experience. Be sure to brush regularly. You can receive updates to help improve your oral healthcare.
Note: Make sure your phone's Bluetooth is turned on when using the app. Your toothbrush uses the Bluetooth connection to transfer your brushing data to the app. If you have questions about why your brushing data is collected, be sure to review the Sonicare Privacy Statement, available throughout the app setup process.
Sonicare app – Track and improve your oral health care
Your Sonicare power toothbrush is equipped with smart sensors to provide you with feedback about your brushing habits, including:
- Daily brushing sessions
- Time spent during each brushing session
- Applied brushing pressure
- Brush head replacement reminder (based on actual use)
The Sonicare app collects the data provided by the smart sensors and tracks your brushing habits over time.
Each of the features available in the app are designed to help you understand your brushing habits and provide you with simple recommendations for improving and maintaining your oral health. You will receive personalized brushing information in the Sonicare app.
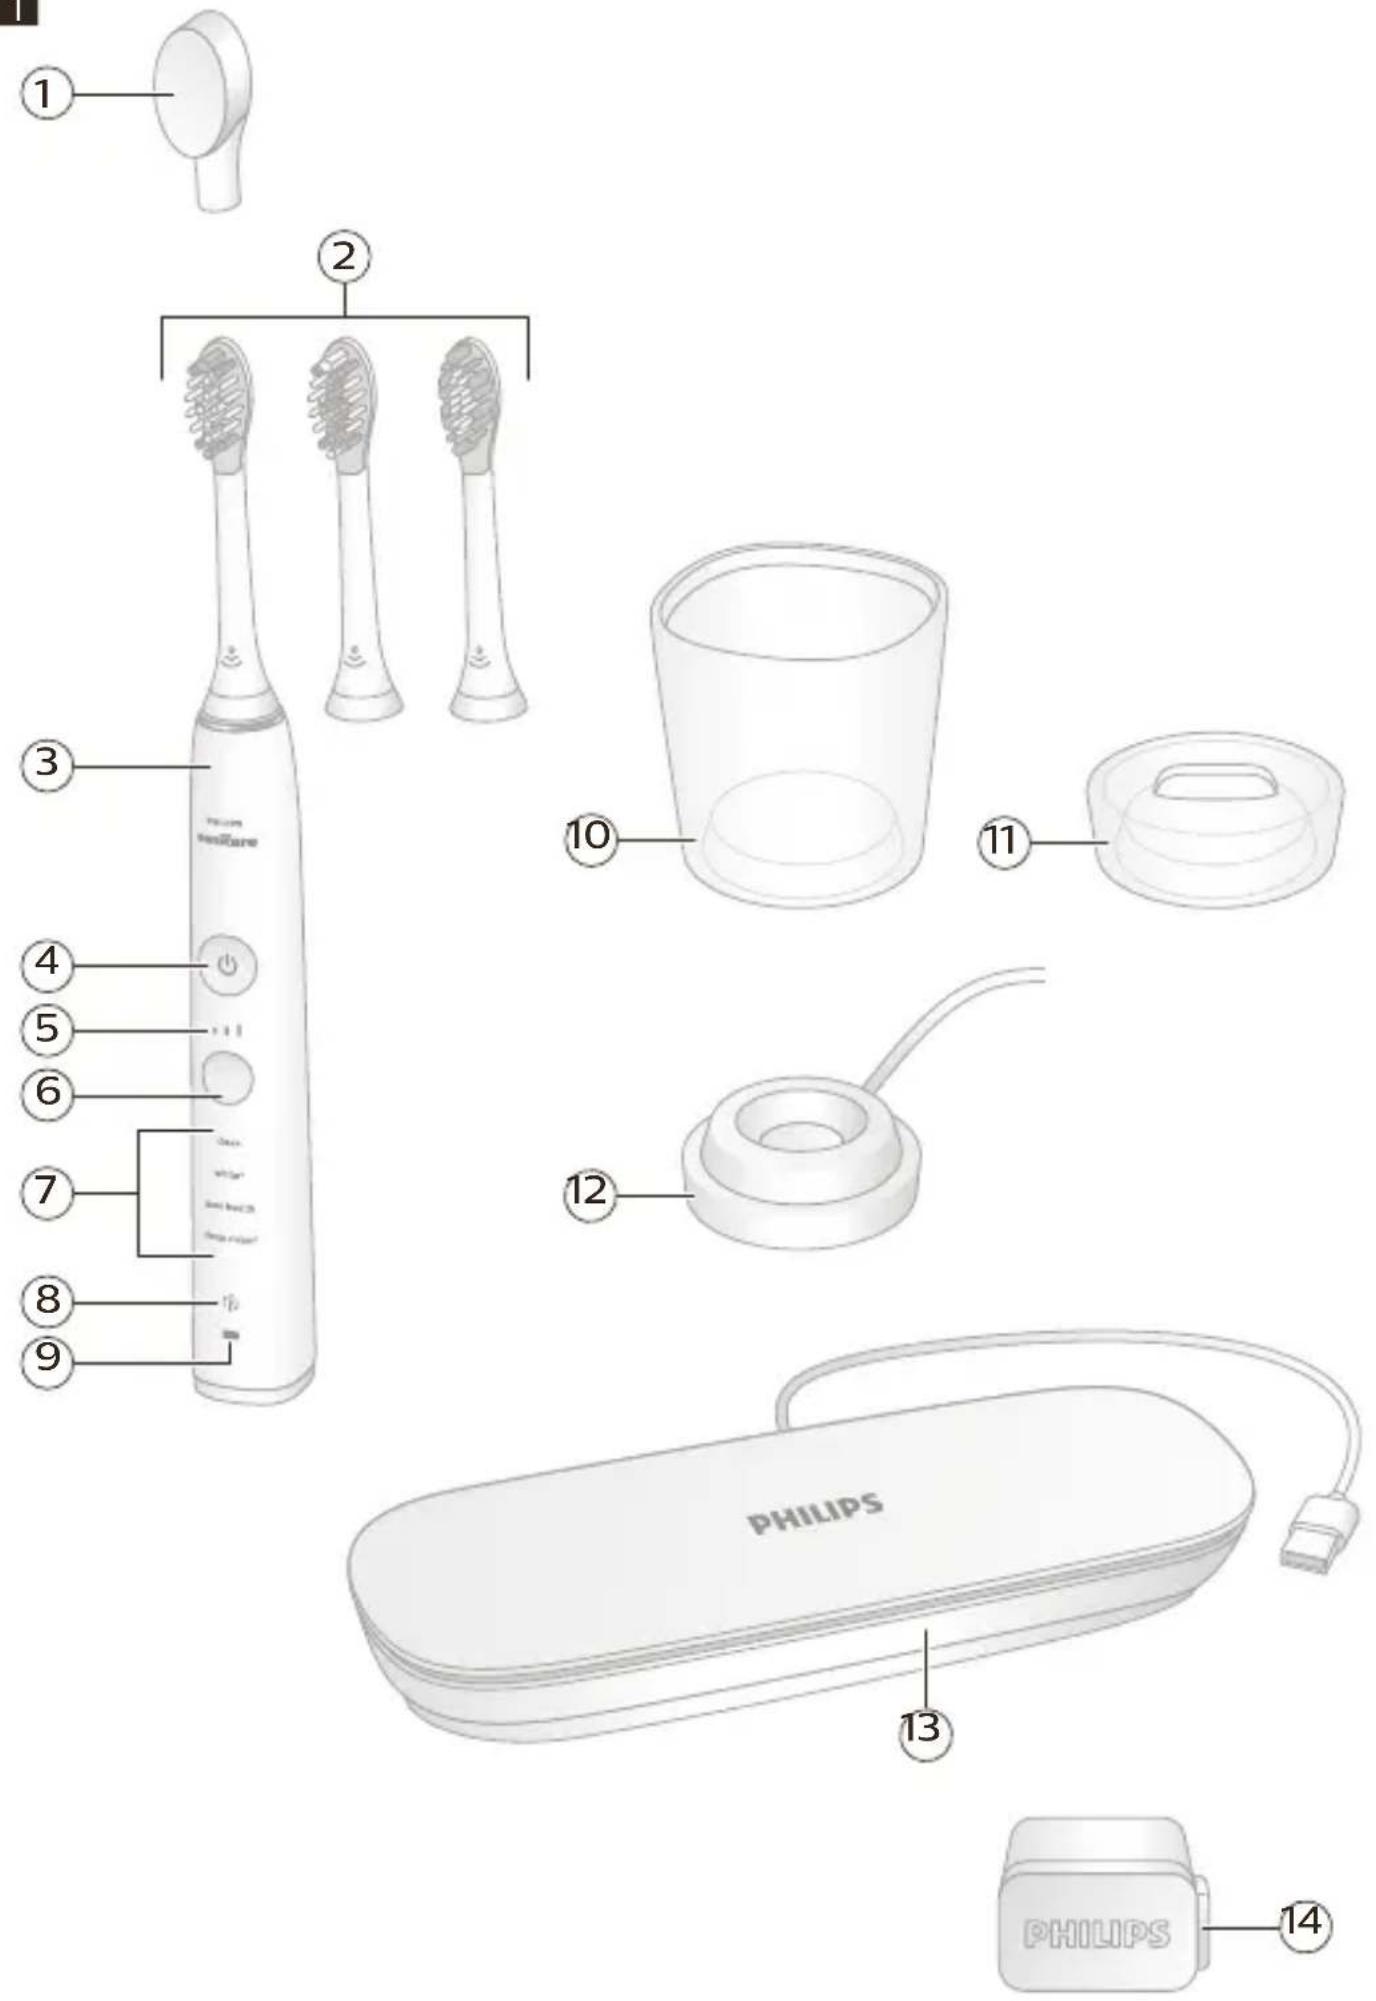
Brush heads
To see what type of brush head you have, check the label at the bottom of the brush head. The symbol at the bottom of the brush head indicates that it is a smart brush head, equipped with the BrushSync technology.
| Brush head name | Premium Plaque Control | Premium White Premium Gum Care |
| Brush head label | C3 W3 G3 |
Benefit
Plaque removal Plaque and stain removal
Healthier gums
To explore our full range of brush heads, go to
www.philips.com/toothbrush-heads for more information.
Using your Philips Sonicare
Brushing instructions
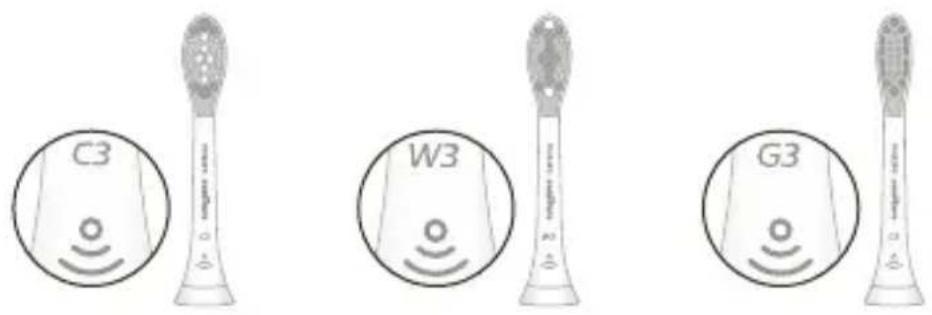
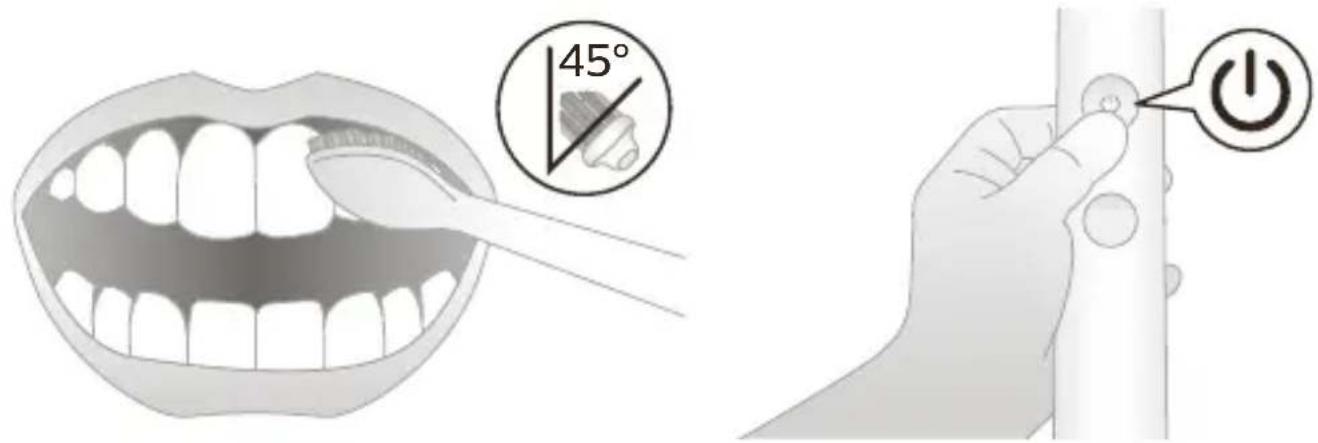
1 Push the brush head firmly onto the handle. Wet the bristles and apply toothpaste.
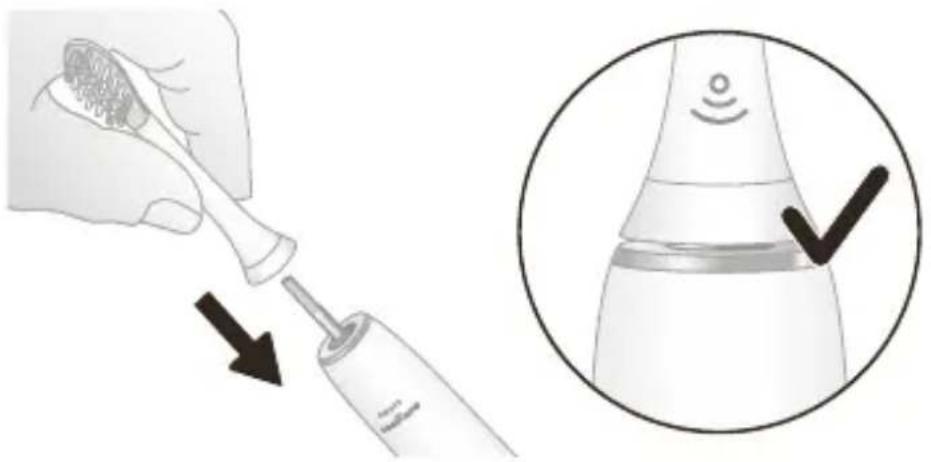
natural_image
Illustration showing a hand using a toothbrush to apply a toothbrush to a digital device, with a magnified view of the device's tip (no text or symbols present)Note: It is normal to see a slight gap between the brush head and the handle. This allows the brush head to vibrate properly.
2 Place the toothbrush bristles against the teeth at a slight angle (45 degrees), apply light pressure to make the bristles reach the gumline or slightly beneath the gumline.
Note: Keep the center of the brush head in contact with the teeth at all times.
3 Press the power on/off button to turn on the Philips Sonicare.
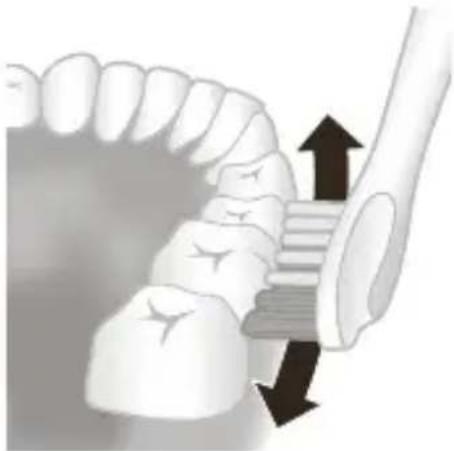
4 Apply light pressure to maximize Philips Sonicare's effectiveness and let the Philips Sonicare toothbrush do the brushing for you. Gently move the brush head slowly across the teeth in a small back and forth motion so the longer bristles reach between your teeth. Continue this motion throughout the brushing cycle.
natural_image
Illustration of a dental tool interacting with teeth, showing tooth positioning and movement arrows (no text or symbols)Note: Different modes are available (see 'Brushing modes').
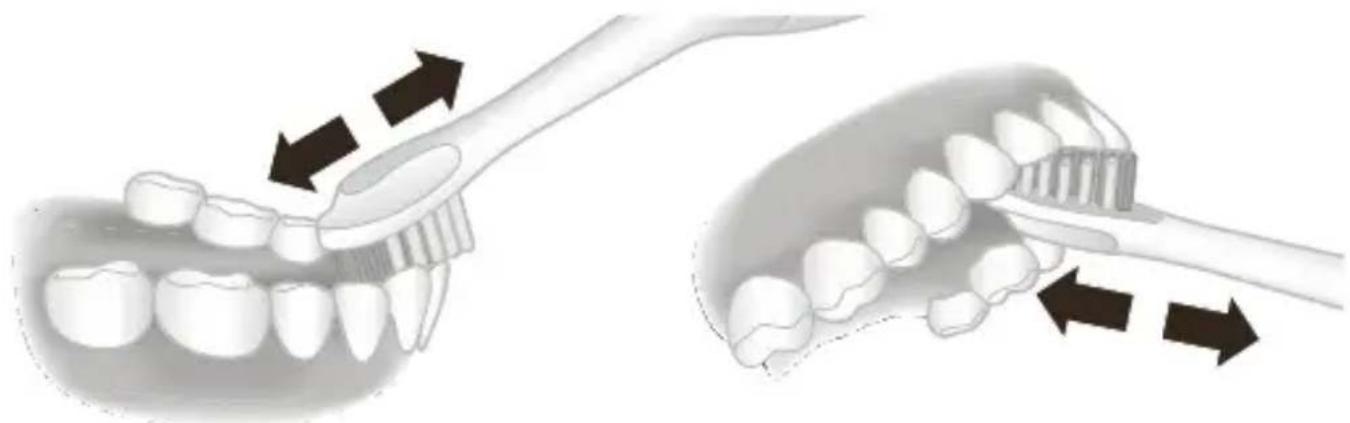
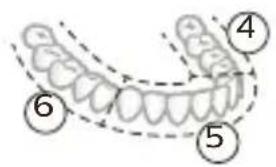
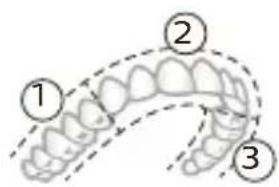
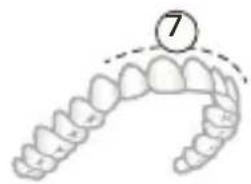
5 To clean the inside surfaces of the front teeth, tilt the brush handle semi-upright and make several vertical overlapping brushing strokes on each tooth.
natural_image
Illustration of dental tool manipulation showing tooth removal and tooth positioning (no text or symbols)Note:
- A change in vibration from the handle alerts you when you apply too much pressure (see 'Pressure sensor').
- Your Philips Sonicare toothbrush is safe to use on braces, dental modifications and dental restorations (fillings, crowns, veneers)
- Do not use your power toothbrush in the shower.
BrushSync technology
BrushSync technology enables your brush heads to communicate with your handle using a microchip. The symbol at the bottom of the
brush head indicates that it is equipped with the BrushSync technology. This enables the following features:
- Brush head mode pairing
- Brush head replacement reminder
Brushing modes
Your power toothbrush is equipped with 4 different modes: clean, white+, gum health and deep clean+.
Based on the smart brush head you use, the optimal mode and intensity will be selected automatically by the BrushSync technology.
To manually change the mode, press the mode/intensity button while the toothbrush is off with the brush head attached.

* Note:
- All brush heads work with each mode.
- When the Philips Sonicare toothbrush is used in clinical studies, it must be used at high intensity, with the EasyStart feature turned off.
Brush head mode pairing
Brush heads with BrushSync technology are equipped with a microchip which communicates to the handle and automatically pairs it with the recommended mode and intensity.
Note: If you change modes/intensity, the brush head will remember the last used setting. If you wish to brush with the recommended setting, you can find the recommended mode/intensity in ‘Brushing Modes’.
Brush head mode pairing
Brush heads with BrushSync technology are equipped with a microchip which communicates to the handle and automatically pairs it with the recommended mode and intensity.
Note: If you change modes/intensity, the brush head will remember the last used setting. If you wish to brush with the recommended setting, you can find the recommended mode/intensity in the following table.
clean and deep white+ gum health clean+
| Benefit | Plaque removal | Plaque and surface stains removal | Plaque removal and gum massage |
| Recommended brush head | Premium Plaque Control (C3) | Premium White (W3) | Premium Gum Care (G3) |
| Recommended intensity level | 3 3 3 | ||
| Total brushing time | clean: 2 minutes deep clean+: 3 minutes* | 2 minutes and 40 seconds | 3 minutes and 20 seconds |
clean and deep white+ gum health clean+
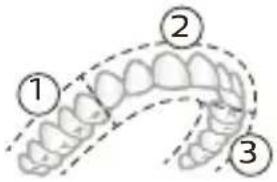
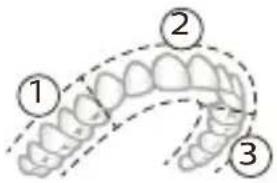
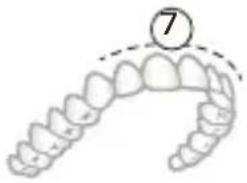
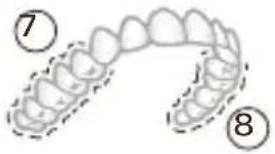
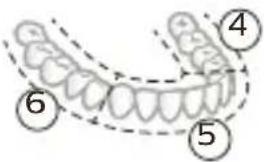
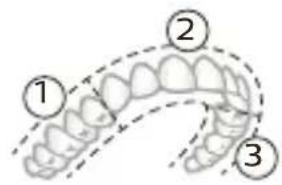
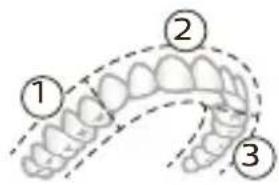
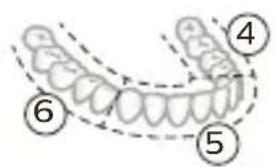
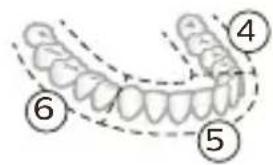
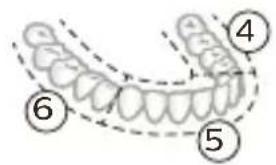
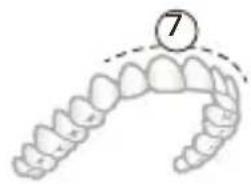
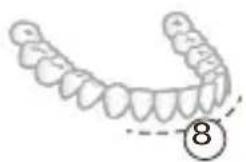
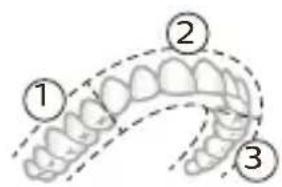
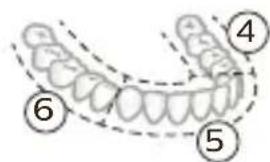
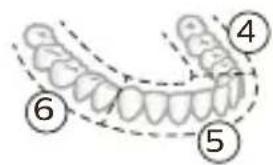
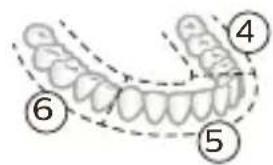
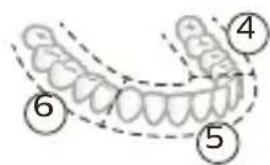
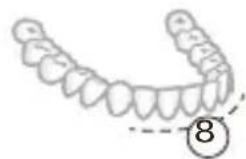
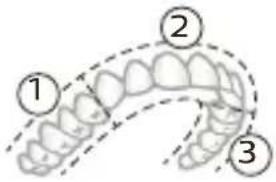
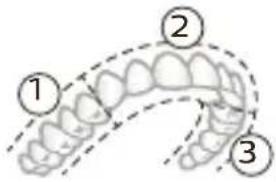
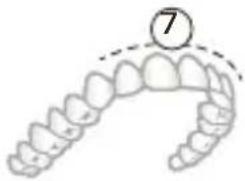
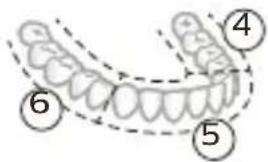
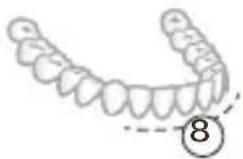
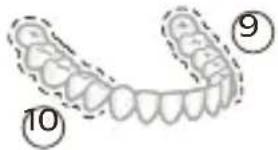
| How to brush | clean: Brush each segment for 20 seconds | Brush each segment for 20 seconds, | Brush each segment for 20 seconds, |
 | 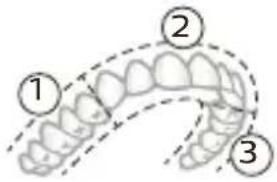 | 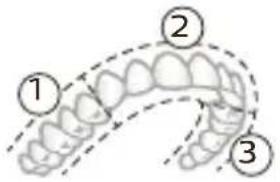 | |
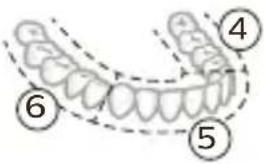 | 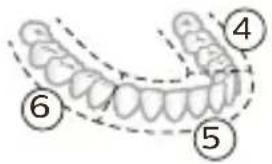 | 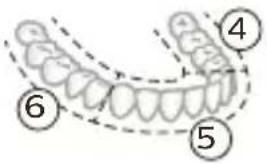 | |
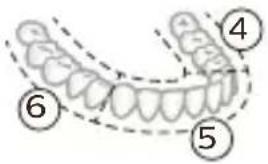
| deep clean+: Brush each segment for 30 seconds* | then brush segments 7 and 8 for 20 seconds each. | then brush segments 7, 8, 9 and 10 for 20 seconds each. | |
 |  |  | |
 |  |  |
*Note: When brushing with the Sonicare app in 'deep clean+' mode, the brushing time will be 2 minutes.
Intensity settings
Your power toothbrush comes with 3 different intensity settings:
- low intensity (one bar)
- medium intensity (two bars)
- high intensity (three bars)
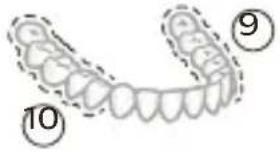
When attached to the handle, the smart brush head will automatically select the recommended intensity. To manually change the intensity, turn on the handle and press the mode/intensity button.
While toothbrush is ON, press this button to change the intensity setting
Features
- BrushPacer
- Pressure sensor
- Brush head replacement reminder
- EasyStart
BrushPacer
The BrushPacer features indicates when you have to move to the next section of your teeth with a brief change in vibration.
The toothbrush turns off automatically at the end of the brushing session.
Pressure sensor
Your Philips Sonicare measures the pressure you apply while brushing to protect your gums and teeth from damage.
If you apply too much pressure, the handle will change its vibration until you reduce the pressure.
Note: The Pressure Sensor comes activated with your product. To deactivate this feature, see 'Activating or deactivating features'.
Brush head replacement reminder
Over time, the handle will track the wear of your smart brush head by measuring:
- The overall pressure you apply while brushing
- The total time you have brushed with your brush head
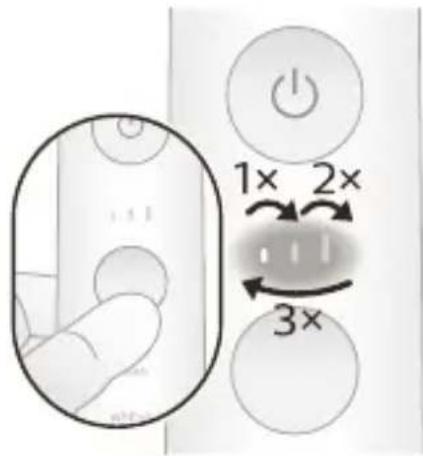
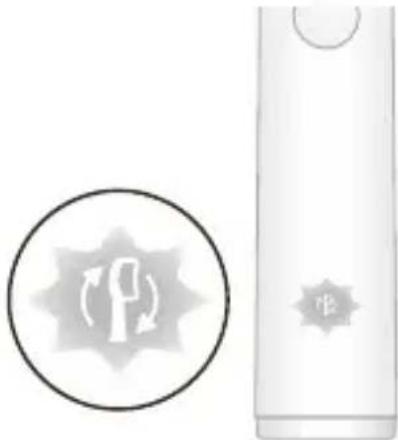
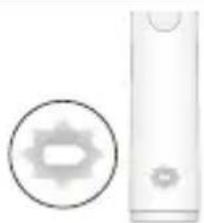
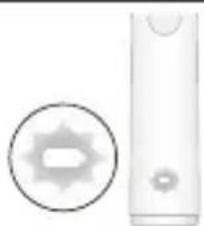
Once your brush head is no longer effective, the brush head replacement reminder will blink amber and the handle will make a series of beeps and tones.
natural_image
Illustration of a cylindrical device with a circular arrow symbol and a starburst design (no text or labels)Note: The brush head replacement reminder comes activated with your product. To deactivate this feature, see 'Activating or deactivating features'.
EasyStart
The EasyStart feature gently increases the power of the handle over the first 14 brushings to help you get used to the brushing power of the Philips Sonicare.
The EasyStart feature works with all modes.
Note: The EasyStart feature comes deactivated with your product. To activate EasyStart, see 'Activating or deactivating features'.
Charging and battery status
Charging on charger base
1 Plug the cord of the charging base into an electrical outlet.
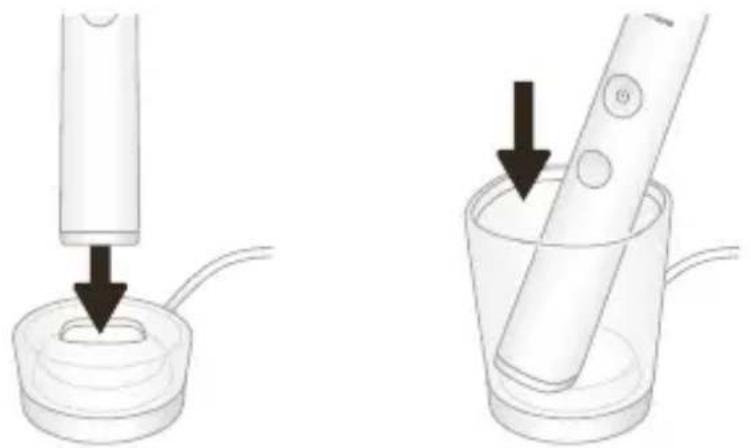
2 Place the charging stand or the charging glass on the charging base.
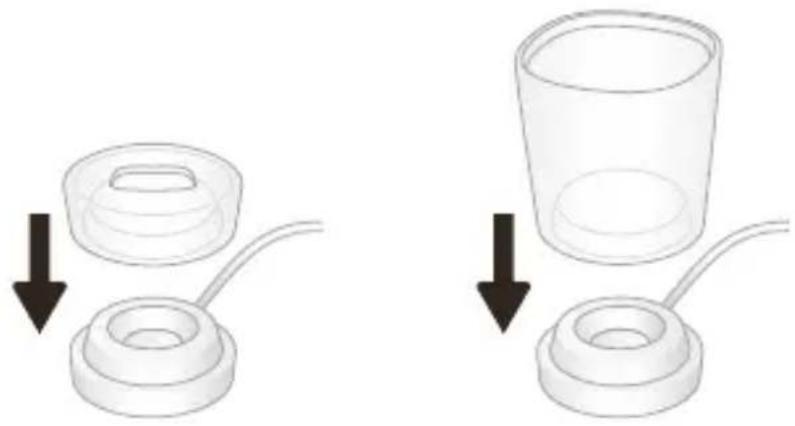
natural_image
Two-step diagram showing a mechanical component being inserted into a cup, with arrows indicating the process (no text or symbols present)3 Place the handle on the charging stand or in the charging glass.

natural_image
Illustration showing two steps of a device manipulation: one with a probe inserted into a base, the other with a brush applying material to a container (no text or symbols present)4 The charger will charge your toothbrush until it is fully charged. The handle is charging when the battery indication is blinking white. When the handle is fully charged, the battery indication illuminates white for 30 seconds and then turns off.
Note: Your handle comes pre-charged for first use. After first use, charge for at least 24 hours.
Charging with the travel case\*
*Note: The charging travel case may not be included depending on the model purchased.
1 Take the USB cable from the bottom of the charging travel case.
2 Connect the charging travel case to 5V DC input power either from:
- The USB adapter provided
- a UL-listed or certified to ANSI/UL 60950-1 personal computer's standard USB connector or,
- a UL-listed or certified to ANSI/UL 60950-1 LPS power supply with USB output port or,
- a UL-listed or certified 1310 Class 2 power supply.
Important: The wall adapter must be a safe extra low voltage source, compatible with the electrical ratings marked on the bottom of the device.
3 The travel case charges your toothbrush until your toothbrush is fully charged.
Battery Status (handle on plugged in charger)
When the handle is placed on the charger or in the travel case, the battery indication will communicate the battery level.
Battery status Battery indication
Charging Blinks in white
Full Illuminates white for 30 seconds
and then turns off.
Battery Status (when handle is not placed on Charger)
When you turn on the handle, the battery light at the bottom of the handle will indicate the status of the battery.
Battery status Battery indication Sound
Full Illuminated in white -
Partially full Blinks white -
Low Blinks amber The handle emits 3
beeps
Empty Blinks amber The handle emits 2
sets of 5 beeps
Activating or deactivating features
You can activate or deactivate the following features of your toothbrush:
- EasyStart
- Brush head replacement reminder
- Pressure sensor
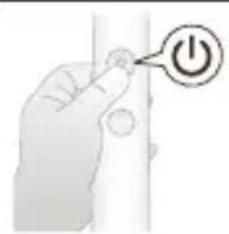
Step 1: Place the handle on the charging stand or in the charging glass.
natural_image
Hand holding a button with an 'Power' icon (no text or symbols on the button)Step 2: Press and hold power button for:
Easy start Brush head replacement reminder Pressure sensor
3 seconds Up to 5 seconds Up to 7 seconds
Step 3: Let go power button when you hear
1 beep 1 beep and then 2 beeps 1 beep, 2 beeps and then 3 beeps
natural_image
Simple illustration of a gray gear icon next to a white cylindrical device (no text or symbols)If you see the battery indication blink white 2 times and hear 3 tones from low to high, then the feature has been activated.
OR
natural_image
Simple illustration of a gray gear icon next to a white cylindrical device (no text or symbols)If you see battery indication blink white once and hear 3 tones high to low, then the feature has been deactivated.
Cleaning
- All parts can be cleaned with a damp cloth or rinsed with warm water.

natural_image
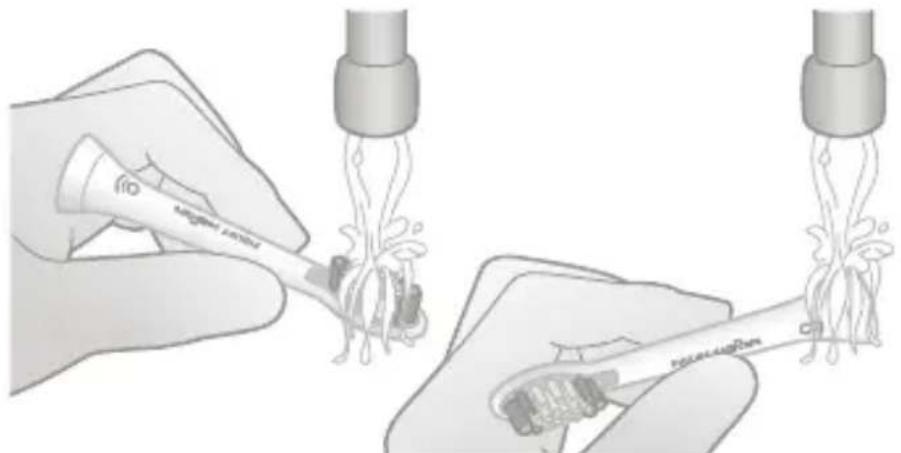
Two gray icons: a towel covering the surface and a faucet with a shower (no text or symbols)- Remove the brush head from the handle and rinse it thoroughly.
natural_image
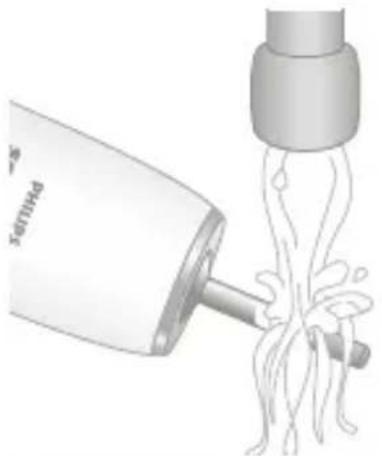
Illustration of two hands using a pipette to connect plant seedlings, showing different stages of growth (no text or symbols present)- Rinse the entire handle, especially the brush head connection, at least once a week.
natural_image
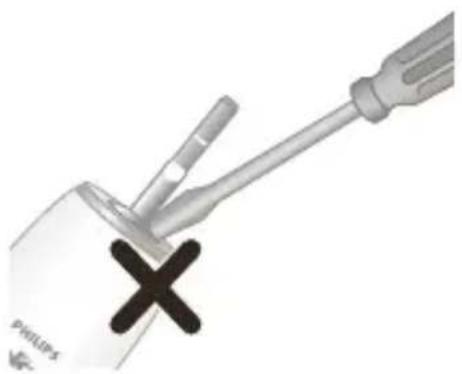
Illustration of a hairdryer with a spool of noodles being inserted (no text or symbols)Caution: Do not push on the rubber seal at the top of the handle. Gently clean around the rubber seal.
natural_image
Close-up of a screwdriver holding a medical device with a black X mark (no text or symbols visible)Cautions:
- Do not clean the brush head, travel cap, handle, charger or travel case in the dishwasher.
- Do not use isopropyl alcohol, vinegar, bleach, or any other house hold cleaning products, to clean the handle as this may cause discoloration.
- Unplug the charger before you clean it.
- Do not use essential oils to clean the brush heads as this can cause damage.
Storage
If you are not going to use the product for an extended period of time, unplug it from the electrical outlet, clean it and store it in a cool and dry place away from direct sunlight.
Frequently asked questions
Question Answer
Can I leave my Sonicare on the charger between brushings?
Yes, you can always keep your Philips Sonicare toothbrush on a plugged-in charger. This does not affect the battery lifetime.
Question Answer
| Will other brush heads fit my Philips Sonicare toothbrush? | All Philips Sonicare electric toothbrush brush heads that snap on will fit your toothbrush. However, not all are equipped with BrushSync technology. You can identify the brush heads with BrushSync technology by the icon at the base of the brush head. |
| How often do I need to replace my brush head? | We advise you to replace your Philips Sonicare brush head after 3 months of use (based on brushing twice a day for 2 minutes each session).The brush head replacement reminder will also notify you when it is time to replace your brush head. |
| Is my Philips Sonicare toothbrush waterproof? | Yes, your Philips Sonicare toothbrush is waterproof. However, never put your handle in a dishwasher to clean it. And do not use it in the shower. |
| What phones are compatible with the Philips Sonicare app? | The Philips Sonicare app support Android OS, and Apple iOS. For the most up to date version of the Philips Sonicare app check out the Android Play Store or Apple App Store. Mobile devices must have Bluetooth 4.0 or newer. |
| What other Philips Sonicare toothbrushes can I use with the Philips Sonicare app? | You can only use Philips Sonicare Flexcare Platinum Connected, DiamondClean Smart, DiamondClean 9000 and ExpertClean toothbrushes with the Sonicare app. Look for the Bluetooth symbol on the front panel of the package. |
Recycling
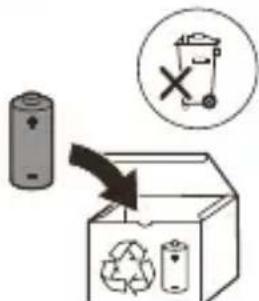
- This symbol means that this product shall not be disposed of with normal household waste (2012/19/EU).
- This symbol means that this product contains a built-in rechargeable battery which shall not be disposed of with normal household waste (2006/66/EC). Please take your product to an official collection point or a Philips service center to have a professional remove the rechargeable battery.
- Follow your country's rules for the separate collection of electrical and electronic products and rechargeable batteries. Correct disposal helps prevent negative consequences for the environment and human health.
Removing the rechargeable battery at the end of lifetime
Warning
- Only remove the rechargeable battery when you discard the handle.
- Make sure the battery is completely empty when you remove it.
- Any attempt to remove the battery will void the warranty.
For assistance, visit our website at www.philips.com/support or call 1-800-243-3050 toll free.
Removing the rechargeable battery
Warning: Only remove the rechargeable battery when you discard the appliance. Make sure the battery is completely empty when you remove it.
To remove the rechargeable battery, you need a towel or cloth, a hammer and a flat-head (standard) screwdriver. Observe basic safety precautions when you follow the procedure outlined below. Be sure to protect your eyes, hands, fingers, and the surface on which you work.
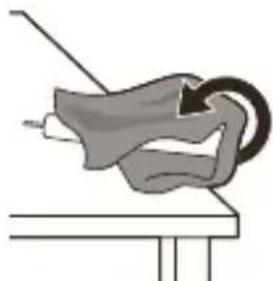
1 To deplete the rechargeable battery of any charge, remove the handle from the charger, turn on the Philips Sonicare and let it run until it stops. Repeat this step until you can no longer turn on the Philips Sonicare.
natural_image
Illustration of a mechanical device with a curved arm and lever (no text or symbols)2 Remove and discard the brush head. Cover the entire handle with a towel or cloth.
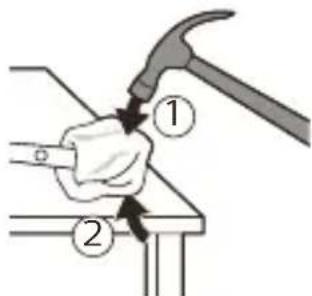
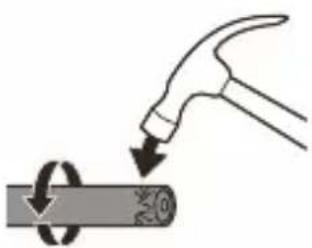
3 Hold the top of the handle with one hand and strike the handle housing 0.5 inch above the bottom end. Strike firmly with a hammer on all 4 sides to eject the end cap.
Note: You may have to hit on the end several times to break the internal snap connections.
natural_image
Illustration of hands holding a battery with a switch, no text or symbols present4 Remove the end cap from the toothbrush handle. If the end cap does not release easily from the housing, repeat step 3 until the end cap is released.
natural_image
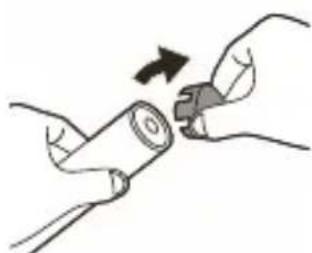
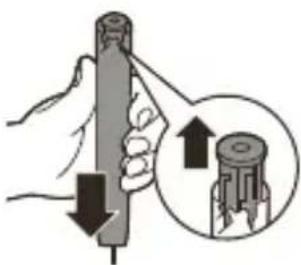
Illustration of a hand using a hammer to tighten a cylindrical object with a circular arrow (no text or symbols)5 Holding the handle upside down, press the shaft down on a hard surface. If the internal components do not easily release from the housing, repeat step 3 until the internal components are released.
natural_image
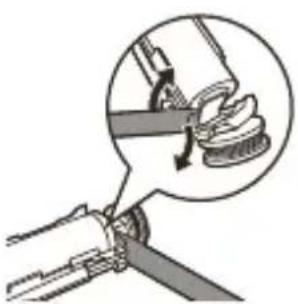
Illustration of a hand holding a cylindrical object with arrows indicating force direction, and an inset showing a magnified view of the object (no text or symbols present)6 Wedge the screwdriver between the battery and the black frame at the bottom of the internal components. Then pry the screwdriver away from the battery to break the bottom of the black frame.
natural_image
Diagram showing a mechanical assembly with a magnified inset of a component being inserted (no text or symbols present)7 Insert the screwdriver between the bottom of the battery and the black frame to break the metal tab connecting the battery to the green printed circuit board. This will release the bottom end of the battery from the frame.
natural_image
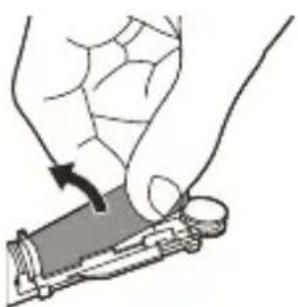
Illustration of a hand holding a small object with an arrow indicating motion (no text or symbols)8 Grab the battery and pull it away from the internal components to break the second metal battery tab.
Caution: Be aware of the sharp edges of the battery tabs so as to avoid injury to your fingers.
9 Cover the battery contacts with tape to prevent any electrical short from residual battery charge. The rechargeable battery can now be recycled and the rest of the product discarded appropriately.
Note: Do not throw away the appliance with the normal household waste at the end of its life, but hand it in at an official collection point for recycling. By doing this, you help to preserve the environment.
Warranty and support
If you need information or support, please visit
www.philips.com/support or read the international warranty leaflet.
Warranty restrictions
The terms of the international warranty do not cover the following:
- Brush heads.
- Damage caused by use of unauthorized replacement parts.
- Damage caused by misuse, abuse, neglect, alterations or unauthorized repair.
- Normal wear and tear, including chips, scratches, abrasions, discoloration or fading.
Einführung
natural_image
Illustration showing a hand using a toothbrush to apply a second toothbrush to a digital device (no text or symbols present)natural_image
Illustration of a dental tool interacting with teeth and jaw (no text or symbols)natural_image
Illustration of dental tool manipulation showing tooth removal and tooth alignment (no text or symbols)Hinweis:
natural_image
Illustration of a parking meter with a circular icon containing a parking sign and a stylized 'P' symbol (no text or labels)natural_image
Two-step diagram showing a mechanical assembly with a lid and base, both with arrows indicating direction of movement (no text or symbols present)natural_image
Illustration showing two steps of a dental tool: one being inserted into a base, the other being inserted into a cup (no text or symbols present)natural_image
Hand holding a button with a power button icon (no text or symbols)natural_image
Illustration of a dental procedure showing two steps: using a toothbrush to apply a tooth model, with no visible text or symbols.natural_image
Illustration of a hairdryer with a spool of hair being inserted (no text or symbols)natural_image
Close-up of a screwdriver holding a white object with a black X mark, no visible text or symbolsAchtung.
natural_image
Illustration of a mechanical or electrical component with a curved arm and rod, no visible text or symbolsnatural_image
Illustration of hands holding a battery with a switch, no text or symbols presentnatural_image
Illustration of a hammer striking a cylindrical object with a circular arrow indicating rotation (no text or symbols)natural_image
Illustration of a hand holding a cylindrical object with an arrow indicating downward motion, and a magnified inset showing the internal structure (no text or symbols)natural_image
Mechanical assembly diagram showing a tool interacting with a gear and a rotating component (no text or symbols)natural_image
Illustration of a hand holding a small object with a curved arrow indicating motion (no text or symbols)natural_image
Illustration showing a hand using a toothbrush to apply a toothbrush to a digital device, with a circular inset highlighting the same tool (no text or symbols present)natural_image
Illustration of a dental tool interacting with a tooth (no text or symbols present)natural_image
Illustration of two dental restorations with toothbrushes and arrows indicating direction (no text or symbols)Nota:
*Nota:
natural_image
Illustration of a cylindrical device with a circular icon containing a stylized 'P' and directional arrows, next to a rectangular label with a starburst design (no readable text or symbols)natural_image
Two-step diagram showing a container being inserted into a lid, with arrows indicating the process (no text or symbols present)natural_image
Illustration showing two steps of a dental procedure: one using a tool to press or apply, the other adding a brush to a cup (no text or symbols present)natural_image
Hand holding a button with a power button icon (no text or symbols)natural_image
Pure electrical circuit lines without any symbolsnatural_image
Simple illustration of a white cylindrical device with a gear symbol and a circular outline, no text or symbols present.natural_image
Simple line drawing of a folded towel with a droplet (no text or symbols)
natural_image
Simple gray icon of a faucet with water splashing (no text or symbols)natural_image
Illustration of two hands using pipettes to connect a small object, no text or symbols presentnatural_image
Illustration of a syringe dispensing liquid into a container (no text or symbols visible)natural_image
Close-up of a medical or dental tool with a cross mark on a device (no text or symbols visible)Precauciones:
natural_image
Illustration of a mechanical device with a curved arm and lever (no text or symbols)natural_image
Illustration of hands holding a cylindrical object with an arrow indicating rotation (no text or symbols)natural_image
Illustration of a hammer striking a cylindrical object with a circular arrow indicating rotation (no text or symbols)natural_image
Mechanical diagram showing a tool interacting with a gear or cam mechanism, with an inset magnified view of the gear assembly (no text or symbols present)natural_image
Illustration of a hand holding a small object with an arrow indicating motion (no text or symbols)natural_image
Illustration showing a hand using a toothbrush to apply a toothbrush to a digital device, with a circular inset highlighting the device's sensor status.natural_image
Illustration of a dental tool interacting with a tooth (no text or symbols present)natural_image
Illustration of dental procedure showing tooth removal using a toothbrush (no text or symbols present)Remarque :
natural_image
Illustration of a dental arch with a numbered marker (7) indicating a specific tooth position, no text or symbols present.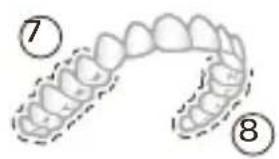
natural_image
Illustration of a tooth with segmented teeth and a circled number 8 (no text or symbols present)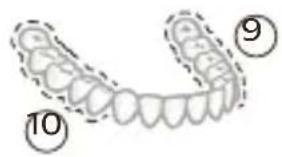
natural_image
Illustration of a cylindrical device with a circular arrow symbol and a starburst design, next to a rectangular container with a starburst icon (no text or symbols present)natural_image
Two-step diagram showing a mechanical component being inserted into a cup, with arrows indicating the process (no text or symbols present)natural_image
Illustration showing two steps of a dental procedure: one using a tool to press or apply, the other adding a brush to a cup (no text or symbols present)natural_image
Hand holding a button with a power symbol (no text or labels)natural_image
Simple illustration of a cylindrical device with a gear symbol and a small circular icon, no text or symbols present.natural_image
Close-up of a white cylindrical device with a circular icon containing a gear-like symbol (no text or labels visible)natural_image
Simple line drawing of a folded towel with a droplet (no text or symbols)
natural_image
Simple gray icon of a faucet with water splashing (no text or symbols)natural_image
Illustration of two hands using pipettes to connect a small object, no text or symbols presentnatural_image
Simple line drawing of a mechanical component or tool interacting with a surface (no text or symbols)natural_image
Illustration of hands fastening a battery with a switch (no text or symbols)natural_image
Illustration of a hand using a hammer to tighten a cylindrical object with a circular arrow (no text or symbols)natural_image
Illustration of a hand holding a pen with arrows indicating force direction, showing a close-up of the pen tip (no text or symbols present)natural_image
Diagram showing a mechanical assembly with a magnified inset of a hand holding a tool, no text or symbols present.natural_image
Illustration of a hand holding a tool with a curved arrow indicating motion (no text or symbols)natural_image
Illustration showing a hand using a toothbrush to apply a second toothbrush to a digital device (no text or symbols present)natural_image
Illustration of a dental tool interacting with teeth, showing tooth width and tooth profile (no text or symbols)natural_image
Illustration of two dental tools applying toothbrush to teeth (no text or symbols present)Nota:
Clean e Deep White+ Gum Health Clean+
Come pulire i denti
natural_image
Illustration of a dental arch with a numbered circle highlighting the tooth (no text or symbols present)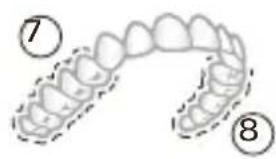
natural_image
Illustration of a dental arch with teeth and jawbone, marked with number 8 (no text or symbols on the arch itself)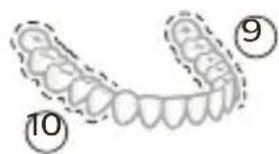
natural_image
Illustration of a cylindrical device with a circular icon containing a stylized 'P' and directional arrows, next to a rectangular label with a starburst design (no readable text or symbols)natural_image
Two-step diagram showing a mechanical component being inserted into a cup, with arrows indicating the process (no text or symbols present)natural_image
Illustration showing two steps of a dental procedure: one using a tool to press or apply a component, the other adding a brush to a cup (no text or symbols present)natural_image
Hand holding a button with a power symbol (no text or labels)natural_image
Simple diagram showing a gear icon and a vertical cylindrical object with circular elements (no text or symbols)natural_image
Simple illustration of a cylindrical device with a gear symbol and a circular inset showing a gear (no text or labels)natural_image
Simple line drawing of a folded garment with a droplet (no text or symbols)
natural_image
Simple gray icon of a faucet with a handle and faucet blades (no text or symbols)natural_image
Illustration of a medical procedure showing two hands using a pipette to connect a small object to a device, with no visible text or symbols.natural_image
Illustration of a medical device with tubing and a cap, showing fluid flow (no text or symbols)natural_image
Close-up of a medical or laboratory device with a screwdriver and a cross mark, no visible text or symbolsAvvertenze:
natural_image
Illustration of a mechanical component with a curved arm and lever (no text or symbols)natural_image
Illustration of hands holding a cylindrical battery with a switch, no text or symbols presentnatural_image
Illustration of a hammer striking a cylindrical object with a circular arrow indicating rotation (no text or symbols)natural_image
Illustration of a hand holding a cylindrical object with arrows indicating direction, and an inset showing a magnified view of the object (no text or symbols present)natural_image
Diagram showing a hand gripping a mechanical component with a magnified inset highlighting a curved tool (no text or symbols present)natural_image
Illustration of a hand holding a small object with an arrow indicating rotation (no text or symbols)De Philips Sonicare (afb. 1)
natural_image
Illustration showing a hand using a toothbrush to apply a toothbrush to a digital device, with a circular inset highlighting the device's sensor status.natural_image
Illustration of a dental tool interacting with a tooth (no text or symbols present)natural_image
Illustration of two dental tools applying toothbrush to teeth (no text or symbols present)Opmerking:
* Opmerking:
clean en deep white+ gum health clean+
| Poetsinstruc ties | clean: poets elk segment 20 seconden lang | poets elk segment 20 seconden lang, | poets elk segment 20 seconden lang, |
|  |  | |
 | |  | |
| deep clean+: poets elk segment 30 seconden lang* | poets vervolgens segment 7 en 8 elk 20 seconden lang. | poets vervolgens segment 7, 8, 9 en 10 elk 20 seconden lang. | |
|  |  | |
 |  |  |
natural_image
Illustration of a cylindrical device with a circular icon containing a stylized 'P' and directional arrows, next to a rectangular label with a starburst design (no readable text or symbols)natural_image
Two-step diagram showing a container being inserted into a lid, with arrows indicating the process (no text or symbols present)natural_image
Illustration showing two steps of a dental or medical procedure: one using a tool to press or attach material, the other adding a brush to a cup (no text or symbols present)natural_image
Hand holding a button with a power symbol (no text or labels)natural_image
Simple diagram showing a gear icon and a vertical cylindrical object with circular elements (no text or symbols)natural_image
Simple illustration of a cylindrical device with a gear symbol and a circular inset showing a gear (no text or labels)natural_image
Simple line drawing of a folded garment with a droplet (no text or symbols)
natural_image
Simple gray icon of a faucet with a handle and faucet blades (no text or symbols)natural_image
Illustration of a medical procedure showing two hands using a pipette to connect tissue samples into a device (no text or symbols present)natural_image
Illustration of a medical device with tubing and a cap, showing fluid flow (no text or symbols)natural_image
Close-up of a medical screwdriver with a black X mark on a medical device (no text or symbols visible)Let op:
natural_image
Illustration of a mechanical device with a curved arm and lever, no text or symbols presentnatural_image
Illustration of hands holding a cylindrical object with an arrow indicating rotation (no text or symbols)natural_image
Illustration of a hammer striking a cylindrical object with a circular arrow indicating rotation (no text or symbols)natural_image
Mechanical assembly diagram showing a lever and gear mechanism with an arrow indicating rotation (no text or symbols)natural_image
Illustration of a hand holding a device with a circular component and an arrow indicating rotation (no text or symbols)www.philips.com/support
natural_image
Illustration showing a hand using a toothbrush to apply a toothbrush to a dental implant, with an inset close-up of the implant detail (no text or symbols)natural_image
Illustration of a dental tool interacting with teeth, showing a finger inserted into a tooth (no text or symbols present)natural_image
Illustration of dental tool manipulation showing tooth removal and tooth positioning (no text or symbols)Nota:
Clean e Deep White+ Gum Health Clean+
natural_image
Illustration of a cylindrical device with a circular icon containing a stylized 'P' and directional arrows, next to a rectangular label with a starburst design (no readable text or symbols)natural_image
Two diagrams showing a mechanical component being inserted into a cup, with arrows indicating the process (no text or symbols present)3 Coloque a pega no suporte de carregamento ou no vidro de carga.
natural_image
Two-step illustration showing a device being inserted into a container, with arrows indicating the process (no text or symbols present)natural_image
Hand holding a button with a power button icon (no text or symbols)natural_image
Simple illustration of a cylindrical device with a gear-like symbol and a circular inset (no text or symbols)natural_image
Pure electrical circuit lines without any symbolsnatural_image
Simple line drawing of a folded towel with a droplet (no text or symbols)
natural_image
Simple gray icon of a faucet with water splashing (no text or symbols)natural_image
Illustration of two hands using a pipette to connect a small object into a container, with no visible text or symbols.natural_image
Illustration of a medical device with tubing and a cap, showing fluid flow (no text or symbols)natural_image
Close-up of a medical screwdriver with a black X mark on a medical device (no text or symbols visible)Avisos:
natural_image
Illustration of a mechanical device with a curved arm and lever, no text or symbols presentnatural_image
Illustration of hands holding a battery with a switch, no text or symbols presentnatural_image
Illustration of a hand using a hammer to tighten a cylindrical object with a circular arrow (no text or symbols)natural_image
Illustration of a hand holding a cylindrical object with an arrow indicating downward motion, and a magnified inset showing the same object (no text or symbols)natural_image
Mechanical diagram showing a tool interacting with a gear or cam mechanism, with an inset magnified view of the gear assembly (no text or symbols present)natural_image
Illustration of a hand holding a small object with an arrow indicating motion (no text or symbols)Premium Plaque Control
Premium White Premium Gum Care
natural_image
Illustration showing a hand using a toothbrush to apply a toothbrush to a digital device, with a circular inset highlighting the device's sensor icon.natural_image
Illustration of a dental tool interacting with a tooth (no text or symbols present)natural_image
Illustration of dental tool manipulation showing tooth removal and tooth alignment (no text or symbols)Σημείωση:
* Σημείωση:
natural_image
Illustration of a cylindrical device with a circular icon containing a stylized 'P' and a starburst design, next to its external casing (no text or symbols)natural_image
Two-step diagram showing a container being inserted into a lid, with arrows indicating the process (no text or symbols present)natural_image
Illustration showing two steps of a device manipulation: one with a probe inserted into a base, the other with a brush applying material to a beaker (no text or symbols present)natural_image
Hand holding a button with an 'Power' icon (no text or symbols on the button)natural_image
Pure electrical circuit lines without any symbolsnatural_image
Two white cylindrical objects with circular and square features, one containing a gear-like symbol (no text or symbols present)natural_image
Simple line drawing of a folded paper towel with a droplet (no text or symbols)
natural_image
Simple gray icon of a faucet with a handle and faucet feet (no text or symbols)natural_image
Illustration of a dental procedure showing two hands using a tool to apply material to a tooth model (no text or symbols present)natural_image
Illustration of a medical device with tubing and a cap, showing fluid flow (no text or symbols)natural_image
Close-up of a screwdriver with a black X mark on a medical device (no text or symbols visible)Προφυλάξεις:
natural_image
Illustration of a mechanical device with a curved arm and lever, no text or symbols presentnatural_image
Illustration of hands holding a battery with a switch, no text or symbols presentnatural_image
Illustration of a hammer striking a cylindrical object with a circular arrow indicating rotation (no text or symbols)natural_image
Mechanical diagram showing a lever mechanism with a magnified inset highlighting the joint detail (no text or symbols present)natural_image
Illustration of hands holding a device with a black arrow indicating motion (no text or symbols)natural_image
Diagram of open and closed folding panels with grid patterns and directional arrows (no text or symbols)www.philips.com/Sonicare
©2019 Koninklijke Philips N.V. (KPNV). All rights reserved. Philips and the Philips shield are trademarks of KPNV. Sonicare and the Sonicare logo are trademarks of Philips Oral Healthcare, LLC and/or KPNV.
3000.041.6900.1 (6/9/2019)