
PLN2400 - Monitor Planar - Free user manual and instructions
Find the device manual for free PLN2400 Planar in PDF.

User questions about PLN2400 Planar
0 question about this device. Answer the ones you know or ask your own.
Ask a new question about this device
Download the instructions for your Monitor in PDF format for free! Find your manual PLN2400 - Planar and take your electronic device back in hand. On this page are published all the documents necessary for the use of your device. PLN2400 by Planar.
USER MANUAL PLN2400 Planar
Operation Instructions .... 1
Unpacking Instructions 3
Safety Precautions 3
Front View of the Product....7
Rear View of the Product 8
Quick Installation....10
Basic Operation 11
OSD Menu 13
Supporting Timing Modes 19
Technical Information 20
Wall Mount Instructions 21
Care and Maintenance Wall 22
Troubleshooting 22
Planar Support 23
Operation Instructions
Thank you for purchasing the PLN2400 monitor. Please read this guide thoroughly before installation.
FCC RADIO FREQUENCY INTERFERENCE STATEMENT WARNING: (FOR FCC CERTIFIED MODELS)
This LED LCD Monitor has been tested and found compliant with the limits for a Class B digital device, pursuant to part 15 of the FCC Rules. These limits are designed to provide proper protection against harmful interference to a residential installation. This LED LCD Monitor generates, uses, and can radiate radio frequency energy. Harmful interference to radio communication may be the result if it's not properly installed and used. However, there is no guarantee that interference will not occur in a particular installation. If this LED LCD Monitor does cause serious interference to radio or television reception, resetting may correct it. Moreover, users are encouraged to reduce interference by doing one or more of the following:
● Reorient or relocate the receiving antenna.
- Move the LED LCD Monitor and the receiver further away from each other.
- Connect the LED LCD Monitor into an outlet on a circuit different from that to which the receiver is connected.
- Consult your local dealer or a qualified technician.
FCC Warning:
To assure a continued FCC compliance, a user must use a grounded power supply cord and the provided shielded video interface cable with bonded ferrite cores. Also, any unauthorized changes or modifications to this LED LCD Monitor would void the user's authority to operate this device.
Note: If necessary, shielded interface cables and AC power cord must be used to meet the emission level limits.
Shielded cables must be used with this unit to ensure compliance with the Class B FCC limits.
According to WEEE regulation, this LED LCD Monitor can't be handled as normal trash in Europe when it is out of usage. Please refer to the recycle information on Planar's website to handle it.
For more information on how to recycle your product, please visit http://www.planar.com/about/green/
COMMUNIQUE D'AVERTISSEMENT DE LA FCC CONCERNANT LES INTERFERENCE DE FREQUENCE RADIO: (SEULEMENT POUR MODELES CERTIFIE PAR LA FCC)
Unpacking Instructions
- Remove the LED LCD Monitor out of the package and take off EPE Foam.
- Remove stand and base from EPE Foam and attach to base.
- Adjust the display between -5^ and 15^ .
Safety Precautions
Follow all warnings, precautions and maintenance as recommended in this user's manual to maximize the life of your unit.
DO :
- Turn off the product before cleaning.
- Surface may be cleaned using a soft clean cloth moistened with mild window glass commercial cleaners or 50/50 mixture of water and isopropyl alcohol.
- Use a soft cloth moistened with mild detergent to clean the display housing.
- Disconnect the power plug from AC outlet if the product is not going to be used for an extended period of time.
Don't :
- Do not touch the LED display screen surface with sharp or hard objects.
- Do not use abrasive cleaners, waxes or solvents for your cleaning.
- Do not operate the product under the following conditions:
○ Over 16 hours per day.
○ Extremely hot, cold or humid environment.
○ Areas susceptible to excessive dust and dirt.
○ Near any appliance generating a strong magnetic field.
○ In direct sunlight.
- If smoke, abnormal noise or odor emits from your LED LCD Monitor, remove the power cord immediately and call your service center.
- Never remove the rear cover of your LED LCD Monitor. The display unit inside contains high-voltage parts and may cause electric shock.
- Never try to repair your LED LCD Monitor yourself. Always call your service center or a qualified technician to fix it.
- Due to safety concerns, if the VESA mounting kit is purchased separately, please make sure the mounting kit is UL-listed, and replaceable only by service personnel.
natural_image
Line drawing of a flat-screen monitor with a stand (no text or symbols)LED LCD Monitor
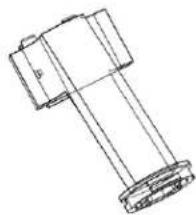
natural_image
Technical line drawing of a mechanical component with no visible text or symbols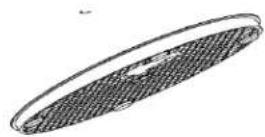
Stand Base
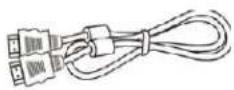
HDMI Cable Power Cord
User's Guide
First Setup
Install the Stand Base
- Lay the LED LCD Monitor flat on a table with the LED screen face down. To prevent the LED LCD Monitor from being scratched, put a piece of soft cloth on the table on which the screen will be set.
- Insert Stand into the monitor, then secure Base to Stand by turning clockwise, as shown below.
- Stand the LED LCD Monitor up

Disconnecting the Stand Base
- Lay the LED LCD Monitor flat on a table with the LED screen face down. To prevent the LED LCD Monitor from being scratched, put a piece of soft cloth on the table on which the screen will be set.
- Press the release button and pull away the monitor to remove the stand from the monitor.
- Pull the release lever and turn counter-clockwise to remove base from stand.
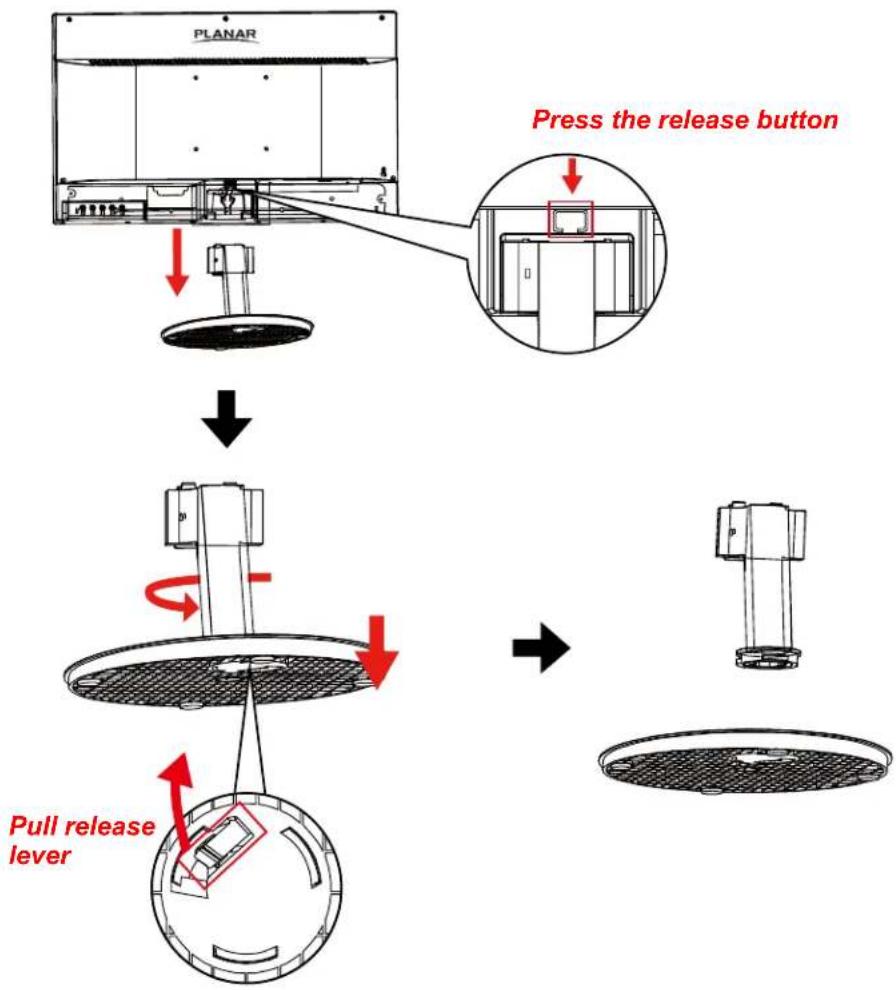
flowchart
graph TD
    A["Press the release button"] --> B["Pull release lever"]
    B --> C["Final release device with red arrows indicating press and lever actions"]
Front View of the Product
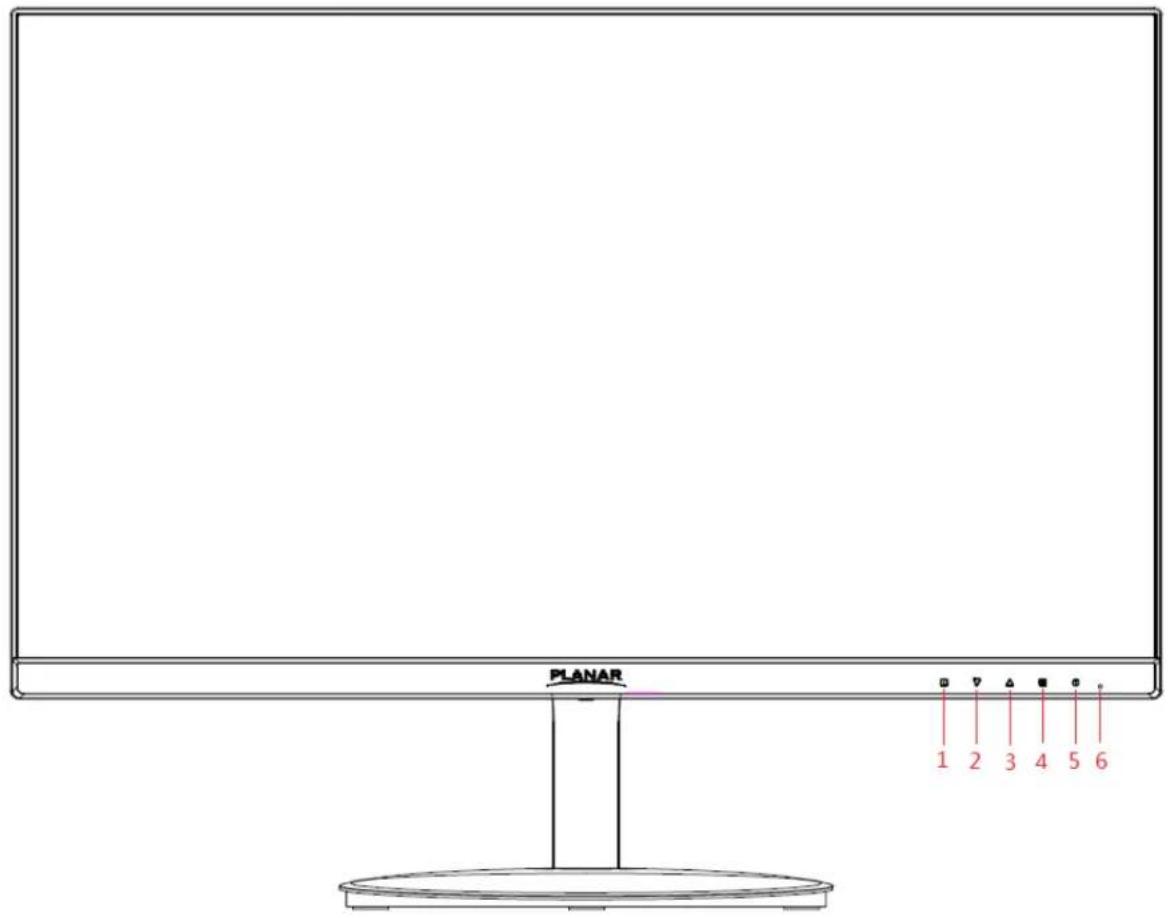
text_image
PLANAR 1 2 3 4 5 6| 1 | Menu / Exit |
| 2 | Brightness / Down |
| 3 | Blue Light Reducer / Up |
| 4 | Input select / Enter |
| 5 | Power On / Off |
| 6 | LED Indicator |
*Hot keys Instructions please see "Basic Operation" on page10.
Rear View of the Product
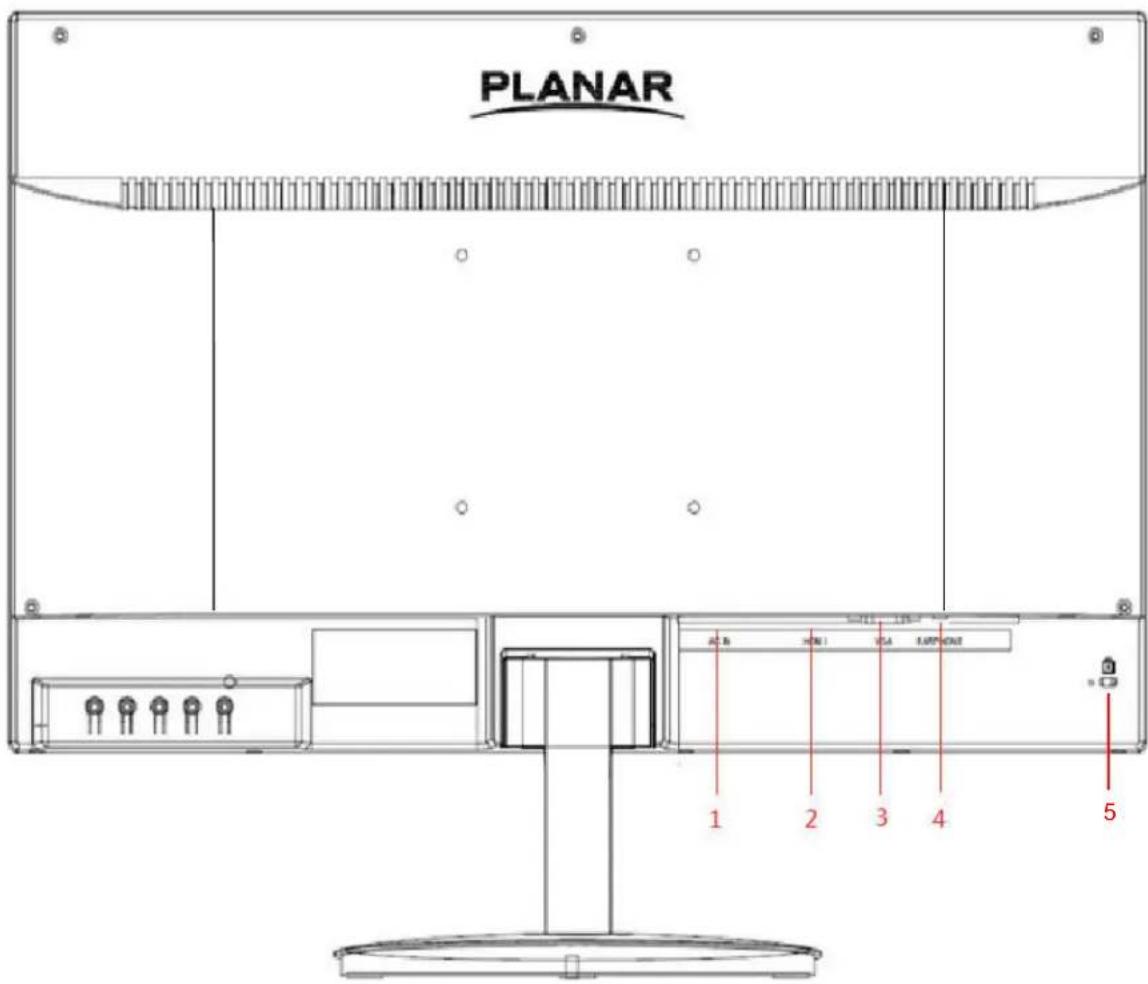
text_image
PLANAR 1 2 3 4 51 Power Input (AC input)
2 HDMI Input (HDMI 19 pin)
3 VGAI Input (VGA 15 pin)
4 Audio Output (EARPHONE)
5 Kensington Lock
Quick Installation
- Connect either HDMI or VGA Video Source from the monitor to the computer. Make sure both monitor and computer are powered OFF. Please note the monitor ships with an HDMI cable only.
- Connect the power cord to a properly grounded AC outlet, then to the monitor.
- Power-ON computer and then POWER-ON the monitor.
- Set the timing mode on your computer. Recommended resolution and refresh rate is 1920x 1080@60Hz.
Figure 1:
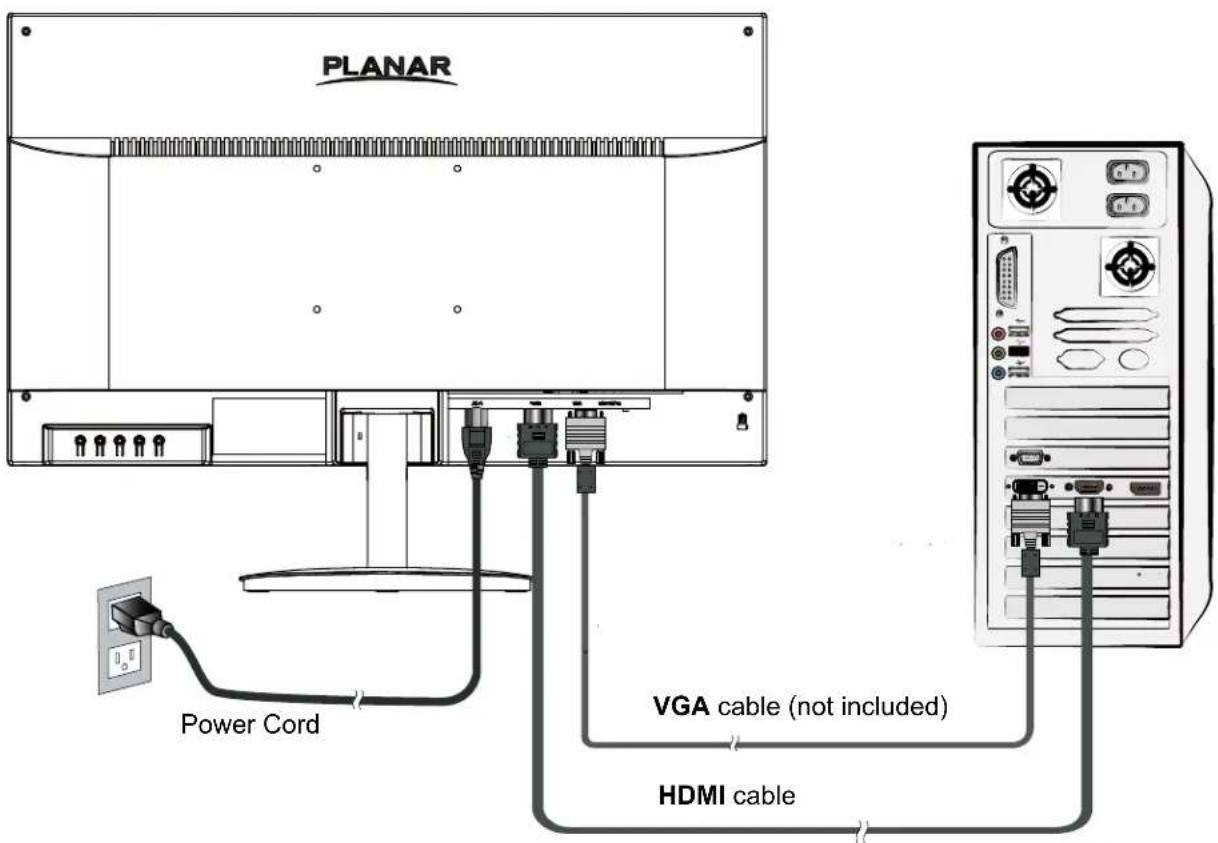
text_image
PLANAR Power Cord VGA cable (not included) HDMI cableBasic Operation
Before using the LED LCD Monitor:
- Connect external equipment properly.
- Insert the power plug, and the power LED indicator will light orange.
Power On/Off
To turn the LED LCD Monitor on/off:
Press button on the front. The power LED indicator light will be blue when the LED LCD Monitor is on.
Using the OSD Menu
Use OSD menus to adjust settings by using the menu button on the front of the LED LCD Monitor.
| 1 | Displays main menu |
| Exits from OSD menu | |
| 2 | Selects between VGA or HDMI |
| ▼ | Select the desired item when in OSD menu |
| When not in OSD menu, directly enters Brightness Menu | |
| ▲ | Select the desired item when in OSD menu |
| When not in OSD menu, directly enters Blue Light Reducer Menu |
OSD lock out Function
When LED LCD Monitor is on and the OSD menu is not activated, the "Lock Out" function can be enabled.
Option 1: OSD lock-all 4 buttons are locked except the "POWER" button.
Press and hold the button ☐ for 5 seconds to lock the OSD buttons.
The LED LCD Monitor will show an "OSD locked" message for 5 seconds and the message will disappear automatically.
OSD LOCKED
Repeat this step to unlock.
Option 2: OSD & Power button lock-all 5 buttons including the "POWER" button are locked.
Press and hold the 2 button for 5 seconds to lock all 5 buttons.
The LED LCD Monitor will show a “Power button locked” message for 5 seconds and the Message will disappear automatically.
POWER LOCKED
Repeat this step to unlock.
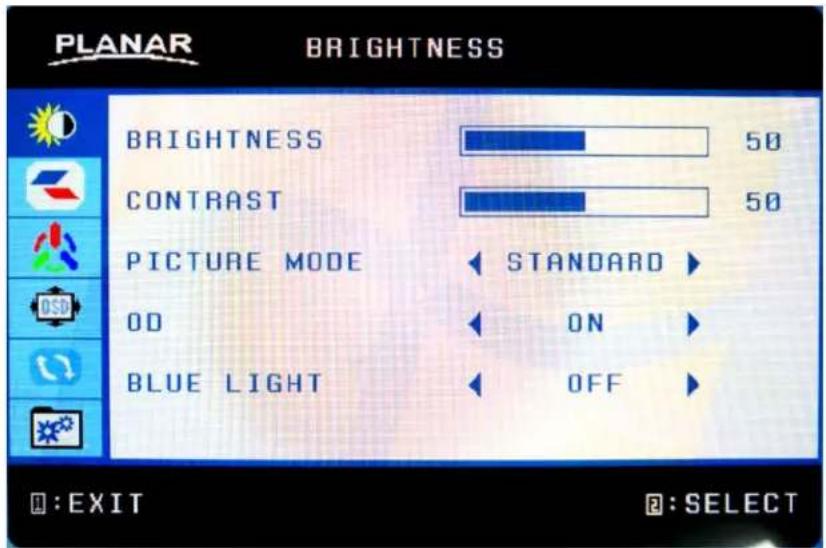
text_image
PLANAR BRIGHTNESS BRIGHTNESS 50 CONTRAST 50 PICTURE MODE STANDARD OD ON BLUE LIGHT OFF A:EXIT B:SELECTBRIGHTNESS
• BRIGHTNESS: Adjust backlight levels
Adjust between 0-100.
• CONTRAST: Adjust contrast levels
Adjust between 0-100.
• PICTURE MODE : Select from preset modes
Standard, Movie, Game, Text.
• OD: Turn Overdrive on or off
ON/OFF.
- BLUE LIGHT: Reduces blue light
OFF: Video (15% reduction), Web Browsing (30% reduction),
Reading (50% reduction), Low Light (70% reduction).
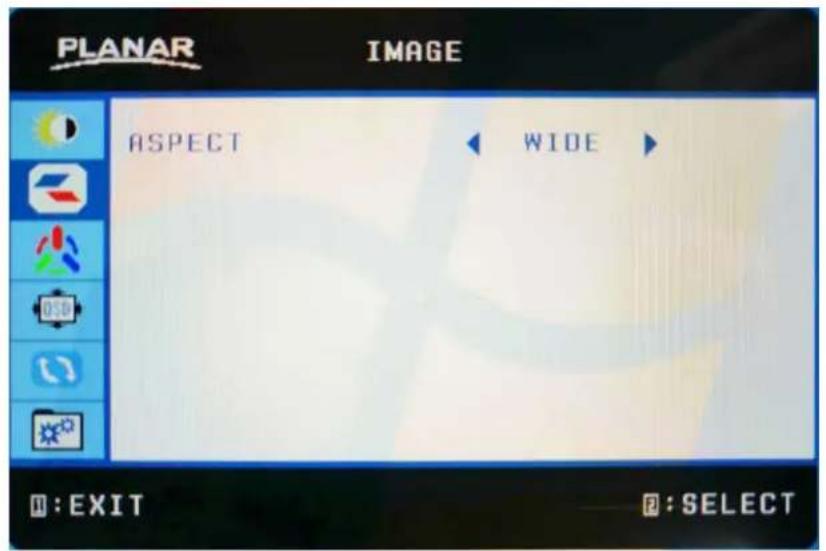
text_image
PLANAR IMAGE ASPECT WIDE I:EXIT P:SELECTIMAGE
• ASPECT : Select aspect ratio
Wide, 4:3.
text_image
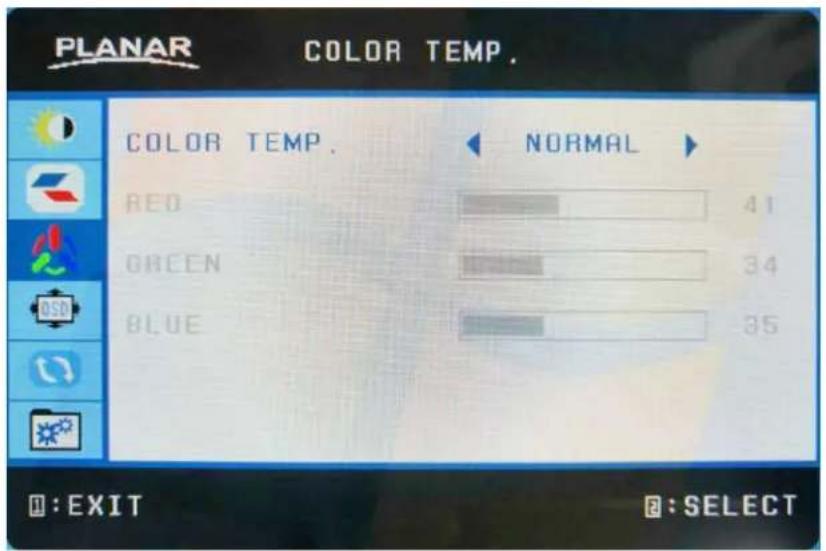
PLANAR COLOR TEMP. COLOR TEMP. NORMAL RED 41 GREEN 34 BLUE 35 :EXIT E:SELECTCOLOR TEMP
• COLOR TEMP : Choose color temperature User, Warm, Normal, Cool Under USER, the following colors can be adjusted
• LANGUAGE : Choose language
English, French, German, Italian, Spanish, Russian
- OSD H. POS : Adjust horizontal position of OSD 0\~100
- OSD V. POS : Adjust vertical position of OSD 0\~100
- OSD TIMER : Adjust OSD time out 0\~60
• TRANSPARENCY: Adjust OSD transparency 0\~100
text_image
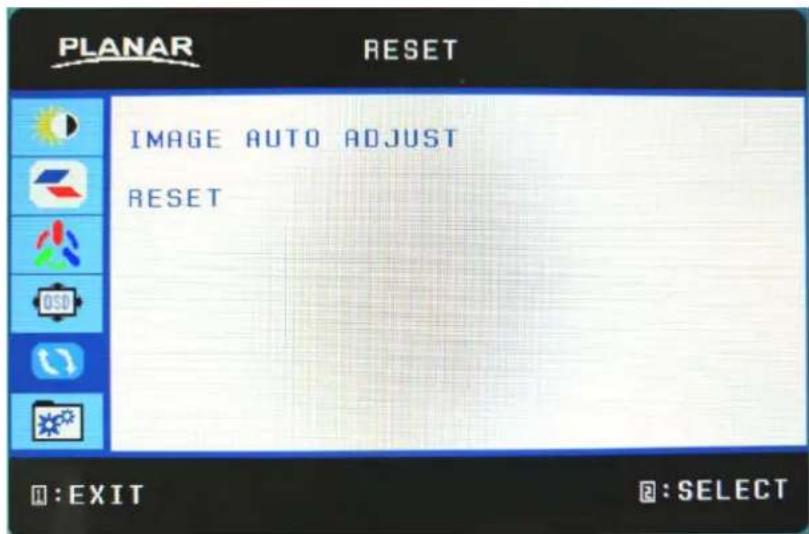
PLANAR RESET IMAGE AUTO ADJUST RESET :EXIT P:SELECTRESET
• IMAGE AUTO ADJUST: Adjust display automatically (Only available in VGA input).
- RESET : Reset to factory default
text_image
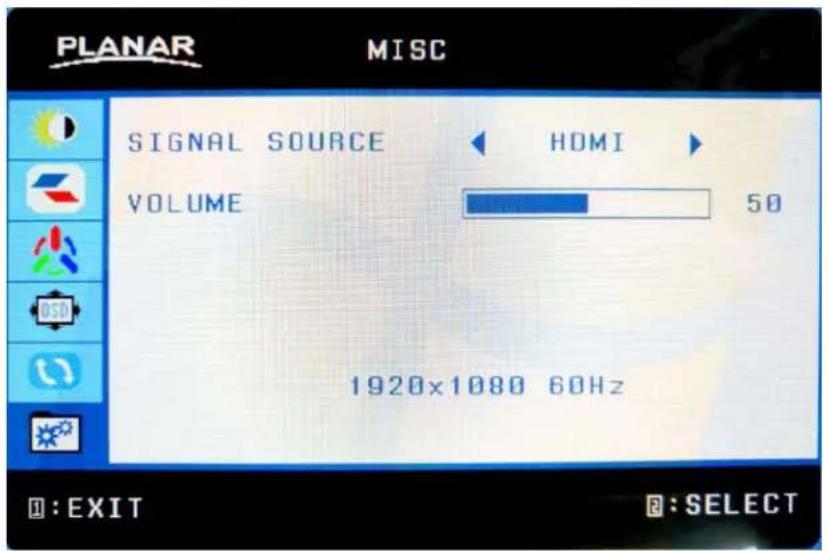
PLANAR MISC SIGNAL SOURCE HDMI VOLUME 50 1920x1080 60Hz D: EXIT F: SELECTMISC
• SIGNAL SOURCE : Select Input source HDMI, VGA
• VOLUME : Adjusts volume of earphone
0-100
Supporting Timing Modes
| STANDARD RESOLUTION | |
| VGA | 640 x 480 @ 60Hz |
| MAC 640 x | 480 @ 67Hz |
| VESA 800 x | 600 @ 56Hz |
| VESA 800 x | 600 @ 60Hz |
| VESA 800 x | 600 @ 72Hz |
| VESA 800 x | 600 @ 75Hz |
| MAC 832 x | 624 @ 75Hz |
| VESA 1024 x | 768 @ 60Hz |
| VESA 1024 x | 768 @ 70Hz |
| VESA | 1024 x 768 @ 75Hz |
| VESA 1280 x | 720 @ 60Hz |
| VESA | 1280 x 800 @ 60Hz |
| VESA | 1280 x 1024 @ 60Hz |
| VESA 1280 x | 1024 @ 75Hz |
| VESA | 1440 x 900 @ 60Hz |
| VESA 1440 x | 900 @ 75Hz |
| VESA | 1680 x 1050 @ 60Hz |
| VESA | 1920 x 1080 @ 60Hz |
Note:
HDMI supports 480i, 480p, 576i, 576p, 720p, 1080i, and 1080p.
Warning 1.: The equipment is only suitable for mounting at heights ≤ 2 m.
| Panel 23.8" TFT (with LED backlight) | |
| Power Management Normal | On: 22 Watts (typical), 24 Watts (maximum) |
| Standby Mode: < 0.5WattOff: < 0.5 Watt | |
| Displayable Resolution FHD 1920x1080 max | |
| Pixel Dimension 0.2745(H)x0.2745(V)mm | |
| Display Color 16.7M | |
| Tilt -5° ~ 15° | |
| Active Display Area 527.04mm x 296.46mm | |
| Temperature Operating: 5° ~ +40°Storage: -20° ~ +60° | |
| Compliance FCC-B ,CE, UL/CUL | |
| Power AC 110V~240V | |
Wall-Mount Installation Instructions
Attaching The Optional Wall Mount Arm (not supplied)
Follow these steps to finish installing the wall mounting arm:
- Place the wall mounting arm onto the back of the LED LCD Monitor. Line up the holes of the arm with the holes in the back of the monitor.
- Insert the 4 screws into the holes and tighten.
- Reconnect the cables. Refer to the User's Guide that came with the optional wall mounting arm for instructions on attaching it to the wall.
NOTE
100 mmx100 mm VESA high hole (n=4), M4, pitch =0.7 mm screw mounting kit not included.
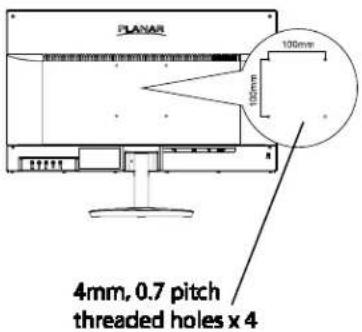
text_image
PLANAR 100mm 100mm 4mm, 0.7 pitch threaded holes x 4Care and Maintenance
Care
- Avoid exposing your LED LCD monitor directly to sunlight or other heat source. Place your LED LCD monitor away from the sun to reduce glare.
- Put your LED LCD monitor in a well ventilated area.
- Do not place any heavy things on top of your LED LCD monitor.
- Make certain your LED LCD monitor is installed in a clean and moisture-free area.
- Keep your LED LCD monitor away from magnets, motors, transformers, speakers and TV sets.
Note
- Move the LED out of the package and take off the plastic bag and Polystyrene Foam.
- Pull the base from Parallel versus Panel to Vertical.
- Adjust the Panel within -5° leaning forward and 15° leaning backward.
Safety Tips
- If smoke, abnormal noise or odor came out from your LED LCD monitor, caution you should remove the power cord immediately and call your service center.
- Si de fumée, un bruit anormal ou une odeur séchappait de votre moniteur, débranchez immédiatement le cordon dalimentation et appelez votre centre de service.
- Never remove the rear cover of your LED LCD monitor cabinet. The display unit inside contains high-voltage parts and may cause electric shock to human bodies.
- Never try to repair your LED LCD monitor yourself. Always call your service center or a qualified technician to fix it.
Troubleshooting
No power
- Make sure A/C power cord is securely connected to the power adapter and the power supply if firmly connected to the LED LCD Monitor.
- Plug another electrical device into the power outlet to verify that the outlet is supplying proper voltage.
- Make sure all signal cables are installed.
Power on but no screen image
- Make sure the video cable supplied with the LED LCD Monitor is tightly secured to the video output port on back of the computer. If not, tightly secure it.
- Adjust brightness.
Wrong or abnormal colors
- If any colors (red, green, blue) are missing, check the video cable to make sure it is securely connected. Loose or broken pins in the cable connector could cause an improper connection.
- Connect the LED LCD Monitor to another computer.
Planar Support
Cables and Accessories
To find cables and accessories for your Planar monitor, touch screen or other Planar products visit our online store at www.PlanarOnline.com.
Technical Support
Visit Planar at http://www.planar.com/support for operations manuals, touchscreen drivers, warranty information and access to Planar's Technical Library for online trouble shooting. To speak with Planar Customer Support please have your model and serial number available and dial:
Planar Support
Tel: 1-866-PLANAR1 (866-752-6271) or + 1 503-748-5799 outside the US.
Hours: 24 hours a day, 7 days a week.
Toll or long distance charges may apply.
Planar Systems, Inc.
Customer Service
24x7 Online Technical Support: http://www.planar.com/support
1195 NE Compton Drive, Hillsboro, OR 97006
Tel: 1-866-PLANAR1 (866-752-6271), or + 1 503-748-5799 outside the United States,
Hours: 24 hours a day, 7 days a week
©2019 Planar Systems, Inc.
Planar is a registered trademark of Planar Systems, Inc. Other brands and names are the property of their respective owners. Technical information in this document is subject to change without notice.