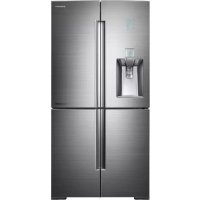
RF34H9950S4 - Fridge SAMSUNG - Free user manual and instructions
Find the device manual for free RF34H9950S4 SAMSUNG in PDF.


User questions about RF34H9950S4 SAMSUNG
0 question about this device. Answer the ones you know or ask your own.
Ask a new question about this device
Download the instructions for your Fridge in PDF format for free! Find your manual RF34H9950S4 - SAMSUNG and take your electronic device back in hand. On this page are published all the documents necessary for the use of your device. RF34H9950S4 by SAMSUNG.
USER MANUAL RF34H9950S4 SAMSUNG
Refrigerator user manual
imagine the possibilities
Thank you for purchasing this Samsung product.

Free Standing Appliance
SAMSUNG
Contents
SAFETY INFORMATION......2
SETTING UP YOUR FRENCH DOOR REFRIGERATOR 11
TROUBLESHOOTING....51
Safety information
SAFETY INFORMATION
- Before using your new Samsung Refrigerator, please read this manual thoroughly to ensure that you know how to operate the features and functions that your new appliance offers safely and efficiently.
- This appliance is not intended for use by persons (including children) with reduced physical, sensory or mental capabilities, or lack of experience and knowledge, unless they have been given supervision or instruction concerning use of the appliance by a person responsible for their safety. Children should be supervised to ensure that they do not play with the appliance.
- Because the following instructions cover various models, the characteristics of your refrigerator may differ slightly from the refrigerator described in this manual.
- If you have any question, contact us at 1-800-SAMSUNG or find help and information online at www.samsung.com.
- R-600a or R-134a is used as a refrigerant. Check the compressor label on the rear of the appliance or the rating label inside the fridge to see which refrigerant is used for your refrigerator. If this product contains flammable gas (Refrigerant R-600a), contact your local authority in regard to safe disposal of this product.
- It is hazardous for anyone other than an Authorized Service Person to service this appliance.
Warning; Risk of fire / flammable materials
Important safety symbols and precautions:
WARNING
Hazards or unsafe practices that may result in severe personal injury or death.
CAUTION
Hazards or unsafe practices that may result in minor personal injury or property damage.
| Do NOT attempt. | |
| Do NOT disassemble. | |
| Do NOT touch. | |
| Follow directions carefully. | |
| Unplug the power plug from the wall socket. | |
| Make sure the refrigerator is grounded to prevent electric shock. | |
| Call the contact center for help. | |
| Note. |
These warning symbols are here to prevent injury to you and others.
Please follow them carefully.
After reading this section, keep it in a safe place for future reference.

WARNING
STATE OF CALIFORNIA PROPOSITION 65 WARNING (US ONLY)
• Cancer and Reproductive Harm - www.P65Warnings.ca.gov.

WARNING
CRITICAL INSTALLATION WARNINGS

- Do not install the refrigerator in a damp location or place where it may come in contact with water.
- Deteriorated insulation on electrical parts may cause an electric shock or fire.
- Do not place this refrigerator in direct sunlight or expose it to the heat from stoves, room heaters, or other appliances.
- Do not plug several appliances into the same multiple power strip.
The refrigerator should always be plugged into its own individual electrical outlet which has a voltage rating that matches the voltage listed on the refrigerator's rating plate.
- This provides the best performance and also prevents overloading of house wiring circuits, which could cause a fire hazard from overheated wires.
- If the wall socket is loose, do not insert the power plug.
- There is a risk of electric shock of fire.
- Do not use a power cord that has cracks or
abrasion damage along its length or at either end.
- Do not bend the power cord excessively or place heavy objects on it.
- Do not twist or tie the power cord.
- Do not hook the power cord over a metal object, place a heavy object on the power cord, insert the power cord between objects, or push the power cord into the space behind the appliance.
- When moving the refrigerator, be careful not to roll over or damage the power cord.
- This may result in an electric shock or fire.
- Never unplug your refrigerator by pulling on the power cord.
Always grip the plug firmly and pull straight out from the outlet.
- Damage to the cord may cause a short-circuit, fire, and/or electric shock.
- Do not use aerosols near the refrigerator.
- Using aerosols near the refrigerator may cause an explosion or fire.
- Do not install this appliance near a heater or inflammable material.
- Do not install this appliance in a humid, oily, or dusty location, or in a location exposed to direct sunlight or water (rain, etc.).
- Do not install this appliance in a location where gas may leak.
- This may result in an electric shock or fire.

- This refrigerator must be properly located and installed in accordance with the instructions in this manual before you use it.
- Connect the power plug in the proper position with the cord hanging down.
- If you connect the power plug upside down, the wire can get cut off and cause a fire or electric shock.
- When moving the refrigerator, be careful not to roll over or damage the power cord.
- This constitutes a fire hazard.
• Make sure that the power plug is not crushed or damaged by the back of the refrigerator.
- Keep the packing materials out of reach of children.
- There is a risk of death from suffocation if a child puts the packing materials on his or her head.
- The appliance must be positioned so that the plug is accessible after installation.
- Failing to do so may result in an electric shock or fire due to electric leakage.
- You need to remove all the protective plastic film before you initially plug the product in.
- Children should be supervised to ensure that they do not play with the snap rings used for door adjustment or the water tube clips
- There is risk of death by suffocation if a child swallows a snap ring or water tube clip. Keep the snap rings and water tube clips out of children's reach.

- The refrigerator must be safely grounded.
- Always make sure that you have grounded the refrigerator before attempting to investigate or repair any part of the appliance. Power leakages can cause severe electric shock.
- Never use gas pipes, telephone lines, or other potential lightning attractors as an electrical ground.
- Improper use of the grounding plug can result in a risk of electric shock. If it is necessary to use an extension cord, use only a 3-wire extension cord that has a 3-blade grounding plug and a 3-slot receptacle that will accept the plug on the appliance. The marked rating of the extension cord should be AC 115-120 V, 10 A, or more. If a grounding adapter is used, make sure the receptacle box is fully grounded.
- Plug the power plug into the wall socket firmly. Do not use a damaged power plug, damaged power cord, or loose wall socket.
- This may result in an electric shock or fire.

- If the power cord is damaged, have it replaced immediately by the manufacturer or one of its service agents.
- The wall socket must be easily accessible so that the appliance can be quickly disconnected from the wall socket in an emergency.
- It must be outside the area of the rear of the appliance.
- When positioning the appliance, ensure the power cord is not trapped or damaged.
- Do not locate multiple portable socket-outlets or portable power supplies at the rear of the appliance.
- Keep ventilation openings, in the appliance enclosure or in the built-in structure, clear of
obstruction.
- Connect to potable water supply only.
- Do not store explosive substances such as aerosol cans with a flammable propellant in this appliance.

CAUTION
INSTALLATION CAUTIONS

- Allow sufficient space around the refrigerator and install it on a flat surface.
- Keep the ventilation space in the appliance enclosure or mounting structure clear of obstructions.
- Allow the appliance to stand for 2 hours before loading foods after installation and turning on.
- We strongly recommend you have a qualified technician or service company install the refrigerator.
- Failing to do so may result in an electric shock, fire, explosion, problems with the product, or injury.

WARNING
CRITICAL USAGE WARNINGS

- Do not insert the power plug into a wall socket with wet hands.
- Do not store articles on the top of the appliance.
- When you open or close the door, the articles may fall and cause personal injury and/or material damage.
- Do not insert hands, feet or metal objects (such as knives, etc.) into the bottom or the back of the refrigerator.
- This may result in an electric shock or injury.
- Any sharp edges may cause a personal injury
- Do not put a container filled with water on the refrigerator.
- If spilled, there is a risk of fire or electric shock.
- Children should be supervised to ensure that they do not play with the appliance.
- Keep fingers out of "pinch point" areas. Clearances between the doors and cabinet are necessarily small. Be careful when you open the doors if children are in the area.
- Do not let children hang on the door or door
bins. A serious injury may occur.
- Do not let children go inside the refrigerator. They could become trapped.
- Do not insert your hands into the bottom area under the appliance.
- Any sharp edges may cause personal injury.
- Do not let children step on a drawer.
- The drawer may break and cause them to slip.
- Do not overfill the refrigerator with food.
- When you open the door, an item may fall out and cause personal injury or material damage.
- Do not touch the inside walls of the freezer or products stored in the freezer with wet hands.
- This may cause frostbite.
- Never put fingers or other objects into the water dispenser hole, ice chute, or ice maker bucket.
- It may cause personal injury or material damage.
- Do not use or place any substances sensitive to temperature such as flammable sprays, flammable objects, dry ice, medicine, or chemicals near or inside of the refrigerator.
- Do not keep volatile or flammable objects or substances (benzene, thinner, propane gas, alcohol, ether, LP gas, and other such products) in the refrigerator.
- This refrigerator is for storing food only.
- This may result in fire or explosion.
- Do not store pharmaceutical products, scientific materials, or temperature sensitive products in the refrigerator.
- Products that require strict temperature controls must not be stored in the refrigerator.
- Do not place or use an electrical appliance inside the refrigerator, unless it is of a type recommended by the manufacturer.
- Do not stand on top of the appliance or place objects (such as laundry, lighted candles, lighted cigarettes, dishes, chemicals, metal objects, etc.) on the appliance. This may result in an electric shock, fire, problems with the product, or injury. Do not put a container filled with water on the appliance.
- If spilled, there is a risk of fire or electric shock.
- Do not use mechanical devices or any other means to accelerate the defrosting process, other than those recommended by the manufacturer.
- Do not damage the refrigerant circuit.
- Do not spray volatile material such as insecticide onto the surface of the appliance.
- As well as being harmful to humans, it may also result in an electric shock, fire, or problems with
the product.
- Never stare directly at the UV LED lamp for long periods of time.
- This may result in eye strain due to the ultraviolet rays.

- Do not attempt to repair, disassemble, or modify the refrigerator yourself.
- Do not use any fuse (such as cooper, steel wire, etc.) other than a standard fuse.
- If your refrigerator needs to be repaired or reinstalled, contact your nearest service center.
- Failing to do so may result in an electric shock, fire, problems with the product, or injury.
- If the interior or exterior LED lamp has gone out, contact your nearest service center.

- Children should be supervised to ensure that they do not play with the appliance.
- Keep fingers out of "pinch point" areas.
Clearances between the doors and cabinet are necessarily small.
Be careful when you open the doors if children are in the area.
- Do not let children hang on the door. A serious injury may occur.
- Do not let children go inside the refrigerator. They could become trapped.
- Bottles should be stored tightly together so that they do not fall out.
- This product is intended only for the storage of food in a domestic environment.
- If a gas leak is detected, avoid any naked flames or potential sources of ignition, and air the room in which the appliance is standing for several minutes.
- Do not touch the appliance or power cord.
- Do not use a ventilating fan.
- A spark may result in explosion or fire.
- Use only the LED Lamps provided by the manufacturer or its service agents.

- If the refrigerator emits a burning smell or smoke, unplug the refrigerator immediately and contact your Samsung Electronics service center.
- If you experience difficulty changing a non-LED light, contact a Samsung service center.
- If the product is equipped with LED lamps, do not disassemble the Lamp Covers and LED lamps yourself.
- Contact a Samsung service center.
- If dust or water enters the refrigerator, unplug the refrigerator and contact your Samsung Electronics service center.
- There is a risk of fire.

CAUTION
USAGE CAUTIONS

- Do not re-freeze frozen foods that have thawed completely. Do not place carbonated or fizzy drinks in the freezer compartment. Do not put bottles or glass containers in the freezer.
- When the contents freeze, the glass may break and cause personal injury.
- Use only the ice maker provided with the refrigerator.
- Have the refrigerator's water supply connected only to a potable water supply.
To operate the ice maker properly, water pressure of 20 \~ 125 psi (138 \~ 862 kPa) is required.
If you will be away from home for a long period of time (on vacation, for example) and won't be using the water or ice dispensers, close the water valve.
- Otherwise, water leakage may occur.
- If you won't be using the refrigerator for a very long period of time, (3 weeks or more) empty the refrigerator including the ice bucket, unplug it, close the water valve, wipe excess moisture from the inside walls, and leave the doors open to prevent odors and mold.
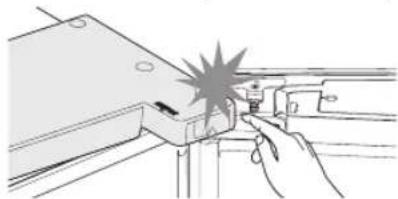
- Be careful that your fingers are not caught in.
natural_image
Illustration of a hand using a tool to adjust or install a component, with no visible text or symbols.
• Service Warranty and Modification.
- Any changes or modifications performed by a 3rd party on this finished appliance are not covered under Samsung warranty service, nor is Samsung responsible for safety issues that result from 3rd party modifications.
- Do not block the air vents inside the refrigerator.
- If the air vents are blocked, especially with a plastic bag, the refrigerator can be over cooled. If a cooling period lasts too long, the water filter may break and cause water leakage.
- If the refrigerator is disconnected from the power supply, you should wait for at least five minutes before plugging it back in.
- If you have a long vacation planned or do not intend to use the refrigerator for a long period of time, (3 weeks or more) empty the refrigerator - including the ice bucket - pull out the power plug, close the water valve, wipe excess moisture from the inside walls, and leave the doors open to prevent odors and mold.
• To get the best performance from the product:
- Do not place food too close to the vents at the rear of the refrigerator as this can obstruct free air circulation in the refrigerator compartment.
- Wrap food up properly or place it in airtight containers before putting it into the refrigerator.
- Do not place glass bottles or carbonated beverages into the freezer. They can freeze and break. Broken beverage containers can cause injury.
- Please observe maximum storage times and expiration dates of frozen goods.
- There is no need to disconnect the refrigerator from the power supply if you will be away for less than three weeks.
However, if you will be away for more than three weeks, remove all the food and ice in the ice bucket, unplug the refrigerator, close the water valve, wipe excess moisture from the inside walls, and leave the doors open to prevent odors and mold.
- Fill the water tank and ice cube trays with potable water only (tap water, mineral water, or purified water).
- Do not fill the tank with tea or a sports drink. This may damage the refrigerator.
- Do not strike or apply excessive force to any glass surface.
- Broken glass may result in a personal injury and/or property damage.

- If the refrigerator is flooded, make sure to contact your nearest service center.
- There is a risk of electric shock or fire.
- Do not keep vegetable oil in your refrigerator's door bins. The oil can solidify, making it foul-tasting and difficult to use. In addition, the open container can leak and the leaked oil can
cause the door bin to crack. After opening an oil container, it is best to keep the container in a cool and shaded place such as a cupboard or pantry.
- Examples of vegetable oil: olive oil, corn oil, grape-seed oil, etc.
CAUTION
CLEANING CAUTIONS

- Do not spray water directly on the inside or outside the refrigerator.
- There is a risk of fire or electric shock.
- Do not use a hair dryer to dry the inside of the refrigerator.
- Do not place a lighted candle in the refrigerator to remove bad odors.
- This may result in an electric shock or fire.

- Use a clean, dry cloth to remove any foreign matter or dust from the power plug blades. Do not use a wet or damp cloth when cleaning the plug.
- Otherwise, there is a risk of fire or electric shock.

- Before cleaning or performing maintenance, unplug the appliance from the wall socket.
- Failing to do so may result in an electric shock or fire.
- Use a clean sponge or soft cloth and a mild detergent in warm water to clean the refrigerator.
- Do not use abrasive or harsh cleansers such as window sprays, scouring cleansers, flammable fluids, muriatic acid, cleaning waxes, concentrated detergents, bleaches, or cleansers containing petroleum products on exterior surfaces (doors and cabinet), plastic parts, door and interior liners, and gaskets.
- These can scratch or damage the material.
- Do not clean glass shelves or covers with warm water when they are cold. Glass shelves and covers may break if exposed to sudden temperature changes or impacts such as bumping or dropping.
WARNING
CRITICAL DISPOSAL WARNINGS

- DANGER: Risk of child entrapment. Before you throw away your old refrigerator or freezer:
- Take off the doors and door latch.
- Leave the shelves in place so that children may not easily climb inside.
- Children trapped inside a refrigerator can hurt themselves or suffocate to death.
- Please dispose of the packaging material from this product in an environmentally friendly manner.
- Ensure that none of the pipes on the back of the refrigerator are damaged prior to disposal.
- R-600a or R-134a is used as a refrigerant. Check the compressor label on the rear of the appliance or the rating label inside the fridge to see which refrigerant is used for your refrigerator.
If this refrigerator contains flammable gas (Refrigerant R-600a), contact your local authority in regard to safe disposal of this product.
- When disposing of this refrigerator, remove the door/door seals and door latch so that small children or animals cannot become trapped inside.
Children should be supervised to ensure that they do not play with the appliance.
If trapped inside, a child may get hurt or suffocate to death.
- Cyclopentane is used in the insulation. The gases in the insulation material require a special disposal procedure. Please contact your local authorities in regard to the environmentally safe disposal of this product.
- Keep all packaging materials well out of the reach of children, as packaging materials can be dangerous to children.
- If a child places a bag over his or her head, the child could suffocate.

ADDITIONAL TIPS FOR PROPER USAGE
- In the event of a power failure, call the local office of your electric company and ask how long the failure is going to last.
- Most power failures that are corrected in an hour or two will not affect your refrigerator temperatures. However, you should minimize the number of door openings while the power is off.
- Should the power failure last more than 24 hours, remove and discard all frozen food.
- The refrigerator might not operate consistently (frozen contents can thaw or temperatures can become too warm in the frozen food compartment) if sited for an extended period of time in a location where ambient air temperatures are constantly below the temperatures for which the appliance is designed.
- In case of particular foods, keeping it under refrigeration can have a bad effect on preservation due to its properties.
- Your appliance is frost free, which means there is no need to manually defrost your appliance. This will be carried out automatically.
- Temperature rise during defrosting complies with ISO requirements. If you want to prevent an undue rise in the temperature of frozen food while the appliance defrosts, wrap the frozen food in several layers of newspaper.
- Do not re-freeze frozen foods that have thawed completely.
Saving Energy Tips
- Install the appliance in a cool, dry room with adequate ventilation.
Ensure that it is not exposed to direct sunlight and never put it near a direct source of heat (a radiator, for example). - Not to block any vents and grilles is recommended for energy efficiency.
- Put frozen food in the refrigerator to thaw. You can then use the low temperatures of the frozen products to cool food in the refrigerator.
- Do not keep the door of the refrigerator open for too long when putting food in or taking food out. The shorter the time the door is open, the less frost build-up you'll have in the freezer.
- It is recommended to install the refrigerator with clearance to the back and sides. This will help reduce power consumption and keep your energy bills lower.
THIS APPLIANCE IS INTENDED TO BE USED IN HOUSEHOLD AND SIMILAR APPLICATIONS SUCH AS
- staff kitchen areas in shops, offices and other working environments;
- farm houses and by clients in hotels, motels and other residential type environments;
• bed and breakfast type environments;
• catering and similar non-retail applications.
1. Regulatory Notice
1.1 FCC Notice

FCC CAUTION:
Any changes or modifications not expressly approved by the party responsible for compliance could void the user's authority to operate the equipment.
Contains Transmitter Module FCC ID: A3LSWL-B70F
This device complies with Part 15 of FCC Rules. Operation is Subject to the following two conditions:
(1) This device may not cause harmful interference, and
(2) This device must accept any interference received including interference that cause undesired operation.
For products available in the US and Canadian markets, only channels 1\~11 are available.
You cannot select other channels.
FCC STATEMENT:
This equipment has been tested and found to comply within the limits for a Class B digital device, pursuant to part 15 of the FCC Rules. These limits are designed to provide reasonable protection against harmful interference in a residential installation.
This equipment generates, uses, and can radiate radio frequency energy and, if not installed and used in accordance with the instructions, may cause harmful interference to radio communications. However, there is no guarantee that interference will not occur in a particular installation. If this equipment does cause harmful interference to radio or television reception, which can be determined by turning the equipment off and on, the user is encouraged to try to correct the interference by one or more of the following measures:
• Reorienting or relocating the receiving antenna
- Increasing the separation between the equipment and receiver
- Connecting the equipment to an outlet that is on a different circuit than the receiver.
- Consulting the dealer or an experienced radio/TV technician for help.
FCC RADIATION EXPOSURE STATEMENT:
This equipment complies with FCC radiation exposure limits set forth for an uncontrolled environment. This equipment should be installed and operated so there is at least 8 inches (20 cm) between the radiator and your body. This device and it's antennas must not be co-located or operated in conjunction with any other antenna or transmitter except in accordance with FCC multi-transmitter product procedures.
SAVE THESE INSTRUCTIONS
1. Regulatory Notice
1.2 IC Notice
Contains Transmitter Module IC: 649E - SWLB70F
The term "IC" before the radio certification number only signifies that Industry Canada technical specifications were met. Operation is subject to the following two conditions: (1) this device may not cause interference, and (2) this device must accept any interference, including interference that may cause undesired operation of the device.
This Class B digital apparatus complies with Canadian ICES-003.
For products available in the US and Canadian markets, only channels 1\~11 are available.
You cannot select other channels.
IC RADIATION EXPOSURE STATEMENT:
This equipment complies with IC RSS-102 radiation exposure limits set forth for an uncontrolled environment. This equipment should be installed and operated so there is at least 8 inches (20 cm) between the radiator and your body. This device and it's antennas must not be co-located or operated in conjunction with any other antenna or transmitter except in accordance with FCC multi-transmitter product procedures.
SAVE THESE INSTRUCTIONS
English - 10
Setting up your French Door Refrigerator
GETTING READY TO INSTALL THE REFRIGERATOR
Congratulations on your purchase of the Samsung refrigerator. We hope you enjoy the state-of-art features and efficiencies that this new appliance offers.
Selecting the best location for the Refrigerator
Choose :
- A location with easy access to a water supply.
- A location without direct exposure to sunlight.
- A location with level (or nearly level) flooring.
- A location with enough space for the refrigerator doors to open easily.
- A location that allows sufficient space to the right, left, back, and top for air circulation. If the refrigerator does not have enough space, it can decrease the refrigerator's efficiency and increase its power consumption.
- A location that allows you to move the refrigerator easily if it needs maintenance or service.
Do not install the refrigerator in locations where the temperature is over 110 °F (43 °C) or below 50 °F (10 °C).
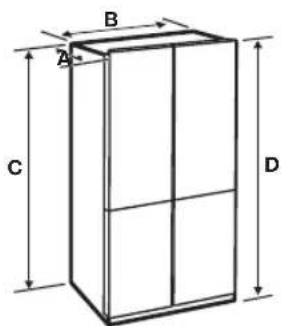
text_image
A B C D| RF33H*/RF34H*RF24J* | ||
| Depth “A” 35 | 3/4" (906 mm) 28 7 | /8" (733 mm) |
| Width “B” 35 | 3/4" (908 mm) 35 6 | /8" (908 mm) |
| Height “C” 71 | 3/4" (1822 mm) 68 | 7/8" (1749 mm) |
| Overall Height “D” | 90 7/8" (1850 mm) | 70" (1777 mm) |
text_image
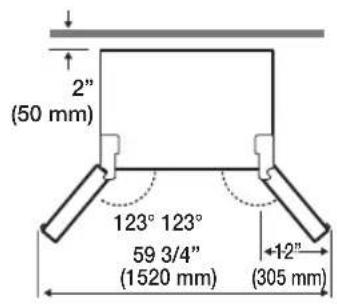
2" (50 mm) 123° 123° 59 3/4" (1520 mm) +12" (305 mm)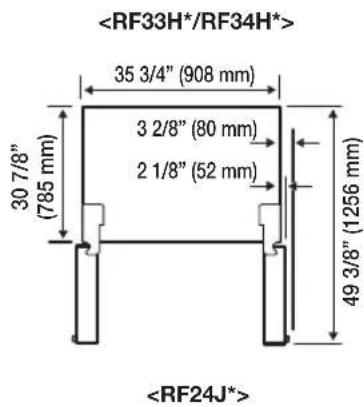
text_image

text_image
35 3/4" (908 mm) 3 2/8" (80 mm) 2 1/8" (52 mm) 24" (610 mm) 42 1/2" (1081 mm)
Measurements reflect the design dimensions. The actual dimensions of your refrigerator may differ slightly.

When moving your refrigerator
To prevent floor damage, be sure the front leveling legs are in the up position (above the floor).
Refer to "HOW TO LEVEL THE REFRIGERATOR" in the manual on page 16.
FLOORING
For proper installation, you must place this refrigerator on a level, hard surface that is the same height as the rest of the floor.
This surface should be strong enough to support a fully loaded refrigerator.
To protect the finish of the flooring, cut a large section of the cardboard carton and place it under the refrigerator where you are working.
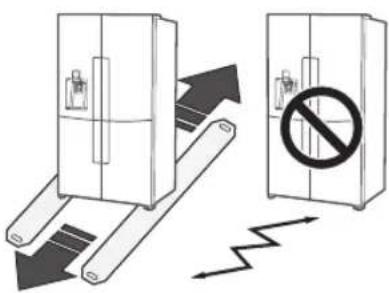
When moving the refrigerator, you need to pull and push it straight forwards or back. Do not wiggle it from side to side.
text_image
Diagram illustrating a device with an upward arrow and a prohibition sign, alongside a lightning bolt symbol indicating electrical hazard.REMOVING THE REFRIGERATOR DOORS
If the refrigerator is too large to pass through your doorways easily, you can remove the refrigerator doors.
If you need to remove the doors, continue below. If you do not need to remove the refrigerator doors, go to 'Leveling the Refrigerator' on page 16.
Tools you will need (Not provided)
 | 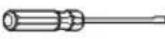 | 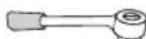 |
| Philips screwdriver (+) | Flat-blade screwdriver (-) | Socket wrench 3/8" (10 mm) |
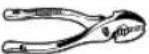 | 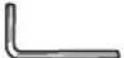 | 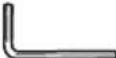 |
| Pliers | Allen wrench 5/32" (4 mm) | Allen wrench 7/32" (5 mm) |

Disconnect power to the refrigerator before removing the doors or drawers.

- Be careful not to drop, damage, or scratch the doors/drawers while removing them.
- Use care when you remove the doors/drawers. The doors are heavy and you could injure yourself.
- Re-attach the doors/drawers properly to avoid:
- Moisture from air leakage.
- Wasting energy due to improper door seal.
DISASSEMBLING THE REFRIGERATOR DOORS
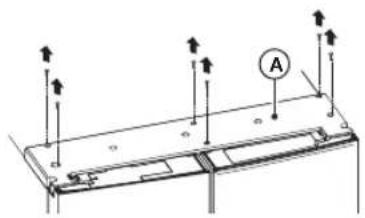
- With the door closed, remove the 6 screws holding the Top Cover (A) with a Phillips (+) Screwdriver, and then remove the Top Cover with the entire wire-harnesses attached.
text_image
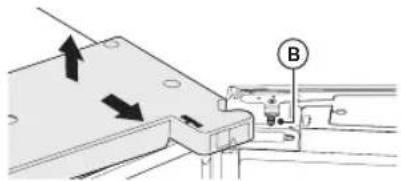
Technical diagram showing a structural support system with upward force arrows and a labeled point A on a beam.1-1. Open the right door to prevent interference between Bracket (B) and the Top Cover. Hold the rear of the Top Cover, and pull it out to remove. (Optional)
natural_image
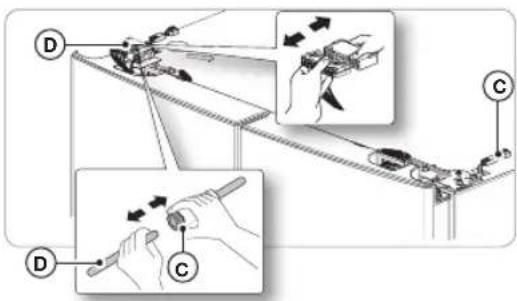
Mechanical assembly diagram showing directional arrows and a labeled component (B), no readable text or symbols present.- Separate the two connectors on the left door and the one connector on the right door. Press the white sleeve (C) of the Water Tube Coupler, and then separate the Water Tube (D).
text_image
Technical diagram illustrating mechanical assembly steps with labeled components D and C, showing hand movement and tool path.2-1. From the right hinge, slide Pusher (E) to the front to remove. (Optional)
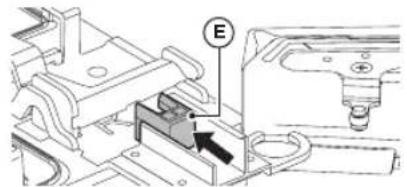
text_image
Technical diagram showing mechanical assembly with labeled component E and directional arrow2-2. Loosen the screw on the right door to remove the Bracket. (Optional)

natural_image
Mechanical assembly diagram showing a tool pressing into a workpiece with arrows indicating motion (no text or labels)
Keep the removed Pusher and Bracket for later use.
- Pull up the Fixer Lever (F), and then pull it forward.
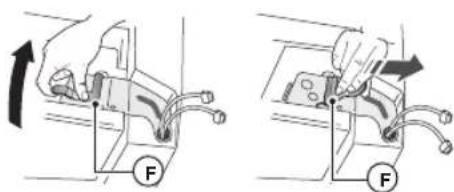
text_image
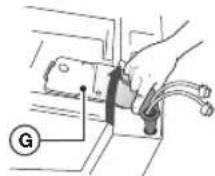
Technical diagram showing two mechanical assembly steps with force indicators and labeled components F- Remove the Hinge (G).
- Open the door more than 90^ . Lift it up and take it off.
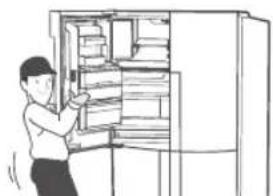
natural_image
Illustration of a person standing beside a refrigerator with shelves (no text or symbols visible)- Repeat Steps 3 through 5 to remove the other Fridge door.

- While disassembling and reassembling the doors, make sure that the electric wires are not peeled off.
- Do not let the doors fall down.
DISASSEMBLING THE FREEZER DOORS

- Be sure to remove the Fridge doors before removing the Freezer doors.
- Be careful with the wires attached to the bottom of the Freezer doors while disassembling.
- With the door open, remove the screw holding the cover (A) of the Adjustable Leg at the bottom of the door with a Phillips (+) Screwdriver, and then disassemble the Connector (B).
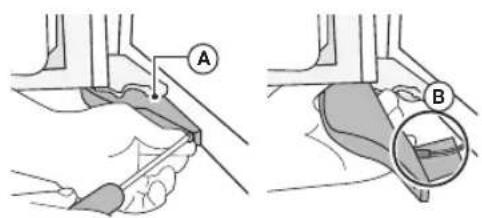
text_image
Medical illustration showing two steps of a laparoscopic procedure: step A indicates a laparoscopic point, and step B shows the same laparoscopic view.- While holding the axis of the center hinge (C) in the top of the Freezer Door, pull out the Freezer Door.
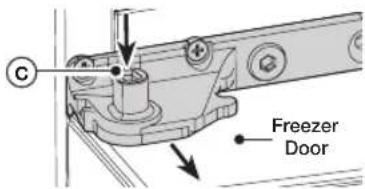
text_image
C Freezer Door- Tilt the Door forward a little, and then lift it up to remove.
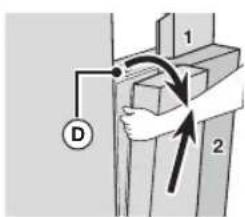
text_image
Diagram showing a hand holding a component with labeled parts and directional arrows indicating movement or force.- Repeat Steps 1 through 3 to remove the other Freezer Door.
RE-ATTACHING THE REFRIGERATOR DOORS

- Be sure to re-attach the Freezer doors before re-attaching the Fridge doors.
- Before re-attaching, make sure that all the wire connectors at the bottom of the Freezer doors are connected.
Once you have moved the refrigerator to its installation location, follow the steps below to re-attach the doors.
How to Re-attach the Freezer Door
- Insert the door into the lower hinge (A) in the direction of arrow (1) and then push the door in the direction of arrow (2).
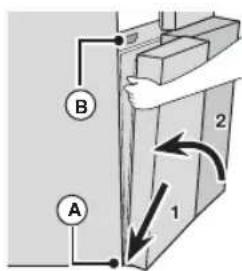
text_image
Diagram showing electrical connections with labeled components A and B, and directional arrows indicating movement or force.
- Be careful not to damage the wires on the bottom of the door. Avoid stepping on them, etc.
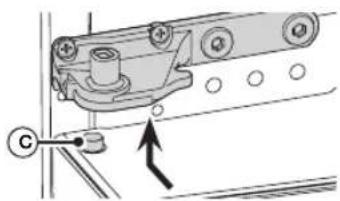
- Insert the hinge axis (C) into the lower hole of the center hinge.
natural_image
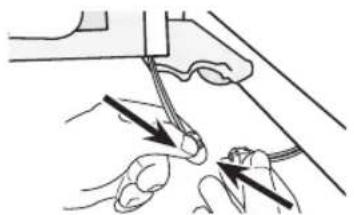
Mechanical assembly diagram showing a bracket with mounting holes and a directional arrow (no text or symbols)- With the door open, join the connectors on the bottom of the door.
natural_image
Illustration of hands performing a manual tool manipulation technique (no text or symbols present)- Be careful not to step on or damage the connectors.
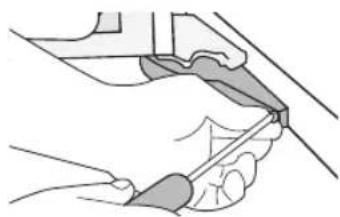
- Attach the Adjustable Leg Cover using a Phillips (+) Screwdriver.
natural_image
Illustration of a hand holding a tool or device with a shaded area, no text or symbols present- Repeat Steps 1 through 4 to re-attach the other Freezer Door.
How to Re-attach Fridge Door
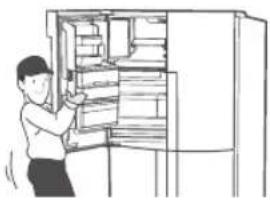
- Attach the detached Fridge Door to the Mid Hinge. (Attach the Door in the open position.)
natural_image
Illustration of a person opening a refrigerator with shelves (no text or symbols visible)- Slide the Fridge Hinge (A) into the fixing slot, and then press it down so that it is aligned with the hole in the door.
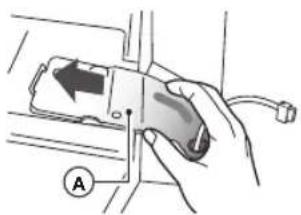
natural_image
Hand holding a device with an arrow pointing to it, labeled 'A' (no text or symbols on the device itself)- Insert the Fixer Lever (B) in the direction of the arrow, and then flip it down to assemble.
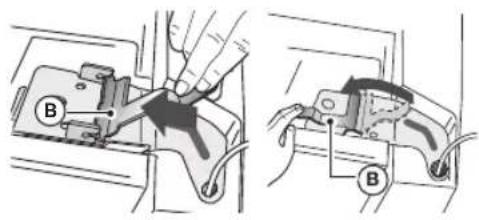
text_image
Technical diagram showing two mechanical assembly steps with labeled components A and B, likely illustrating a manual or electrical procedure.- Repeat Steps 1 through 4 to re-attach the other Fridge Door.
4-1. Screw the hinge, and mount the bracket. (Optional)
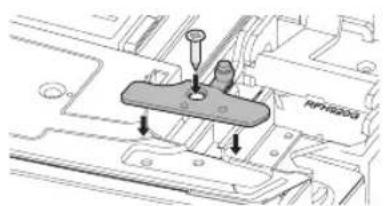
natural_image
Technical diagram of a mechanical component with two screws and a central base, no visible text or symbols- Connect the Water Tube (C). Connect the connector (E) on the left door and the connector (F) on the right door.
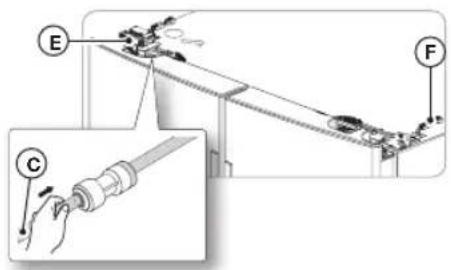
text_image
Technical diagram showing mechanical assembly with labeled parts E, F, and C, including a magnified inset of a hand holding a cylindrical component.- Attach the front of the Top Cover, and then press down on its back until it lies flat. Re-attach the screws.
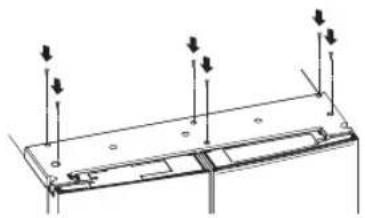
natural_image
Technical line drawing of a structural support frame with vertical arrows indicating force or movement (no text or symbols)6-1. When attaching the Top Cover, open the right door to prevent interference between Bracket (G) and the Top Cover. (Optional)
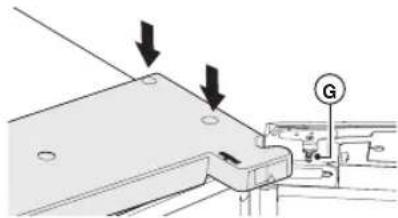
natural_image
Mechanical assembly diagram showing a bracket with mounting holes and directional arrows, no text or symbols present
- Assemble the Fridge and Freezer doors in the reverse order of disassembly.
- If the Wire Connectors are cross-assembled, the display will not work properly.
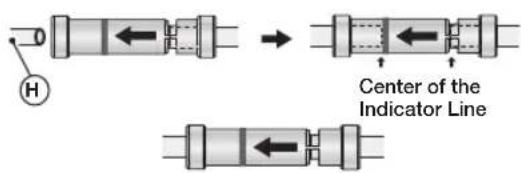
text_image
H Center of the Indicator Line6-2. Insert Pusher (J) in the arrow direction to attach. (Optional)
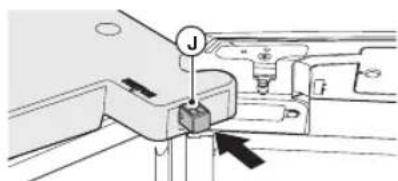
text_image
Technical diagram showing mechanical assembly with labeled components and directional arrows
• Make sure Pusher (J) does not protrude.
If the Refrigerator is not level, it can cause one Fridge door to be lower than the other.
- Insert a Flat-Head (-) Screwdriver into the slot in the Leveling Leg Control Lever and adjust the level by turning the Control Lever clockwise or counter-clockwise. When you rotate the Lever clockwise, you raise the refrigerator. When you rotate the Lever counter-clockwise, you lower the refrigerator.
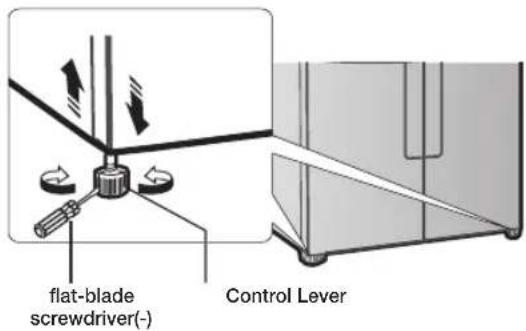
text_image
flat-blade screwdriver(-) Control Lever
- If the Refrigerator is not level back and front, put a solid panel (such as a plastic panel, a plastic ruler, etc.) on the floor where the rear legs will rest, and then fix it in place with plastic tape. When you push in the Refrigerator, make sure the rear legs rest on the panel.
- If you have a wooden floor or similar soft floor, take care not to damage the floor when pushing the Refrigerator into place.
HOW TO ADJUST THE DOOR HEIGHT
If any one of the doors is lower than the other:
- Check if the Refrigerator is level before adjusting the door.
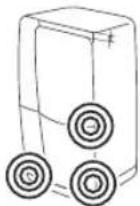
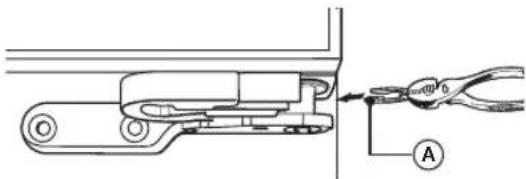
- Adjust the door height difference by inserting a Snap Ring (A) as shown between the door and the hinge. You can use the rings to raise the right side door of the fresh food compartment and both doors of the freezer compartment.
text_image
Technical diagram showing a mechanical tool with labeled parts and an arrow indicating direction, marked with point A.- After checking the height difference, select one Snap Ring with a suitable thickness. Important: You can only insert one snap ring. Inserting two or more Snap Rings may cause the Snap Rings to slip out or make a rubbing noise.
- Lift up the lower door and insert the Snap Ring into the space between the Door and the Hinge.

- To avoid injury, insert or remove Snap Rings carefully.
- Keep the Snap Rings out of the reach of children and make sure that children do not play with them or put them into their mouths.

- 1 mm, 1.5 mm, 2 mm, and 2.5 mm Snap Rings come with the Refrigerator.
- If the Refrigerator is level before you load it with food, the Refrigerator may become unbalanced due to the weight of the food. If this occurs, adjust the level again using the same procedure.
- If you raise the door too far, it can rub against the Top Cover.
Snap Rings included with the refrigerator:

natural_image
Five identical abstract black-and-white icons arranged in a 2x2 grid, no text or symbols present.1 mm 1.5 mm 2 mm 2.5 mm
HOW TO ADJUST THE DOOR GAP
If the gap between the left and right fridge compartment doors is not even.
- You can adjust the gap by turning the bolt at the top right of the cold storage compartment door.
- Do not turn the bolt too far. You can break it.
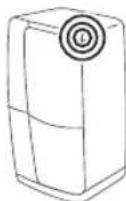
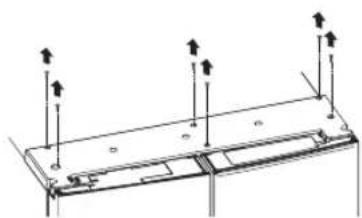
- With the doors closed, remove the 6 screws holding the top cover using a Phillips screwdriver, and then remove the Top Cover together with the connected cables.
natural_image
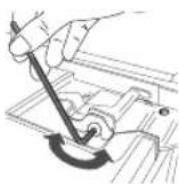
Pure technical diagram of a structural beam with upward force arrows, no text or symbols present- Turn the bolt with a 4 mm hexagonal L-wrench to adjust the gap. (Not provided)
-
Turn the bolt clockwise to ( ) widen the gap. Turn the bolt counter clockwise ( ) to narrow the gap.
-
When done, re-attach the Top Cover wit the connecting cables, and then press down on its back until it lies flat. Insert the 6 screws you removed, and then tighten each.
INSTALLING THE WATER DISPENSER LINE
A water dispenser with a filter is one of the helpful features on your new refrigerator. To help promote better health, the water filter removes unwanted particles from your water. However, it does not sterilize or destroy microorganisms. You may need to purchase a water purifying system to do that. The water line also connects to the ice maker. For the ice maker to operate properly, water pressure of 20\~125 psi (138\~862 kPa) is required. If the refrigerator is installed in an area with low water pressure (below 20 psi), you can install a booster pump to compensate for the low pressure. After you have connected the water line, make sure the water storage tank inside the refrigerator is properly filled. To do this, press the water dispenser lever until water runs from the water outlet.

- Water line installation kits are available at extra cost from your dealer. We recommend using a water line installation kit that contains copper tubing and 14 " compression nut.
- Use the new hose-sets supplied with the appliance only. Do not re-use an old hose set.
Connecting to the water supply line
- First, shut off the main water supply.
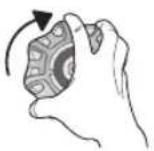
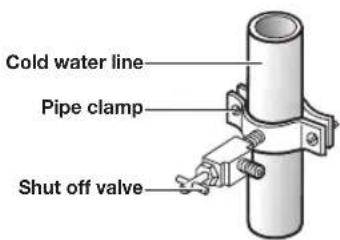
- Locate the nearest cold water drinking line and install the pipe clamp and shut off valve.
text_image
Cold water line Pipe clamp Shut off valve- Connect the water line installation kit to the shut off valve.

text_image
Cold water line Pipe clamp Shut off valve Water line installation kitConnecting the water supply line to the refrigerator.
There are several items that you need to purchase to complete this connection.
You may find these items sold as a kit at your local hardware store.
| For Copper Tubing For Plastic Tubing | |
| 1⁄4" copper tubing1⁄4" compression nut (1pc)Ferrule (2pc) | 1⁄4" plastic tubing→ Molded end (Bulb)1⁄4" compression nut (1pc) |
text_image
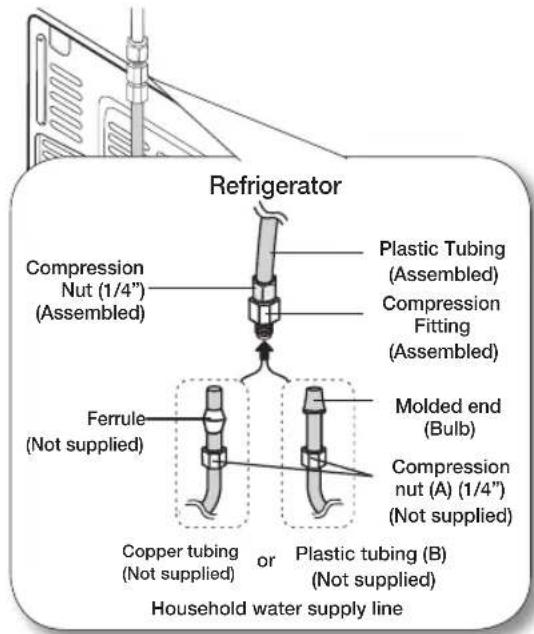
Refrigerator Compression Nut (1/4") (Assembled) Plastic Tubing (Assembled) Compression Fitting (Assembled) Ferrule (Not supplied) Molded end (Bulb) Compression nut (A) (1/4") (Not supplied) Copper tubing (Not supplied) or Plastic tubing (B) (Not supplied) Household water supply line
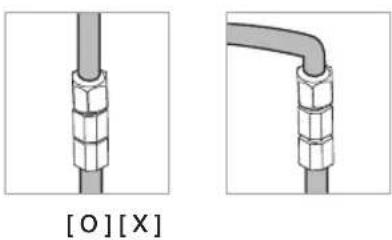
If you have to relocate the refrigerator after connecting the water line (C), make sure the joined section of the water line must is straight.
text_image
[O][X]- Connect the household water line to the assembled compression fitting.
- If you are using copper tubing, slip the compression nut (A) (not supplied) and ferrule (not supplied) on the copper tubing (not supplied) as shown.
- If you are using plastic tubing ( B ), insert the molded end (Bulb) of the plastic tubing ( B ) into the compression fitting.

- Do not use plastic tubing (B) without a molded end (Bulb).
-
Tighten the compression nut (A) onto the compression fitting. Do not over-tighten the compression nut (A).
-
Turn the water on and check for any leakage. If you find water drops or leakage in the connection areas, turn off the main water supply. Check the connections and, if necessary, tighten.
-
Flush 1 gallon of water through the filter before drinking or using the water from the refrigerator. (Flush approximately 6 minutes.) To flush, press a large glass or cup against the water dispenser lever. Fill the glass, empty it into the kitchen sink after it is filled, and then repeat.
-
After you turn on the refrigerator, let the ice maker make ice for 1 to 2 days. Over that period of time, throw out the first 1 or 2 buckets of ice the freezer makes to ensure all impurities have been removed from the water line.

- Only connect the water line to a drinkable water source. If you have to repair or disassemble the water line, cut off 1/4" of the plastic tubing to make sure you get a snug, leak-free connection.

- You can test the water line quickly using a paper cup. Under normal conditions, the water dispenser can fill a 5.75 oz. (170 cc) cup in about 10 seconds.
text_image
SETTING UPINSTALLING A SODASTREAM 60L CO₂ CARBONATOR (FOR SPARKLING WATER REFRIGERATORS ONLY - OPTIONAL)
To use the Sparkling Water feature on your refrigerator, you need to install a Sodastream 60L CQ Carbonator. If you don't have a sparkling water refrigerator, go to page 22.
Purchasing Sodastream 60L CO _2 Carbonators
- Purchase SodaStream 60L Carbonators at the nearest SodaStream retailer or on line at www.sodastream.com.
- USE ONLY SodaStream 60L Carbonators. SAMSUNG and SODASTREAM are not legally responsible for any damage, including, but not limited to, property damage caused by gas leakage from the use of generic carbonators (or CO₂ cylinders (60L)). The sparkling water system in your SAMSUNG refrigerator is designed to work ONLY WITH Sodastream 60L Carbonators.
- We suggest buying extra Carbonators for later use. Store extra Carbonators in a cool, open space, well out of the reach of children.

If sparkling water is produced when the internal refrigerator temperature or the temperature of the Sodastream Carbonator is high, you may hear a "horn sound".
When you turn on your refrigerator for the first time, do not generate sparkling water until approximately 2 hours have passed. Let the refrigerator and Sodastream Carbonator cool. When you purchase a new Sodastream 60L CO₂ Carbonator, be sure to store it in a cool dry place until you are ready to install it (23 \~ 68 °F (-5 \~ 20 °C)).
If the Carbonator is stored in higher temperatures, it may build up extra internal pressure, which could create a "horn sound" when sparkling water is produced.
Water Line Hookup
- Make sure that you have connected the refrigerator to a water line before installing the Sodastream Carbonator.
Installing a Carbonator into the Refrigerator
To install a new SodaStream 60L Carbonator in the refrigerator, follow these steps:
| 1. Open the Carbonator Cover.• The refrigerator comes from the factory with the Sparkling Water function set to Off. If the Sparkling Water function is Off, the OFF icon is displayed on the Display Panel.Refer to Page 41 : Turning Off the Sparkling Water Function. | 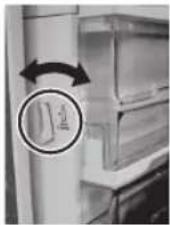 |
2. Attach the SodaStream 60L Carbonator to the Regulator, and then rotate it clockwise. | 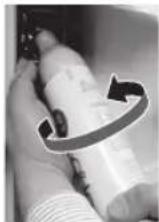 |
| 3. Push the SodaStream 60L Carbonator into the Support. | 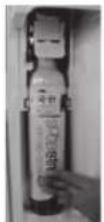 |
| 4. Lock the SodaStream 60L Carbonator into place by pressing the Lever.The inner pressure of the Carbonator may make it difficult to press the lever down. Hold the lever as shown in the illustration on the right, and then push down.If you don't lock the Carbonator into place, the refrigerator won't produce sparkling water.If the Carbonator is not tightly connected to the Regulator, it will leak CO2 gas, producing a hiss. If this occurs, repeat Steps 2, 3, and 4, making sure that the Carbonator is firmly attached and locked into place. |  |
5. Press the Sparkling Maker button 3 seconds to run the Sparkling Making function. Wait about 20 minutes. (the amount of time needed for a medium level of carbonation) while the refrigerator makes sparkling water.To make sparkling water, the refrigerator injects CO2 from the CO2 cylinder into water stored in the Sparkling Water tank. The water enters the tank through the refrigerator's water supply line.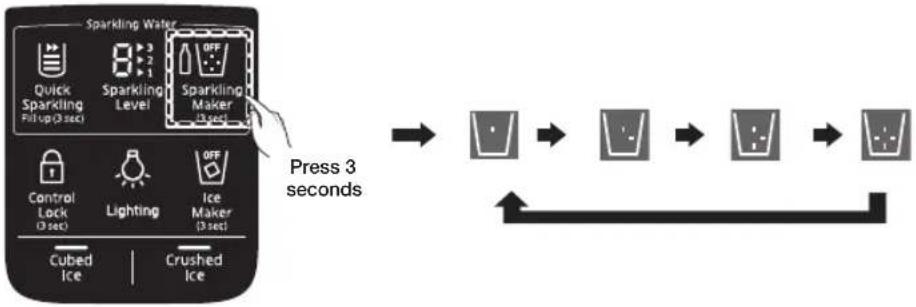 | |
| 6. To remove any residual substances that may be in the water, dispense 2 or 3 large glass fulls of Sparkling Water and empty them into a sink. | |
For more information about using the Sparkling Water function, see Using the Sparkling Water Function.

COMPLETING THE SET UP
Now that you have your new refrigerator installed in place, you are ready to set up and enjoy the features and functions of the appliance. By completing the following steps, your refrigerator should be fully operational.
- Make sure your refrigerator is in an appropriate location with reasonable clearance between it and the wall. Refer to installation instructions in this manual.
- Once the refrigerator is plugged in, make sure the interior light comes on when you open the doors.
- Set the Temperature control to the coldest temperature and wait for an hour. The freezer will get slightly chilled and the motor will run smoothly. Reset the refrigerator and freezer to the temperatures you want.
- After you plug the refrigerator in. It will take a few hours to reach the appropriate temperature. You can store food and drinks in the refrigerator after the temperature is sufficiently cool.

If condensation or water drops appears on both sides of the fridge door's central part, turn the Energy Saving mode off after removing the condensation.
(See the explanation of the Energy Saving button in USING THE CONTROL PANEL on page 24.)
Operating your French Door Refrigerator
USING THE MAIN CONTROL PANEL
text_image
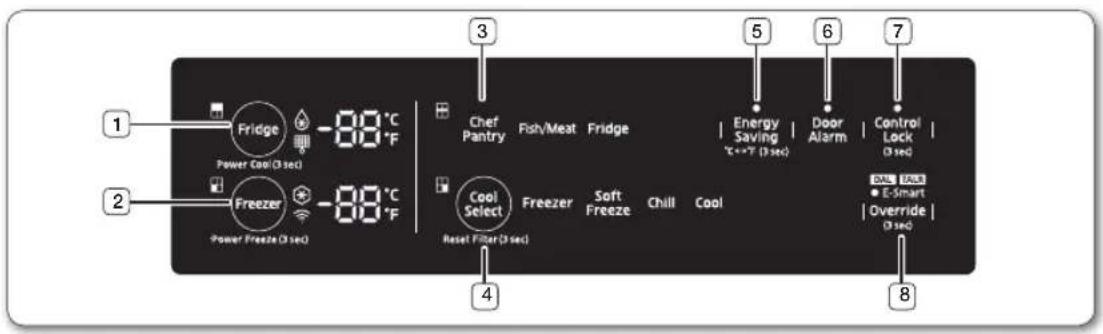
1 Fridge Power Cool (3 sec) -88°C -88°F 2 Freezer Power Freeze (3 sec) -88°C -88°F 3 Chef Pantry Fish/Meat Fridge 4 Cool Select Reset Filter (3 sec) Freezer Soft Freeze Chill Cool 5 Energy Saving °C→T (3 sec) Door Alarm Control Lock (3 sec) 6 BALL /ALL E-Smart Override (3 sec) 7 8| (1) | Fridge (Hold 3sec for Power Cool) |
| The Fridge button serves two purposes:- To set the Fridge to your desired temperature.- To turn the Power Cool function on and off.1. To set the Fridge temperature, touch the Fridge button. You can set the temperature between 34 ^ ( 1 ^ ) and 44 ^ ( 7 ^ ).2. Power Cool functionTouch and hold this button for 3 seconds to decrease the time needed to cool products in the Refrigerator.Power Cool can be helpful if you need to quickly cool easily spoiled items or if the temperature in the fridge has warmed dramatically (For example, if the door was left open).To turn Power Cool off, touch and hold this button again for 3 seconds. |
| (2) | Freezer(Hold 3 sec for Power Freeze) |
| The Freezer button serves two purposes:- To set the Freezer to your desired temperature.- To turn the Power Freeze function on and off.1. To set the Freezer temperature, touch the Freezer button to set the Freezer to your desired temperature. You can set the temperature between 5 °F (-15 °C) and -8 °F (-23 °C).2. Power Freezer functionTouch and hold this button for 3 seconds to decrease the time needed to freeze products in the Freezer.Power Freeze can be helpful if you need to quickly freeze easily spoiled items or if the temperature in the freezer has warmed dramatically (For example, if the door was left open).When you use this function, the energy consumption of the refrigerator will increase. Remember to turn it off when you don't need it and return the freezer to your original temperature setting. If you need to freeze a large amount of food, activate Power Freeze function at least 24 hours before.To turn Power Freeze off, touch and hold this button again for 3 seconds. | |
| (3) Chef Pantry | |
| Chef Pantry | Chef pantry will change to Fish/Meat or Fridge Mode automatically depending on the set fridge temperature.The Fish/Meat Mode lets you store fish and meat at their freshest for a short period of time.To store fish or meat for longer, put it into the Cool Select Room and select the “Freezer” or “Soft Freeze” functions.If you set the fridge temperature to 34~36 °F, the Chef Pantry changes to Fish/Meat Mode and the Fish/ Meat icon lights.The Chef Pantry is set to 30 °F (-1 °C) in the Fish/Meat mode.If you set the fridge temperature to 37~44 °F, the Chef Pantry changes to Fridge Mode and the Fridge Icon turns on. |
| (4) | CoolSelect(Hold 3 sec for Reset Filter) |
| The CoolSelect button lets you set the Cool Select Room on the bottom right of your refrigerator to one of four settings: Freezer, Soft Freezing, Chill, or Cool. Each time you touch the button, the setting changes.The CoolSelect button also lets you reset the water filter life indicator. After you replace the water filter, touch and hold this button for 3 seconds to reset the water filter life indicator. | |
| Freezer | Select Freezer to set the Cool Select Room to the same temperature as the freezer.Use this setting to keep frozen food fresh. |
| Soft Freeze | Select Soft Freeze to set the temperature in the Cool Select Room to 23 °F (-5 °C).This feature helps keep meat and fish fresh longer. |
| Chill | Select Chill to set the temperature of the Cool Select Room to 30 °F (-1 °C). |
| Cool | Select Cool to set the temperature of the Cool Select Room to 41 °F (5 °C). You can keep water, juice, soft drinks, beer, etc. cold. |
| Filter | |
| Water filter usageThis icon lights when you need to change the filter, usually after the refrigerator has dispensed about 300 gallons of water (after about 6 months). The icon will blink red for several seconds when you open or close the door.After you install the new water filter, reset the filter indicator by touching and holding the CoolSelect/hold 3 sec for Filter Reset button for 3 seconds.If water is not dispensing or dispensing slowly, you need to replace the water filter because the water filter is clogged.Some areas have large amounts of lime in their water, which causes the water filter to clog more quickly. | |
| (5) | Energy Saving(Hold 3 sec for °C↔°F) |
| Energy Saving | Touching this button turns Energy Saving mode on and off. When you turn Energy Saving on, the Energy Saving icon lights.Turn Energy Saving off and the icon goes off. The Energy Saving function is set to “ON” in the factory.If condensation or water drops appear on the doors, turn the Energy Saving mode off.This button also lets you switch the temperature displays between °C and °F. Touch and hold this button for 3 seconds to switch the temperature units between °C and °F. |
| (6) Door Alarm | |
| Door Alarm | The Door Alarm button lets you turn the door alarm on and off.If the door alarm is set to On, an alarm beeps if any refrigerator door is left open for more than two minutes.The beeping stops when you close the door.The Door Alarm function is pre-set to On in the factory. You can turn it off by touching and then releasing this button.You can turn it back on in the same fashion. The icon lights up when the function is on.When the Door Alarm function is on and the alarm sound is triggered, the Door Alarm Icon will blink while the alarm sounds. |
| (7) | Main Control Panel Lock (3 sec) |
| Control Lock | Touch and hold the Control Lock button for 3 seconds to lock the Main Control Panel. If the Main Control Lock is on, none of the buttons on the Main Control Panel work.(However, the dispenser control panel and the dispenser level will continue to work, because the dispenser control panel has its own, independent Control Lock button.)To unlock the Main Control Panel, touch and hold the main Control Lock button for 3 seconds again.The Main Control Panel locks automatically one minute after the last button input, after you have set Main Lock Control on.If you Lock the Dispenser Control Panel, the Lock Icon ( )on the STAR DISPLAY is displayed. The Dispenser Control Lock doesn't affect the Main Control Panel. The Main Control Panel has its own lock button.If you lock the Main Control Panel, the dot on the Main Control Lock ( )on the STAR DISPLAY lights. |
| Cooling Off Mode |
| - North American (US, Canada) Models Only ; Cooling Off mode (also called Shop mode), is designed for use by retailers when they are displaying refrigerators on the shop floor. In Cooling Off mode, the refrigerator's fan motor and lights work normally, but the compressors do not run, and the refrigerator and freezer do not get cold. To start Cooling Off mode, touch and hold the Fridge, Freezer, and Door Alarm buttons for 5 seconds during normal operation. The refrigerator chime sounds and the temperature display flashes "OFF". The Star Display blinks slowly on and off when the refrigerator is in Cooling Off mode (17 seconds on, 3 seconds off).To cancel Cooling Off mode, touch and hold the Fridge, Freezer, and Door Alarm buttons again for 5 seconds. |
| (8) | Override (3 sec) |
| The Override function activates/deactivates Smart Grid (page 27).Touch and hold the Override button for 3 seconds to set/clear the Override function. |
E-SMART REFRIGERATOR FEATURES
How to get the most out of your E-Smart refrigerator.
Connected Product 📤 E-Smart
The E-Smart icon lets you check the status of the refrigerator's AP connection (network connection).
- When connected to an AP: The E-Smart icon is on.
- When not connected to an AP: The E-Smart icon is off.
Getting Connected
To use the Smart Grid (Demand Response) and E-Smart function on your Refrigerator, you need the following devices and apps:
• Devices: 1) Wireless Router, 2) Samsung E-Smart Refrigerator, 3) Smartphone (Recommended: Galaxy S4, Galaxy Note 3/Android OS Jelly bean).
- Applications: 1) "Samsung E-Smart App" from the Google Play Store or Samsung Apps.
In addition, you need to:
- Connect the Refrigerator and the Smartphone to the same Wi-Fi network in your home.
- Install and run the Samsung E-Smart App on your Smartphone (to use the Samsung E-Smart function).
In addition, to use the Smart Grid (Demand Response) function, you must register for the service with your electric company. The company must have an EMS (Energy Management System) that supports SEP (Smart Energy profile).
DOWNLOADING THE E-SMART APP AND CONNECTING THE REFRIGERATOR TO YOUR NETWORK
- On your Smartphone, connect to the app store (e.g. Google Play, etc.).
- Search for the app using "Samsung E-Smart Ref." as the keyword.
- Download the app and install it on your phone.
- Launch the app. The network configuration screen appears.
- Configure the AP information (SSID, Password, etc.) on the app screen.
- Configure the network settings according to the instructions in the app.
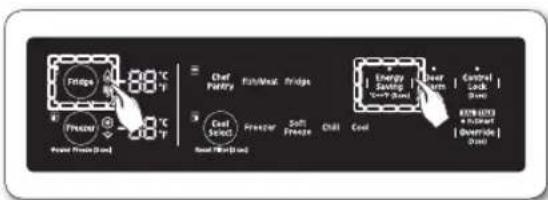
- On the refrigerator, press and hold the Fridge and Energy Saving buttons at the same time for 3 seconds. The refrigerator enters the AP mode.
text_image
Fridge 88°C Proud 88°C Proud Freeze (100g) Chef Furry Fish/Meal Fridge Cool Screw Freezer Soft Freeze Chill Cool Energy Switch Water (100g) Heat Warm Control Lock (50m) ASTM-633 a Insert (Overside) (20m)- If you have completed the network settings properly, the app shows the home screen.
- Please confirm your Internet devices (AP, Smartphone) are working properly before configuring the network settings.
- This refrigerator supports the IEEE 802.11 a/b/g/n protocols.
Samsung Electronics recommends IEEE 802.11n.
- To connect the refrigerator to a wireless network, you have to connect the refrigerator to an AP (router or modem).
If the AP supports DHCP, you can connect the refrigerator to the Internet using DHCP or a fixed IP address.
- Set the channel of the AP to one not currently being used.
If the channel set for the AP is being used by another device nearby, it may result in interference.
- Most wireless networks allow you to configure network security settings. If your network has a security password, you must enter the password to connect to the network.
- The refrigerator supports the following wireless security modes and encryption types:
- Security Mode: WEP, WPAPSK, WPA2PSK
- Encryption Type: WEP, TKIP, AES (WPA2PSK and AES are recommended.)
- The app supports indoor control only.
- The Samsung E-Smart Ref. app is optimized for Samsung Electronics Smartphones. (Galaxy S4, Galaxy Note 3)
For other Smartphones, some functions may work differently.
• Supported Wireless Channels: 1 to 11.
MAC Address Display Mode
This function displays the MAC address of the Wi-Fi module on the refrigerator for one minute.
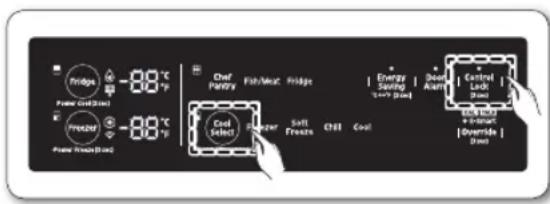
- Touch and hold the CoolSelect and ControlLock (3 sec) buttons at the same time for 3 seconds.
text_image
Fridge -80 °C Fruit (heat) -80 °C Frozer -80 °C Fruit (heat) (heat) Coil Poultry Fish/Meat Fridge Energe Sawing +/- (min) Basal Asnion Control Lock +/- (min) +/- (min) +/- (min) Cool Select Recker Soft Freeze CHL Cool +/- (min) +/- (min) +/- (min)-
A Buzzer sounds. Four of the twelve Mac addresses of the Wi-Fi module are displayed in turns in the freezer and fridge temperature displays for 1 minute. For example, if the Wi-Fi module's MAC address is "11-22-33-44-55-66", the MAC address is displayed as follows: "11 22" → "33 44" → "55 66" → "11 22" for 1 minute.
-
After 1 minute, the Buzzer sounds again and the display returns to the normal state.

If the MAC address is not available or there is no Wi-Fi module, ‘----’ is displayed on the fridge and freezer temperature displays.
SMART GRID Function (Demand Response)
When the refrigerator operates in SMART GRID (Demand Response) mode, the E-Smart Refrigerator function can control energy usage or delay the operation of some functions to save money when energy prices or demand are the highest.

You can deactivate the SMART GRID (Demand Response) function at any time using the Override On/Off function.)

To use the SMART GRID (Demand Response) function, you need a separate contract with your electric Utility company.
Using the SMART GRID (Demand Response) Function
This feature monitors energy price and demand information from your utility company and sends notifications to the refrigerator to run high energy-consuming tasks during off-peak times when electricity costs and demand are lower.
If the refrigerator receives the control signal from the Utility Company, the refrigerator will display the DAB) \~ (L4)TAPels on the refrigerator display and control the power consumption according to the level.
[Exception condition] The DALD contacr signals from an Utility Company work as long as the product performance is maintained. If the refrigerator receives the SMART GRID (Demand Response) signal (DAL), the BALR refrigerator will operate in Delay Appliance Load (Star Display: L3) or Temporary Appliance Load Reduction (Star Display: L4) mode.
- Delay Appliance Load (L3): The refrigerator responds to a DAGnal by providing a moderate load reduction for the duration of the delay period.
This function controls functions that consume large amounts of energy such as adjusting the Cooling system, running the defrost cycle, and making ice.
- When the refrigerator operates in (DAB) mode, "DAIED (Star Display: L3) is on.
- Divide is automatically deactivated after it lasts for the amount of time stipulated by the signal (max. 4.5 hours) or when the Override key is pressed.
- Temporary Appliance Load Reduction (L4): The refrigerator responds to a T&Ional by aggressively reducing the load for a short time period.
This function reduces energy consumption by stopping the compressor and controlling the functions that consume large amounts of energy such as the defrost cycle and making ice.)
- When the refrigerator operates in TAL4 mode, "TAILED (Star Display: L4) is on.
- TALRmode is automatically deactivated after it lasts for the received duration (max. 15 minutes), or when the Override key is pressed. The mode is immediately deactivated and the refrigerator returns to the normal state when the door is opened or closed, or the dispenser is used.
Override Mode
When you want to ignore the SMART GRID (Demand Response) signal from the Utility Company, you can activate OVERRIDE mode. If OVERRIDE mode is activated, the SMART GRID (Demand Response) signal is ignored and the refrigerator will not be controlled by the Utility Company.
Activating and deactivating Override mode
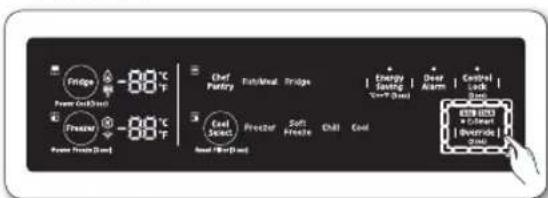
- Touch and hold the [Override] button for 3 seconds.
text_image
Fridge Power (Cold/Short) -88°C Fridge Power (Cold/Short) -88°C Fridge Chief Fantry Fish/Meal Fridge Energy Supply Vorr/Temp (Cool) Deep Alarm Control Lock Stop Fruit Cool Select Freezer Soft Freeze Chill Cool ASTB 0523 a Column b Overside Heat (Warm/Short)-
A Buzzer sounds and 'Or' and 'on' is displayed on the fridge and freezer temperature displays for 5 seconds.
-
If the refrigerator receives the SMART GRID (Demand Response) signal from the Utility Company, 'Or' is displayed on the fridge temperature display.
-
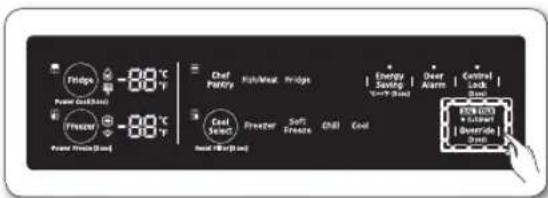
To deactivate OVERRIDE mode, touch and hold the [Override] button for 3 seconds.
text_image
Pridgs -8.0 °C Power (in Basic) PRESERV -8.0 °C Power (in Basic) (top) Ded Perry Fish/Meat Pridgs Energy Switch V=7 Pads Door Avent Control Lock EAST ON/OFF + Littered Outside Lock Cool Select Freezer Soft Freeze CHL Cool Heat (Warp/Box)- A Buzzer sounds and 'Or' and 'oF' is displayed on the fridge and freezer temperature displays for 5 seconds.

Alternatively, you can activate or deactivate OVERRIDE mode using the app.)
Using the E-SMART Function
The E-SMART function enables you to control and monitor your E-Smart refrigerator remotely for your convenience using your Samsung smart phone.

• To use the E-SMART refrigerator functions, you have to install the Samsung E-Smart app first.
• The app supports indoor control only.
E-Smart Features
-
Operational Status, User Settings & Messages
-
You can view the freezer and fridge temperature settings.
- You can receive an alarm when the freezer or fridge door is open for 2 minutes.
- You can check the DR and the Override status.
- You can check the operational condition of the ice maker in the freezer.
-
The door-open alarm indicator appears on the status bar of the top area of your mobile phone.
-
Remote Management
-
Power Freeze Setting: You can activate the Power Freeze function remotely.
- Power Cool Setting: You can activate the Power Cool function remotely.
-
Ice On/Off Setting: You can set the Ice On/Off Setting function remotely.
-
Energy Consumption Reporting
- Shows the accumulated power consumption. (Power consumption data is updated every 10 minutes.)

The energy consumption report may differ from the power consumption specifications of the product depending on the operating environment and the type and quantity of food in the fridge.
- Delay Defrost Capability
- The Delay Defrost Capability function saves energy by delaying the defrost operation to a time specified by the user. You can configure the time, and this function will save energy during the specified period in a 24 hour cycle. If the time is not set, the function works with the default time settings. The default time settings are below:
- 6 am to 10 am: 1st. November \~ 30th. April
- 3 pm to 7 pm: 1st. May \~ 31th. October
Provision FOR Open Access to the Connected Product Requirements
- SGIP Open Standards (Smart Energy Profile 2.0 - http://www.csep.org/)
• Energy Consumption Reporting -
Demand Response
-
Samsung OPEN API
• Operational Status, User Settings & Messages
- ICE Maker Status: GET /external/ icestatus?icegetstatus=opt (relevant to the energy consumption of the product 1)
- Door Open Alarm: GET /devices/0/ Door?type=opt (relevant to the energy consumption of the product 2)
- DR Status: GET /external/drlc?drgetstatus=opt
- Delay Defrost Capability
- Set Schedule of the Defrost Delay: POST / devices/0/defrost/addSchedule
- Get Schedule of the Defrost Delay : GET / devices/0/defrost/getSchedule
- Delete Schedule of the Defrost Delay: POST / devices/0/defrost/delSchedule
- Defrost Delay On/OFF: PUT /devices/0/defrost/delayevent.
STAR DISPLAY INDICATORS
text_image
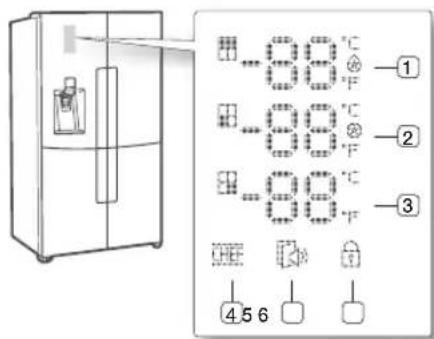
99°C -1 99°C -2 99°C -3 456The Star Display contains indicators and icons that graphically display the state of your refrigerator. For example, the Power Cool indicator lights when the Power Cool mode is on.
(1) Fridge

- Fridge temperature display (°C/°F).
- 'Power Cool' Mode Indicator ( ).
(2) Freezer

- Freezer temperature display (°C/°F).
- 'Power Freezer' Mode Indicator ( ).
(3) Cool Select
(Cool Select Room)

The displayed temperature corresponds to the Cool Select Room setting. Freezer: Same as the freezer temperature ( ^ C/ ^ F). Soft Freeze: 23 ^ F (-5 ^ C) Chill: 30 ^ F (-1 ^ C) Cool: 41 ^ F (5 ^ C)
(4) Chef Pantry

If this icon lights up, it means that the CHEF Mode is operating now.
(5) Door Open indicator

If the door is open for a certain length of time, this indicator icon blinks and the refrigerator beeps.
(6) Dispenser Control Panel Lock

If you Lock the Dispenser Control Panel, the Lock icon (☐) on the Door is displayed.
The Dispenser Lock doesn't affect the Main Control Panel. The Main Control Panel has its own lock button.
If you lock the Main Control Panel, the dot on the Main Control Lock (Control Lock will be displayed.
USING THE DISPENSER
CONTROL PANEL
text_image
Sparkling Water 1 Quick Sparkling Fill up (3 sec) Sparkling Level Sparkling Maker (3 sec) 2 OFF 3 4 Control Lock (3 sec) Lighting Ice Maker (3 sec) 5 Cubed Ice Crushed Ice 6(For Sparkling model Only)
text_image
Ice-Water 4 Control Lock (3 sec) Lighting Ice Maker (3 sec) 6 Cubed Ice Crushed Ice 7 5 8(For Ice·Water model Only)
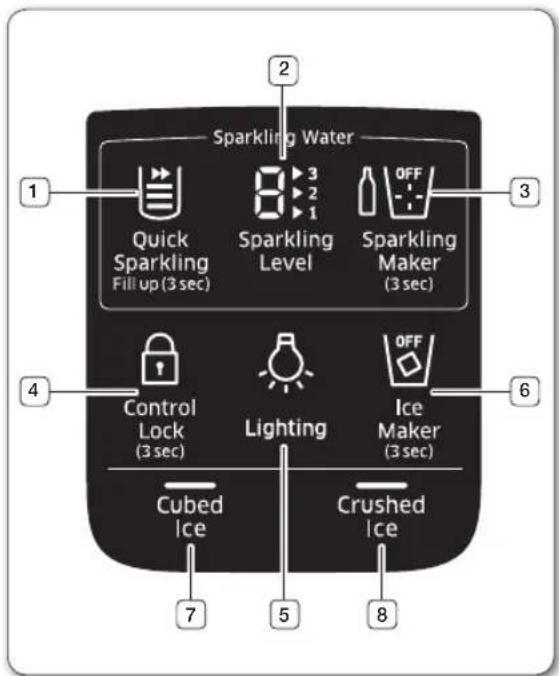
(1) Quick Sparkling / Fill up (3 sec)
When you touch the Quick Sparkling button, the (▶)icon lights and the refrigerator makes sparkling water rapidly at the level indicated by the Sparkling Level icon. If there is no sparkling water in the Sparkling Water tank, the refrigerator will begin making sparkling water immediately. If there is sparkling water in the tank, the refrigerator applies the Quick Sparkling function the next time it makes sparkling water.
When you replace the SodaStream carbonator, press the 'Quick Sparkling/ Fill up (3 sec)' button for 3 seconds to activate the Fill up function.

The refrigerator will fill the sparkling water tank with water and inject CO_2 gas into the water to make sparkling water. The sparkling level of the water may differ from the set level, depending on the amount and CO_2 concentration of the sparkling water remaining in the tank. If the tank is empty or the concentration is very low, the refrigerator will make sparkling water at the level indicated by the Sparkling Level icon.
The Quick Sparkling icon (☐) also indicates the amount of sparkling water in the sparkling water tank. When the tank is full, three bars light. The number of bars lit decreases as the amount of sparkling water decreases.
| (2) Sparkling Level | |
| The refrigerator can make sparkling water in three sparkling levels: low (1), medium (2), and high (3). To set the sparkling level, tap the Sparkling Level button. Each time you tap the button, the small numbers on the right side ( ▶1, ▶change. Stop when you have selected the sparkling level you want.The next time the refrigerator makes sparkling water, it will make it at the sparkling level you have selected.The large number on the left ( ▶ indicates the current sparkling level. If there is previously produced sparkling water inside the Sparkling Water tank, the refrigerator dispenses sparkling water at this level. (Changes to the sparkling level do not take effect until the next time the refrigerator makes sparkling water. | |
| (3) Sparkling Maker (3 sec) | |
| Touch and hold for 3 seconds to turn on the sparkling water maker. Touch and hold for 3 seconds again to turn it off.If the SodaStream carbonator runs out of CO_2 , the icon turns on ( ) and you must replace the carbonator with a new one.The Cylinder icon may turn on and off briefly several times when the cylinder has a little CO_2 remaining. | |
| (4) | Dispenser Control Panel Lock (3 sec) |
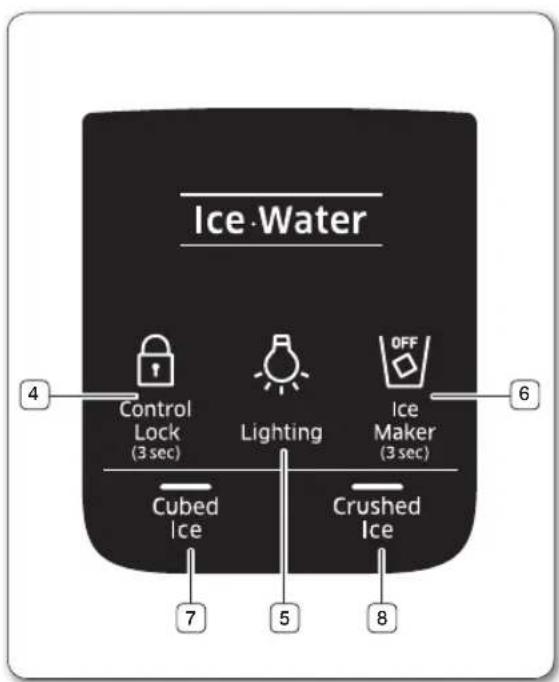
| Touch this button for 3 seconds to turn on the Dispenser Control Lock which locks the dispenser and dispenser panel buttons so the buttons can not be used. The Control Lock icon lights up to indicate you've activated the Control Lock function. Touch and hold this button for 3 seconds to unlock. |
| (5) Lighting | |
| Touching this button sets the Dispenser LED lamp (under the display) to continuous mode so that it stays on continuously.The button also lights up. If you want the Dispenser lamp to come on only when some one uses the dispenser, touch this button to turn the continuous mode off. | |
| (6) | Ice Maker (3 sec) |
| To turn the ice maker on or off, touch and hold the Ice Maker button for 3 seconds.The 'Off' LED lights and the Ice-Maker stops making ice. To turn the ice maker on, touch and hold the Ice Maker button again for 3 seconds. The 'Off' LED turns off.We recommend you stop ice making if the following occur:- There is enough ice in the ice bucket.- You want to save water and energy.- Water is not being supplied to the refrigerator.If the ice maker function is ON, and the water line is not connected, there will be a water valve noise from the back of the unit. If this occurs, touch and hold the Ice Maker button for 3 seconds to turn the ice maker off. |
| (7) Cubed Ice(8) Crushed Ice | |
| Cubed Ice | Touch the Cubed Ice or Crushed ice button to select the type of ice you want to dispense.Each time you touch the button, the cubed and crushed ice modes alternate and the Cubed or Crushed ice icon lights up, indicating your selection. |
| Crushed Ice | |
CHANGING THE WATER FILTER

- To reduce the risk of water damage to your property DO NOT use generic brands of water filters in your SAMSUNG Refrigerator.
USE ONLY SAMSUNG BRAND WATER FILTERS. SAMSUNG is not legally responsible for any damage, including, but not limited to, property damage caused by water leakage from the use of a generic water filter. SAMSUNG Refrigerators are designed to work ONLY WITH SAMSUNG Water Filter.
The Filter light turns red to let you know when it is time to change your water filter cartridge.
To give you time to get a new filter, the red light comes on just before the capacity of the current filter runs out. Changing the filter on time provides you with the freshest, cleanest water from your refrigerator.
(Red)
TO CHANGE THE WATER FILTER
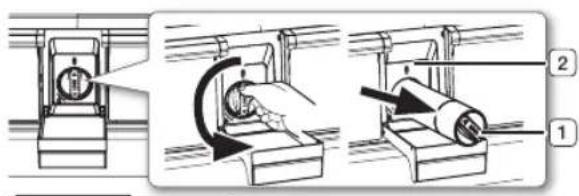
- Shut off the water supply. Pull down the filter cover, and then turn the water filter (1) about 1/4 turn, counter-clockwise.
- Pull the water filter (1) from the case filter (2).
text_image
Technical diagram showing three mechanical assembly steps with labeled components and directional arrows indicating motion or movement.
- To change the water filter more easily, shut off the water supply valve.
- Sometimes, it is hard to disassemble the water filter because impurities in the water cause it to stick. If you are having difficulties, grip the water filter firmly and pull it hard.
- When you pull out the water filter, a little water can leak from the opening. This is normal. To minimize the water leaks, keep the filter cartridge horizontal when you pull it.
text_image
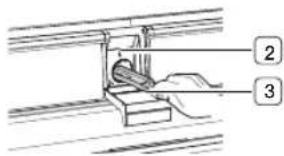
Technical diagram showing a mechanical assembly with labeled parts 2 and 3- To prevent overflow, empty the water filter tray (3) and dry around the filter case (2).
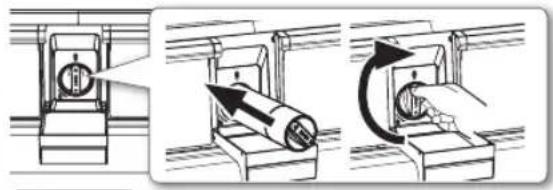
- Insert the new filter into the filter case (2).
- Push the filter in, and then turn it clockwise until it locks.

- If you have trouble inserting the water filter because of high water pressure, shut off the water supply valve.
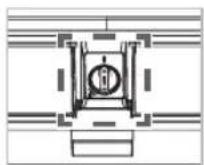
- The locked symbol should be lined up with the indicator line.
natural_image
Three-step diagram showing mechanical assembly steps: press, roller, and clamping (no text or symbols)- Touch the "CoolSelect" button for about 3 seconds to reset the water filter. The color of the indicator (changes from red to off.
- If you turned off the water supply, turn it back on.

- For a replacement water filter, visit your local home Improvement center, go to SamsungParts.com on line, or contact your authorized Samsung dealer. Be sure the replacement water filter has the SAMSUNG logo on the box and on the water filter.
Removing any residual matter inside the water supply line after installing the water filter.
-
Turn ON the main water supply if you turned it off when you installed the water filter.
-
Run water through the dispenser until the water runs clear (approx. 6 to 7 minutes). This will clean the water supply system and remove air from the lines.
-
Additional flushing may be required in some households.
-
Open the Refrigerator door and make sure there are no water leaks coming from the water filter.

- Be sure to flush the dispenser thoroughly, otherwise water may drip from the dispenser.
This means that there is still air in the line.
Reverse Osmosis Water Supply IMPORTANT:
The pressure of the water supply coming out of a reverse osmosis system going to the water inlet valve of the refrigerator needs to be between 35 and 120 psi (241 and 827 kPa).
If a reverse osmosis water filtration system is connected to your cold water supply, the water pressure to the reverse osmosis system needs to be a minimum of 40 to 60 psi (276 to 414 kPa.) If the water pressure to the reverse osmosis system is less than 40 to 60 psi (276 to 414 kPa):
- Check to see whether the sediment filter in the reverse osmosis system is blocked. Replace the filter if necessary.
- Allow the storage tank on the reverse osmosis system to refill after heavy usage.
- If your refrigerator has a water filter, it may further reduce the water pressure when used in conjunction with a reverse osmosis system. Remove the water filter.
If you have questions about your water pressure, call a licensed, qualified plumber.
natural_image
Diagram of a vehicle crossed with a diagonal line, indicating no change or crossing (no text or symbols present)CONTROLLING THE TEMPERATURE
RECOMMENDED FREEZER AND REFRIGERATOR COMPARTMENT TEMPERATURES
The recommended temperatures for the Freezer and Refrigerator Compartments are 0 °F and 37 °F (-18 °C and 3 °C) respectively.
If the temperature of the Freezer and Refrigerator Compartments are too high or low, adjust the temperature manually.
Controlling the Freezer temperature
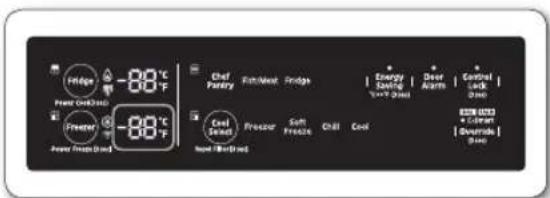
text_image
Fridge -8.0 °C Fresh (Cold) Freezer -8.0 °C Power Freeze Dryer Chief Fanry Fast/Meal Fridge Energy Serving V=70 GHz Deep Alarm Control Lock Drop Cool Seated Freezer Soft Freeze Chill Cool Non-Morbid 8258 0533 * Latent [Divide] [Divide]Recommended Temp.: 0 °F (-18 °C)
Freezer
The Freezer temperature can be set between -8 °F and 5 °F (or between -23 °C and -15 °C) to suit your particular needs.
Press the Freezer button repeatedly until the desired temperature is shown in the temperature display. The temperature will change by 1 °F (or 1 °C) with each press.
See below.
$$ \begin{array}{l}\text {Fahrenheit:} 0 ^ {\circ} \mathrm{F} \rightarrow - 1 ^ {\circ} \mathrm{F} \rightarrow - 2 ^ {\circ} \mathrm{F} \rightarrow - 3 ^ {\circ} \mathrm{F} \rightarrow - 4 ^ {\circ} \mathrm{F}\\rightarrow - 5 ^ {\circ} \mathrm{F} \rightarrow - 6 ^ {\circ} \mathrm{F} \rightarrow - 7 ^ {\circ} \mathrm{F} \rightarrow - 8 ^ {\circ} \mathrm{F} \rightarrow 5 ^ {\circ} \mathrm{F} \rightarrow 4 ^ {\circ} \mathrm{F} \rightarrow\3 ^ {\circ} \mathrm{F} \rightarrow 2 ^ {\circ} \mathrm{F} \rightarrow 1 ^ {\circ} \mathrm{F} \rightarrow 0 ^ {\circ} \mathrm{F}.\end{array} $$
$$ \begin{array}{l}\text {Centigrade: - 18 ^ {\circ} C\rightarrow - 19 ^ {\circ} C\rightarrow - 20 ^ {\circ} C\rightarrow - 21 ^ {\circ} C}\\rightarrow - 2 2 ^ {\circ} \mathrm{C} \rightarrow - 2 3 ^ {\circ} \mathrm{C} \rightarrow - 1 5 ^ {\circ} \mathrm{C} \rightarrow - 1 6 ^ {\circ} \mathrm{C} \rightarrow - 1 7 ^ {\circ} \mathrm{C}\\rightarrow - 1 8 ^ {\circ} \mathrm{C}.\end{array} $$

- The Freezer or Fridge temp indicator will blink when the temperature in the fridge or freezer compartment goes up dramatically.
(The Freezer or Fridge temperature indicator will stop blinking when the temperature in the Freezer or Fridge becomes normal. If the temperature indicator does not stop blinking after several hours, please contact a Samsung Service Center.
Power Freeze
The Power Freeze function substantially speeds up the freezer compressor, causing the freezer to cool down rapidly to a temperature you choose.
This icon will light up when you press and hold the Freezer button for 3 seconds.
Power Freeze is useful if you need to quick freeze an item, to make a large quantity of ice, or to cool the freezer rapidly if it has warmed dramatically (for example, if the door was left open).
To turn the Power Freeze function off manually, press the Freezer button, and then re-set the Freezer temperature.
Power Freeze turns off automatically after 50 hours to decrease energy consumption.
When you use this function, the energy consumption of the refrigerator will increase.
If you need to freeze large amounts of food, activate the Power Freeze function at least 20 hours before.
Controlling the fridge temperature
The fridge temperature can be set between 34 °F and 44 °F (or between 1 °C and 7 °C) to suit your particular needs. Press the Fridge button repeatedly until the desired temperature is shown in the temperature display. The temperature will change by 1 °F (or 1 °C) with each press.
See below.
Fahrenheit : 37 °F → 36 °F → 35 °F → 34 °F → 44 °F → 43 °F → 42 °F → 41 °F → 40 °F → 39 °F → 38 °F → 37 °F.
Centigrade: 3^ 2^ 1^ 7^ 6^ 5^ 4^ 3^.
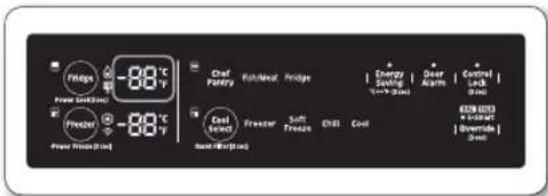
text_image
Priced -88 °C Power Locking Freezer -88 °C Power Press (100 g) Diet Palmers Rich/Meat Pridge Energy Swating %~50 gm Door Alarm Control Lock (100 g) Cool Seated Freezer Soft Freeze CHL Cool ECON 2023 + Invert Overside (100 g)Recommended Temp.: 37 °F (3 °C)

- The temperature of the Freezer, Fridge, or Cool Select Room may rise when you open the doors too frequently, or if a large amount of warm or hot food is placed inside.
- This may cause the digital display to blink. Once the Freezer and Fridge temperature return to their normal set temperatures, the blinking will stop.
- If the blinking continues, you may need to "reset" the Refrigerator. Try unplugging the appliance, waiting for around 10 minutes, and then plugging the power cord back in.
- If there is a communication error between the Display and Main Controller, the Convertible Display light may blink. If the blinking continues for a long period of time, please contact a Samsung Electronics Service Center.
USING THE CLOD WATER & ICE DISPENSER
Push the appropriate ice type button to select what you want to dispense.
Using the ice lever (1)
Push the Ice lever dispenser (1) gently with your glass. Ice will be released from the dispenser. You can choose the type of ice by pushing the cubed or crushed button first.
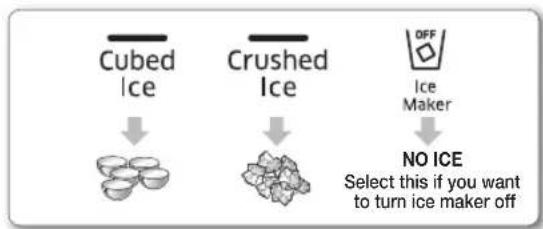
flowchart
graph TD
    A["Cubed Ice"] --> B["Crushed Ice"]
    B --> C["Ice Maker"]
    C --> D["NO ICE"]
    style A fill:#f9f,stroke:#333
    style B fill:#ccf,stroke:#333
    style C fill:#cfc,stroke:#333
    style D fill:#fcc,stroke:#333
Using the Water lever (2)
Push the Water lever dispenser (2) gently with your glass.
Water will be released from the dispenser.
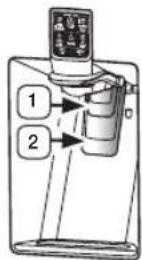

- If you push the water and ice lever at about the same time, the dispenser operates only the option you actually selected or pushed first.

- Please wait 1 second before removing the glass after dispensing water to prevent spills. Do not pull out the dispenser lever after dispensing ice or water. It comes back automatically.
Using the Ice & Water Dispenser together
To get ice and water, push the ice lever (1) first for ice, then move your glass down and press the water dispenser lever (2) for water.
Maintaining the Ice Bucket
- To clean the ice bin/bucket, wash with a mild detergent, rinse well, and dry thoroughly. Do not use harsh or abrasive cleaners or solvents.
- Ice is made in cubes. When you select "Crushed", the ice maker grinds the ice cubes into crushed ice.
- When you select Cubed Ice after using the Crushed Ice mode, a small amount of residual crushed ice might be produced.
- The ice cubes generated by the rapid ice making process will look white, which indicates they are generated normally.
- If ice doesn't come out, pull out the ice bucket and press the Test button located on the right side of ice maker. See the illustration under Making Ice below.
- Do not press the Test button continuously if the tray is filled with ice or water. Water may overflow or ice may jam the bucket.
Making Ice
- To fill the ice bucket to maximum capacity after installation, follow these steps:
- Allow your refrigerator to operate and cool down for 24 hours (or 1 full day).
- Waiting 24 hours will allow your ice maker to cool properly.
- Dispense 4 to 6 ice cubes into a glass.
- After another 8, and then 16 hours, dispense a full glass of ice.
- To test the ice maker, press the Test button on the ice maker. You will hear the refrigerator chime (ding-dong). When the chime sounds, release the Test button.
- The chime sounds automatically again to let you know the ice maker is working well.
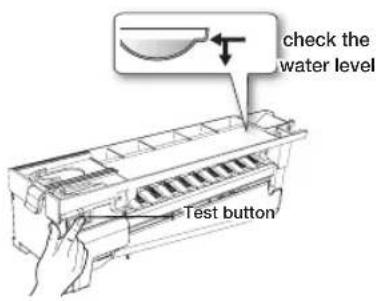
text_image
check the water level Test button
- If you want to remove ice cubes without using the ice bucket, turn the ice maker off and remove the front cover from the ice maker. Then, remove the ice cubes. Note that with the cover removed, the ice cubes in the ice maker can spill out.

- Do not put food in the ice bucket. If you store food in the ice bucket, the food can strike the ice maker when you open or close the door, causing damage to the ice maker.

- Note that the ice cubes in the ice bucket may spill out over the drawer when you remove the ice bucket from the drawer. If this occurs, be sure to pick up any ice cubes that spill.

- If a power failure occurs, ice cubes may melt then freeze together when the power comes back on, causing the dispenser to stop working.
To prevent this problem, after a power failure, pull out the ice bucket and discard the residual ice or water.

- If you use all the ice at once, you must repeat ice making Steps 2 and 3. However, only wait 8 hours before dispensing the first 4 to 6 ice cubes. This will replenish the ice cubes and ensure maximum ice production.
Using the ice off Function
When you select the Ice Off mode, remove all ice cubes from the bucket.
If you leave the ice cubes in the bucket, the ice cubes may clump together, making it difficult to remove them.
To remove the ice bucket safely and avoid injury, hold the bottom of the bucket with one hand and the side of the bucket with the other.
Then, lift up on the ice bucket, and pull it straight out.
To put the ice bucket back in, push it firmly straight back.

If the ice bucket is not pushed firmly into place, ice in the bucket can melt.
If the bucket does not fit, turn the helix 90 degree (see the last illustration on the right, below) and try again.
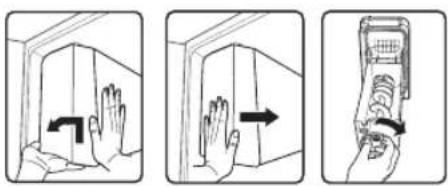
text_image
Illustration showing three steps of hand positioning: opening, moving, and holding a mobile phone.
- The inside of the ice bucket stays cold when it is operating. Do not reach deep inside the ice bucket.

- Use only the ice maker provided with the refrigerator. Have the refrigerator's water supply connected only to a potable water supply.
Going on vacation...
If you are going on a long vacation or business trip and won't use the water or ice dispensers for a long time:
- Close the water valve. Otherwise, water leakage may occur.
- Remove all food and ice in the ice bucket.
- Unplug the refrigerator.
- Wipe excess moisture from inside and leave the doors open. Otherwise, odor and mold may develop.
Ice Maker Do's and Don'ts
Do not put your fingers, hands or any other unsuitable objects in the chute or ice-maker bucket.
- You can hurt yourself or damage the refrigerator. Never put your finger or any other objects in the dispenser opening.
You can injure yourself. - Do not try to disassemble the ice maker.
- Do not wash or spray the ice bucket with water while it is in the refrigerator.
Remove it to clean it.

- When you insert the ice maker tray, be sure that the tray is well centered at the entrance.
Otherwise, the tray may be stuck.
Water clouding phenomenon

- All water provided to the refrigerator flows through a core alkaline water filter. In the filtering process, the pressure of the water that has flowed out of the filter has increased, and the water has become saturated with oxygen and nitrogen.
When this water flows out into the air, the pressure plummets and the oxygen and nitrogen get supersaturated, which results in gas bubbles.
The water may temporarily look misty or cloudy due to these oxygen bubbles. After a few seconds, the water will look clear.
USING THE SPARKLING WATER FUNCTION (FOR SPARKLING WATER REFRIGERATORS ONLY - OPTIONAL)
With a Sodastream CO_2 cylinder installed, your refrigerator can make and dispense sparkling (carbonated) water.
Making Sparkling Water
To produce sparkling water, press and hold the Sparkling Maker button for 3 seconds. When the carbonation process starts, the short lines inside the cup icon turn on one by one clockwise. When the process is complete, all short lines turn solid.
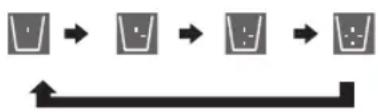
If you leave the Sparkling Water Production function on, and the amount of Sparkling Water becomes low, the refrigerator automatically enters the Sparkling Water production mode and makes more. However, if you turn off the Sparkling Water Production function, the refrigerator will not make additional sparkling water, even if there is little sparkling water left in the Sparkling Water tank.
Sparkling Water Production Time
Depending on the Carbonation (Sparkling) Level you set (See Controlling the Carbonation Level on page 40), the amount of time it takes the refrigerator to complete the sparkling water production process changes. The table below lists the production times by Carbonation Level. The refrigerator is pre-set at the factory to Level 2.
Quick Sparkling enables you to produce sparkling water within 10 minutes. (It consumes more CO_2 gas than production at Level 3.)
| Carbonation(Sparkling) Level | Level 3 - High Level 2 -Mid Level 1 - Low |
| Production Time About 30 minutes About 20 minutes About 10 minutes | |
| Available Capacity 1.16 quarts (1.1 L) 1.16 quarts (1.1 L) 1.16 quarts (1.1 L) | |
Dispensing Sparkling Water
To dispense sparkling water, press the Sparkling-Selection lever above the dispenser down (See the illustration on page 40.) Then, push the Ice/Sparkling Water lever gently with a glass. As time passes, the sparkling water dispensing speed can change. When the water tastes strongly carbonated, the dispensing speed can be faster. When the carbonation is weaker, the dispensing speed can slow.
The dissolved CO_2 in the sparkling water can also cause the water to pop out when you dispense it. In addition, due to the pressure fluctuations in the Sparkling Water Tank, the water stream may shake or become intermittent.
If you keep dispensing sparkling water, the water stream may become unstable or break up. This is caused by changes in pressure in the Sparkling Water Tank. It is not a defect.
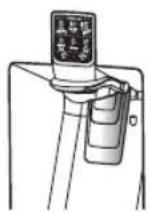
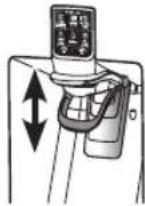
After dispensing Sparkling water, lift the Sparkling-selector lever up.

Do not hang on the Sparkling-selector lever and do not use excessive force to pull it down or lift it up.
Water Dripping
Some time after you have dispensed sparkling water, a few drops of sparkling water can escape from the dispenser. The water dripping is not a product defect, but a natural result of mixing CO_2 and water.
Controlling the Carbonation Level
You can change the sparkling water's carbonation level by pressing the Sparkling Level button. Each time you press the Spakling Level button, the carbonation level changes as follows:
Medium (Level-2) Strong (Level-3) Weak (Level-1) Medium (Level-2). As you press the button, the small numbers on the right side of the button light up in succession, indicating the level change.
The change in carbonation level is applied the next time the refrigerator makes sparkling water.
- If there is previously produced sparkling water inside the Sparkling Water tank, the refrigerator dispenses sparkling water with the previous carbonation level. (Again, changes in the carbonation level do not take effect until the next time the refrigerator makes sparkling water. The change does not affect sparkling water that is already made.)
- While the refrigerator is producing sparkling water, the Sparkling Level icons light up in rotation (Level-1 → Level-2 → Level-3 → Level-1, etc.). If you press the Sparkling Water button again while the carbonation level is being displayed, the carbonation level changes. The change in the carbonation level will take effect the next time the refrigerator makes sparkling water.
- The main number on the left side indicates the sparkling level of the current sparkling water, while the small numbers on the right side indicate the sparkling level for the next process. Even if you change the sparkling level while the refrigerator is producing sparkling water, the change is not applied to the current process but is applied to the next process.
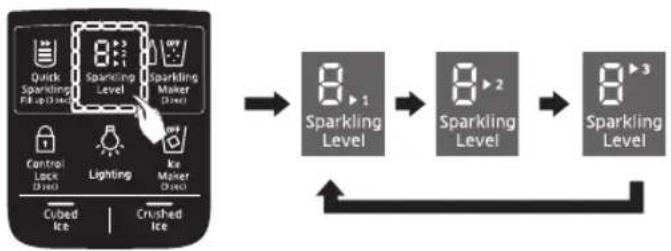
flowchart
graph LR
    A["Quick Sparkling Flip-up"] --> B["Sparkling Level"]
    C["Control Lock"] --> D["Lighting"]
    E["Ice Maker"] --> F["Crushed Ice"]
    B --> G["Sparkling Level"]
    D --> G
    F --> G
    G --> H["Sparkling Level"]
    H --> I["Sparkling Level"]
The Sparkling Level is set to Level 2 at the factory. If the sparkling water tastes too strong or too weak, change the carbonation level. Level 1 provides a milder carbonation, Level 3 a stronger carbonation.
- If there is a power interruption when the refrigerator is making sparkling water, the refrigerator may restart the carbonation process when power returns and put too much carbonation into the water. If this occurs, we recommend throwing out the overly carbonated water and starting the process again.
- The lifetime of the CO_2 cylinder can vary, depending on the Sparkling Levels you choose.
Turning Off the Sparkling Water Function
To turn off the Sparkling Water function, press the Sparkling Maker button for 3 seconds.
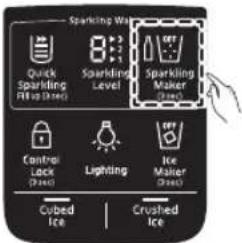
text_image
Sparkling Wafer Quick Sparkling Rip (Deep) 8:10 Sparkling Level Sparkling Maker Cubed Ice Crushed Ice Control Lock (Peak) Lighting Ice Maker (Peak)Press for 3 seconds
Any sparkling water remaining in the Sparkling Water tank after you have turned off the Sparkling Water function can still be dispensed.
Replacing a SodaStream Carbonator
If the cylinder icon ( ) turns on, replace the SodaStream 60L Carbonator with a new one. To replace a Carbonator, follow these steps:
| 1. Lift up the Lever holding the SodaStream 60L Carbonator in place. |  |
| 2. Pull the Carbonator out of the Support. |  |
| 3. Rotate the Carbonator counterclockwise to remove it from the Regulator. |  |
| 4. To install a new SodaStream 60L Carbonator, follow the directions for installing a Carbonator starting at Step 2 in Installing a Carbonator into the Refrigerator on pages 20 and 21. | |
Notes
- If you open the refrigerator door while the refrigerator is making sparkling water, it will stop. When you close the door, it will resume making sparkling water in about a minute.
- If you keep dispensing sparkling water, the water stream may become unstable or break up. This is caused by changes in pressure in the Sparkling Water Production Tank. It is not a defect.
- If the water hose is kinked or water is not supplied properly, the Carbonation Level of the Sparkling Water will be high. This occurs because the same amount of carbon dioxide (CO₂) is dispensed by the SodaStream 60L Carbonator regardless of the amount of water in the Production Tank.
- If the Sparkling Water function is on and you dispense about 1.16 quarts (1.1 L) of sparkling water, the refrigerator automatically begins making more sparkling water.
- If you are not going to be home for a long period of time, do not want to use the Sparkling Water function any more, or you are moving:
- Press the Sparkling Maker button for three seconds to turn off the Sparkling Water function.
- Empty the Sparkling Water tank by dispensing all the water in the tank.
- Remove the CO_2 Cylinder.
- When you dispense sparkling water, the CO_2 in the water causes the dispenser stream to disperse. To ensure that all the water dispenses into your glass, place the glass closer to the dispenser nozzle.
- If you replace a SodaStream 60L Carbonator that has gas remaining, the Cylinder icon on the display may not turn on for a period of time.
• Purchase cylinders (60L) at the nearest Sodastream retailer or on line at www.sodastream.com.
PARTS AND FEATURES
Use this page to become more familiar with the parts and features of the Refrigerator.
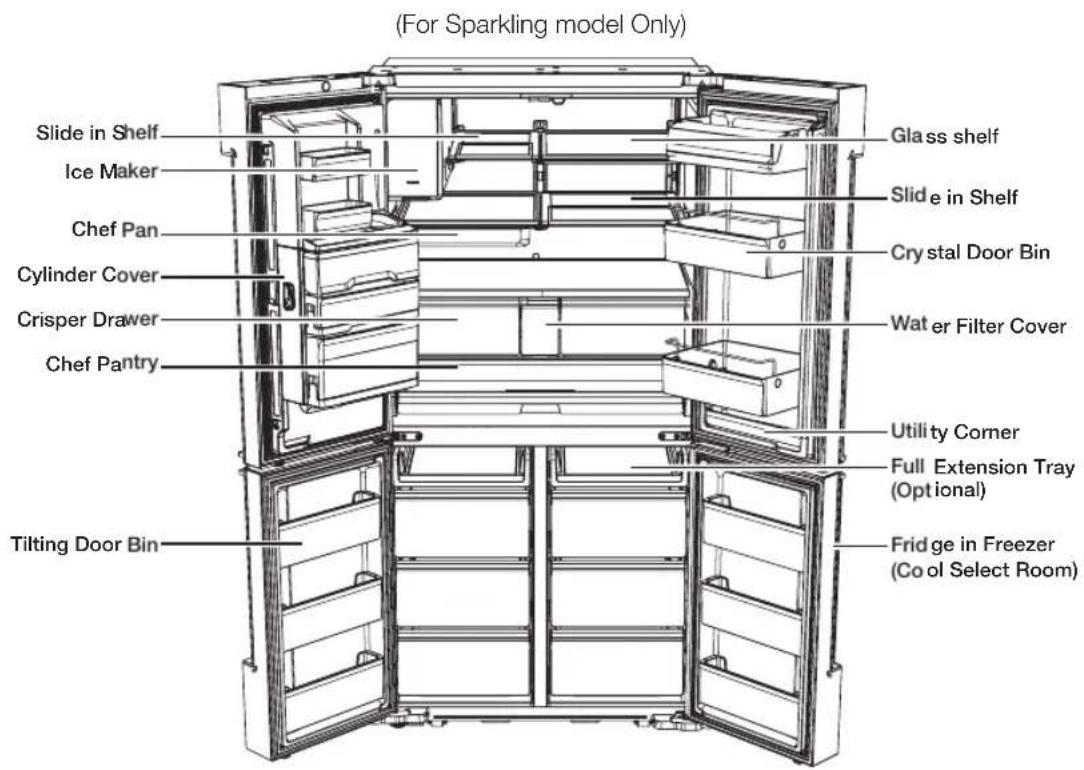
text_image
(For Sparkling model Only) Slide in Shelf Ice Maker Chef Pan Cylinder Cover Crisper Drawer Chef Pantry Tilting Door Bin Glass shelf Slide in Shelf Crystal Door Bin Water Filter Cover Utili ty Corner Full Extension Tray (Optional) Fridge in Freezer (Co ol Select Room)OPERATING
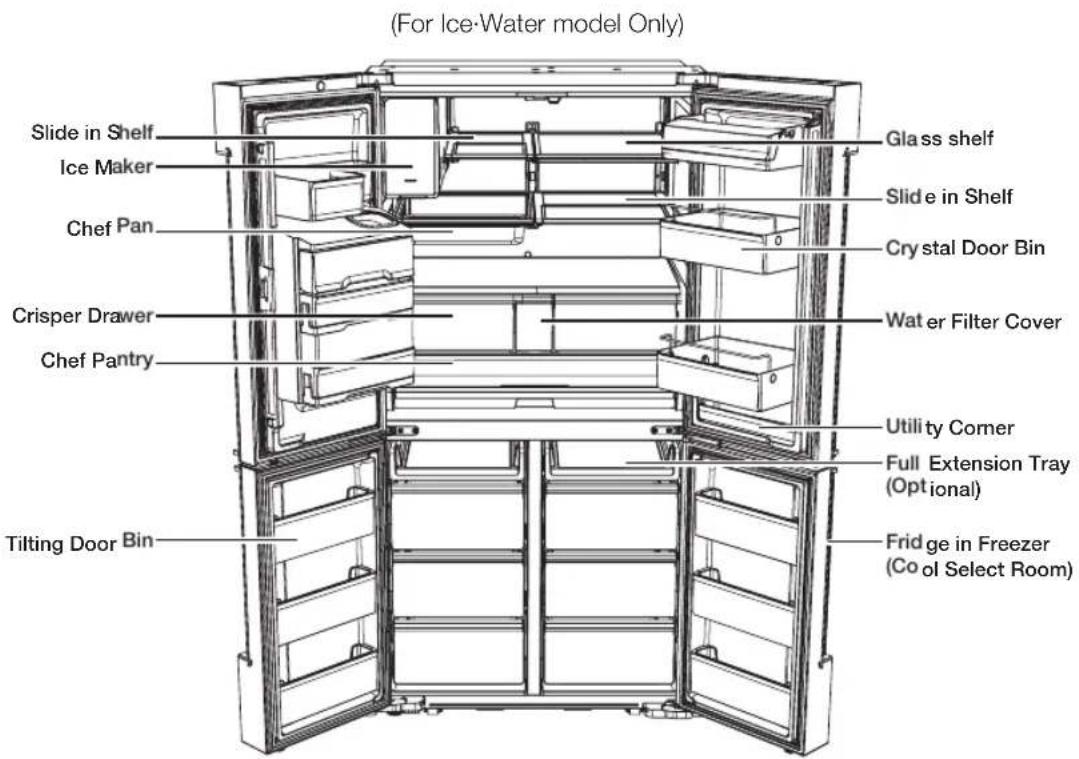
text_image
(For Ice-Water model Only) Slide in Shelf Ice Maker Chef Pan Crisper Drawer Chef Pantry Tilting Door Bin Glass shelf Slide in Shelf Crystal Door Bin Water Filter Cover Utility Corner Full Extension Tray (Optional) Fridge in Freezer (Co ol Select Room)English - 43
Door bins
Your refrigerator ships with door bins of different types and sizes. If the door bins for your refrigerator were packaged separately, use the figure below to help you position the bins properly.
The number of door bins provided may differ with the model.
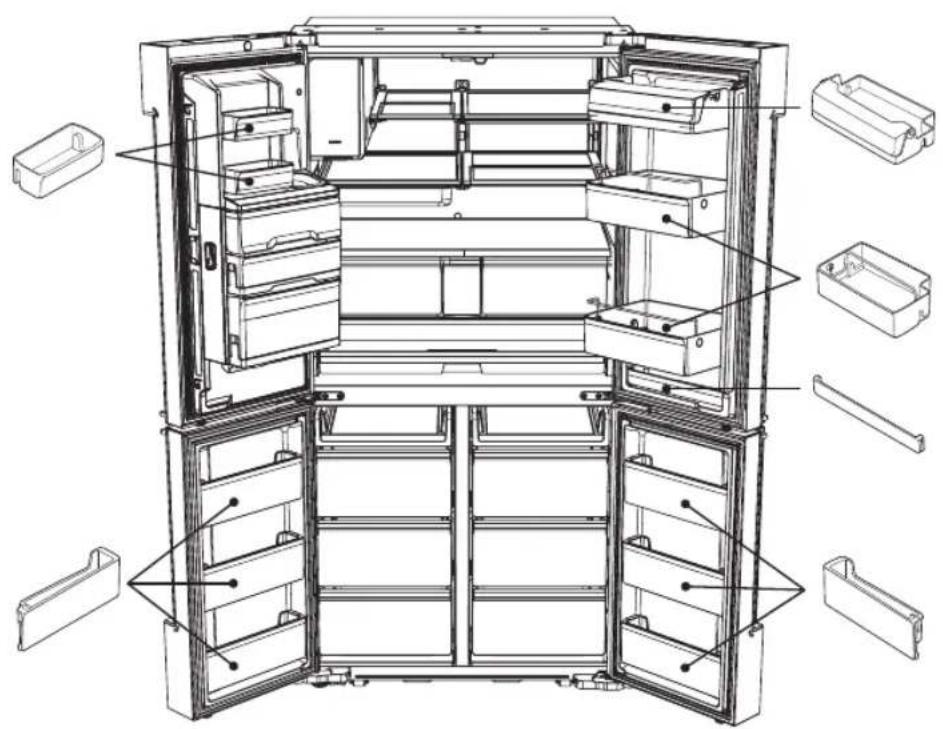
natural_image
Technical line drawing of an open refrigerator with internal compartments and labeled parts (no text or symbols present)English - 44

For the greatest energy efficiency, leave all selves, drawers, and baskets in their original positions as shown in the illustration on the previous page.

When closing the door, make sure the Vertical Hinged Section is in the correct position to avoid scratching the other door. If the Vertical Hinged Section is reversed, put it back into the correct position, and then close the door.
Moisture may appear at times on the Vertical Hinged Section.
If you close one door with too much force, the other door may open.

When the door opens, the interlock switch automatically turns off the auger motor in the ice maker for safety reasons.

If the interior or exterior LED lamp has gone out, please contact Samsung service.
MULTI-PURPOSE DOOR BIN
A detachable divider makes it convenient to store food.
How to use the FLEX DIVIDER
- When not in use, leave the Flex Divider flipped over as shown in the diagram.
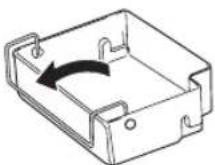
- Flip the Flex Divider to position (1) to prevent items from falling out and over.
(1)
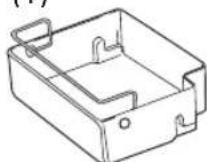
- Flip the Flex Divider to position (2) to use it as a divider.
(2)
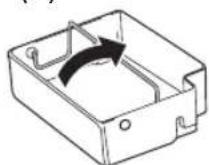
How to use the Tilting Door Bin
- The freezer door bin is designed to be tilted for easy access.
- Tilt the freezer door bin for easy access when inserting food, and put it back upright when closing the door.
- Do not insert too much food in the freezer door bin. The door may not close properly.
- To avoid collisions between the freezer door and drawers, leave the freezer door wide open when using the freezer drawers.
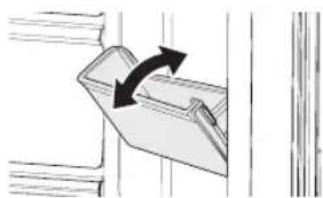
natural_image
Diagram of a mechanical component with an arrow indicating rotation, no text or symbols presentCHEF PAN
Using the Chef Pan for the first time
• Make sure to clean the Chef Pan before use.
- Put vinegar and neutral detergent in a 2:1 ratio into warm water. Apply this water to a sponge, and use this sponge to wipe out the Chef Pan. Rinse the pan in warm water.

This is to remove impurities coming from the production process.
Precautions on cooking on the Chef Pan

- The Chef Pan is not suitable for use in a microwave oven.
Storage
- Use a stainless steel detergent with a soft cloth or sponge to clean the pan.
REMOVING THE REFRIGERATOR ACCESSORIES
-
Door Bins Compartment
-
To remove - Simply lift the bin up and pull straight out.
- To relocate - Slide the bin in above the desired location and push down until it stops. Alternatively, for the top bin of the refrigerator, insert the bin so that it is aligned with the marked line inside the door.

There is a marked line for the top bin only.
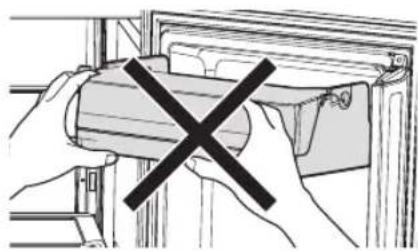
natural_image
Illustration of hands holding a cylindrical object with a black X symbol, no text or symbols present- Do not hold the front side of the door bin when inserting it. The door bin may not fit the door.
- To replace, insert the door bin fully to the marked line of the door. Otherwise, it may not be attached to the door properly.
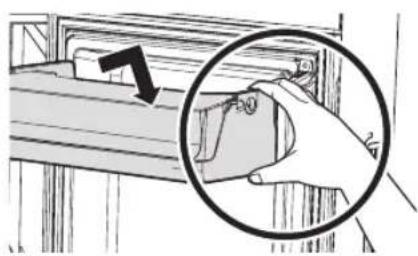
natural_image
Illustration of a hand adjusting a wooden shelf with a magnified inset showing the process (no text or symbols)- Hold the rear side of the door bin with both hands, and press down and insert it fully to the marked line inside the door.
Removing bins with covers
- For bins with covers, open the Door Bin Cover, and then pull the bin out using both hands.
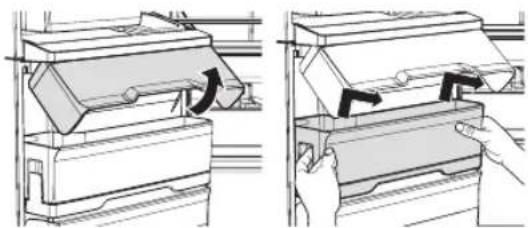
natural_image
Technical line drawing showing two views of a mechanical device with arrows indicating motion (no text or symbols)Removing the Chef Basket
- Tip the Chef Basket top towards you, and then pull the Basket out using both hands.
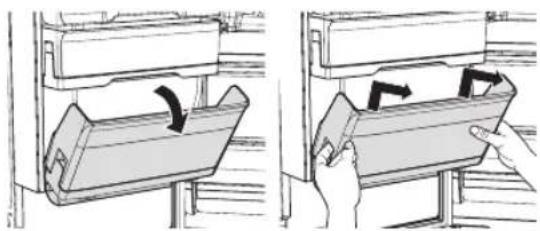
natural_image
Illustration of two hand-drawn views of a storage rack with arrows indicating rotation (no text or symbols)Removing bins
- Simply lift the bin up and pull straight out.
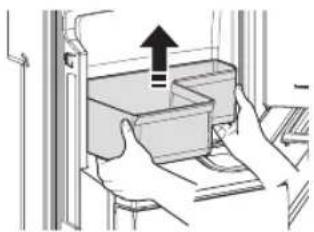
natural_image
Illustration of hands inserting a paper into a device (no text or symbols visible)
Injuries can occur if the door bins are not firmly attached to the doors. Do not allow children to play with the bins. Sharp corners of the bins may cause injury.

Do not adjust a bin full of food. Remove the food first.
• To remove dust, wash the bins in water.
-
Tempered Glass shelves
-
To remove - Tilt up the front of the shelf in the direction shown (1) and lift it up vertically (2). Pull the shelf out.
- To relocate - Tilt the front of the shelf up and guide the shelf hooks into the slots at a desired height. Then, lower the front of the shelf so that the hooks can drop into the slots.

The Tempered Glass shelves are heavy. Use special care when removing them.
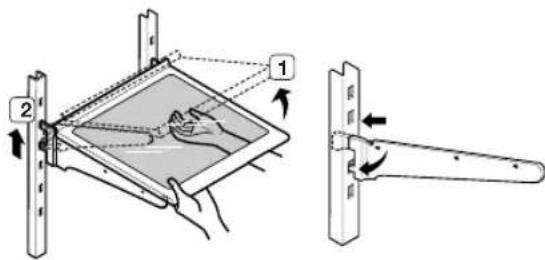
text_image
Technical diagram showing a mechanical assembly with labeled components and directional arrows indicating motion or assembly.- When re-installing the glass shelves, make sure that all the hooks on both sides of the shelf are firmly engaged in the slots of the support.
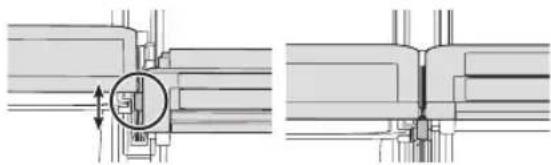
natural_image
Technical line drawing showing mechanical assembly with cross-sectional views (no text or symbols)-
Chef Pan
-
To insert or remove the Chef Pan from the shelf, hold both sides of the pan with both hands. Pull out to remove. Push in to re-insert.
- Use only for stainless steel detergent when wash it.
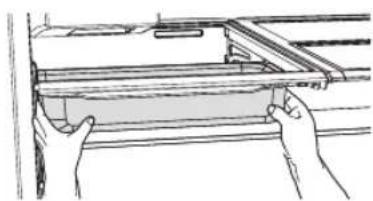
natural_image
Line drawing of hands holding a shelf with a rack (no text or symbols)- Vegetable & Fruit Drawers (EZ Fresh Zone)
- Holding the drawer with one hand, lift it up a little bit while pulling it forward, and then pull it out of the refrigerator.

Remove the door bins before removing the drawer to prevent damage to the door bins.
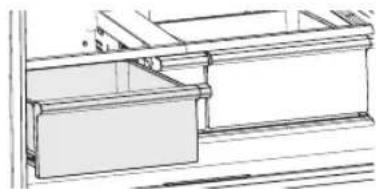
natural_image
Technical line drawing of a mechanical assembly with no visible text or symbols- Removing the vegetable storage shelf
| 1. Slide out the left vegetable drawer. |  |
| 2. Slide in the right foldable shelf. | 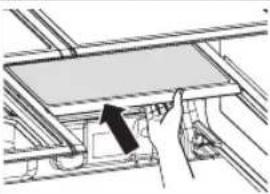 |
| 3. While supporting the vegetable storage shelf with one hand, lift it up with the other hand. | 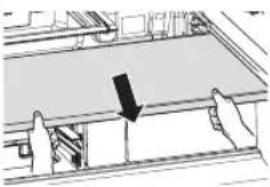 |
| 4. Through the empty space created by removing the foldable shelf, take out the vegetable storage shelf. (Reinsert by following the removal steps in reverse.) | 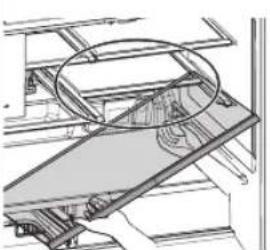 |
-
Removing the Shelf Pantry
-
Slide out the vegetable drawers.
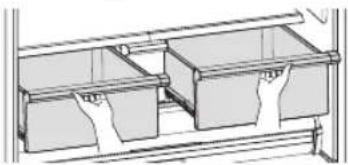
natural_image
Technical line drawing of a two-compartment storage unit with no text or symbols- Remove the vegetable storage shelf.
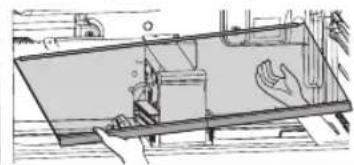
natural_image
Technical line drawing of a mechanical assembly or assembly with no visible text or symbols- Loosen two screws at the back of the water tank.
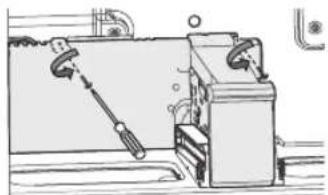
natural_image
Technical line drawing of a mechanical assembly with no visible text or symbols- Take the rear right corner of the water tank and pull it out a little. (Note: This is not to fully remove the water tank)

Take care not to remove the Water Hose.
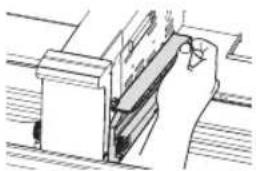
natural_image
Technical line drawing of a mechanical assembly or mounting bracket (no text or symbols visible)- Lift up the water tank to remove it from the Shelf Pantry, and then bend the pantry cover to unlock it from the left.
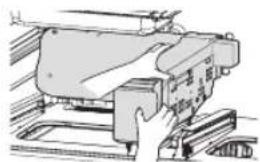
natural_image
Technical line drawing of a mechanical assembly or machine component (no visible text or symbols)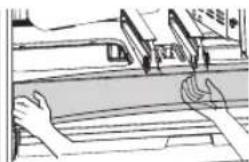
natural_image
Illustration of hands operating a vehicle with sensors and a roof rack (no text or symbols)- Take out the Shelf Pantry. (Reinsert by following the removal steps in reverse.)
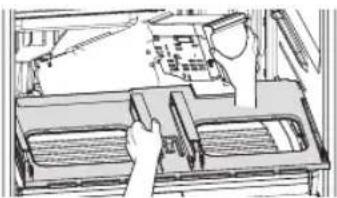
natural_image
Technical line drawing of a mechanical device with a hand operating the component (no visible text or symbols)- Removing the Deodorizer
- Fridge Room
TYPE 1
- Pull out the Chef Pantry, and then pull out the Deodorizer while pushing the Deodorizer cover clip up with your finger.
TYPE 2
- Remove the Chef Pantry drawer, and remove the Deodorizer from inside the fridge room by unlocking the cover clip.
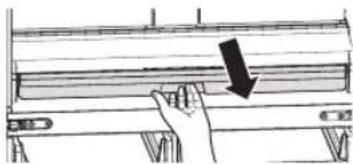
natural_image
Hand pressing down on a wooden panel with a black arrow indicating the motion (no text or symbols)
The appearance and detaching instructions of the deodorizer depend on the model. Please check your model first.

text_image
TYPE 1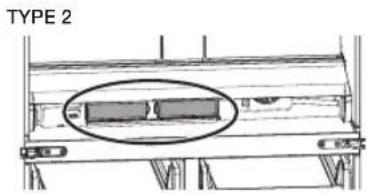
text_image
TYPE 2- Freezer/Cool Select Room: Remove the bottom Drawer, and then pull out the Deodorizer while pushing the Deodorizer cover clip up with your finger
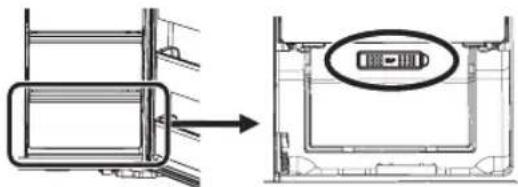
natural_image
Technical diagram showing a device inside a housing with an arrow indicating transformation (no text or symbols present)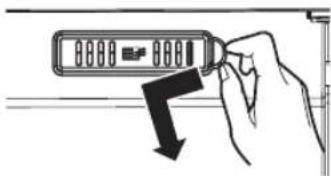
text_image
Hand holding a digital display with a downward arrow, indicating a measurement or change.- Cleaning the Deodorizer
- Clean the Deodorizer once every two years or whenever you feel its performance has diminished. Dry the Deodorizer under the sun for 24 hours and then replace it in the reverse order of its removal.
CLEANING THE REFRIGERATOR

Do not use benzene, thinner, Clorox, or can detergent to clean the refrigerator. They can damage the surface of the appliance and may cause a fire.
Do not spray the refrigerator with water while it is plugged in. This can cause an electric shock.
To clean the refrigerator, follow these steps:
- Unplug the power cord of the refrigerator.
- Slightly dampen a soft, lint-free cloth or paper towel with water.

Do not use any kind of detergent to clean the refrigerator because that can discolor or damage the refrigerator.
- Wipe the inside and outside of the refrigerator until it is clean and dry.
- Plug the power cord of the refrigerator back in.
CHANGING THE INTERIOR LIGHTS
Freezer / Fridge LED Lamp
- If the LED Lamp Cover is stained with foreign substances, the LED lamp may not look bright. Wipe the surface cover with clean dry cloth to return the light to full brightness.

- Do not disassemble or replace the LED type lighting yourself. To replace the LED lights, contact a Samsung service center or your authorized Samsung dealer.

If you attempt to replace the LED lamps yourself, you risk subjecting yourself to an electric shock or serious personal injury.
Sparkling Water: Operational Notes
- Be sure to use genuine Soda Stream Cylinders from authorized resellers.
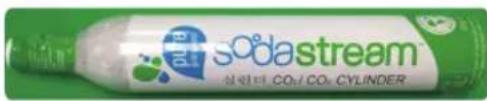
text_image
sodastream 실린더 CO₂/CO₃ CYLINDER- The refrigerator starts making sparkling water about 10 seconds after you turn on the Sparkling Water Production function.
- If you open the refrigerator door while the refrigerator is making sparkling water, it will stop. When you close the door, it will resume making sparkling water in about a minute.
- If there is a power interruption when the refrigerator is making sparkling water, the refrigerator may re-start the carbonation process when power returns and put too much carbonation into the water. If this occurs, we recommend throwing out the overly carbonated water and starting the process again.
- If you keep dispensing sparkling water, the water stream may become unstable or break up. This is caused by changes in pressure in the Sparkling Water Tank. It is not a defect.
- If the water hose is kinked or water is not supplied properly, the Carbonation Level of the Sparkling Water will be high. This occurs because the the same amount of the carbon dioxide (CO _2 ) is dispensed by the Cylinder regardless of the amount of water in the Production Tank.
- The useful life of a SodaStream carbonator will vary, depending on the level of carbonation you select.
- If you are not going to be home for a long period of time, do not want to use the Sparkling Water function any more, or you are moving:
-
Press the Sparkling Maker button for three seconds to turn off the Sparkling Water function.
-
Empty the Sparkling Water tank by dispensing all the water in the tank.
-
Remove the CO_2 Cylinder.
- To reduce the processing time, use the Quick Sparkling option. Quick Sparkling sets the Sparkling Level to 3 (high). The refrigerator applies the Quick Sparkling setting the next time it makes sparkling water.
If the refrigerator is making sparkling water when you select the Quick Sparkling option, the refrigerator adjusts the Sparkling Level automatically.
To cancel this option, press the Quick Sparkling button again within 20 seconds after activating it.
- If the cylinder icon ( ) turns on, replace the current SodaStream Carbonator with a new one.
- To dispense the sparkling water, pull down the Sparkling-Selector Lever, and push and hold the Ice/Sparkling Water Lever with a glass.

- Please remove the Soda Stream Carbonator from the compartment located in the left door of the refrigerator before you transport the refrigerator.
-
Press the Sparkling Maker button for three seconds to turn off the Sparkling Water function.
-
Empty the Sparkling Water tank by dispensing all the water in the tank.
-
Remove the Soda Stream Carbonator.

Producing sparkling water with Quick Sparkling consumes more CO_2 gas. (Quick Sparkling requires 30 % to 50 % more CO_2 gas compared to Sparkling Level 3.)
Troubleshooting
| PROBLEM SOLUTION | |
| The refrigerator does not work at all or it does not chill sufficiently. | Check if the power plug is properly connected.Check if the set temperature on the digital display is warmer than the freezer or fridge inner temperature. If it is, set the freezer or fridge to a colder temperature.Is the refrigerator in direct sunlight or located near a heat source?If so, it may not be able to cool sufficiently. Install it in a location that is out of direct sunlight and not near a heat source.Is the back of the refrigerator too close to the wall, preventing proper ventilation?If so, it may not be able to cool sufficiently. Keep it an appropriate distance from the wall.Is there too much food inside so that the food is blocking the outlet vent?To keep the refrigerator at a suitable temperature, do not fill the refrigerator with too much food. |
| The food in the fridge is frozen. | Check if the set temperature on the digital display is too low.If so, raise the set temperature inside the refrigerator.Is the temperature too low in the room? Set the refrigerator warmer.Did you store food with a high moisture content in the coldest part of the refrigerator or near the cooling outlet vent? Try moving those items to the other shelves in the fridge instead of keeping them in the colder areas or bins. |
| You hear unusual noise or sounds. | Check if the refrigerator is level and stable.Is the back of the refrigerator too close to the wall, preventing proper ventilation?Try moving the back of the refrigerator at least 2 inches from the wall.Was anything dropped behind or under the refrigerator?If you hear a “ticking” sound from inside the refrigerator, this is normal.It occurs because various parts contract or expand in response to temperature changes in the refrigerator interior.If it sounds as if something is hitting something else inside the refrigerator, this is normal. The sound is caused by the compressor operating at high capacity. |
| The cabinet-door sealing area of the appliance is hot and condensation is occurring. | Some heat is normal as anti-condensators are installed in the vertical hinged section of the refrigerator to prevent condensation.Is the refrigerator door ajar? Condensation can occur when you leave the door open for a long time. |
| The Ice Maker is not producing ice. | It may take longer to make ice if the refrigerator is not sufficiently cool, such as when the refrigerator was first installed.Is the water line connected and the shut-off valve opened?Did you manually stop the ice making function?Check if the water filter is properly installed. If it is not properly installed, the ice making function may not work. |
| You can hear water bubbling in the refrigerator. | This is normal. The bubbling comes from refrigerant circulating through the refrigerator. |
| There is a bad smell in the refrigerator. | Check for spoiled food.Foods with strong odors (for example, fish) should be tightly covered.Clean out your freezer periodically and throw away any spoiled or suspicious food. |
| Frost forms on the walls of the freezer. | Is the air vent blocked? Remove any obstructions so air can circulate freely.Allow sufficient space between the stored food for efficient air circulation.Is the freezer drawer closed properly? |
| The water dispenser is not functioning. | Is the water line connected and the shut-off valve opened?Has the water supply line tubing been crushed or kinked?Make sure the tubing is free and clear of any obstruction.Is the water tank frozen because the fridge temperature is too low?Try selecting a warmer setting on the Digital display.Check if the water filter is properly installed. If it is not properly installed, the water dispenser may not work. |
| The freezer door auto close system does not work. | Is there an imbalance between the right and left parts of the door?Open and close the door smoothly 1~2 times. After you do this, the auto close system usually works properly again.Try opening the door smoothly to avoid unbalancing the right part and the left part of the door. |
| Condensation or water drops forms on the vertical mullion and surroundings, etc. | Condensation or water drops may form if the humidity is too high while the refrigerator is operating.If condensation or water drops appears on vertical mullion and surroundings, etc., turn the Energy Saving mode off after removing the condensation. |
| Sparkling water is not dispensed. | Is the water line connected and the shut-off valve opened?Did you pull down the Sparkling-Selector Lever? (Applicable to Chef Collection models.)Is the Sparkling Water Production Function Off icon on?Press the Sparkling Maker button for 3 seconds to turn on sparkling water production.The Sparkling Water Production function is set to OFF at the factory. Set it ON to get sparkling water.Is the Sparkling Maker icon blinking?The blinking icon indicates the refrigerator is producing sparkling water.Please wait until the icon stops blinking.Check if the Quick Sparkling button's cross bar icon is lit.The cross bar icon shows how much carbonated water is left in the carbonated water tank. (Applicable to Chef Collection models.)Is the carbonated gas cylinder empty?If the refrigerator dispenses a small amount or no sparkling water, replace the SodaStream 60L Carbonator with a new one.If the SodaStream Carbonator runs out of CO_2 , the cylinder icon (turns on.If the Exchange Carbonated Gas Cylinder icon is lit, check the SodaStream Carbonator. (Applicable to Chef Collection models.)Is the refrigerator door open?If the door is open, Sparkling water/Water/Ice are not dispensed.Is the cylinder lever unlocked?Open the cylinder cover and lock the cylinder lever.Is the Control Lock on?If carbonated water or regular water is dispensed continually for 1 minute or more, dispensing may temporarily stop. Press the lever again to continue dispensing. |
| The Quick Making option makes a wind noise while in process. | While the Quick Making option is active, the SodaStream Carbonator cycles through injecting and discharging CO_2 gas, which can make a wind-like noise. |
| The taste of the sparkling water is weak. | Increase the Sparkling Level of the sparkling water.When the taste of the sparkling water is too weak or there is no other taste than water, replace the SodaStream Carbonator with a new one.If you use the Fill Up (3 sec) option immediately after replacing the Carbonator, the sparkling water tastes stronger or weaker than normal, depending on the amount and concentration of the CO_2 remaining in the water tank. |
| The taste of the sparkling water is too high. | Decrease the Sparkling Level of the sparkling water.(Sparkling Levels - 1: Low, 2: Medium, 3: High)Empty the sparkling water tank, and then set the Sparkling Level lower.When the refrigerator makes sparkling water, it will make water at a lower level of carbonation.* To empty the sparkling water tank, press and hold the “Sparkling Maker” button for 3 seconds to turn the Sparkling water maker off.Dispense all the remaining sparkling water. After emptying the sparkling water, press and hold the “Sparkling Maker” button for 3 seconds to activate the sparkling water maker.* Did you make sparkling water by pressing the “Quick Sparkling/Fill up” button and holding for 3 seconds? If there was still sparkling water in the tank before you started the Quick Fill function, sparkling water with a higher CO2 concentration than the level you set can be produced.Once the sparkling water tank is emptied, the refrigerator will make sparkling water at the Sparkling Level you have set. |
| The taste of the sparkling water did not change after you changed the sparkling concentration level. | If you change the concentration level, the new level is applied to the subsequent production. That is, the change does not affect the sparkling water in the sparkling water tank nor does it affect the sparkling water production currently in progress. The change is only applied to subsequent productions. |
| After you replaced the Sodastream Carbonator, no sparkling water is being produced. | After replacing the SodaStream Carbonator, be sure to touch and hold the “Quick Sparkling/Fill up” button for 3 seconds to reset the SodaStream Carbonator. |
| The sparkling water suddenly stops being dispensed even though the operation is still in progress. | Check if the short lines inside the cup icon are turning on one by one in a clockwise direction. This indicates that the sparkling water is being produced. When production is complete, all of the short lines inside the cup icon turn on. When production is complete, the refrigerator will dispense sparkling water.If the refrigerator is not dispensing sparkling water, check if “OFF” is displayed above the cup icon over the Sparkling Maker button.This indicates that the sparkling water tank is empty and the automatic sparkling water production function is turned off. To produce sparkling water, touch and hold the “Sparkling Maker” button for 3 seconds to start production. |
| The Sparkling function is turned off but sparkling water continues to be dispensed. | Even if you turn off the sparkling water production function, sparkling water is dispensed for as long as there is sparkling water in the sparkling water tank.If you do not use the sparkling water maker for an extended period of time, stop the automatic sparkling water production function and remove the sparkling water through the dispenser. |
| The sparkling water dispenses at a slower rate than regular water. | ·Check if the tap water valve is closed or the hose is bent and if water is being supplied to your home at the normal pressure. If the tap water pressure is too low, the sparkling water maker may not work properly because too little water is being supplied to the sparkling water tank.·When water is supplied to the sparkling water tank from a water purifier, sparkling water may not be produced properly because too much water is required over a short period of time. We recommend that you do not dispense water from a water purifier less than five minutes before you start a sparkling water production cycle.·If this problem continues, please contact the water purifier manufacturer or ask a plumber to increase the tap water pressure to a normal level. |
| The sparkling water is not cold enough and tastes flat. | ·If you continuously produce a lot of sparkling water, you may not be able to enjoy the true taste of sparkling water because there is too little time to cool the water. To drink sparkling water at its optimal state, you have to ensure sufficient cooling time before you dispense sparkling water.·We recommend you wait at least four hours after connecting tap water to the refrigerator before making and dispensing sparkling water. |
| The sparkling “OFF” icon is displayed, but the sparkling water maker is not turned off. | ·Check if the short lines inside the cup icon are turning on one by one in a clockwise direction. This indicates that sparkling water is being produced and cannot be stopped immediately. However, if you press and hold the “Sparkling Maker” button for 3 seconds during production, then the “OFF” icon is displayed over the cup icon and automatic sparkling water production will turn off after the current production cycle is complete. |
| The concentration control function is disabled during sparkling water production. | ·Check if the short lines inside the cup icon are turning on one by one in a clockwise direction. This indicates that the sparkling water is being produced. Since the sparkling water concentration cannot be changed during a production operation, change the concentration level when production is complete and the blinking stops. The refrigerator applies the new Sparkling Level to the next production operation. |
| Sparkling water is produced continuously. | ·Has the sparkling water production time limit been reached?The length of time during which sparkling water is generated is determined by the Sparkling Level setting. (Level 1: Approx. 10 mins; Level 2: Approx. 20 mins; Level 3: Approx. 30 mins)Please wait until the sparkling water production time has been reached.·Check if the refrigerator door is open.If the refrigerator door is open, the sparkling water maker stops to prevent noise that is generated by the sparkling water production.If you open the door frequently, the time during which sparkling water is produced may be extended depending on the Sparkling Level setting. Close the refrigerator door and wait until the sparkling water production time limit has been reached. |
| The cylinder icon did not turn on when the SodaStream Carbonator was removed. | ·If you remove a SodaStream Carbonator that has a little gas remaining, the cylinder icon on the display may turn on after a several seconds.·If you remove a SodaStream Carbonator that has gas remaining, the cylinder icon on the display may not turn on for a period of time. |
| What Do I Need to use the E-Smart and Smart Grid functions? | To use the Smart Grid (Demand Response) and E-Smart function on your Refrigerator, you need the following devices and apps: - Devices: 1) A Wireless Router, 2) A Samsung E-Smart Refrigerator, 3) A Smartphone. (Recommended: Galaxy S4, Galaxy Note3 or later models and Android OS Jelly Bean or later version) - Applications: 1) “Samsung E-Smart App” from the Google Play Store or Samsung Apps.You also need to:Connect the Refrigerator and the Smartphone to the same Wi-Fi network in your home.Install and run the Samsung E-Smart App on your Smartphone.In addition, to use the Smart Grid (Demand Response) function, you must Register for the service with your electric company.The company must have an EMS (Energy Management System) that supports SEP (Smart Energy profile). |
| Why isn’t the E-Smart function working normally? | Confirm that the router in your home and the Internet are working properly.- Connect a Smartphone to the router (AP, Access Point), and then confirm that you can browse the Internet on the phone.Confirm that refrigerator is connected to the AP.- Check the E-Smart icon on the panel of the refrigerator.If the refrigerator is connected, the icon will be on.Confirm that the refrigerator and Smartphone are connected to the same router. |
| Why isn’t the Delay Defrost Capability working normally? | Confirm that the router in your home and the Internet are working properly.- Connect a Smartphone to the router (AP, Access Point), and then confirm that you can browse the Internet on the phone.Confirm that the area where you live is properly entered into the Samsung E-Smart App.Confirm that the Smart Grid function works correctly.(Check the panel. L3 andL4 should not be displayed on the panel.) |
OPTIMUM OPERATING ENVIRONMENT FOR SPARKLING WATER
| Item Descriptions | |
| [Water temperature]“We recommend that you only drink sparkling water after it is sufficiently cooled.” | Since the temperature of the sparkling water greatly affects the taste of the water, if the temperature of water is not sufficiently low, you may not be able to get the right taste.We recommend you wait at least four hours after connecting tap water to the refrigerator before making and dispensing sparkling water.We also recommend that when the refrigerator is producing sparkling water, that you dispense as little regular water as possible so that the sparkling water is produced with cold water.If you drink 0.5 gallons (2 liters) or more a day, the water may not be cooled sufficiently.To store dispensed sparkling water, put the water in an air tight container and keep it in a cold section of the refrigerator for better taste. |
| [CO_2 concentration of sparkling water 1] “To ensure a precise CO_2 concentration, dispense all the remaining sparkling water before producing additional sparkling water.” | Because the current system does not measure the CO_2 concentration of the sparkling water remaining in the sparkling water tank before it starts to produce additional sparkling water, the resulting concentration may differ from the desired level, depending on the remaining sparkling water in the sparkling water tank.If you haven't used the sparkling water function for an extended period of time (one week or longer), first remove all the sparkling from the sparkling water tank, and then produce fresh sparkling water for better quality and taste. |
| [CO_2 concentration of sparkling water 2] “To maintain a precise CO_2 concentration of sparkling water, replace the CO_2 cylinder before it is depleted.” | As the time to replace the SodaStream Carbonator comes closer, the CO_2 concentration decreases and sparkling water becomes weaker.If the SodaStream Carbonator runs out of CO_2 , the cylinder icon ( ) turns on. If this occurs, replace the SodaStream 60L Carbonator with a new one. |
| [Preparing sparkling water - Capacity]“If you want to have sufficient sparkling water prepared in the morning, we recommend that you touch and hold the Sparkling Maker button for 3 seconds to start the sparkling water production before going to bed.” | If you do not press and hold the “Sparkling Maker” button for 3 seconds to start the sparkling water production, the amount of sparkling water in the water tank may be less than the maximum production capacity of 1.1 liters.Since a production time of 10~30min is required if you need 1.1 liters or more of sparkling water, we recommend producing and storing enough sparkling water in advance or at least securing the maximum sparkling water capacity of 1.1 liter by pressing and holding the “Sparkling Maker” button for 3 seconds to start sparkling water production. |
| [The water supply pressure and water taste]“If a water purifier is connected to the refrigerator, we recommend that you do not dispense water from the water purifier less than five minutes before you start a sparkling water production cycle.” | · If water pressure to the refrigerator is low, check if the water line valve is fully open and if the water line is kinked or bent.· If a water purifier is connected to the refrigerator, there may be insufficient water supply for sparkling water production.· If there is insufficient water supply, the concentration of the sparkling water increases or the amount of sparkling water may decrease. |
OPEN SOURCE ANNOUNCEMENT
The software included in this product contains open source software.
You may obtain the complete corresponding source code for a period of three years after the last shipment of this product by sending an email to mailto:oss.request@samsung.com.
It is also possible to obtain the complete corresponding source code in a physical medium such as a CD-ROM; a minimal payment will be required.
The following URL http://opensource.samsung.com/opensource/ConnectedProduct/seq/0 leads to the download page of the source code made available and open source license information as related to this product.
This offer is valid to anyone in receipt of this information.
text_image
QR code image containing encoded data, no visible human-readable textEnglish - 59
Warranty (USA)
WARRANTY ON SAMSUNG REFRIGERATOR
LIMITED WARRANTY (U.S.A.)
SAMSUNG REFRIGERATOR
LIMITED WARRANTY TO ORIGINAL CONSUMER PURCHASER WITH PROOF OF PURCHASE
This SAMSUNG brand product, as supplied and distributed by Samsung Electronics America, Inc. (SAMSUNG) and delivered new, in the original carton to the original consumer purchaser, is warranted by SAMSUNG against manufacturing defects in materials or workmanship for the limited warranty period of:
One (1) year parts and labor
Five (5) years parts and labor on Sealed Refrigeration System Only (Compressor, Evaporator, Condenser, Drier, and Connecting Tubing)
Ten (10) years part and Five (5) years labor on Digital Inverter Compressor Only
This limited warranty is valid only on products purchased and used in the United States that have been installed, operated, and maintained according to the instructions attached to or furnished with the product. To receive warranty service, the purchaser must contact SAMSUNG at the address or phone number provided below for problem determination and service procedures. Warranty service can only be performed by a SAMSUNG authorized service center. The original dated bill of sale must be presented upon request as proof of purchase to SAMSUNG or SAMSUNG's authorized service center to receive warranty service.
SAMSUNG will provide in-home service within the contiguous United States during the warranty period at no charge, subject to availability of SAMSUNG authorized servicers within the customer's geographic area. If in-home service is not available, SAMSUNG may elect, at its option, to provide transportation of the product to and from an authorized service center. If the product is located in an area where service by a SAMSUNG authorized servicer is not available, you may be responsible for a trip charge or required to bring the product to a SAMSUNG authorized service center for service.
To receive in-home service, product must be unobstructed and accessible to the service agent.
During the applicable warranty period, a product will be repaired, replaced, or the purchase price refunded, at the sole option of SAMSUNG. SAMSUNG may use new or reconditioned parts in repairing a product, or replace the product with a new or reconditioned product. Replacement parts and products are warranted for the remaining portion of the original product's warranty or ninety (90) days, whichever is longer. All replaced parts and products are the property of SAMSUNG and you must return them to SAMSUNG.
This limited warranty covers manufacturing defects in materials or workmanship encountered in normal household, noncommercial use of this product and shall not cover the following: damage that occurs in shipment, delivery, installation, and uses for which this product was not intended; damage caused by unauthorized modification or alteration of the product; product where the original factory serial numbers have been removed, defaced, changed in any way, or cannot be readily determined; cosmetic damage including scratches, dents, chips, and other damage to the product's finishes; damage caused by abuse, misuse, pest infestations, accident, fire, floods, or other acts of nature or God; damage caused by use of equipment, utilities, services, parts, supplies, accessories, applications, installations, repairs, external wiring or connectors not supplied or authorized by SAMSUNG; damage caused by incorrect electrical line current, voltage, fluctuations and surges; damage caused by failure to operate and maintain the product according to instructions; in-home instruction on how to use your product; and service to correct installation not in accordance with electrical or plumbing codes or correction of household electrical or plumbing (i.e., house wiring, fuses, or water inlet hoses). The cost of repair or replacement under these excluded circumstances shall be the customer's responsibility.
Visits by an authorized servicer to explain product functions, maintenance or installation are not covered by this limited warranty. Please contact SAMSUNG at the number below for assistance with any of these issues.
EXCLUSION OF IMPLIED WARRANTIES
IMPLIED WARRANTIES, INCLUDING THE IMPLIED WARRANTIES OF MERCHANTABILITY OR FITNESS FOR A PARTICULAR PURPOSE, ARE LIMITED TO ONE YEAR OR THE SHORTEST PERIOD ALLOWED BY LAW. Some states do not allow limitations on how long an implied warranty lasts, so the above limitations or exclusions may not apply to you. This warranty gives you specific rights, and you may also have other rights, which vary from state to state.
LIMITATION OF REMEDIES
YOUR SOLE AND EXCLUSIVE REMEDY IS PRODUCT REPAIR, PRODUCT REPLACEMENT, OR REFUND OF THE PURCHASE PRICE AT SAMSUNG'S OPTION, AS PROVIDED IN THIS LIMITED WARRANTY. SAMSUNG SHALL NOT BE LIABLE FOR SPECIAL, INCIDENTAL OR CONSEQUENTIAL DAMAGES, INCLUDING BUT NOT LIMITED TO TIME AWAY FROM WORK, HOTELS AND/OR RESTAURANT MEALS, REMODELING EXPENSES, LOSS OF REVENUE OR PROFITS, FAILURE TO REALIZE SAVINGS OR OTHER BENEFITS REGARDLESS OF THE LEGAL THEORY ON WHICH THE CLAIM IS BASED, AND EVEN IF SAMSUNG HAS BEEN ADVISED OF THE POSSIBILITY OF SUCH DAMAGES. Some states do not allow exclusion or limitation of incidental or consequential damages, so the above limitations or exclusions may not apply to you. This warranty gives you specific rights, and you may also have other rights, which vary from state to state.
SAMSUNG does not warrant uninterrupted or error-free operation of the product. No warranty or guarantee given by any other person, firm, or corporation with respect to this product shall be binding on SAMSUNG.
To obtain warranty service, please contact SAMSUNG at:
Samsung Electronics America, Inc.
85 Challenger Road
Ridgefield Park, NJ 07660
If your refrigerator needs service
Do not hesitate to call any Samsung Authorized Service Center nearby giving them your name, address and telephone number when your product is not functioning properly.
Warranty Information (CANADA)
Limited Warranty for Original Purchaser
This Samsung product is warranted by Samsung Electronics Canada Inc. (hereafter referred to as SECA) against manufacturing defects in material or workmanship for the following periods:
Labor : 1 year (in-home)
Parts : 1 year
Inverter Compressor : 10 Years (Part only)
SECA further warrants that if this product fails to operate properly within the specified warranty period and the failure is due to improper workmanship or defective material, SECA will repair or replace the product at its option. In-home service is not available in all areas. Contact us to find out if in-home service is currently available in your area by using the contact information at the back of this warranty.
All warranty repairs or part replacements must be performed by a SECA Authorized Service Center. (To find the nearest SECA Service Center, call 1-800-SAMSUNG (7267864) or visit our web site at www.samsung.com/ca)
Obligation to the Original Owner
The original dated sales receipt must be retained by the customer and is the only acceptable proof of purchase. It must be presented to a SECA Authorized Service Center at the time service is requested before warranty services are rendered. On all carry-in models, transportation to and from the Authorized Service Center is the responsibility of the customer.
Exclusions of the Warranty
This warranty does not cover damage due to accident, fire, flood, and/or other Acts of God, misuse, incorrect line voltage, improper installation, improper or unauthorized repairs, commercial use, or damage that occurs during shipping. Customer adjustments which are explained in this owners manual are not covered under the terms of this warranty. This warranty will automatically be voided for any unit found with a missing or altered serial number. This warranty is valid only on products purchased and used in the Canada.
SAMSUNG CUSTOMER CARE CENTER
Samsung Electronics Canada Inc. 2050 Derry Road West, Mississauga, Ontario L5N 0B9 Canada
www.samsung.com/ca/support (English)
www.samsung.com/ca_fr/support (French)
Memo
Scan this with your smartphone
Scan the QR code* or visit
www.samsung.com/spsn
to view our helpful
How-to Videos and Live Shows
* Requires reader to be installed on your smartphone
Contact SAMSUNG WORLD WIDE
If you have any questions or comments relating to Samsung products, please contact the SAMSUNG customer care center.
| Country C | Contact Center Web | Site Subsidiaries office address | |
| U.S.A | 1-800-SAMSUNG (726-7864)1-844-SAM-PAYS (726-7297) | www.samsung.com/us/support | Samsung Electronics America, Inc. 85 Challenger Road Ridgefield Park, NJ 07660 |
| CANADA | 1-800-SAMSUNG (726-7864)1-844-SAM-PAYS (726-7297) | www.samsung.com/ca/support (English)www.samsung.com/ca_fr/support (French) | Samsung Electronics Canada Inc. 2050 Derry Road West, Mississauga, Ontario L5N 0B9 Canada |


Refrigerador
Manual del usuario
natural_image
Illustration of a hand using a tool to adjust or install a mechanical component with a starburst effect (no text or symbols)
1.1 Aviso de la FCC (Federal Communications Commission)

text_image
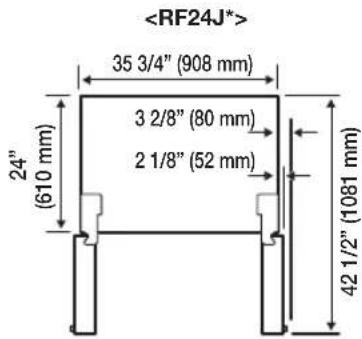
text_image

text_image
Diagram illustrating refrigerant cooling system with directional arrows and a prohibition sign, showing circuit breakers and a warning symbol.text_image
Technical diagram showing a mechanical or electrical component with upward force arrows and a labeled point A on the surface.natural_image
Technical diagram showing mechanical assembly with arrows indicating motion and a labeled component B (no text or symbols present)text_image
Diagram illustrating mechanical assembly steps with labeled components and directional arrows indicating motiontext_image
Technical diagram showing mechanical assembly with labeled component E and directional arrownatural_image
Technical line drawing of a mechanical assembly with no visible text or symbols
text_image
Technical diagram showing two mechanical assembly steps with labeled components F and directional arrows indicating motion or movement.- Retire la bisagra (G).
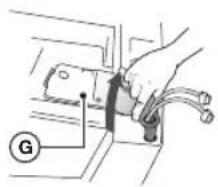
natural_image
Hand operating a mechanical component with a labeled section (G), no visible text or symbolsnatural_image
Illustration of a person standing beside a refrigerator with shelves (no text or symbols visible)text_image
Medical illustration showing two steps of a laparoscopic procedure: step A indicates laparoscopic placement, and step B shows laparoscopic insertion.text_image
Diagram showing a hand holding a component with labeled parts and directional arrows indicating movement or force.text_image
Diagram showing a door or panel installation with labeled components and directional arrows indicating movement or force.
natural_image
Mechanical assembly diagram showing a bracket with mounting holes and a directional arrow (no text or symbols)natural_image
Illustration of hands performing a medical procedure with forceps and arrows indicating pressure or movement (no text or symbols)natural_image
Illustration of a hand holding a tool or device with a small object inserted (no text or symbols visible)natural_image
Illustration of a person handling a refrigerator with shelves (no text or symbols visible)text_image
Diagram showing a hand holding a device with an arrow and labeled point A, likely illustrating a mechanical or electrical component.text_image
Technical diagram showing hand operating a component with labeled parts B, likely illustrating electrical or mechanical assembly steps.text_image
Technical diagram showing mechanical assembly with labeled parts E, F, and C, including a close-up of a hand holding a tool.natural_image
Technical line drawing of a structural support frame with vertical arrows indicating force or movement (no text or symbols)natural_image
Technical diagram showing mechanical components with arrows and a labeled point G (no text or symbols present)
text_image
Technical diagram showing mechanical assembly with labeled component 'J' and directional arrow indicating movement or force
natural_image
Technical line drawing of a mechanical clamp or tool with a pointer and labeled point A (no text or symbols present)natural_image
Four identical rectangular frames each containing a single stylized symbol (no text or numbers)1 mm 1.5 mm 2 mm 2.5 mm
natural_image
Technical line drawing of a structural support frame with vertical arrows indicating force or movement (no text or symbols)text_image
1 Fridge -88°C Power Cool (3 sec) 2 Freezer -88°C Power Freeze (3 sec) 3 Chef Pantry Fish/Mest Fridge 4 Cool Select Freezer Soft Reset Filter (3 sec) Soft Chill Cool 5 | Energy Saving | Door Alarm | Control Lock | *<=7 (3 sec) | Alarm CALL E-Safe ● E-Smart | Override | (3 sec)text_image
Fridge -89°C Chel Fantry Fish/Meat Fridge Energe Sunny Sweet White Cool Screw Soft Freeze Chel Cool Deep White Control Lock (Box) REDUCE a Instant Override (Box)text_image
Fridge Power Control Panel Freezer Power Refriger Panel -88 °C -88 °C -88 °C Chef Fantry Fish/Meat Fridge Energy Solder %+/-/ +/ band Door Alarm Control Lock Band Cool Select Printer Soft Freeze CHEI Cool + Convert Divoride Bandtext_image
Fridge -8.00 °C Power (Cold) Unit Freezer -8.00 °C Power Troupe (Cold) Chief Fuzzy Fast/Meal Bridge Energy Switch 1+/-T Speed Deep Alarm Control Lock Day Cool Select Freezer Soft Freeze Chill Cool New Filtered Unit * CoSmart * Overdrive Locktext_image
-98°C -98°C -98°C CHEF 456 ① ② ③text_image
Ice-Water 4 Control Lock (3 sec) Lighting 6 Ice Maker (3 sec) Cubed Ice Crushed Ice 7 5 8text_image
Technical diagram illustrating mechanical assembly steps with labeled components and directional arrows
natural_image
Three-step diagram showing mechanical assembly steps: press, roller, and cutting (no text or symbols)natural_image
Diagram of a vehicle crossed out with no visible text or symbolsCONTROL DE LA TEMPERATURA
text_image
Fridge -80℃ Front (Lock) Fridge -80℃ Front (Lock) (Low) Chef Ferry Fish/Meal Fridges Energy Seating V=9 (Low) Over Alarm Control Lock (Low) Cool Snack Freezer Soft Freeze Chill Cool RSDI LOWS + Cotton + Overside (Low) Cool (High/Low)Temperatura recomendada : 0 °F (-18 °C)
Congelador
text_image
-88°C Fridge Power (kW) (1 sec) -88°C FRESH Power (Pipes) (1 sec) Chief Furry FishMeat Fridge Energy Switching Spare (Box) Clear Roams Control Lock (1 sec) COOL 620V 4253 + Retreat Overload (Box)Temperatura recomendada : 37 °F (3 °C)

text_image
Illustration showing three steps of door opening and holding a device, with arrows indicating movement direction.
flowchart
graph LR
    A["Quick Sparkling Fill (3 sec)"] --> B["Sparkling Level"]
    C["Control Lock (3 sec)"] --> D["Lighting"]
    E["Ke Maker (3 sec)"] --> F["Cubed Ice"]
    G["Crushed Ice"] --> H["Crushed Ice"]
    B --> I["Sparkling Level"]
    D --> I
    F --> I
    H --> I
    I --> J["Sparkling Level"]
    J --> K["Sparkling Level"]
    K --> L["Sparkling Level"]
natural_image
Technical line drawing of an open refrigerator with internal compartments and doorways (no text or labels)Español - 44

natural_image
Simple line drawing of a container with an arrow indicating rotation (no text or symbols)CHEF PAN
natural_image
Illustration of hands holding a cylindrical object with a black X symbol, no text or symbols presentnatural_image
Illustration of a hand adjusting a wooden shelf with a magnified inset showing the process (no text or symbols)natural_image
Technical line drawing showing two views of a mechanical device with arrows indicating motion (no text or symbols)natural_image
Illustration of two hand-drawn views of a mechanical component with arrows indicating direction (no text or symbols)natural_image
Illustration of hands inserting a device into a container with an upward arrow (no text or symbols)
text_image
Technical diagram showing a mechanical assembly with labeled components and directional arrows indicating motion or assembly.natural_image
Technical line drawing showing mechanical assembly with cross-sectional views (no text or symbols)natural_image
Illustration of hands installing or adjusting a shelf panel (no text or symbols visible)natural_image
Technical line drawing of a mechanical assembly or frame structure (no text or symbols)natural_image
Hand holding a shelf with an arrow indicating direction (no text or symbols present)natural_image
Technical line drawing of a mechanical assembly with a black arrow indicating a component (no text or symbols present)natural_image
Diagram of a mechanical assembly with a hand holding a component, showing no text or symbols.natural_image
Technical line drawing of a mechanical assembly with no visible text or symbolsnatural_image
Diagram of two rectangular storage compartments with hand gestures, no text or symbols presentnatural_image
Illustration of a person sitting at a desk with equipment, no visible text or symbolsnatural_image
Technical line drawing of a mechanical assembly with no visible text or symbolsnatural_image
Technical line drawing of a mechanical assembly or clamping mechanism (no text or symbols)natural_image
Technical line drawing of a mechanical assembly or machine component (no visible text or symbols)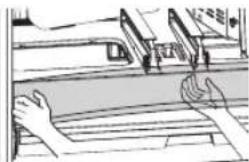
natural_image
Illustration of hands reaching toward a train window with overhead equipment (no text or symbols visible)natural_image
Technical line drawing of a mechanical assembly with a hand operating a component (no visible text or symbols)natural_image
Hand placing a black arrow on a wooden shelf (no text or symbols visible)
natural_image
Diagram showing a device inside a storage unit with an arrow indicating transformation (no text or symbols present)
text_image
Diagram showing a hand holding a digital thermometer with a downward arrow indicating measurement or change.text_image
sodastream 실린더 CO₂/CO₂ CYLINDERRidgefield Park, NJ 07660
natural_image
Illustration of hands using a tool to adjust or install a mechanical component (no text or symbols visible)
text_image
Diagram showing two devices with directional arrows and a prohibition symbol, indicating a hazard or failure condition.RETRAIT DES PORTES DU RÉFRIGÉRATEUR
text_image
Technical diagram showing a mechanical assembly with labeled components and directional arrows indicating motion or force vectors.natural_image
Technical diagram showing mechanical assembly with arrows indicating motion and a labeled point B (no text or symbols present)text_image
Technical diagram illustrating mechanical assembly steps with labeled components D and C, showing tool path and component placement.text_image
Technical diagram showing mechanical assembly with labeled component E and directional arrownatural_image
Technical line drawing of a mechanical assembly with arrows indicating force or movement (no text or symbols)
text_image
Technical diagram showing two mechanical assembly steps with force indicators and labeled components Fnatural_image
Hand holding a tool interacting with a mechanical component (no visible text or symbols)natural_image
Illustration of a person opening a refrigerator with shelves (no text or symbols visible)text_image
Medical illustration showing two steps of a lap joint procedure, labeled A and B with magnified view of the joint detail.text_image
Diagram showing a hand holding a device with labeled parts and directional arrows indicating movement or force.text_image
Diagram showing a door or panel installation with labeled components and directional arrows indicating movement or force.
natural_image
Mechanical assembly diagram showing a bracket with mounting holes and a directional arrow (no text or symbols)natural_image
Illustration of hands performing a manual tool with force arrows indicating movement (no text or symbols)natural_image
Illustration of a hand holding a tool with a pen, no text or symbols presentnatural_image
Illustration of a person handling a refrigerator with shelves (no text or symbols visible)natural_image
Hand holding a handheld device with an arrow pointing to it, labeled 'A' (no text or symbols on the device itself)text_image
Technical diagram showing two mechanical assembly steps with labeled components A and B, likely illustrating a manual or electrical procedure.natural_image
Technical diagram of a mechanical component with mounting holes and a central base (no text or symbols)text_image
Technical diagram showing mechanical assembly with labeled parts E, F, and C, including a close-up of a hand holding a tool.natural_image
Technical line drawing of a structural support frame with three vertical arrows indicating force or displacement (no text or symbols)natural_image
Mechanical assembly diagram showing a bracket with mounting holes and directional arrows, no text or symbols present
text_image
Technical diagram showing mechanical assembly with labeled component 'J' and directional arrow
natural_image
Technical line drawing of a mechanical clamp or tool with a pointer and labeled point A (no text or symbols present)natural_image
Four identical rectangular frames each containing a small circular symbol, no text or labels present.1 mm 1,5 mm 2 mm 2,5 mm
RÉGLAGE DE L'INTERVALLE DES PORTES
natural_image
Pure technical diagram of a mechanical assembly with no text, numbers, or symbolsnatural_image
Two diagrams showing pipe fittings with coiled components, no text or symbols present[0][X]
text_image
Fridge 88°C Freeze 88°C Freeze (Sand) Chef Fantry Fish/Meat Fridge Cool Seal Freezer Soft Freeze Chill Cool Energy Sauver 500V (Sand) Heat Candle Control Lock (Side) RENT 2023 a Scent Override (Dry)text_image
Fridge Power cooling Freezer Power cooling -8.0 °C -8.0 °C -8.0 °C Chef Pantry Fish/meat: Fridge Energy Saving | Down Arm Lock | Down Arm Control Lock | Down Arm Cool Select Power Soft Freeze Chill Cool + Insert + Downside | Downtext_image
Fridge From Grilled -8.0 °C -8.0 °C FRESH Power Power Stand Chief Punchy Heat/Heat Fridge Energy Serving V=7.6mm Cool Select Freezer Soft Freeze Chill Cool Energy Serving V=7.6mm Cool Control Lock Stop EAST 0523 a Column Override Stoptext_image
-99°C -99°C -99°C -99°C ① ② ③ ④ 5 6text_image
Ice-Water 4 Control Lock (3 sec) Lighting 6 Ice Maker (3 sec) Cubed Ice Crushed Ice 7 5 8text_image
Technical diagram showing three stages of a mechanical assembly with labeled parts 1, 2, and directional arrows indicating motion or movement.
natural_image
Three-step diagram showing mechanical assembly steps: press, tool, and cutting (no text or symbols)natural_image
Diagram of a vehicle with two crossed arms and no visible text or symbolsPower Freeze (Congélation rapide)
text_image
-88°C Fridge Power (Cold/Dim) -88°C Freeze Power (Theses/Cond) Chef Fantry Fast/Meat Fridge Energy Serving %+/- Free Deep Airer Control Lock Drain Cool Select Fresh/Beased Pruiser Soft Freeze Chill Cool 100% Coastar Beverde Draintext_image
Diagram illustrating hand positioning and movement of a device, showing three steps: opening, moving, and holding a device.
natural_image
Diagram showing two mechanical components with directional arrows indicating movement or force (no text or symbols present)flowchart
graph LR
    A["Quick Sparkling Fill (Speed)"] --> B["Sparkling Level"]
    C["Control Lock (Speed)"] --> D["Lighting"]
    E["Ike Maker (Speed)"] --> F["Crushed Ice"]
    B --> G["Sparkling Level"]
    D --> G
    F --> G
    G --> H["Sparkling Level"]
    H --> I["Sparkling Level"]
text_image
Sparkling Wear Quick Spanding Perceived Sparkling Level Sparkling Maker (User) Control Lock (Speed) Lighting Ke Maker (Speed) Cubed Ice Crushed Ice Appuyez pendant 3 secondsnatural_image
Technical line drawing of an open refrigerator with internal compartments and doorways (no text or labels)Français - 44

natural_image
Simple line drawing of a container with an arrow indicating rotation (no text or symbols)CONTENEUR CHEF PAN
natural_image
Illustration of hands holding a cylindrical object with a black X symbol, no text or symbols presentnatural_image
Illustration of a hand adjusting a wooden beam, with a magnified inset showing the detail (no text or symbols)natural_image
Technical line drawing showing two views of a mechanical device with arrows indicating motion (no text or symbols)natural_image
Illustration of two mechanical assembly steps showing a door handle being inserted into a housing (no text or symbols present)Retrait des bacs
natural_image
Illustration of hands inserting a device into a container with an upward arrow (no text or symbols)
text_image
Technical diagram showing a mechanical assembly with labeled components and directional arrows indicating motion or force.natural_image
Technical line drawing showing mechanical assembly with cross-sectional views (no text or symbols)natural_image
Illustration of hands installing or adjusting a shelf with a tray (no text or symbols visible)natural_image
Technical line drawing of a mechanical assembly or frame structure (no text or symbols)natural_image
Diagram of two rectangular storage compartments with hand gestures, no text or symbols presentnatural_image
Illustration of a person working at a bench with equipment, no visible text or symbolsnatural_image
Technical line drawing of a mechanical assembly with no visible text or symbolsnatural_image
Technical line drawing of a mechanical assembly or mounting bracket (no text or symbols)natural_image
Technical line drawing of a mechanical assembly or machine component (no visible text or symbols)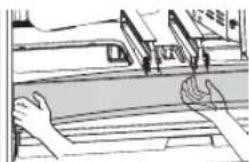
natural_image
Illustration of hands operating a vehicle with sensors and a bridge (no text or symbols visible)natural_image
Diagram of a hand inserting a component into a device panel (no text or symbols visible)natural_image
Hand pressing down on a mechanical component with a black arrow indicating the downward motion (no text or symbols present)
natural_image
Technical line drawing of a mechanical component with a circular inset showing a dimension (no text or symbols)TYPE 2
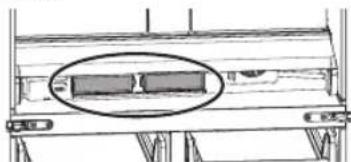
natural_image
Technical line drawing of a mechanical assembly with two rectangular components, one highlighted in gray (no text or symbols)text_image
Diagram showing three-step installation of a device with a control panel, including a hand holding the display.text_image
sodastream 실린더 CO₂/CO₂ CYLINDER.www.samsung.com/ca/support (English)
www.samsung.com/ca_fr/support (French)