MD5420 - Speaker stands Mounting Dream - Free user manual and instructions
Find the device manual for free MD5420 Mounting Dream in PDF.
| Product Type | Soundbar Mount |
| Brand | Mounting Dream |
| Model | MD5420 |
| Maximum Supported Weight | 6.8 kg (15 lb) |
| Main Material | High Strength Steel |
| Compatibility | Soundbars with standard mounting holes or wide/narrow spacing |
| Mounting Options | Between TV and wall mount or directly on the TV |
| Package Contents | Brackets, extension arms, screws, washers, spacers, mounting tool |
| Assembled Unit Dimensions | Approximately 60 x 5 x 2 cm (depending on configuration) |
| Package Weight | Approximately 0.8 kg |
| Care and Cleaning | Clean with a soft, dry cloth; do not use abrasive products |
| Safety | Do not exceed the maximum load; ensure the wall supports 5 times the total weight |
| Spare Parts and Repairability | Non-removable parts; contact customer service in case of defects |
| Warranty | 1 year (subject to manufacturer's conditions) |
| General Information | For indoor use only; do not modify the product |
Frequently Asked Questions - MD5420 Mounting Dream
User questions about MD5420 Mounting Dream
0 question about this device. Answer the ones you know or ask your own.
Ask a new question about this device
Download the instructions for your Speaker stands in PDF format for free! Find your manual MD5420 - Mounting Dream and take your electronic device back in hand. On this page are published all the documents necessary for the use of your device. MD5420 by Mounting Dream.
USER MANUAL MD5420 Mounting Dream
MD5420 INSTALLATION INSTRUCTION
The weight of your sound bar DO NOT EXCEED 15LBS (6.8 kg).
□ You must verify that the total weight of your TV, sound bar, sound bar mount and any accessories must be lower than the maximum weight rating of your TV mount.
□ You read through the user manuals of your TV, sound bar and TV mount for additional guidance.
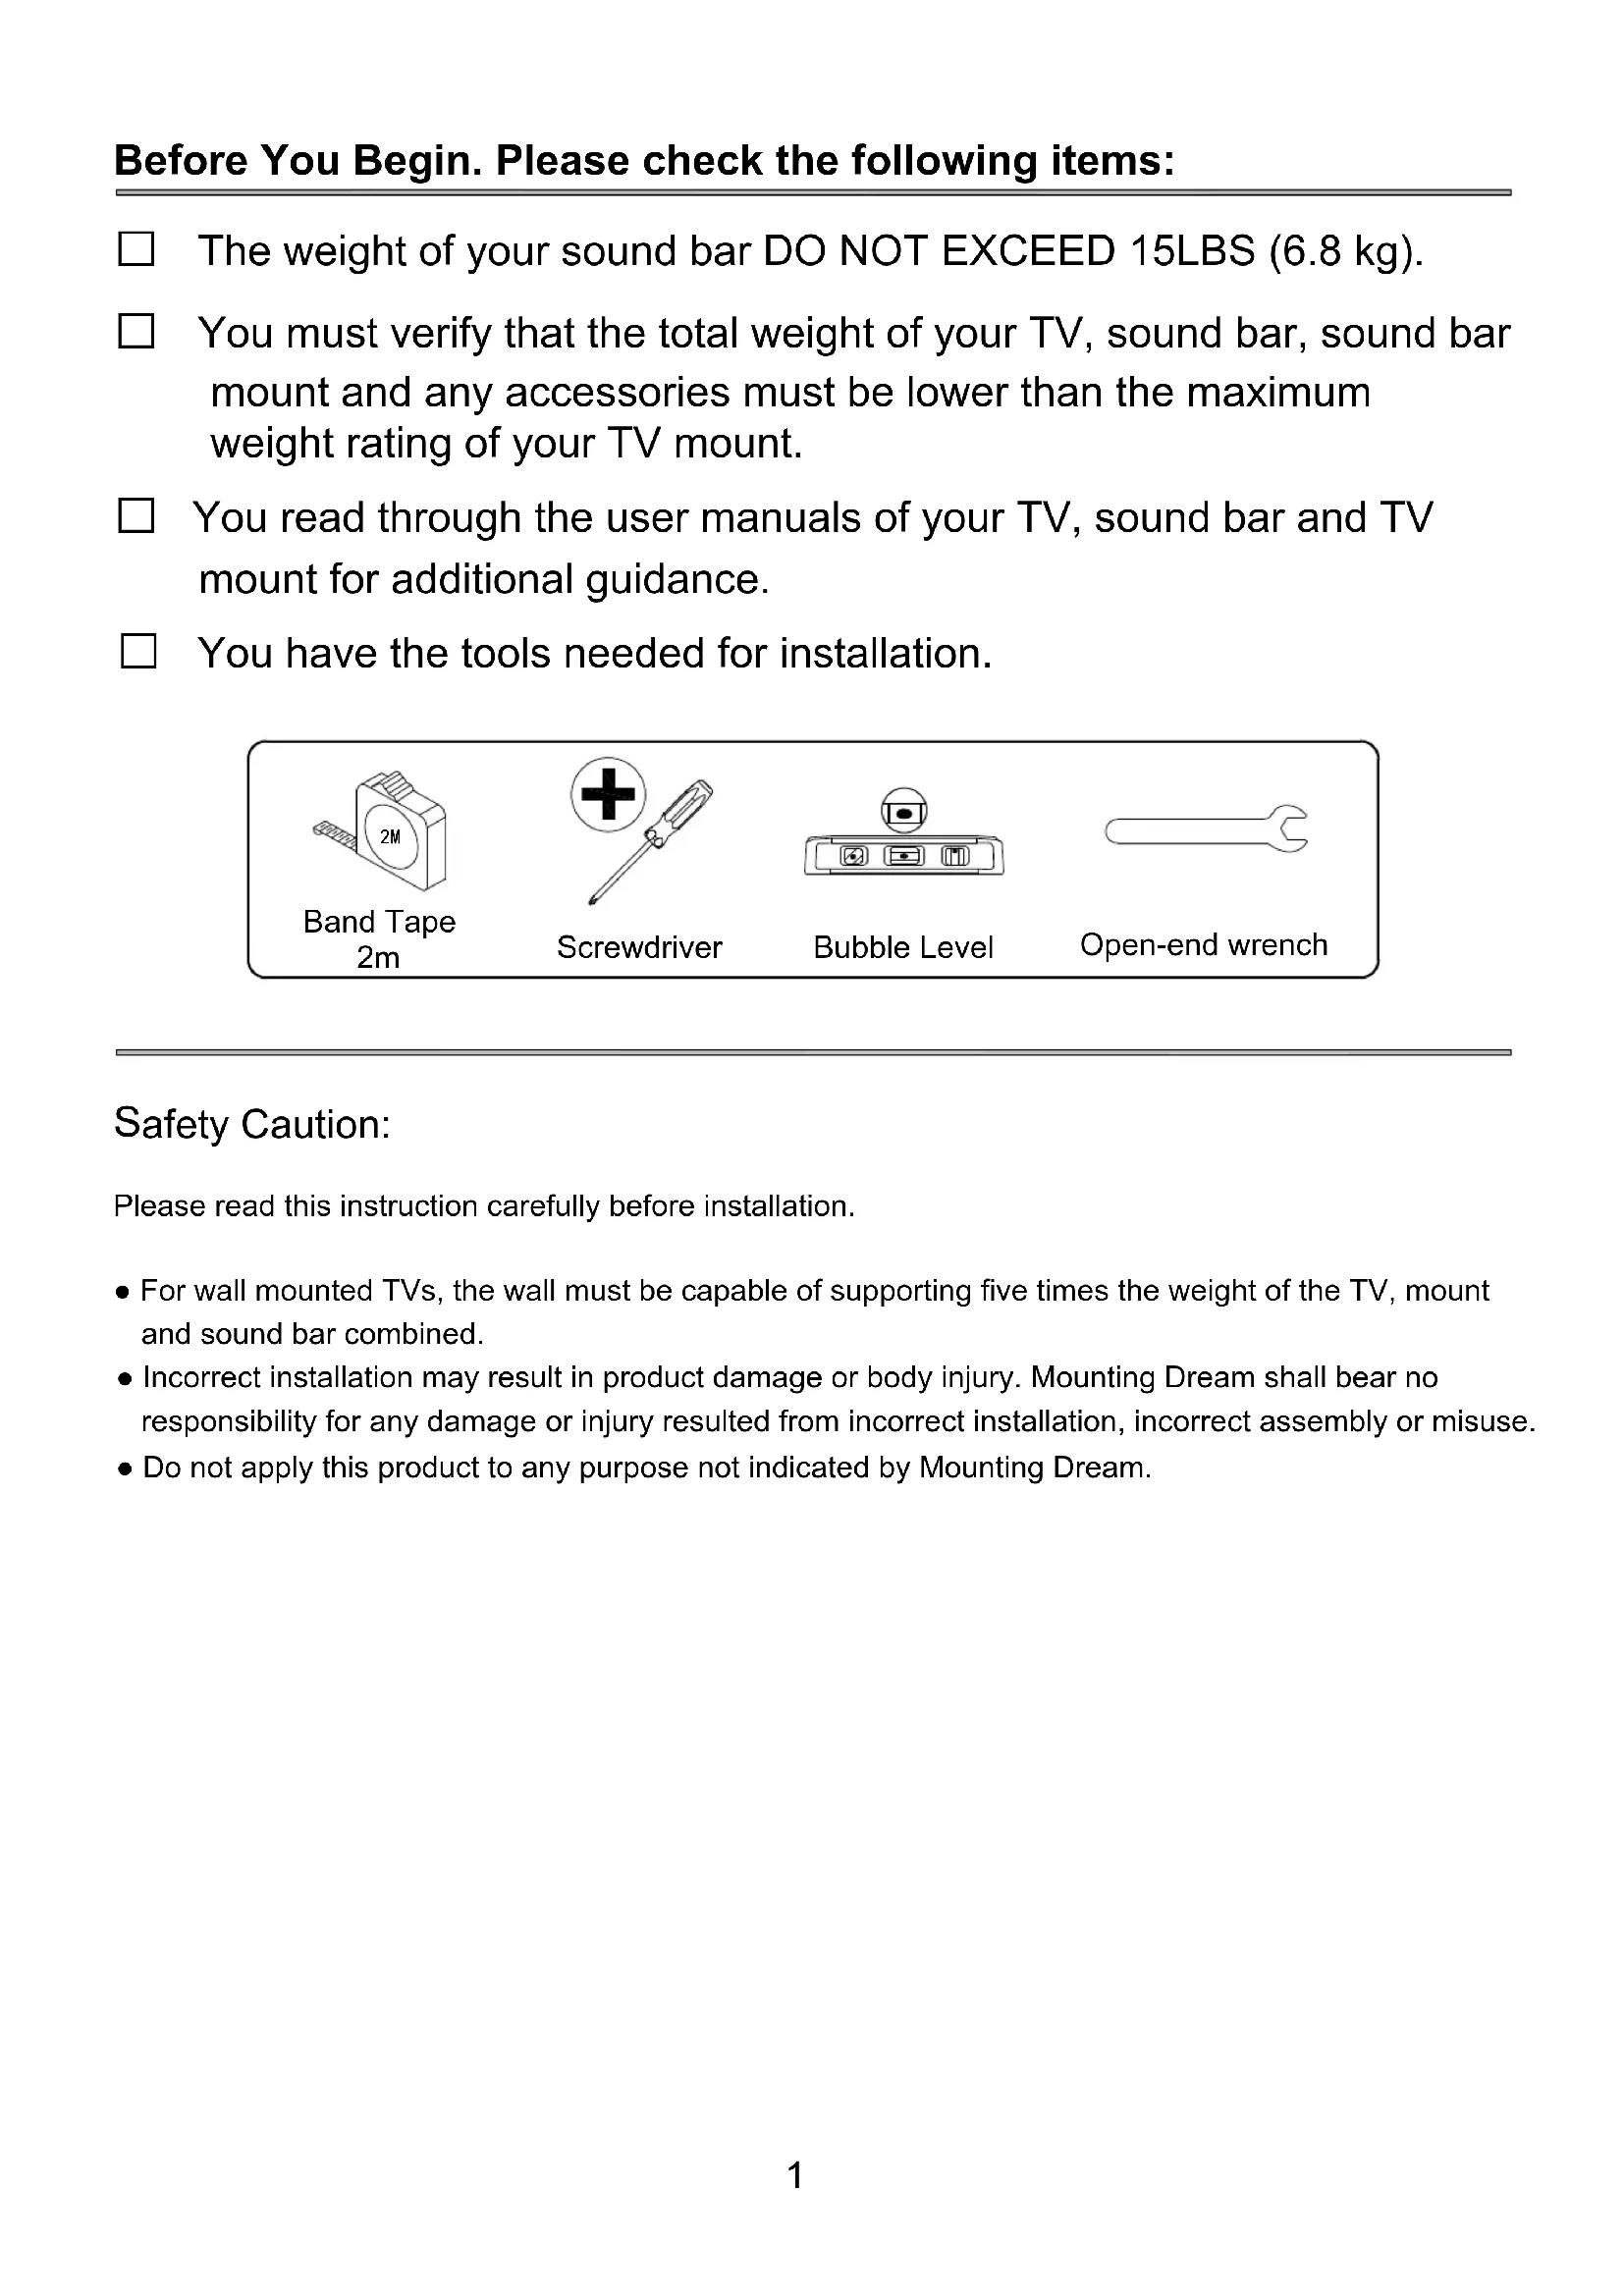
You have the tools needed for installation.
Band Tape 2m
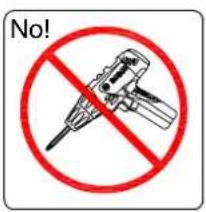
Screwdriver
Bubble Level

Open-end wrench
Safety Caution:
Please read this instruction carefully before installation.
- For wall mounted TVs, the wall must be capable of supporting five times the weight of the TV, mount and sound bar combined.
- Incorrect installation may result in product damage or body injury. Mounting Dream shall bear no responsibility for any damage or injury resulted from incorrect installation, incorrect assembly or misuse.
- Do not apply this product to any purpose not indicated by Mounting Dream.
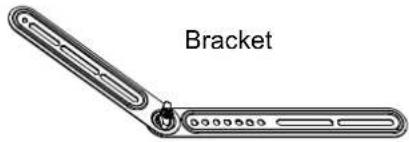
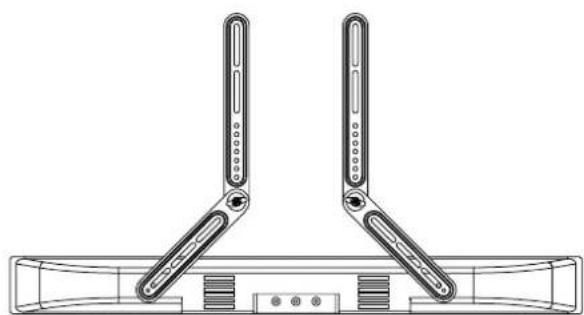
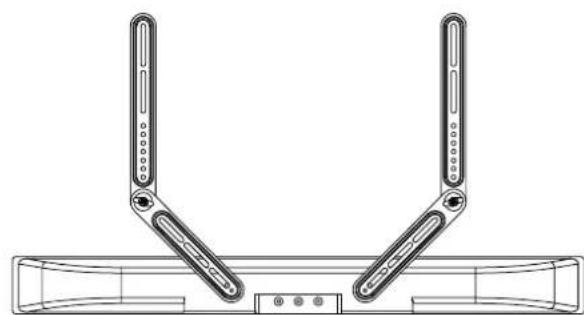
STEP 1 Attach Brackets to Sound Bar
Parts and Hardware
WARNING: This product contains small items that could be a choking hazard if swallowed. Before starting assembly, verify all parts are included and undamaged.
NOTE: Not all hardware included will be used.
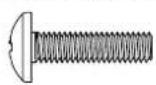
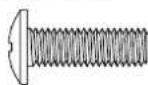
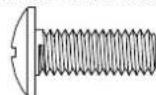
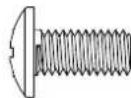
M4x16mm Bolt M5x16mm Bolt
M6x16mm Bolt
01
02
03x2
M5/M6 Washer

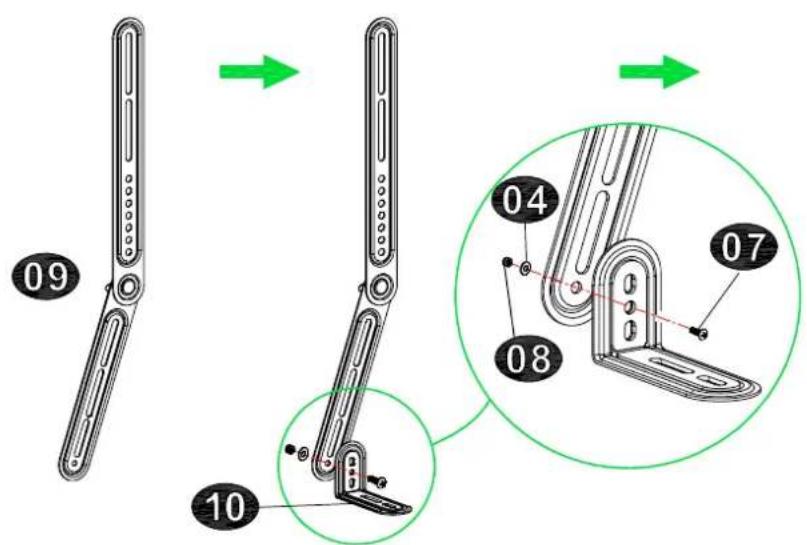
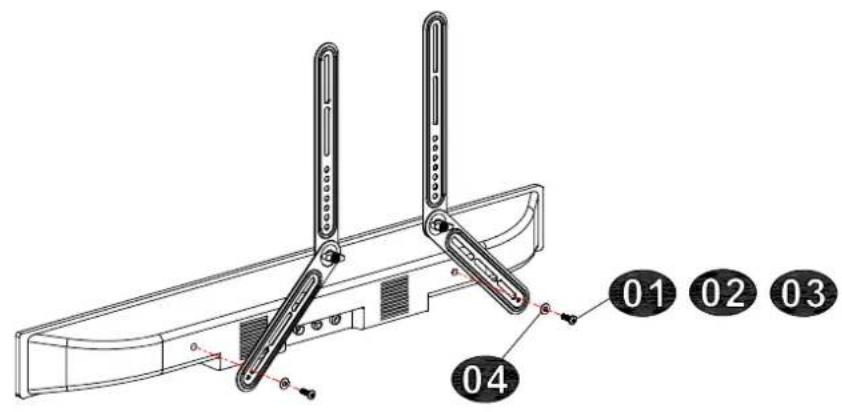
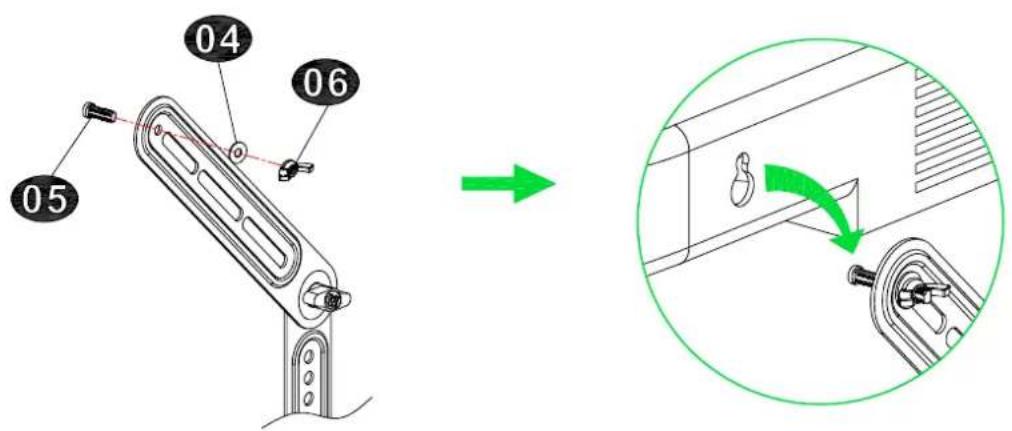
04 x4 x2
Key Hole Bolt
05 x2x2 x2
M6 Butterfly Nut
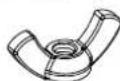
06
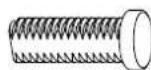
M6x12mm Bolt
07x2
Antiskid Nut

08x2
09 x2
Extension Arm
10 x2
1-1 Adjust the Brackets to Your Sound Bar

For wide mounting hole spacing

For narrow mounting hole spacing

For soundbar bottom holes, you might need to combine and assemble the extension arms 10.
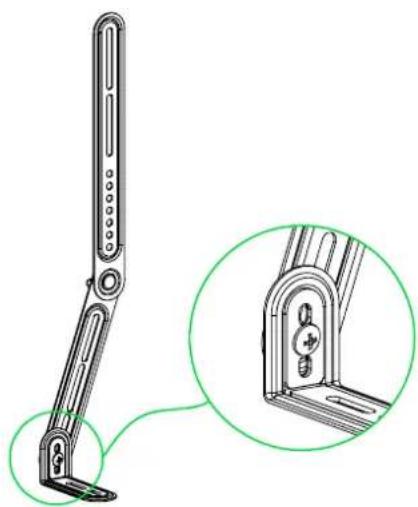
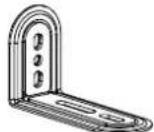
1-2 Attach the Brackets to Your Sound Bar
Please check the mounting holes to determine your installation option.

Screw Hole

Key Hole

"L" Shape Hanger Bracket
(Included in package)
STEP 2 Install the Assembled Sound Bar Unit to Your TV
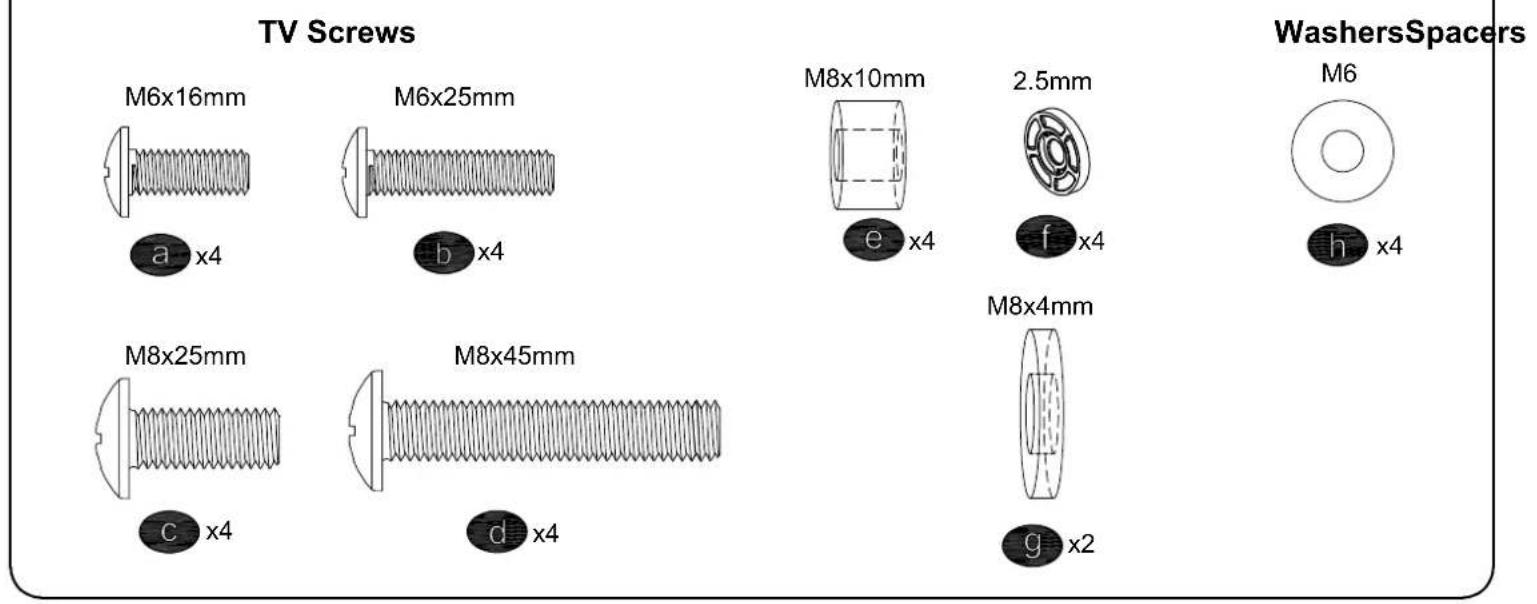
Parts and Hardware

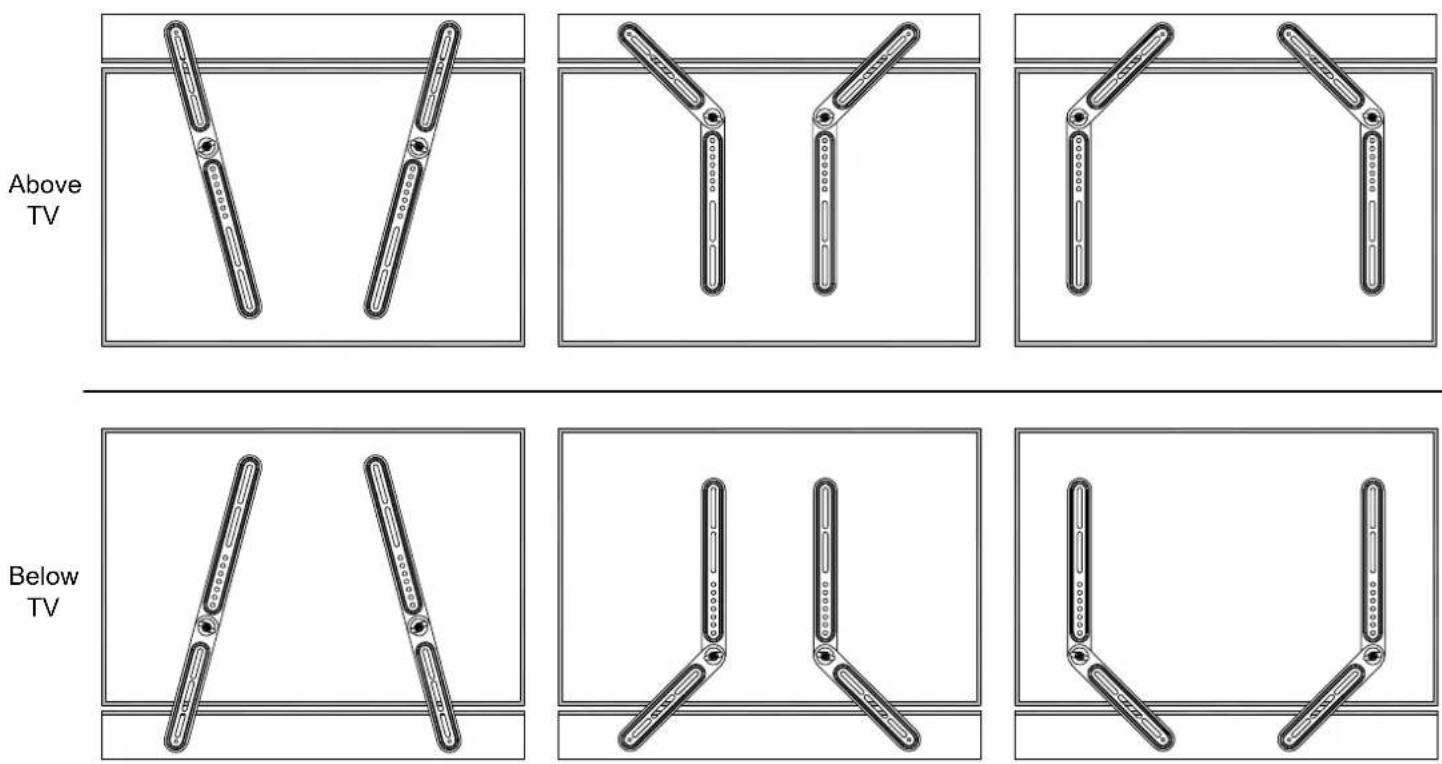
Assembly Options (Just for reference)
Mount one screw each brackets for TV hole
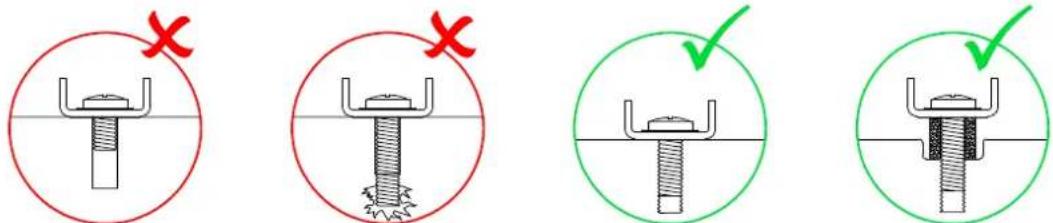
?Select Correct Screw/Washer/Spacer for Your Installation
STEP2A
For Sound Bar Brackets Attach to TV Mount
2A-1 Disassemble Your TV from the Mount
I Remove all cables
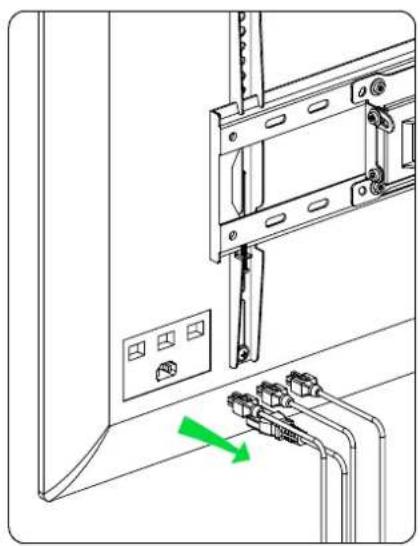
II Take off the TV from the mount
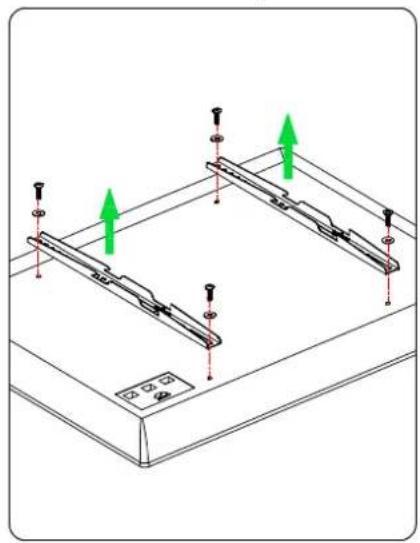
III Remove the TV brackets from your TV
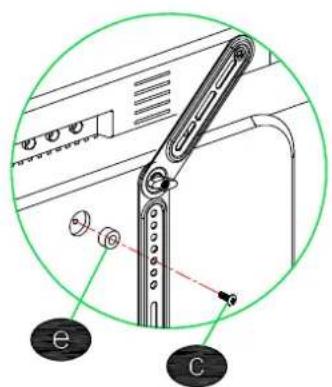
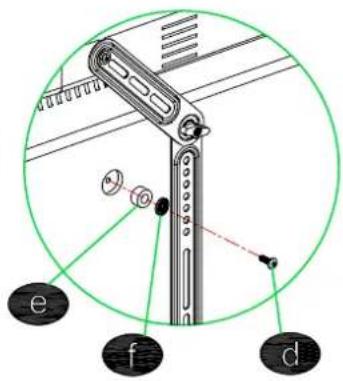
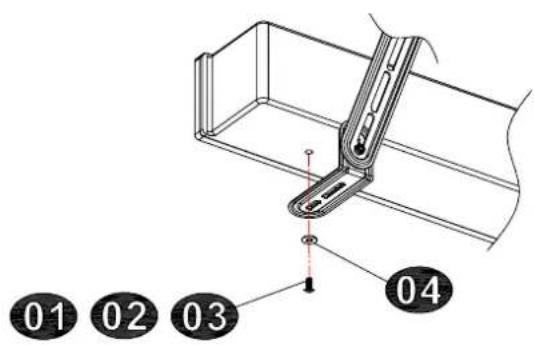
2A-2 Attach the Assembled Sound Bar and Brackets Unit to Your TV

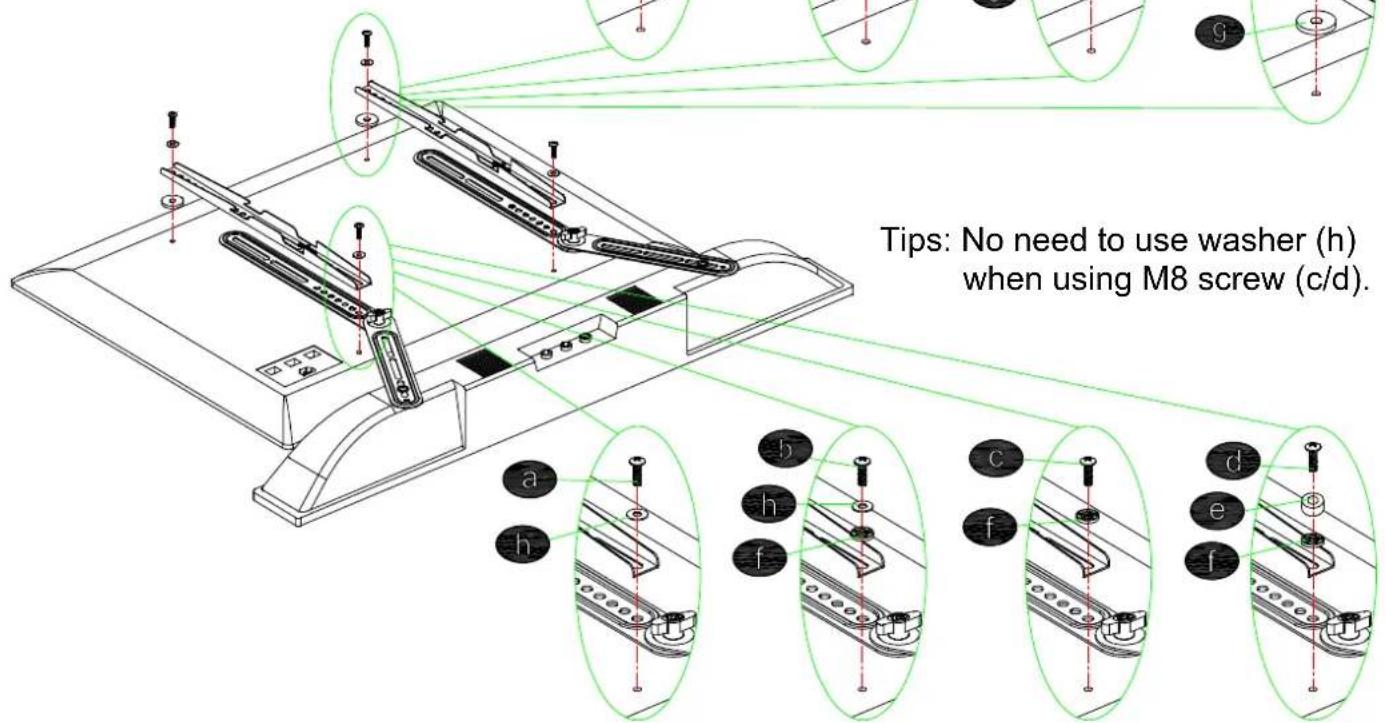
Tips: No need to use washer (h) when using M8 screw (c/d).
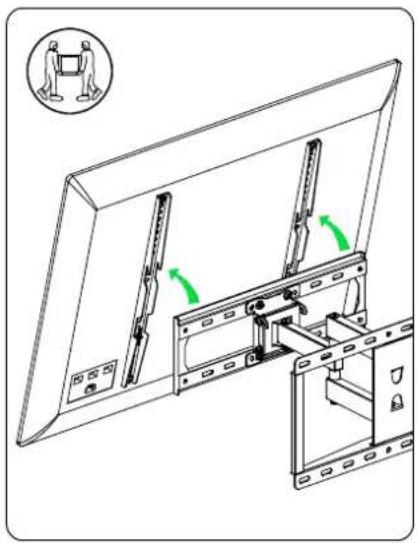
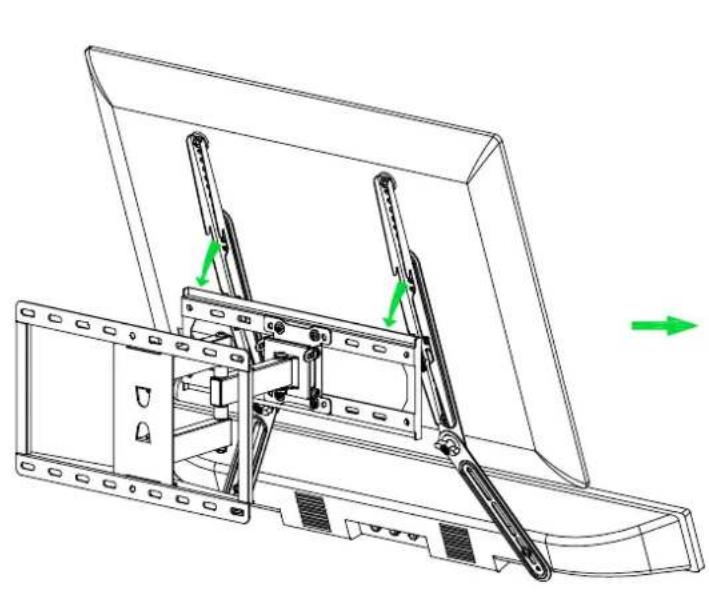
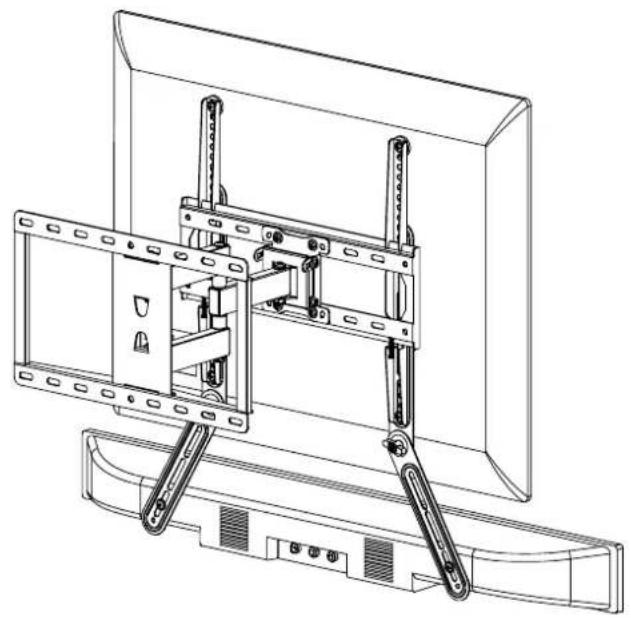
2A-3 Hang the Whole Assembled Unit to the Mount
STEP2B
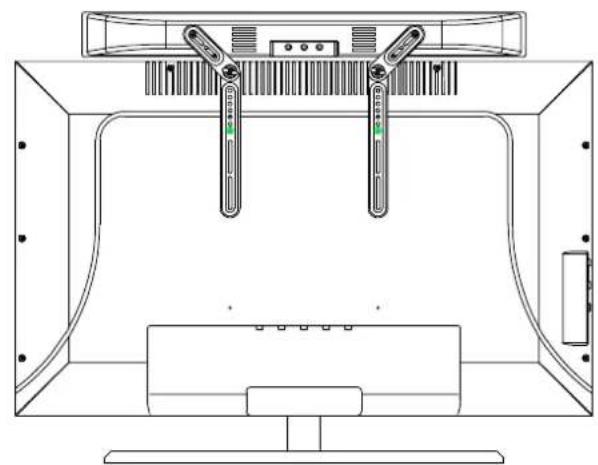
For Sound Bar Brackets Directly Attach to TV Back
Attach the Assembled Sound Bar Unit to Your TV
Screw/Washer/Spacer Combination Options

For TV with flat back
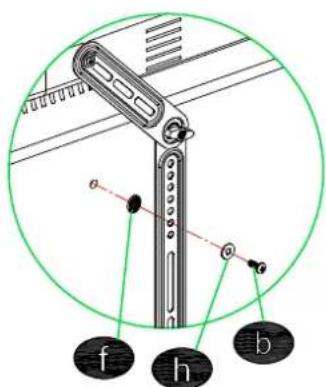

For TV with insert hole