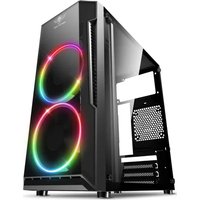
CLONE 3 - Desktop Computer SPIRIT OF GAMER - Free user manual and instructions
Find the device manual for free CLONE 3 SPIRIT OF GAMER in PDF.

| Product Type | Gaming Desktop |
| Brand | Spirit of Gamer |
| Model | CLONE 3 |
| Dimensions (L x W x H) | 450 x 200 x 450 mm (estimated) |
| Net Weight | Approximately 8 kg |
| Recommended PSU | 650 W (not included) |
| Compatible Motherboard Form Factors | ATX, Micro-ATX, Mini-ITX (estimated) |
| Storage Bays | 2 x 2.5", 2 x 3.5" (estimated) |
| Pre-installed Fans | Depending on model: front and/or rear |
| Main Functions | Gaming PC assembly, optimized cooling, cable management |
| Maintenance and Cleaning | Clean dust filters regularly |
| Safety | Use an antistatic wrist strap, do not force connections, avoid moisture |
| Spare Parts and Repairability | Standard components (CPU, RAM, GPU, etc.) individually replaceable |
| Warranty | 1 year from the date of purchase |
| General Information | Consult the manufacturer's manual for advanced instructions |
Frequently Asked Questions - CLONE 3 SPIRIT OF GAMER
User questions about CLONE 3 SPIRIT OF GAMER
0 question about this device. Answer the ones you know or ask your own.
Ask a new question about this device
Download the instructions for your Desktop Computer in PDF format for free! Find your manual CLONE 3 - SPIRIT OF GAMER and take your electronic device back in hand. On this page are published all the documents necessary for the use of your device. CLONE 3 by SPIRIT OF GAMER.
USER MANUAL CLONE 3 SPIRIT OF GAMER
This generic manual is provided to help you assemble your computer. The actual installation varies with the specifications of the case that you purchased.
For more advanced instructions, please refer to the installation manuals for your motherboard, graphic card, etc., and all the different peripherals that you wish to install while assembling your configuration! We decline all liability for any incorrect component handling and/or installation.
BEFORE STARTING, READ THESE RECOMMENDATIONS:
Stability and cleanliness: To assemble the case, make sure you have a flat and stable work surface. Assemble the case away from dust in a well-lit room! Never lay the case on a carpet charged with static electricity.
Take your time: Carefully handle the case to avoid any risk of injury. Despite the care that we take when manufacturing our products, some may still have sharp inside edges! Avoid any sudden movement. We recommend wearing gloves.
Always read the instructions first... Every component is different! Start by reading the assembly instructions for each of your computer's component parts like the CPU, RAM, etc. For example: refer to the instructions that come with your CPU cooler to identify the steps that you need to take into account before installing the motherboard.

What does anti-static mean? To preserve component integrity, it is essential to protect them from any static electricity discharge that may be caused by your body becoming charged. Wear an anti-static wrist band so that you can handle parts safely. Handle components and cards with care and never touch unshielded components or contacts. Always hold your card, your processor by its edges (never its pins).
Use the right tools! We recommend that you always use the right tools for every assembly step. Never use a "makeshift" screwdriver like a coin, a knife tip, your fingernails, etc. You may damage your equipment or injure yourself. During assembly never overtighten components or you may damage the threads or break the equipment.
Never force things! Before connecting a cable, make sure that both connectors are correctly aligned. Connectors are often fool-proofed: this means that they are fitted with a mechanism, generally a mechanical one, that inhibits any assembly or connection errors! Never force things as bent connector pins may require replacing the entire connector!
Any questions? If you have any doubts or if you cannot assemble your components, contact the support department or seek the help of a qualified technician.
REMOVING THE CASE SIDE
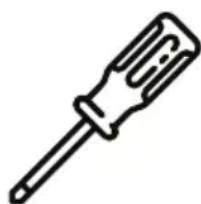
To remove the case side, unscrew the knurled screws. Depending on the model, use a suitable screwdriver.
INSTALLING THE MOTHERBOARD
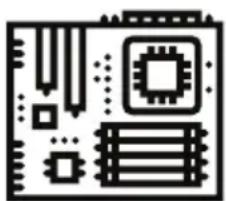
Start by unpacking it and placing it on the protective foam that it came with. This way you have a more comfortable working area to install the CPU, its cooling system that generally comprises a heat sink with a fan on top, and the memory, etc. Follow the assembly instructions for every component!
Before positioning the motherboard, attach the back connector panel sold with the motherboard by clipping it to the side of the case. Depending on the format of the motherboard used, check the spacers already installed on the case or add new ones. Position the motherboard and screw it into the case. Remember, never overtighten! Take care to never fix more spacers than there are holes in your motherboard or you may create short circuits.
INSTALLING 2.5" / 3.5" HARD DISK AND OPTICAL DISC DRIVES

Before installing a hard disk drive check the amount of space required and the length of your graphic card. Depending on the case, connecting disks may be complicated or require removing cradles or racks. The graphic card may also require attaching a mounting rail or moving a removable fan rail.
- There are a variety of hard disk drive mounting systems. Some of our cases do not require screws:
- Quick-fit cradle mounting: Insert the disk into the cradle, then lower the lever to hold it in place.
- Removable clip-fit cradle: Remove the cradle by pressing the tabs / Insert the disk drive into the holes on one side / Spread the cradle to insert the other side of the disk drive / Refit the cradle into the rack.
- For screw mounted cages/cradles/rail, always use the screws supplied and do not forget to use vibration damping washers where necessary.
OPTIMISING COMPUTER COOLING
Fans: Depending on the model, the case comes ready equipped with fans. Cooling can be optimised by installing additional fans (not included) and mounting them with four screws in the locations provided for them. The number and location of the optional fans is shown in the specifications at the beginning of this manual.
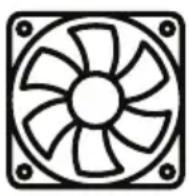
To ensure optimum airflow, the front/front panel fans draw fresh air into the case. The fans at the rear and at the top of the case exhaust the hot air towards the outside. To properly locate the fans, check the marking on them showing the air flow direction.
Water cooling: if the case is compatible with water cooling, then the back panel will come with pipe openings. Installing this kind of cooling system is a complex job. Refer to the manufacturer's instructions!
Dust filters: these limit the build-up of dust inside the case. They optimise the air flow: never obstruct them and service them regularly.
INSTALLING THE POWER SUPPLY UNIT

Place the power supply unit in the location provided. The location varies depending on the case. Screw the power supply unit into place using the screws provided with it or in the nut and bolt kit!
Important: Never place the power supply unit fan against a surface without a ventilation grille! Never power up the power supply unit before component installation is finished and all of the connections have been checked!
CONNECTION INSTRUCTIONS? USB, AUDIO. . .
To make things easier, install the extension cards (graphic card, controllers, etc.) last! This ensures that there is more room left to access the various connectors on the motherboard.
Think about cable management to optimise cable routing and storage. Use the back of the case to run cables. Our cases are often fitted with roomy cable management systems for hiding a large part of the cables; its thickness varies with the model. This system also optimise the airflow and therefore component cooling. It offers easy access to components and peripherals so that you can make changes or add other components.
To make the various connections, start with the connectors used for front panel components.
These comprise small connectors marked: Power LED / Power Button / Reset / Speaker / HDD LED etc.
To find out where to connect these connectors on the motherboard refer to the manufacturer's instructions that came with it.
Then make the following connections:
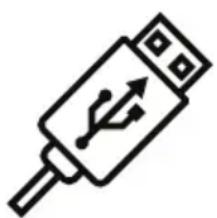
- USB 2.0 and/or USB 3.0 ports
- HD Audio connector
- Fans directly to the motherboard (three pins) or via the power supply unit
- Hard disk and optical drives to the motherboard and to the power supply unit
Once most of the connections have been made, install the extension cards: graphic cards, controllers, etc.
INSTALLING THE GRAPHIC CARD AND THE OTHER CARDS
Start by removing the card from its anti-static packaging taking care to hold it by the edges. Never touch card components - you know why!
Today, graphic cards are almost always installed in a PCIe connector located close to the CPU. If you cannot find the PCIe connectors, refer to the motherboard documentation!
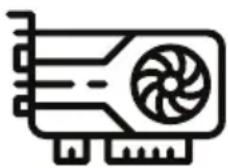
First of all, remove the back cover for the PCIe slot where the graphic card will be located. Slot the new card into the PCIe connector. Press it in firmly but without forcing it. Wait for the "click" that indicates that the locking clip is properly locked in place.
That's it, installation is finished! Check the connections one last time! Refit the side panels! Connect your display, mouse and keyboard to your new case! Now all that's left is to plug in your new computer and press the power button. Thank you for your choosing us and we look forward to seeing you again soon.
WARNING, IMPORTANT NOTES AND SAFETY INSTRUCTIONS:

Do not attempt to make repairs. Do not attempt to disassemble, open, repair or alter the product, its accessories, or the power cable. You could electrocute yourself or expose yourself to other hazards. Any signs of attempts to open and/or alter this device, including removing or tearing a sticker, will void the warranty.
Using it near liquids: To reduce any risks of fire or electric shock, do not use this device near a liquid and do not expose it to rain or moisture. Do not attempt to dry the device with a hair-dryer or microwave oven.
Risk of asphyxiation: this device may contain small parts, plastic bags or packaging that could represent a risk of asphyxiation for children. Keep all small parts, bags and packaging out of the reach of children.
Charging-related risks, leads/cables: Store all cables and leads in such a manner that there is no risk of persons or animals accidentally tripping on them or pulling them when moving around the area where the device is located. Do not allow children to play with the cables and leads.
TO AVOID ANY DAMAGE TO THE POWER CABLES AND THE POWER SUPPLY:
Protect the electrical cables in such a manner that no one can tread on them.
Protect the electrical cables from pinching or excessive bending, in particular when connected to the power plug, power supply unit, or the device.
Do not pull abruptly on the power cables, do not bend them too tightly and do not mistreat them in any other way.
Do not expose the power cables to heat sources.

Keep the power cables out of the reach of children and animals. Do not allow them to bite or chew them.
When disconnecting the power cables, pull on the plug. Do not pull on the cable.
If a power cable or power supply unit is damaged in any way, stop using it immediately. Disconnect your device during storms or if not used for extended periods of time.
For devices provided with a mains power cable that connects to the power supply unit, always follow the instructions hereafter when connecting the power lead: connect the mains power cable to the power supply unit by fully engaging it, then connect the other end of the mains lead to the wall outlet.
WARRANTY

Because your satisfaction is our main concern, each product has a unique serial number!
You will be asked for this number, along with your invoice, when you contact the After-Sales & Warranty service of our authorised reseller.
Our products are guaranteed for one year from date of purchase. Keep your invoice safely, we recommend stapling it to your user guide.
Remember that failure to observe the safety instructions, along with any signs of attempts to open and/or alter this device and its cables/leads, including removing or tearing a sticker, will void the warranty.
CE
CE declaration of compliance: We declare that this product conforms to the main requirements and other provisions of the applicable EC directives.
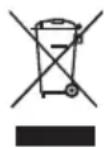
WEEE (Waste Electrical and Electronic Equipment): this symbol indicates that this product may not be treated as household waste. By disposing of this product in accordance with applicable regulations, you help avoid any potentially negative effects on the environment and on human health. For further information on the recycling of this product, please contact your local household waste collection and recycling service.

Moebius strip: you have all seen this logo on our packaging materials. But what does it actually mean? It means that the product and its packaging are recyclable. The easiest way to protect our environment is to recycle! Become an eco-friendly, eco-responsible citizen.

RoHS (Restrictions of Hazardous Substances) standard: this is a European environmental directive restricting the use of environmentally hazardous substance in all electronic products. This directive applies to all electronic and electrical equipment using an electrical or electromagnetic field. In order to reduce the use of hazardous substances in the manufacture of our products, we undertake to offer you the best technology in an environmentally respectful manner.
ATTENTION