WEREVLUMIEREV2 - Alarm clock radio WE - Free user manual and instructions
Find the device manual for free WEREVLUMIEREV2 WE in PDF.

| Product type | Lighted alarm clock with dawn and dusk simulator |
| Brand | WE |
| Model | WEREVLUMIEREV2 |
| Dimensions | 170 x 170 x 93 mm |
| Power supply | 2 AAA batteries (not included) or USB-C cable (included) or 5V power adapter (included) |
| Speaker power | 2 watts |
| Number of LEDs | 9 white LEDs 0.2W and 9 RGB LEDs 0.3W |
| Main functions | Digital FM radio (88-108 MHz), alarm with snooze, 6 natural wake-up sounds, dawn and dusk simulation, bedside lamp with 10 intensities, time display with 3 brightness levels, touch button |
| Time setting | 12/24 h format, manual adjustment with buttons |
| Alarm | Programmable with sound and light, duration 2 minutes, repeat every 5 minutes |
| Radio | Automatic frequency search, memorization of the last station, adjustable volume from 1 to 15 |
| Lighting | 10 intensity levels, color-changing mode, 6 fixed colors (green, red, blue, purple, orange, indigo) |
| Display | Digital clock with alarm, 12/24 mode, brightness indicators |
| Safety | Contains no user-replaceable parts; do not open the case; avoid moisture; unplug during thunderstorms; use a suitable power source |
| Maintenance and cleaning | Wipe with a soft, dry cloth; do not use chemicals; remove batteries if not used for a long time |
| Spare parts and repairability | No spare parts available; repair only by qualified personnel |
| Included accessories | User manual, USB-C cable 120 cm, power adapter |
| Warranty | Limited warranty (excluding natural acts, unauthorized modifications, misuse) |
| Recycling | This product should not be disposed of with household waste; take it to an appropriate collection point |
| General information | Manufactured by WE Connect, 58 Rue de Lamirault, 77090 Collégien; technical support: 01 60 95 05 10; website: www.connect-we.fr |
Frequently Asked Questions - WEREVLUMIEREV2 WE
User questions about WEREVLUMIEREV2 WE
0 question about this device. Answer the ones you know or ask your own.
Ask a new question about this device
Download the instructions for your Alarm clock radio in PDF format for free! Find your manual WEREVLUMIEREV2 - WE and take your electronic device back in hand. On this page are published all the documents necessary for the use of your device. WEREVLUMIEREV2 by WE.
USER MANUAL WEREVLUMIEREV2 WE
Take the time to read the instructions in the entire manual. Its content is designed to help you install and use your device as much as possible to get the most out of its features.
WARNING:
DOES NOT CONTAIN ANY USER-REPLACEABLE PART.
CONTACT THE COMPETENT STAFF IN CASE OF PROBLEMS.
- Keep this manual for future reference.
- Do not use this product near water or moisture.
- Do not use this appliance near a washing machine, kitchen sink, laundry tub, in a wet basement, near a swimming pool, and generally avoid places containing water. water or moisture.
- Unplug equipment during lightning storms or when unused for long periods of time to prevent damage to the product.
- Use qualified personnel for any repair needs.
- Repair is necessary when the unit has been damaged in any way: for example, liquid has been spilled or objects have fallen into the unit, the unit has been exposed to rain or moisture, device does not operate normally or has been dropped.
- Do not attempt to disassemble the device.
- Opening or removing the case may expose you to
dangerous voltages and other hazards.
- To reduce the risk of electric shock, do not overload wall outlets, extension cords, or multiple outlets.
- Make sure that you use the correct power source: Plug the device into an outlet with proper power as described in the instruction manual or on the product.
- The appliance must not come into contact with dripping or splashing, and never place containers of liquids on top of the appliance.
WARNING
- RISK OF ELECTRIC SHOCK!
DO NOT OPEN
Main Features:
- Number of LEDs: 9pcs white of 0.3W and 9pcs RGB of 0.3W
- Speaker output: 2 watts
- Touch keys
- Alarm with SNOOZE function
- 6 natural sounds for alarm
- Sunrise and sunset simulation
- Digital FM Radio 88MHz - 108MHz
- Time display with 3 brightness levels
- Bedside lamp with 10 adjustable light intensities
- Power supply: 2 × AAA batteries (excluded) or USB-C cable (included) or EU adapter 5V (included)
Size: 170x170x93mm - Receiver sensitivity ≤ -10dBm
Package Content:
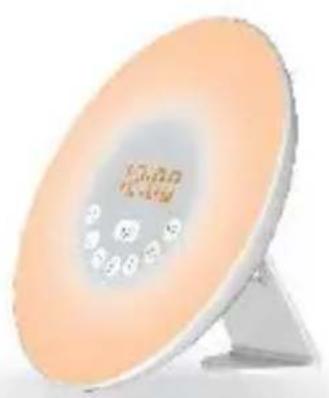
- Wakeup light
- User Manual
- 120cm USB-C cable
- Power supply
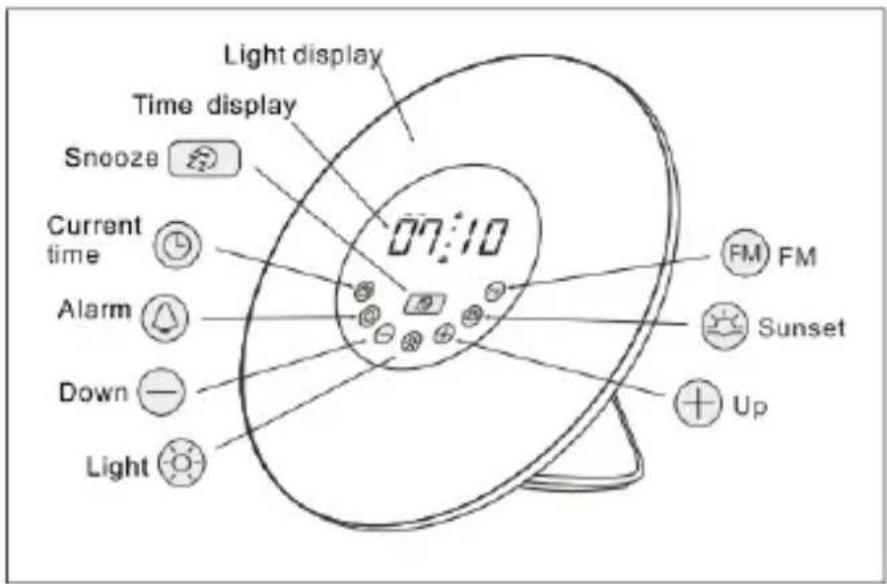
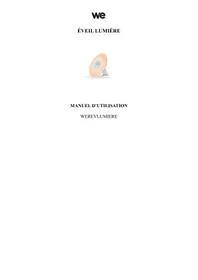
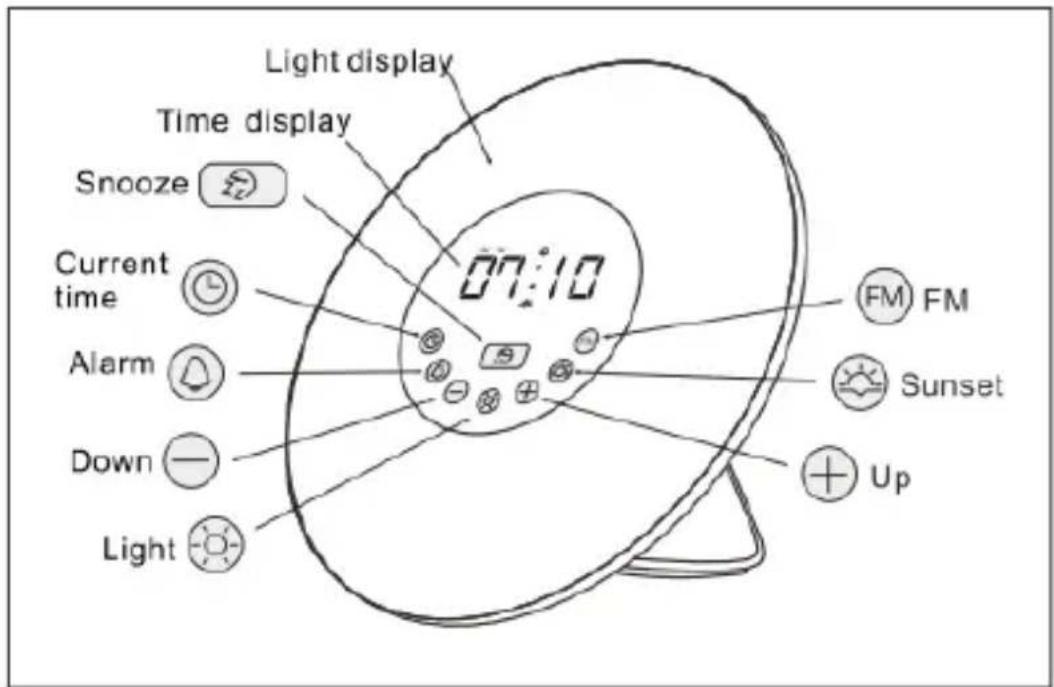
PRODUCT DISCRIPTION
OPERATION OF THE PRODUCT
Before use
- Install the base in the space provided
- Plug the power cord into the power outlet.
- Use the batteries as an emergency power source (if the power is off, and you do not have access to a computer or other source, or want to use the clock radio in another location The batteries keep your settings.)
- To install batteries: Use two AAA batteries (not included).
o Open the battery compartment in the direction indicated by the arrow on the battery cover.
o Insert two AAA batteries, in the direction of polarity, marked on the inside of the compartment.
o Replace the cover.
CAUTION: If you only use the batteries as a power source, then the functions are limited:
- The clock remains displayed for 5 seconds. Press any button located on the back of the device to view it.
- All lighting functions are unavailable.
- The radio is not available.
Time setting
When connected, the time flashes automatically. If the time is not flashing, press the clock button.
Press the button to set the hour and minutes and press the button to confirm.
This is only possible in the time setting mode and the hour indicator flashes, otherwise press the clock button again.
Each time when you unplug the power plug, the clock must be reprogrammed.
Using the device
1- Setting the mode 12-24 hours
Tap on the back of the device.
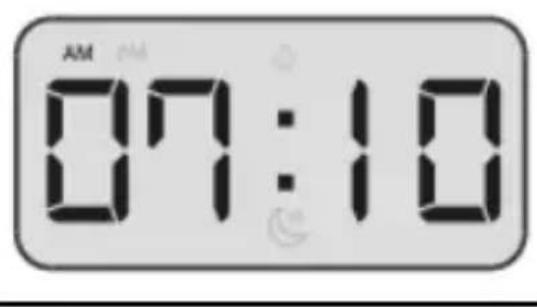
When 12H mode is active, PM or AM appears on the display.
2- Intensity of the brightness of the screen
Press the brightness button on the display to adjust the brightness level.
The brightness switches successively low, then high and off.
3- FM RADIO / Volume
We recommend that you fully deploy the antenna to use the radio function.
For the first use of this fonction, press and hold the
button for 3 seconds to perform an automatic radio frequency search.
Press the button to enable / disable the radio.
To select the desired radio frequency, press the buttons

CAUTION: The time display is not available when the radio is on. The display shows the radio frequency. You
can touch the button to view the time, then touch again to continue listening to the radio.
Press the volume button on the back of the product to adjust the volume level from 1-15.
ATTENTION: The sound level you have chosen also applies to the alarm.
4- Setting the alarm
Press the alarm button to activate / deactivate the alarm.

Appears or disappears on the clock screen.
Press and hold for 3 seconds, the alarm time indication flashes. Press the button to set the
hour and minutes and press to confirm.
The icon appears on the screen to indicate that the alarm is activated. When the alarm goes off, you can
turn off the alarm by pressing the button . It willstart again tomorrow. To deactivate the alarm
permanently, press the button again. The icon disappears from the screen.
The alarm (sound and / or light) automatically turns off after 2 minutes.
5- Setting the alarm buzzer
You can switch between the 7 natural sounds or the radio as your alarm clock.
Press the button on the back of the device to select, and use the button to select from 1-7 available
sounds. Press to confirm the selection. When you choose a new ringtone or radio, you will hear a preview of the alarm for 5 seconds.
When you select 7, the last station listened to will be
selected as the wake-up sound. Press the button to select the volume level between 00-15.

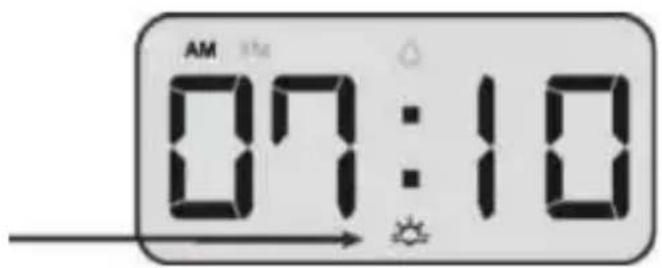
6-Dawn simulation
The light intensity gradually increases to the level selected during the 15 minutes preceding the time of the programmed alarm.
At the alarm time, the selected ringer will be on for 2 minutes. However, if you have selected the radio as the alarm clock, the radio will not be stopped automatically after 2 minutes.
Touch to repeat after 5 minutes. It will then be triggered again for 2 minutes. The lamp stays on at the selected intensity, but the sound of the alarm stops.
Press or touch any button except to stop the alarm.
Press and hold to turn off the wake up light.
7- Set the sunset time of the sun
Touch to turn on / off the sunset mode.
Appears or disappears on the clock screen.
Press and hold for 3 seconds, the time indication starts flashing. Press the buttons to set the
desired hour and minute and press to confirm. 30 minutes before the programmed time, the lighting is activated at 100% brightness in any mode, then the brightness is reduced gradually before going off at the set time.
8- Lighting
Touch to activate the lighting.
Press to adjust the brightness level (1-10).
Touch again to automatically activate the changing color mode.
Press to select color: Green, Red, Blue, Purple,
Orange, Indigo
Press a third time to turn off the lights.
IMPORTANT INFORMATION
- Don't press two or more keys at the same time
- To avoid failure interval of every touch must be more than 1 second
- If there is any malfunction, please unplug the unit for 3 second
- If the batteries are not used for a long time, please remove
- When the batteries voltage is low, the product will get restarted and all settings are lost, pls replace new batteries
- The adapter is designed to use with this product only, please do not use the adapter to charge other devices like mobile phone
GUARANTEE
What your warranty does not cover:
- Natural acts, such as fire or static discharge.
- Damage resulting from unauthorized repair or modification or accident.
- Damage resulting from misuse or neglect.
- A unit has been modified or integrated with other products or is used for institutional or commercial purposes.
- Improper handling or installation.

RECYCLING
This symbol indicates that this product must not be disposed of with other conventional household waste in the European Union. To protect the environment and human health from uncontrolled waste disposal, please dispose of this device separately from household waste and it is your responsibility to dispose of it in such a way as to allow recycling to allow proper reuse of its resources. To do this, take this device to an appropriate collection point or contact the dealer if in doubt. The dealer of the product has a duty to help you dispose of the product correctly for recycling.
EU simplified declaration of conformity
Hereby, WE Connect, 58 Rue de Lamirault, 77090 Collégien, declares under its sole responsibility that the product WE WEREVLUMIEREV2 when installed, maintained and used in the applications for which it was designed, and according to the appropriate installation standards, complies with the essential requirements of EC directives:
2014/53 / EU.
The full text of the EU declaration of conformity is available on our site: www.connect-we.fr
Do not hesitate to call our technical service 0033 1 60 95 05 10 for any technical problems or explanations.
We.
www.connect-we.fr
MGF / WE Connect
58 rue de Lamirault
ZAC de Lamirault
77090 Collégien

lichtwekker
HANDLEIDING
WEREVLUMIEREV2
BESCHRIJVING VAN HET PRODUCT