AD31 - Aroma diffuser Duronic - Free user manual and instructions
Find the device manual for free AD31 Duronic in PDF.



| Product Type | Ultrasonic Aroma Diffuser |
| Brand | Duronic |
| Model | AD31 |
| Water Tank Capacity | 100 ml |
| Supply Voltage | DC 24V 0.5A |
| Cable Length | 1.2 m |
| Weight | 630 g |
| Material | Glass and Plastic Housing |
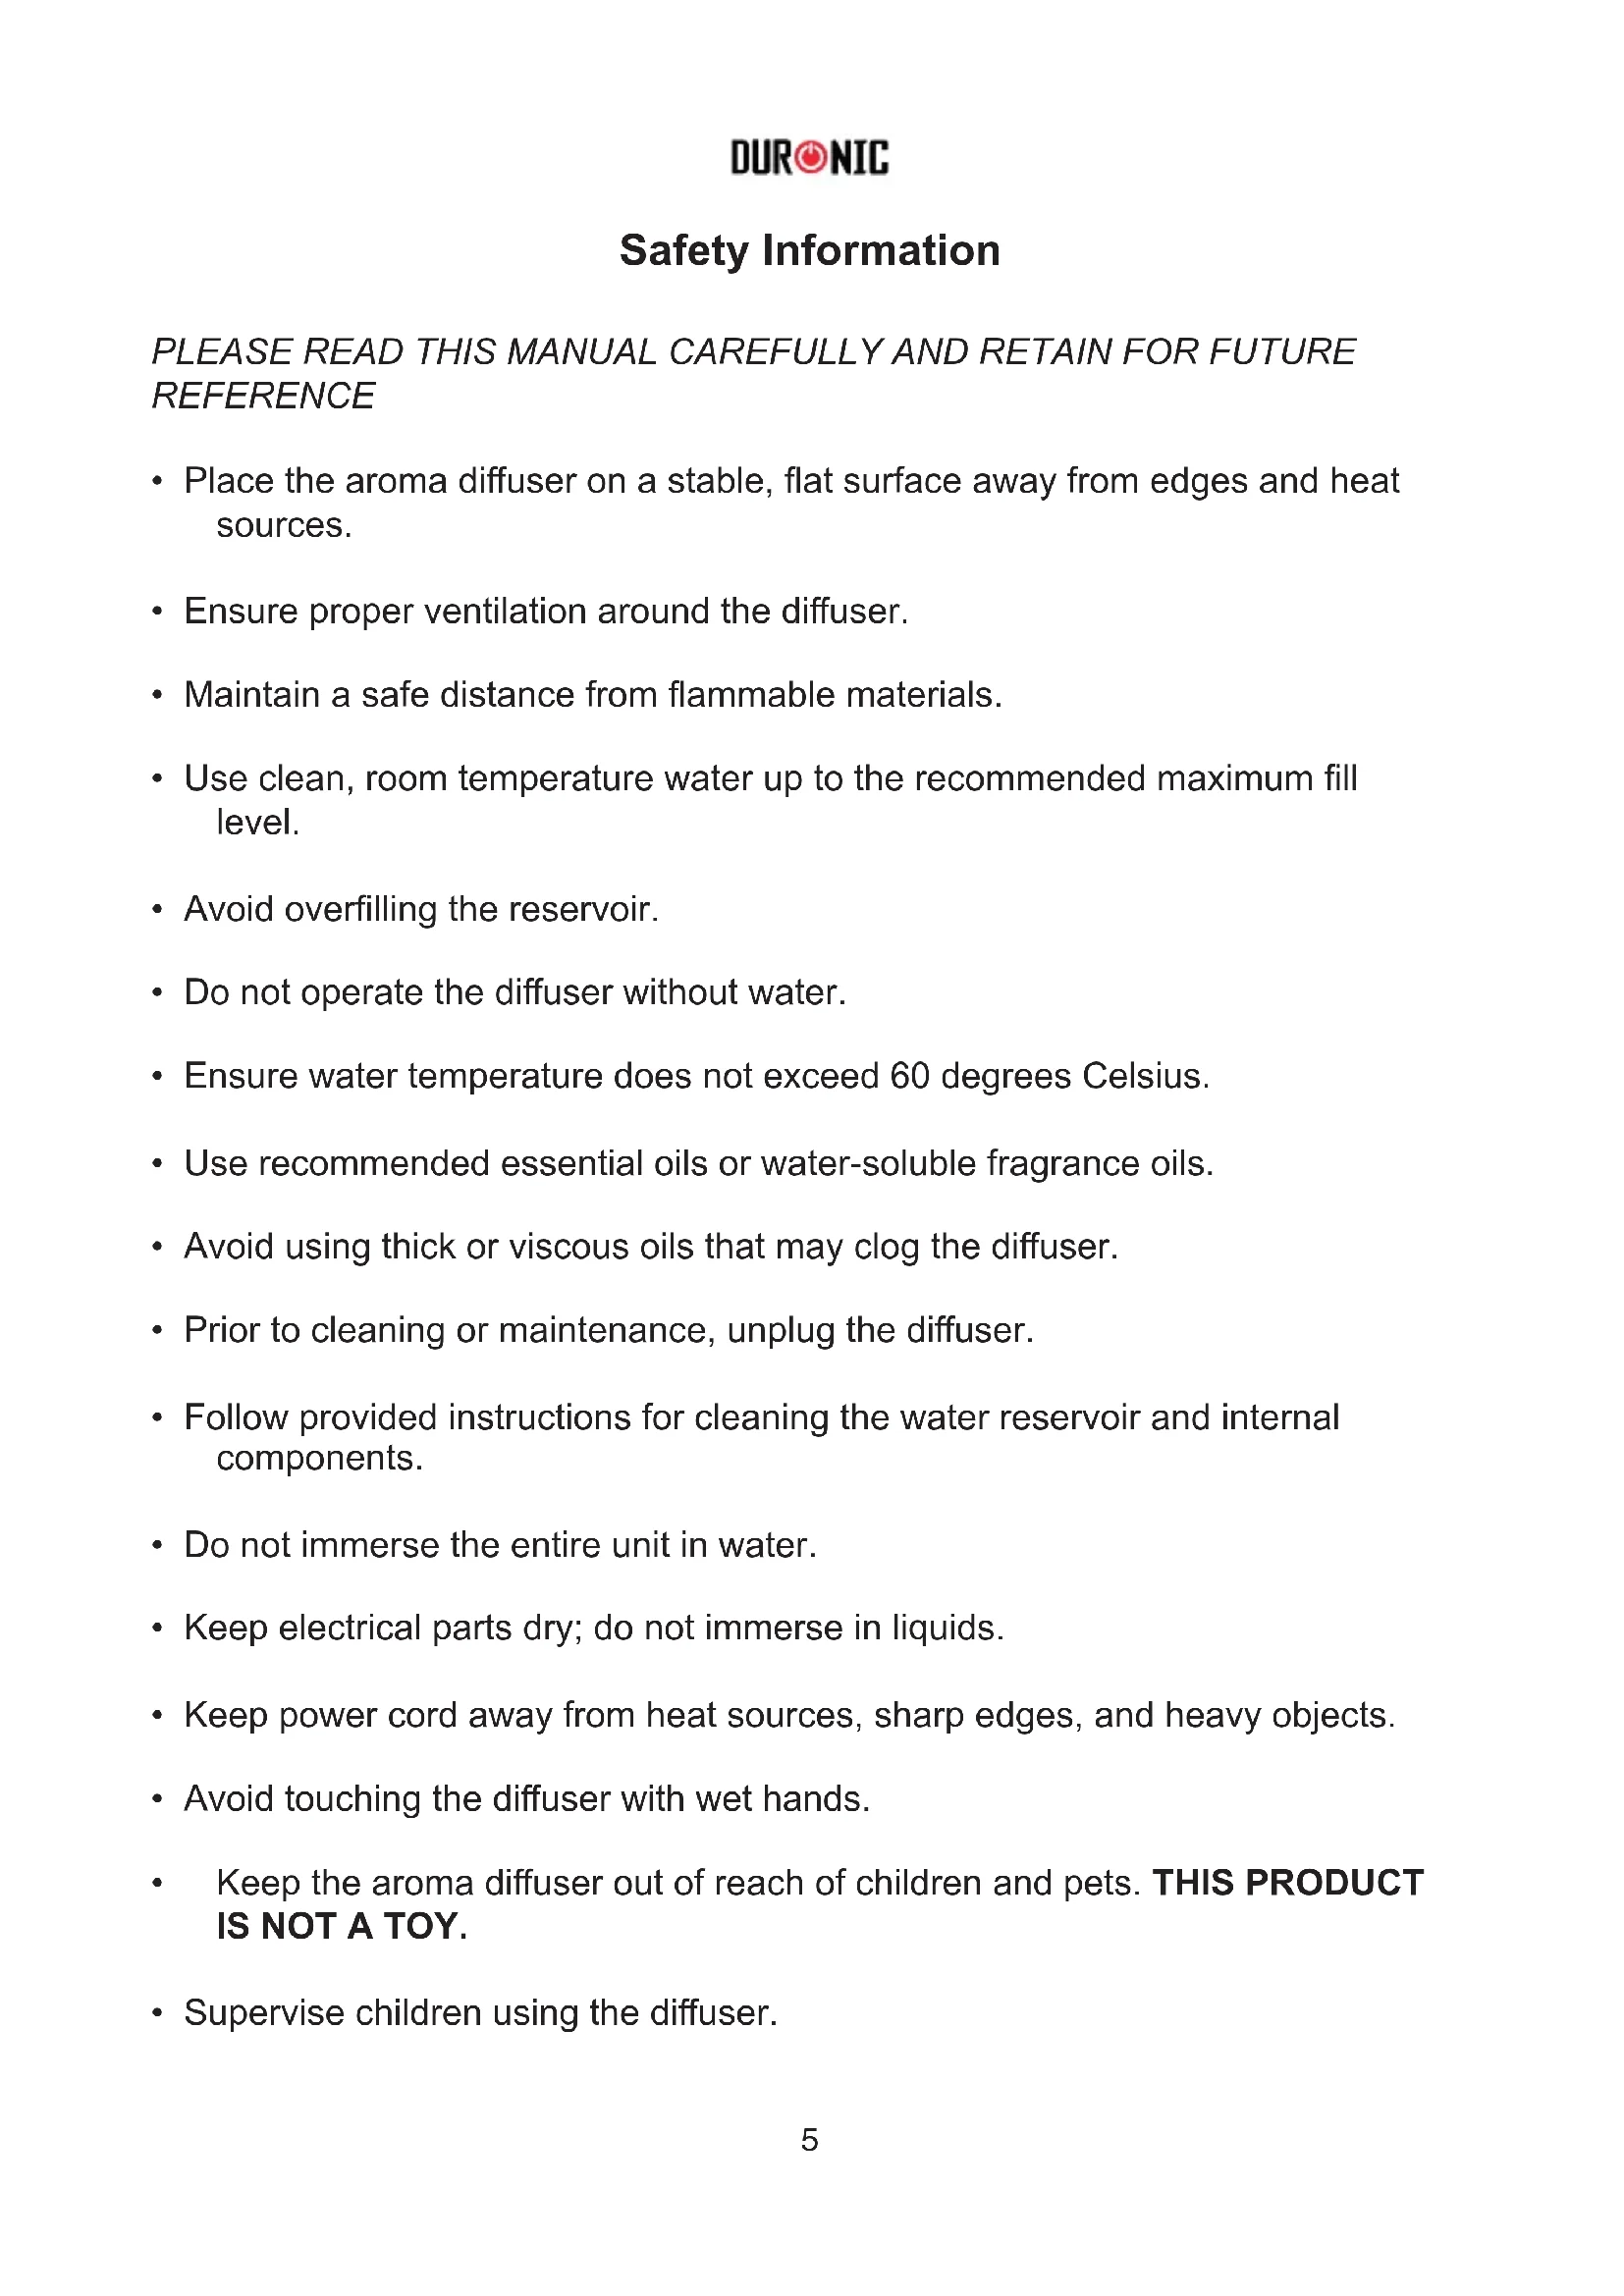
| Main Functions | Ultrasonic mist, LED night light, automatic shut-off when water runs out, timer (1h, 2h, 3h) |
| Buttons | Power button (on/off and timer), light button |
| Recommended Oil Types | Water-soluble essential oils, avoid thick oils |
| Cleaning | Damp cloth, use distilled water to prevent limescale |
| Safety | Do not immerse, do not use without water, keep out of reach of children |
| Automatic Shut-off | Yes, when water runs out |
| Built-in Timer | 1h, 2h, 3h |
| Night Light | Yes, can operate without mist |
Frequently Asked Questions - AD31 Duronic
User questions about AD31 Duronic
0 question about this device. Answer the ones you know or ask your own.
Ask a new question about this device
Download the instructions for your Aroma diffuser in PDF format for free! Find your manual AD31 - Duronic and take your electronic device back in hand. On this page are published all the documents necessary for the use of your device. AD31 by Duronic.
USER MANUAL AD31 Duronic
Creative Consumer Products
natural_image
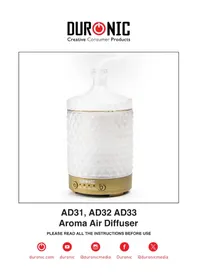
Clear glass water purifier with textured lid and gold base, no visible text or symbols on bodyAD31, AD32 AD33 Aroma Air Diffuser
PLEASE READ ALL THE INSTRUCTIONS BEFORE USE

duronic.com

duronic

@duronicmedia

Duronic

@duronicmedia
Contents
English Manual 3
Features and Specifications
| Cable Length Water Capacity Weight Voltage | |||
| 1.2m 100 ml | 630g DC 24V 0.5A | ||
Components
natural_image
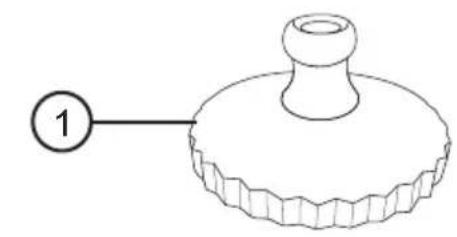
Simple line drawing of a mechanical part with a flanged base and a circular label marked '1' (no text or symbols on the object itself)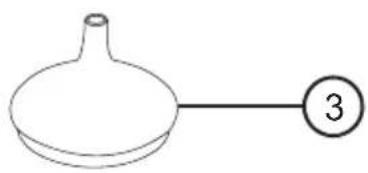
natural_image
Simple line drawing of a round-bottom flask with a pointed tip and a numbered label (3) on the right side (no text or symbols on the object itself)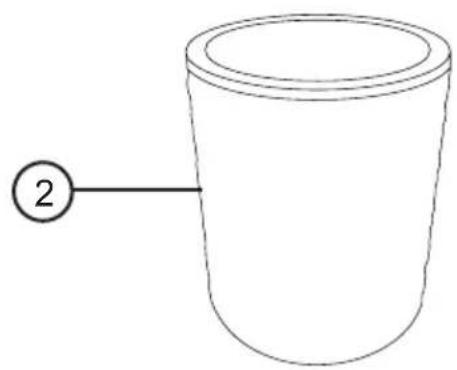
natural_image
Simple line drawing of a cup with a numbered label pointing to its side (no text or symbols on the cup itself)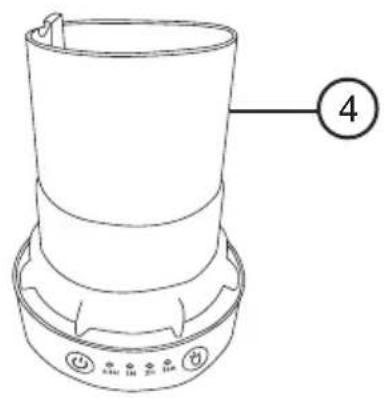

flowchart
graph LR
    A["5"] --> B["Power"]
flowchart
graph LR
    A["Lightbulb Icon"] --> B["6"]
- Lid
- Glass Casing
- Reservoir Lid
- Water Reservoir
- Power Button
- Light Button
DURONIC
Safety Information
PLEASE READ THIS MANUAL CAREFULLY AND RETAIN FOR FUTURE REFERENCE
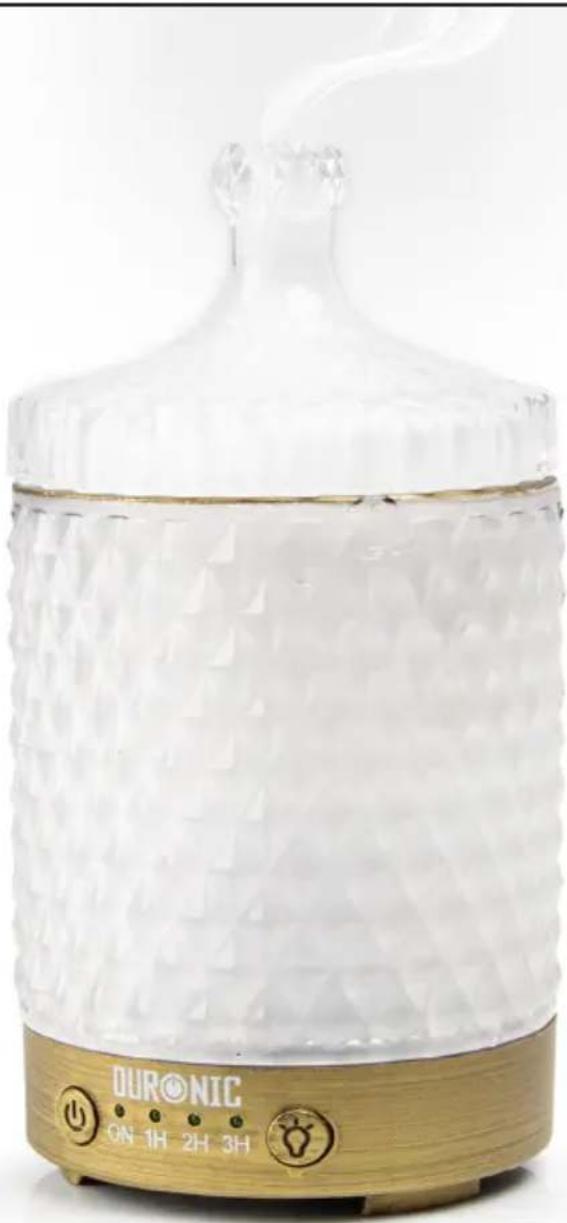
- Place the aroma diffuser on a stable, flat surface away from edges and heat sources.
- Ensure proper ventilation around the diffuser.
- Maintain a safe distance from flammable materials.
- Use clean, room temperature water up to the recommended maximum fill level.
- Avoid overfilling the reservoir.
- Do not operate the diffuser without water.
- Ensure water temperature does not exceed 60 degrees Celsius.
- Use recommended essential oils or water-soluble fragrance oils.
- Avoid using thick or viscous oils that may clog the diffuser.
- Prior to cleaning or maintenance, unplug the diffuser.
- Follow provided instructions for cleaning the water reservoir and internal components.
- Do not immerse the entire unit in water.
- Keep electrical parts dry; do not immerse in liquids.
- Keep power cord away from heat sources, sharp edges, and heavy objects.
- Avoid touching the diffuser with wet hands.
- Keep the aroma diffuser out of reach of children and pets. THIS PRODUCT IS NOT A TOY.
- Supervise children using the diffuser.
DURONIC
Safety Information (Continued)
- Do not leave the aroma diffuser unattended while in operation.
• Always turn off and unplug the device when not in use. - Prevent overheating by avoiding prolonged usage.
- If the device becomes hot, allow it to cool before further use.
- Contact authorised service for repairs; avoid self-repair.
• Using unauthorised parts or modifying the device can lead to hazards.

WARNING
- Consult a doctor or medical professional for allergies to essential oils.
- Read essential oil warning labels for skin contact.
• DO NOT cover or obstruct the product and opening.
How to Use
• Prepare the Aroma Diffuser.
- Plug aroma diffuser into power outlet using provided supply.
- Make sure the diffuser is on a flat, heat proof stable surface away from electrical equipment.
- Remove the cover and reservoir lid.
- Fill the water reservoir up to indicated maximum level.
- Add 5-10 drops of essential oil for desired fragrance strength.
- Reattach the cover and reservoir lid securely.
- Place cover and reservoir lid back on.
- Press the power button to turn the product on.
Automatic Shut-off:
- Mist and light functions turn off when the diffuser runs out of water.
DURONIC
Night Light Function:
• Light can be turned on even without water, serving as a night light.
Power & Light Button Function
Power Button:
- Press once to turn on diffuser.
- Press twice for 1-hour timer.
- Press three times for 2-hour timer.
- Press four times for 3-hour timer.
Light Button:
- Press once to turn on the light.
- Press twice to turn off the light.
Troubleshooting
There is no mist:
- Check if the product is plugged in and turned on.
- Check outlet for blockage; clean with cotton swab.
- Make sure the reservoir lid is correctly placed.
- Ensure water level is within limits.
There is less mist:
- Clean mist outlet with cotton swab if blocked.
- Ensure the cap is fully secured on the water tank.
Cleaning and Maintenance
- Unplug the device and leave to cool before cleaning.
- Carefully empty the water reservoir.
- Use a damp, well-wrung cloth to wipe the outside and inside of the device. Clean the cover and the lid separately.
DURONIC
- Use a dry cloth to dry any dampness that is left.
- To avoid limescale build-up, please use distilled water.
Storage
- Unplug the device and leave to cool.
- Carefully empty the water reservoir and dry.
- Wrap the power cable around the device.
- Store in a dry place.
flowchart
graph LR
    A["Lightbulb"] --> B["6"]
flowchart
graph LR
    A["Lightbulb Icon"] --> B["6"]
flowchart
graph LR
    A["Lightbulb"] --> B["6"]
natural_image
Simple line drawing of a mechanical part with a flanged base and a circular label marked '1' (no text or symbols on the object itself)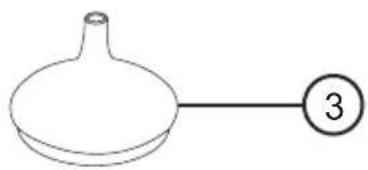
natural_image
Simple line drawing of a funnel-shaped object with a numbered circle pointing to the end (no text or symbols)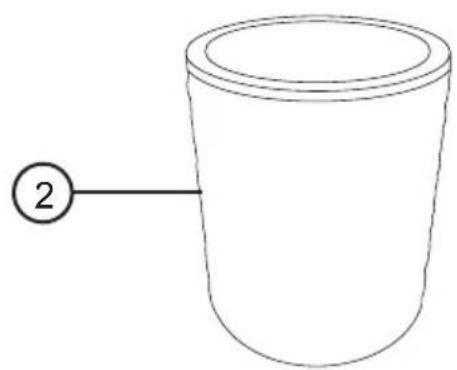
natural_image
Simple line drawing of a cup with a numbered label pointing to its side (no text or symbols on the cup itself)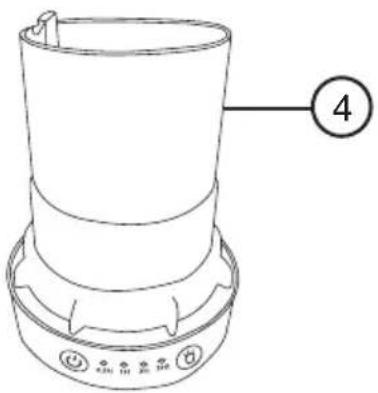

flowchart
graph LR
    A["5"] --> B["Power"]
flowchart
graph LR
    A["Lightbulb Icon"] --> B["6"]
flowchart
graph LR
    A["Lightbulb Icon"] --> B["6"]
flowchart
graph LR
    A["Lightbulb Icon"] --> B["6"]
flowchart
graph LR
    A["Lightbulb Icon"] --> B["6"]
- Deksel
- Glazen hoesje
- Reservoirdeksel
- Water reservoir
- Aanknop
- Lichte knop
DURONIC
flowchart
graph LR
    A["Lightbulb Icon"] --> B["6"]
Information for consumers on the disposal of Waste Electrical & Electronic Equipment (WEEE).
This mark on a product and/or accompanying documents indicates that when it is to be disposed of, it must be treated as Waste Electrical & Electronic Equipment, (WEEE).
Any WEEE marked products must not be mixed with general household waste, but kept separate for the treatment, recovery and recycling of the materials used. For proper treatment, recovery and recycling; please take all WEEE marked waste to your Local Authority Civic waste site, where it will be accepted free of charge.
If customers dispose of Waste Electrical & Electronic Equipment correctly, they will be helping to save valuable resources and preventing any potential negative effects upon human health and the environment, of any hazardous materials that the waste may contain.

Information for consumers on the disposal of Waste Electrical & Electronic Equipment (WEEE).
- Creative Consumer Products
- AD31, AD32 AD33 Aroma Air Diffuser
- Contents
- Features and Specifications
- Components
- DURONIC
- Safety Information
- PLEASE READ THIS MANUAL CAREFULLY AND RETAIN FOR FUTURE REFERENCE
- Safety Information (Continued)
- WARNING
- How to Use
- Automatic Shut-off:
- Night Light Function:
- Power & Light Button Function
- Power Button:
- Light Button:
- Troubleshooting
- There is no mist:
- There is less mist:
- Cleaning and Maintenance
- Storage
Brand : Duronic
Model : AD31
Category : Aroma diffuser