
Cereal & Co RK202 - Rice cooker TEFAL - Free user manual and instructions
Find the device manual for free Cereal & Co RK202 TEFAL in PDF.
| Brand | Tefal |
| Model | Cereal & Co RK202 |
| Product type | Rice cooker |
| Maximum capacity | 10 cups of white rice (approximately 1.8 L) |
| Functions | Rice cooking, steaming, slow cooking, automatic keep warm |
| Power | 500 W (estimated) |
| Dimensions (approx.) | 30 x 25 x 25 cm |
| Weight (approx.) | 2 kg |
| Inner pot material | Non-stick, removable |
| Inner lid | Removable for cleaning |
| Pressure valve | Removable |
| Condensate collector | Removable, empty after each use |
| Included accessories | Non-stick inner pot, rice spatula, measuring cup, steam basket, spatula rest |
| Cleaning and maintenance | Inner pot, steam basket, condensate collector, spatula and measuring cup are dishwasher safe. Wipe the outer body with a damp cloth. |
| Safety | Automatic shut-off at the end of cooking, overheating protection, do not use without inner pot |
| Spare parts and repairability | Have any repairs carried out by an approved service center. Use original spare parts. |
| Warranty | Manufacturer's warranty: refer to the terms provided |
Frequently Asked Questions - Cereal & Co RK202 TEFAL
User questions about Cereal & Co RK202 TEFAL
0 question about this device. Answer the ones you know or ask your own.
Ask a new question about this device
Download the instructions for your Rice cooker in PDF format for free! Find your manual Cereal & Co RK202 - TEFAL and take your electronic device back in hand. On this page are published all the documents necessary for the use of your device. Cereal & Co RK202 by TEFAL.
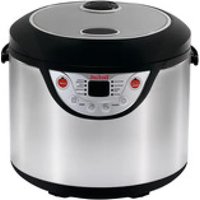
USER MANUAL Cereal & Co RK202 TEFAL
3 in 1 Rice & Multi Cooker

7


IMPORTANT SAFEGUARDS
When using electrical appliances, basic safety precautions should always be followed including the following:
- Read all instructions.
- Do not touch hot surfaces. Use handles or knobs.
- To protect against electrical shock do not immerse cord, plugs, or any other parts in water or other liquid.
- Close supervision is necessary when any appliance is used by or near children.
- Unplug from outlet when not in use and before cleaning. Allow to cool before putting on or taking off parts.
- Do not operate any appliance with a damaged cord or plug or after the appliance malfunctions or has been damaged in any manner. Return appliance to the nearest authorized service facility for examination, repair, or adjustment.
- The use of accessory attachments not recommended by the appliance manufacturer may cause injuries.
- Do not use outdoors.
- Do not let cord hang over edge of table or counter, or touch hot surfaces.
- Do not place on or near a hot gas or electric burner, or in a heated oven.
- Extreme caution must be used when moving an appliance containing hot oil or other hot liquids.
- Always attach plug to appliance first (depending on model), then plug cord into the wall outlet. To disconnect, turn any control to "off", then remove plug from wall outlet.
- Do not use appliance for other than intended use.
14. SAVE THESE INSTRUCTIONS FOR HOUSEHOLD USE ONLY
- This appliance is not intended to be operated using an external timer or separate remote control system.
- Check that the power supply voltage corresponds to that shown on the appliance (alternating current).
-
Given the diverse standards in effect, if the appliance is used in a country other than that in which it is purchased, have it checked by an approved service center.
-
Do not place the appliance near a heat source or in a hot oven, as serious damage could result. This appliance is designed for domestic use only. In case of professional use, inappropriate use or failure to comply with the instructions, the manufacturer accepts no responsibility and the guarantee does not apply.
-
It is not intended to be used in the following applications, and the guarantee will not apply for:
-
staff kitchen areas in shops, offices and other working environments;
-farm houses; - by clients in hotels, motels and other residential type environments;
-
bed and breakfast type environments.
-
Never leave the appliance in operation unattended. Keep away from children.
This appliance is not intended for use by persons (including children) with reduced physical, sensory or mental capabilities, or lack of experience and knowledge, unless they have been given supervision or instruction concerning use of the appliance by a person responsible for their safety.
- Do not use the appliance if:
- the appliance or the cord is damaged.
- the appliance has fallen or shows visible damage or does not work properly.
In these cases, the appliance must be sent to your nearest approved service center to avoid any possible danger. Do not take the appliance apart yourself.
- Do not leave the cord hanging.
- Do not unplug the appliance by pulling on the cord.
-
Always unplug the appliance:
-
immediately after use,
- when moving it,
- prior to any cleaning or maintenance,
-
if it fails to function correctly.
-
Use a flat, stable, heat-resistant work surface away from any water splashes.
- Children should be supervised to ensure that they do not play with the appliance.
- Burns can occur by touching the hot surface of the appliance, the hot water, the steam or the food.
-
Never try to operate the appliance when the bowl is empty or without the bowl.
-
The cooking function/knob must be allowed to operate freely. Do not prevent or obstruct the function from automatically changing to the keep warm function.
- Do not remove the bowl while the appliance is working.
- Do not put the appliance directly onto a hot surface, or any other source of heat or flame, as it will cause a failure or danger.
- The bowl and the heating plate should be in direct contact. Any object or food inserted between these two parts would with the correct operation.
- Do not put any food or water into the appliance until the bowl is in place.
- Respect the levels indicated in the recipes.
- During cooking, the appliance gives out heat and steam. Keep face and hands away. Do not get face and hands close to the steam outlet. Do not obstruct the steam outlet.
- Do not immerse the body in water nor pour water into it, only into the bowl.
- Should any part of your appliance catch fire, do not attempt to put it out with water. To smother the flames use a damp dish towel.
- Any intervention should only be made by a service center with original spare parts.
- CAUTION - To ensure continued protection against risk of electric shock, connect to properly grounded outlets only.
- CAUTION : to reduce the risk of electric shock, cook only in removable container.
SHORT CORD INSTRUCTIONS
a) A short power-supply cord (or detachable power-supply cord) should be used to reduce the risk resulting from becoming entangled in or tripping over a longer cord.
b) Longer detachable power-supply cords or extension cords are available and may be used if care is exercised in their use.
c) If a longer detachable power-supply cord or extension cord is used:
1) The marked electrical rating of the cord set or extension cord should be at least as great as the electrical rating of the appliance; and
2) The cord should be arranged so that it will not drape over the countertop or tabletop where it can be pulled on by children or tripped over unintentionally.
EN
If the appliance is of the grounded type, the extension cord should be a grounding-type 3-wire cord.
For any problems or queries please contact our Customer Relations Team or consult our web site: www.t-falusa.com
Protect the environment
- Your appliance has been designed to run for many years. However, when you decide to replace it, remember to think about how you can contribute to protecting the environment.

Environment protection first!
① Your appliance contains valuable materials which can be recovered or recycled.
Leave it at a local civic waste collection point.
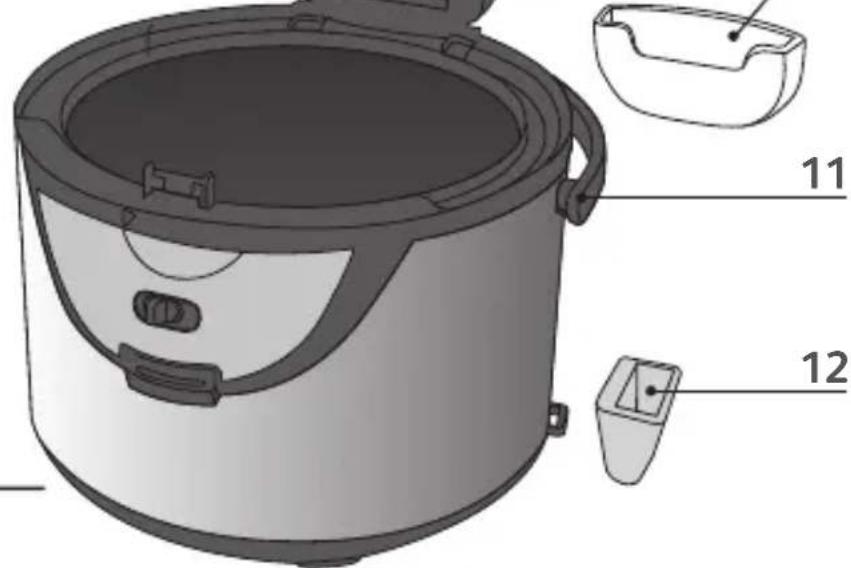
MISES EN GARDE IMPORTANTES
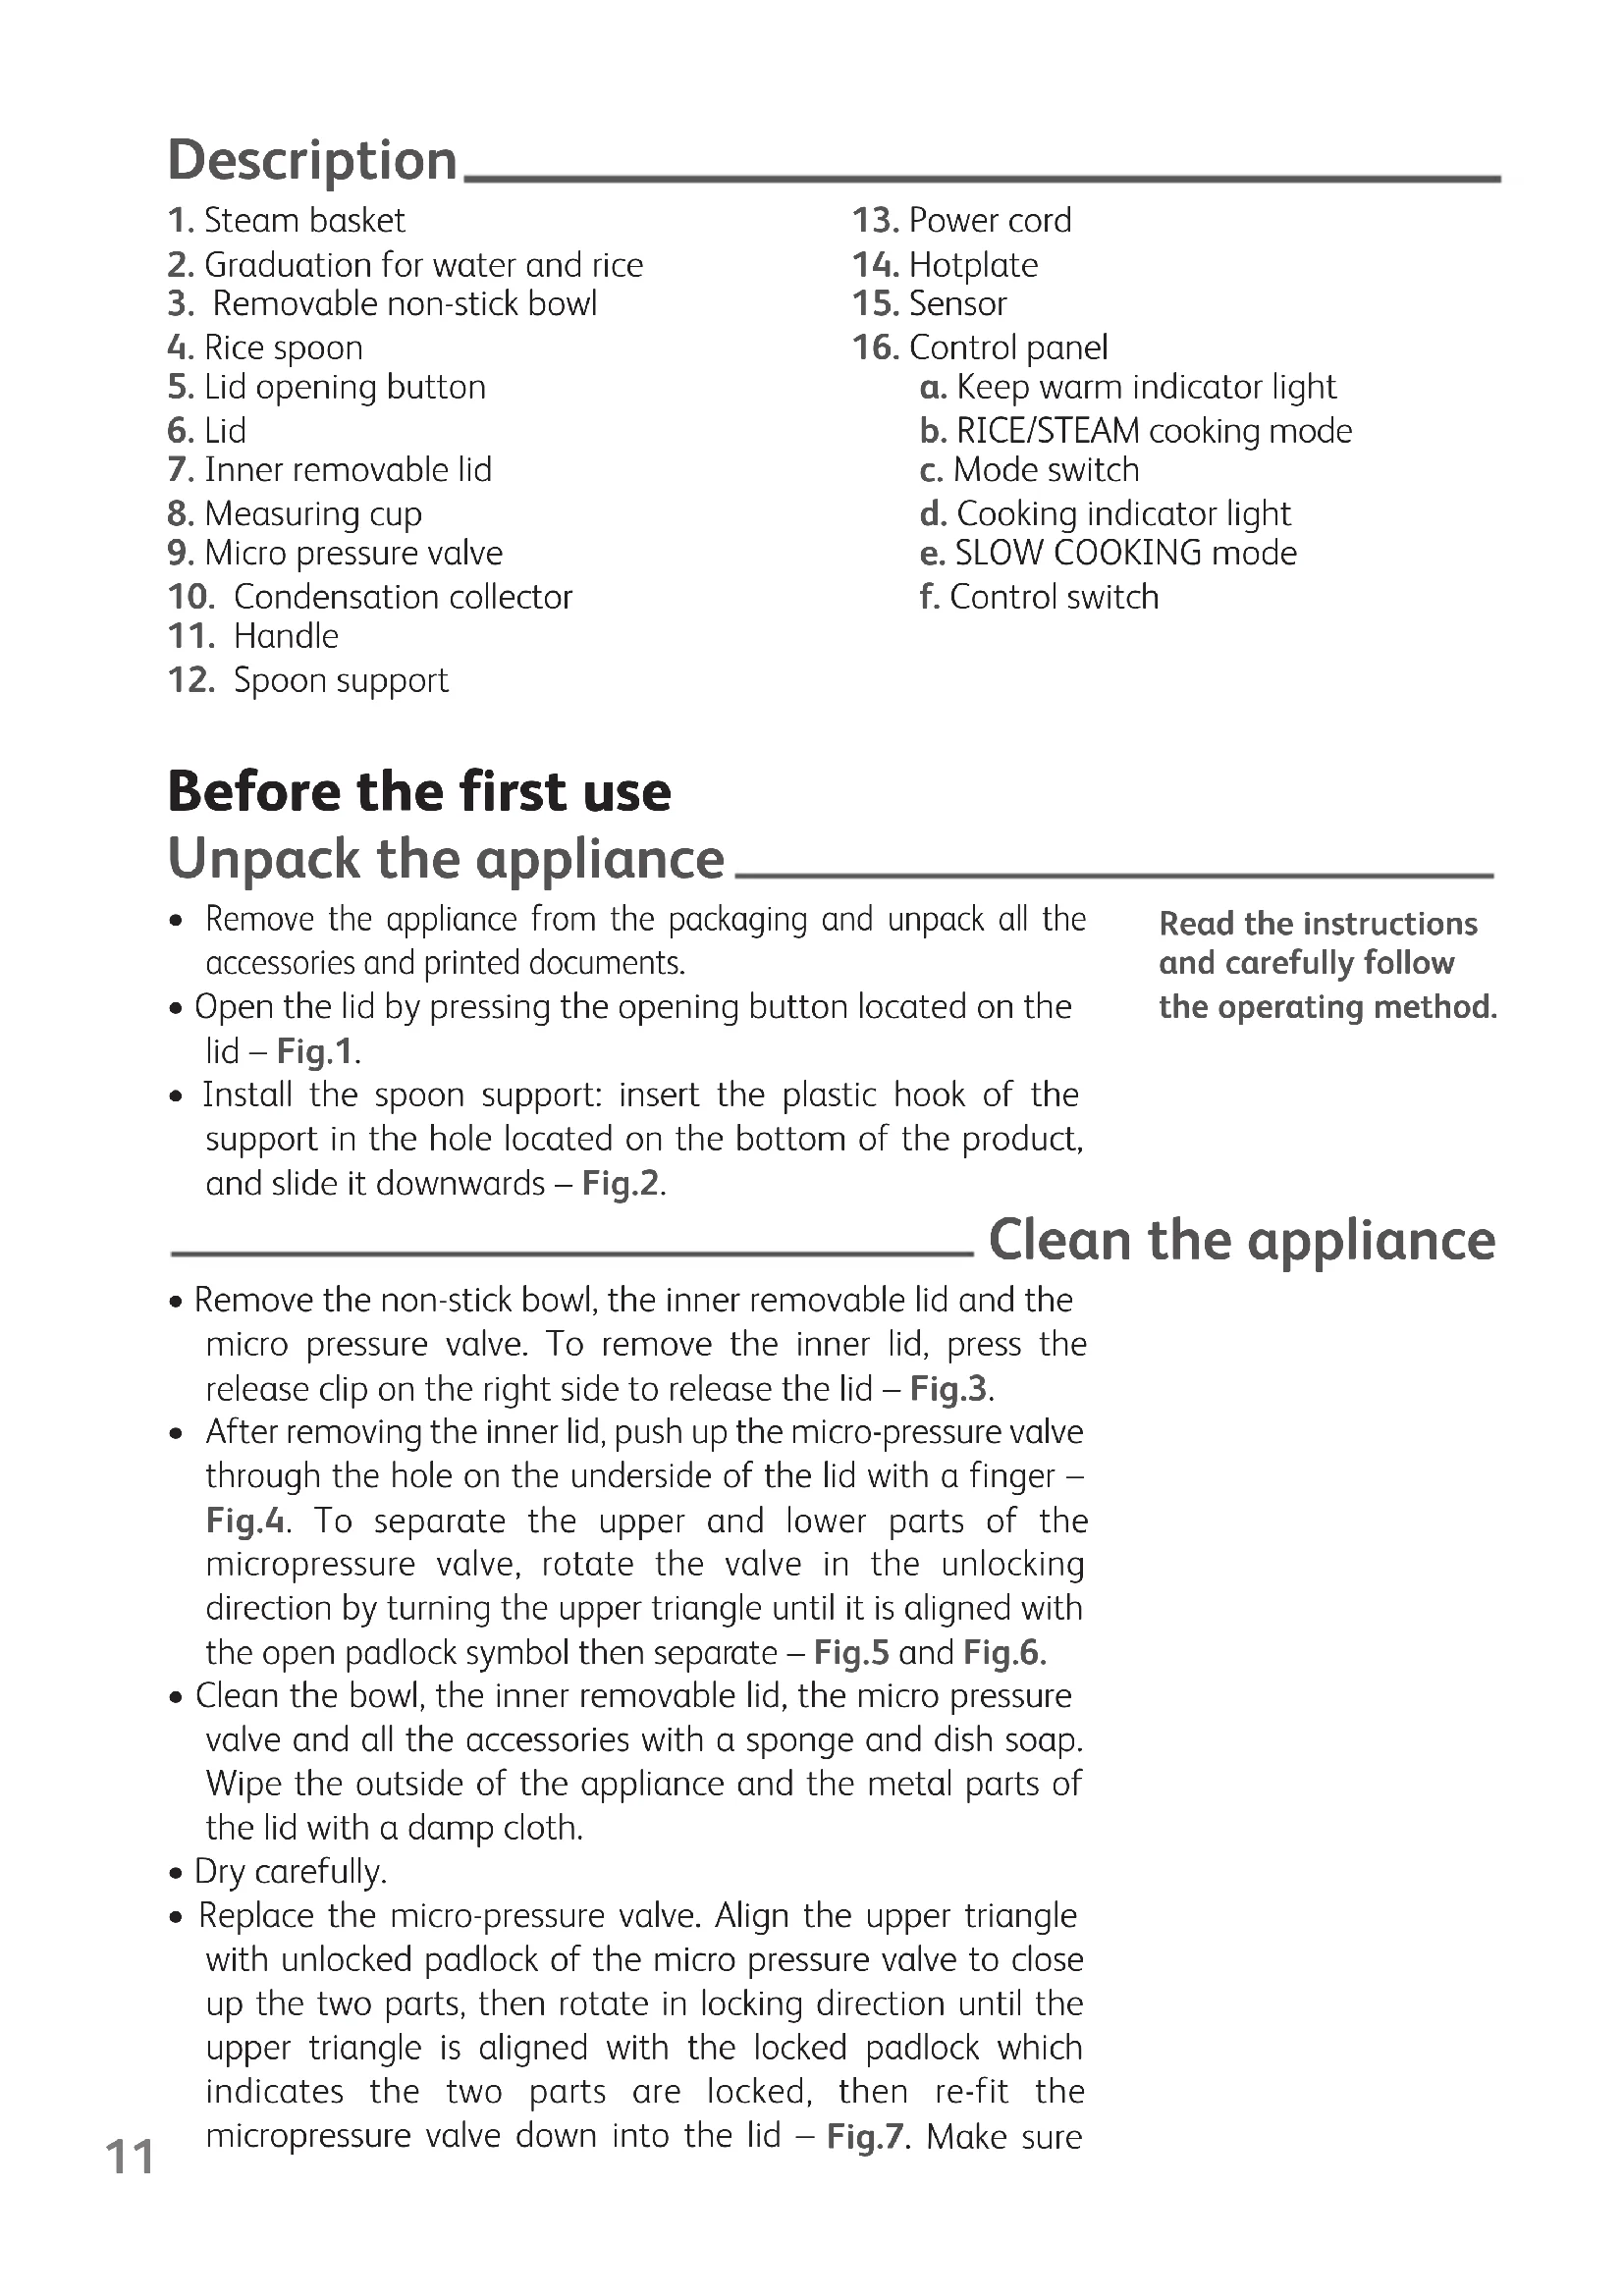
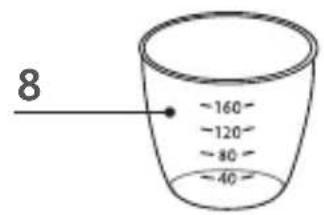
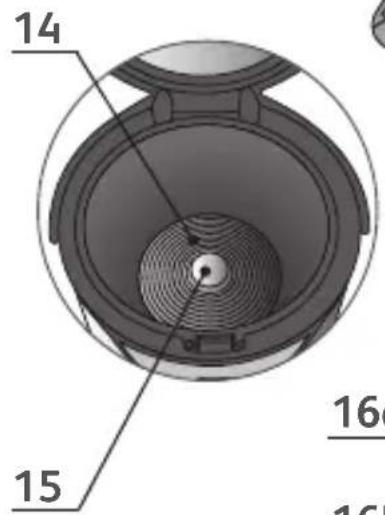
- Steam basket
- Graduation for water and rice
- Removable non-stick bowl
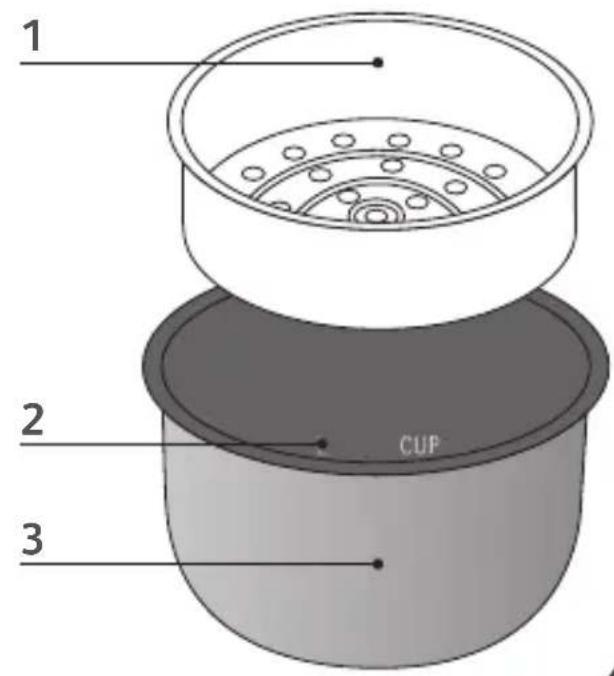
- Rice spoon
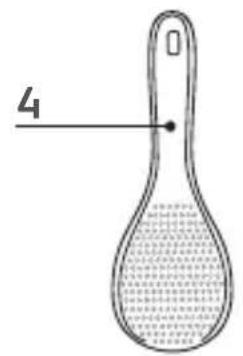
- Lid opening button
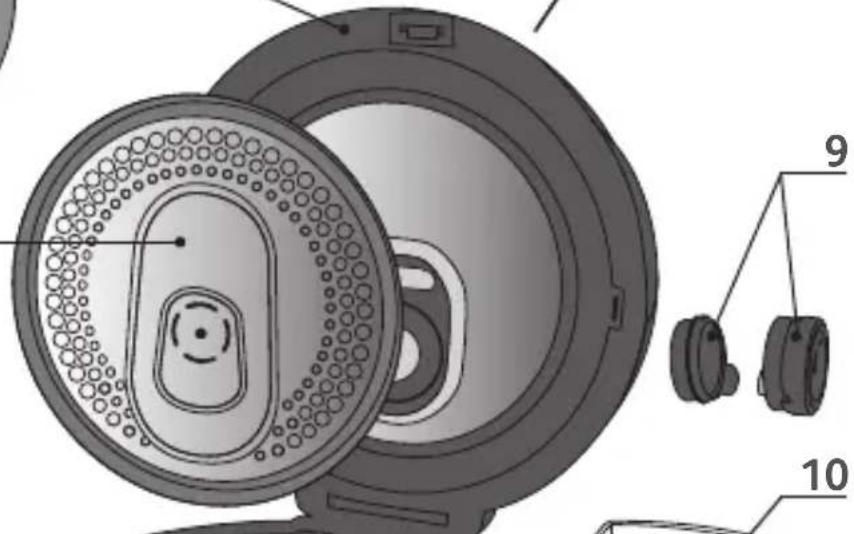
- Lid
- Inner removable lid
- Measuring cup
- Micro pressure valve
- Condensation collector
- Handle
-
Spoon support
-
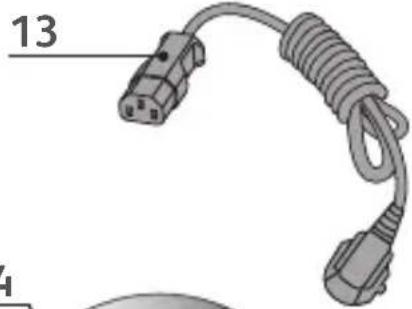
Power cord
- Hotplate
- Sensor
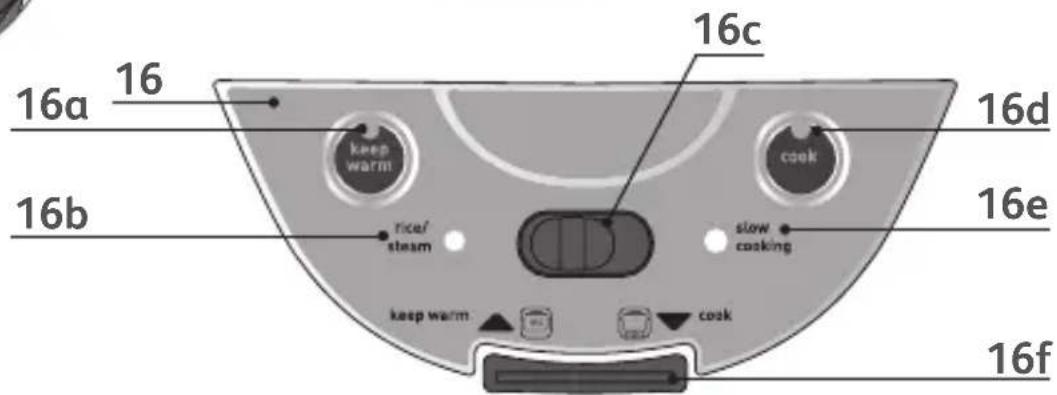
- Control panel
a. Keep warm indicator light
b. RICE/STEAM cooking mode
c. Mode switch
d. Cooking indicator light
e. SLOW COOKING mode
f. Control switch
Before the first use Unpack the appliance
- Remove the appliance from the packaging and unpack all the accessories and printed documents.
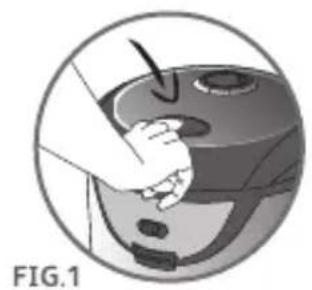
- Open the lid by pressing the opening button located on the lid - Fig.1.
- Install the spoon support: insert the plastic hook of the support in the hole located on the bottom of the product, and slide it downwards - Fig.2.
Read the instructions and carefully follow the operating method.
Clean the appliance
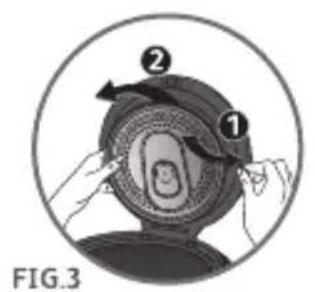
- Remove the non-stick bowl, the inner removable lid and the micro pressure valve. To remove the inner lid, press the release clip on the right side to release the lid - Fig.3.
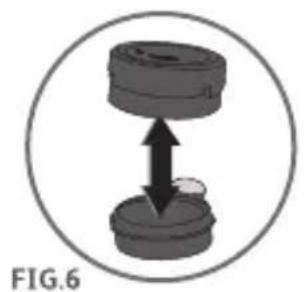
- After removing the inner lid, push up the micro-pressure valve through the hole on the underside of the lid with a finger - Fig.4. To separate the upper and lower parts of the micropressure valve, rotate the valve in the unlocking direction by turning the upper triangle until it is aligned with the open padlock symbol then separate - Fig.5 and Fig.6.
- Clean the bowl, the inner removable lid, the micro pressure valve and all the accessories with a sponge and dish soap. Wipe the outside of the appliance and the metal parts of the lid with a damp cloth.
- Dry carefully.
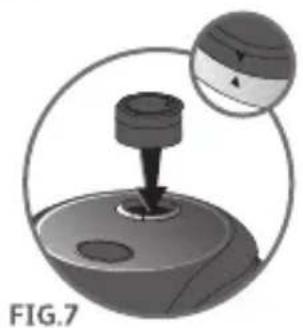
- Replace the micro-pressure valve. Align the upper triangle with unlocked padlock of the micro pressure valve to close up the two parts, then rotate in locking direction until the upper triangle is aligned with the locked padlock which indicates the two parts are locked, then re-fit the micropressure valve down into the lid - Fig.7. Make sure
that the triangle in the micropressure valve is aligned with the triangle on the lid and firmly push down until fits in place.
- Replace the inner removable lid by fitting the tab on the left side into the slot on the lid, then push in the lid until the tab on the right clicks into place. The gasket side must be facing you when fitting the lid in place.
Using your rice cooker
For all 3 functions
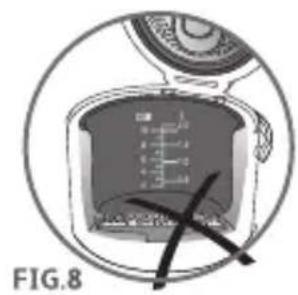
- Carefully wipe the outside of the bowl (especially the bottom). Make sure that there are no foreign residues or liquid underneath the bowl and on the hotplate - Fig.8.
- Place the bowl into the appliance - Fig.9, making sure that it is correctly positioned.
- Slightly rotate the bowl in both directions, so as to ensure good contact between the bottom of the bowl and the hotplate.
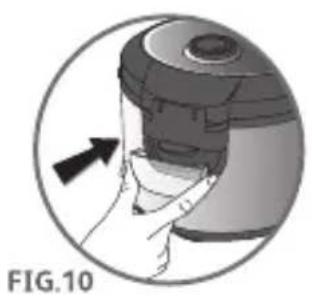
- Check that the condensation collector is correctly placed in position, if not, please install it by pushing firmly into the groove - Fig.10.
- Close and lock the lid.
- Plug in the appliance.
- Do not switch on the appliance until all of the above stages have been completed.
- Avoid to switch on the appliance with an empty cooking bowl.
- Do not touch the heating plate when the product is plugged.
Rice Cooking
Never place your hand on the steam vent during cooking, as there is a danger of burns. Only use the inner pot provided with the appliance. Do not pour water or put ingredients in the appliance without the bowl inside.
Measuring the ingredients - Max capacity of the bowl
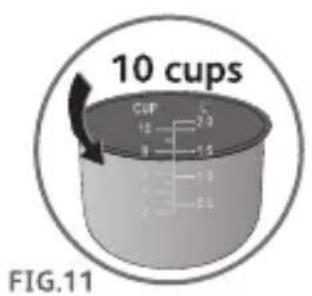
- The graduated markings on the inside of the bowl are given in liters and cups, these are used for measuring the amount of water when cooking rice - Fig.11.
- The plastic cup provided with your appliance is for measuring rice and the table states the quantity of rice required for the number of servings.
- For best results, we recommend using ordinary rice rather than "easy cook" type of rice which tends to give a stickier rice and may adhere to the base.
- To cook only 1 cup of white rice (serves 2 small or 1 large portion) because there isn't the mark of 1 cup in the cooking
pot, you should use 1 measuring cup of white rice and then add 1 1/2 measuring cups of water. With some types of rice it is normal for a little rice to stick on the base when cooking 1 cup of rice. To cook other quantity of white rice, refer to cooking guide below.
- The maximum quantity of water and rice should not exceed the 10 cup mark inside the bowl - Fig.11. Depending on the type of rice, quantities of water may need adjustment. See the table below.
- Rinse the rice thoroughly before cooking.
| COOKING GUIDE FOR WHITE RICE - 10 CUPS | |||
| Measuring cups of white rice | Water level in the bowl (+ the rice) | Serves | Approximative cooking time* |
| 2 2 cup mark | 3per.-4per. | 25 min | |
| 4 | 4 cup mark 5per.-6per. 35 min | ||
| 6 | 6 cup mark 8per.-10per. 36 min | ||
| 8 | 8 cup mark 13per.-14per. 37 min | ||
| 10 10 cup mark 16per.-18per. 40 min | |||
- The rice cooker will automatically determine the exact cooking time depending on the quantity of water and rice placed in the bowl.
To cook rice
The cooking time given in the table above is a rice cooking time guide.
- Place the appliance on a flat, stable, heat-resistant work surface away from water splashes and any other sources of heat.
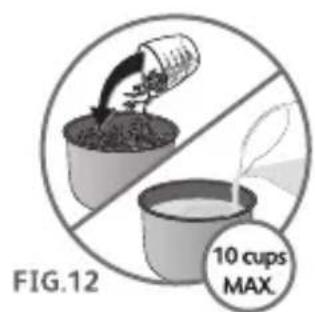
- Pour the required quantity of rice into the bowl using the measuring cup provided. Then fill with cold water up to the corresponding "CUP" mark printed in the bowl (See cooking guide above) - Fig.12.
- Close the lid.
Note: Always put the rice first otherwise you will have too much water.
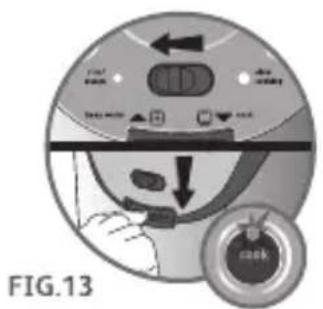
- Check that the appliance is plugged in. Side the mode switch to the left to choose "RICE/STEAM" mode - Fig.13 and then press downwards on the control switch, the cooking indicator illuminates showing that cooking has begun - Fig.13.
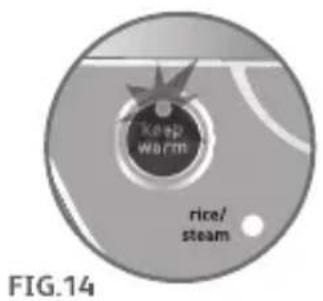
- When cooking is finished, it will automatically turn into the keep warm mode and the "Keep Warm" indicator light will turn on - Fig.14.
- After each use empty and clean the condensation collector.
The rice cooker itself determines the exact cooking time depending on the quantity of water and ingredients placed in the bowl (see cooking table above for a guide to timing). When all of the water has been absorbed by the rice, the appliance stops the cooking process automatically and enters into the "KEEP WARM" mode (the "KEEP WARM" indicator light comes on).
for best results when cooking rice
- Measure the rice and rinse it thoroughly under running water in a sieve (except for risotto rice which should not be rinsed). Then place the rice in the bowl together with the corresponding quantity of water.
- Make sure that the rice is well distributed in the bowl to allow even cooking.
- Add salt to water: depending on personal taste.
Water may be substituted with stock. If using stock, there is risk of rice browning in the bowl. - Do not open the lid during cooking as steam will escape and this will affect the cooking time and the taste.
- On completion of cooking, the "KEEP WARM" indicator light will turn on. Stir the rice and then leave it in the rice cooker for a few minutes longer in order to get perfect rice with separate grains
Steam cooking (for vegetables, fish, etc.)
Measuring the ingredients
- The maximum quantity of water in the bowl should not exceed the maximum CUP mark shown in "CUP" on the bowl - Fig.11. Exceeding this level may cause overflow during use.
- The water level should be lower than the steam basket.
Preparation
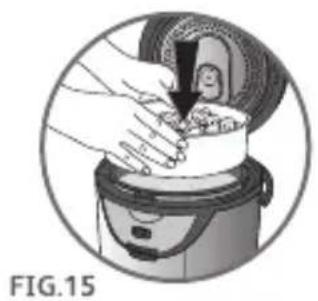
- Pour water into the bowl, never exceed the maximum CUP mark.
- Place the steam basket in the bowl - Fig.15.
- Add the ingredients in the steam basket.
To steam cook
- Close the lid.
- Slide the mode switch to the left to choose "RICE/STEAM" mode - Fig.13 and then press downwards on the control switch, the cooking indicator illuminates showing that cooking has begun - Fig.13.
- After the time you estimate ok for steam cooking, you can end the steam cooking mode by lifting the control switch to its upper position. The "KEEP WARM" indicator light will come on and the appliance turns to keep warm function.
- When there is no more water in the cooking pot, it will turn to keep warm automatically, the "KEEP WARM" indicator light will turn on - Fig.14.
Slow Cooking
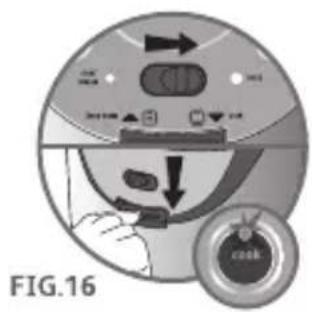
To slow cook
- Slide the switch to the right to choose "SLOW COOKING" mode - Fig.16 and then press downwards on the control switch, the cooking indicator illuminates showing that cooking has begun - Fig.16.
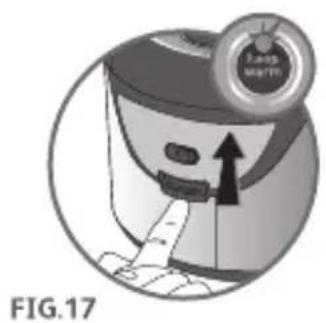
- To finish cooking procedure, lift the control switch to its upper position. The "KEEP WARM" indicator light will come on and the appliance turns to keep warm function - Fig.17.
- Note: The slow cooking mode is a low temperature cooking mode.
Keep warm function
It is recommended to use the keep warm function for 1 hour maximum.
On completion of cooking, for rice or steam cooking, the appliance automatically enters into the "KEEP WARM" function. The control switch comes up to its upper position and the "KEEP WARM" indicator light will come on. For slow cooking, the "KEEP WARM" indicator light will come on when you lift the control switch to its upper position. The food is thus kept warm until ready to serve. Be careful: using the "KEEP WARM" function for a long time can affect the quality of the rice. To switch off this function, unplug the appliance - Fig.18
On completion of cooking
- Open the lid.
- Serve the food using the plastic spoon supplied with the appliance and close the lid.
- The food remaining in the bowl will keep warm for the remaining servings until you unplug the appliance or a maximum of 1 hour.
- Unplug the appliance after cooking and/or the keep warm mode is no longer needed.
Never remove the bowl after cooking without protective oven gloves.
Cleaning and Maintenance
Condensation collector
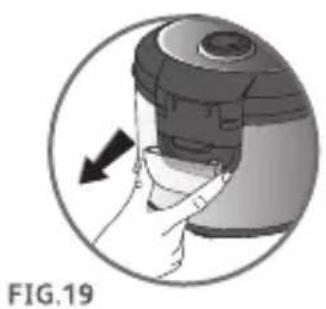
- The condensation collector should be emptied and cleaned after each use.
- To remove the collector, press on each side of the plastic cover and remove - Fig.19.
- To put the condensation collector back, firmly push it into place.
Bowl, condensation collector, inner removable lid, micro pressure valve and the steam basket
EN
- After removing the inner lid, push up the micro-pressure valve through the lid hole with finger from underside of the lid - Fig.4. Rotate the valve in the unlocking direction by turning the lower part in an unlocking direction until it is aligned with the lower triangle then separate - Fig.5.
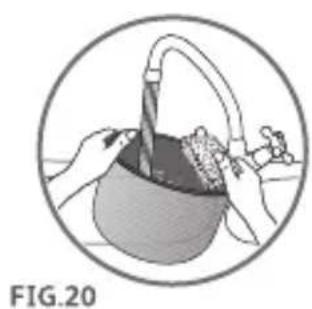
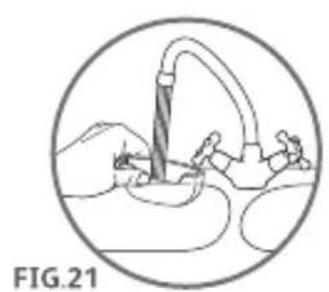
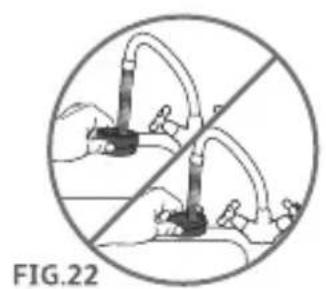
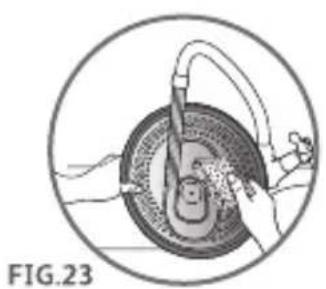
- Unplug the appliance before removing the bowl. Use hot water, dish soap and a sponge to clean the bowl - Fig.20, the condensation collector - Fig.21, the micro pressure valve - Fig.22, the inner removable lid - Fig.23, the spoon and the cup. Scouring powders and metal sponges are not recommended.
- If food has stuck to the bottom, allow the bowl to soak for a while before washing it.
- The non-stick bowl, the steam basket, the condensation collector, the spoon and the cup are dishwasher safe.
- Dry the bowl carefully.
- Do not immerse the appliance in water, or pour water into the interior of the appliance body.
Taking care of the non-stick bowl
- To keep the non-stick coating quality of the bowl for as long as possible, it is recommended not to cut food in it.
- Use plastic or wooden utensils and not metal ones when stirring or serving food to avoid damaging the bowl surface.
- To avoid any risk of corrosion, do not pour vinegar into the bowl.
- The color of the bowl surface may change after using for the first time or after long period of use. This change in color is due to the action of steam and water and does not have any effect on the use of the rice cooker, nor is it dangerous for your health. It is perfectly safe to continue using it.
- Do not use a handblender to mix ingredient in the non-stick bowl.
Cleaning and care of the other parts of the appliance
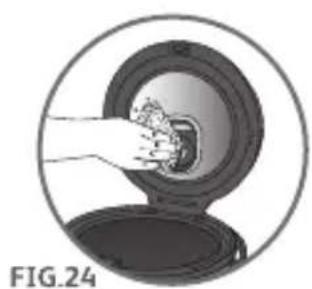
- Unplug the appliance before cleaning.
- Clean the outside of the Rice Cooker, the inside of the lid - Fig.24 and the cord with a damp cloth and wipe dry. Do not use abrasive products.
- Do not use water to clean the interior of the appliance body as it could damage the heat sensor.
Technical troubleshooting guide
| Malfunction description Causes Solution | ||
| The indicator lights are not illuminated and appliance is not heating. | Rice cooker not plugged in. | Check the power cord is firmly engaged in the rice cooker and the appliance is plugged into the outlet. |
| The indicator lights are not illuminated and appliance is heating. | A problem with the internal connection of the indicator light or the indicator light is damaged. | Send to Authorized Service Center for repair. |
| Cooking indicator light is not illuminated, keep warm indicator light is illuminated. | Control switch not in the cooking position. | Push the control switch into the lower position. |
| Steam leakage during using. | Lid is badly closed. | Open and close the lid again. |
| Micropressure valve not well positioned or assembled incorrectly. | Stop the cooking (unplug the product) and check the valve is assembled correctly (2 parts locked together) and well positioned. | |
| Lid or micropressure valve gasket is damaged. | Send to Authorized Service Center for repair. | |
| Rice not fully cooked or over cooker. | Not enough or too much water compared to rice quantity. | Refer to cooking chart for water quantity. |
| Rice not fully cooked. | Mode is in the slow cooking setting. | Slide the switch to the "rice/steam" mode. |
| Automatic Keep Warm function fails(appliance stays on cooking program or does not heat on Keep Warm) | Send to Authorized Service Center for repair. | |
| Water leakage on the work surface. | Condensation collector missing or condensation collector overflow. | Empty the condensation collector after each use and check it is correctly positioned. |
Remark: if inner bowl is damaged, do not use it anymore. Obtain a replacement from the Authorized Service Center for repair.
Description


- IMPORTANT SAFEGUARDS
- SAVE THESE INSTRUCTIONS FOR HOUSEHOLD USE ONLY
- SHORT CORD INSTRUCTIONS
- Protect the environment
- Environment protection first!
- MISES EN GARDE IMPORTANTES
- Before the first use Unpack the appliance
- Clean the appliance
- Using your rice cooker
- For all 3 functions
- Rice Cooking
- Measuring the ingredients - Max capacity of the bowl
- To cook rice
- Note: Always put the rice first otherwise you will have too much water.
- for best results when cooking rice
- Steam cooking (for vegetables, fish, etc.)
- Measuring the ingredients
- Preparation
- To steam cook
- Slow Cooking
- To slow cook
- Keep warm function
- On completion of cooking
- Cleaning and Maintenance
- Condensation collector
- Bowl, condensation collector, inner removable lid, micro pressure valve and the steam basket
- Taking care of the non-stick bowl
- Cleaning and care of the other parts of the appliance
- Technical troubleshooting guide
- Description
Brand : TEFAL
Model : Cereal & Co RK202
Category : Rice cooker