AQU1625BEW - Freezer AMANA - Free user manual and instructions
Find the device manual for free AQU1625BEW AMANA in PDF.

| Product Type | Upright Freezer |
| Brand | Amana |
| Model | AQU1625BEW |
| Power Supply | 115 V, 15 A, 60 Hz, grounded |
| Temperature Setting | Rotary thermostat, positions 1 to 7, recommended setting: 4 |
| Defrost System | Manual (with drain hose on some models); Free-O-Frost™ option on some models |
| Door Lock | Present on some models, ejectable key |
| Interior Light | Interior lamp (some models) |
| Power Indicator | Power-On indicator (some models) |
| Temperature Alarm | Audible, triggers if temperature rises by 12°C, with 3-position switch (some models) |
| Quick Freeze | Function available on some models (igloo symbol) |
| Cleaning | Warm soapy water, baking soda; do not use abrasive cleaners |
| Maintenance | Defrost if frost > 6 mm; clean at least once a year |
| Safety | Door lock with ejectable key to prevent child entrapment; unplug before cleaning |
| Warranty | Limited one-year parts and labor (United States and Canada) |
| Customer Service | Phone USA: 1-800-688-9900, Canada: 1-800-688-2002 |
Frequently Asked Questions - AQU1625BEW AMANA
User questions about AQU1625BEW AMANA
0 question about this device. Answer the ones you know or ask your own.
Ask a new question about this device
Download the instructions for your Freezer in PDF format for free! Find your manual AQU1625BEW - AMANA and take your electronic device back in hand. On this page are published all the documents necessary for the use of your device. AQU1625BEW by AMANA.
USER MANUAL AQU1625BEW AMANA
natural_image
Simple line drawing of a cabinet or enclosure with a handle and lid (no text or symbols)Deepfreeze® Upright Freezers
Questions about your features?
Please contact us with your model and serial number:
Maytag Services LLC
Attn: CAIR ^® Center
P.O. Box 370
Cleveland, TN
37320-2370
Ph# 1-800-688-9900 in U.S.A.
1-800-688-2002 in Canada
Internet: http://www.amana.com
Keep instructions for future reference.
Keep this manual and your sales receipt together in a safe place in case warranty service is required.
Contents
Introduction 2
Important Safety Information ....3-4
Installation Instructions ....4
Temperature Control 5
Custom Features 6
Hints and Care 7-9
Freezing Guidelines....10-12
Troubleshooting 13-14
Warranty 16
natural_image
Row of identical gray diamond shapes with black lines, no text or symbols presentTHANK YOU FOR BUYING AN AMANA FREEZER!
Please read this Owner's Manual thoroughly. This manual provides proper maintenance information.
Complete registration card and promptly return. If registration card is missing, see contact information on the front cover of your manual.
When contacting Amana, please provide the following information. Product information is on the serial plate, located on the inside wall of the freezer.
Model Number ____
Serial Number ____
Purchase Date ____
Dealer Name ____
Dealer Address ____
Dealer Phone
BEFORE CALLING SERVICE...
If something seems unusual, please check Troubleshooting section, which is designed to help you solve problems before calling service.
WHAT IF THESE FEATURES ARE DIFFERENT FROM MINE?
This book is intended to show the variety of features that are available in the product line. If your freezer does not have all the options that are shown, it is not a mistake. The information provided applies to all of the models in the product line.
IMPORTANT SAFETY INFORMATION
WHAT YOU NEED TO KNOW ABOUT SAFETY INSTRUCTIONS
Warning and Important Safety Instructions appearing in this manual are not meant to cover all possible conditions and situations that may occur. Common sense, caution, and care must be exercised when installing, maintaining, or operating this freezer.
Always contact your dealer, distributor, service agent, or manufacturer about problems or conditions you do not understand.
RECOGNIZE SAFETY SYMBOLS, WORDS, LABELS
DANGER
DANGER – Immediate hazards which WILL result in severe personal injury or death.
WARNING
WARNING – Hazards or unsafe practices which COULD result in severe personal injury or death.
CAUTION
CAUTION – Hazards or unsafe practices which COULD result in minor personal injury.
DANGER
To reduce risk of injury or death, follow basic precautions, including the following:
IMPORTANT: Child entrapment and suffocation are not problems of the past. Junked or abandoned freezers are still dangerous – even if they sit out for "just a few days." If you are getting rid of your old freezer, please follow the instructions below to help prevent accidents.
Before you throw away your old freezer:
• Take off the doors.
- Leave the shelves in place so children may not easily climb inside.
WARNING
To reduce risk of fire, electric shock, serious injury or death when using your freezer, follow these basic precautions, including the following:
- Read all instructions before using the freezer.
- Observe all local codes and ordinances.
- Be sure to follow grounding instructions.
- Check with a qualified electrician if you are not sure this appliance is properly grounded.
- DO NOT ground to a gas line.
- DO NOT ground to a cold-water pipe.
- Freezer is designed to operate on a 115 Volt, 15 amp., 60 cycle line. There should be a separate, grounded circuit serving this appliance only.
- DO NOT modify plug on power cord. If plug does not fit electrical outlet, have proper outlet installed by a qualified electrician.
- DO NOT use a two-prong adapter, extension cord or power strip.
- DO NOT remove warning tag from power cord.
- DO NOT tamper with freezer controls.
- DO NOT service or replace any part of freezer unless specifically recommended in Owner's Manual or published user-repair instructions. DO NOT attempt service if instructions are not understood or if they are beyond personal skill level.
-
Always disconnect freezer from electrical supply before attempting any service. Disconnect power cord by grasping the plug, not the cord.
-
Install freezer according to Installation Instructions. All connections for water, electrical power and grounding must comply with local codes and be made by licensed personnel when required.
- Keep your freezer in good condition. Bumping or dropping freezer can damage freezer or cause freezer to malfunction or leak. If damage occurs, have freezer checked by qualified service technician.
- Replace worn power cords and/or loose plugs.
- Always read and follow manufacturer's storage and ideal environment instructions for items being stored in freezer.
- Do not use any electrical device or any sharp instrument when defrosting your freezer.
- Do not operate the freezer in the presence of explosive fumes.
- Do not store flammable substances near or in this appliance.
- After your freezer is in operation, do not touch the cold surfaces in the freezer compartment, particularly when hands are damp or wet. Skin may adhere to these extremely cold surfaces.
- This freezer should not be recessed or built-in an enclosed cabinet. It is designed for freestanding installation only.
- Children should not climb, hang or stand on any part of the freezer.
IMPORTANT SAFETY INFORMATION
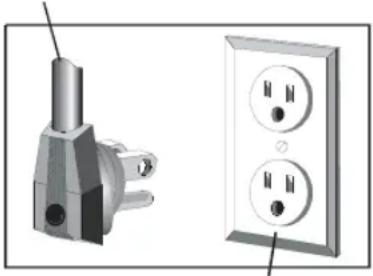
This appliance is equipped with a three-prong grounding plug for your protection against possible electrical shock hazards. It must be plugged into a grounding receptacle. Where a standard two-prong-wall receptacle is encountered, it is the personal responsibility and obligation of the customer to have it replaced with a properly grounded three-prong wall receptacle. Do not under any circumstances, cut or remove the third (ground) prong from the power cord. Do not use an adapter plug.
Power supply cord with three-prong grounding plug
natural_image
Illustration of a wall socket and its electrical outlet (no text or symbols)Grounding type wall receptacle
INSTALLATION INSTRUCTIONS
REMOVE PACKING MATERIALS:
Remove materials, tape and labels before using the freezer.
Do not use sharp instruments, rubbing alcohol, flammable fluids or abrasive cleaners. These can damage the material.
Clean your freezer before using it:
- Use a sponge, cloth or paper towel and mild detergent in warm water to clean outside and inside of freezer, door liner and gasket.
- Rinse and dry thoroughly.
CHOOSE FREEZER LOCATION:
- Locate the freezer in a safe place, indoors, away from direct sunlight or heat sources such as a range, dishwasher, laundry equipment, heat vents or radiator.
- DO NOT store flammables such as gasoline near the freezer.
- Check the strength of the floor. It should hold the weight of a fully loaded freezer.
- Allow at least 3" (7.5 cm) between top of freezer and the ceiling.
- Allow at least 1" (2.5 cm) between back of freezer and the wall.
- Allow 3" (7.5 cm) on each side of the freezer for ease of installation.
- If the freezer is to be against a wall, you might want to leave extra space on the hinge side so the door can be opened wider.
- This freezer is designed to operate at a household temperature of 32^ to 110^ F ( 0^ to 43^ C).
INSTALL FREEZER:
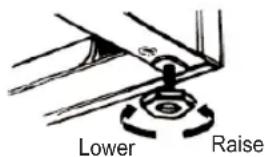
text_image
Lower Raise- Adjust the 2 front legs so that the front of the freezer is slightly higher than the back. When adjusted properly, the door will swing shut from 10" open.
TEMPERATURE CONTROL
NOTE: If the freezer is laid on its side during shipping or transport, place the freezer upright and wait 12 hours before plugging it in. This prevents damage to the freezer.
The freezer control turns the cooling system on.
Initial control setting:
- Set the freezer control on 4.
- Allow the freezer to cool 6 to 8 hours before filling with frozen food. Let the freezer cool overnight before adding large amounts of unfrozen food. Never add more than 2 to 3 pounds of unfrozen food per cubic foot of freezer space.
- 24 hours after adding food, adjust control as desired.
NOTE: When the freezer is first started, the compressor will run constantly until the cabinet is cooled. This may take up to 6-8 hours or longer, depending on room temperature and the number of times the freezer is opened.
The outside of your freezer may feel warm. This is normal. The freezer's design and main function is to remove the heat from packages and air space inside the freezer. This heat is transferred to the room air, so the outside of the freezer may feel warm.
Adjusting the control:
-
Set household thermometer snugly between frozen packages or place thermometer in a glass of vegetable oil, placed in freezer (vegetable oil will not freeze).
-
Thermometer should be designed for use with freezer.
-
Thermometer should read temperatures ranging from -5^ to 50^ F (-21^ to 10^ C).
-
Wait 5 to 8 hours.
- Check temperature.
- Temperature should read 0^ F (-18°C) or slightly below.
- If temperature is not in range, adjust control only one number at a time.
- Turn the control to a higher number if a colder temperature is desired.
- Turn the control to a lower number if a less cold temperature is desired.
- Wait an additional 24 hours and recheck temperature.
CUSTOM FEATURES
FREE-O-FROST™ FROST CONTROL SYSTEM
(SELECT MODELS)
The Amana Free-O-Frost™ system automatically defrosts the freezer so you don't have to. This allows the freezer to run more efficiently and quietly, minimizes odors, and takes the hassle out of keeping a freezer clean.
FAST FREEZE
(SELECT MODELS)
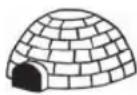
Fast Freeze is a convenient feature that enables quicker freezing of large amounts of food. During Fast Freeze, the freezer runs continuously, to drive the freezer temperature down to its coldest level.
To use Fast Freeze, simply turn the control knob to the Igloo symbol. Then place unfrozen foods in the freezer cavity, spreading them out as much as possible. Return freezer to its normal setting after 24 to 48 hours.
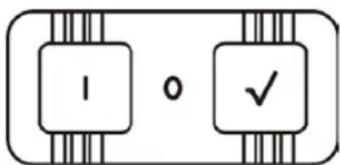
TEMPERATURE MONITOR ALARM
(SELECT MODELS)
Some freezer models feature a temperature monitor that provides an audible alarm. The temperature monitor alarm is located near the temperature control.
The alarm sounds if the temperature in the freezer rises 10^ F ( 12^ C) or more above normal for selected setting. Alarm may sound if temperature control dial is turned to a much colder setting or if a large amount of unfrozen food is added at one time. Alarm is controlled by a three position switch.
text_image
1 0 ✓- 0 = OFF prevents alarm from sounding when freezer is warm, such as during initial start-up or defrosting.
- √ = TEST sounds alarm regardless of temperature. Alarm system should be tested at least once a month.
- 1 = ON is proper setting for normal freezer use. Return switch to 1 after defrosting.
DOOR LOCK
(SELECT MODELS)
To use the door lock:
- Insert key into lock approximately 14 " (6 mm).
- Turn key clockwise to lock freezer and counterclockwise to unlock.
Once locked or unlocked, the lock will push the key out, preventing the key from being kept in the lock.
WARNING
To prevent child entrapment keep key out of reach of children and away from freezer.
INTERIOR LIGHT
(SELECT MODELS)
The interior light works to light the freezer in poor or dimly lit conditions. The light is designed and tested to provide illumination while minimizing heat generated if the door is accidentally left ajar. To replace the interior light, see the Hints and Care section.
POWER LIGHT
(SELECT MODELS)
The power light normally will be "ON." Its purpose is to warn you when there is a power absence. If for any reason the power to the freezer is interrupted (blown fuse, loose plug, etc.) the indicator light will be "OFF."
CAUTION
The presence of the light does not indicate proper food temperatures, or proper operation of the refrigeration system.
HINTS AND CARE
HOW TO CLEAN YOUR FREEZER
WARNING
To avoid electrical shock which can cause severe personal injury or death, disconnect power to freezer before cleaning. After cleaning, reconnect power.
CAUTION
To avoid personal injury or property damage, observe the following:
- Read and follow manufacturer's directions for all cleaning products.
- DO NOT place shelves or accessories in dishwasher. Cracking or warping of accessories may result.
| PART DO | DO NOT USE | |
| Textured Doors and Exterior | Abrasive or harsh cleanersAmmoniaChlorine bleachConcentrated detergents or solventsMetal or plastic-textured scouring pads | Use 4 tablespoons of baking soda dissolved in 1 quart warm soapy water.Rinse surfaces with clean warm water and dry immediately to avoid water spots. |
| Cabinet Interior | ||
| Door Gaskets | Abrasive or harsh cleanersMetal or plastic-textured scouring pads | Use warm, soapy water and a soft, clean cloth or sponge.Rinse surfaces with clean warm water and dry immediately to avoid water spots. |
| Accessories Shelves, etc. | An automatic dishwasher | Allow items to adjust to room temperature.Dilute mild detergent with water and use a soft clean cloth or sponge for cleaning.Use a plastic bristle brush to get into crevices.Rinse surfaces with clean warm water. |
HINTS AND CARE, CONT.
HOW TO REMOVE ODORS FROM FREEZER
WARNING
- To avoid electrical shock which can cause severe personal injury or death, disconnect power to freezer before cleaning.
- Move all food to another freezer.
- Disconnect power to the freezer.
- Wash all interior surfaces including door, floor and walls.
- Clean corners, crevices and grooves thoroughly.
- Wash all accessories and shelves by hand.
- Dry thoroughly with soft clean cloth.
- Reconnect power to freezer and allow it to cool back down.
- Return food to freezer. Verify all food is wrapped tightly or in sealed containers to prevent further odor problems.
- After 24 hours, check freezer to verify odor was eliminated.
If odor is still present:
- Move all food to another freezer.
- Disconnect power to the freezer.
- Pack freezer with crumpled sheets of black and white newspaper.
- Place plain charcoal briquettes in freezer on newspaper.
- Close the freezer door and let stand 24 to 48 hours.
- Remove charcoal briquettes and newspapers. Clean according to directions provided in the first column.
- Reconnect power to freezer and allow it to cool back down.
- Replace food in freezer in sealed, air-tight containers to minimize odor contamination.
- Placing a cotton swab soaked with vanilla extract or an open box of baking soda in the freezer may help prevent odors from returning.
IF YOU ARE MOVING:
Remove all frozen food and pack it in dry ice. Unplug the freezer and clean it thoroughly. Tape the door shut and tape electrical cord to the cabinet.
When you get to your new home, refer to pages 4 and 5 for information on installation and setting controls.
ENERGY SAVING IDEAS
To conserve energy:
- Do not set controls colder than necessary to maintain a temperature range of 0^ (-18°C) or slightly below.
- Operate in normal room temperatures away from heat sources and direct sunlight.
- Keep freezer full.
- Keep door gaskets clean and pliable. Replace gaskets if worn.
DEFROSTING
WARNING
• To avoid electrical shock which can cause severe personal injury or death, disconnect power to freezer before defrosting.
• Water damage due to improper defrosting or drainage may cause mold/mildew growth.
CAUTION
To avoid property damage, do not use sharp or pointed instruments to scrape frost from shelves or interior surfaces.
Manual defrost freezers need to be defrosted when frost has accumulated to approximately 14 " (6 mm) of thickness. Complete defrosting and cleaning should be done at least once a year. In high humidity areas, more frequent defrosting and cleaning may be necessary. The upper section of the freezer will generally have more frost accumulation than the lower. Frost should not be scraped or pulled out of the freezer, as damage may result.
Amana Free-O-Frost™ (select models) freezers do not require defrosting.
MANUAL DEFROST FREEZERS
(SELECT MODELS)
- Transfer food to another freezer or a well insulated cooler.
- Disconnect power to freezer.
- Remove the toe grille (select models) by pushing down and pulling it forward.
- Reach underneath the freezer and pull out the defrost drain tube. Place the tube in a shallow pan or in a nearby floor drain.
- Remove defrost drain plug (select models) from the bottom front of the freezer liner so the defrost water will flow into the drain tube.
• Empty pan as often as necessary during the defrost.

natural_image
Hand holding a small object over a surface, with no visible text or symbolsNOTE: Some models do not have a drain plug and water collecting from the defrost will have to be removed manually.
- To speed defrosting, pans of hot water may be placed on shelves in the freezer.
- Do not bend, scrape or try to move shelves. Shelves are part of the sealed cooling system and can be damaged.
-
Once defrosted, clean the freezer according to guidelines in Hints and Care.
-
Clean defrost drain using a bottle brush. Flush the drain with clear water before replacing the drain tube and drain plug.
- Drain plug must be properly installed and tightly sealed for efficient operation of the freezer.
- Restore power to the freezer.
HOW TO REMOVE AND REPLACE LIGHT BULB
(SELECT MODELS)
WARNING
To avoid electrical shock which can cause severe personal injury or death, disconnect power to freezer before replacing light bulb. After replacing light bulb, connect power.
CAUTION
To avoid personal injury or property damage, observe the following:
- Allow light bulb to cool.
- Wear gloves when replacing light bulb.
(SELECT MODELS)
- Disconnect freezer.
- Remove light bulb.
- Replace bulb.
NOTE: Replace bulb with same wattage appliance bulb.
natural_image
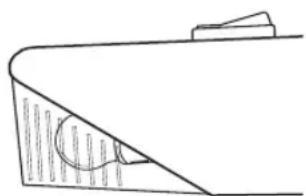
Simple line drawing of a curved surface with a small circular mark and horizontal lines, no text or symbols present.(SELECT MODELS)
- Disconnect freezer.
- Pinch tabs on light cover and pull straight down.
- Remove light bulb.
- Replace bulb.
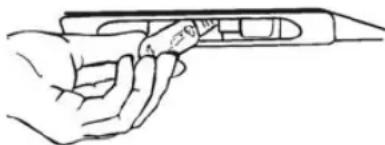
natural_image
Line drawing of a hand holding a tool or device (no text or symbols visible)-
Replace protective cover.
-
Reconnect power supply.
NOTE: Replace bulb with same wattage appliance bulb.
FREEZING GUIDELINES
FREEZER BURN?
Freezer burn occurs when air reaches the surface of the food. The cold, dry air in the freezer causes the foodstuff to dry out in spots and lose quality. While freezer burn may not taste good, it does not make the food unsafe. Freezer burned portions should be cut away either before or after cooking the food.
COLOR CHANGES
Color changes can occur in frozen foods. This can cause ground beef to go from a bright, red to a darker, duller brown due to lack of oxygen. Freezing normally doesn't cause color changes in poultry, but it will cause changes to the color near the bones resulting in 'bone darkening'. These changes are only visual changes and do not indicate poor quality or unsafe food.
FREEZING FACTS
Amana provides this information as a guide to aid in food preservation. For specific questions regarding food handling, cooking, or storage contact USDA Meat and Poultry Hotline at 1-800-535-4555.
- You can freeze almost any food, the main exceptions being eggs still in the shell and cans of foods.
- Frozen food kept at 0^ F (-18°C) or slightly below will always be safe. Only the quality of food suffers over time.
- It is safe to freeze meat or poultry directly in supermarket wrapping. This wrapping is air permeable which allows freezer burn, so the meat should be used within one to two months.
- Freeze foods as quickly as possible. This prevents large ice crystals from forming which decreases food quality.
- Never stack packages to be frozen. Lay packages out in a single layer and then stack them after they are frozen.
- During a power outage, a full freezer will normally keep 2 days, a half full freezer about 1 day. Food should be stacked tightly to provide a nest of cold air—resisting thawing.
- As a general guideline, food 2" thick should freeze completely in about 2 hours.
DEFROSTING FOODS
There are basic methods to defrost food safely. Food should never be defrosted at room temperature. This allows unsafe bacteria to grow while the food is thawing. To defrost safely use:
- Refrigerator: this allows the food to thaw in an environment that controls bacterial growth.
Most foods require a day or two to defrost, approximately one day for each 5 lbs. of weight.
- Cold water: place food in a leakproof bag and immerse it in cold water (If bag leaks, food will become contaminated by bacteria). Check water frequently to verify it stays cold. Change water every thirty minutes. After thawing, refrigerate the food until it is ready to use.
- Microwave: cook food immediately after using a microwave to defrost food. Microwave defrosting warms food and can partially cook it, allowing bacteria to grow as it defrosts. Food cannot be refrozen until it is cooked.
PACKAGING
Proper packaging helps prevent freezer burn, and helps limit odor transfer in the freezer.
For short term storage, freeze meat or poultry directly in supermarket wrapping. This meat should be used within 1 to 2 months.
For long term storage, follow these wrapping guidelines:
• Overwrap store wrapped packages with airtight heavy duty foil, plastic wrap, freezer paper or freezer bags.
- Freeze unopened vacuum wrapped packages as they are.
• Make sure lids are sealed tightly when using airtight freezer containers.
- Break down foods into smaller portions for faster freezing.
- Remove as much air as possible from packages before placing in the freezer.
• If a package has accidentally been torn or damaged while in the freezer, the food is still safe to eat. Just overwrap it or repackage it.
- It is not necessary to rinse meat or poultry before freezing.
NOTE: Freezer storage time is for quality only. Frozen foods remain safe indefinitely.
| Foodstuff Months | |
| Bacon and Sausage 1 to 2 | |
| Casseroles 1 to 2 | |
| Egg whites or egg substitutes | 12 |
| Gravy, meat or poultry 2 to 3 | |
| Ham, Hot Dogs and Lunch Meats 1 to 2 | |
| Meat, uncooked roasts | 9 |
| Meat, uncooked steaks or chops | 4 to 6 |
| Meat, uncooked ground | 3 to 4 |
| Meat, cooked | 2 to 3 |
| Poultry, uncooked whole | 12 |
| Poultry, uncooked parts | 9 |
| Poultry, uncooked giblets | 3 to 4 |
| Poultry, cooked | 3 to 4 |
| Soups and Stews | 2 to 3 |
| Wild game, uncooked | 8 to 12 |
* Provided by the USDA. Chart is based on food storage at 0^ F ( -18^ C) or slightly below.
COOKING FROZEN FOODS
Foods can be cooked or reheated directly from the frozen state. The cooking time will increase to almost one and a half times it would normally take. Remember when cooking poultry or meat to remove paper wrapping, giblet sacks, and any strings that might burn during cooking. Some meats, such as pre-stuffed whole birds, must be cooked from the frozen state to ensure food safety. Remember to read the USDA label on the meat.
NOTE: Do not use a slow cooker for preparing foods from the frozen state.
FREEZING GUIDELINES, CONT.
The chart below is provided by the USDA and should be used as a guideline only. When in doubt about food safety, it is always better to throw questionable food out.
| Food or Food Type | Still contains ice crystals and feels as cold as if refrigerated | Thawed. Held above 40° F for over 2 hours |
| MEAT, POULTRY and SEAFOOD | ||
| Beef, veal, lamb, pork and ground meats | Refreeze | Discard |
| Poultry and ground poultry | Refreeze | Discard |
| Variety meats (liver, kidney, heart, chitterlings) | Refreeze | Discard |
| Fish, shellfish, breaded seafood products | Refreeze, however, there will be some texture and flavor loss. | Discard |
| DAIRY | ||
| Milk | Refreeze, may lose some texture. | Discard |
| Eggs (out of shell) and egg products | Refreeze | Discard |
| Ice cream, frozen yogurt | Discard | Discard |
| Cheese (soft and semi-soft) | Refreeze, may lose some texture. | Discard |
| Hard cheeses | Refreeze | Refreeze |
| Shredded cheeses | Refreeze | Discard |
| Casseroles containing milk, cream, eggs, soft cheeses | Refreeze | Discard |
| Cheesecake | Refreeze | Discard |
| FRUITS and VEGETABLES | ||
| Juices—fruit | Refreeze | Refreeze, discard if mold, yeasty smell or sliminess develops |
| Juices—vegetables | Refreeze | Discard after held above 40° F (4° C) for 6 hours |
| Home, commercially packaged or blanched | Refreeze, will change in texture and flavor. | Discard after held above 40° F (4° C) for 6 hours or if mold, yeasty smell or sliminess develops |
| BREADS and PASTRIES | ||
| Breads, rolls, muffins, cakes (without custard fillings) | Refreeze | Refreeze |
| Cakes, pies, pastries with custard or cheese filling | Refreeze | Discard |
| Pie crusts, commercial and homemade bread dough | Refreeze, some quality loss may occur. | Refreeze, quality loss is considerable. |
| OTHER | ||
| Casseroles—pasta or rice based | Refreeze | Discard |
| Flour, cornmeal, nuts | Refreeze | Refreeze |
| Breakfast items—waffles, pancakes, bagels | Refreeze | Refreeze |
| Frozen meal, entrée, specialty items (pizza, sausage and biscuit, meat pie, and convenience foods) | Refreeze | Discard |
TROUBLESHOOTING
You may save time and money by checking items below before calling for service. List includes common concerns that are not the result of defective workmanship or materials. If your question is not explained below, contact the CAIR® Center at 1-800-688-9900 in the U.S.A., or 1-800-688-2002 in Canada.
OPERATION
| PROBLEM | POSSIBLE CAUSES | WHAT TO DO |
| Appliance not working | Power outage | Make sure appliance is plugged in. |
| Circuit breaker has tripped | Verify that circuit breaker is not tripped. | |
| Fuse has blown | Replace fuse, but do not change fuse capacity. | |
| Freezer not cooling | Temperature control | Change control setting to 4 or above. |
| Poor gasket seal | Clean gasket as described in Hints and Care.Apply light coating of petroleum jelly to gasket. | |
| Failed gasket | Have gasket replaced | |
| Food added recently | Wait 5 to 8 hours for temperature to stabilize after the addition of large quantities of unfrozen food. | |
| Freezer runs frequently | Normal | Needs to run to maintain an even temperature. |
| Door open | Close door. | |
| Temperature set too cold | Adjust temperature control to maintain freezer temperature. | |
| Poor gasket seal | Clean gasket as described in Hints and Care.Apply light coating of petroleum jelly to gasket. | |
| Poor clearance | Confirm that freezer has proper clearance on each side and vents are unobstructed as specified in Installation Instructions. | |
| Light fails to illuminate | Bad bulb | Replace bulb as described in Hints and Care section. |
| Switch not opening | Clean switch plunger to ensure proper operation. | |
| Bad switch | Have authorized servicer replace switch. | |
| Door lock key will not stay in lock | Normal | Locks have "pop out key" function, preventing the key from being kept in the lock. This feature is to prevent child entrapment. |
TROUBLESHOOTING, CONT.
NOISE
| PROBLEM | POSSIBLE CAUSES | WHAT TO DO |
| Clicks | Normal | Temperature control clicks when starting or stopping compressor. |
| Gurgles and pops (like boiling water) | Normal | Refrigerant flow through evaporator coil. |
| Hum or pulsing sound | Normal | Compressor operation. |
APPEARANCE
| PROBLEM | POSSIBLE CAUSES | WHAT TO DO |
| Water droplets on outside of freezer | Poor gasket seal | Clean gasket as described in Hints and Care.Apply light coating of petroleum jelly to gasket. |
| Water pooling in floor by freezer | Poor or missing drain plug | Verify that drain plug is properly in place and sealed.Replace drain plug if seal is poor. |
| Defrost drain pan | On Free-O-FrostTM models, confirm that the defrost drain pan is properly positioned. |
NOTES
WARRANTY & SERVICE WHAT IS NOT COVERED BY THESE WARRANTIES
Warranty
Limited One Year Warranty -
Parts and Labor
For one (1) Year from the original retail purchase date, any part that fails in normal home use will be repaired or replaced free of charge.
Canadian Residents
The above warranties only cover an appliance installed in Canada that has been certified or listed by appropriate test agencies for a compliance to a National Standard of Canada unless the appliance was brought into Canada due to transfer of residence from the United States to Canada.
The specific warranties expressed above are the ONLY warranties provided by the manufacturer. These warranties give you specific legal rights, and you may also have other rights which vary from state to state.
CUSTOMER'S SOLE AND EXCLUSIVE REMEDY UNDER THIS LIMITED WARRANTY SHALL BE PRODUCT REPAIR AS PROVIDED HEREIN. IMPLIED WARRANTIES, INCLUDING WARRANTIES OF MERCHANTABILITY OR FITNESS FOR A PARTICULAR PURPOSE, ARE LIMITED TO ONE YEAR OR THE SHORTEST PERIOD ALLOWED BY LAW. MAYTAG CORPORATION SHALL NOT BE LIABLE FOR INCIDENTAL OR CONSEQUENTIAL DAMAGES. SOME STATES AND PROVINCES DO NOT ALLOW THE EXCLUSION OR LIMITATION OF INCIDENTAL OR CONSEQUENTIAL DAMAGES, OR LIMITATIONS ON THE DURATION OF IMPLIED WARRANTIES OF MERCHANTABILITY OR FITNESS, SO THESE EXCLUSIONS OR LIMITATIONS MAY NOT APPLY TO YOU. THIS WARRANTY GIVES YOU SPECIFIC LEGAL RIGHTS AND YOU MAY ALSO HAVE OTHER RIGHTS, WHICH VARY STATE TO STATE OR PROVINCE TO PROVINCE.
-
Conditions and damages resulting from any of the following:
a. Improper installation, delivery, or maintenance.
b. Any repair, modification, alteration, or adjustment not authorized by the manufacturer or an authorized servicer.
c. Misuse, abuse, accidents, unreasonable use, or acts of God.
d. Incorrect electric current, voltage, electrical and/or gas supply.
e. Improper setting of any control. -
Warranties are void if the original serial numbers have been removed, altered or cannot be readily determined.
-
Light bulbs, water filters and air filters.
-
Products purchased for commercial or industrial use.
-
The cost of service or service call to:
a. Correct installation errors. For products requiring ventilation, rigid metal ducting must be used.
b. Instruct the user on the proper use of the product.
c. Transport the appliance to and from the servicer.
-
Any food loss due to refrigerator or freezer product failures.
-
Expenses for travel and transportation for product service in remote locations.
-
Outside of the United States and Canada this warranty does not apply. Contact your dealer to determine if another warranty applies.
-
Consequential or incidental damages sustained by any person as a result of any breach of these warranties. Some states do not allow the exclusion or limitation of consequential or incidental damages, so the above exclusion may not apply.
IF YOU NEED SERVICE
First see the Troubleshooting section in your Use and Care Guide or call the dealer from whom your appliance was purchased or call Maytag Services, LLC, Customer Assistance at 1-800-688-9900 USA and 1-800-688-2002 Canada to locate an authorized servicer.
- Be sure to retain proof of purchase to verify warranty status. Refer to WARRANTY for further information on owner's responsibilities for warranty service.
- If the dealer or service company cannot resolve the problem, write to Maytag Services LLC, Attn: CAIR® Center, P.O. Box 370, Cleveland, TN 37320-2370, or call 1-800-688-9900 U.S.A. and 1-800-688-2002 Canada. U.S. customers using TTY for deaf, hearing impaired or speech impaired, call 1-800-688-2080.
- User's guides, service manuals and parts information are available from Maytag Services LLC, Customer Assistance.
Notes: When contacting about a service problem, please include
a. Your name, address and telephone number.
b. Model number and serial number.
c. Name and address of your dealer or servicer.
d. A clear description of the problem you are having.
e. Proof of purchase (sales receipt).
natural_image
Simple line drawing of a cabinet with a handle and lid (no text or symbols)Directives de congélation ....26-28