— Game — Mode d'emploi PDF")
Super Mario Galaxy (Wii) - Game NINTENDO - Free user manual and instructions
Find the device manual for free Super Mario Galaxy (Wii) NINTENDO in PDF.
User questions about Super Mario Galaxy (Wii) NINTENDO
0 question about this device. Answer the ones you know or ask your own.
Ask a new question about this device
Download the instructions for your Game in PDF format for free! Find your manual Super Mario Galaxy (Wii) - NINTENDO and take your electronic device back in hand. On this page are published all the documents necessary for the use of your device. Super Mario Galaxy (Wii) by NINTENDO.
USER MANUAL Super Mario Galaxy (Wii) NINTENDO
NEED HELP WITH INSTALLATION MAINTENANCE OR SERVICE?
Nintendo Customer Service
WWW.NINTENO.COM or call 1-800-255-3790
NEED HELP PLAYING A GAME? Nintendo's game pages, at
www.nintendo.com/games featurewalkthroughs, frequently asked questions, and codes for many of our games. If your answerisn't there, check out our forums where you canexchange tips with other games online.
For more information about our forums, visit www.nlntendo.com/community.
If you don't have access to the web site, recorded tips for many titles are available on Nindendo's Power Line at (425) 885-7329. This may be a long distance call, so please ask permission from whoever pays the phone bill.
BESOIN D'AIDE POUR L'INSTALLATION N, L'ENTRETIEN OU LA REPARATION?
The Official Seal is your assurance that this product is licensed or manufactured by Finnitenoo. Always look for this seal when buying video game systems, accessories, games and related products.
- Some people (about 1 in 4000) may have seizures or blackouts triggered by light flashes or patterns, and this may occur while they are watching TV or playing video games, even if they have never had a seizure before.
- Anyone who has had a seizure, loss of awareness, or other symptom linked to an epileptic condition, should consult a doctor before playing a video game.
- Parents should watch their children play video games. Stop playing and consult a doctor if you or your child has any of the following symptoms:
Convulsions Eye or muscle twitching Altered vision Loss of awareness Involuntary movements Disorientation
To reduce the likelihood of a seizure when playing video games:
- Sit or stand as far from the screen as possible.
- Play video games on the smallest available television screen.
- Do not play if you are tired or need sleep.
- Play in a well-lit room
- Take a 10 to 15 minute break every hour.
WARNING - Repetitive Motion Injuries and Eyestrain
Playing video games can make your muscles, joints, skin or eyes hurt. Follow these instructions to avoid problems such as tendonitis, carpal tunnel syndrome, skin irritation or eyestrain:
- Avoid excessive play. Parents should monitor their children for appropriate play.
Take a 10 to 15 minute break every hour, even if you don't think you need it. - If your hands, wrists, arms or eyes become tired or sore while playing or if you feel symptoms such as tingling, numbness, burning or stiffness, stop and rest for several hours before playing again.
- If you continue to have any of the above symptoms or other discomfort during or after play, stop playing and see a doctor.
CAUTION - Motion Sickness
Playing video games can cause motion sickness in some players. If you or your child feels dizzy or nauseous when playing video games, stop playing and rest. Do not drive or engage in other demanding activity until you feel better.
IMPORTANT LEGAL INFORMATION
This Nintendo game is not designed for use with
any unauthorized device. Use of any such device will invalidate your Nintendo product warranty. Copying of any Nintendo game is illegal and is strictly prohibited by domestic and international intellectual property laws. "Back-up" or "archival" copies are not authorized and are not necessary to protect your software. Violators will be prosecuted.
REV-E
WARRANTY & SERVICE INFORMATION
REV-P
You may need only simple instructions to correct a problem with your product. Try our website at www.nintendo.com or call our Consumer Assistance Hotline at 1-800-255-3700, rather than going to your retailer. Hours of operation are 6 a.m. to 7 p.m., Pacific Time, Monday - Sunday (times subject to change). If the problem cannot be solved with the troubleshooting information available online or over the telephone, you will be offered express factory service through Nintendo. Please do not send any products to Nintendo without contacting us first.
HARDWARE WARRANTY
Nintendo of America Inc. ("Nintendo") warrants to the original purchaser that the hardware product shall be free from defects in material and workmanship for twelve (12) months from the date of purchase. If a defect covered by this warranty occurs during this warranty period, Nintendo will repair or replace the defective hardware product or component, free of charge. The original purchaser is entitled to this warranty only if the date of purchase is registered at point of sale or the consumer can demonstrate, to Nintendo's satisfaction, that the product was purchased within the last 12 months.
GAME & ACCESSORY WARRANTY
Nintendo warrants to the original purchaser that the product (games and accessories) shall be free from defects in material and workmanship for a period of three (3) months from the date of purchase. If a defect covered by this warranty occurs during this three (3) month warranty period, Nintendo will repair or replace the defective product, free of charge.
SERVICE AFTER EXPIRATION OF WARRANTY
Please try our website at www.nintendo.com or call the Consumer Assistance Hotline at 1-800-255-3700 for troubleshooting information and repair or replacement options and pricing. In some instances, it may be necessary for you to ship the complete product, FREIGHT PREPAID AND INSURED FOR LOSS OR DAMAGE, to Nintendo. Please do not send any products to Nintendo without contacting us first.
WARRANTY LIMITATIONS
THIS WARRANTY SHALL NOT APPLY IF THIS PRODUCT: (a) IS USED WITH PRODUCTS NOT SOLD OR LICENSED BY NINTENDO (INCLUDING, BUT NOT LIMITED TO, NON-Licensed GAME ENHANCEMENT AND COPIER DEVICES, ADAPTERS, AND POWER SUPPLIES); (b) IS USED FOR COMMERCIAL PURPOSES (INCLUDING RENTAL); (c) IS MODIFIED OR TAMPERED WITH; (d) IS DAMAGED BY NEGligENCE, ACCIDENT, UNREASONABLE USE, OR BY OTHER CAUSES UNRELATED TO DEFECTIVE MATERIALS OR WORKMANSHIP; OR (e) HAS HAD THE SERIAL NUMBER ALTERED, DEFACED OR REMOVED.
ANY APPLICABLE IMPLIED WARRANTY, INCLUDING WARRANTY OF MERCHANTABILITY AND FITNESS FOR A PARTICULAR PURPOSE, ARE HEREBY LIMITED IN DURATION TO THE WARRANTY PERIODS DESCRIBED ABOVE (12 MONTHS OR 3 MONTHS, AS APPLICABLE). IN NO EVENT SHALL NINTENDO BE LIABLE FOR CONSEQUENTIAL OR INCIDENTAL DAMAGES RESULTING FROM THE BREACH OF ANY IMPLIED OR EXPRESS WARRANTY. SOME STATES DO NOT ALLOW LIMITATIONS ON HOW LONG AN IMPLIED WARRANTY LASTS OR EXCLUSION OF CONSEQUENTIAL OR INCIDENTAL DAMAGES, SO THE ABOVE LIMITATIONS MAY NOT APPLY TO YOU.
This warranty gives you specific legal rights. You may also have other rights which vary from state to state or province to province.
Nintendo's address is: Nintendo of America Inc., P.O. Box 957, Redmond, WA 98073-0957 U.S.A.
This warranty is only valid in the United States and Canada.
Manufactured under license from Dolby Laboratories. Dolby, Pro Logic, and the double-D symbol are trademarks of Dolby Laboratories.
DOLBY PRO LOGIC II
This game is presented in Dolby Pro Logic II. To play games that carry the Dolby Pro Logic II logo in surround sound, you will need a Dolby Pro Logic II, Dolby Pro Logic or Dolby Pro Logic IIx receiver. These receivers are sold separately.
© 2007 Nintendo, TM, and the Wii logo are trademarks of Nintendo. © 2007 Nintendo. All rights reserved.
Proble
Every hundred years, a huge comet flies by in the skies above the Mushroom Kingdom. One year that comet filled the entire sky and from it fell a stream of shooting stars. The Toads scooped up the Star Bits and brought them to the cast reborn as a great Power Star in the Mushroom Kingdom. The received a letter...


The Toads brought the shooting stars to the castle, where they become a new source of power.

Dear Mario:
I'll be waiting for you at the castle on the night of the Star Festival.
There's something Id like to give you.
From Peach
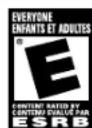
With invitation in hand, Mario headed off to the castle just as the Star Festival was getting into full swing. Surrounded by Toads gleefully trying to catch falling Star Bits, Mario was looking forward to the
But then, something happened.
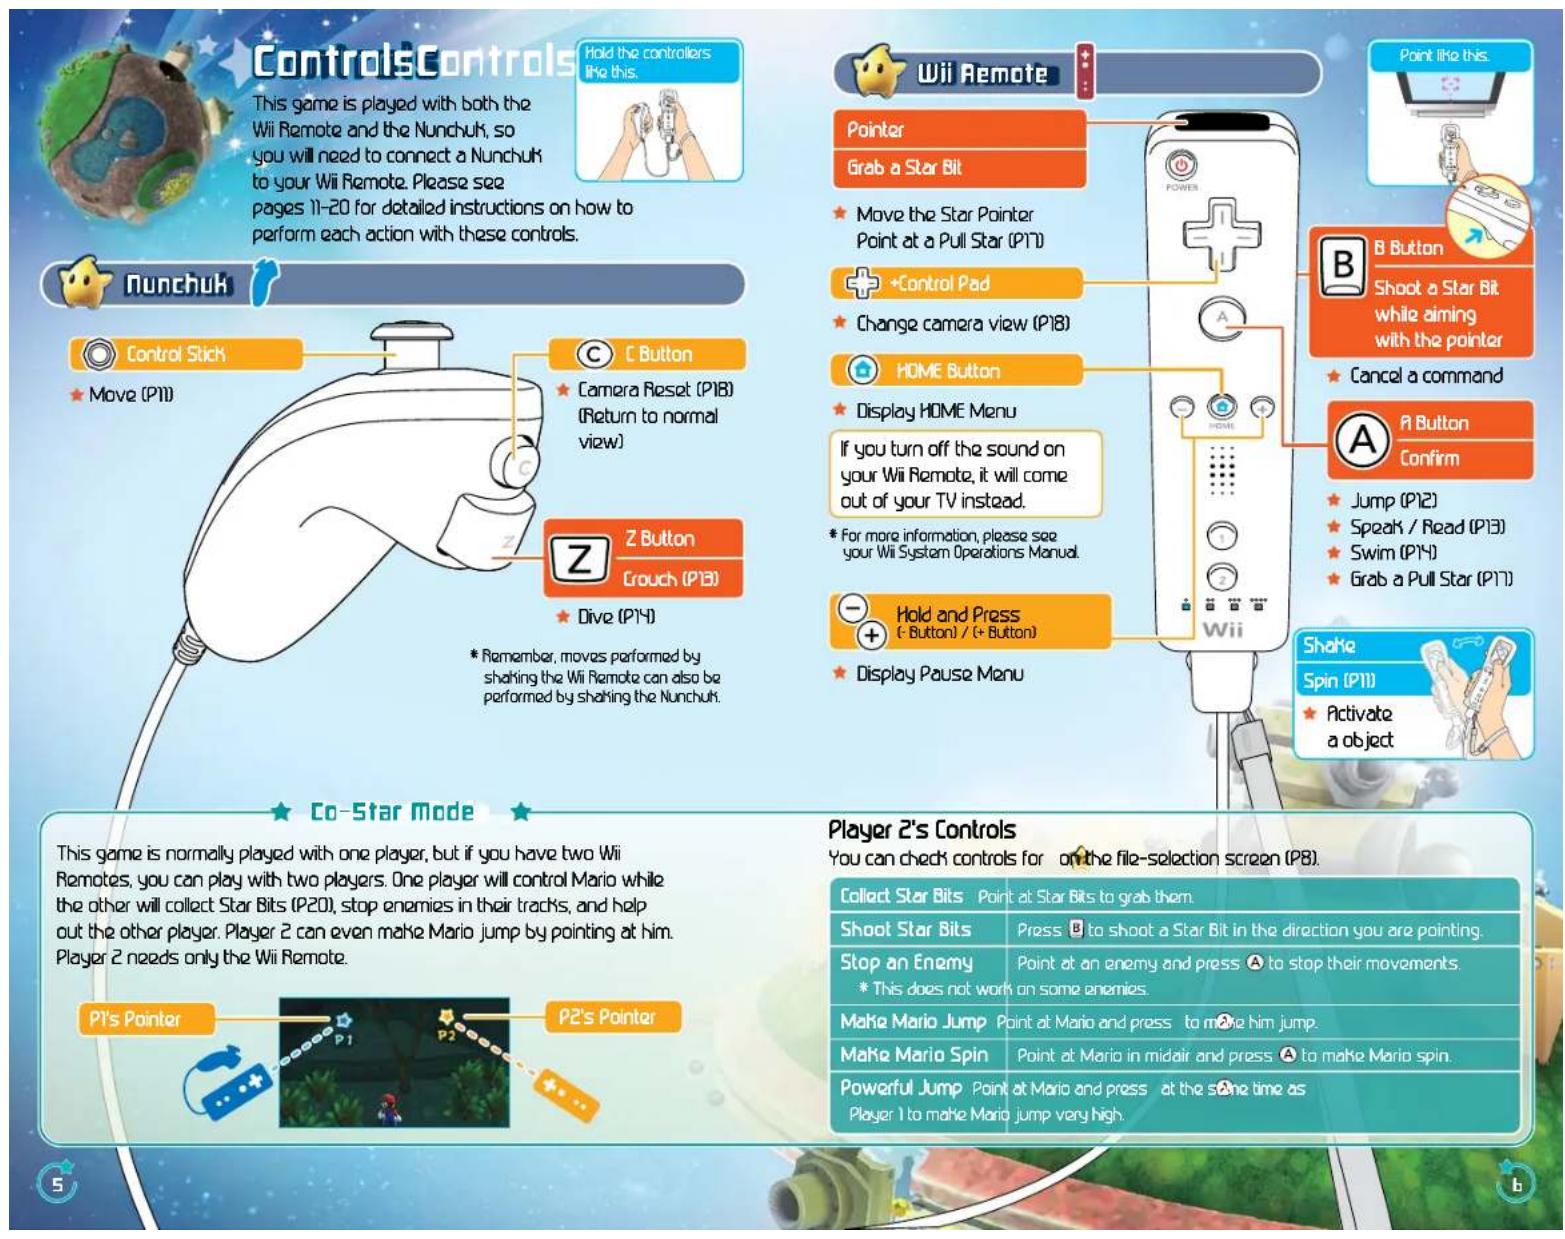
Comrants


Controls 5.
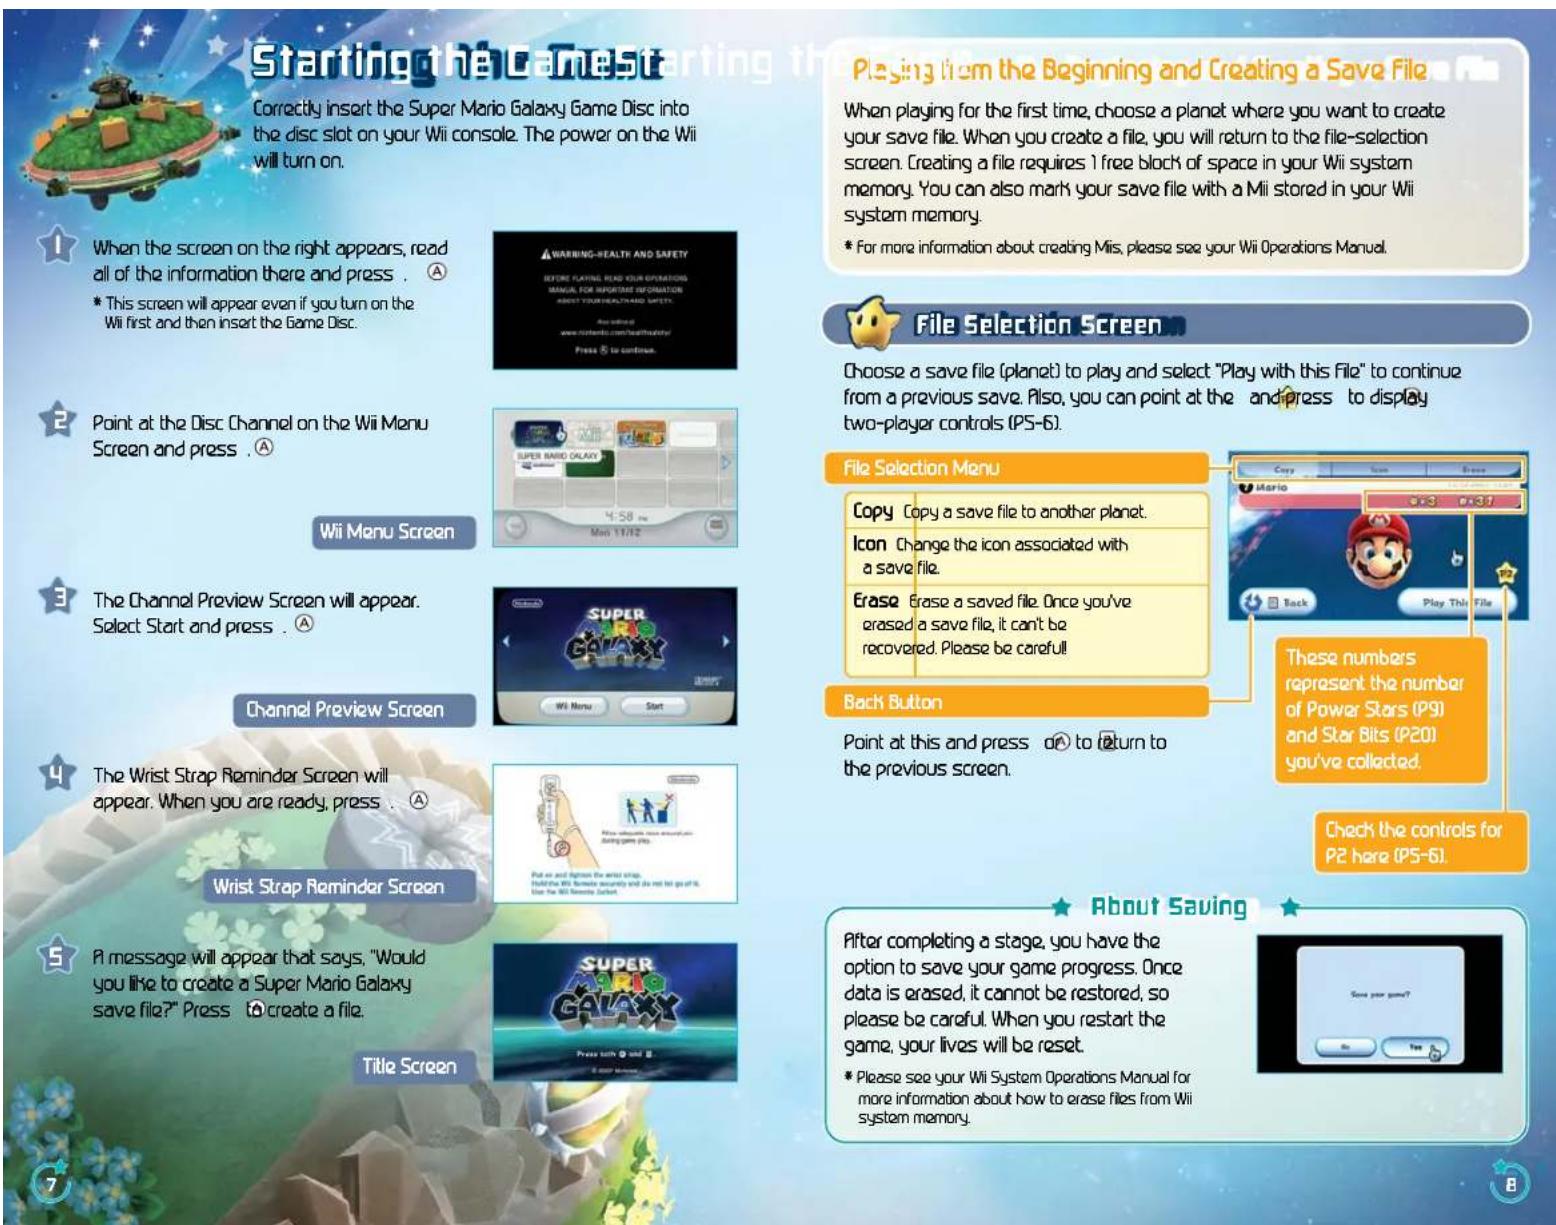
Starting the Game
Traveling the Galaxies 9
Mario's Moves 11
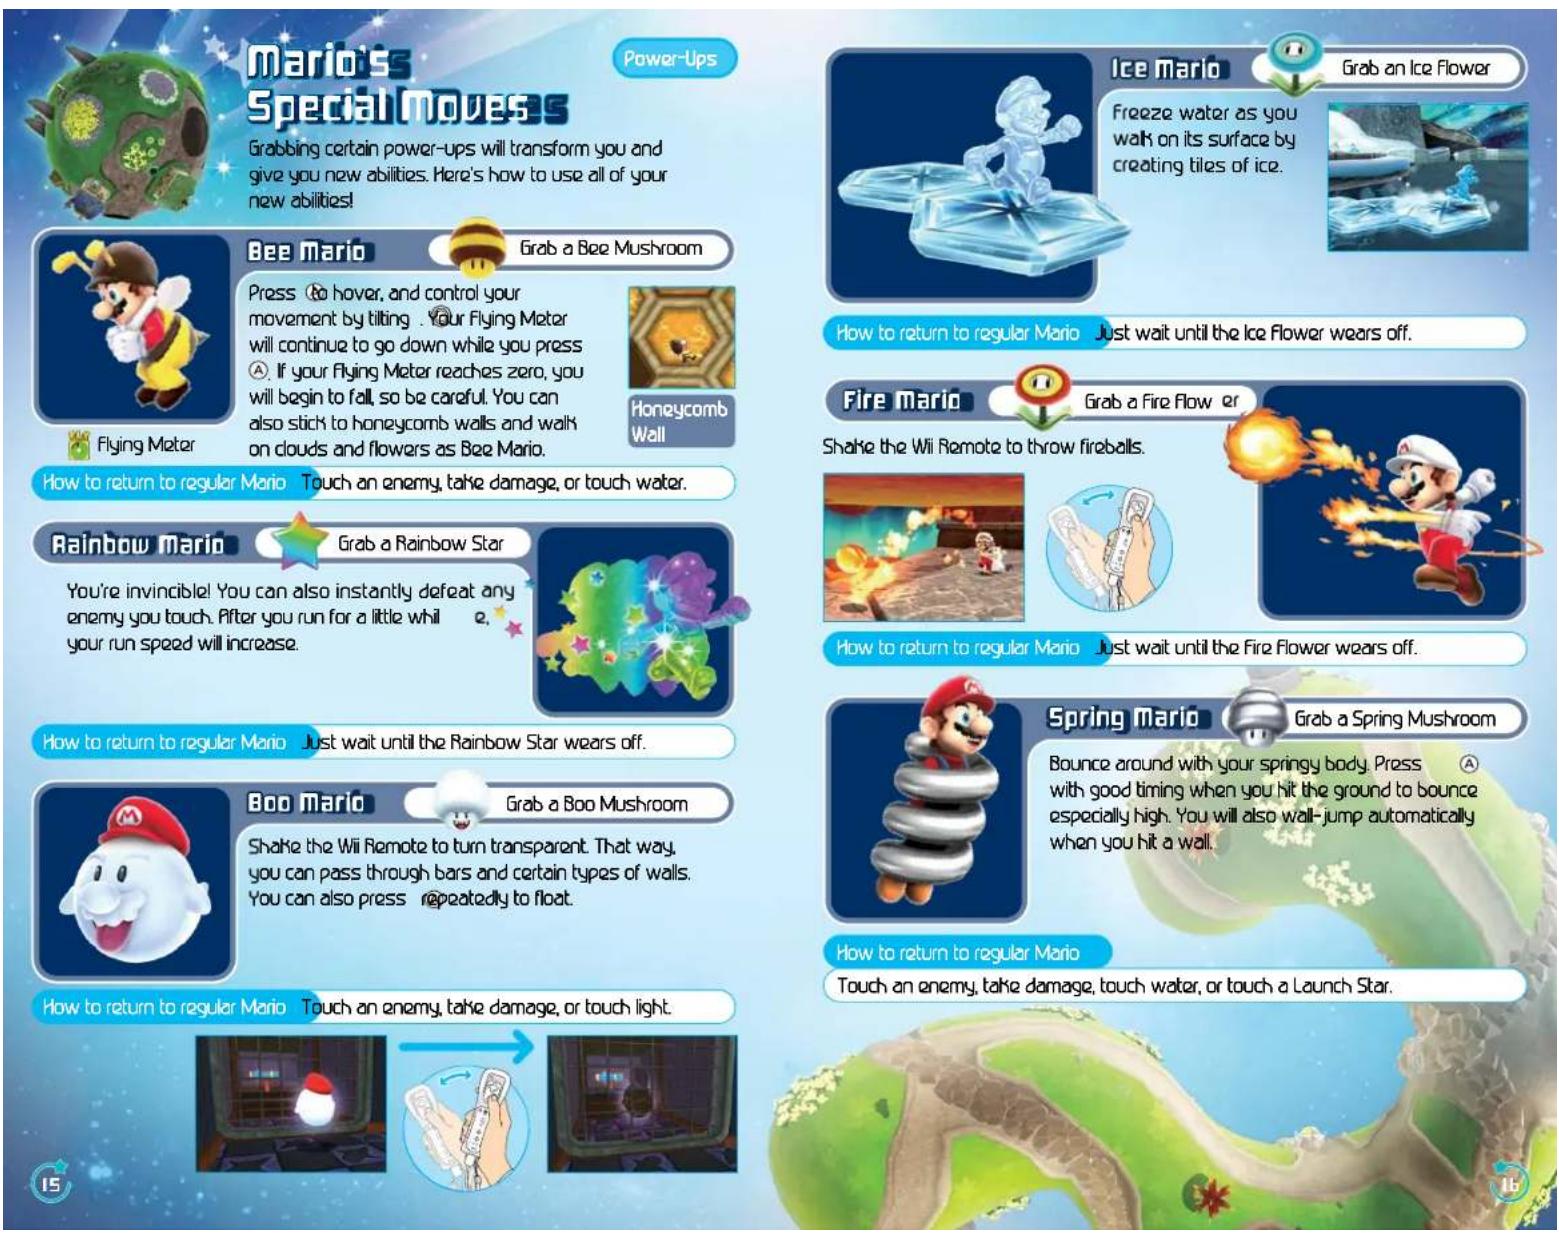
Mario's Special Moves 15
Objects 11
Items 20
Hints 21

Polar
This elderly Luma is Rosalina's most trusted advisor. He Knows all about the observatory, and if you speak to him, he will show you a map.
Rosaine
This Keeper of the Comet Observatory floats through the cosmos with curious star creatures, called Lumas. Her past is shrouded in mystery.
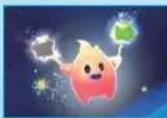
Lumas
Many different types of Lumas live throughout the cosmos. They lo ve Star Bits, the glittering chunks o f stars that are scattered throughout the universe.


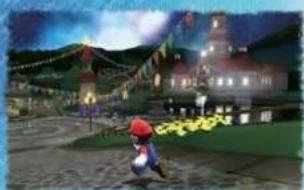
SYSTEM MENU UPDATE
Please note that when first loading the Game Disc into the Wii console, the Wii will check if you have the latest system menu, and if necessary a Wii system update screen will appear. Press OK to proceed.

Traveling the Calories
You'll control Mario as he ventures from the Comet Observatory out into wild and alien galaxies to collect all of the scattered Power Stars.

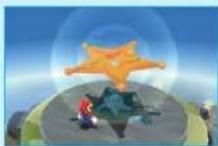
Look for Power Stars
Mario will explore many galaxies. In most galaxies, you will need to do many things to find a Power Star. When you obtain the star at the end of a mission, you will open up the next mission in that galaxy, if there are any.

Power Star

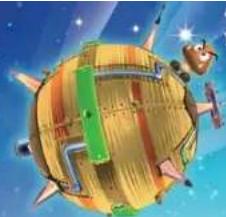
Comet Observatory
This is the starting point for many of your adventures throughout the cosmos. You will move from domes (galaxy observatories) to the galaxies themselves, collecting information from Lumas as you go. When you collect the Grand Star in the last galaxy of one dome, the next dome will open.
Grand Star
Dome
Number of Star Bits
This is the total number of Star Bits you have collected on your journey through the galaxies.

Galaxy Selection Screen
Grab the Pull Star (PTN) at the top of a dome to enter the galaxy-selection screen. Choose the galaxy you want to try, then select "Fly to this Galaxy." You will then advance to the mission-selection screen.
Undiscovered Galaxy
Collected the number of Power Stars shown to discover this galaxy.
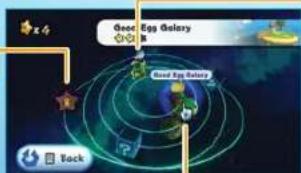
Discovered Galaxy
Point at this galaxy and press A to fly there.
View the System

Point at something other than a galaxy and press to grab a point you can use to rotate the system for a better view.

=1+n>4-2:1
Point at a mission and press softly to the galaxy. If you point at a mission you have already cleared, you can see your previous high score.
Mission You Have Already Completed
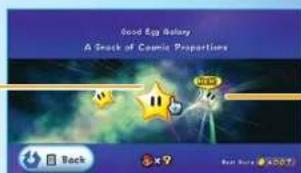
Mission You Have Not Yet Completed

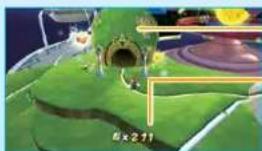
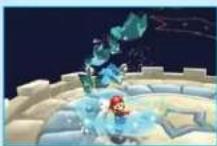
Galaxy Screen
When your life meter reaches zero from getting hit by enemies, thorns, or other dangerous things, or if you fall into a black hole, the number of your remaining lives will go down by one. If you lose your life while you have zero remaining lives, the game will end and you will return to the title screen. Information other than your life meter will appear on-screen when you stand still.
Number of Power Stars Collected

Life Mator
This will go down by one
Each time you touch an enemy, or hazard.
Remaining lives
Number of Coins Collected in the Current Galaxy
Number of Star Hits

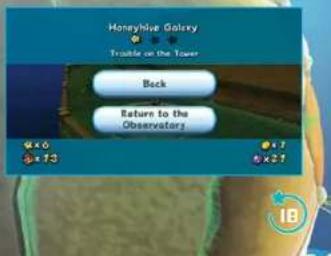
Pause Screen
Press and hold to pause. On the pause screen, you can check how many coins you have collected or which galaxy you are currently in. To resume your game, select Back to go back to the action or Return to the Observatory to go back to the observatory.

maris movesu
#
These are Mario's basic moves. Each one has its uses, depending on the situation, so try experimenting!

move
Tilt a little to walk and a lot to run.

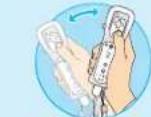
Spin
As you progress in the game, you will learn how to spin. Shake the Wii Remote to spin and destroy
obstacles or stun enemies. You may also need to spin to activate certain kinds of objects, so try
spinning in different places to see what happens.
Destroy Obstacles Stun
femies Use Objects


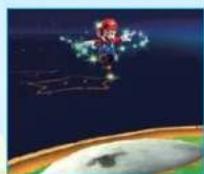
Spin Jump
Shake the Wii Remote in midair.
Spin in midair to perform a spin jump. Jumping and then spinning at the peak of your jump allows you to go higher than in a normal jump.
Defeat Enemies
You can defeat most enemies by stomping on them with a jump, stunning them with a spin, or shooting them with a Star Bit and then running into them. However, there are some enemies that you can't defeat in these ways. You may need to spin to return an enemy's attacks or use an item or mechanism to defeat some enemies.

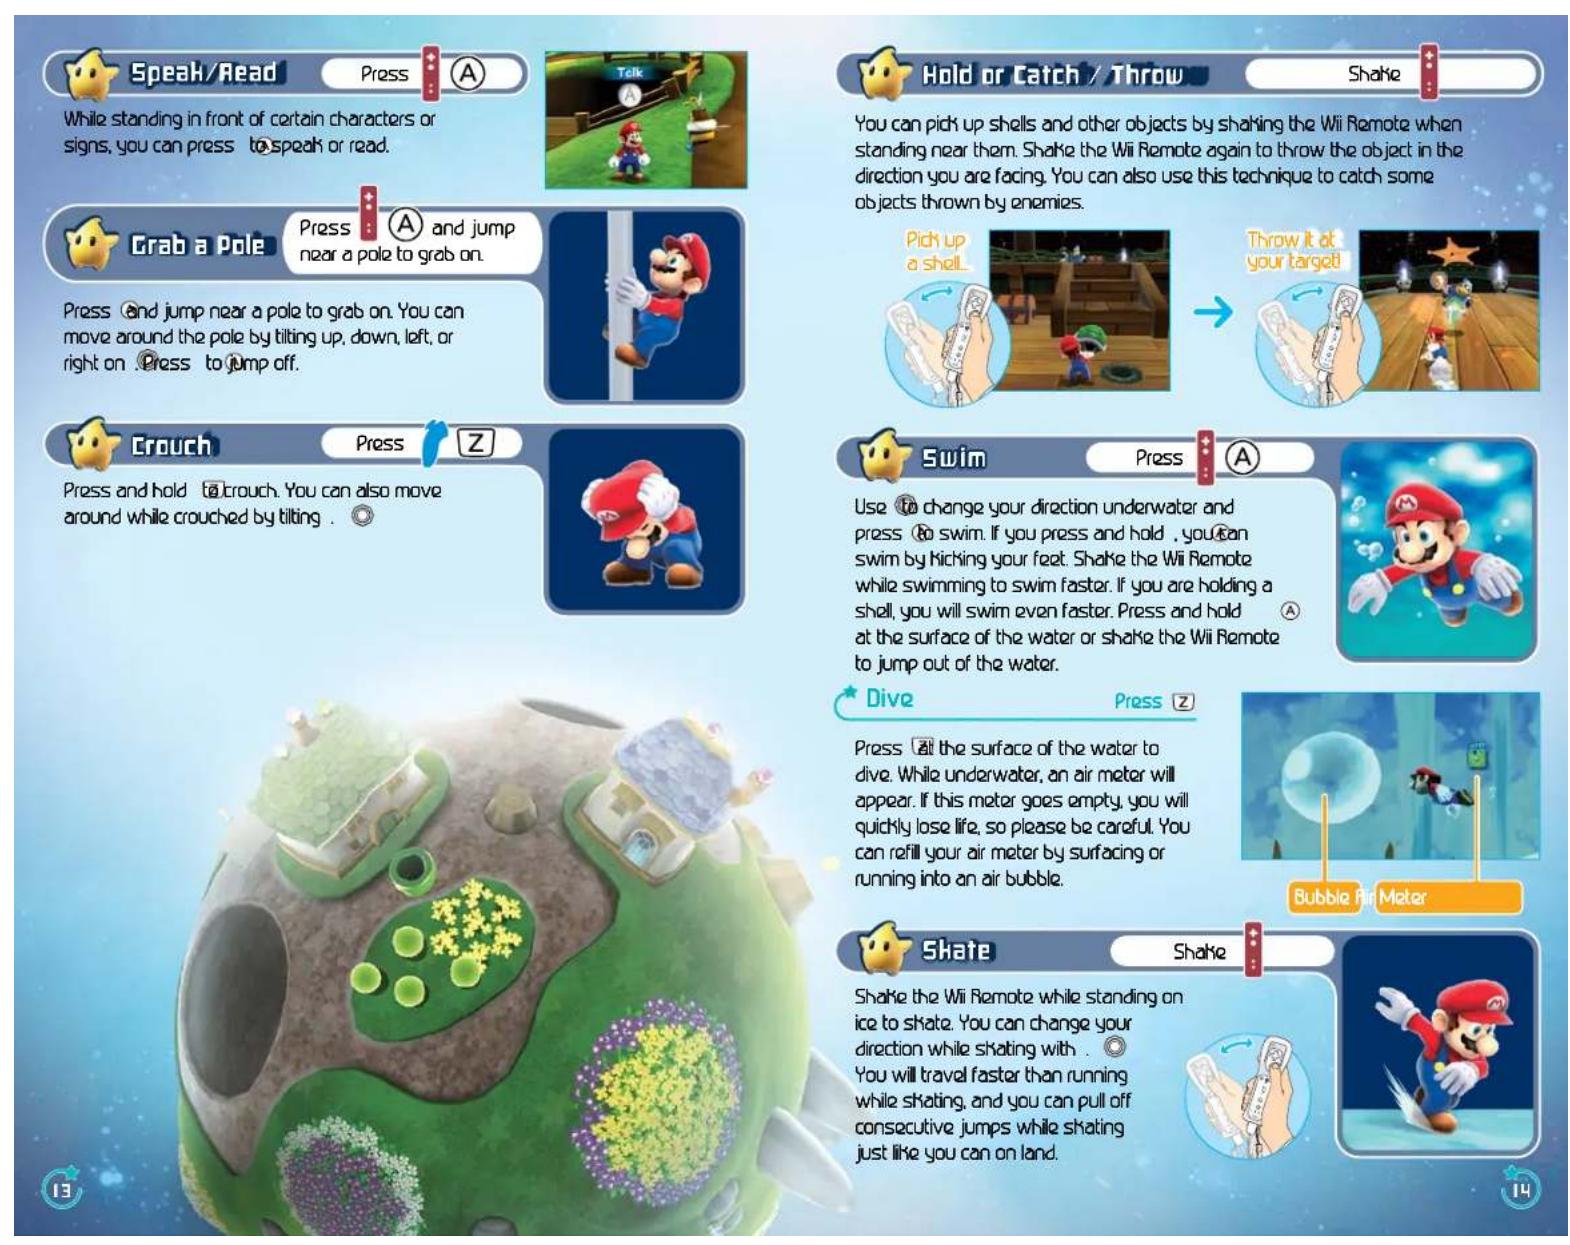
Jump
Press
A to jump
You can jump in many different ways, depending on how you combine the jump with other actions. Try and find the best jump for every situation.

Multiple Jumps / Triple Jump Press Right when you land.
After jumping while you run, press rigA ht as you land for three consecutive jumps On your third jump, you may be able to pull off an especially high jump.


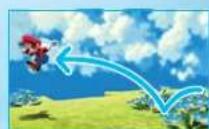
Backward Somersault Hold down 4d press. A
If you jump while crouching, you will leap high into the sky and slightly backward.

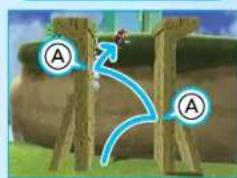
Wall Jump Face a wall and press
A
Face a wall and jump toward it, then continue to jump off the wall with good timing by pressing to kick off the wall. In areas where two walls face each other with a small gap, you can use this method to climb to the top.

Side Somersault Tilt the opposite direction while running and press A
While running, tilt in the opposite direction and press to perform a high jump with a turn.

Long Jump Press and then we're running.
Press and then while running to jump a long distance.

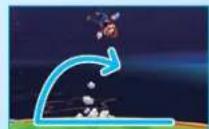
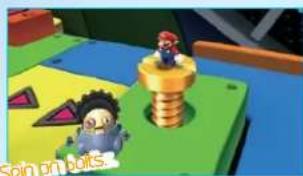
Ground Pound Press 2 while in midair.
Press 2 while in midair to perform a ground pound. You can use a ground pound to break flooring with cracks in it or to activate a ground-pound switch (P1B).


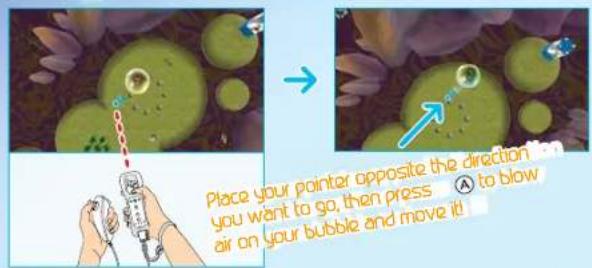
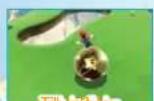
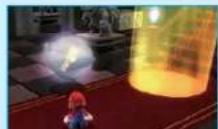
Bubbles
Point
Enter a bubble to float around in it. Just point at the bubble from the other side of the direction you want to go, then press to blow air on the bubble and move it in the desired direction. Press when you want to leave the bubble. If you run into a hazard, your bubble will burst.

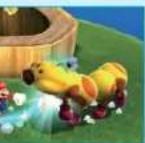
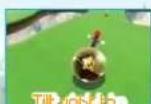
Rolling Ball
Jump to get on top of the ball, then hold your Wii Remote with the top pointing up to move, tilt the Wii Remote in the direction you want to go, and press to jump.
Tilt forward to move forward.
Till left to move left

move light
Tilt back to go backward.


Press (A) and tilt

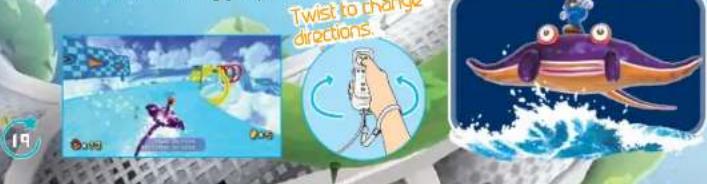
Ray Surfing
Get on Ray and press to move forward. Tilt the Wi Remote left to move left, and tilt it right to move right. Shake the Wi Remote to make Ray jump.

SlingPods
Point and Press
1 + u1 - 1 = ( 1 + u) u1 < 1 = u

Touch the Sling Pod to get inside, then point at it. Press and hold to grab the Sling Pod with and pull it back. Release to release the Sling Pod, which will throw you opposite the direction you pulled it in.
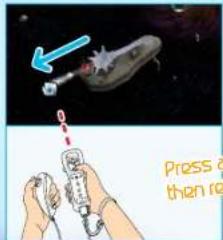

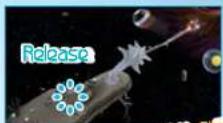
Press and hold A to grab and pull the scissors. Then release A to fly off in the opposite direction.

? Coin
Nobody Knows what will happen when you grab t

ltemsltems
Some items will help you right away. Some items need to be collected before they have an effect. Either way, you want them!

Green Shell
Throw these to break open treasure chests or attack enemies. You can also hold on to one while swimming for a nice speed boost.
Coin
These shiny treasures restore one slice of your health meter. Collect 50 to earn an extra life.

Red shell
Throw one to send it at an enemy! Also, hold on to one while swimming for a big speed boost.
I-Up mushroom
Grab one of these to earn an extra life.

Life mushroom
Grab one of these to temporarily increase your max health to six. But if your life falls to three or lower, your max health will revert to three.

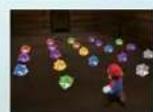
Collect Star Bits
Grab 50 Star Bits to earn an extra life. You can shoot Star Bits you have collected by pointing at your target and pressing . Use them to stun enemies or to feed Hungry Lumas (P21)

HintsHints
Be sure to follow these helpful galactic travel tips!

The Aight Move at the Aight Time
In many galaxies, there may be an area where you have to transform to advance. In others, you may need to use a move to activate a switch or find something hidden. Use the right one of Mario's moves in the right place

Trouble Defeating Enemies?
To defeat some enemies, you may need to use a special move or attack a certain weak spot. Watch the enemy's movements, think about their special characteristics, then launch an attack on their weak spot!

Attack with good timing
Hr anemies with objects!
Look for the enemy's
weaknesses!

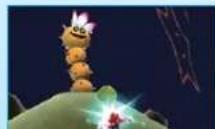
Feed Hungry Lumas with Star Bits!
After speaking to Hungry Lumas, you can point at them to display and feed them Star Bits by pressing What happens when they finally get full of Star Bits?
Hungry Luma

maps
When you have progressed far enough to open up the second dome in the observatory, speak to Polari (P4) to learn about maps. There is a Comet Observatory Map and a Universe Map. Select a galaxy on the Universe Map to see how many Power Stars you've found there. Toggle between the two maps by pressing .
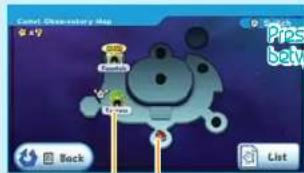
Comet Observatory Map
Dome
Current Position
This is a currently open dome.
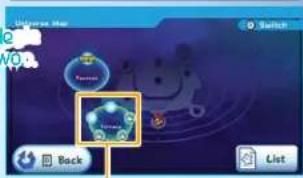
Universal Map
Galaxy Status
A galaxy that still has Power Stars to collect.
A galaxy where you have collected all the Power Stars. A newly discovered galaxy.

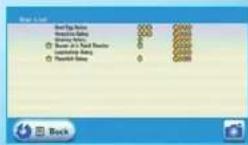
Send Your Star List to a Friend
Select on your Map screen to access the Star List. From here you can see which Power Stars you've collected. Using Nintendo Wi-Fi Connection, you can send your list of stars to your message board or to friends to show them how well you're doing! page at the bottom also shows all of your race times.

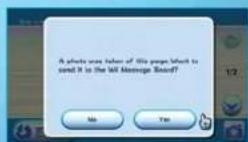
Select on the Star List screen to take a picture of the page.

When you see the screen to the right, you can send the image to your WiMessage Board. When you send the image, mail will arrive and you can send the attached image to friends.
- Please see your Wi Operations Manual for more information on how to send messages.

VEUILLEZ LIRE ATTENTIVEMENT L'INTEGRALITE DU MODE D'EMPLOI DE LA WII AVANT D'UTILISER VOITRE SYSTème, VOITER DISQUE DE JEU, OU VOS ACCESSOIRES WII. CE MODE D'EMPLOI COMPRED D'IMPORTANTES INFORMATIONS SUR VOITE SANTÉ ET VOITE SECURITE. INFORMATIONS IMPORTANTES CONCERNANT VOITE SECURITE: VEUILLEZ LIRE LES PRECAUTIONS SUIVANTES AVANT QUE VOUS OU VOITE ENFANT NE JOUIÉZ À VOIS JEux VIDÉ.
Commencement and use
The Taosie brought the shooting stare to its center, where they became green. Peter's face.